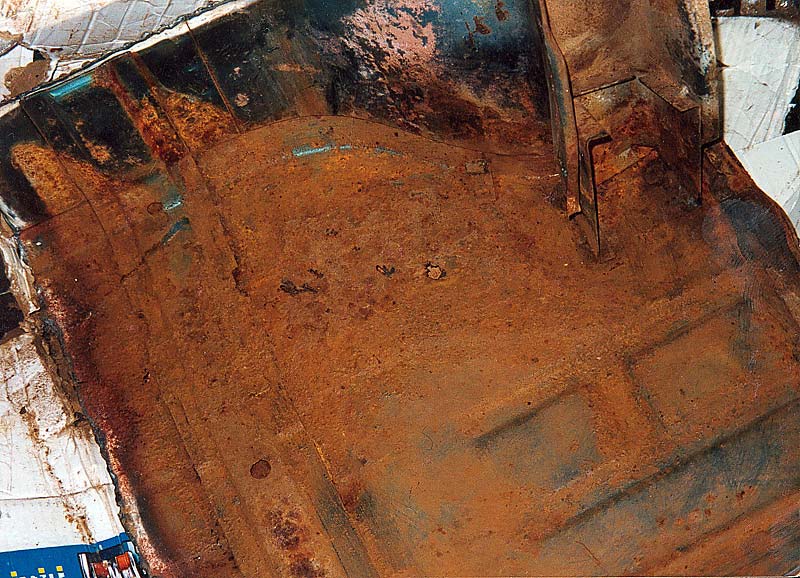
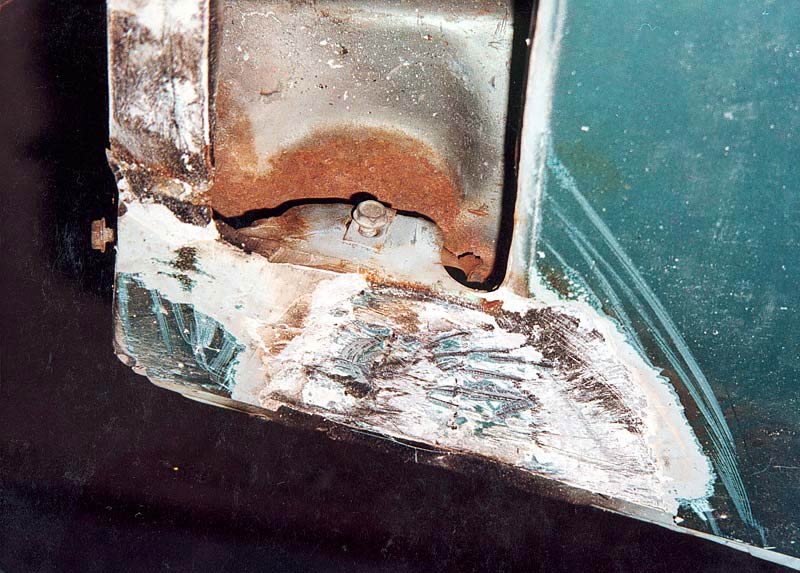
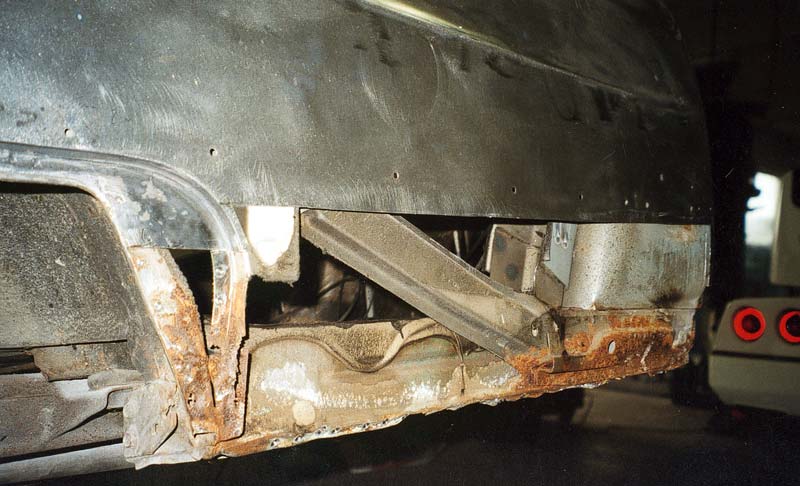
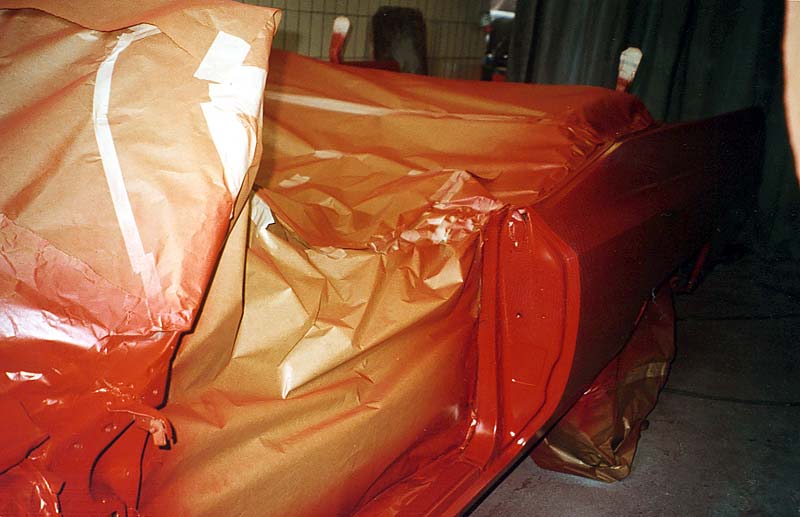
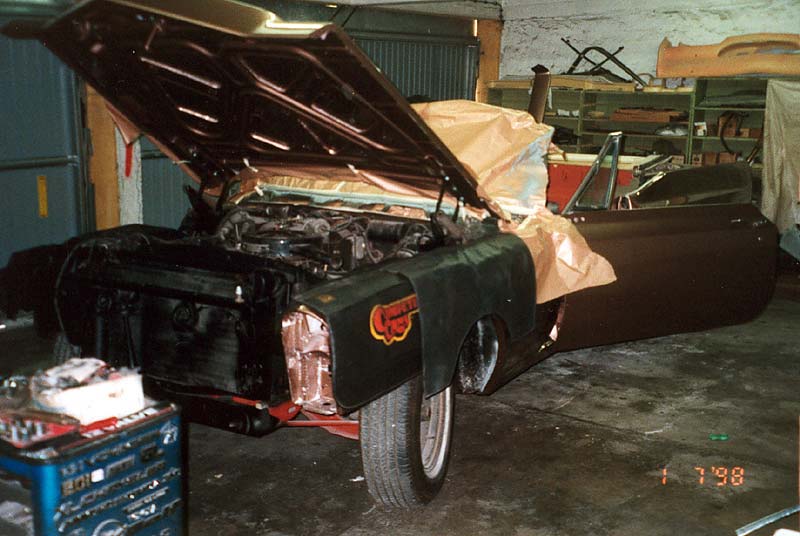
When I brought the car home I found out that it really had some problems I didn't know about before. First the wipers quit working, then the interior lights went out, the brakes didn't work very well and the steering was very shimmy. This was the first time I drove such a land yacht and it was night and raining heavily. So I thought I should contact a professional restoration shop to have the car checked through. It was in need for the complimentary annual check that every car has to pass in Austria anyway. So I brought the car there and the expertise of the shop about my newly acquired car was horrible. It needed almost everything to get a new license. At this time I saw the car at daylight for the first time and was shocked even more. It had a lot of dents and scratches. Most of the chrome and moldings had dings or dents too. Somebody cut out a part of the rear bumper to make place for the bigger Austrian number plates. There was lots of rust at the lower front fenders which was "fixed" with paper and aluminum foil. (See pictures) The trunk floor also had 4 rustholes which had to be fixed.
The Restoration of my 67 DeVille
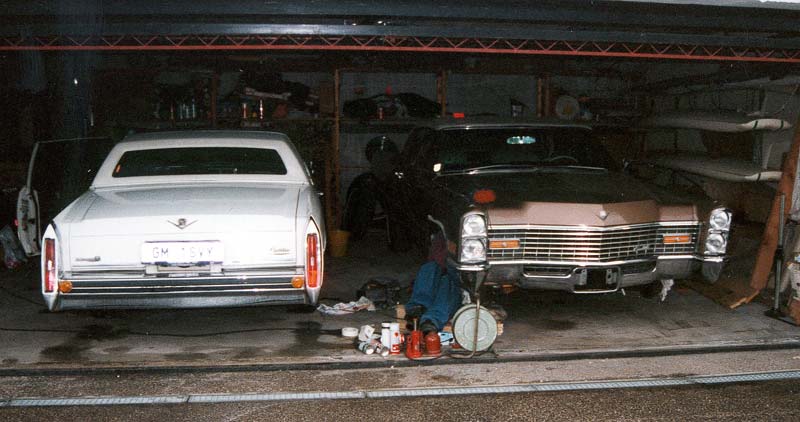
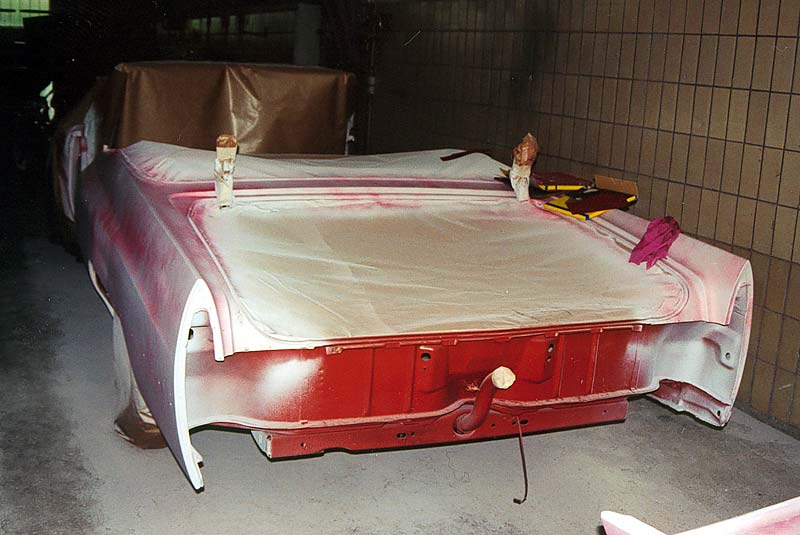
The "Before" pictures
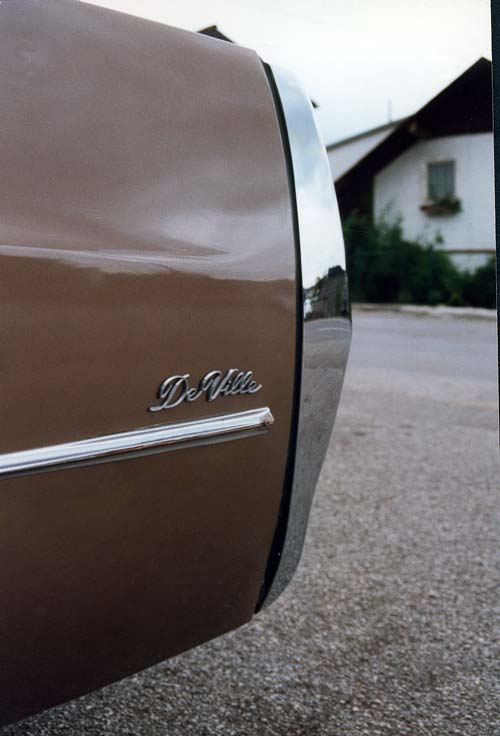
The "before" pictures - with some cosmetical touch-ups for the first cruising season.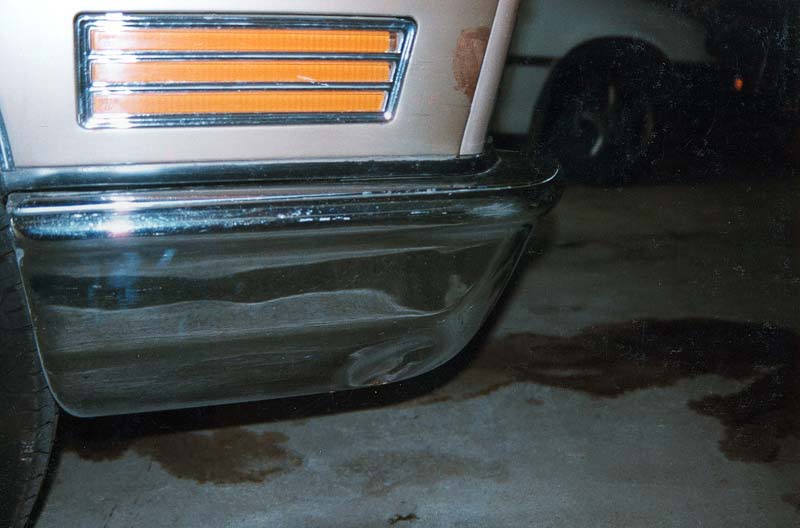
the front bumper was dented
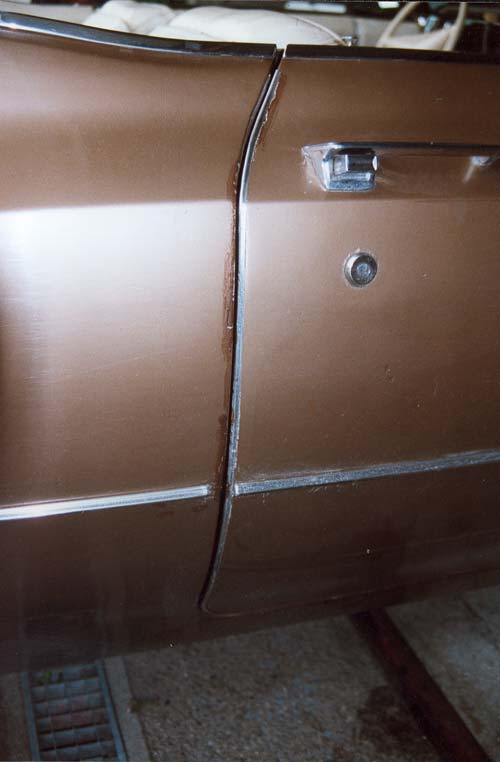
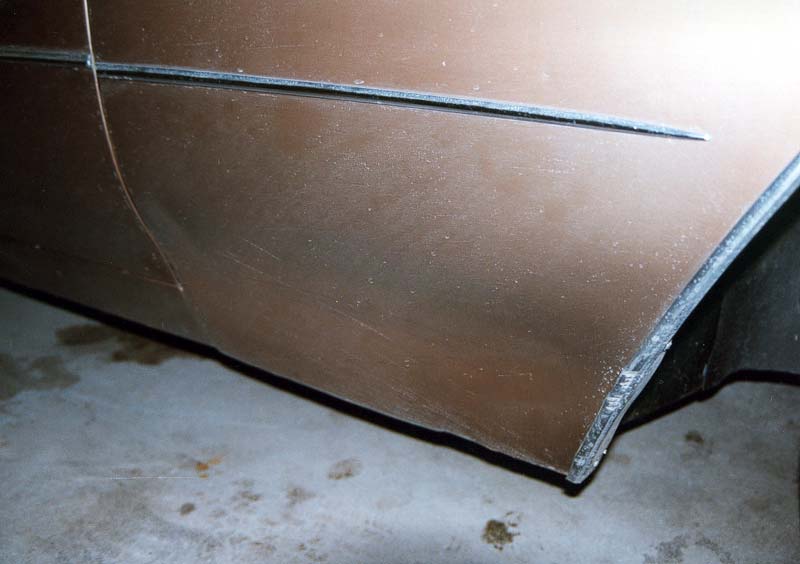
the paint had lots of problems around the doors
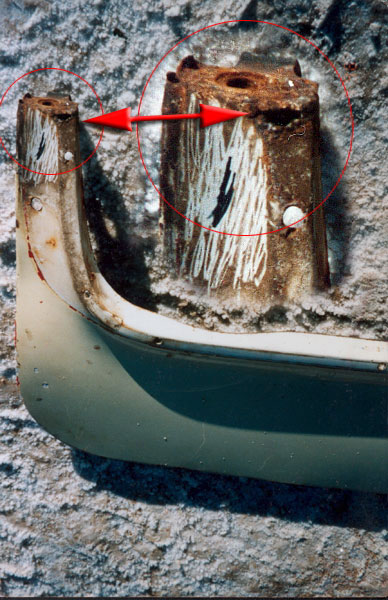
the bent rear bumper outer end and the too short belt trim
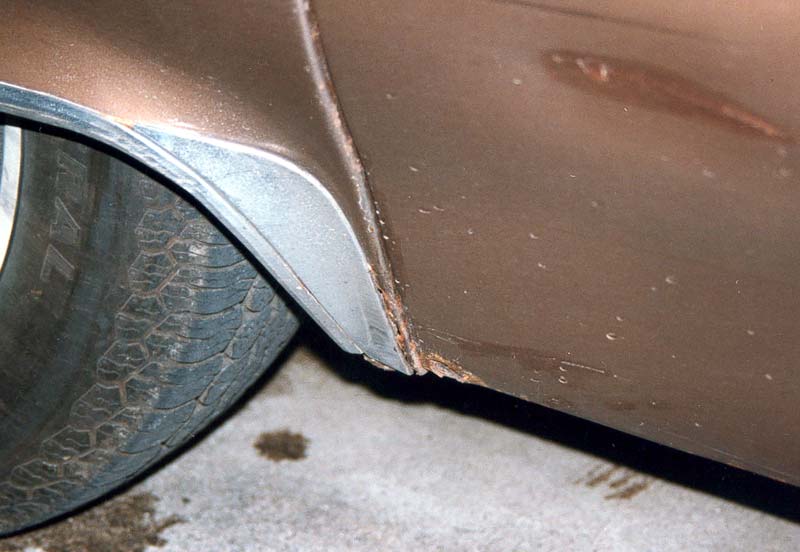
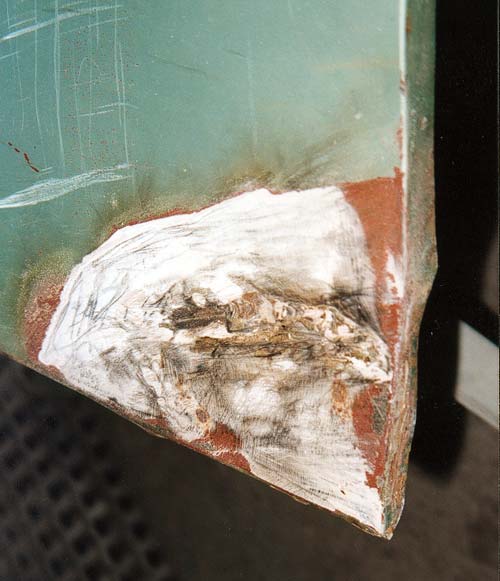
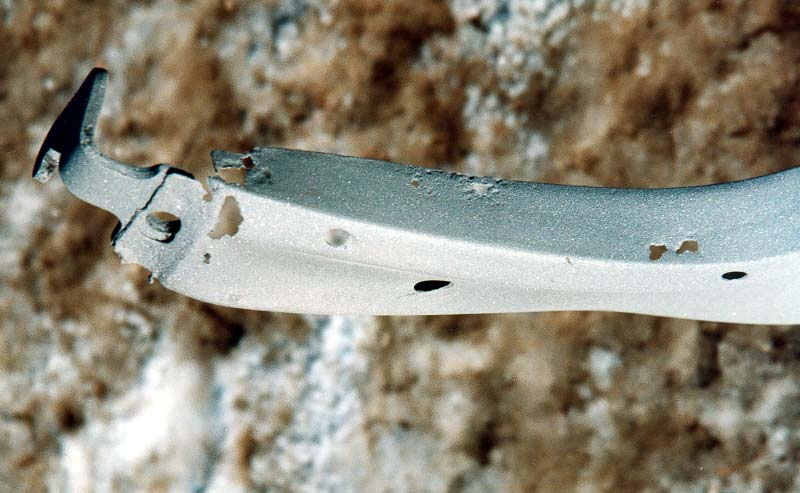
the lower end of one of the front fenders

the cut out lower fender parts - look at the "repairs" the previous owner did...
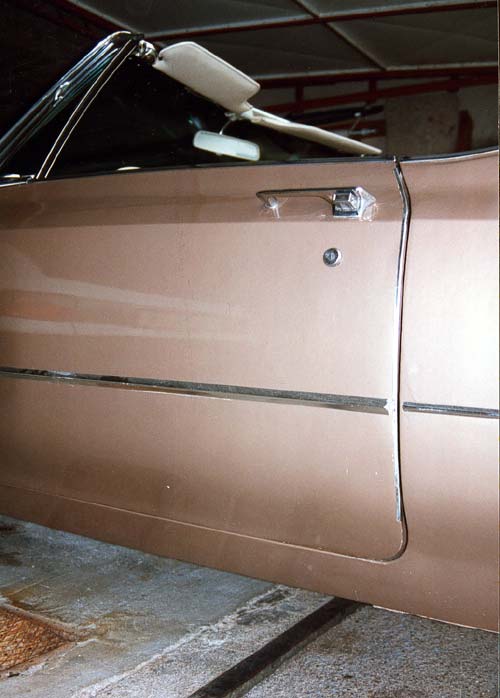
wrong trim on door
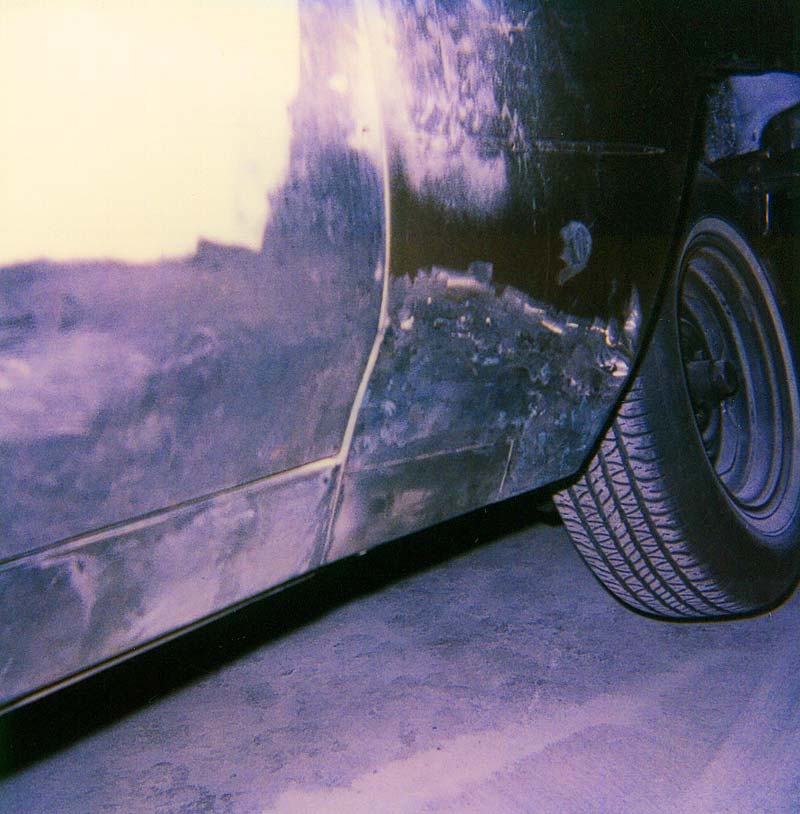
some more details of the rust and dents
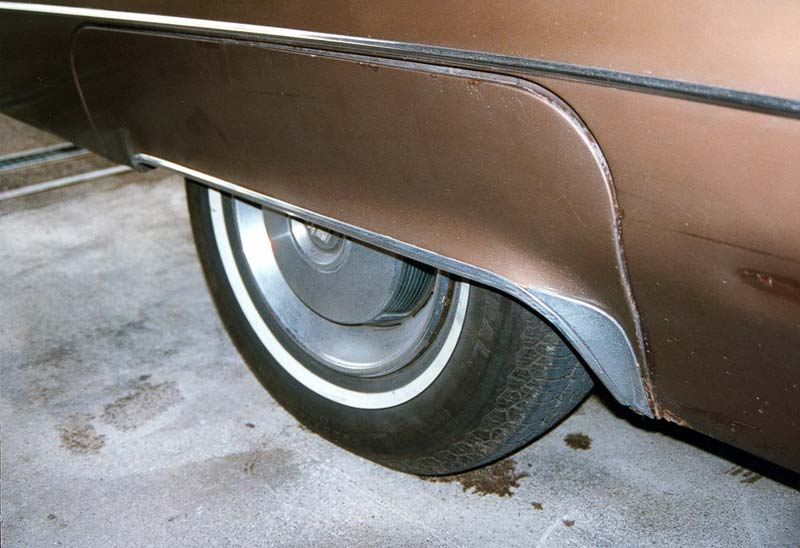
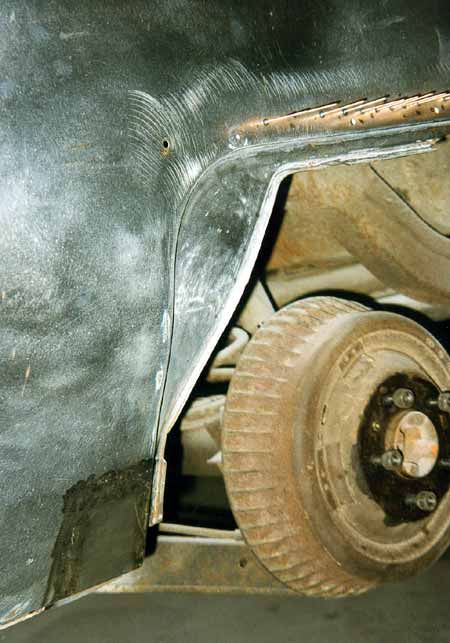
rusted fender skirts and some more dents
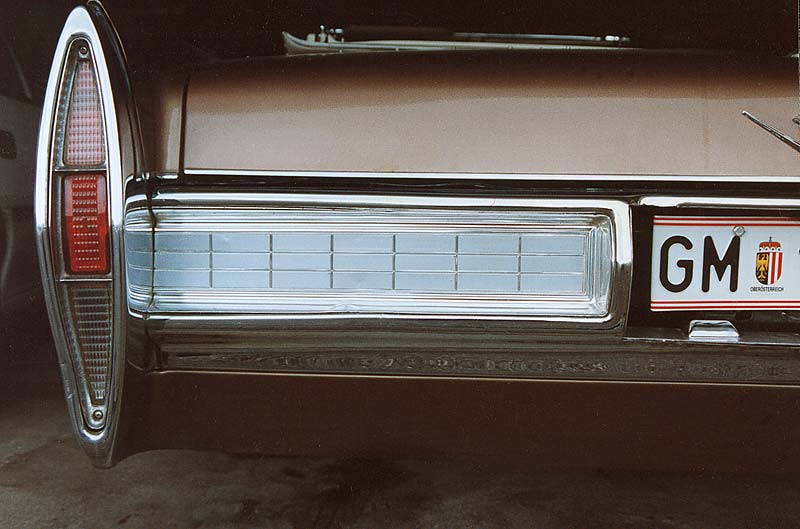
dents in the rear bumper and the cut out around the license plate
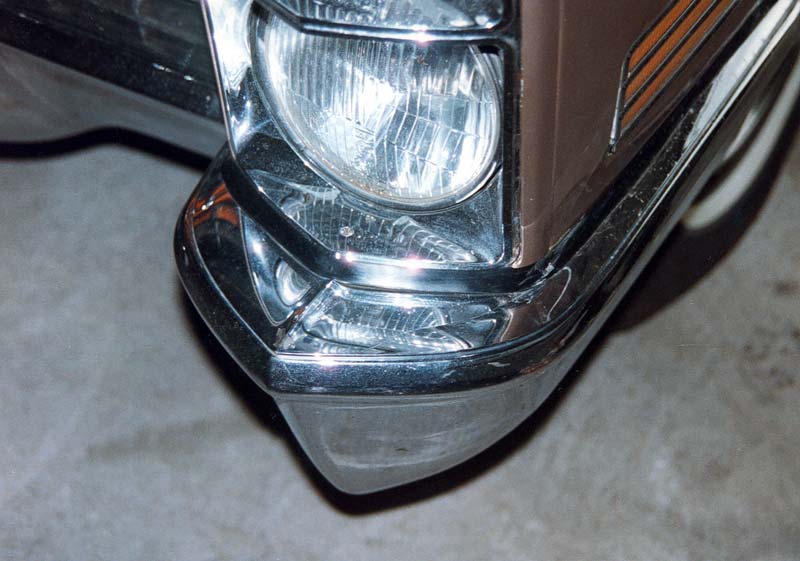
dents in the front bumper

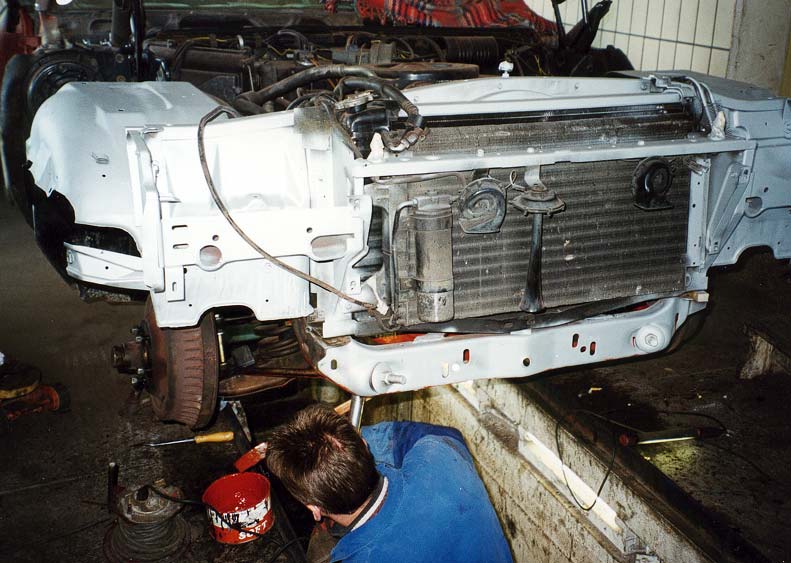
The engine bay before the restoration
Doing some cosmetic work on the wheel housings before the first cruising summer
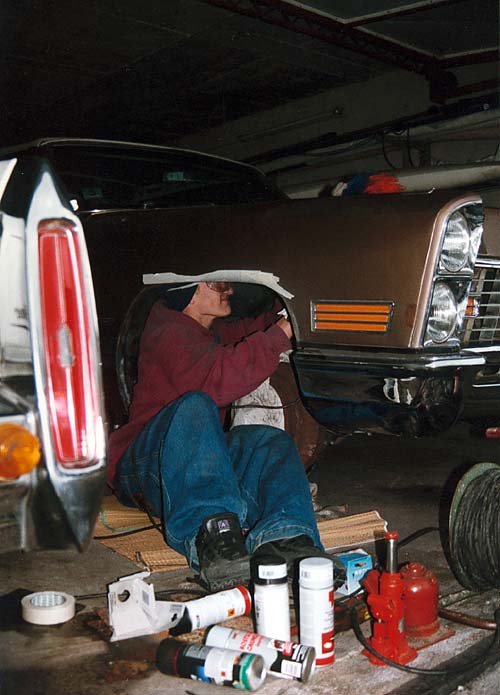
Greg helped me cleaning the surface rust out of the wheel housings
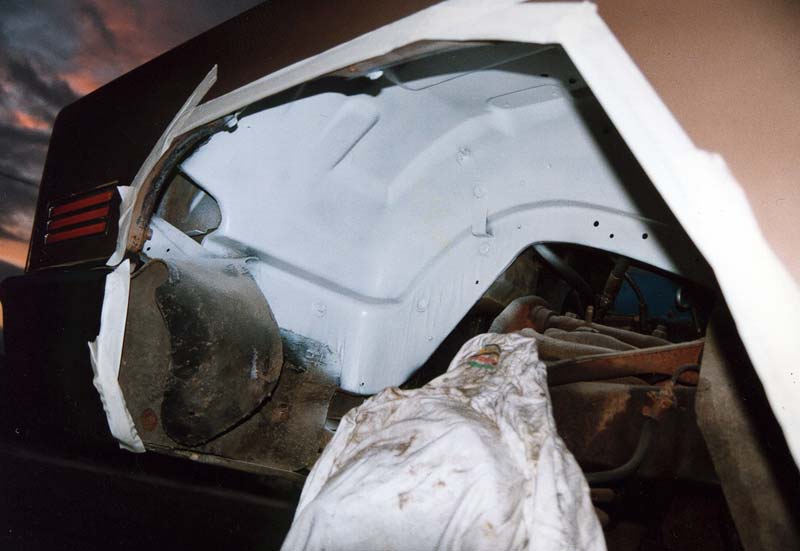
Wheel housings in primer
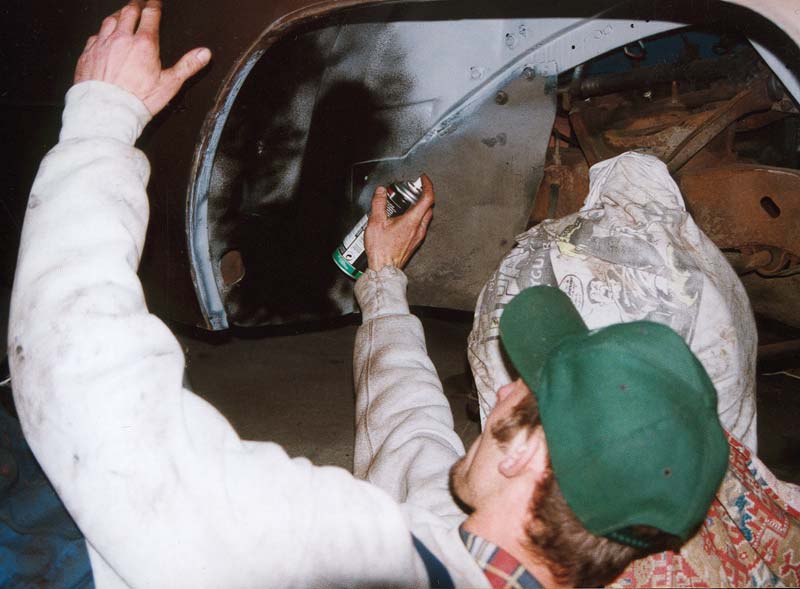
My friend Rich painting them
Technical problems
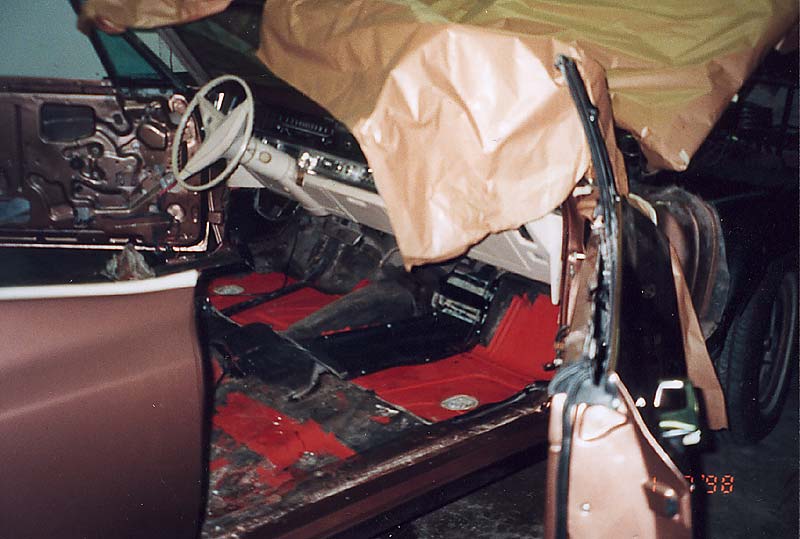
Technically the car was a mess too. It needed a new washer and wiper assembly, climate compressor, new hydraulic lifters, all new gaskets, all new hoses, new power steering pump and gear, complete new brake system with reground drums, all new bulbs, new ignition lock, power antenna, some switches, complete exhaust system, shocks, some front suspension parts and much more. The transmission and engine were leaking oil, the radiator was shot , the tires were almost falling apart. 14 years of storage took its toll. When one thing was repaired the next failed. The only good thing about the car was the interior. Otherwise I had to spend a lot of money to bring the car back on the road as I could do no repairs on my own at this time.So I drove the car for one summer - mostly at night where it looked quite representable. At this time most of the technical things were done, but there were still all these dents, the bent brightwork and rust hurting my eyes all the time...
I was still a student at University and had only very little money - so a real professional restoration was far out of reach. Rudi Kerschbaumer who did the work on my car offered me to do the restoration in his shop at a very good rate for his work. I should do most of the work myself under his supervision. The restoration should not cost more than $10.000 maximum he said. So I had to save the rest of my little income from part time working to put it all into this restoration. I made lots of sacrifices to get the money. I ate less and lost 8 pounds of weight, didn't heat my apartment during the cold winter and rode my bicycle for daily transportation to save all the money I could get.
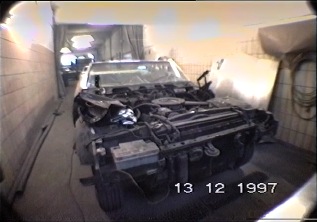
In December of 1997 the restoration started. The goal was to do all the body work necessary, do some detailing here and there, give it a new paintjob in the original color and make everything work again.
So we began to tear the car apart. My friend Rich really helped a lot - a big "thank you" to him! We managed to disassemble the whole car within 48 hours. We put all the parts into boxes and stored them for detailing, overhauling or refurbishing . The only things we didn't take apart were the windshield, the steering wheel and the convertible top which were left on the car. During disassembly lots of new problems that would need attention appeared. The following weekend we began to sand the car down to bare metal. This was a hard and messy job as the original paint was not really easy to remove. While doing this more and more dents appeared under layers of filler. It seems that the old lady - who owned this car before - had some problems maneuvering such a land yacht. Parts like front fenders or doors were sandblasted by my friend Richard.
Here is a video-walk-through at the restoration shop when my buddy Richard and I started to disassemble the car and sand it down to bare metal in 1997:
You have to have Quicktime Player installed to view this video!
The Restoration starts
The restoration pictures - click on image for larger view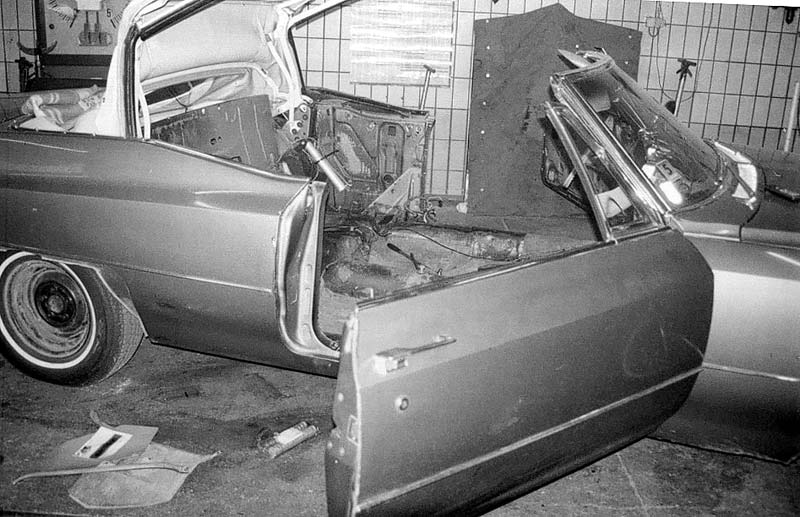
The first picture I took of the restoration - short after disassembly began.
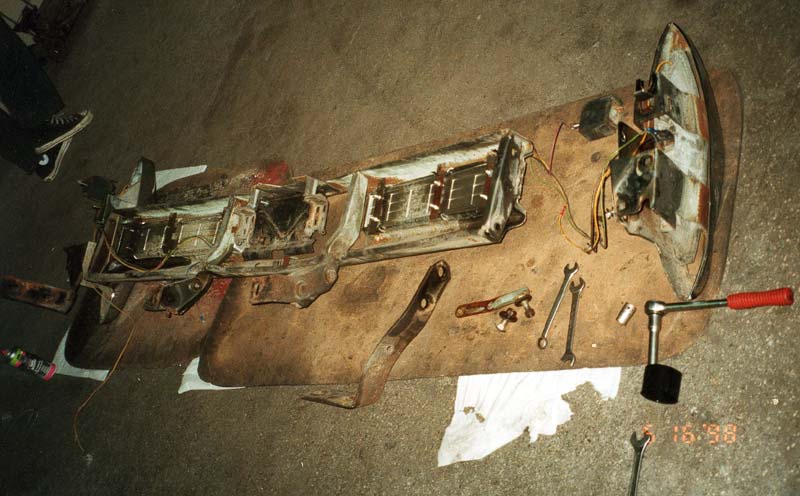
Everything was taken apart - here the rear bumper
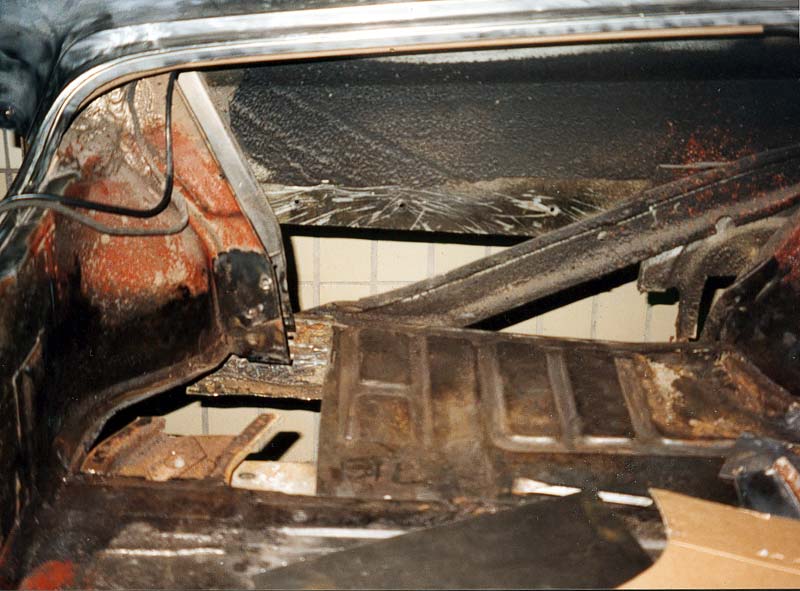
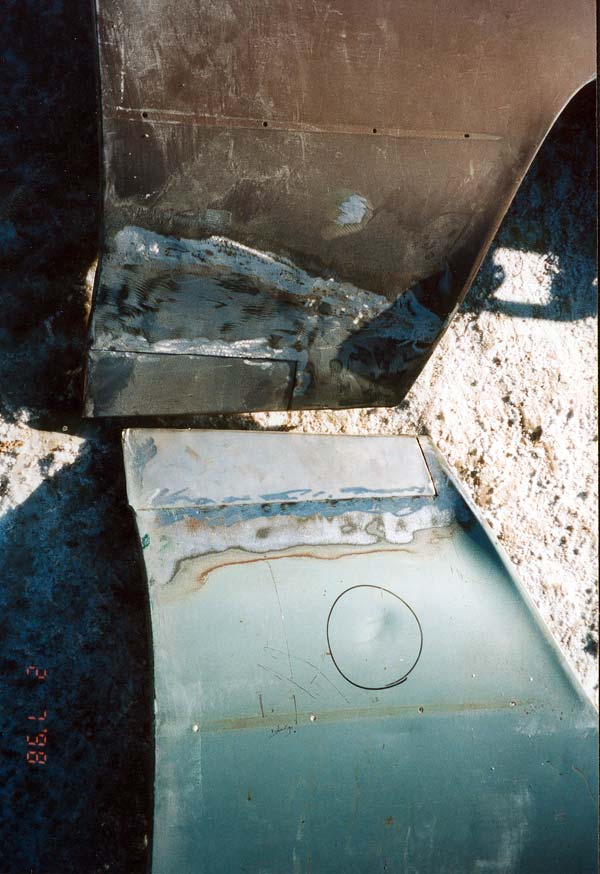
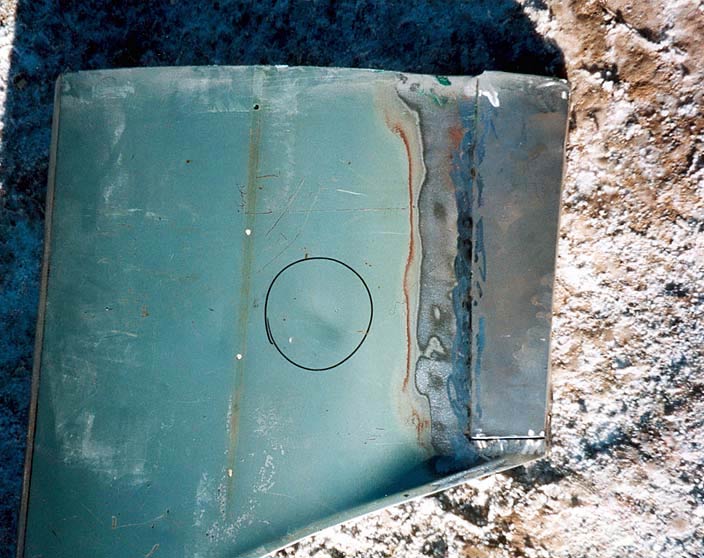
the trunk and the quarter panel were heavily rusted and cut out
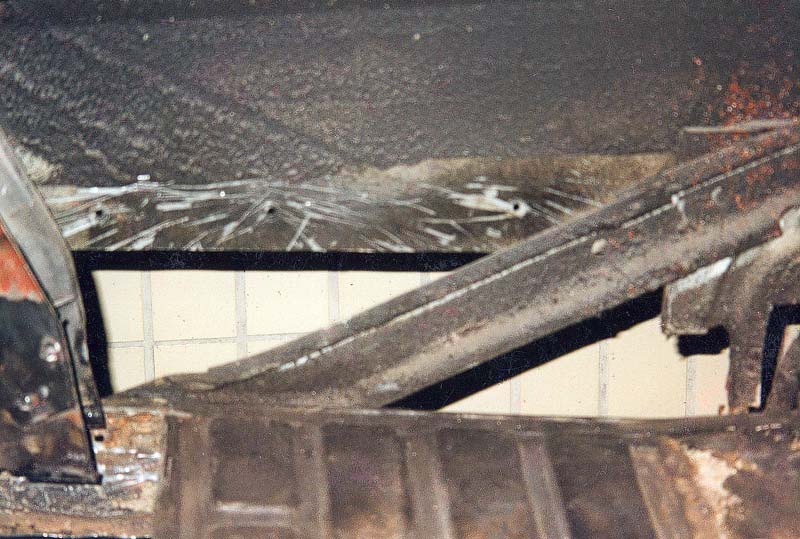
some more cut out metal
the cut out metal in the trunk
rust on the quarter panel
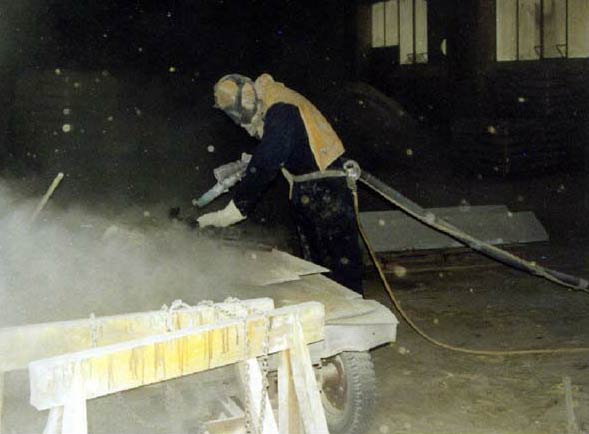
My friend Richard during sandblasting
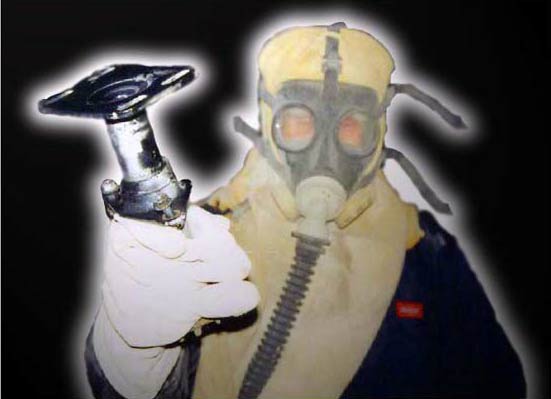
heavy duty sandblasting equipment was used

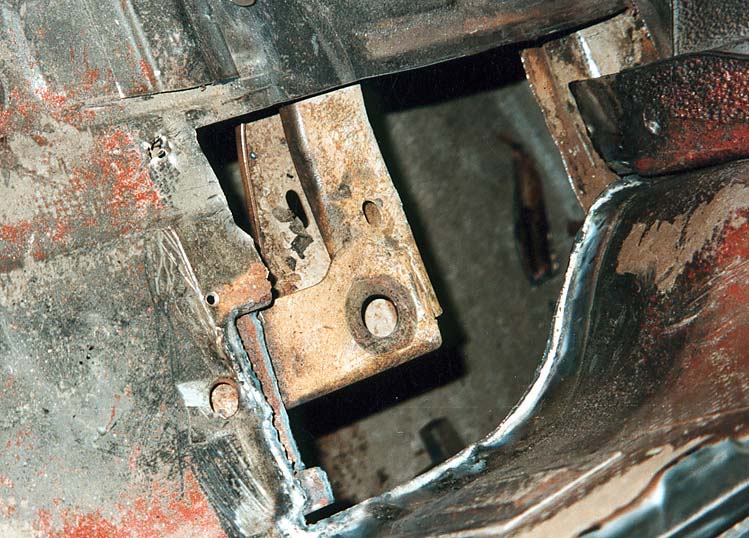
I ordered a rustfree trunkfloor in excellent condition...and that's what they sent me!
One more view of the trunk floor they sent...
One of the front fenders I received from the States. It was described as excellent, rustfree used fender....
one more view of one of the fenders they sent - a deep scratch filled with bondo...
the repaired fenders before they were sandblasted
One of the fenders they sent me was repaired and got a custom made patch panel for the lower end.
the repaired fender was fit in before it was removed again and sandblasted
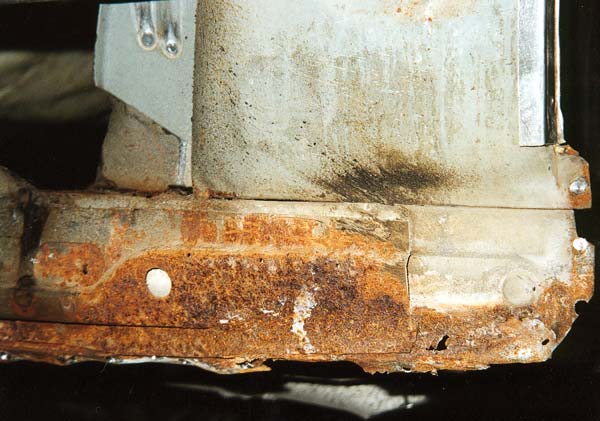
that's what was left after the fenderskirt was sandblasted
the "excellent rustfree fenderskirt" they sent me. After the trim was removed some rustholes appeared!
the car was sanded down to bare metal
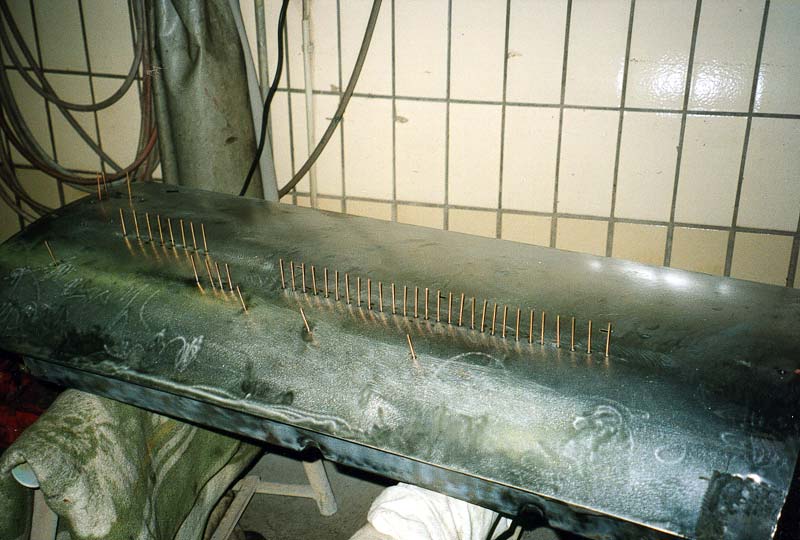
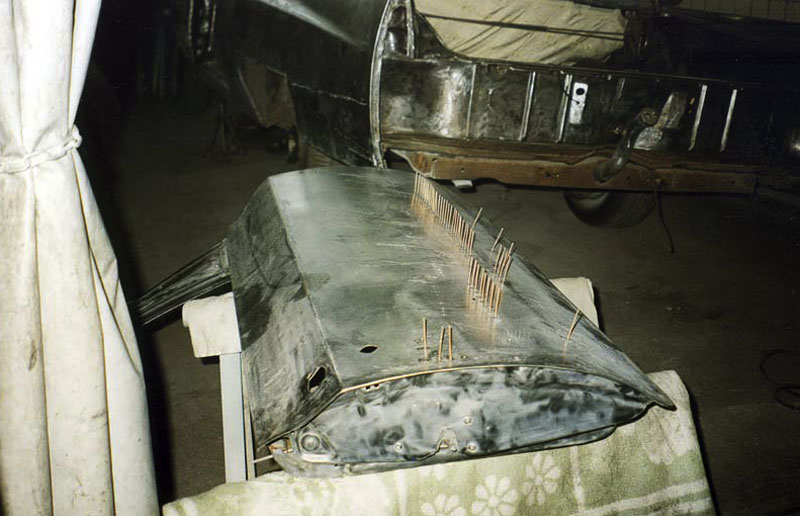
The doors - these "nails" were used to pull out dents
The cut out quarter panel showed lots of rust
All dents were pulled out with weld on nails and a special tool.
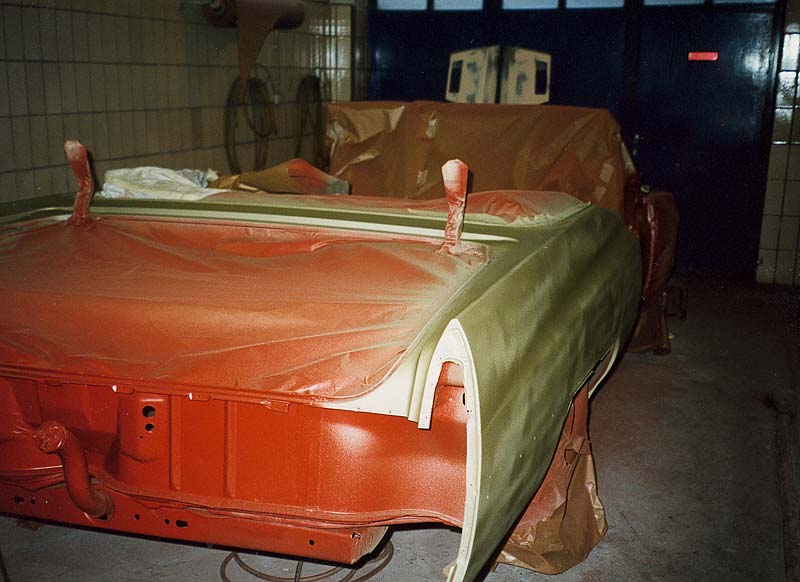
The car in primer
The car in primer
The car in primer
The car with silicone filler
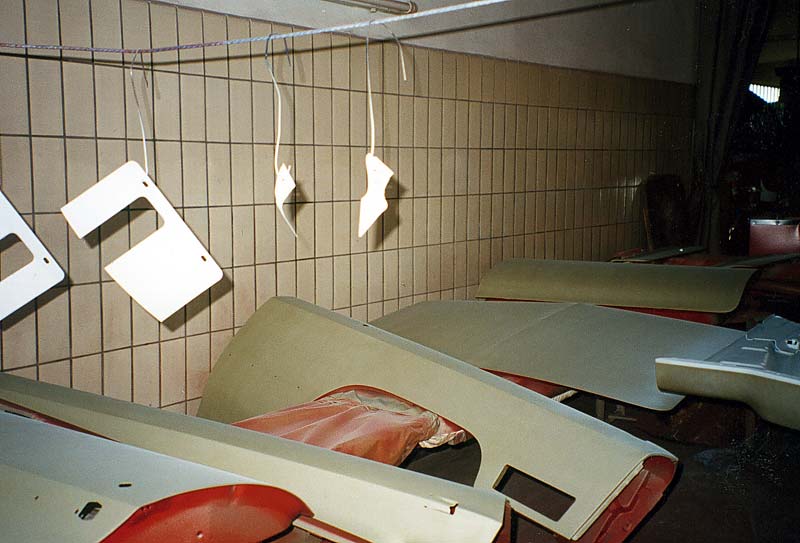
The parts in primer and filler are drying
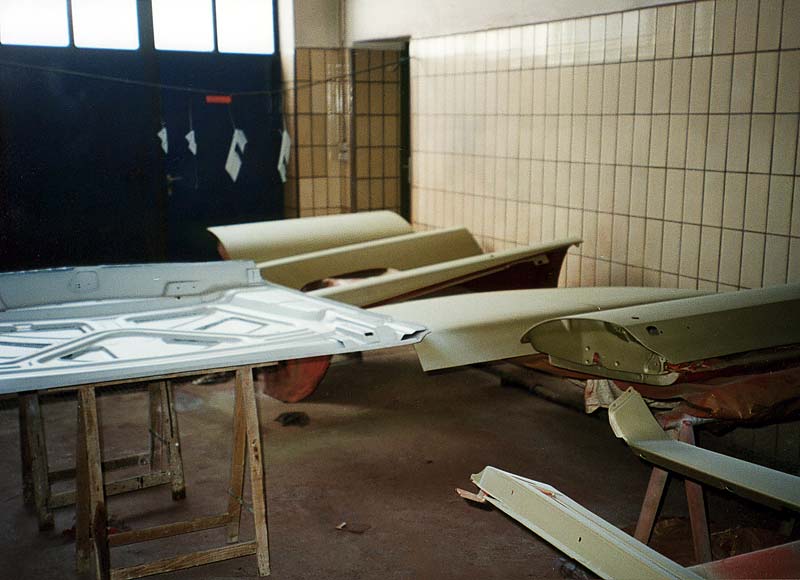
The parts in primer and filler are drying
Fillersanding
Everything was sanded down to bare metal or sandblasted and got a new coat of primer and paint
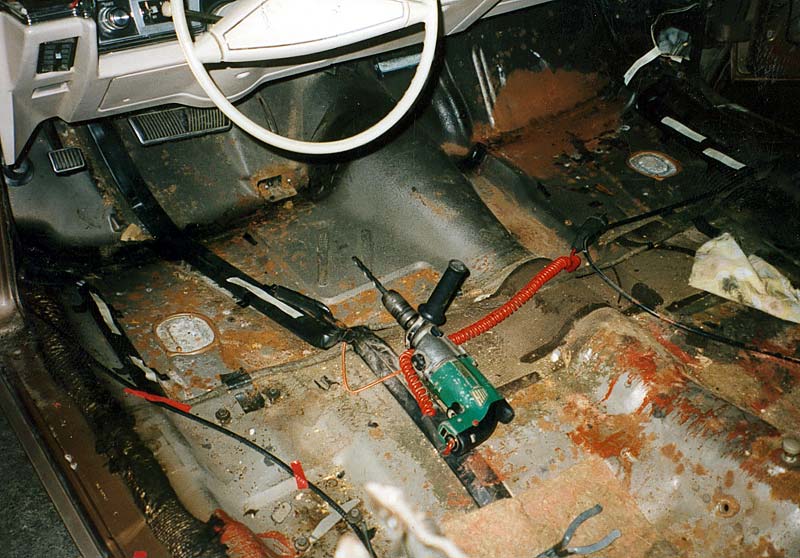
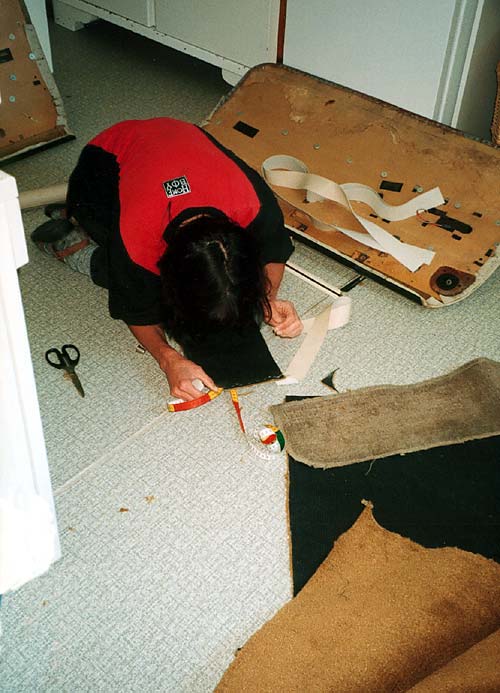
The floor after the carpet was removed. It only showed some light surface rust which was removed
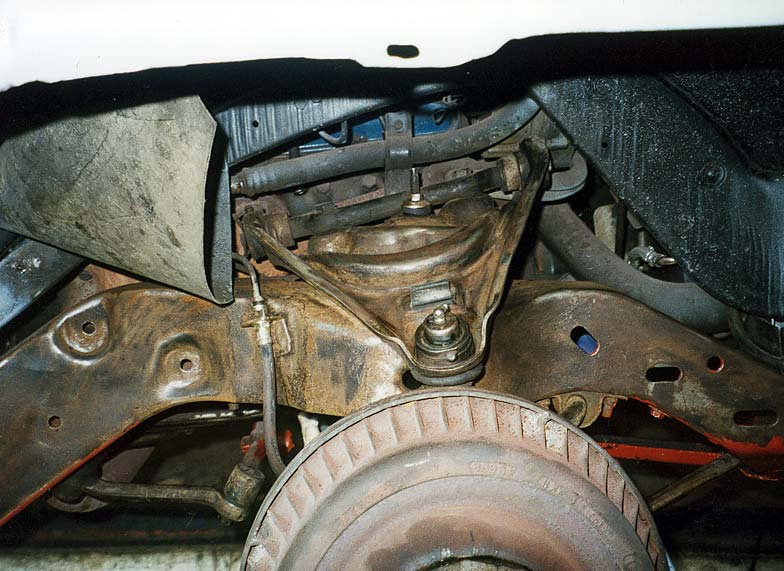
the frame and front suspension were cleaned too
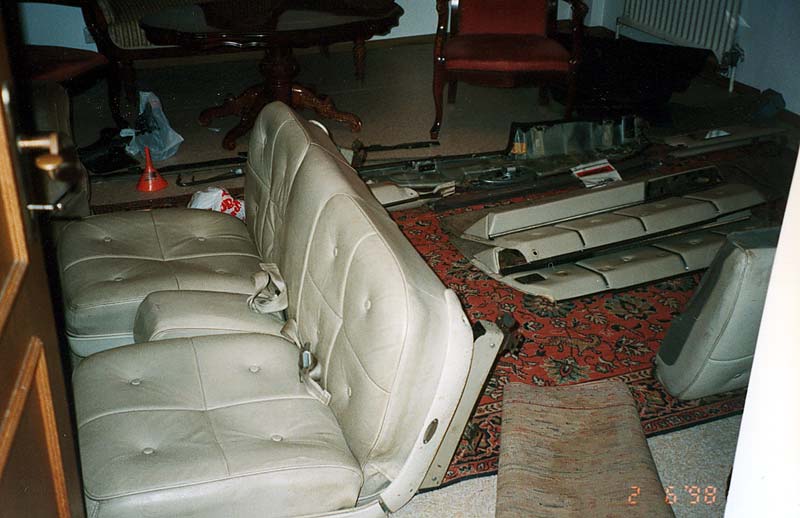
The complete interior was stored in a room at my mothers house
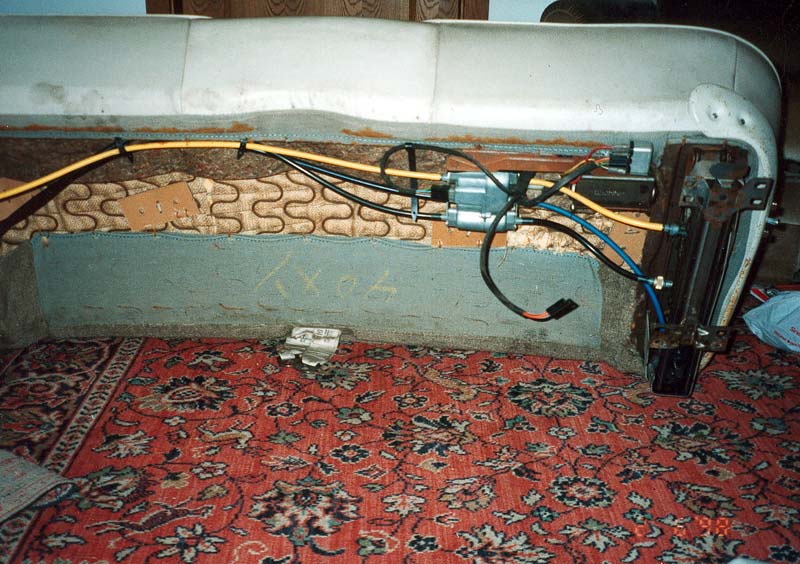
The frontbench after it was removed from the car
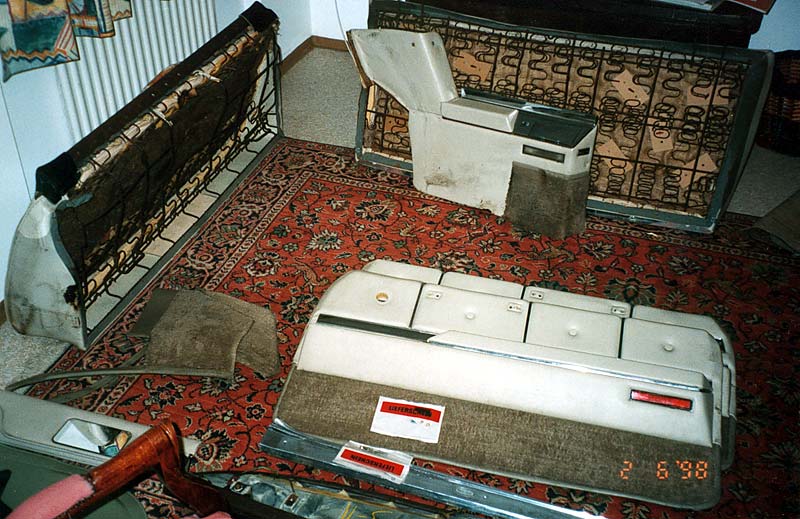
The dirty interior
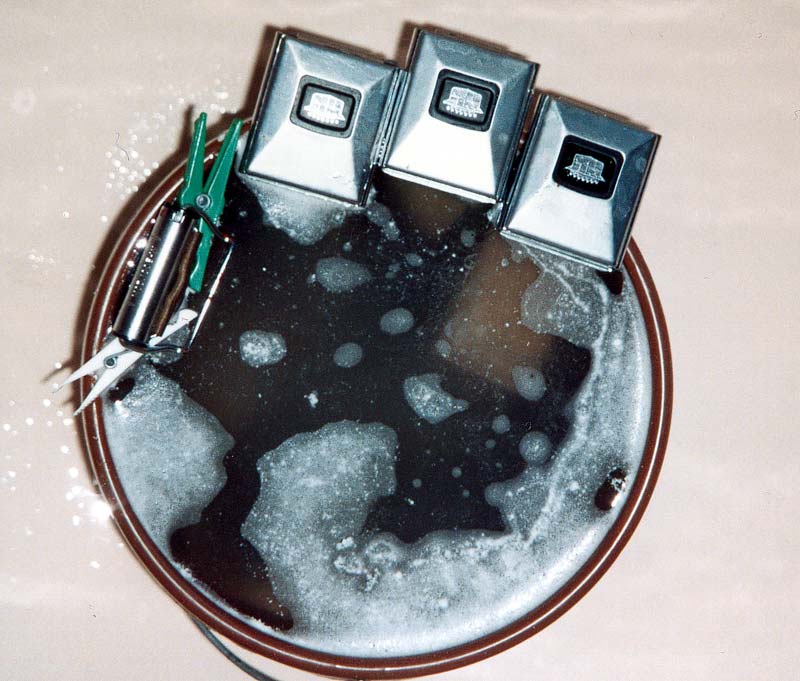
The seatbelts were soaked
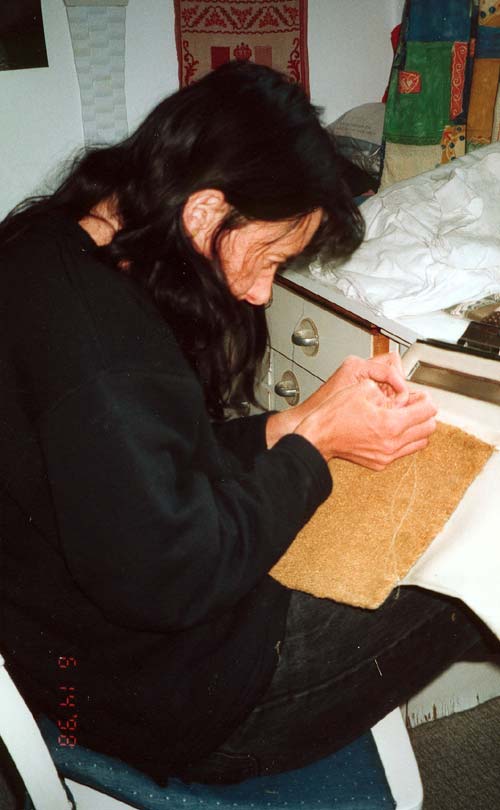
my sister helped me with the interior
my sister helped me with the interior
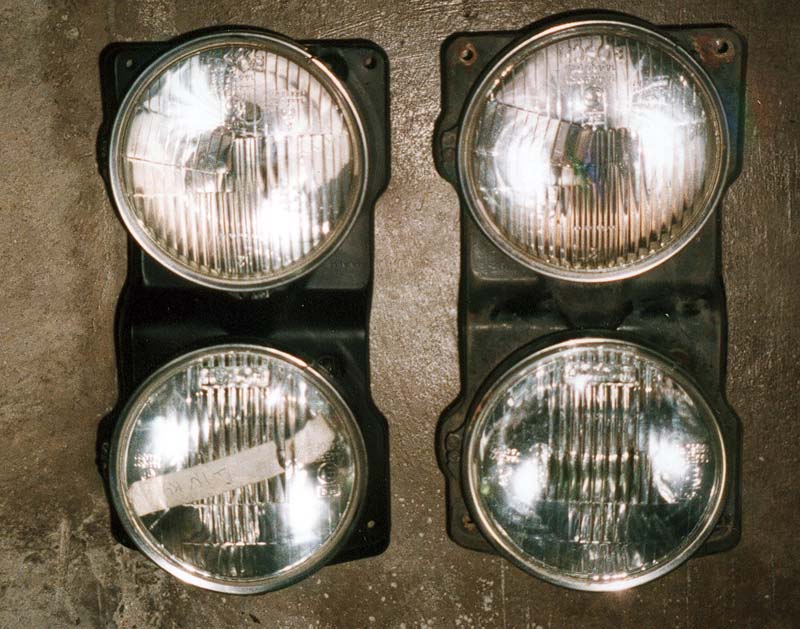
Headlights assembly after/before
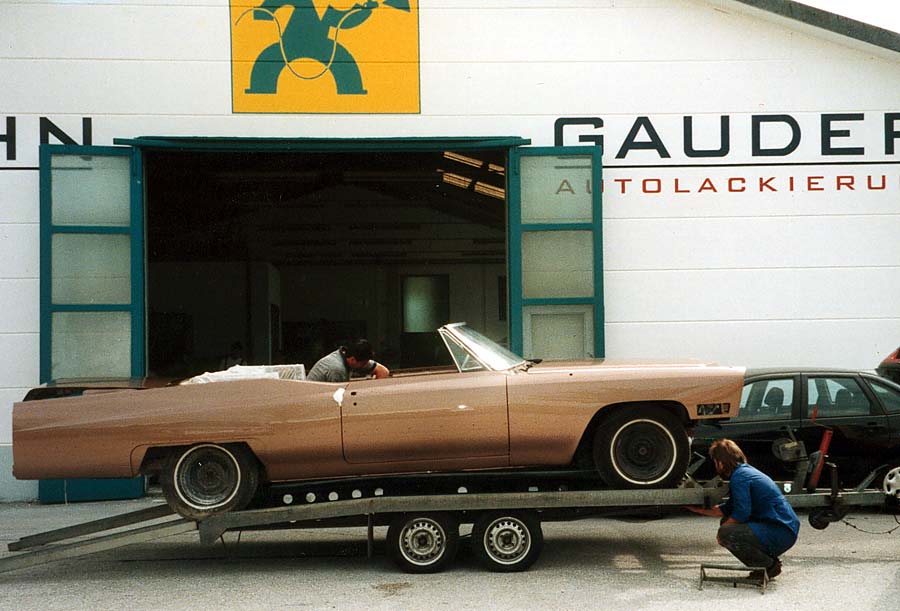
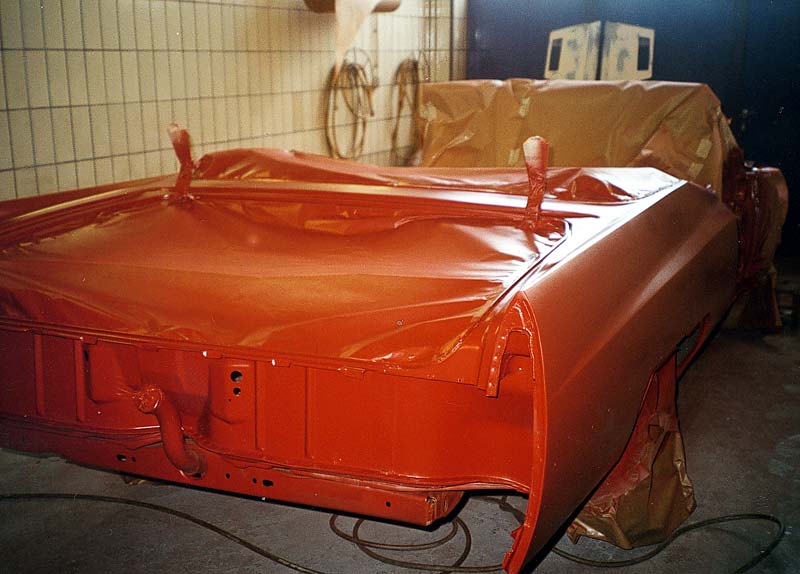
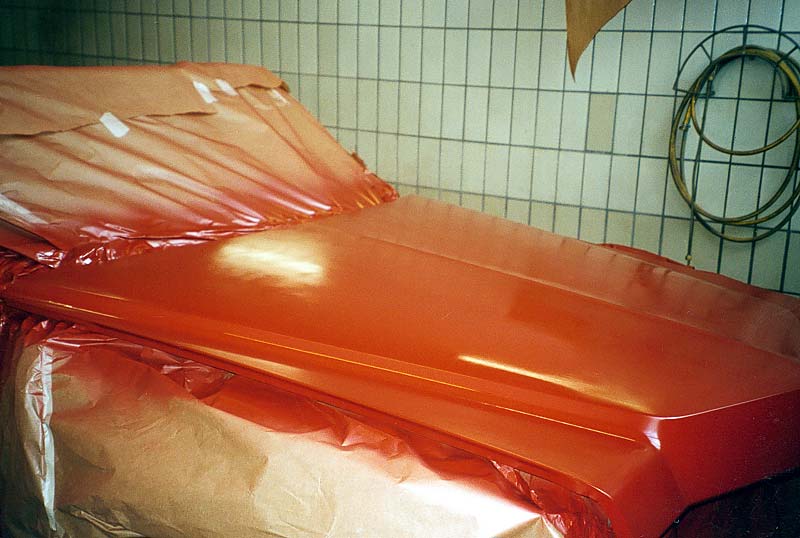
Fresh out of the paintshop
Reassembly begins
Reassembly begins
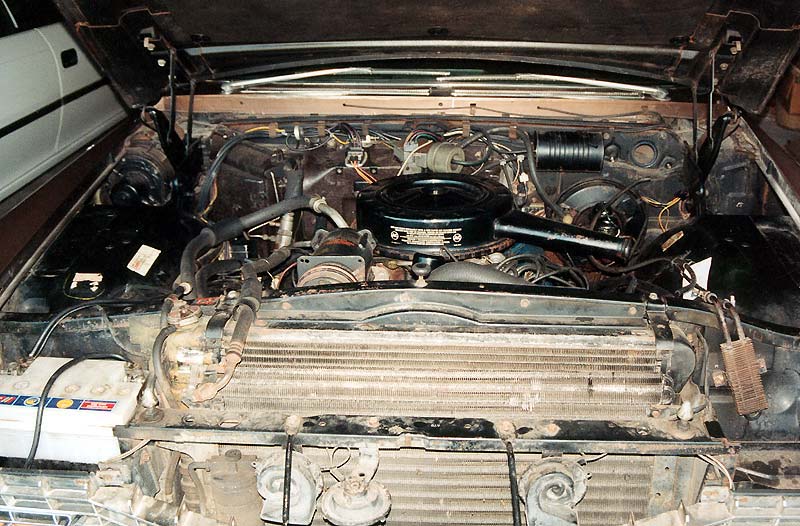
the engine compartment before and...
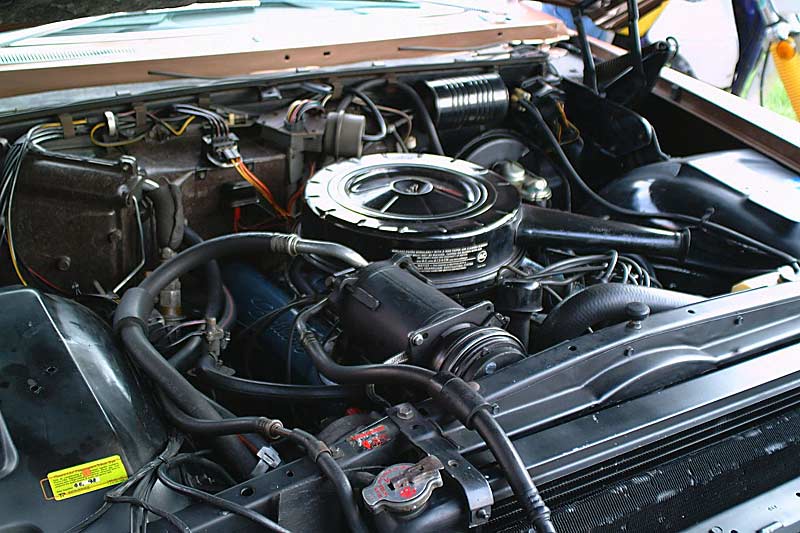
... after the restoration
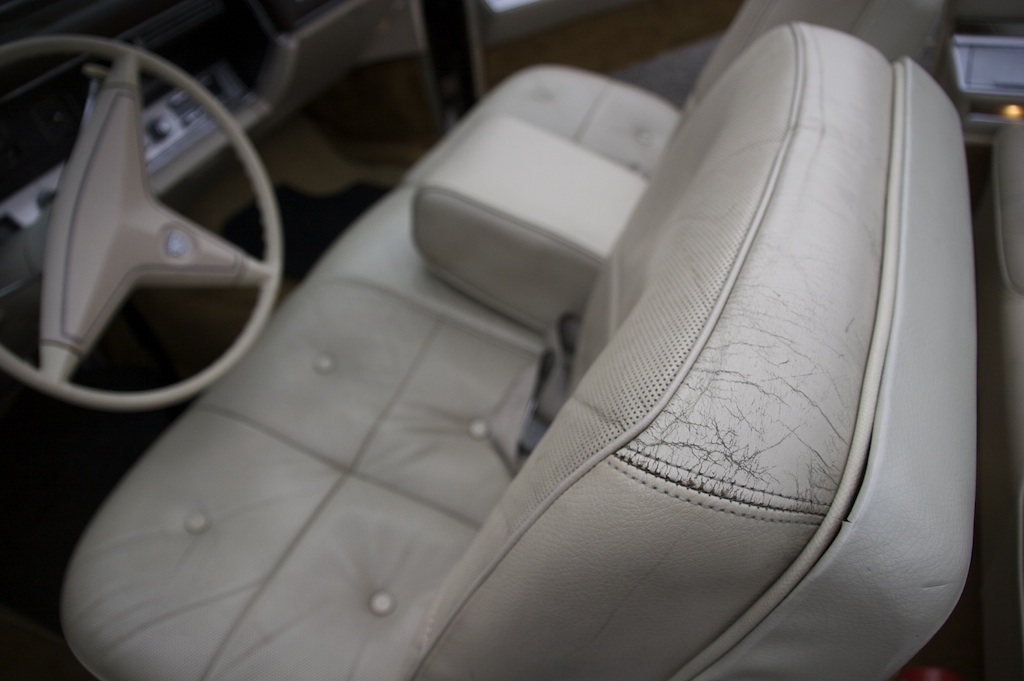
The front seat before it was restored in 2008
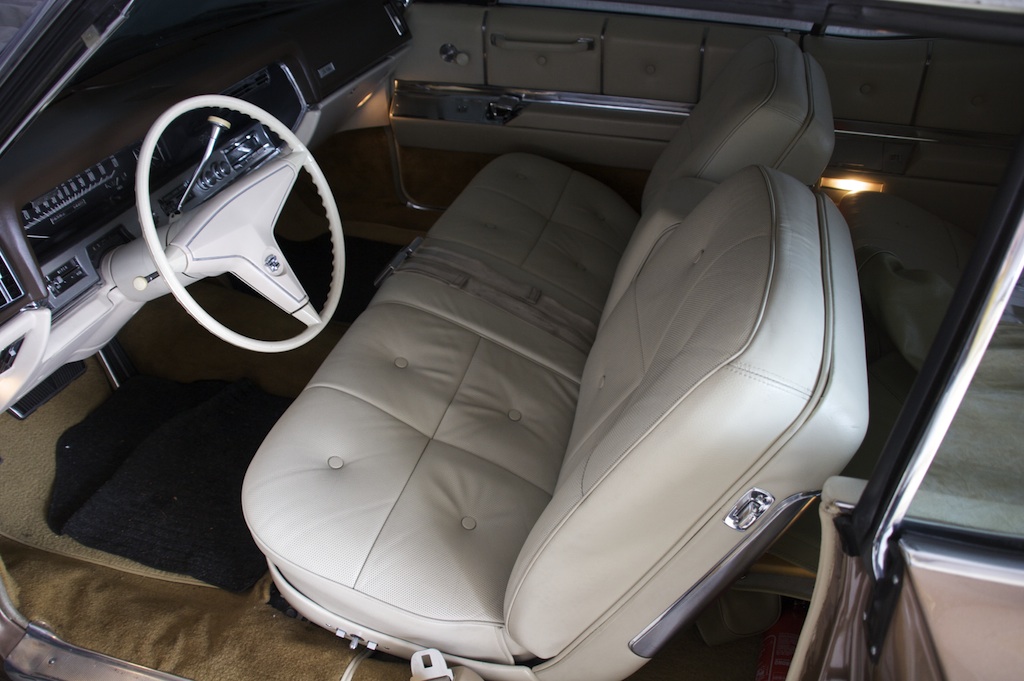
after the detailing
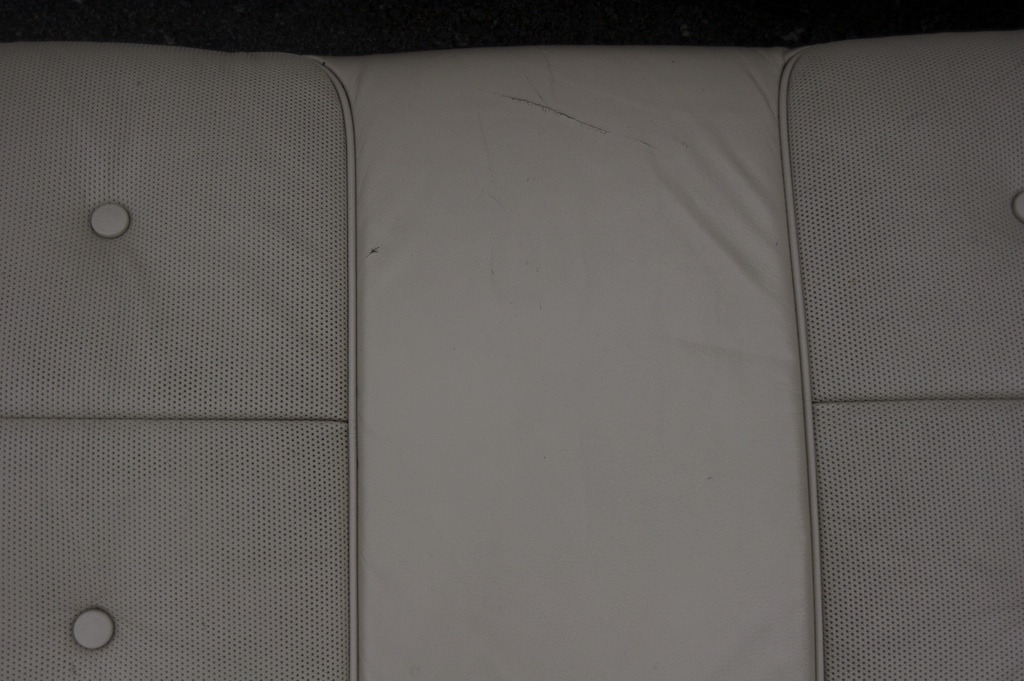
the rear seat had a slight scratch
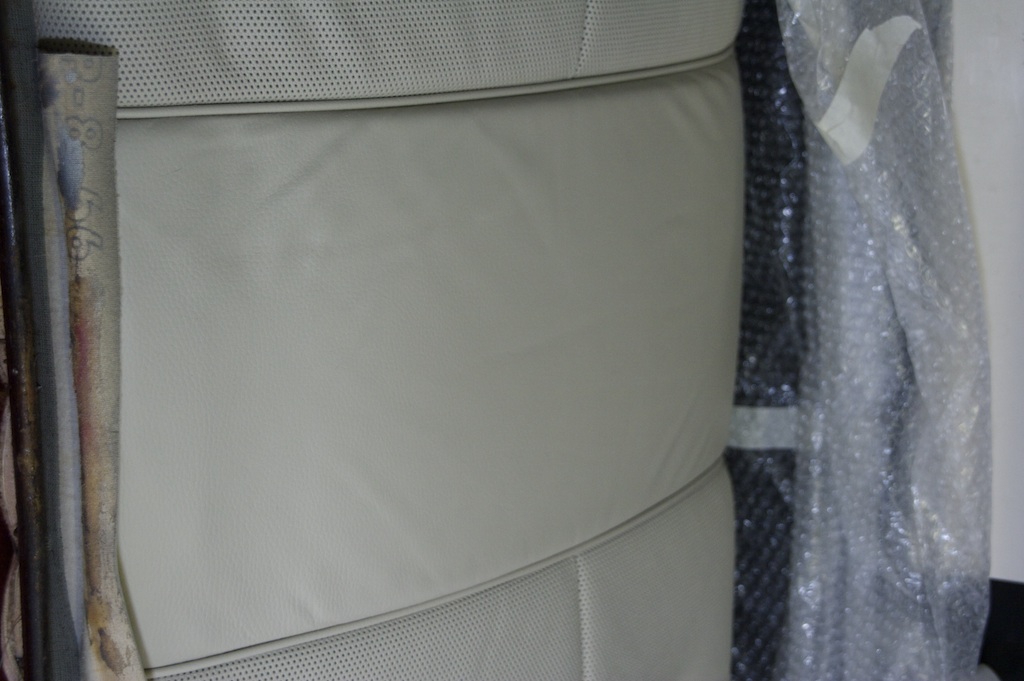
the detailed rear seat - all tears and cracks are gone
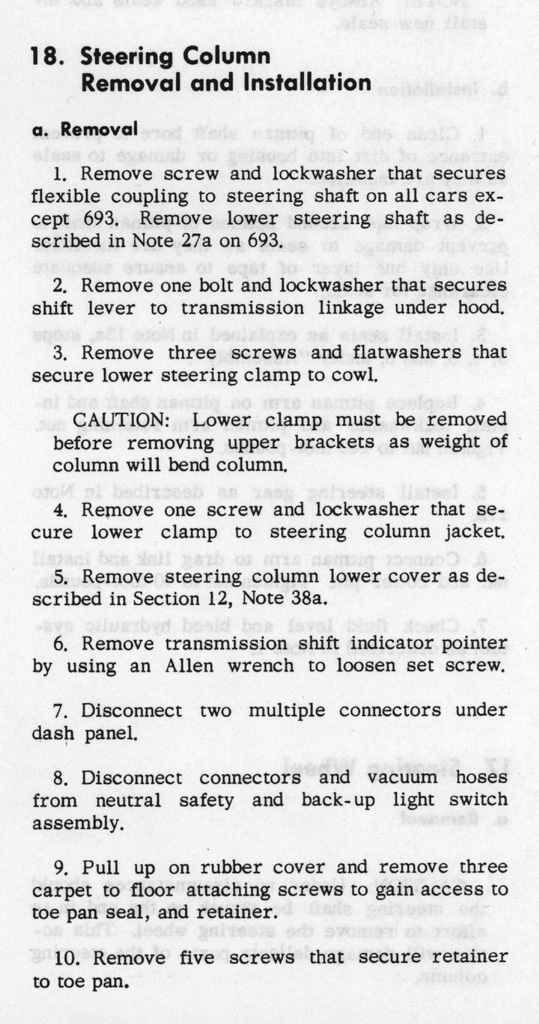
How to change the turn signal switch and steering column
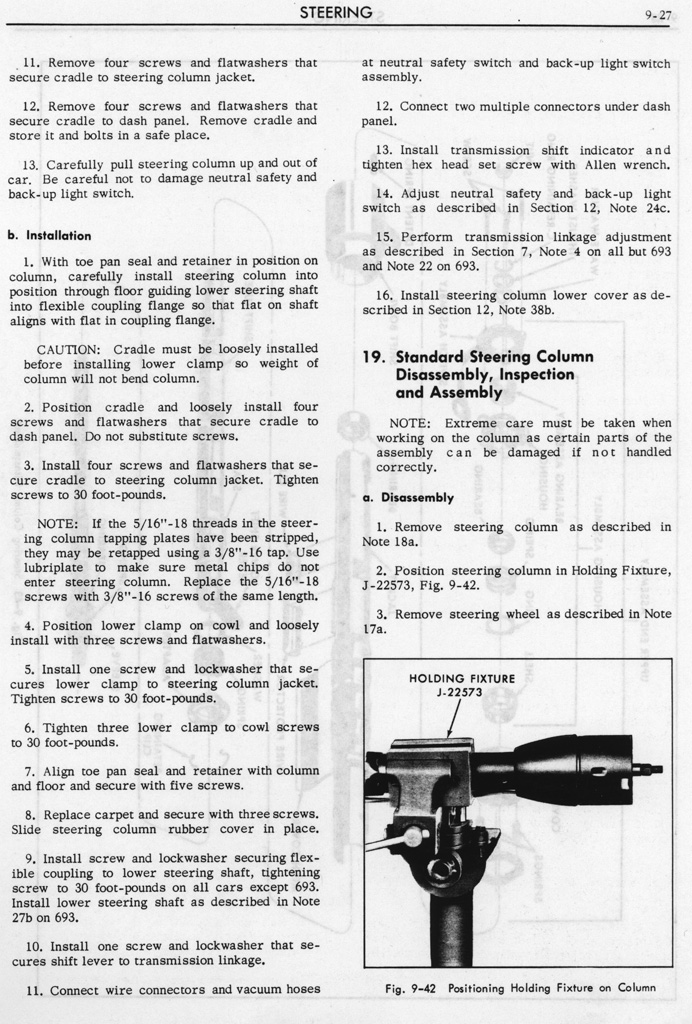
How to change the turn signal switch and steering column
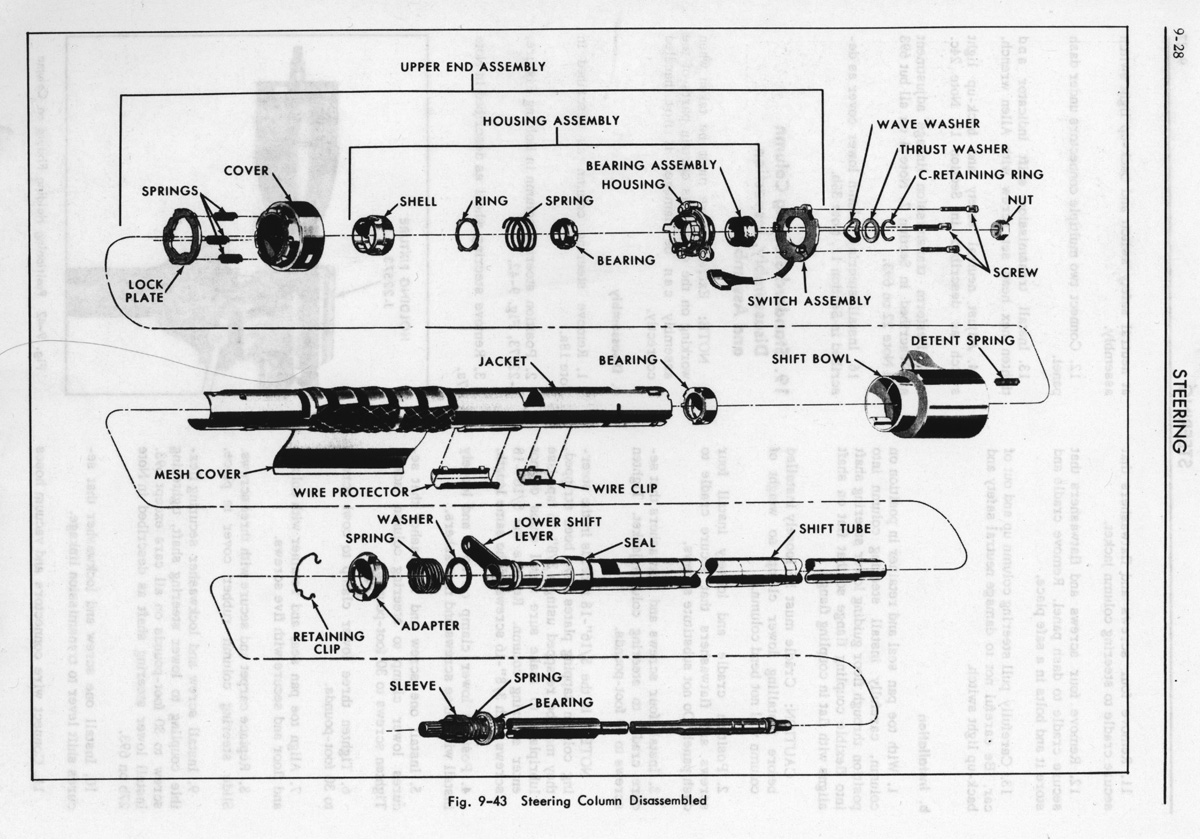
How to change the turn signal switch and steering column
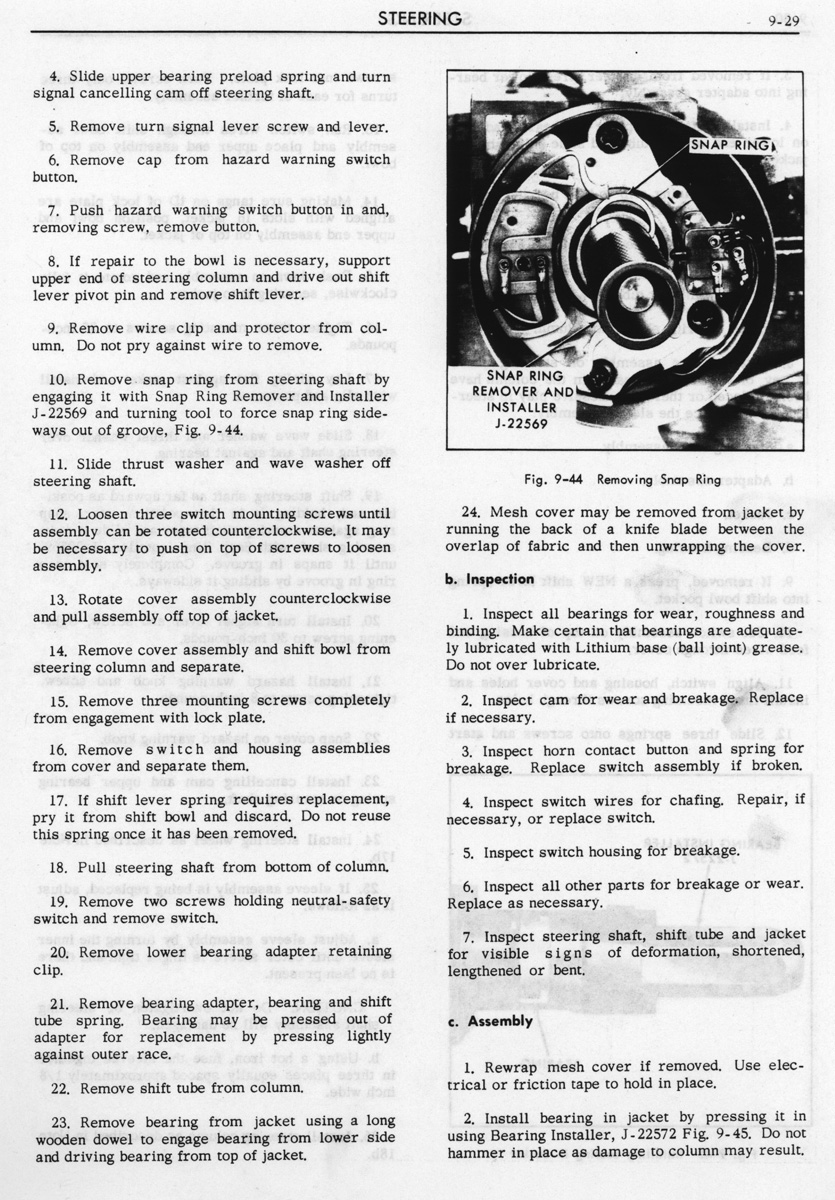
How to change the turn signal switch and steering column
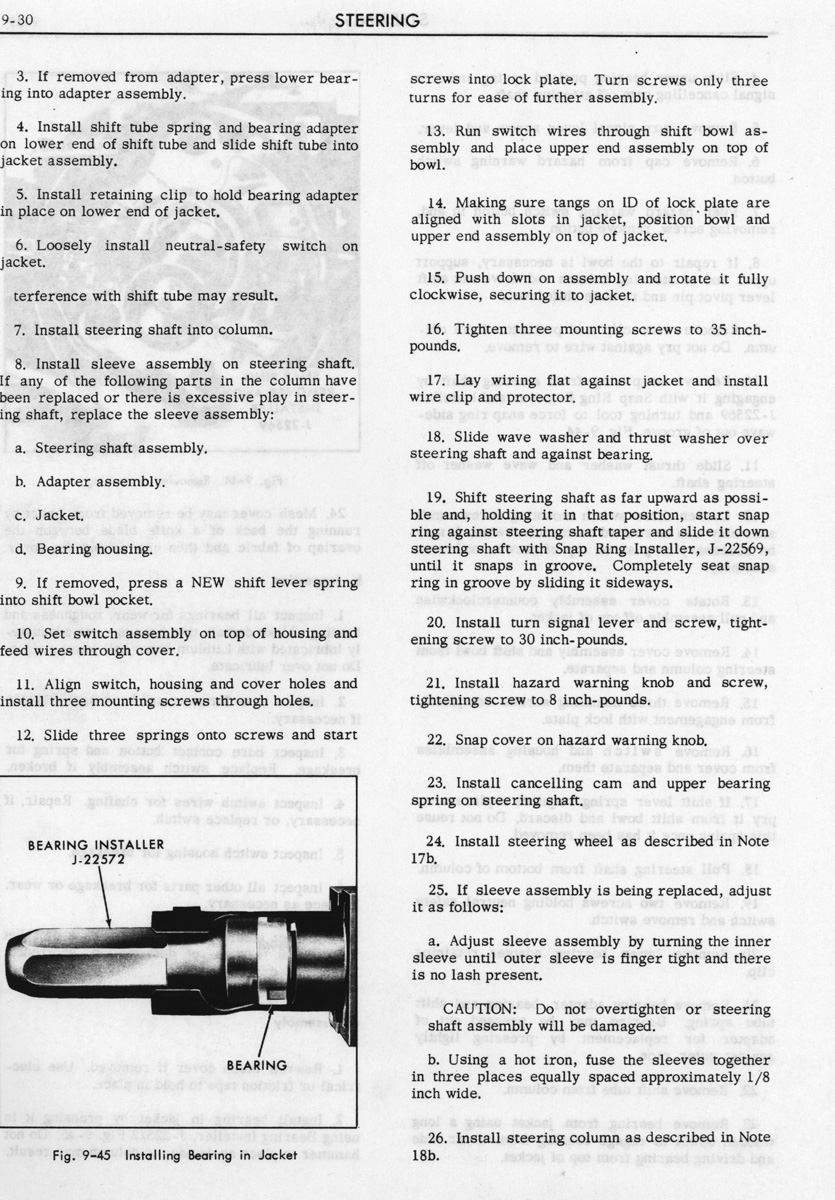
How to change the turn signal switch and steering column
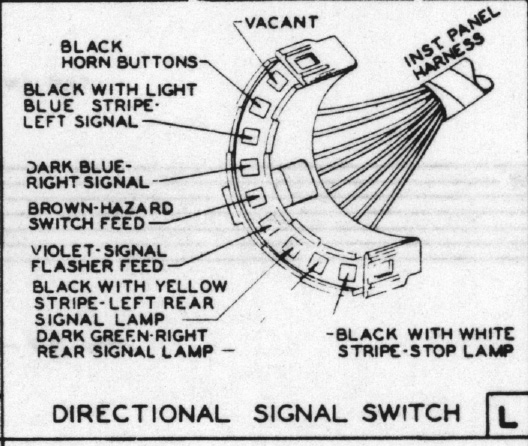
Turn signal switch connector
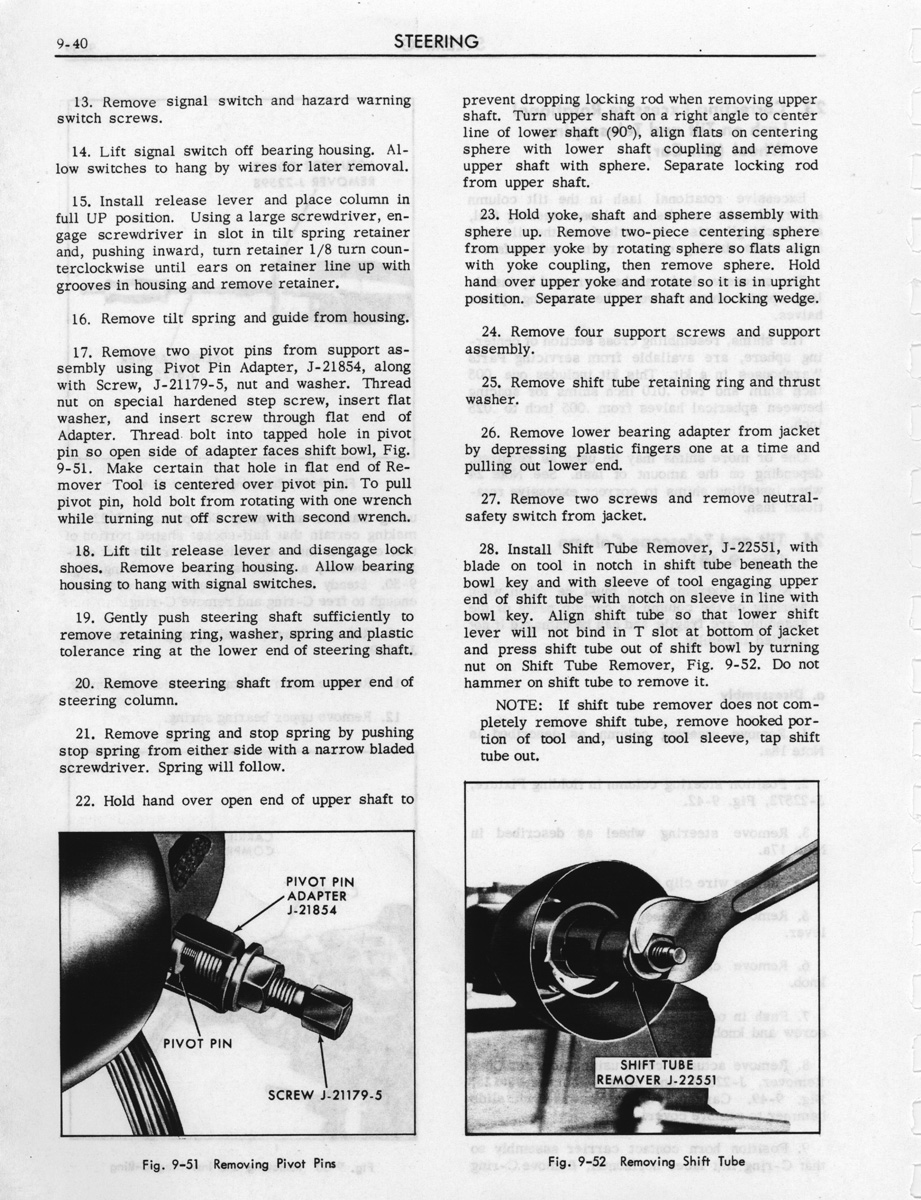
tilt and telescope steering and turn signal switch
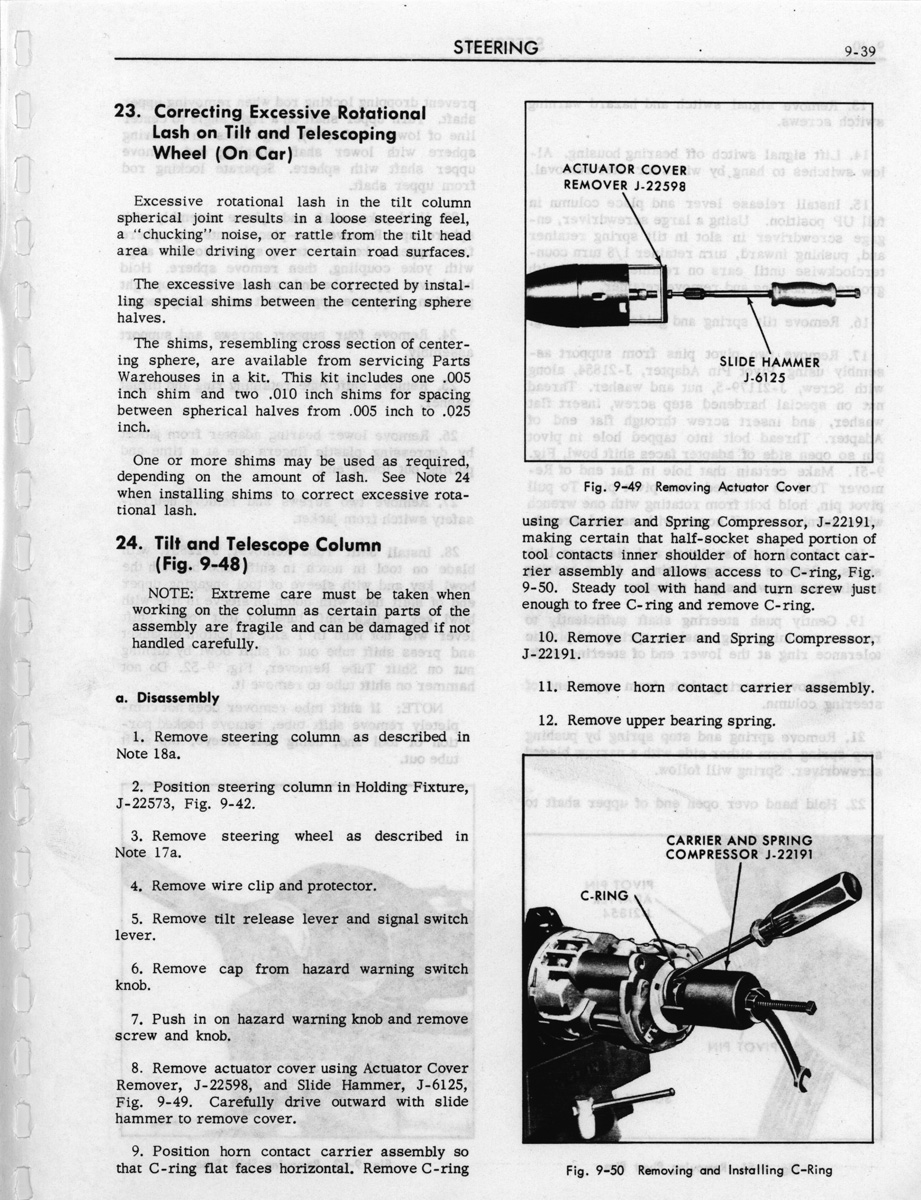
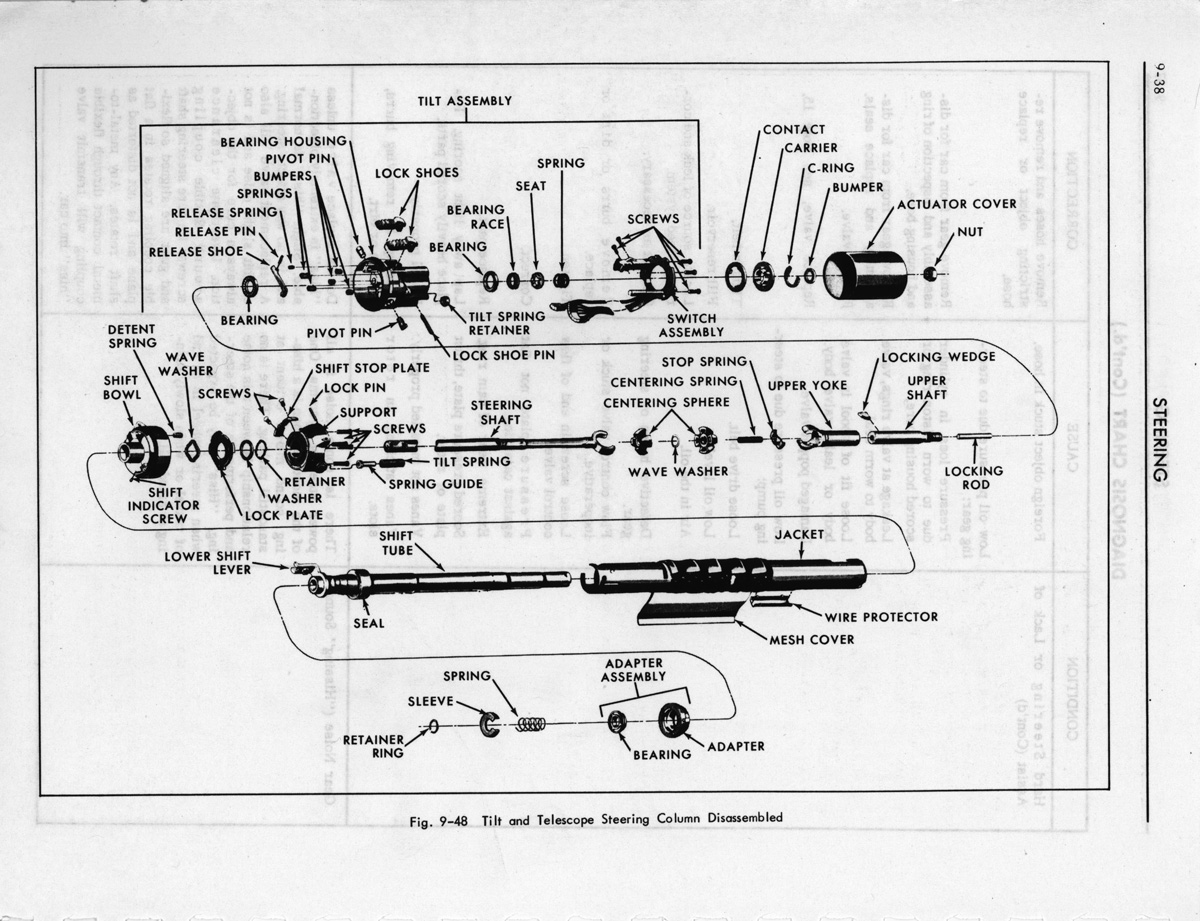
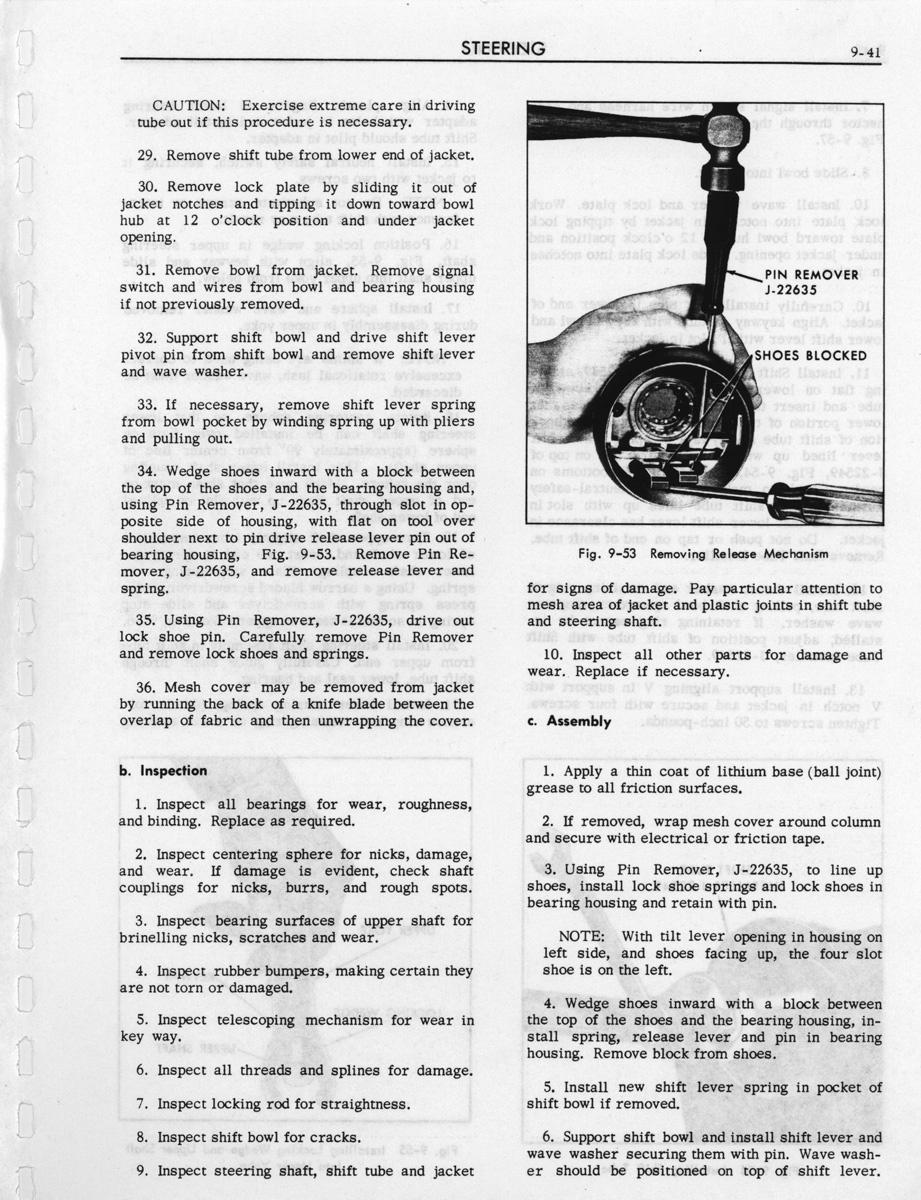
tilt and telescope steering
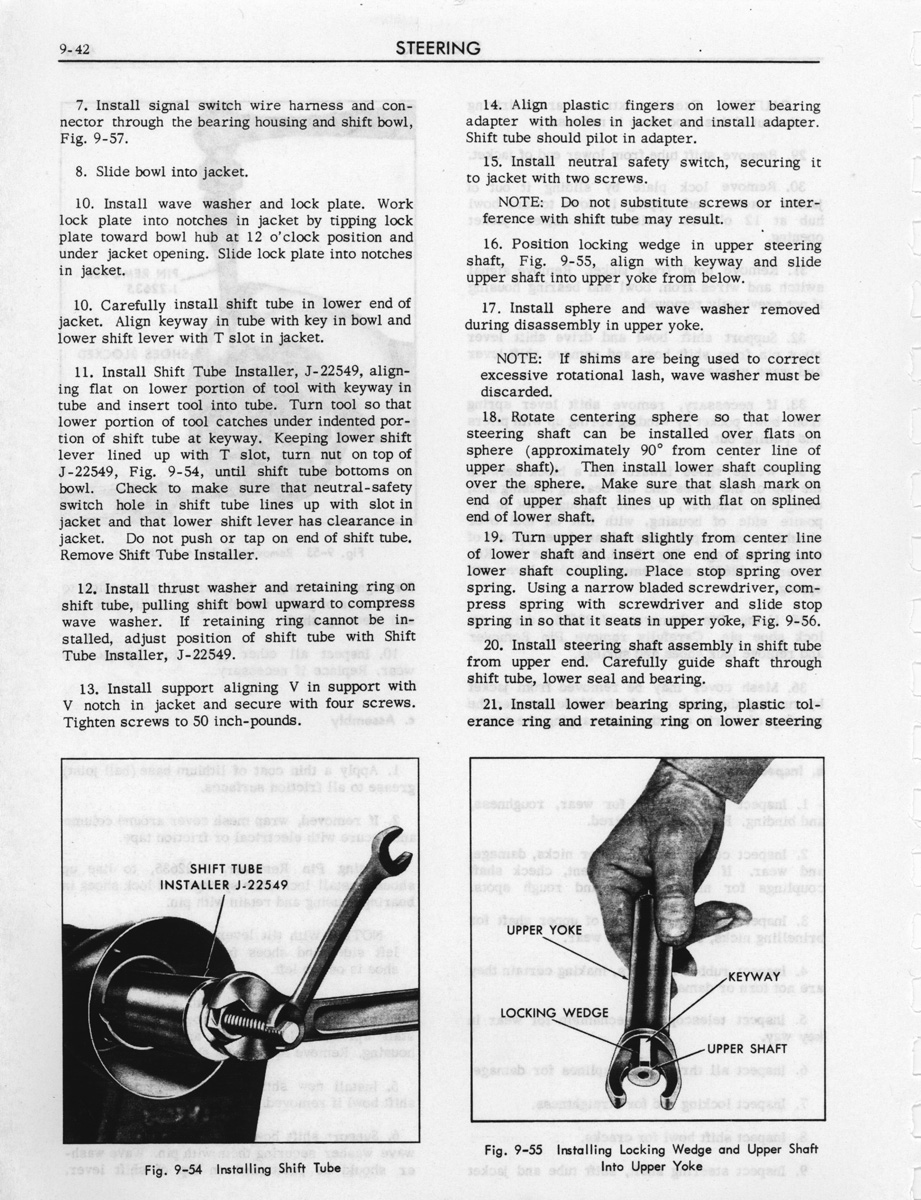
tilt and telescope steering
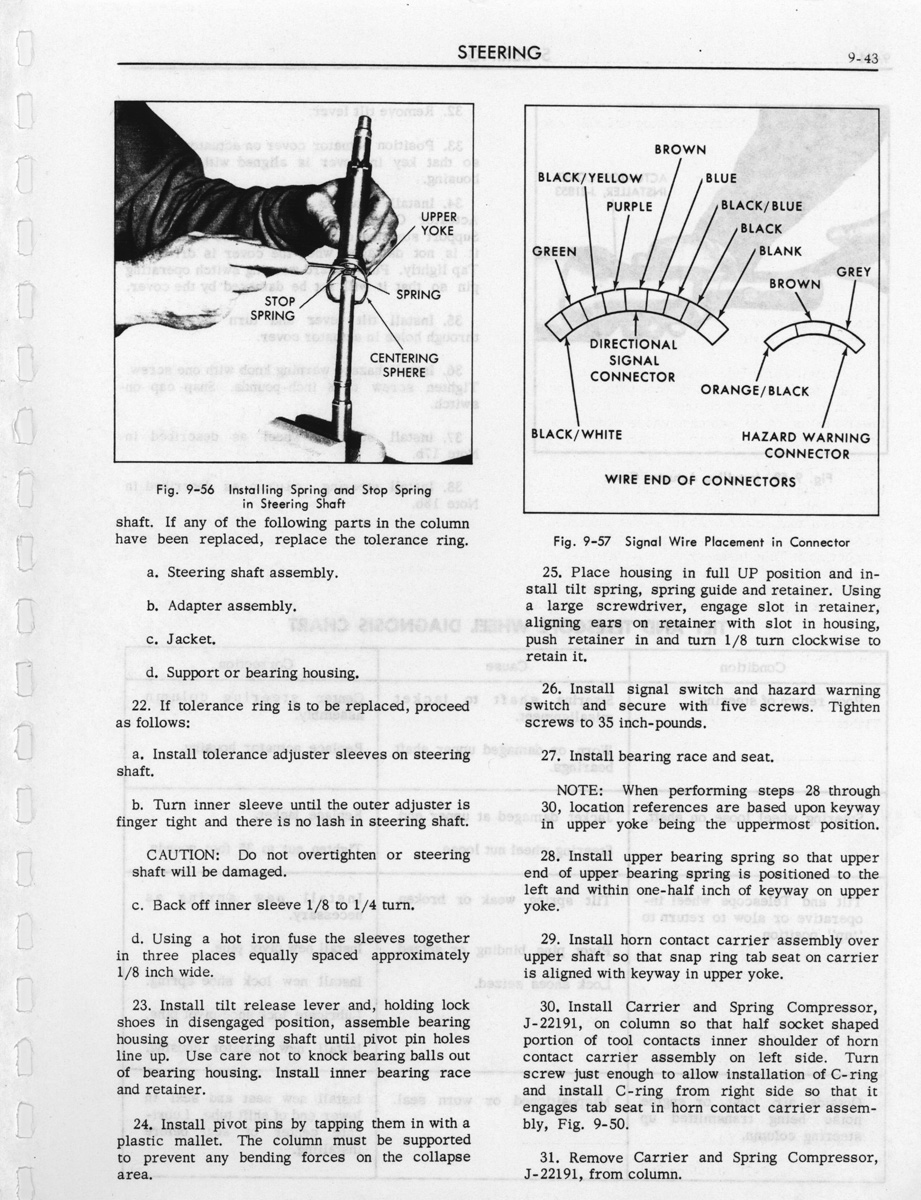
tilt and telescope steering
tilt and telescope steering
tilt and telescope steering
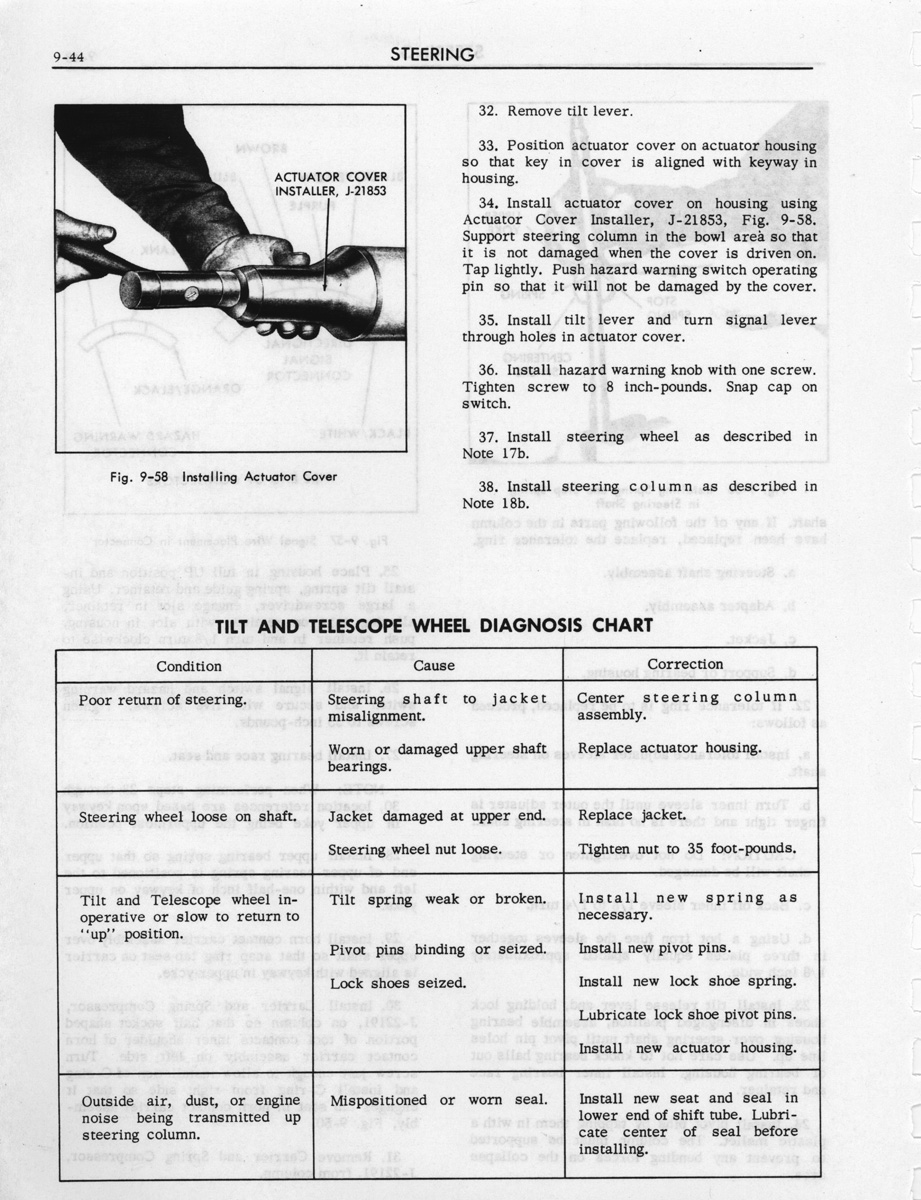
tilt and telescope steering
Restorationwork
After about 100 hours of bodywork the car got a coat of primer and then a thin coat of silicone filler. The body shop gave the car 5 weeks for drying before fillersanding for the perfect body lines began.
A lot of parts were still missing which would be needed for reassembly. I needed some of the bumper parts, climate compressor, gaskets, weather-stripping and much more. Shipping all these parts would have cost more than flying to California and bring them over myself. So I made a 3 week trip to the USA and bought all the parts I needed directly there. When we flew home we had 210 pounds of luggage. I had the climate compressor in my backpack which drew a lot of attention at the security checks at the airport...
Meanwhile I took the complete interior home for detailing it. I cleaned everything - took the doorpanels apart and my sister sewed new carpets and windlaces on them. The front bench was taken apart and brought to an upholstering shop where they took care of it. It got complete new cushioning material under the leather and one small piece was welded together. Everything was sanded down to bare metal, primered and painted, as the metal was not coated at all at the factory. They also sewed the new carpet material to the back of the front bench. I got rid of all the dirt and grime that covered the leather interior and it looked like new afterwards.
After the car was fillersanded by the bodymen it was brought to the paintshop for its new coat of paint. It was wetsanded between each coat of paint for that perfect finish. It looked spectacular when it came back from the paintshop. When we pushed the car back into the garage at the restoration shop a board which was leaning against the wall fell on the front fender and made a big scratch, so we had to bring the car back to the paintshop....
Within a day it was repaired and we started to reassemble the car . We took great care not to damage anything on the fresh painted car. And within 3 weeks with 12-16 hours of work a day the car was completely reassembled. It was great to put all the new or refurbished parts back into the car.
Then it was time for the first test-drive after the restoration, and suddenly the transmission didn't shift up! After days of searching the mechanic found out that there was a vacuum leak in a tube that caused the problem.
After the car was finished the biggest shock was still to come: The bill! Suddenly it was twice as high as the maximum amount we agreed on, although he promised multiple times that we would still be within the financial frame we had set. I really felt ripped off and he held my car hostage... I had to borrow the additional money from my family and friends to get my car back...
Leather seat detailing in 2008
I found a shop which does detailing work on leather interiors. They can remove all tears and cracks and re-dye the original leather. I had them go over my front and rear seats. Now the seats looks like new. Click on the link to view the images!