 GERALD´S CADILLACS - NEWS
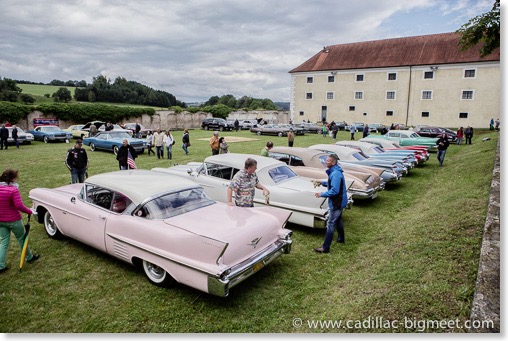
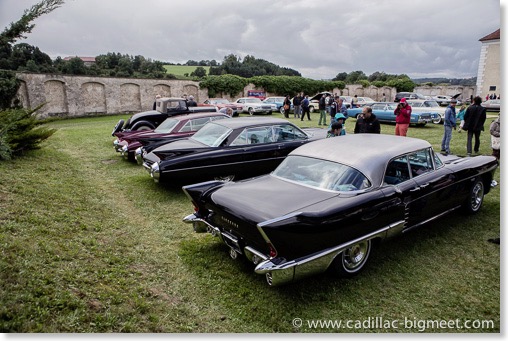
CADILLAC BIG MEET 2023 - THE MOVIE
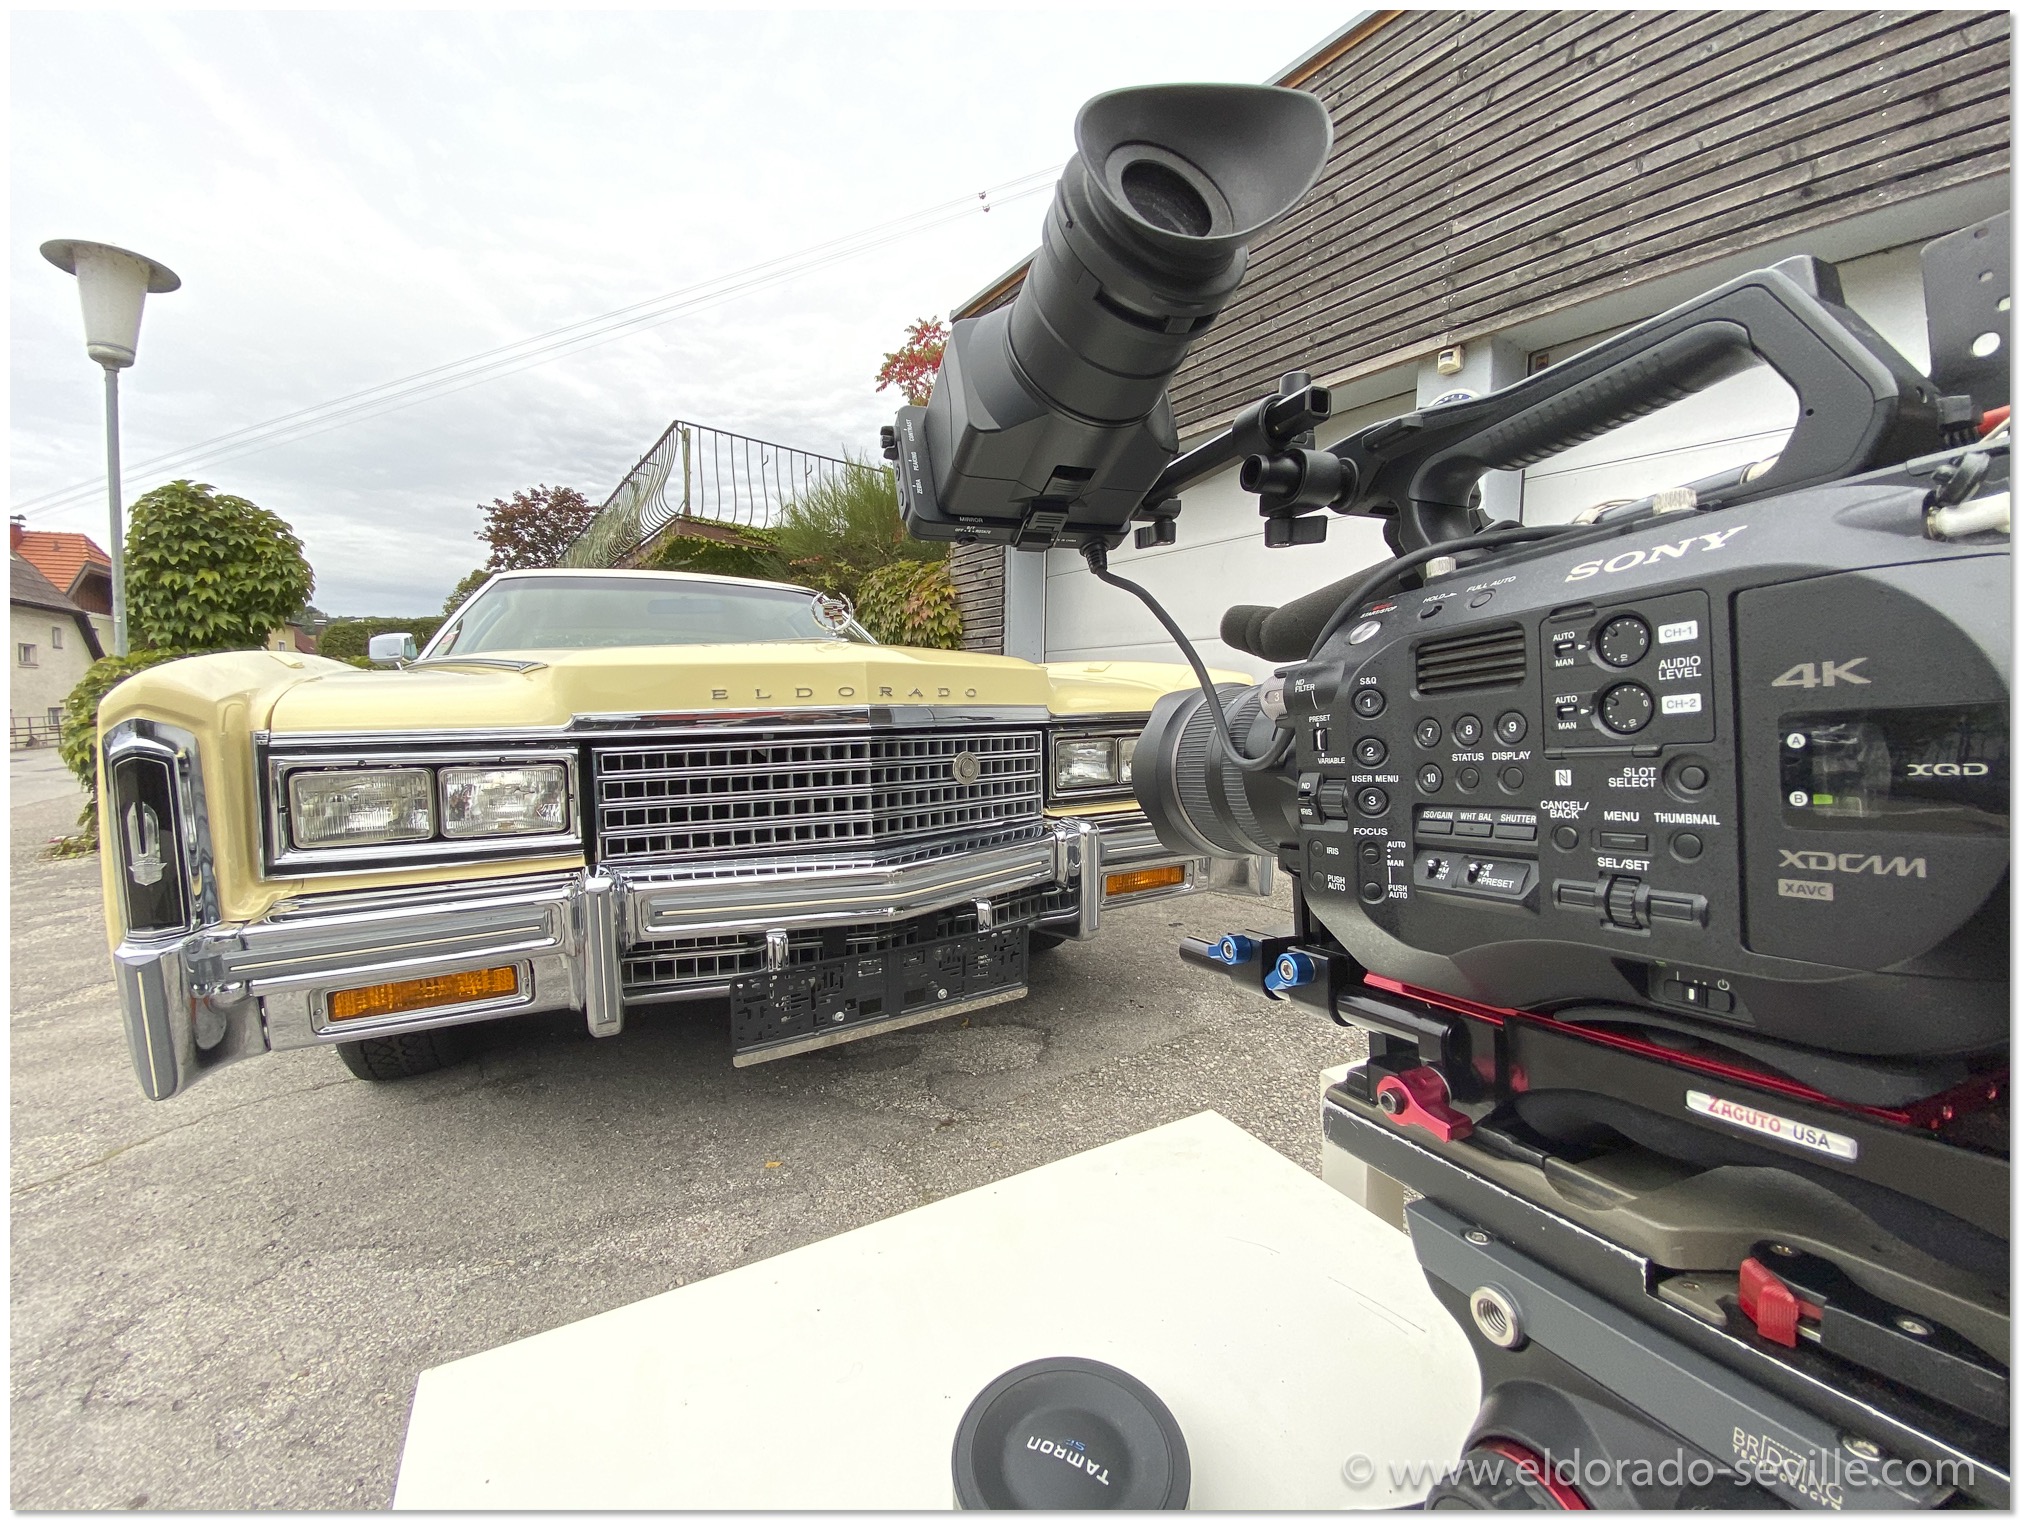
One of my many tasks is to do the website, photography, the videography and promotion for this event. We are a great team of friends and enthusiast and enjoy organising this event.
This year we had a very hot summer weekend and 101 Cadillacs attending the event.
This year my wife and I took the 67 Eldorado and the 78 Biarritz to the event. During the 3 days there we shot a TV report and the official aftermovie, which can be seen here! Enjoy.
It's best viewed on a large screen in 4k resolution.
The official aftermovie
We also did a TV report for an Austrian TV-Channel.
We do not know yet when the next event can take place - I hope in 2025. Check the Cadillac BIG Meet website for updates- as soon as we have more info the website will be updated.
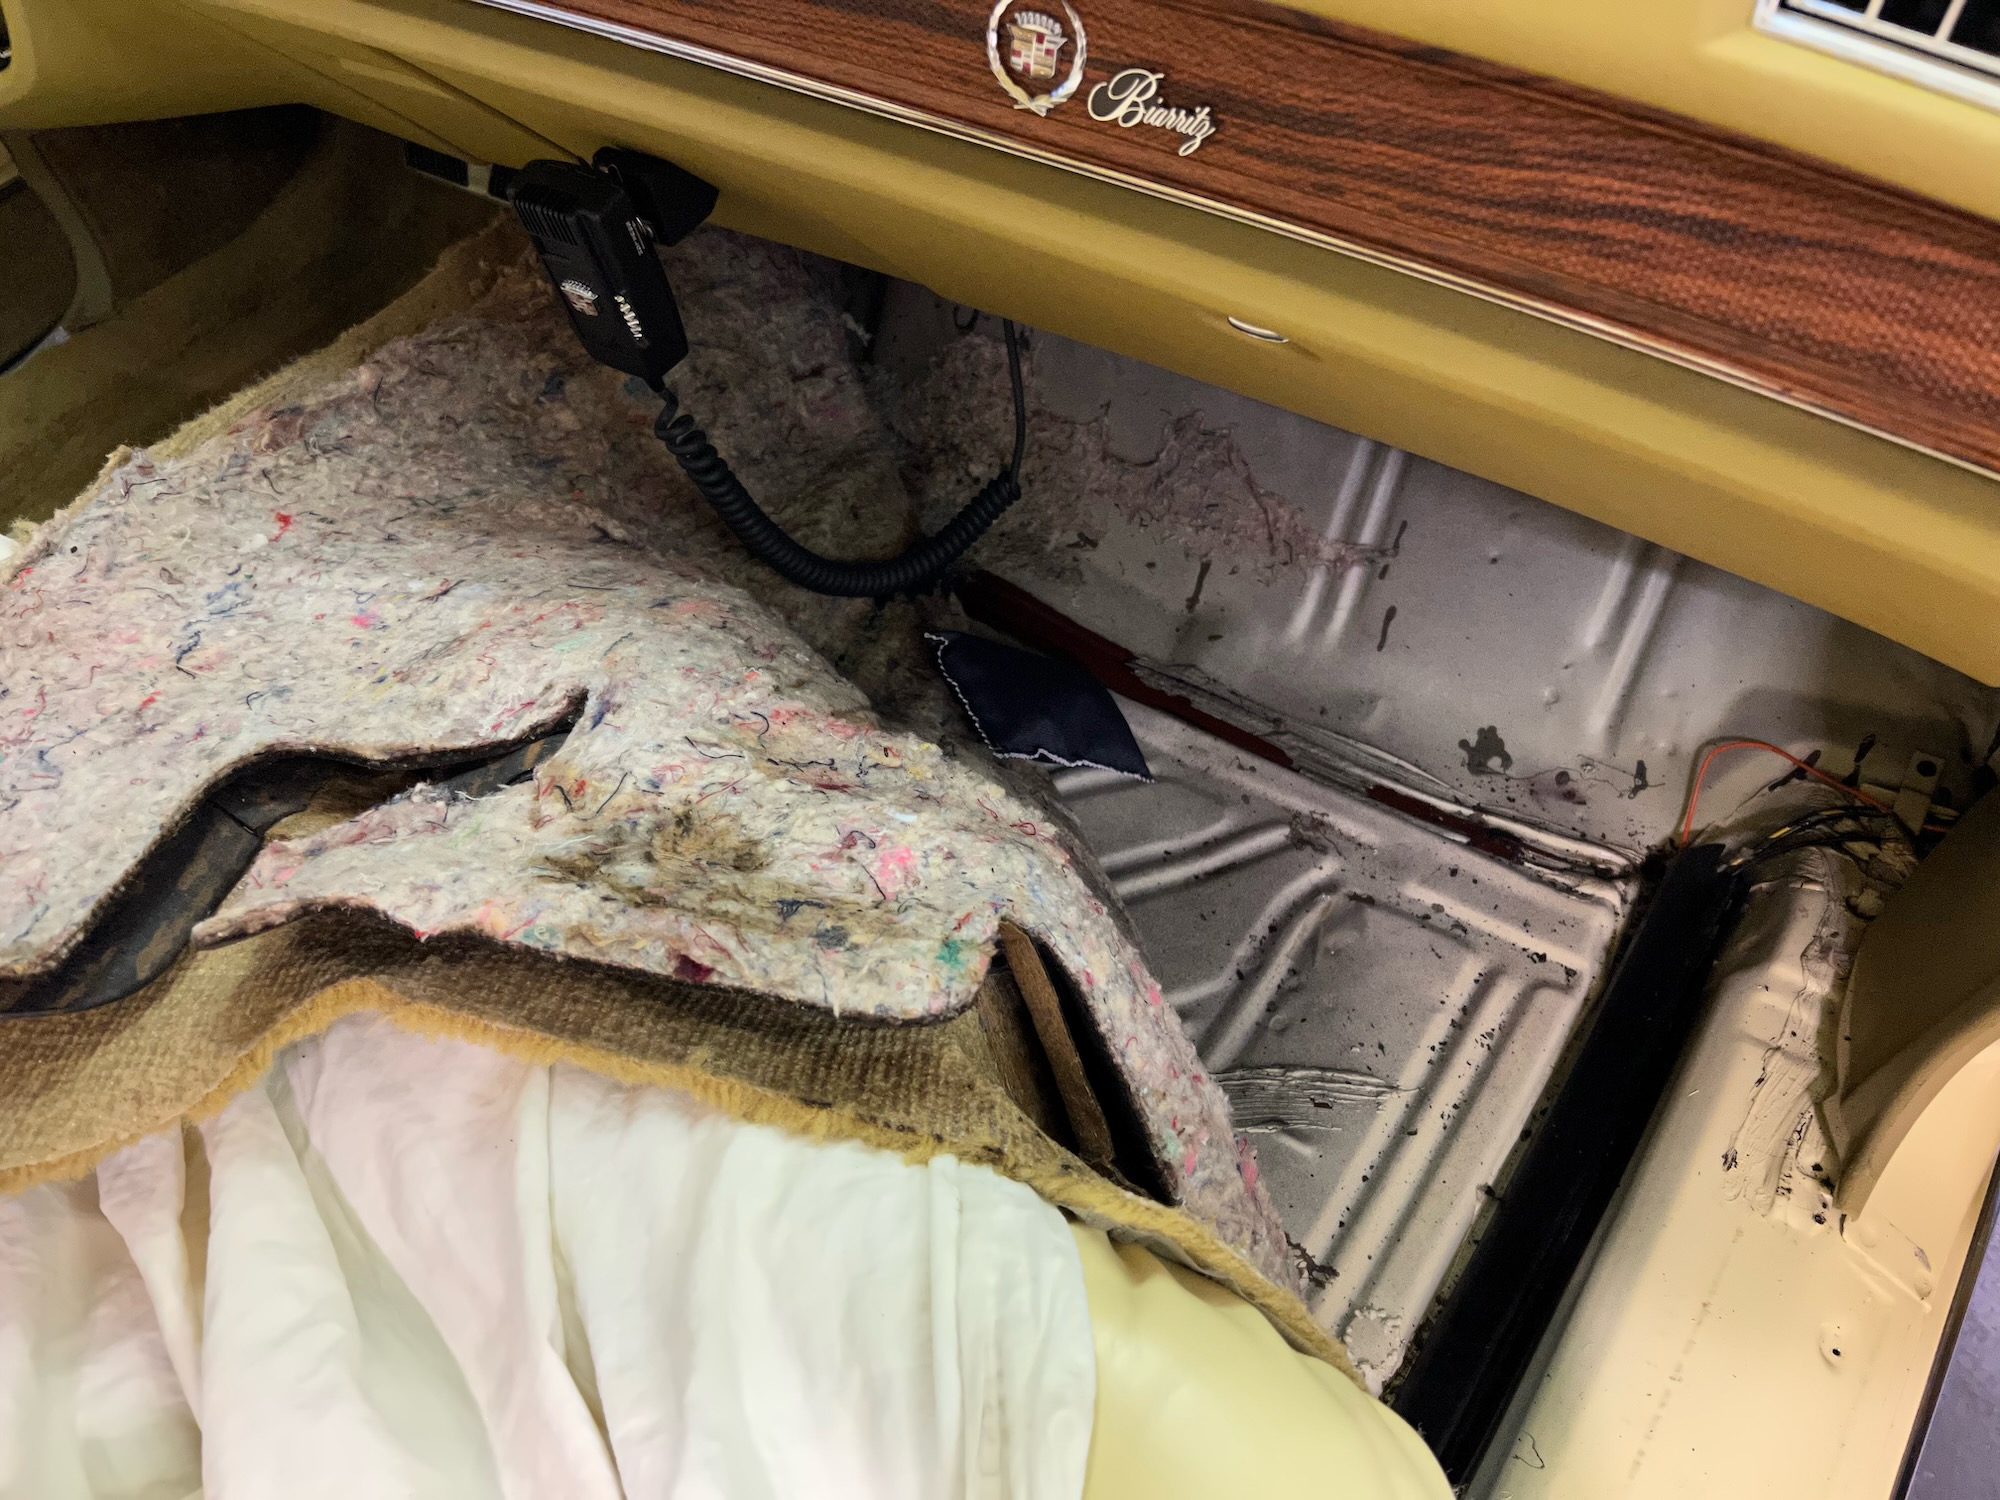
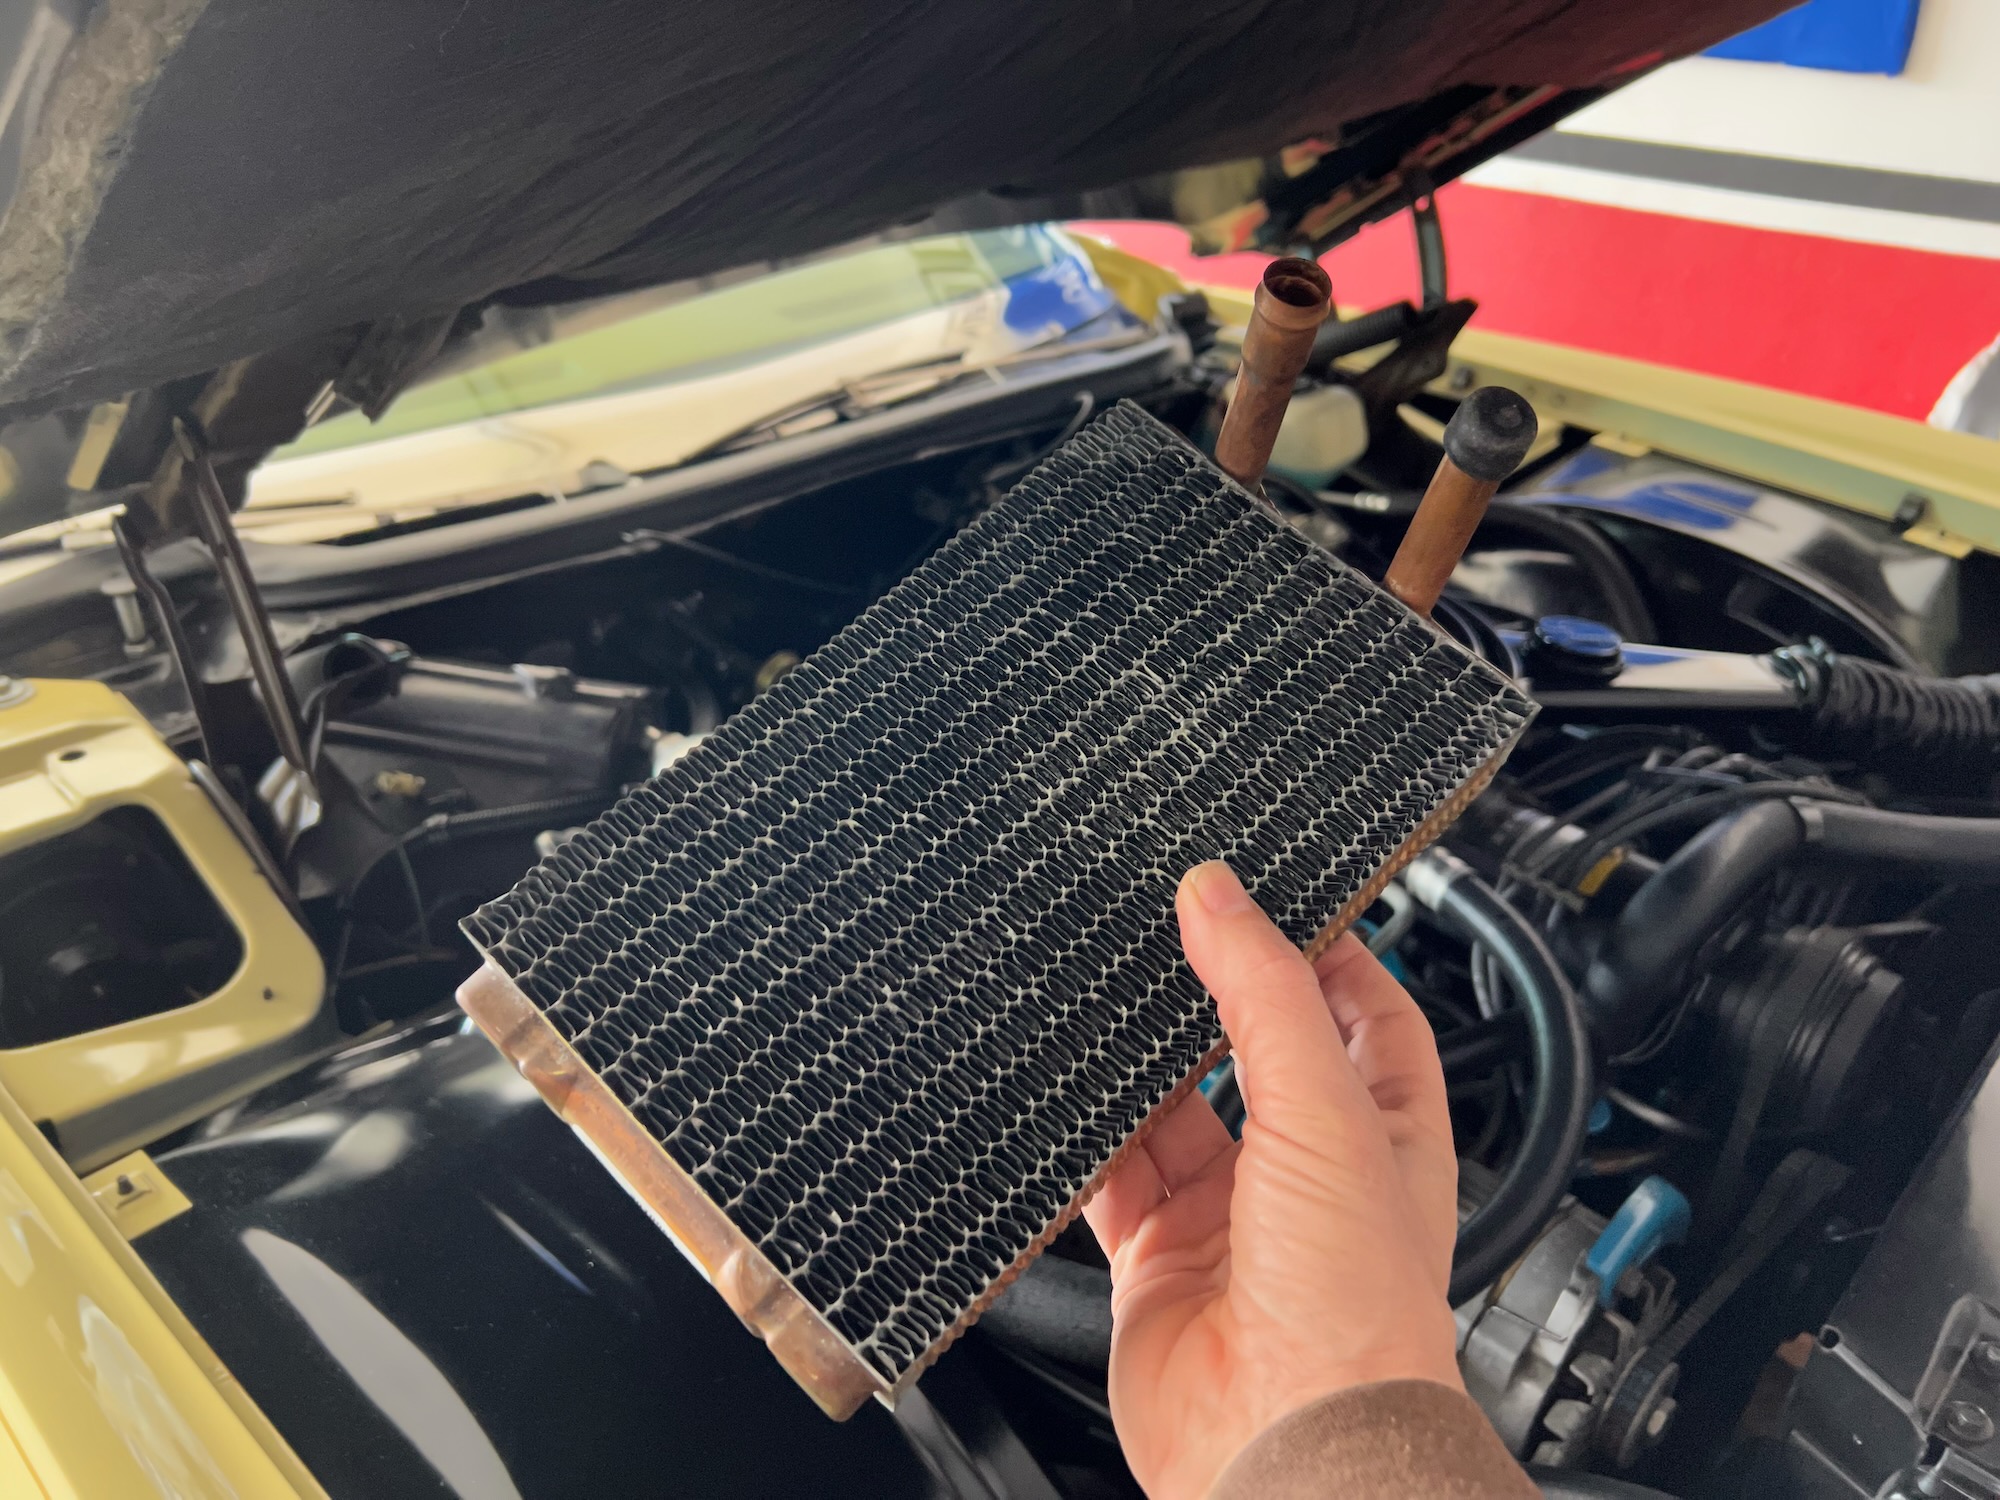
1978 CADILLAC ELDORADO HEATER CORE REPLACEMENT

1978 ACCELERATOR PUMP REPAIR
The car would have a slight hesitation for one or two seconds when driving away from standing still and idling. The hesitation was not present at any higher speeds - only when starting from standing still, no matter how hard I hit the pedal.
Once the car was rolling, it ran perfectly. 2 or 3 times the engine even stalled in the past.
That's why I suspected the accelerator pump.
Replacing it is not too difficult. You basically only need a rebuild kit and remove the carburetor from the car. Then you have to remove 8 screws to take the top off and remove 2 linkages. I'm not a carburetor expert at all, but luckily my friends ,who did the job before, helped me, but it really is not difficult at all. I found some great how-to video on YouTube on how the Quadrajets are taken apart and back together - They have some very informative videos on their youtube channel - here is one of them:
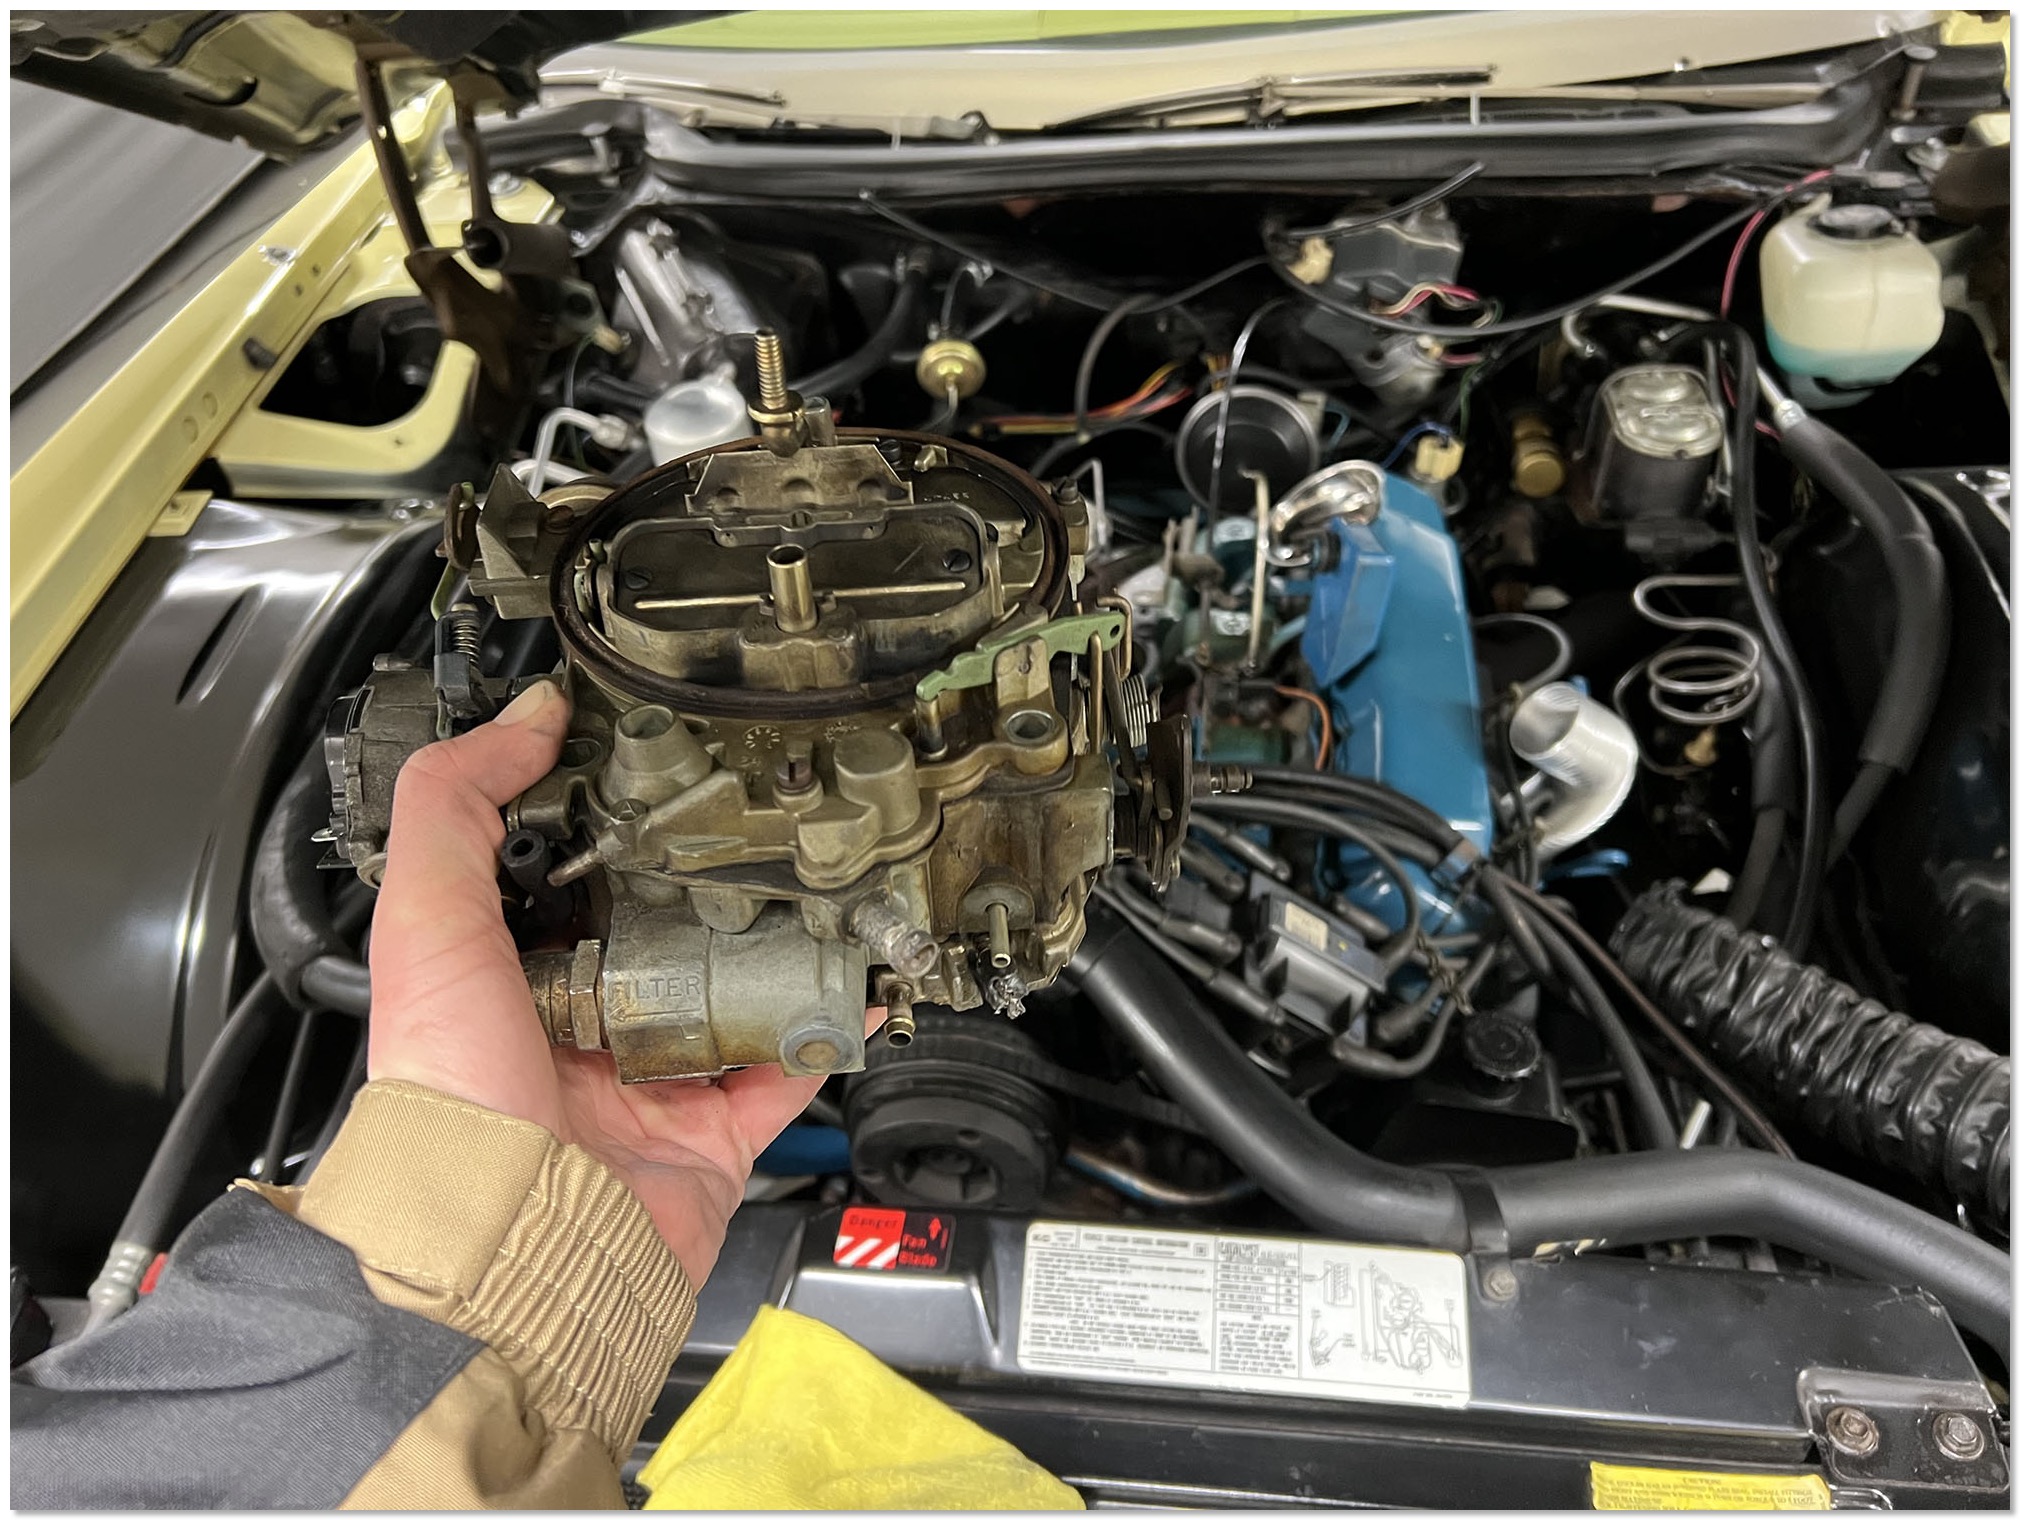 The Quadrajet after removal.
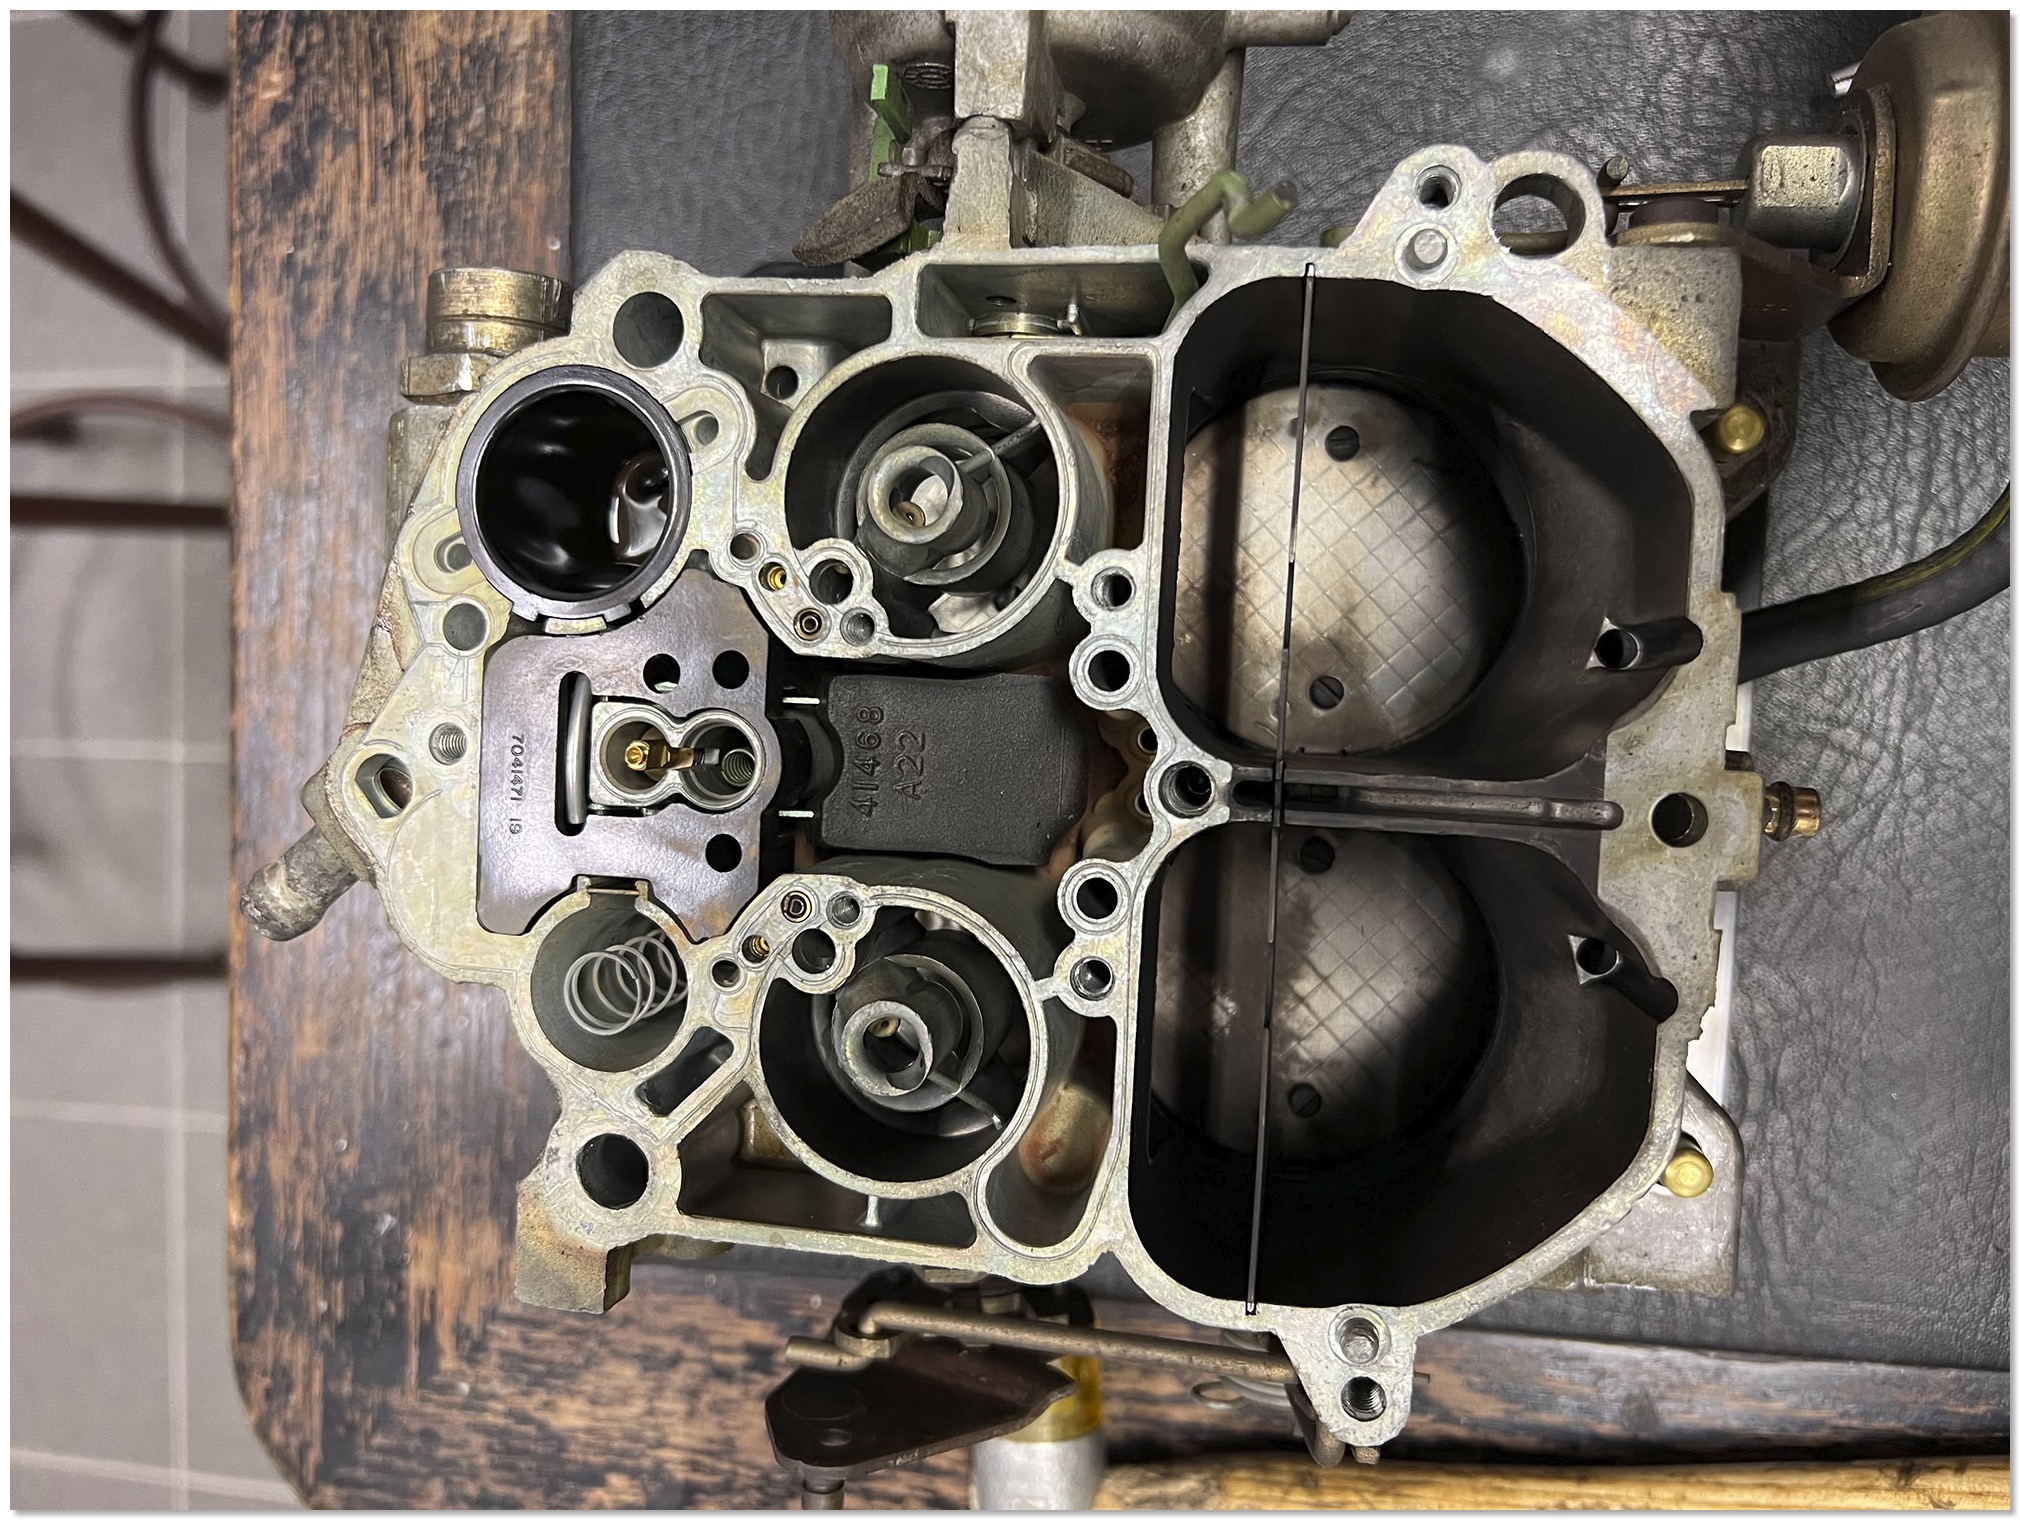
The Quadrajet with the top removed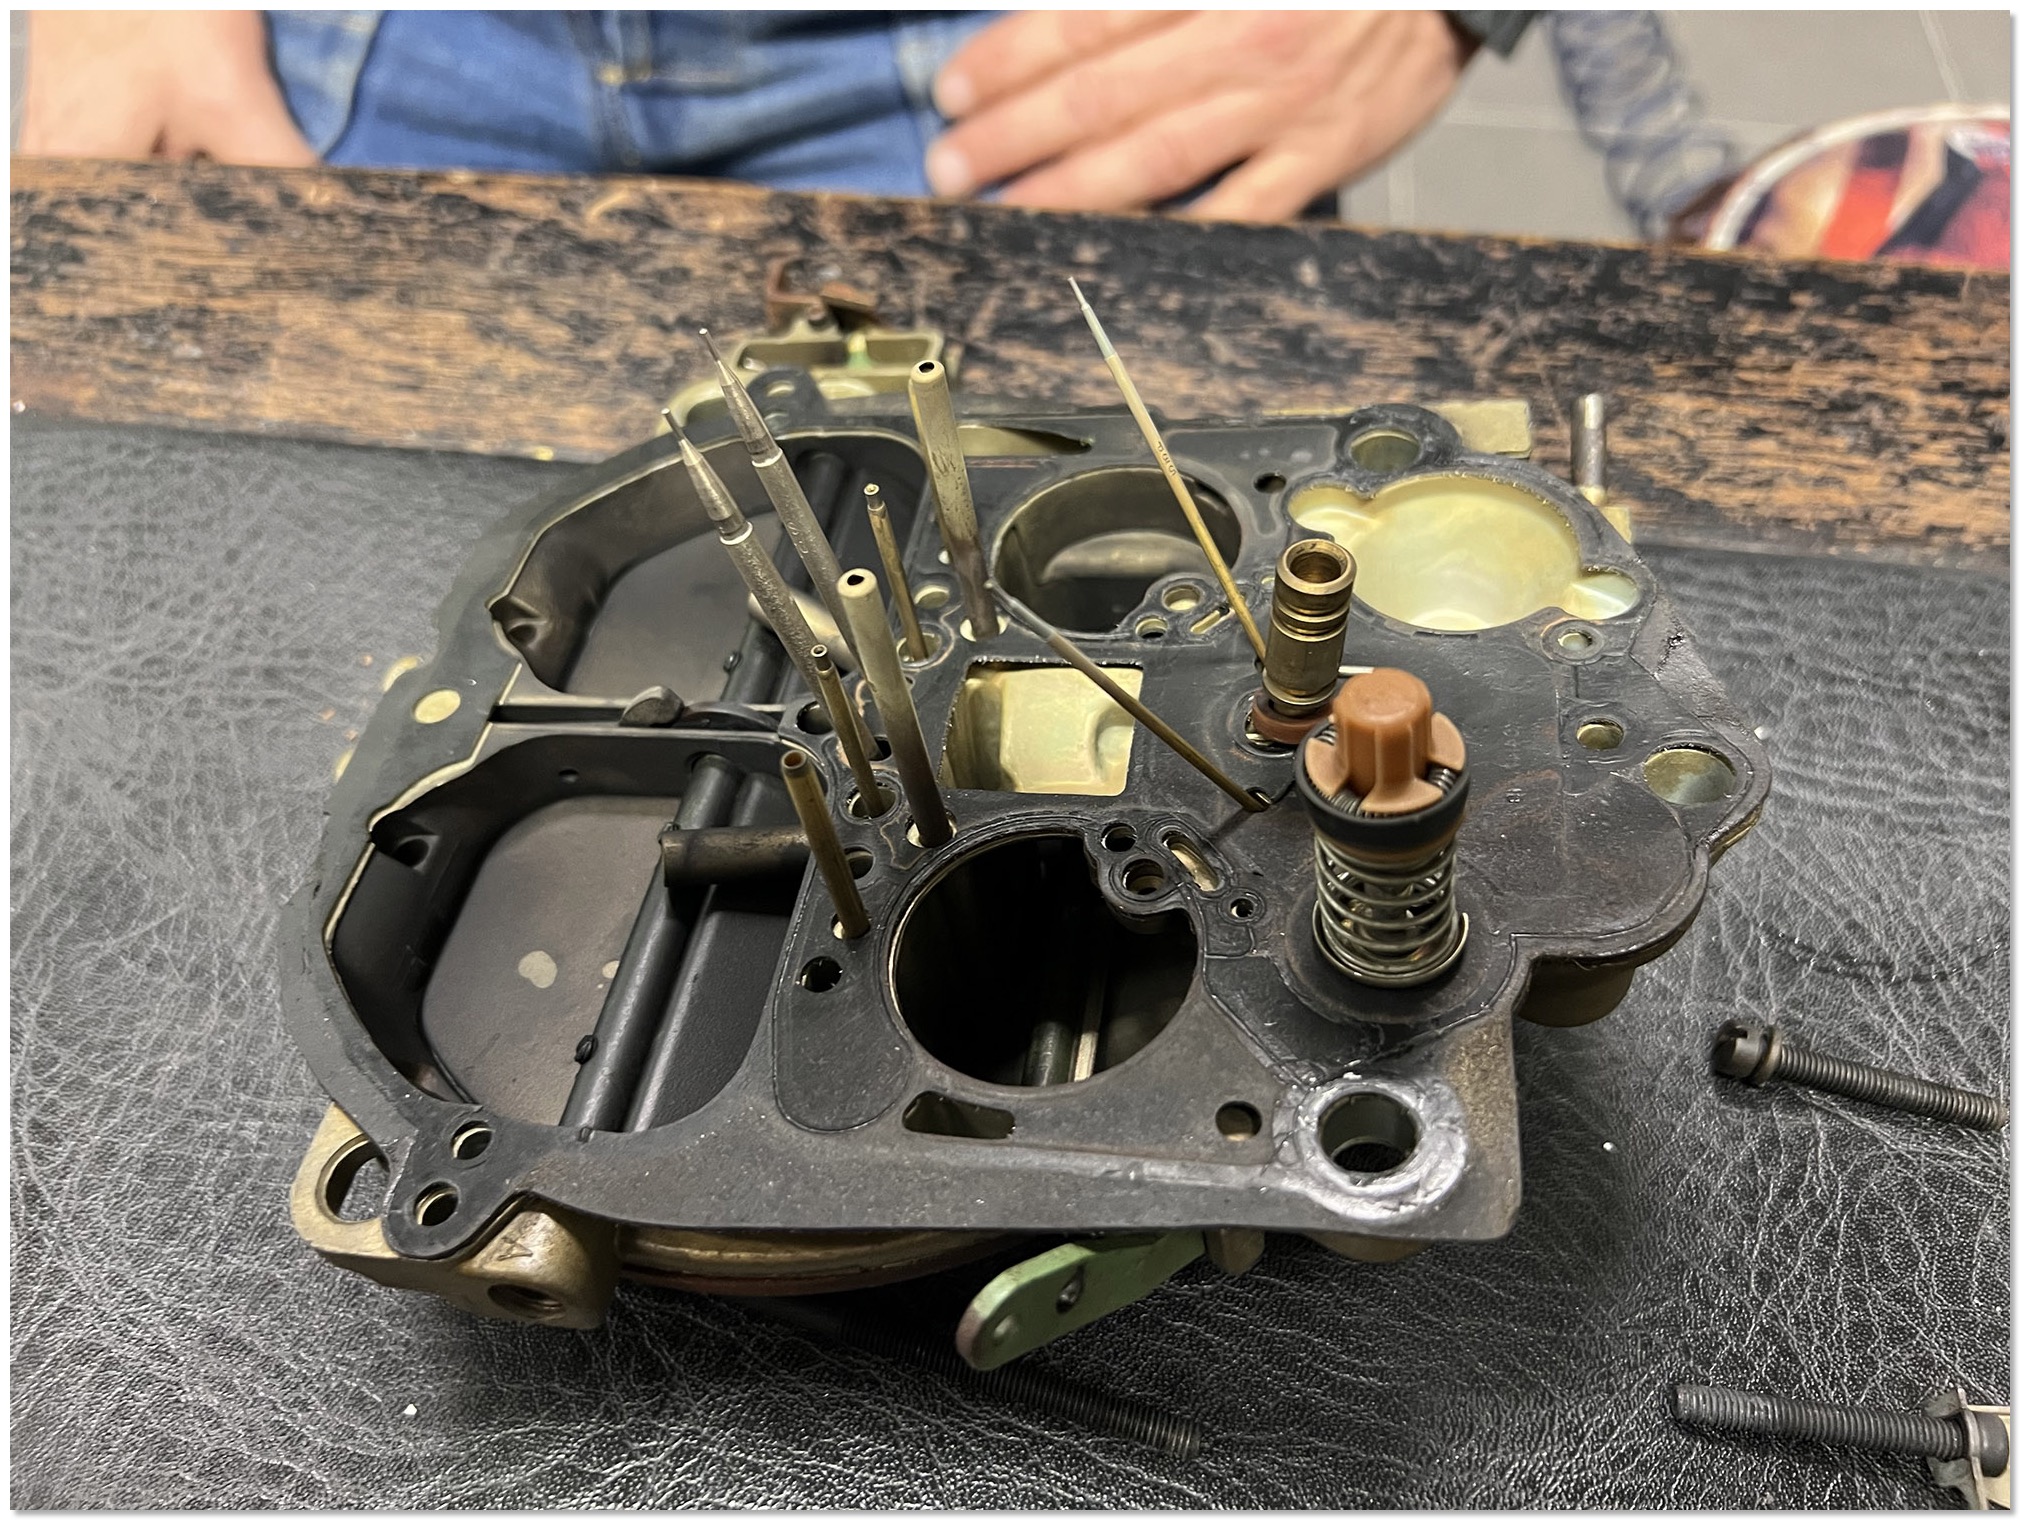 The accelerator pump on the right side
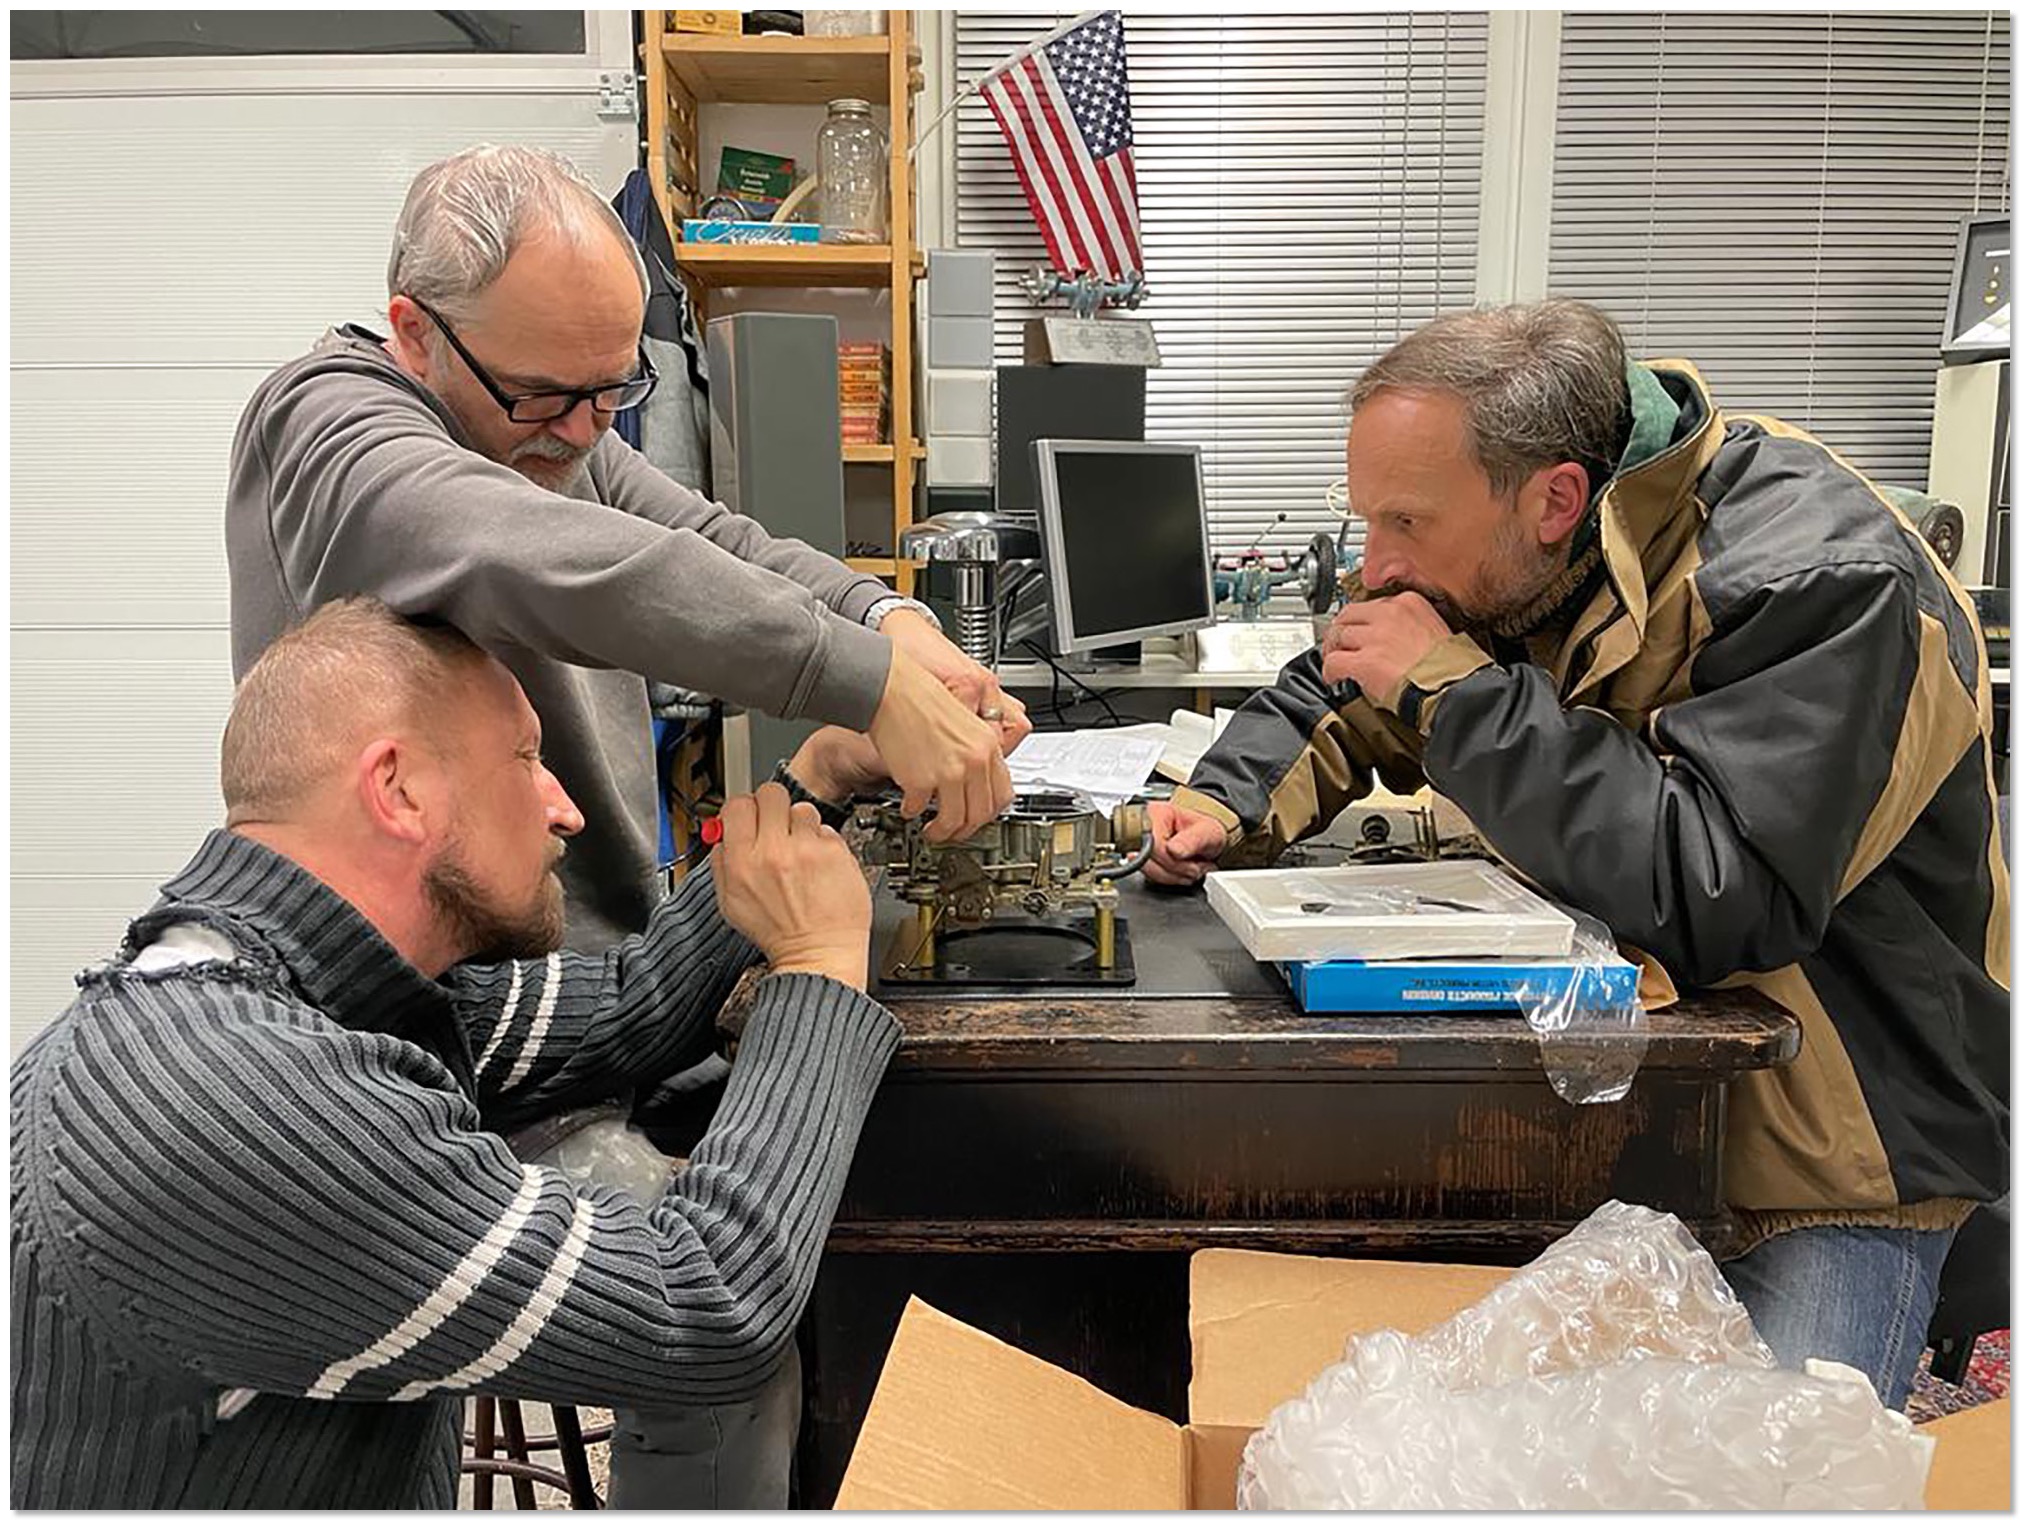
My friends Steve and Lucky helped a lot. Thanks my friends! We did all the work in Luckys fantastic garage and shop.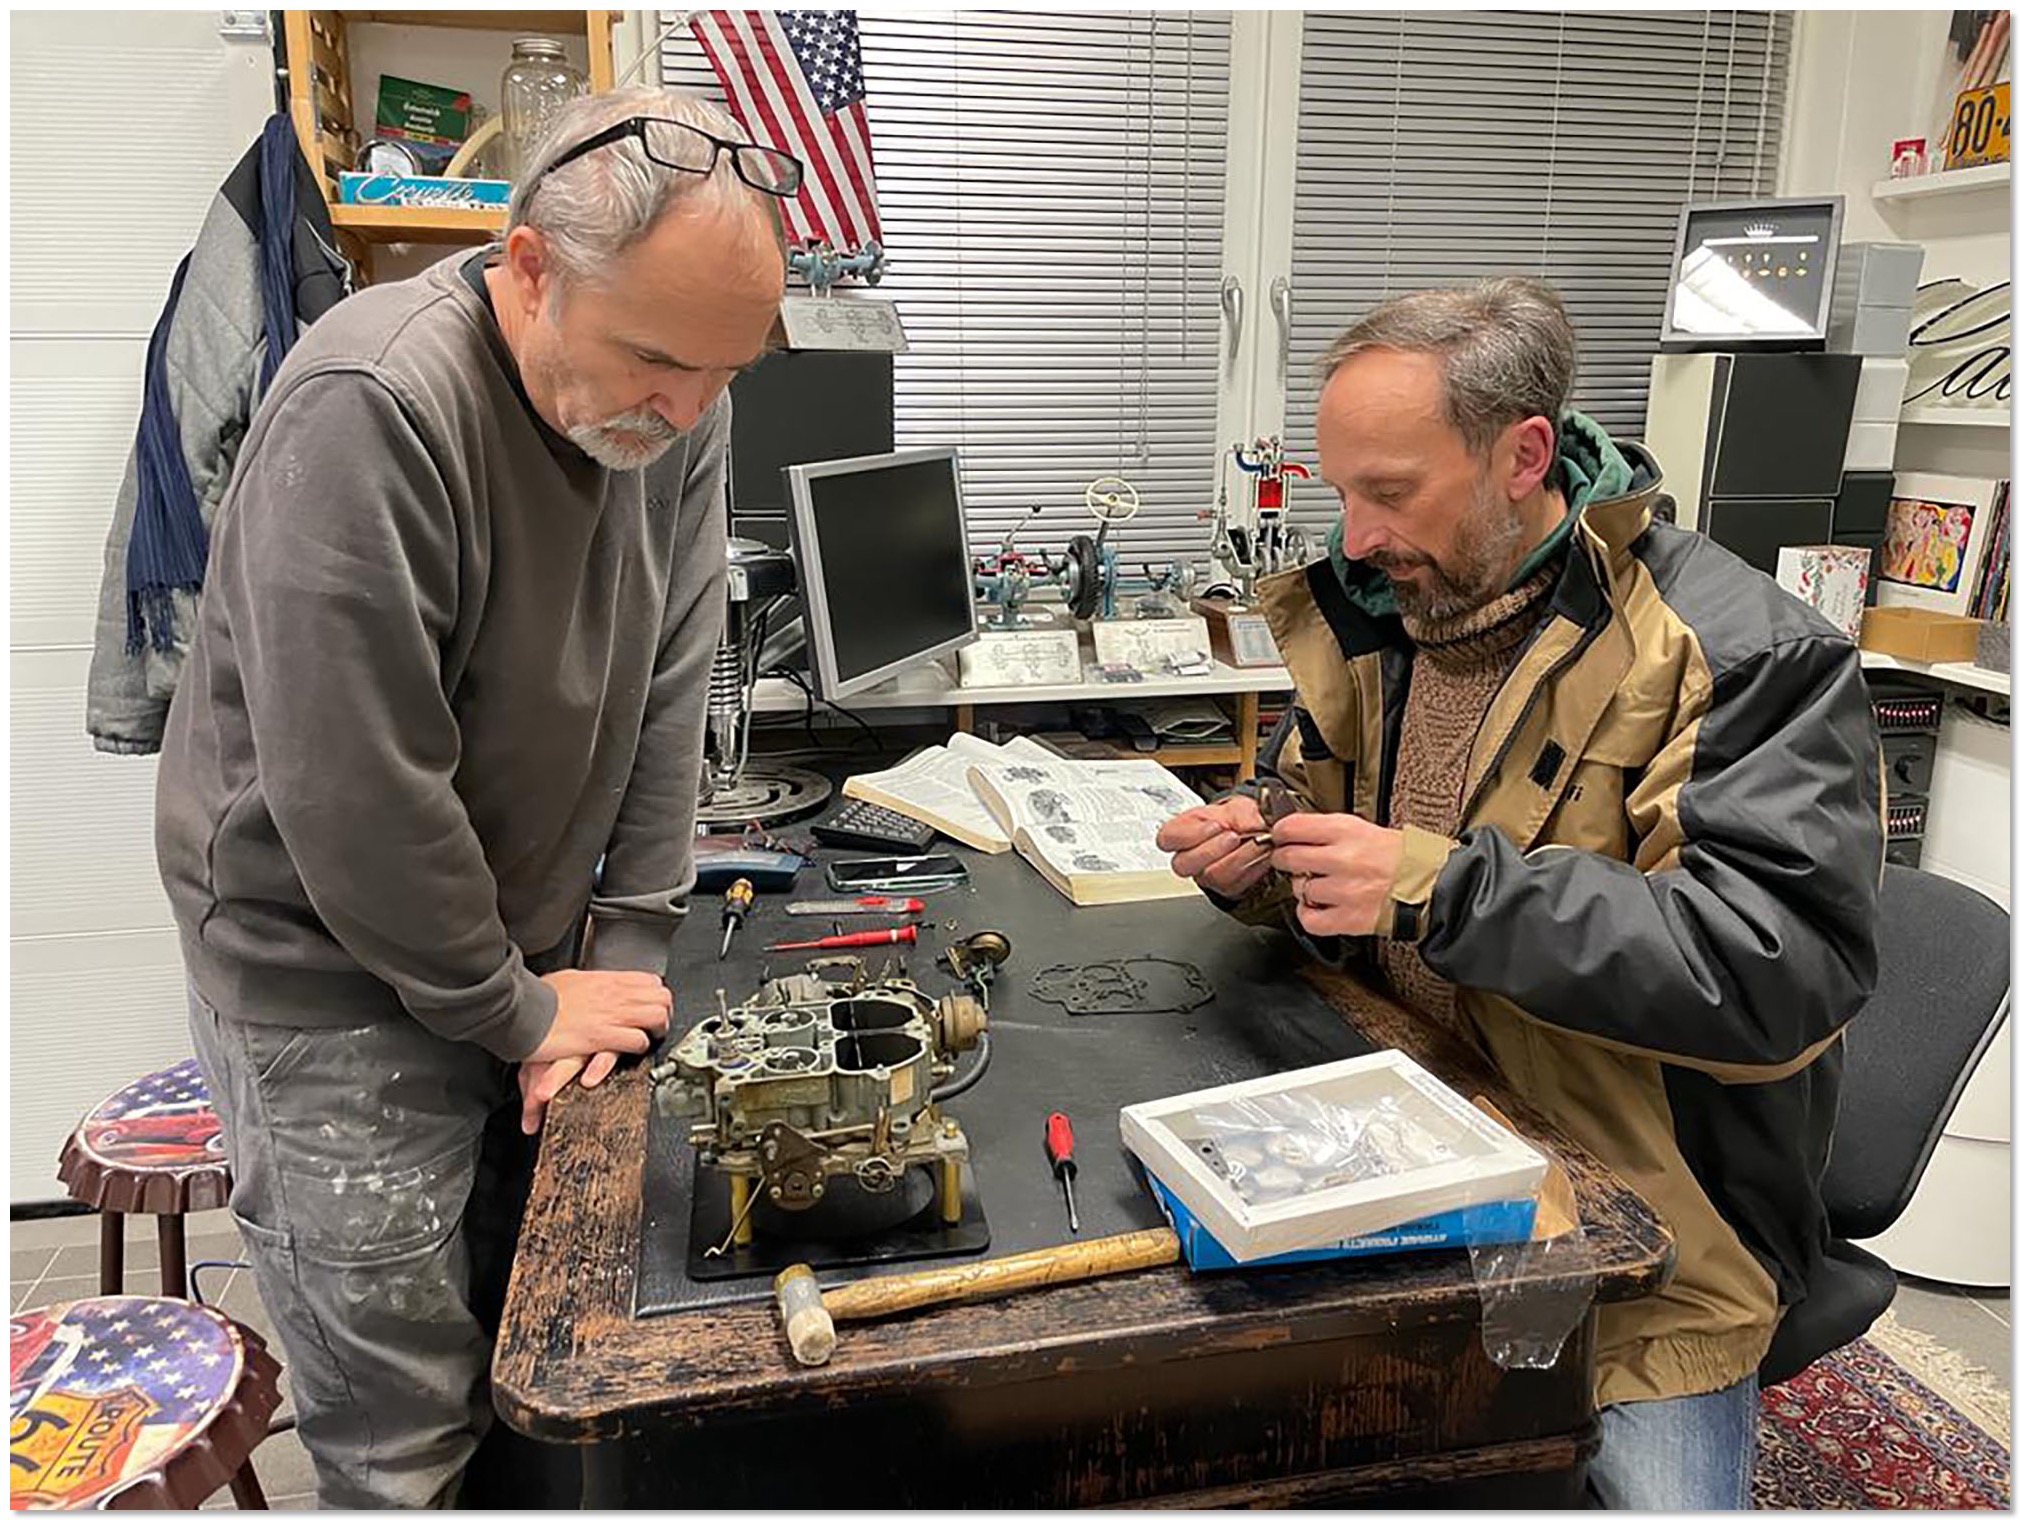
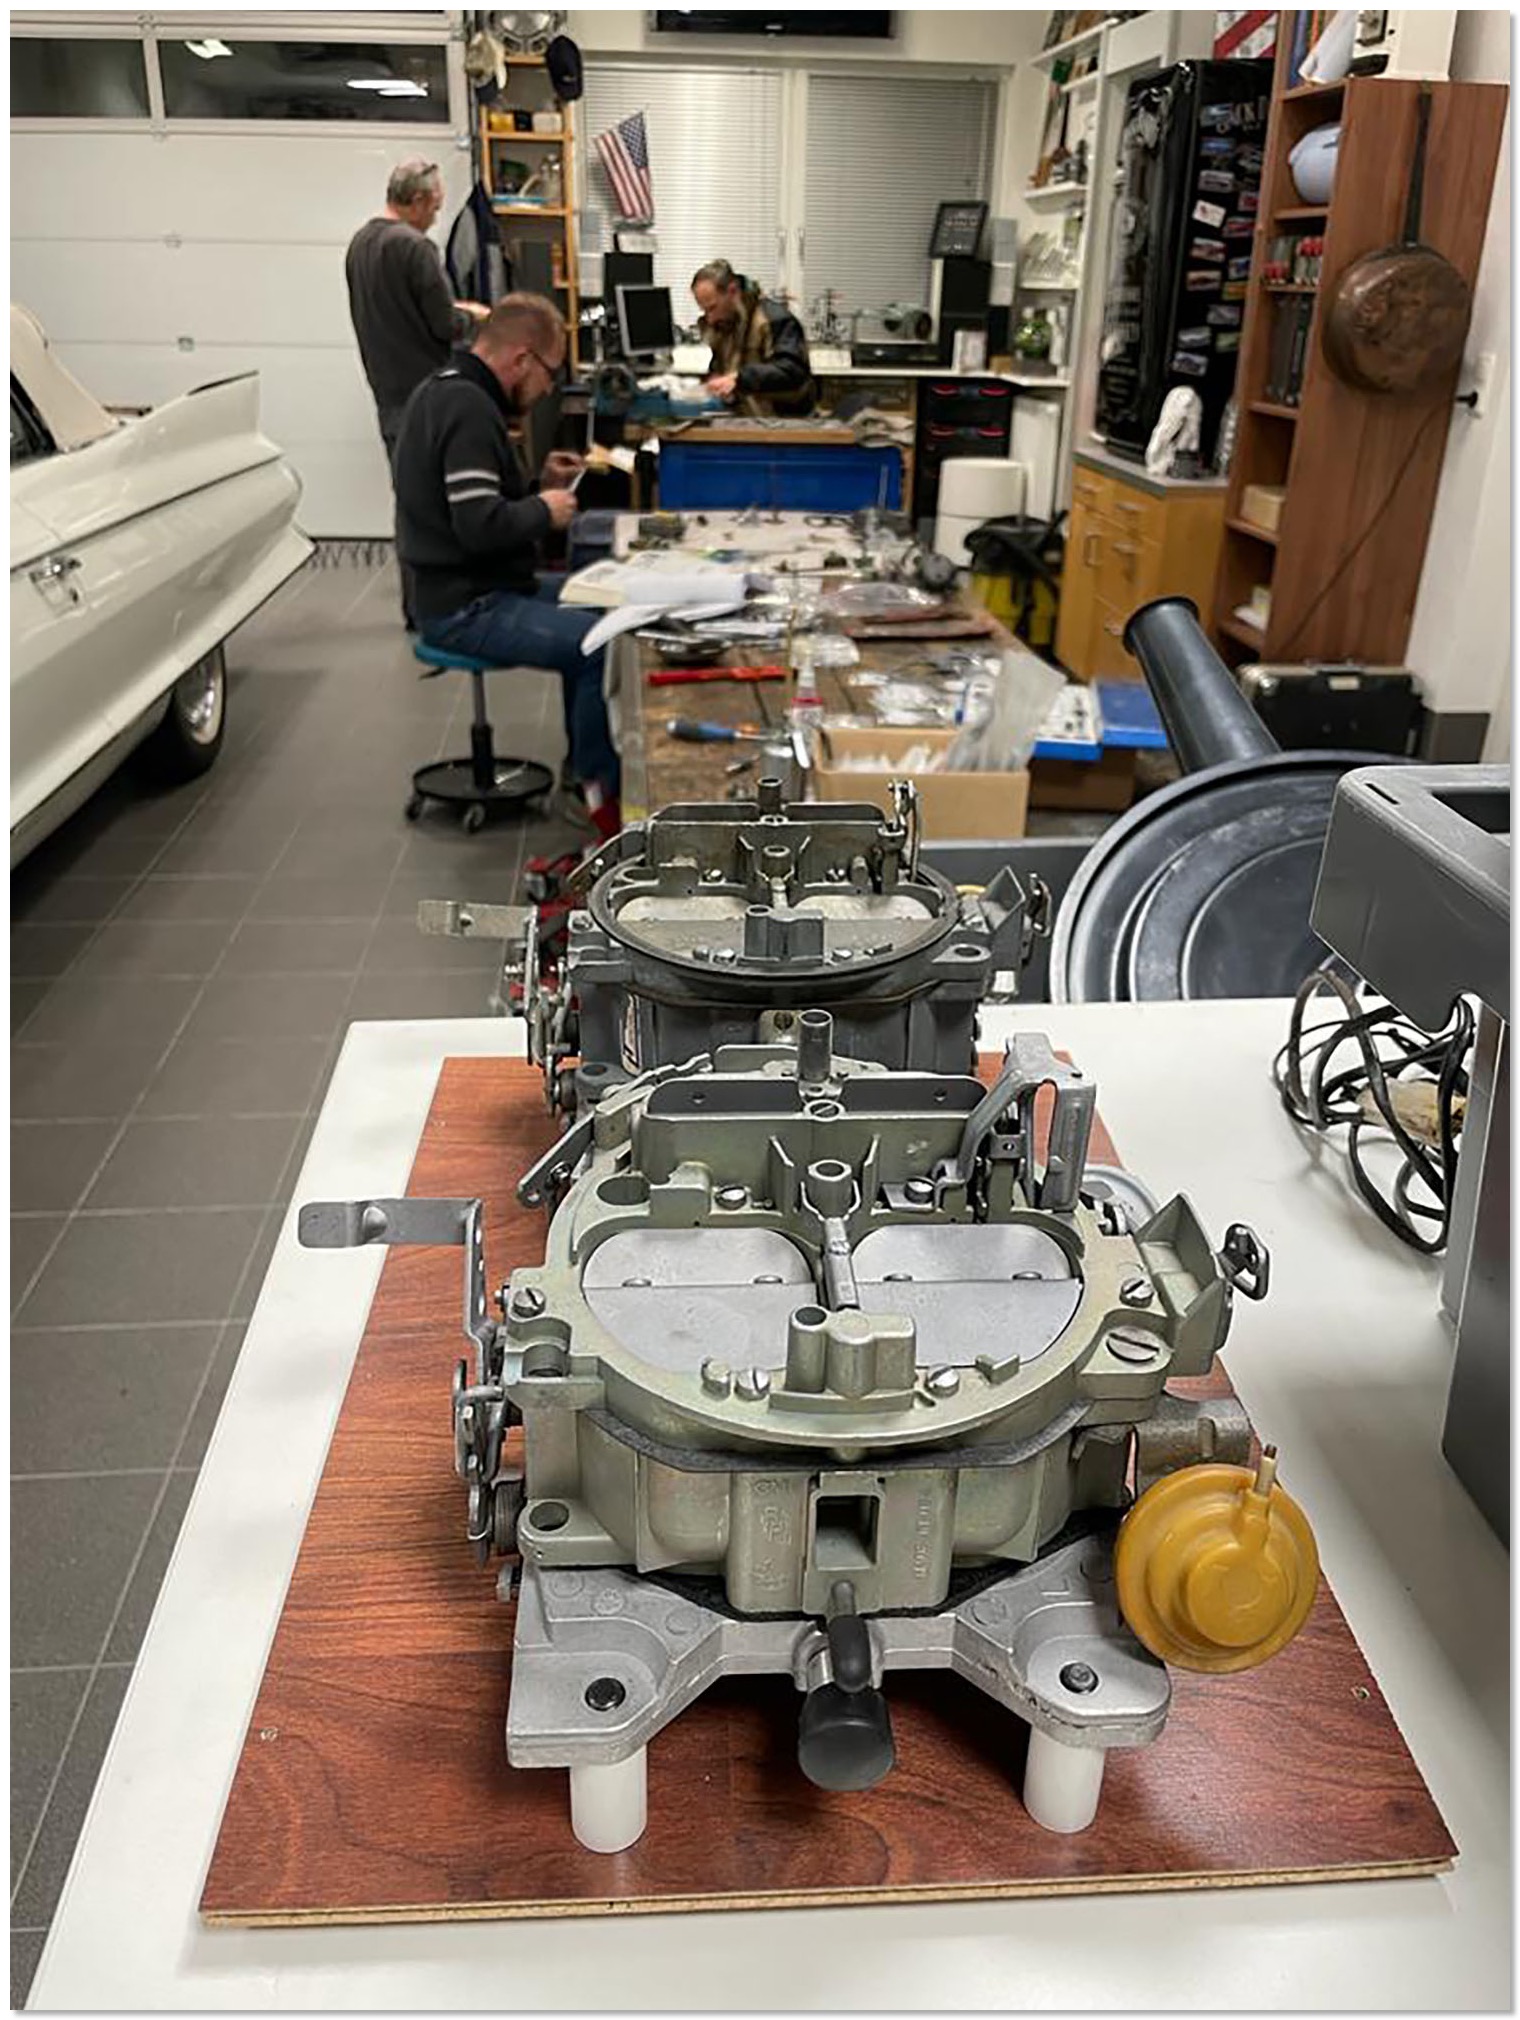 We had "Carburetor Monday" as everybody was working on their carburetors.
We replaced the pump rubber and put everything back together. The carburetor looked very clean inside with only minor deposits, so we left everything else as it was.
I can't wait to install it back into the car and hope the problem is fixed - did not do a full rebuild as it is still very clean and nice inside. Only installed new rubber on the pump and new top gaskets. Hopefully the problem is fixed now. I will update the page once the carb is back in the car.
UPDATE - REPLACING THE CV-JOINTS AND AXLES OF MY 1978 ELDORADO - BUSHINGS
One thing I completely overlooked when I installed replacement axles on my 1978 Biarritz is the fact that the mounting holes for the drive axle to output shaft are bigger on the replacement axles than the original ones. Because of this there is some play.
I did not notice this fact, but my friend Lucky found this problem when he wanted to install a replacement axle to a 67 Eldorado he had been working on. (BTW: There are no replacement axles available that would be an exact fit on a 67/68 Eldorado - you will always have to rebuild your original ones!)
Lucky came up with a perfect solution for this issue though. He found some reduction bushings from 7/16" to ⅜" made by Bates at a Harley Davidson parts shop.
These bushings are a perfect fit and also solve the problem of the too long bolts on the driver side axle. These bolts are too long because the mounting surface of the replacement axle is thinner than the original, and because of that I had to install spacers before.
With these bushings the original bolts do fit perfectly again!
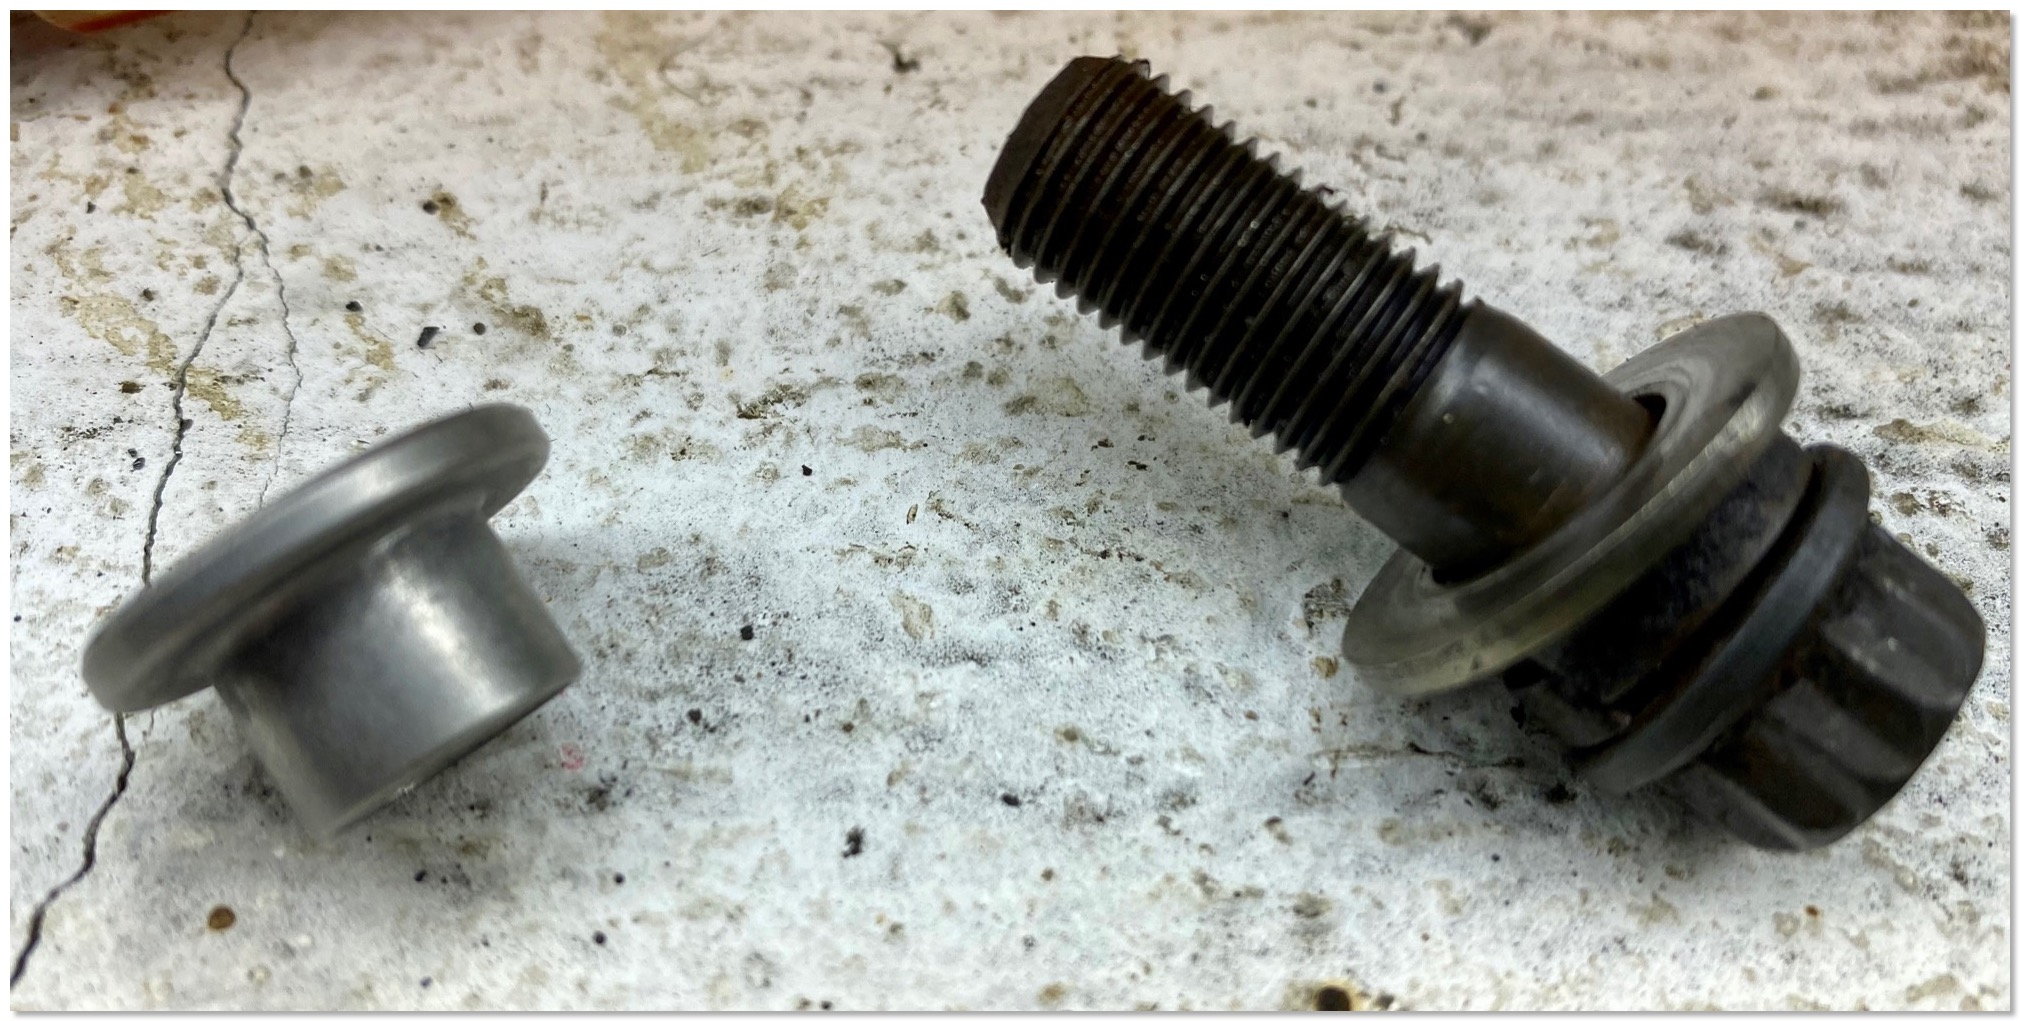
The bushing on the left - the bolt with a now no longer necessary spacer on the right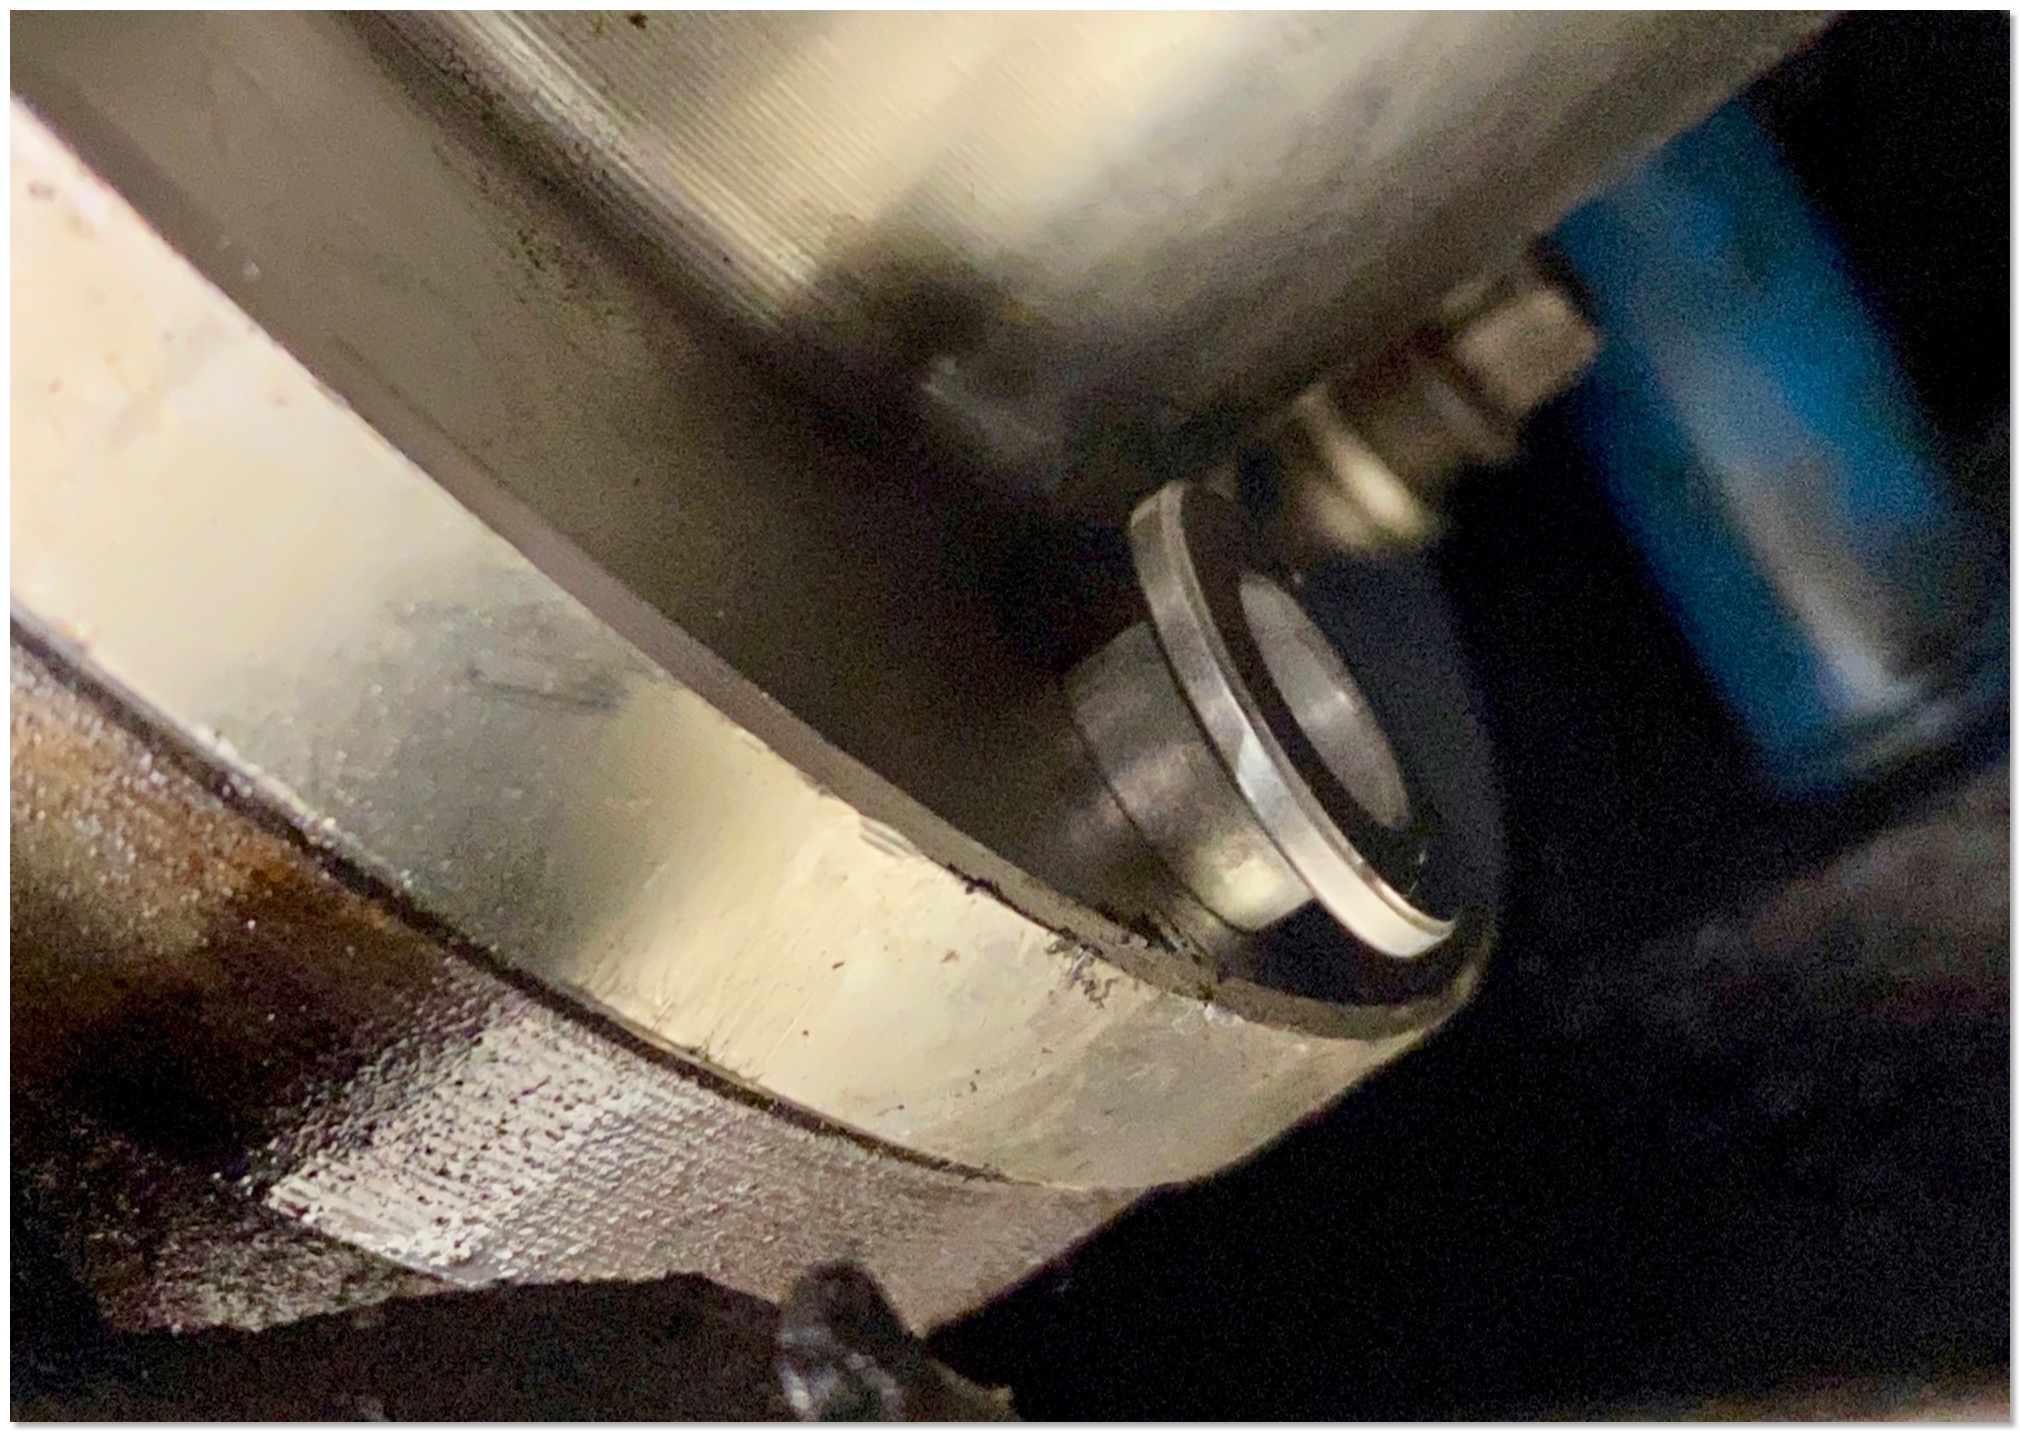
The bushing in place
WINTER PROJECTS FOR 2019/2020
1978 Cadillac Eldorado Biarritz:
- Rebuild the Quadrajet carburetor as the car has some hesitation when accelerating from standstill. Probably the acceleration pump has a problem.
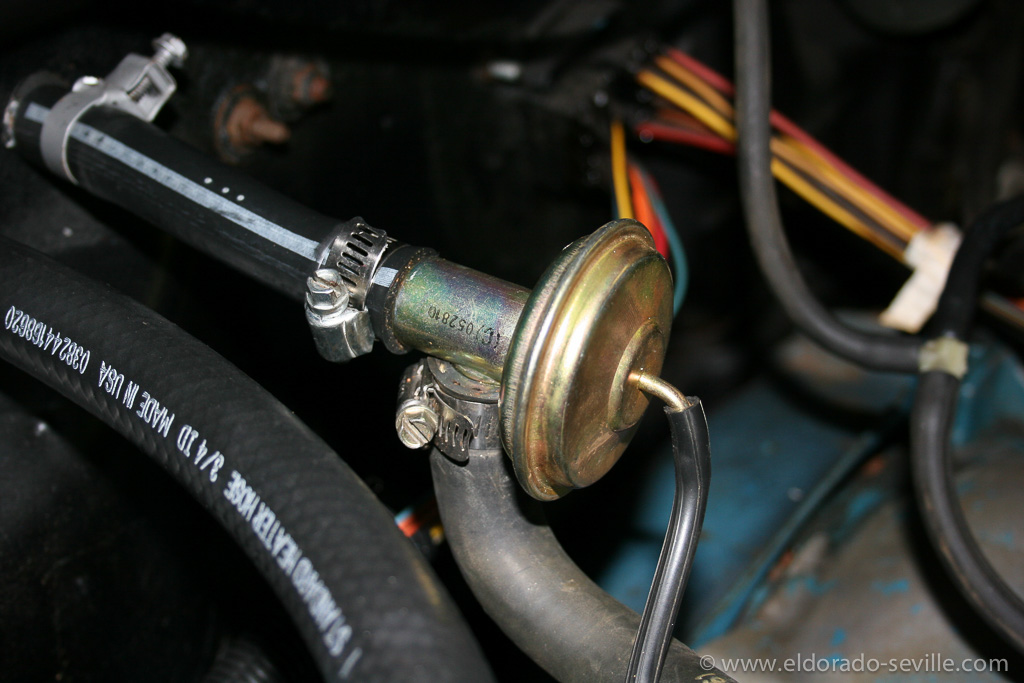
- Check EGR valve.
- The water pump is slightly squeaking (maybe I will have to replace it)
- The AC controller under dash is sometimes making a ticking noise. Looks like a bad contact somewhere causing the setting motor to rattle.
- AIR pump is making a light noise - a well known problem with these old pumps.
- Rebuild AC compressor as it blew its main front gasket a while ago.
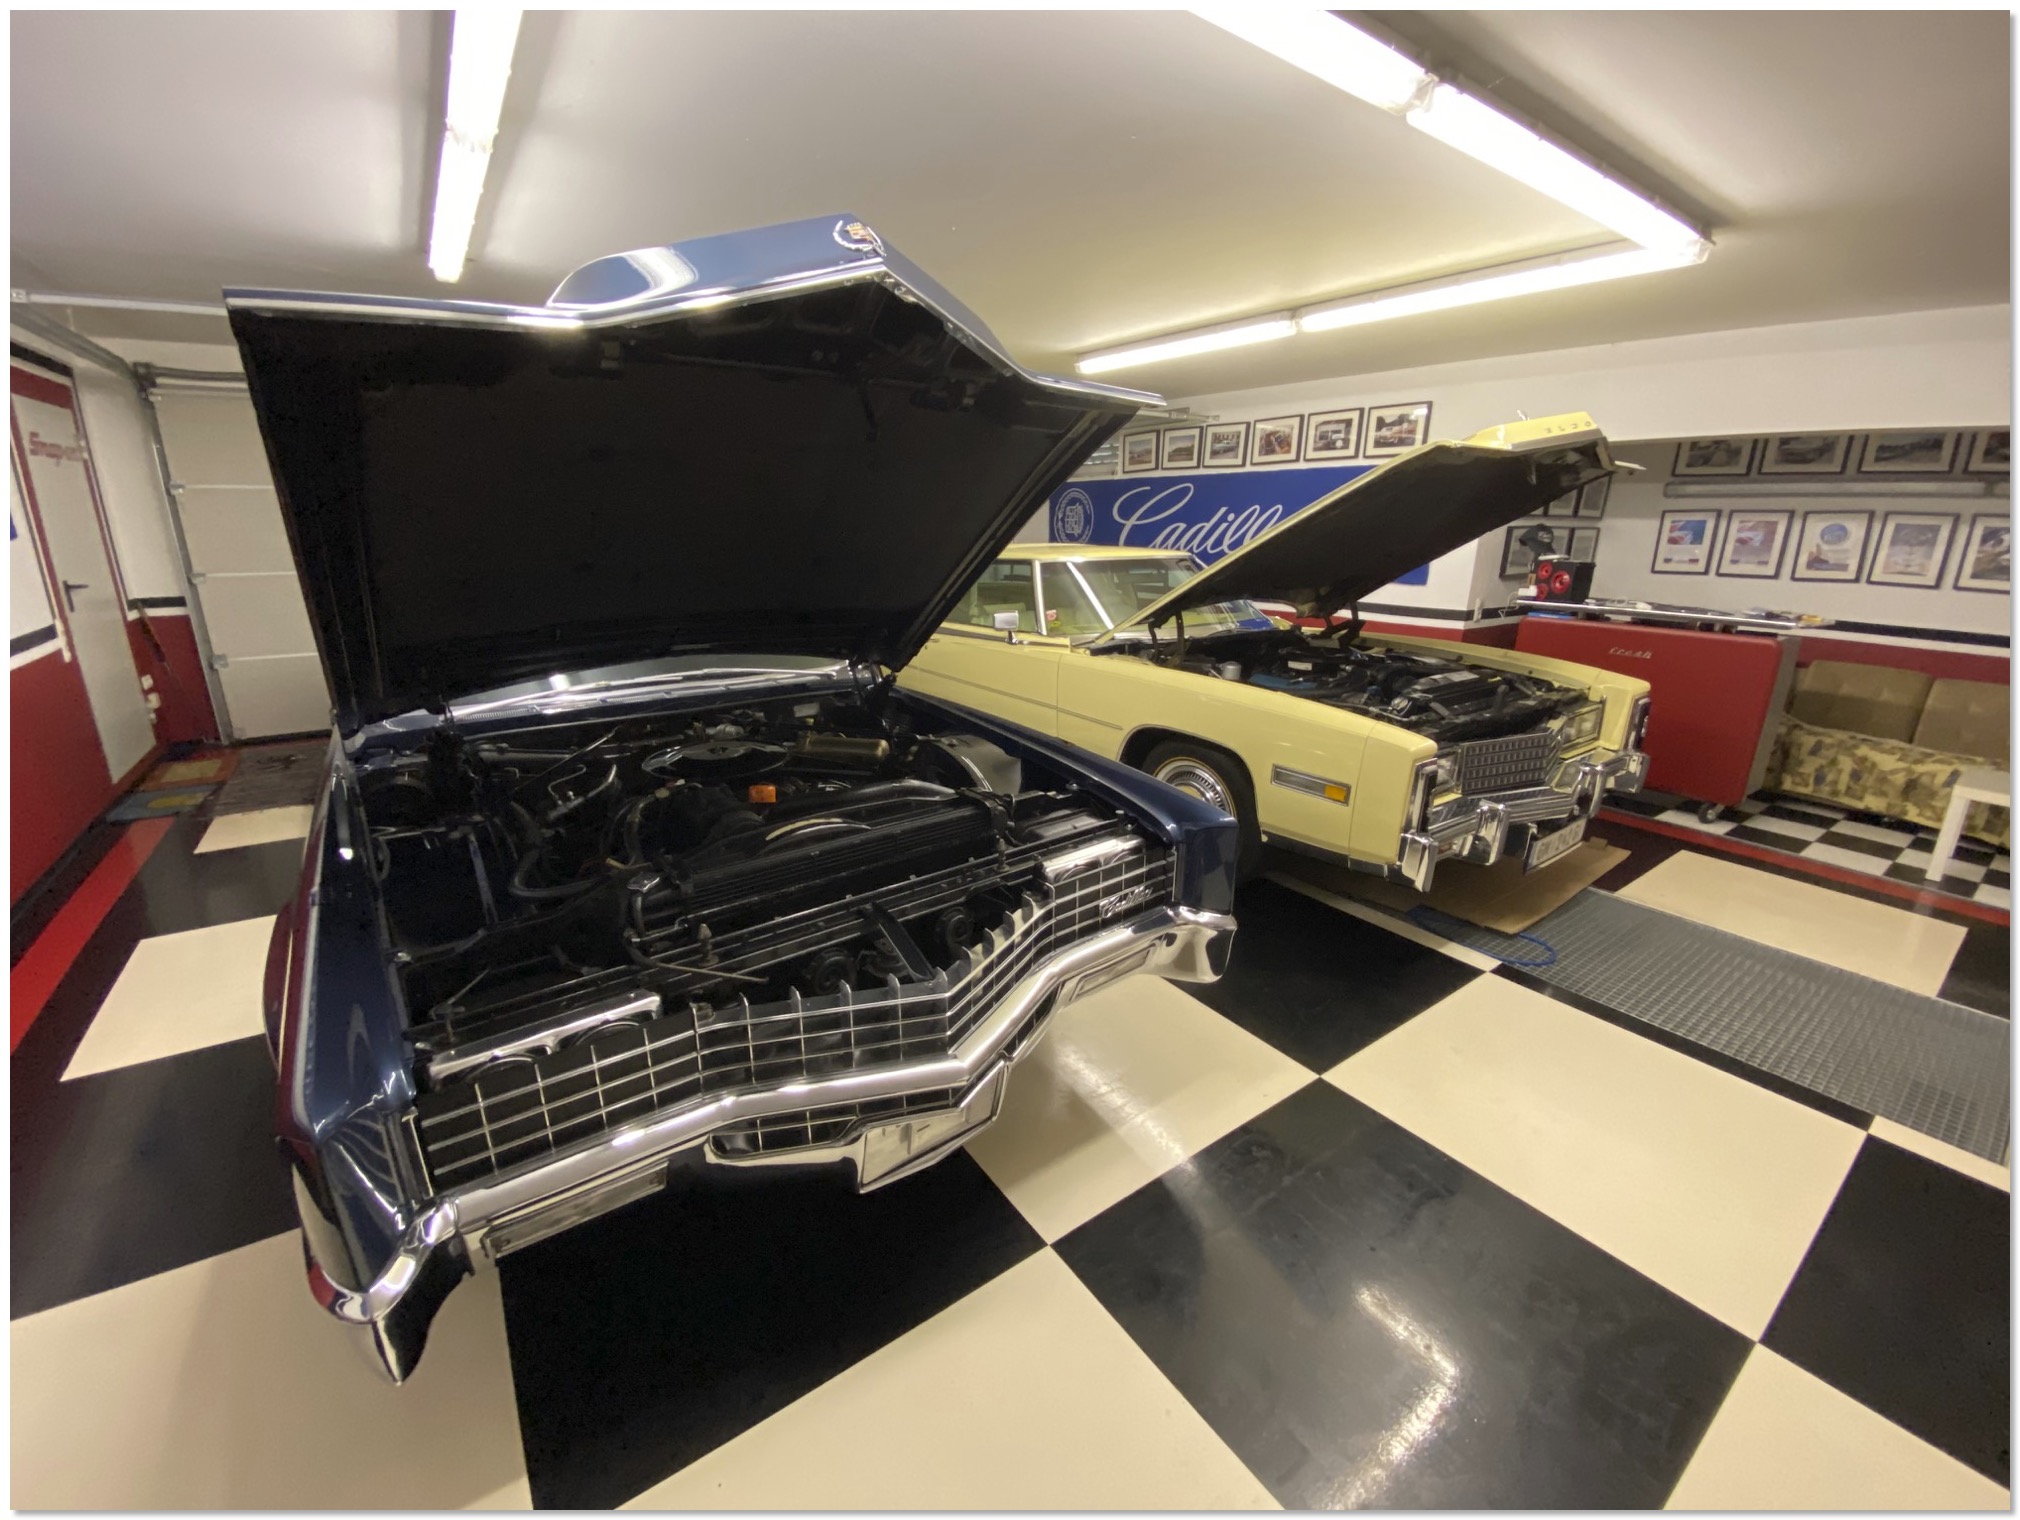
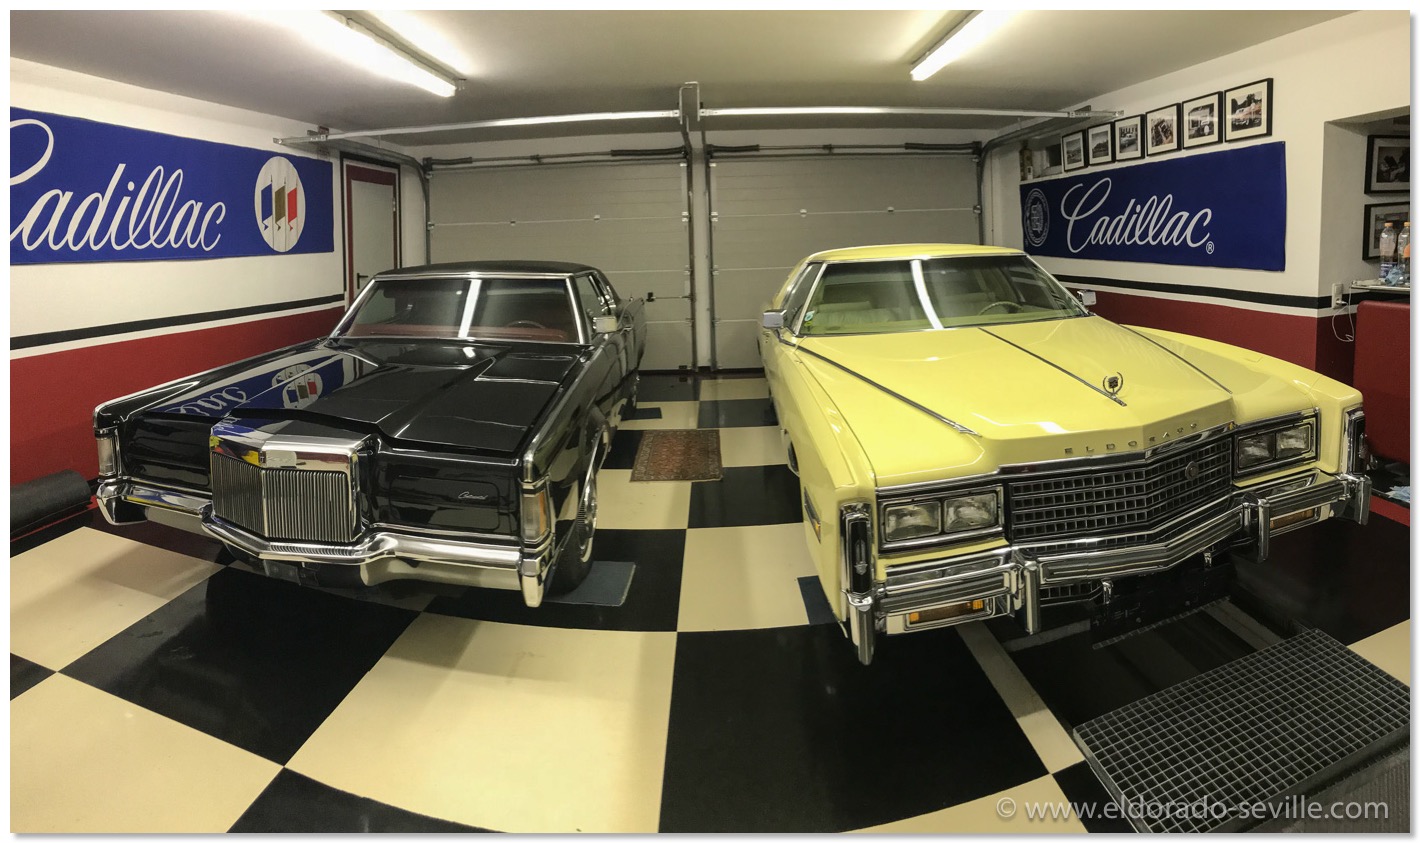
The cars waiting inside the garage for spring to come…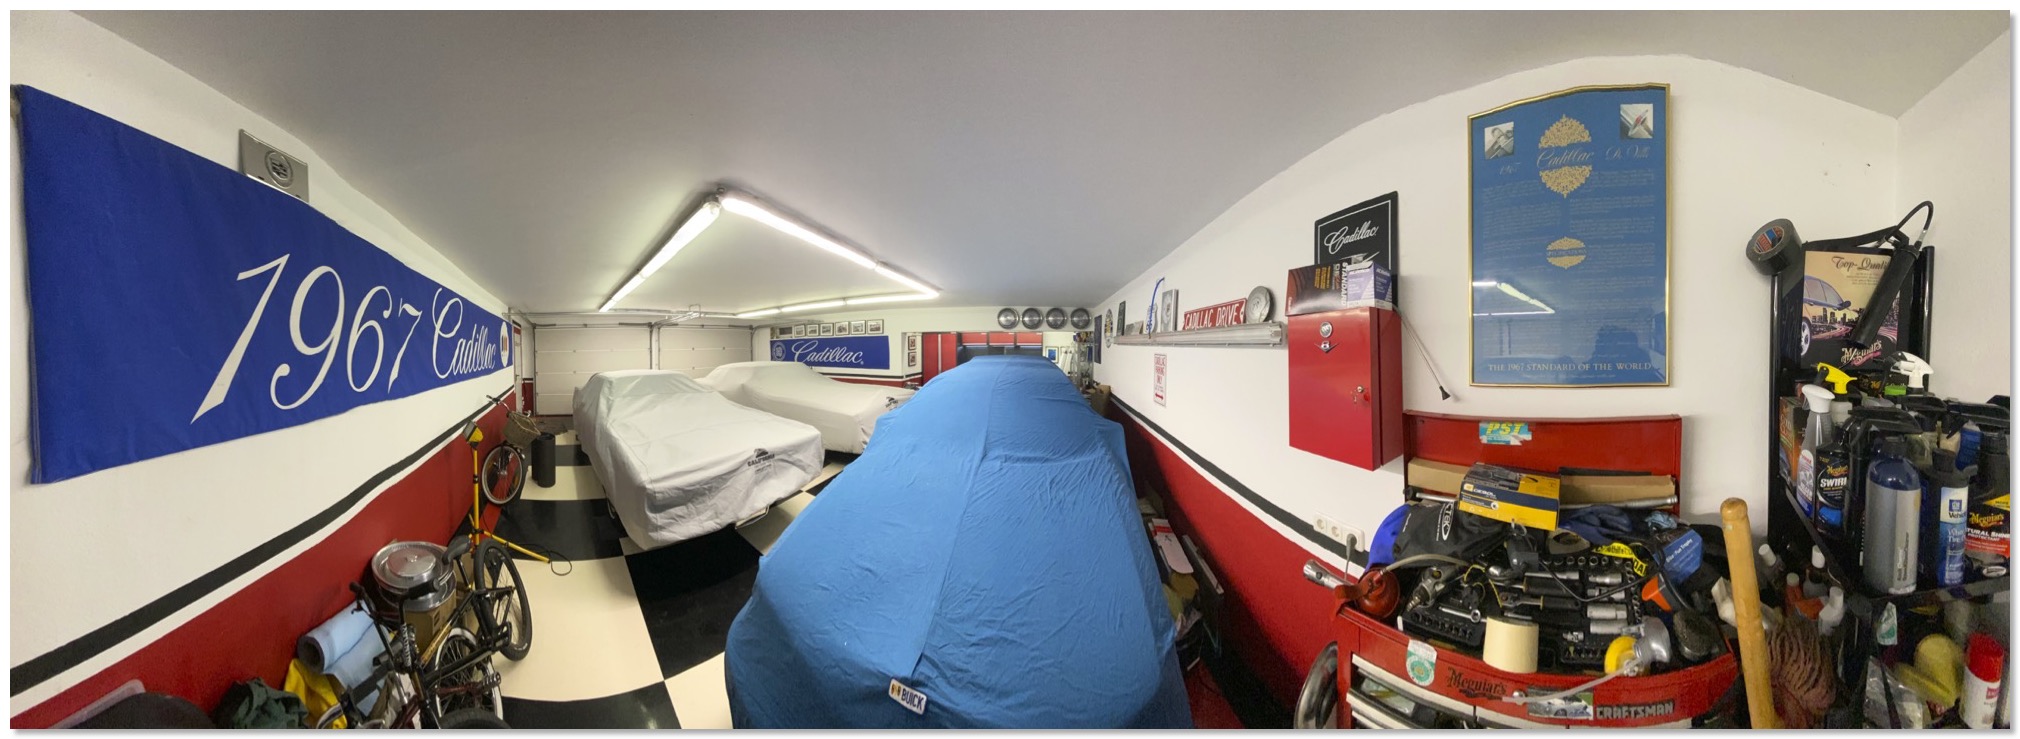
Inside my home garage where I do all the work. First project will be to re-organize my garage and tools.
VIDEO OF MY 1978 ELDORADO BIARRITZ
You can watch the video in 4k UHD resolution on youtube directly if you get an error message (video not available) below.
This is a nice video of my 78 Biarritz. Make sure to watch in HD or 4k!
Behind the scenes.
READ MORE...PHOTOSHOOTING FOR AN AUSTRIAN CLASSIC CAR MAGAZINE
I’m looking forward to their story.
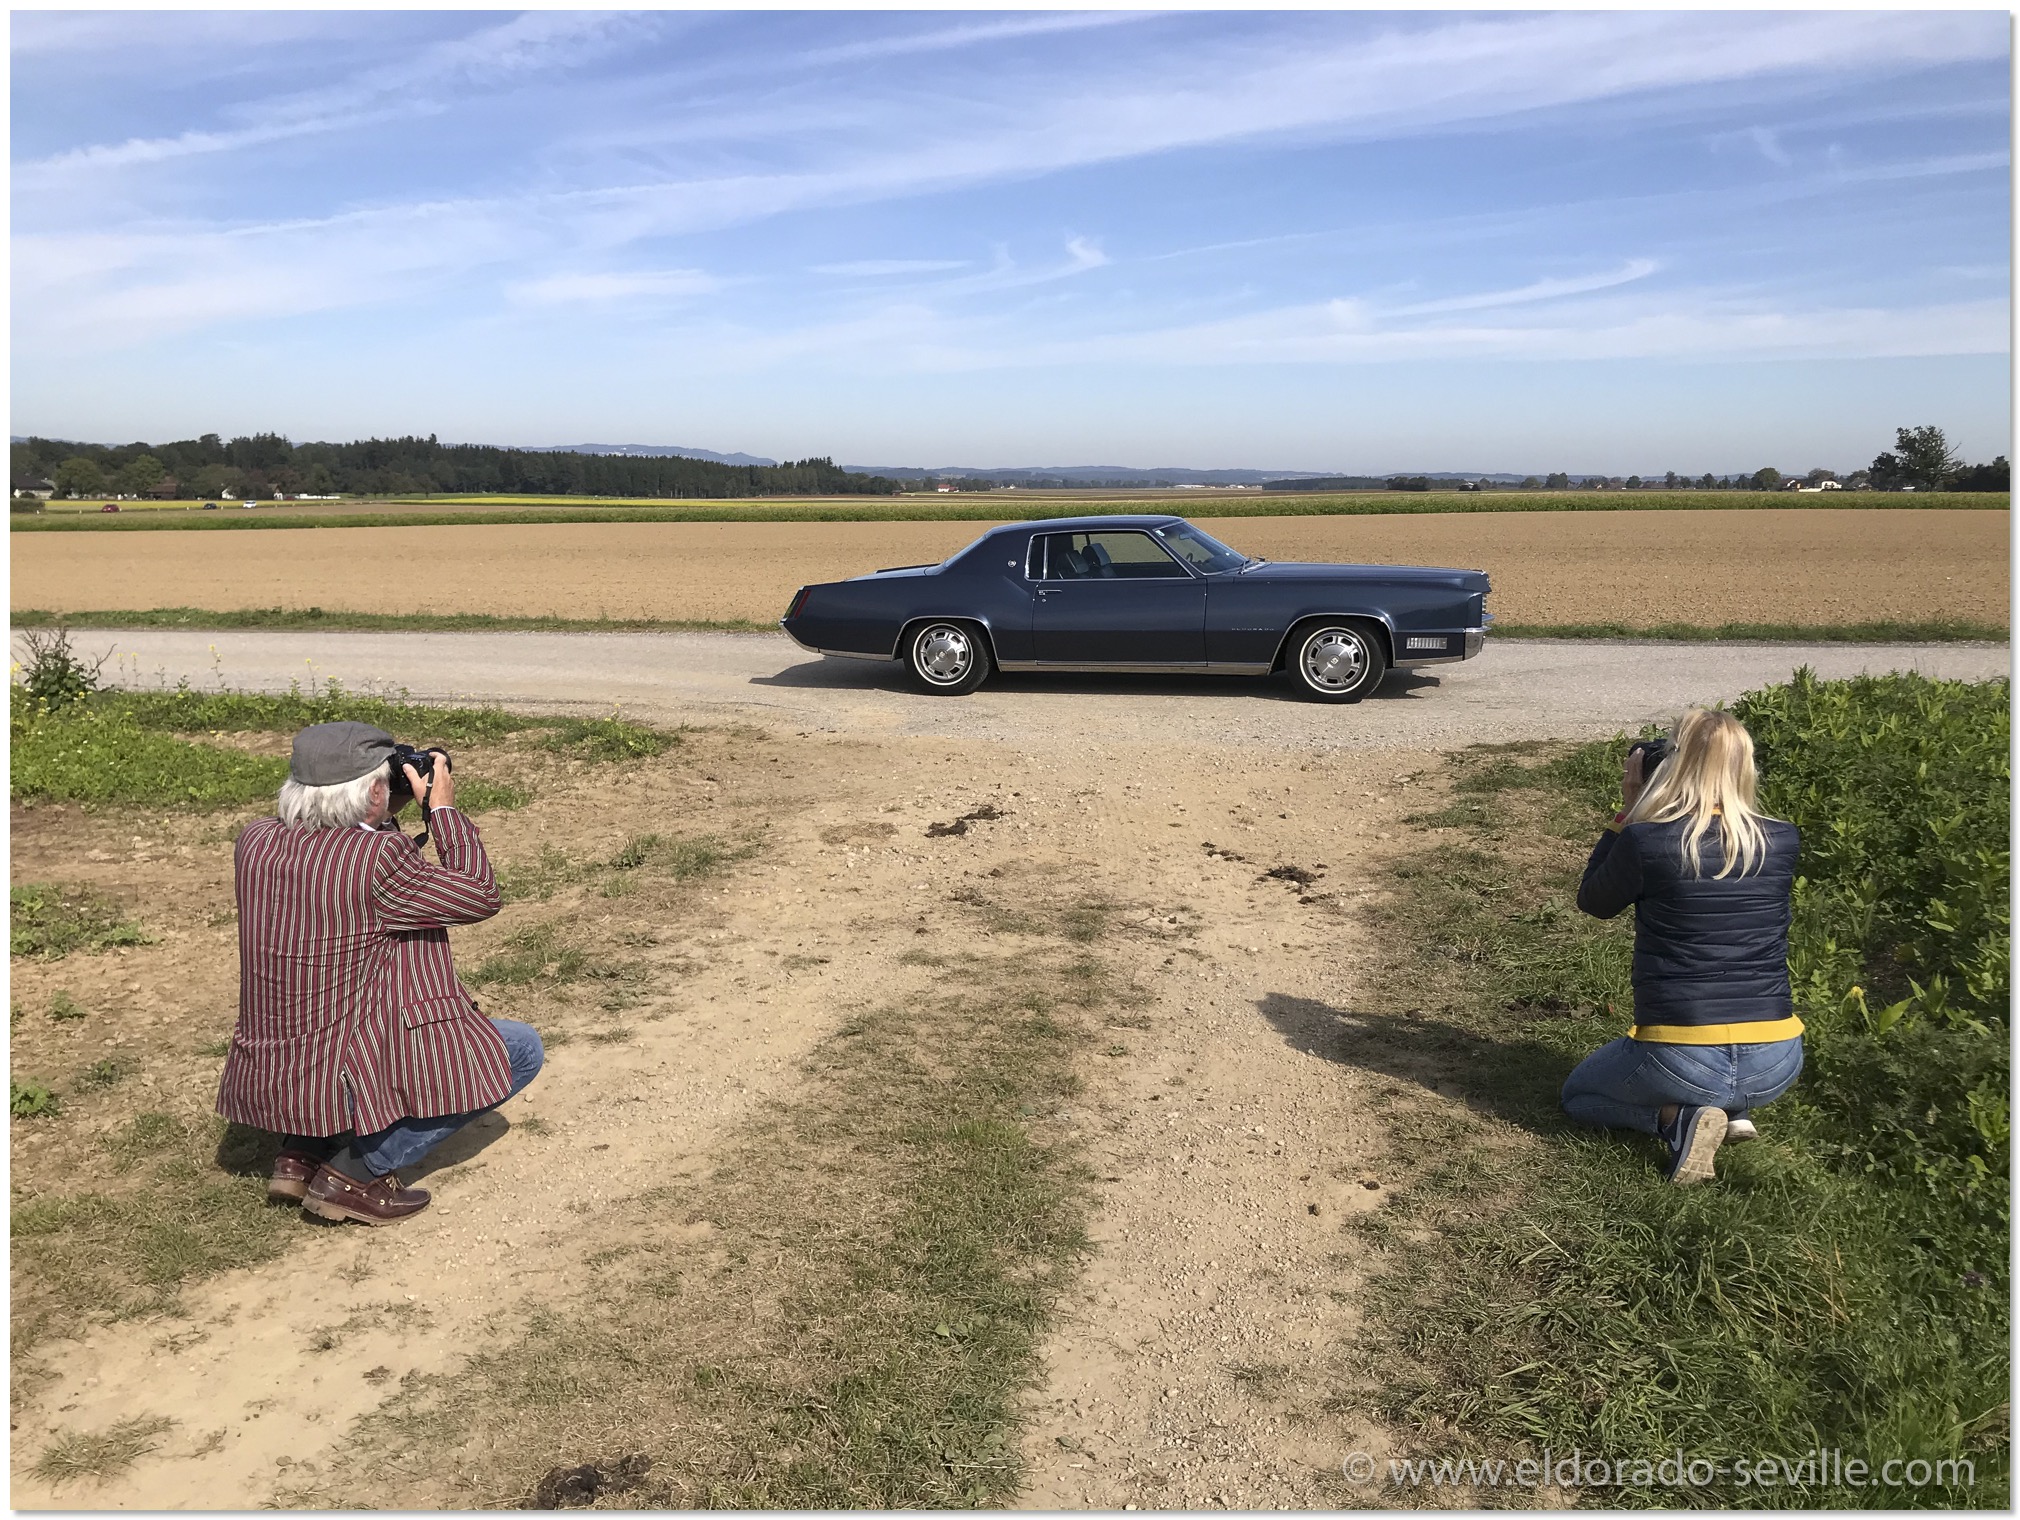 The two photographers and editors at work
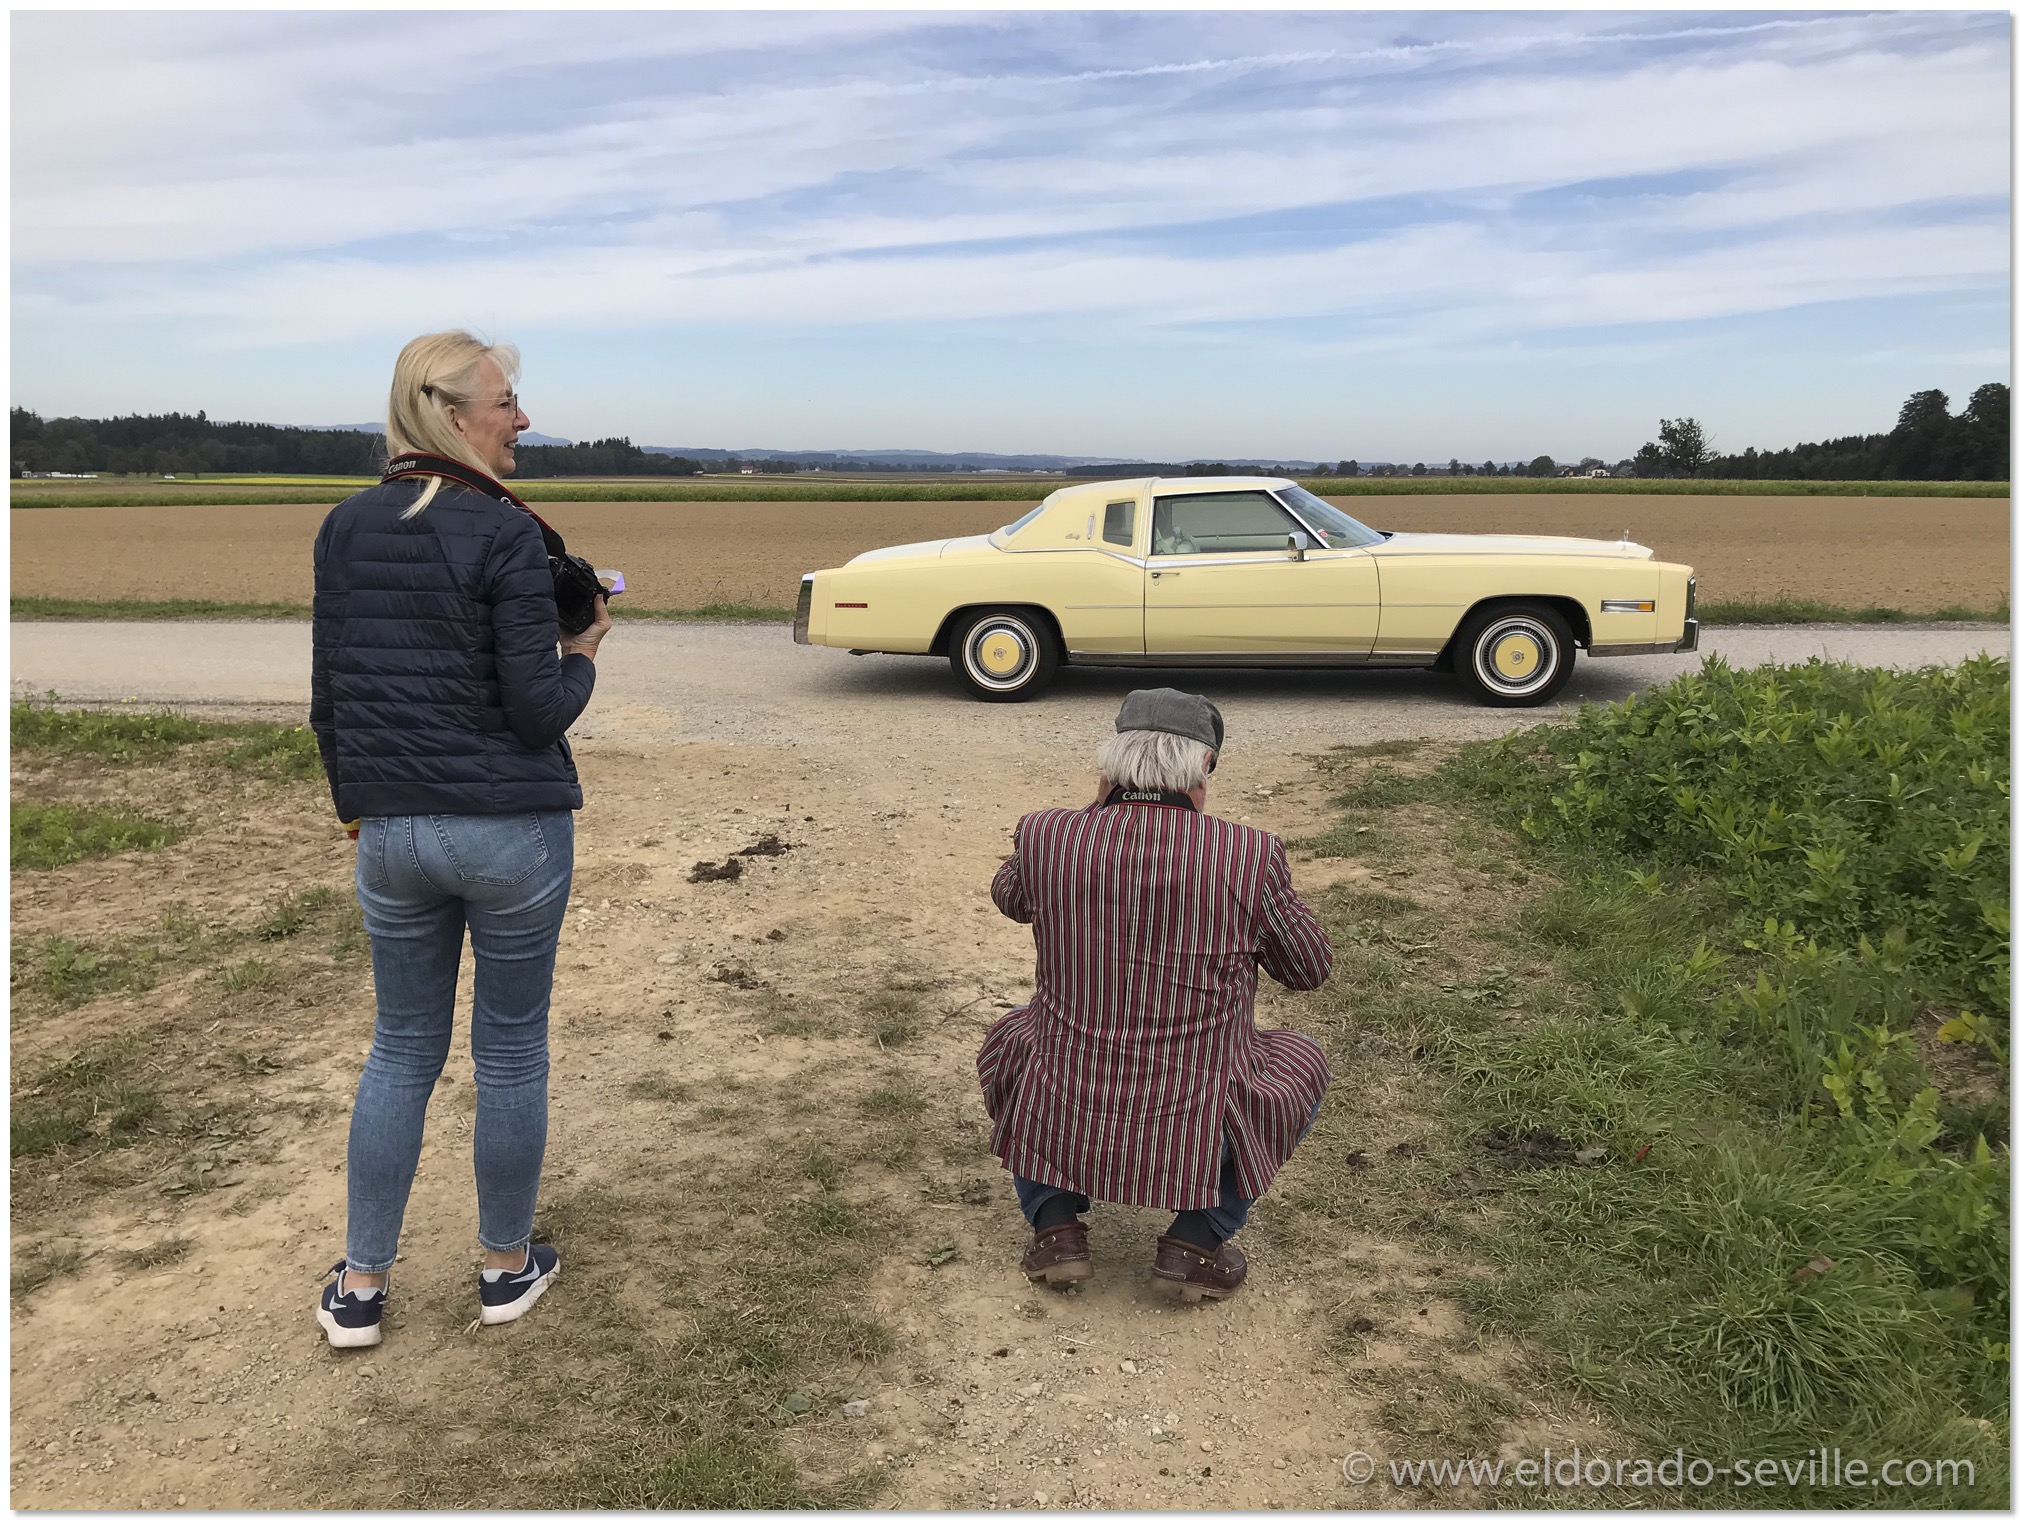
RATTLING REAR BRAKES ON THE 1978 ELDORADO

The right rear brake of my 1978 Biarritz before I took it apart.
READ MORE...MY WINTER PROJECTS 2018/19 - CV BOOTS AND FUEL PUMP
The Mark III has a leaking fuel pump if it was parked for more than an few days... (It stops leaking after its running for 2 minutes...).
The 1978 Eldorado needs both CV boots replaced ( the original ones just came loose but did not rip after only 40 years slinging grease everywhere). The 78 will also need some minor exhaust work (welding) and either the EGR valve needs to be replaced or the accelaration pump in the carburetor has a problem... it won’t get boring in the dead car season… I had hoped that I wouldn’t have to spend any…
The two "patients" in the shop
SEASONS GREETINGS 2016
All the best to the visitors of my website!


My son Elliot - Behind the scenes ;-)
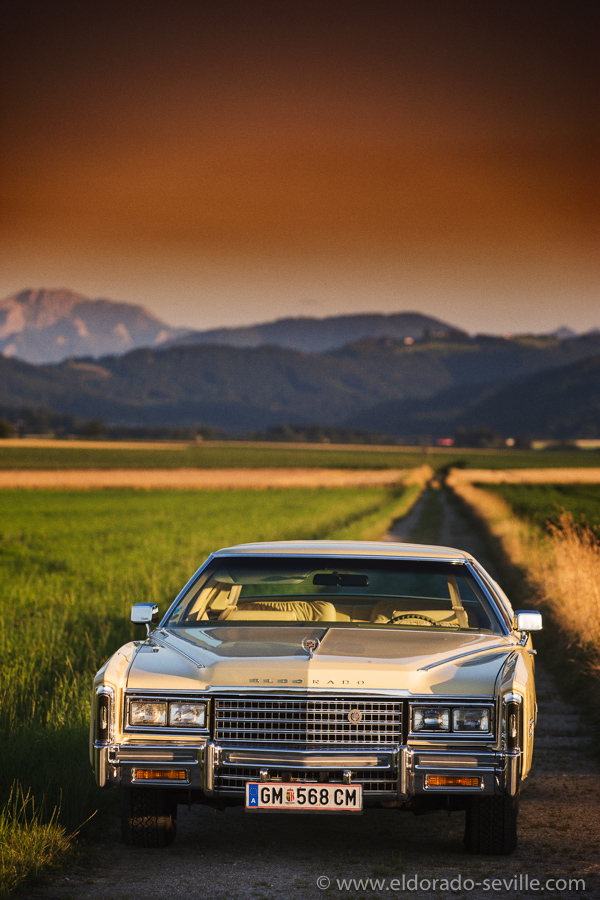
PHOTOSHOOTING WITH THE 78 ELDORADO

THE ILLUMINATED ENTRY SYSTEM RELAY IN THE 1978 ELDORADO
It took me a while to find out what was going on, but eventually I could track it down to the illuminated entry system relay.
Sometimes the interior lights would not come on at all, as they should when the car was locked and I pushed the door button from the outside, or the lights would only flicker, and one could hear a relay making a ratcheting sound.
After a while it dawned on me that the illuminated entry relay must be faulty.
After browsing on ebay for months, I found an offer for an NOS relay, which is extremely hard to find and not available anywhere, as this system was an extra cost option in 1978.
After mailing back and forth with the very well informed and nice seller, I began trying to locate the relay in my car to compare it to the one he offered. Two different ones where used in 1978. They came from two different manufactures but were interchangeable. They have different terminal locations which do not matter though, as there were two different connectors used which you can connect to both models. The part number for the relay is #3063206 - it's the same for both models.
It took me a while to figure out where the relay was hiding, as the factory shop manual did not reveal its location.
I finally found it behind the drivers side kick panel. You have to remove quite a few of the interior panels and the door sills to get access to it. Another problem is that the kick panel is connected with the hood release lever and cable, which makes it very difficult to remove. Luckily I could spread it open wide enough to access the relay without removing the hood release cable, which would have been a pain in the butt to get out.
I removed the relay and compared it to the one I found on ebay, and it was identical to the one which was offered. So I hit the "BUY IT NOW" button immediately as I was concerned that somebody else could buy it.
I then opened the relay up. I wanted to take more pictures, but the battery of my phone died, and I had no other camera at hand - thats the reason why I unfortunately do not have more pictures of this repair.
Everything looked good inside, but then I found out why the relay did not work properly.
It should be mounted to the car with a screw which acts as the ground for the relay, which acts as a 20sec timer for the illuminated entry system.
But there was no screw on the relay… After further investigation I found a broken screw underneath the carpet, and the rest of the screw was stuck inside the screw hole.
It looks like the screw already broke off when the car was assembled and nobody cared as it might have worked for a while… Sometimes the system worked and sometimes it didn't… Probably the owners did not even notice the problem - it took me about a year to notice it as well…
I had a hard time getting the broken screw out of the hole, but after fiddling with it for about an hour, I got it loose and could screw it out. Luckily I had a spare screw and reinstalled the original relay with the new screw, and voila - it now works perfectly again. It probably never worked that good before - even when the car was new…
Too bad I had already ordered the new relay - but at least I have a spare NOS part now, which I will hopefully never need!
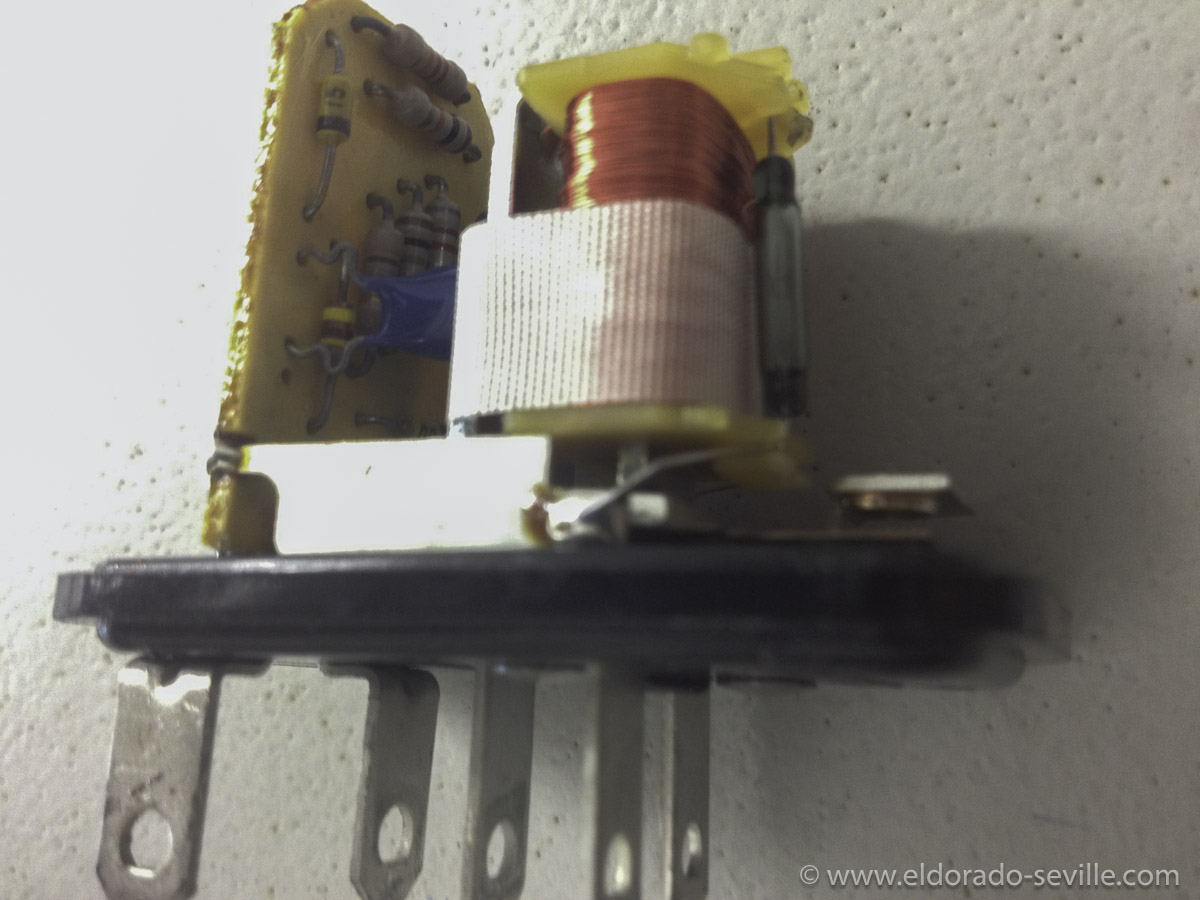
My original relay after I opened it up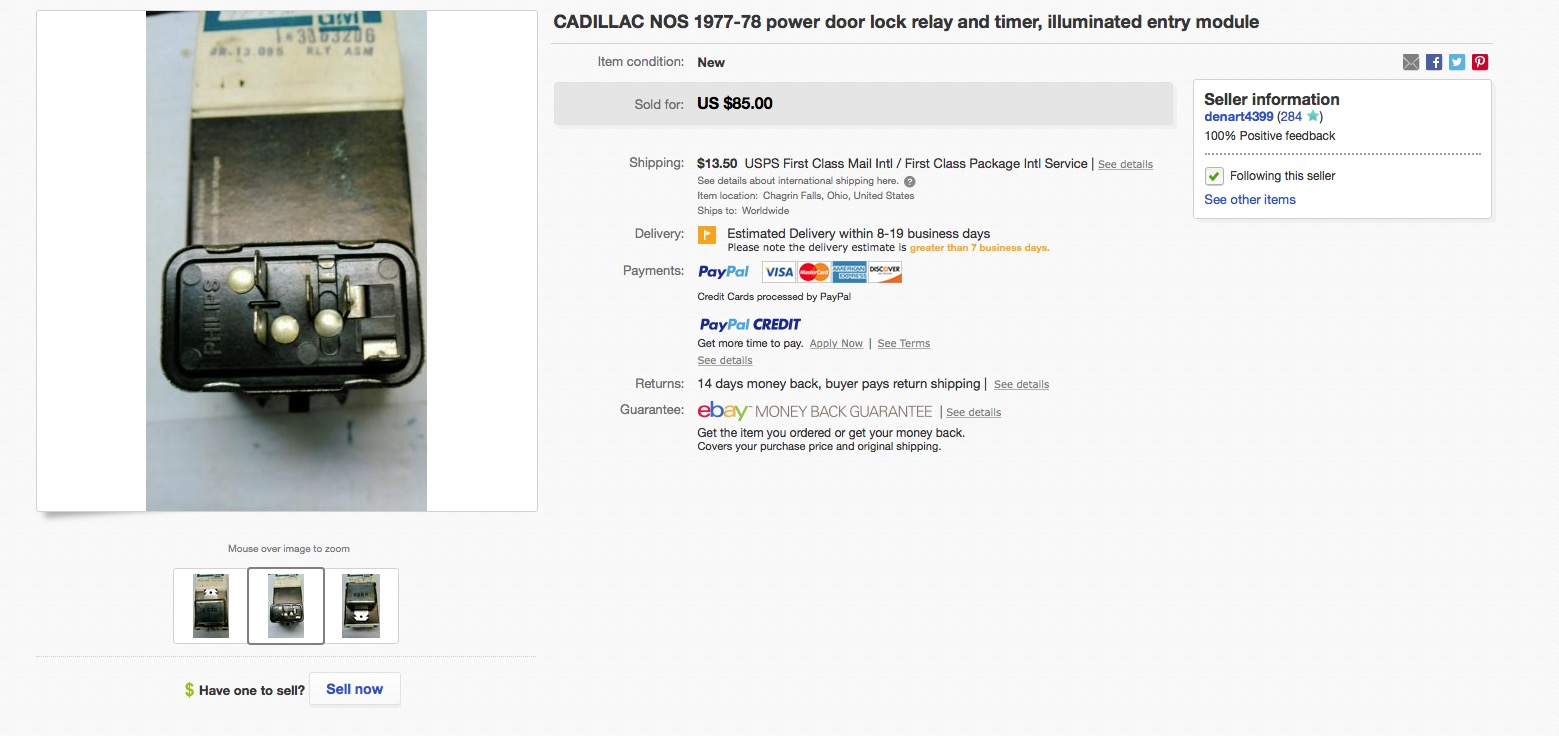
The NOS relay I found on ebay - part # 3063206 - its exactly the same one as I originally have in my car. It is made by Philips.
The NOS relay I found on ebay - part # 3063206 - exactly the same one I originally have in my car. It is made by Philips.
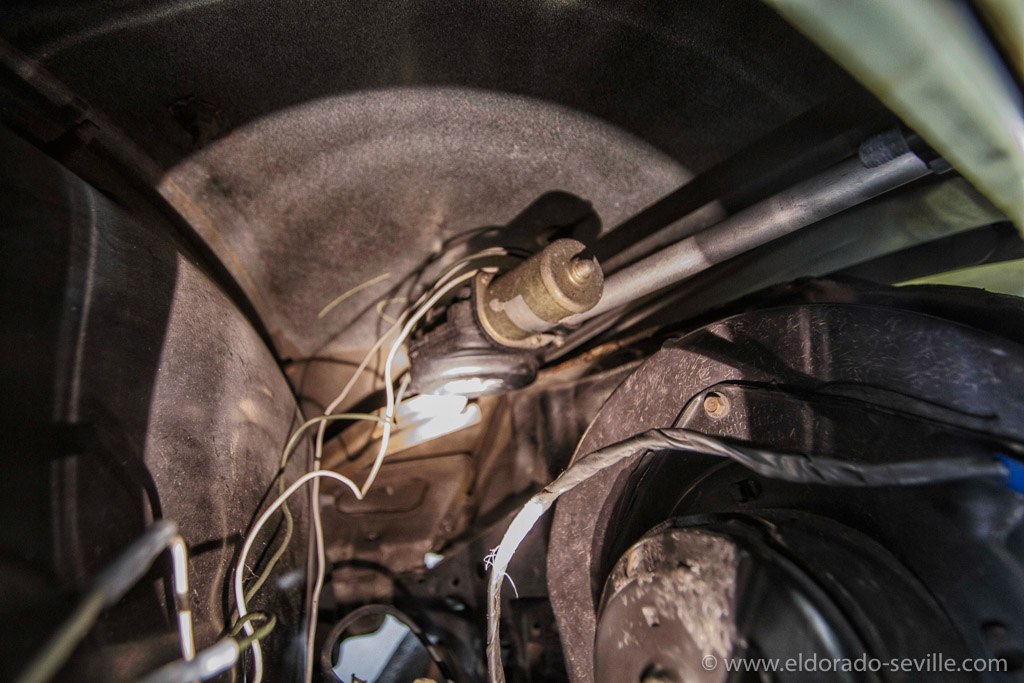
1978 CADILLAC ELDORADO CB ANTENNA
My Eldo comes with a radio with the CB option, so it should have the according tri-band antenna for the 78 Eldorado.
One of the previous owners had replaced the original antenna with a replacement antenna, which worked, but it had very poor CB reception and of course it does not look correctly.
What I have found out is that #22010515 was the original part number for the antenna.
This antenna was also used in the 1977 to 1982 Corvette and is extremely rare...
Replacement antennas had the part number #22010661 on the sticker with a date code below.
When these replacement antennas were no longer available, it seems they switched to a different antenna design as a replacement #12355706 (which I had in my car). This last design came with a special antenna splitter. I do not know if this splitter is essential or of it would also work with the original splitter which is still in my car.
It took me quite a while to find the correct antenna for my car as it seems to be made out of "unobtainium". I did search the net for days and somebody sent me an incorrect antenna which was for a Buick… Suddenly during my daily search, a correct, working antenna showed up on ebay, and I immediately hit the "Buy it now" button. It was not exactly cheap, but I was happy to have finally found it. When it arrived I cleaned it up properly.
I then found out that I would also need the correct antenna bezel on the fender. Various sellers sent me incorrect ones which they claimed would be the correct ones, and eventually I found a good used one from the seller of my antenna and a NOS one from a parts vendor (it has not arrived yet as once again USPS sent it to Australia instead of Austria - don't ask what this little bezel has cost… :-( )
I then also had to replace the thinner replacement antenna lead with an original one going from the antenna splitter behind the glove box to the antenna. I got this one from Arizona Vintage Parts.
I can say now that my car is 100% correct again. Unfortunately this project was an extremely expensive project and I will now try to sell all the not needed parts on ebay. They will fit Eldorados with non CB antennas and the other wrong CB antenna I got will be for Buicks, but could also be installed into the 78 Cadillacs, as the mast itself is exactly the same as on the original antenna and from the outside it would look completely stock. But purist as I am, I just needed the 100% correct antenna ;-)
The later style replacement CB antenna which I wanted to replace with an original one.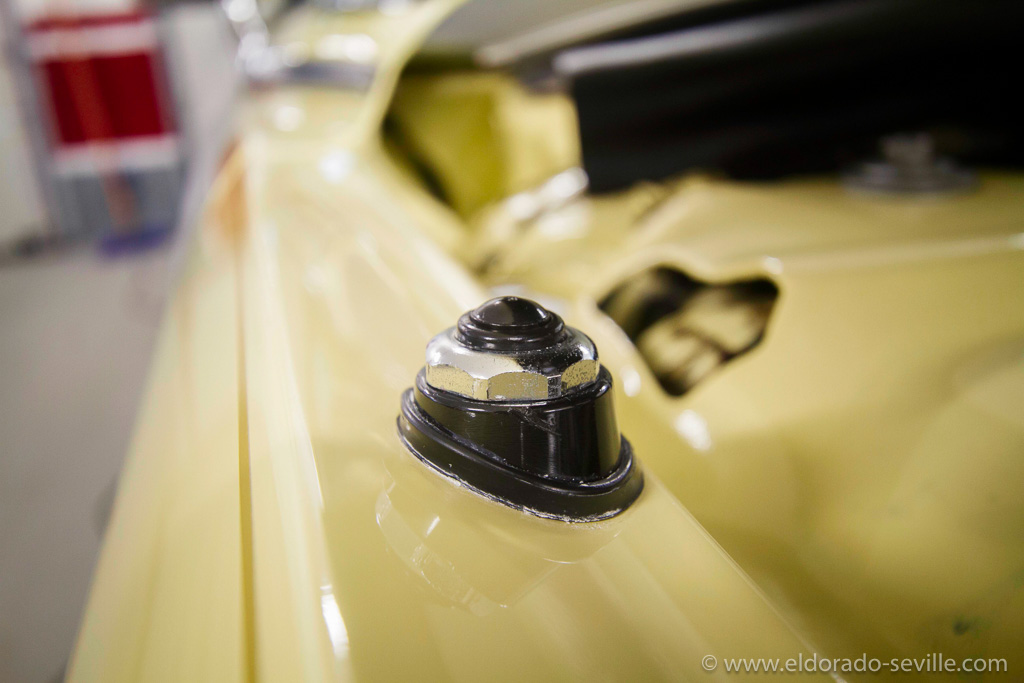
The later replacement style fender bezel looks completely different from the original one.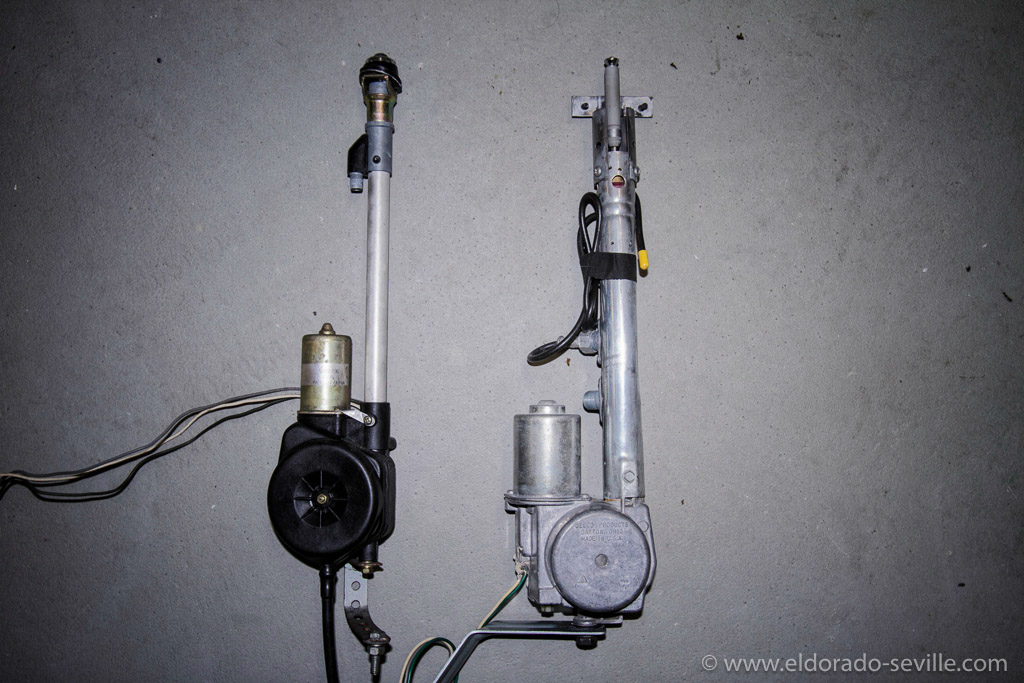
On the left you can see the official later style replacement CB antenna which looks very different. It does not have a load coil and no additional stub antenna. This is part #12355706. On the right you can see the original 1978 CB power antenna with the load coil on the mast and two antenna leads and the additional FM stub antenna. This antenna is nearly impossible to find…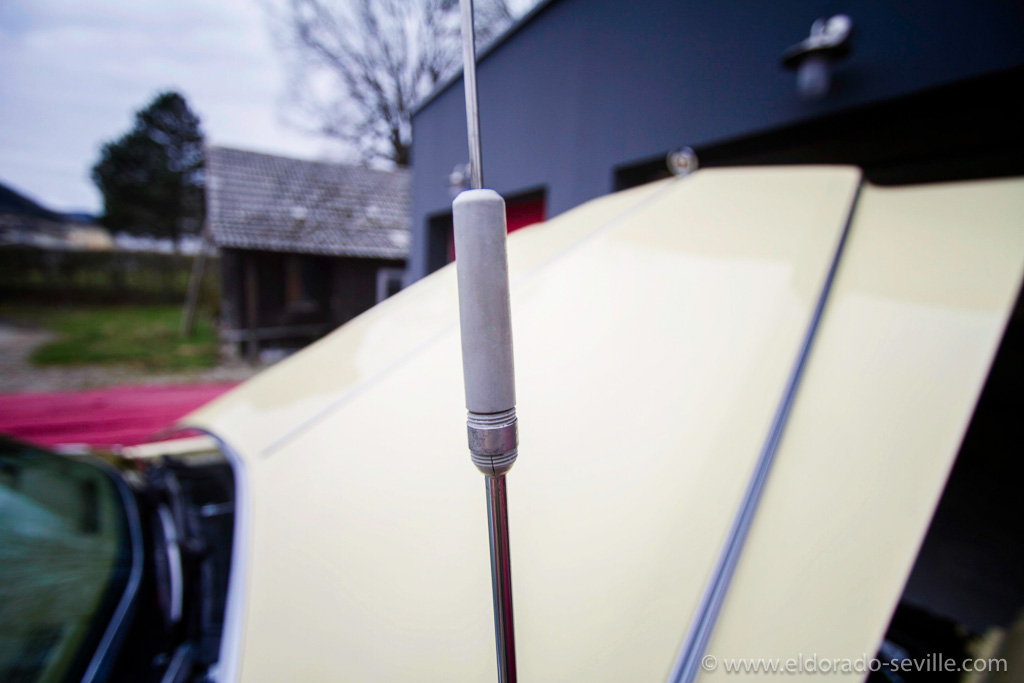
Thats the CB - load coil, which can be adjusted. The plastic unfortunately got very brittle over the years on all antennas of this vintage.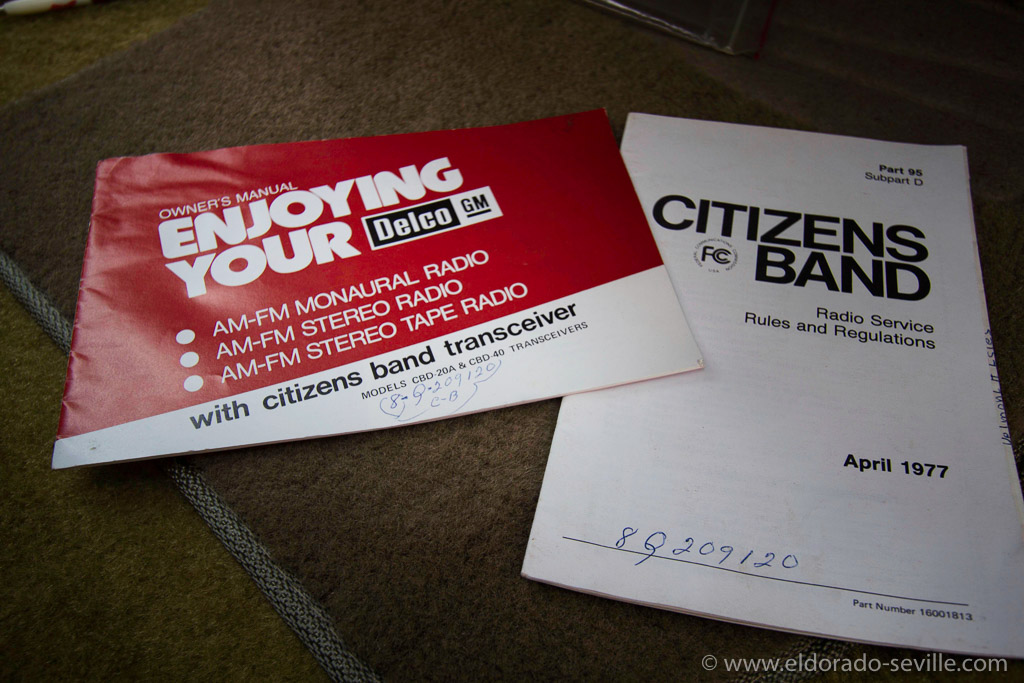
This are the instructions which came with the car, if you ordered the very expensive CB option…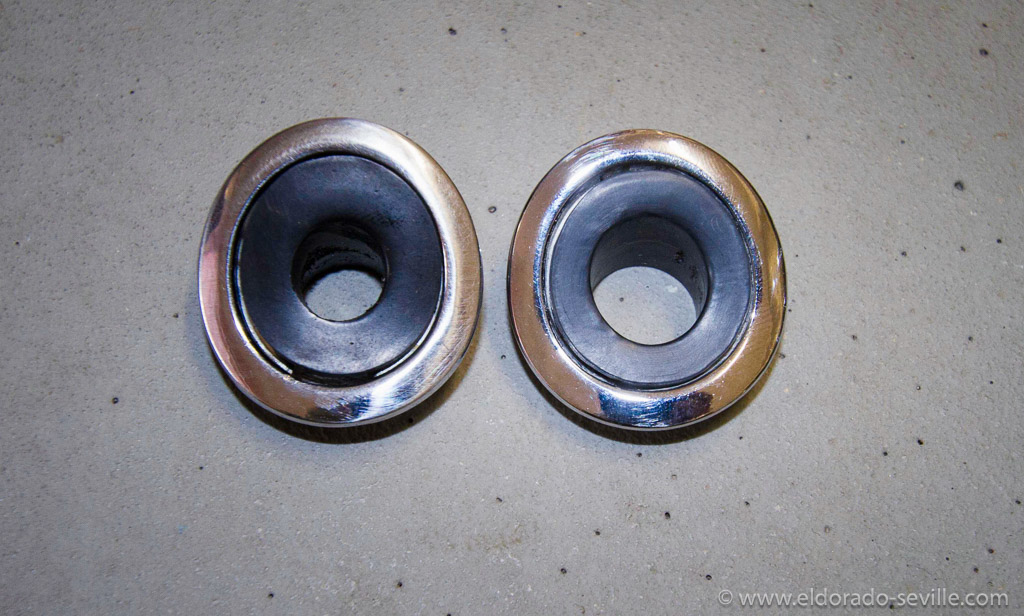
The antenna trim bezels for the 1978 Cadillacs. On the left the one for the regular antenna - on the right the one for the CB antenna with a larger diameter in the plastic part. The chrome ring is exactly the same for both. These two are used ones I found.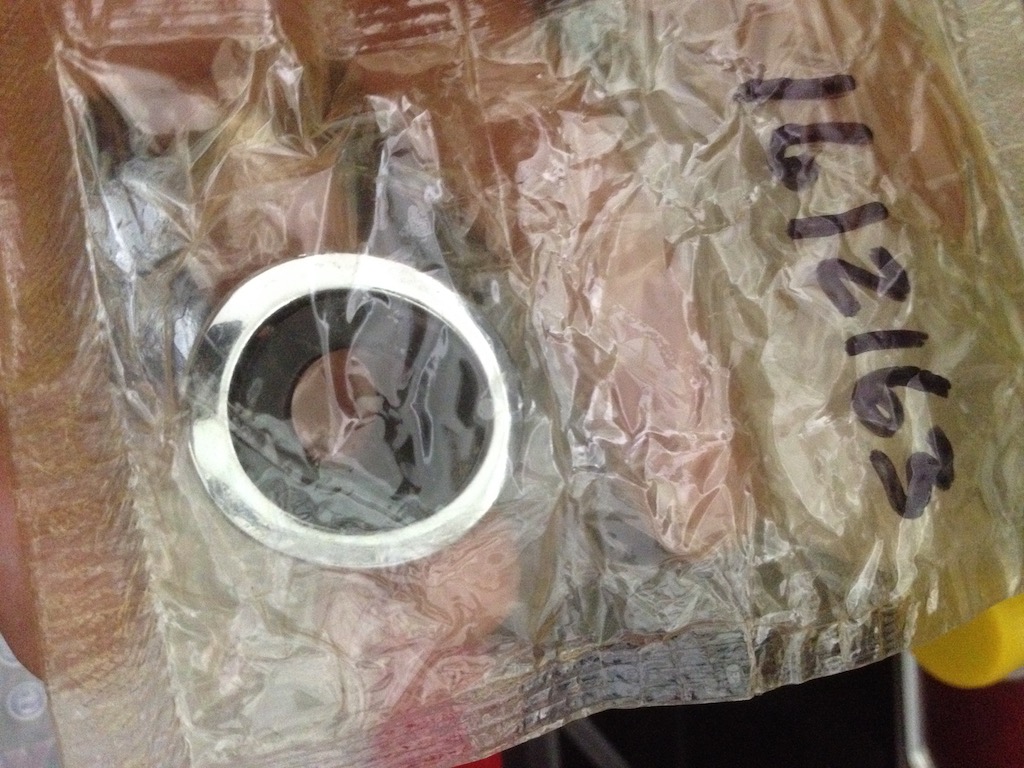
I cant believe that I was lucky enough to find this super rare antenna bezel as a NOS part - still wrapped in its original plastic bag. Not exactly a bargain, but its 100% perfect.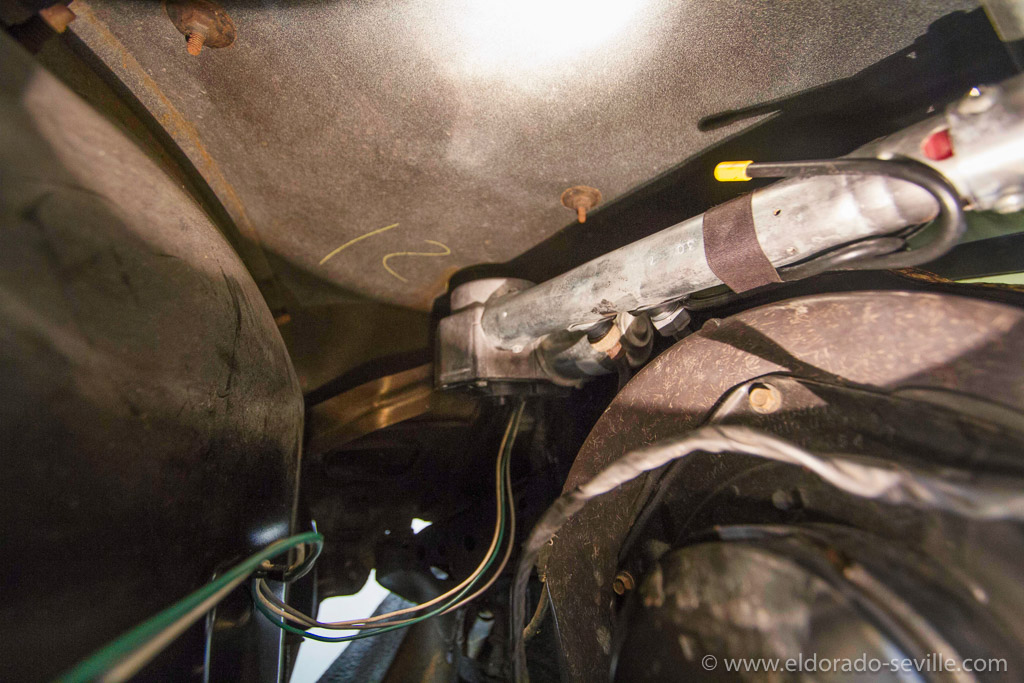
The new, correct antenna installed into the car.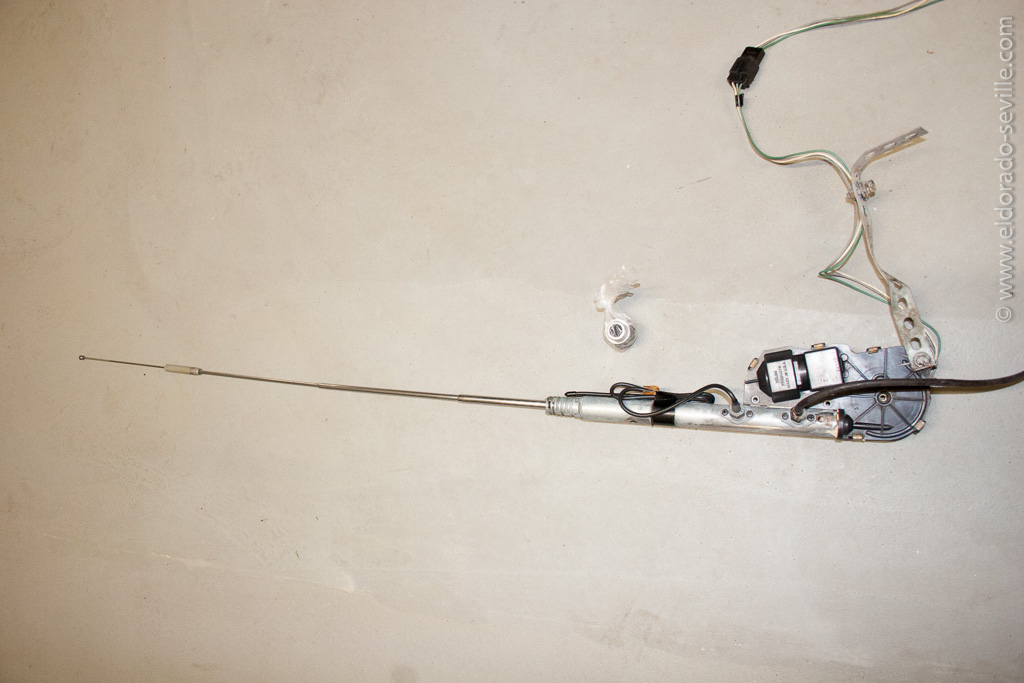
This is the incorrect CB antenna I got. It could be installed into a 78 Eldorado without any problem and would look 100% correct from the outside. It works perfectly smooth, and the chrome mast is in excellent condition. The load coil and the FM stub antenna are all there. The previous owner of this antenna removed it from a 78 Eldorado, but it would normally be correct for Buicks. If you are not such a purist as I am, you can buy it from me for what I paid for it. ($250 + shipping) It comes with all the necessary hardware to install it.
REPAIRING THE 1978 ATC PROGRAMMER (AGAIN)
***This is an update to an older article as I had a very similar problem in the past already.***
I finally found the time to take the 1978 Eldorado out of winter storage. It started right up after many months of inactivity and I checked all accessories and options for operability.
Everything checked out fine but the air-condition… It only blew warm air out of the heater outlets and would not change modes, blower speed or temperature.
I immediately suspected a problem in the ATC programmer again. I already fixed it last year when the system would only work in full AC mode.
Last time I had a bad contact at the transducer which is the most important part in the programmer as it regulates the vacuum supply to the system.
The shop manual mentions that when the system is stuck in full heater mode, most probably an electrical problem is the main cause.
So I tried to push the transducer in again but the system did not come back to life like it did last time when I did this.
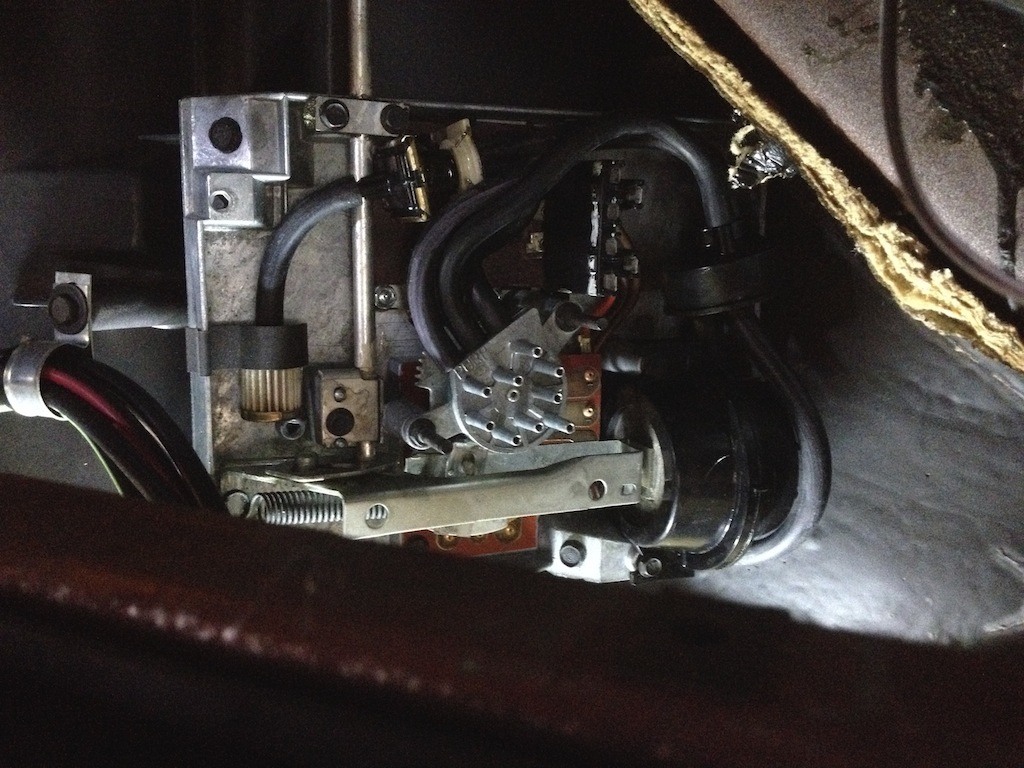
The MKII programmer which you can access through the glove box had to come out again for inspection.
This is how it looks with the cover removed:
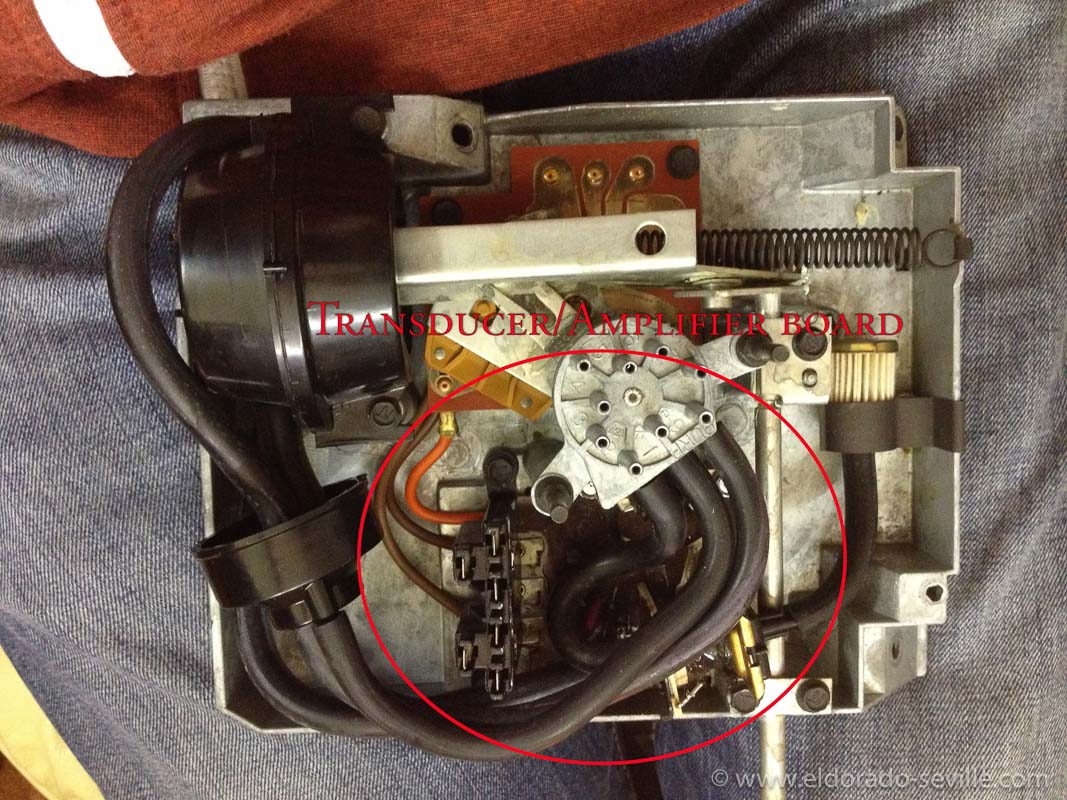
The 1978 MKII programmer with the cover removed.
I decided to take the transducer/amplifier board out of the programmer this time to see where the problem could be. It can be removed very easily - it's only held in place by 4 screws. Be careful not to turn the gear wheel with the potentiometer though as you would have to recalibrate it again afterwards.
After the board came out, I quickly found out where the problem was. Below is a picture of the removed board:
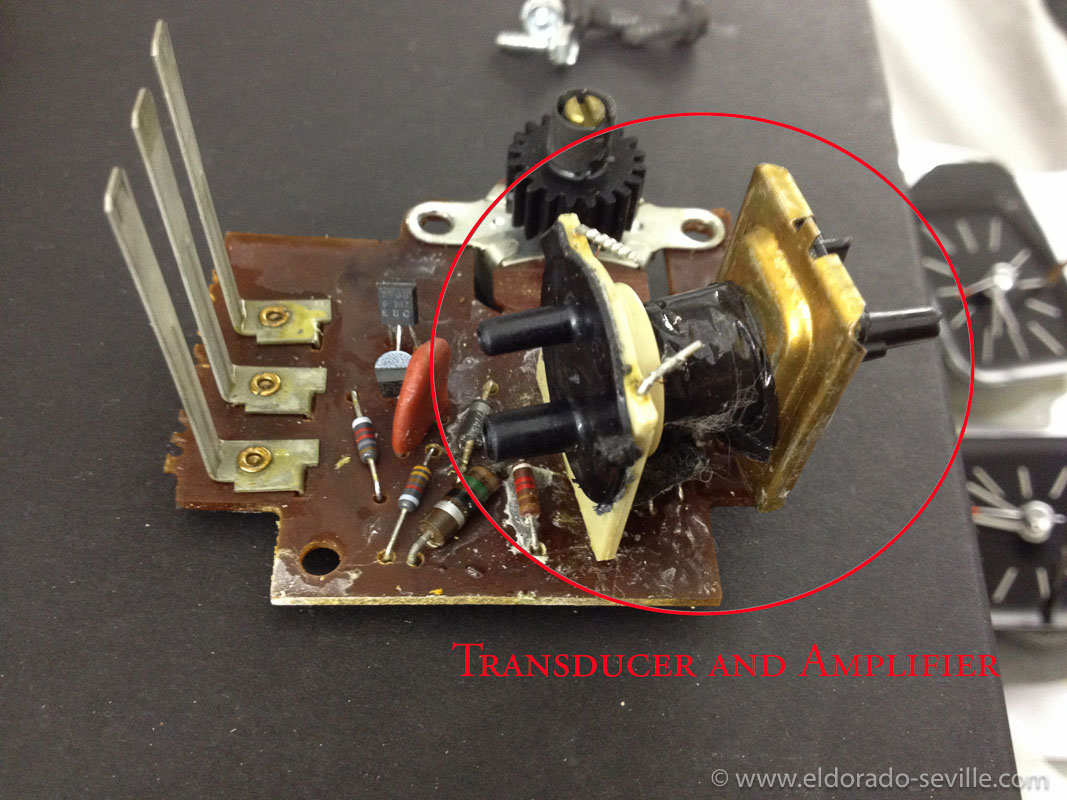
The transducer/amplifier board.
The transducer/amplifier unit was sitting pretty loosely on the circuit board, and one of the very thin and fragile wires going to the coil was broken, as you can see on the picture below:
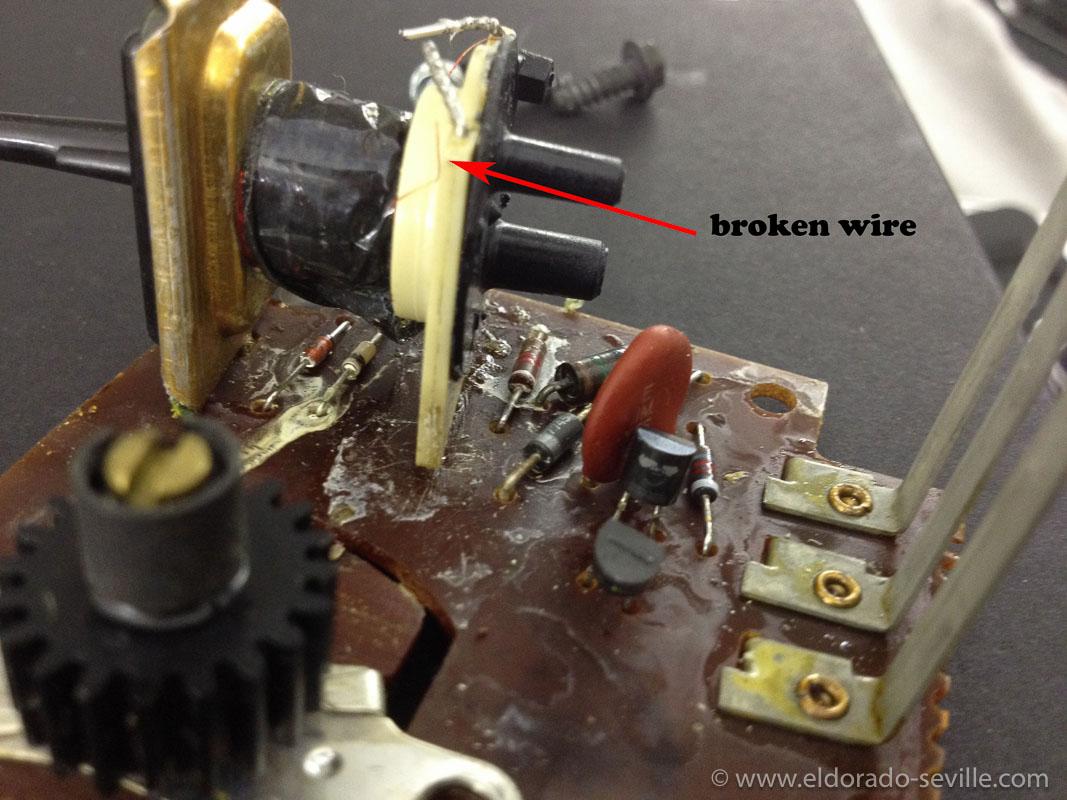
A broken wire at the coil of the transducer.
When I turned the circuit board around I could see that the soldering points on the circuit going to the transducer and the amplifier were broken and that they no longer were making good contact. That was the reason why the system did no longer work.
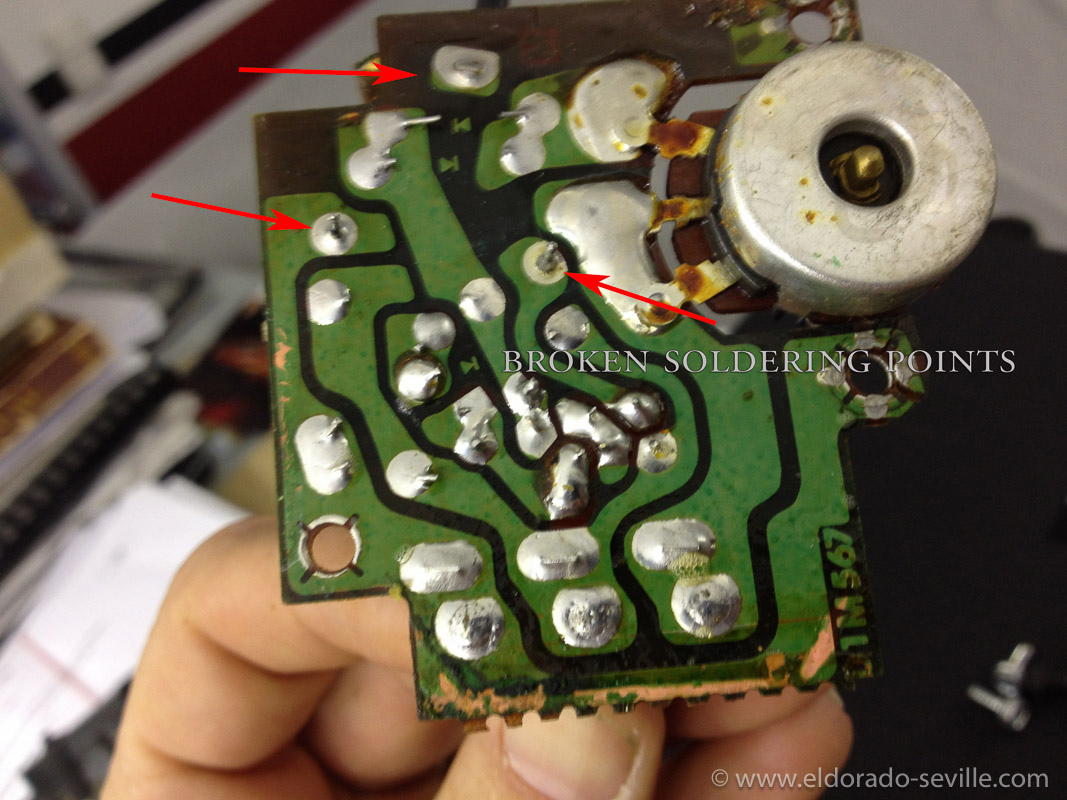
Broken soldering points at the rear of the circuit board.
The pretty simple solution was to re-solder the 3 soldering points and fix the broken wire going to the coil. I then put everything back together and now have a perfectly working ATC again. These old circuit boards can be very troublesome and I think that most of the time when a programmer goes bad on these 70s cars its probably a fixable problem like this. I was very worried that I would need an expensive rebuilt programmer and I am very glad that I could fix it by myself.
I have no idea though why everything worked when I put the car into storage last fall and how it broke while the car was inoperative…
Check my older post of the MKII programmer to also see the electrical diagram for the ATC system.
1978 CADILLAC ELDORADO BIARRITZ RADIO REPAIR
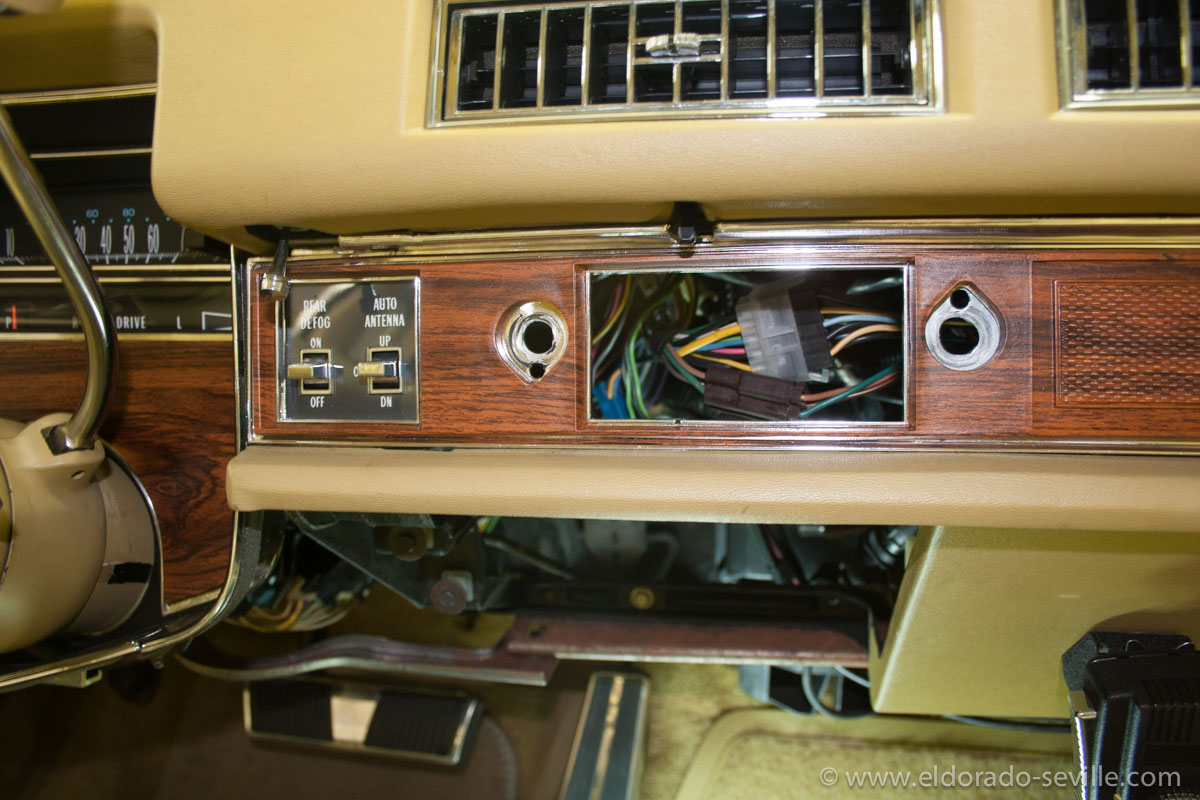
You have to remove the ashtray and part of the lower dash to get the radio out.
Before the spring season will start in May, I want to make sure that all my cars are in top notch condition until then.
The radio on my 78 suddenly died last summer. I was driving the car and the radio and 8-track and CB worked flawlessly. It had great sound and everything worked.
Suddenly, when I wanted to turn the volume down a little bit, the antenna retracted, and the radio went off completely and I could not turn it on again. I also could no longer operate the power antenna.
When I was home I discovered a blown fuse and replaced it, but it immediately blew again when I wanted to turn the radio back on.
I took the radio out now, and measured the power source, and I can clearly see that there is a problem somewhere inside the radio.
It looks like the power source is defective.
My friend Steve who is really good in repairing older radios offered to have a look at it. Unfortunately I cant fix this myself, as I have no clue how this could be repaired, or what could be defective…
Its great to have such good and competent friends who can fix such things.
In a very short time Steve found out what was wrong with the radio. One of the many condensators on the radio got dry over the years and caused a short. Steve replaced the broken condesator and even replaced all the other old ones with new ones to make sure that the radio will last for a long time.
I can´t thank Steve enough for fixing the radio for me. It is very important for me to know that it works again - I hate when things do not work properly on a Cadillac.
When I installed the radio back into the car, it came back to life, but the FM functionality did no longer work, and it was stuck in AM mode. 8 track and CB worked perfectly, but I could not switch to FM mode.
So Steve was so kind to disassemble the radio once again, and found the problem with a disengaged spring which could no longer activate the AM/FM switch.
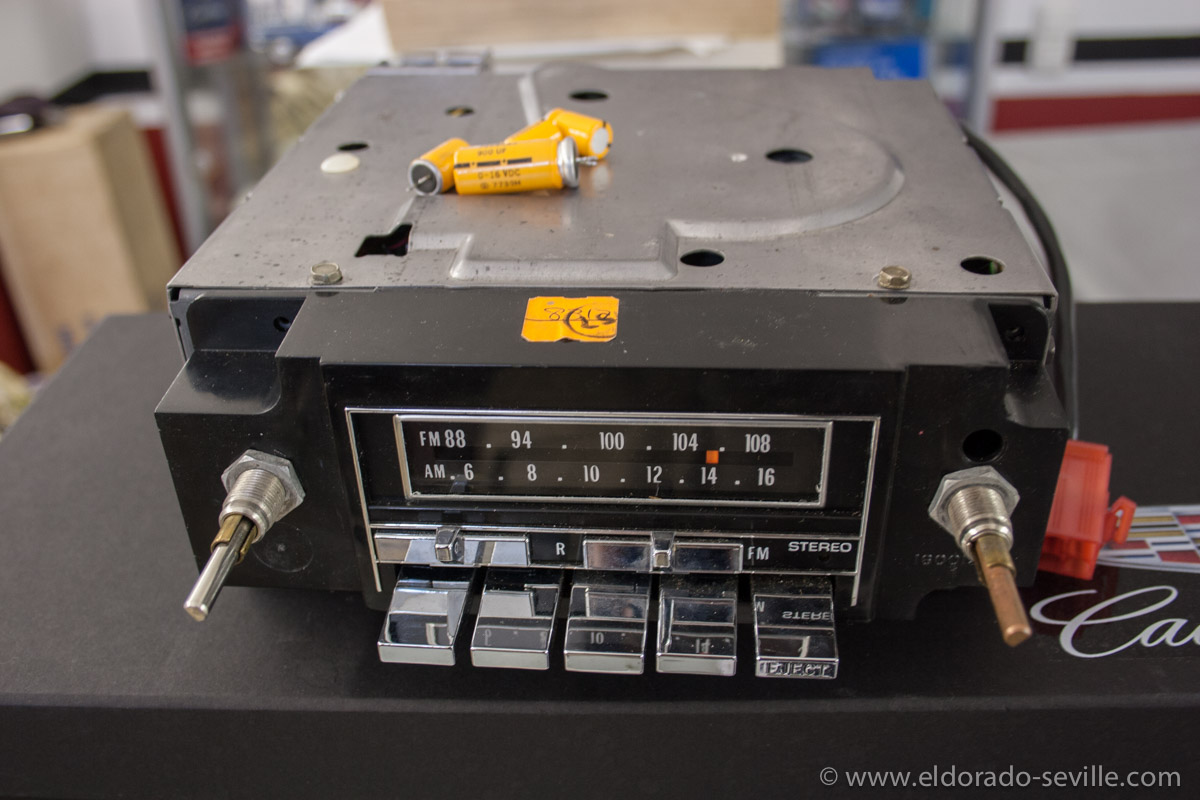
The radio is out of the car - it's the one with 8-track and CB - the most expensive one available in 1978. You can see the replaced condensers on top of the radio.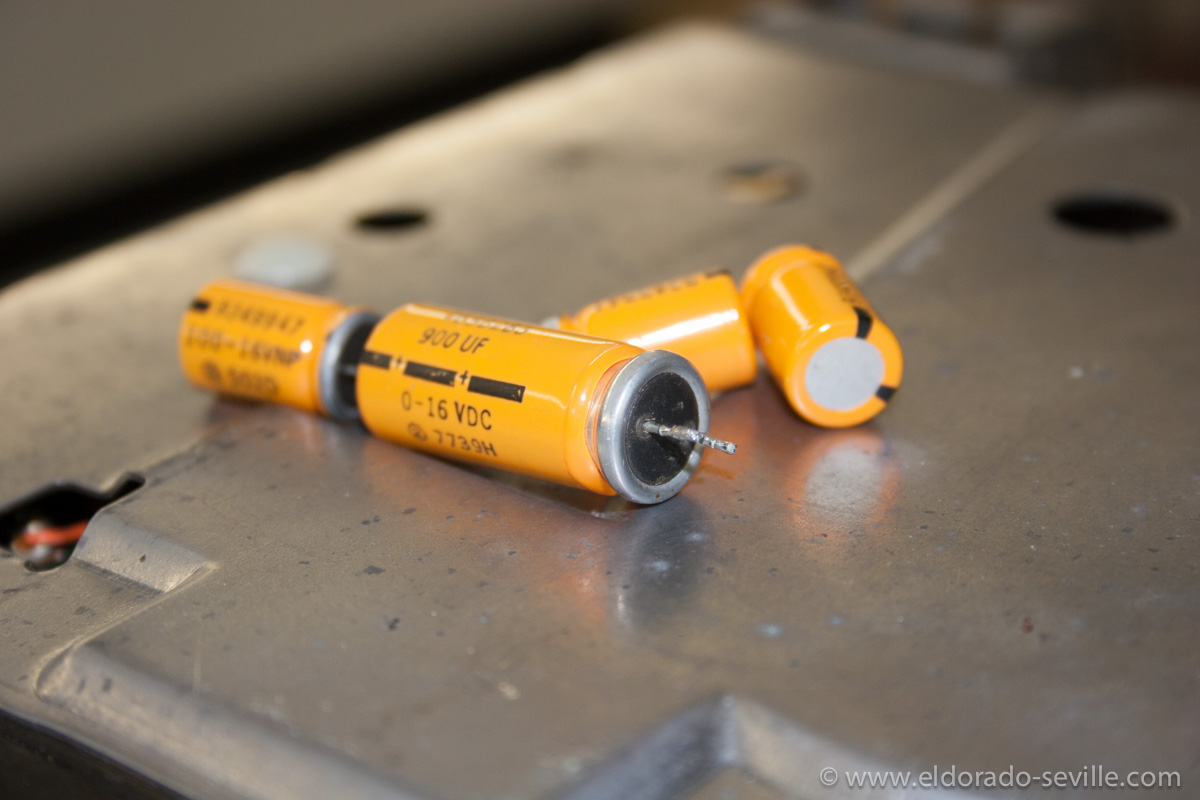
This bigger condenser was the cause for the trouble - it got dry inside and caused a short. The others were exchanged as well as a precautionary measure.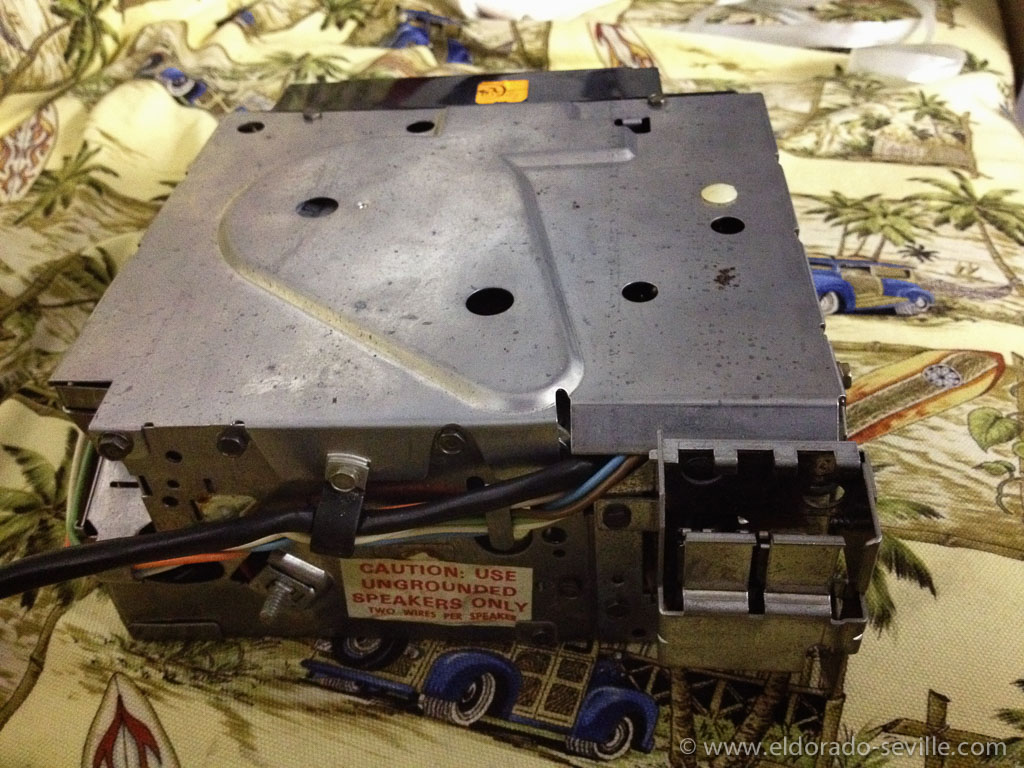
The back side of the radio.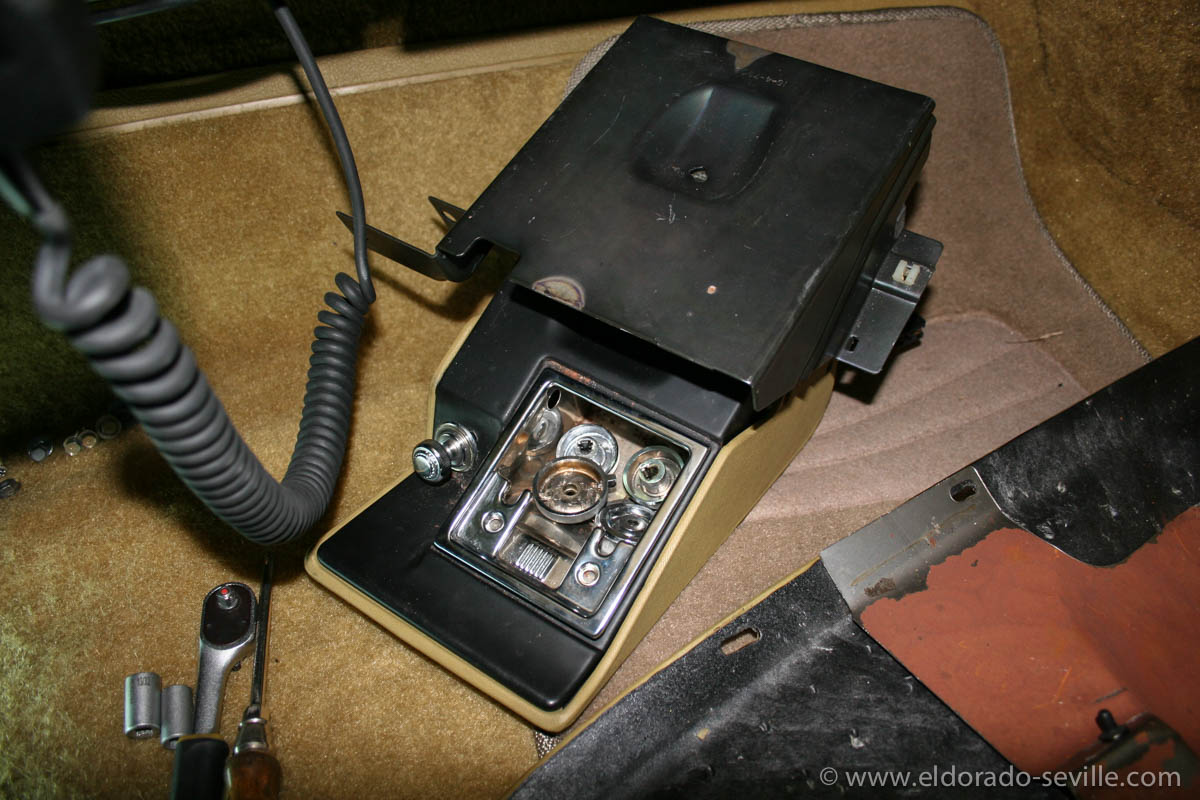
You have to remove the ash tray assembly to get the radio out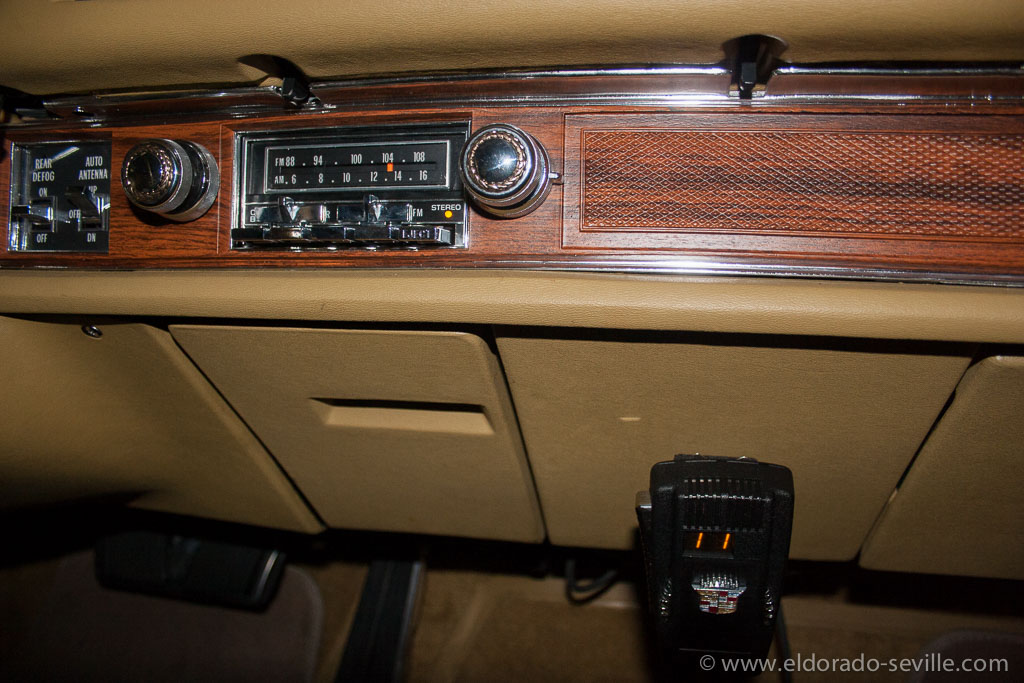
The radio works again and is back in the dash. 8-track and CB work perfectly as well.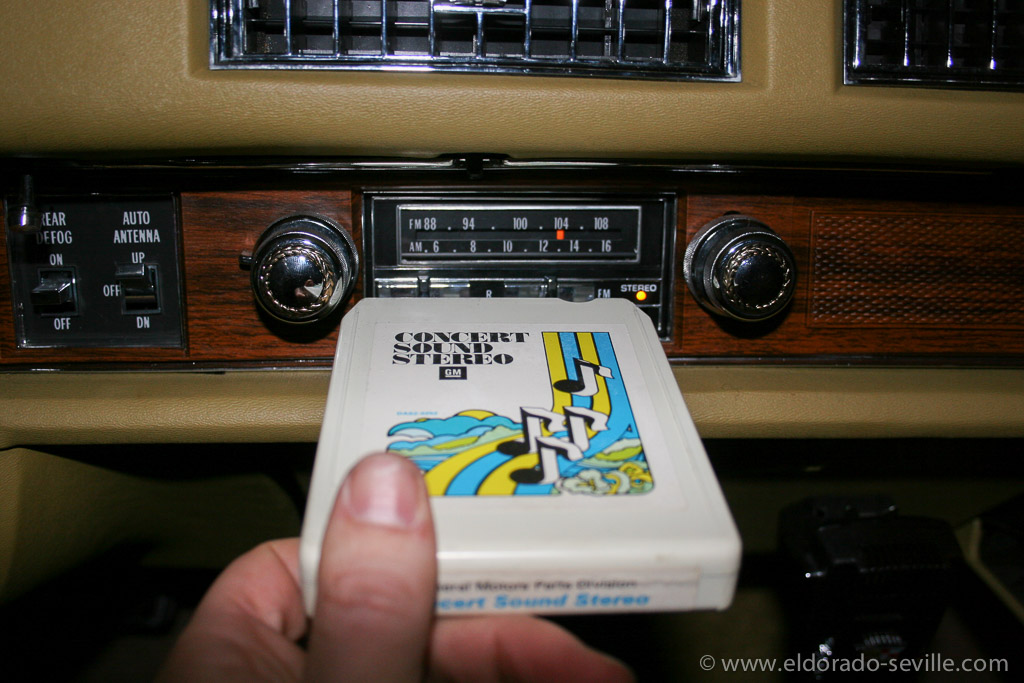
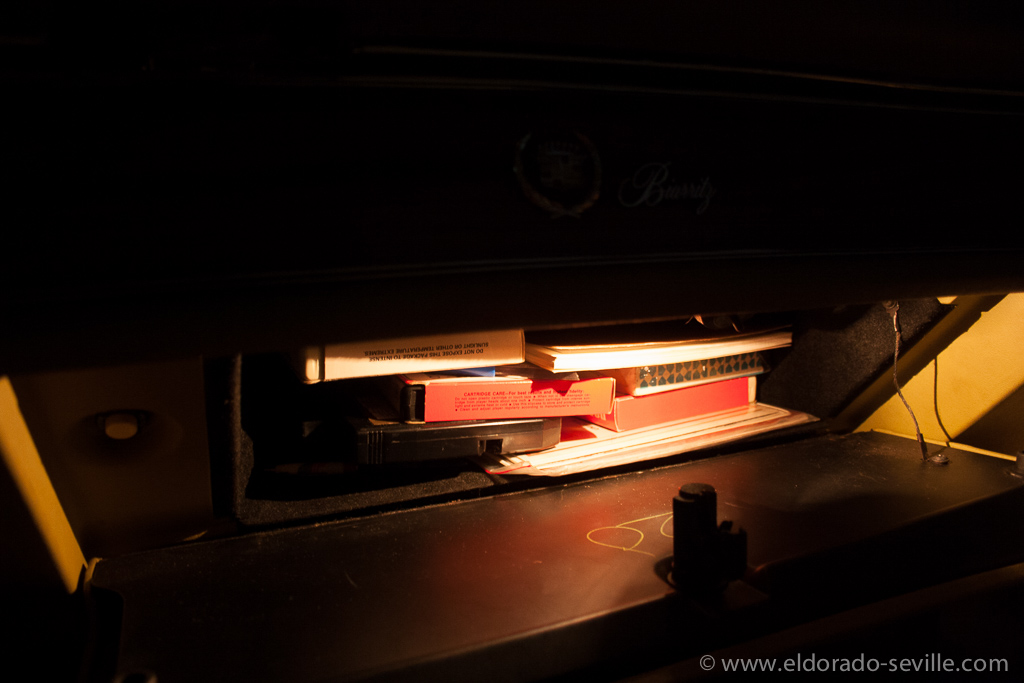
The GM demo tape which came with the car sounds amazingly good. Love the sound.
While I was working on the car I finally repaired the glove box light switch which had a problem since I got the car. I got a new switch from Arizona Vintage Parts and it now works perfectly again.
The glove box light is back in working order.
REPLACING THE HOT WATER VALVE
I also replaced the cars original hot water valve, which had a leak at the vacuum diaphragm and could not close any longer.
I found a perfectly working NOS replacement on ebay for it, as the one I got from Rockauto before looked completely different.
The new hot water valve in place.
The Cadillac BIG Meet 2014 -great cars but bad weather
This years Cadillac BIG Meet was held from August 23rd to August 24th.
We took the 78 Biarritz to the show.
On friday the preparation work for the meeting began, and also the first cars arrived at the hotel.
You can find some pictures here.
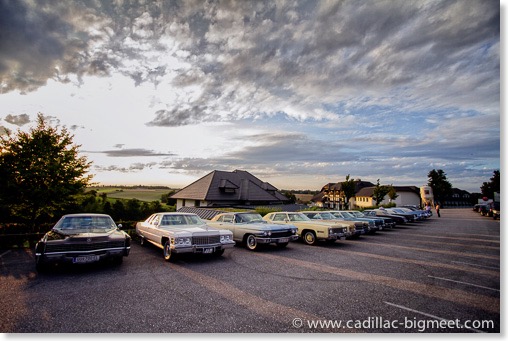
friday evening at the hotel parking lot
On saturday the Driving Tour was held and 59 great Cadillacs participated.
This gallery contains the images from the driving tour which lead us from Kremsmünster to the “Almsee“ for lunch. We then continued to the “Eggenberg“ brewery and back to Kremsmünster where we had dinner in the monastery. As you can see we had some bad luck with the weather...

on the way to the “Almsee“ for lunch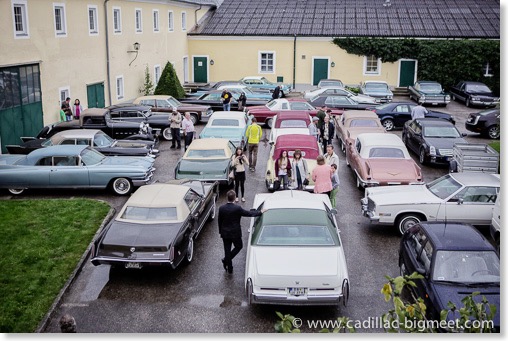
at the brewery
The meeting itself took place on sunday.
Although we had some really bad weather on the Cadillac BIG Meet 2014 weekend, a lot of fantastic Cadillacs attended the 10th anniversary show. We could welcome 130 Cadillacs from 1932 to the most recent models to the show field. In the special exhibition “Cadillac Milestone Cars“ we showed a lot of very important Cadillac models from 1941 until today. Some of the many highlights were 2 59 Eldorado Broughams and a 1957 Eldorado Brougham parked side by side.
We had visitors and participants from 11 nations.
Enjoy the pictures!
Part of the “Milestone Cars " exhibition. I love the 57 - 60 Eldorado Brougham very much.
The next Cadillac BIG Meet is planned for August 28th 2016.
All pictures were shot by my wife Afra Hämmerle-Loidl and me for the Cadillac BIG Meet organization team.
Fixing the 1978 Cadillac Eldorado´s ATC programmer. The AC works again.
****UPDATE****
An update to the article below can be found here as I had to repair the programmer again in May 2015:
The air-condition in my 1978 Biarritz did not work correctly. For some reason the system always stayed in full AC mode and no matter to where I put the temperature dial on the control head I could not get the heat on, no matter what I tried.
The shop manual is very helpful in trouble shooting the system. Its covered in the 1977 factory shop manual (FSM) as there were no changes made to the system in 1978.
It took me a while to fully understand how the system works - so I had to read the FSM multiple times to get the grip what is going on in the system.
First I inspected all the vacuum lines in the car to make sure that there was no leak anywhere, as the heating mode requires a very high vacuum at the vacuum motor in the controller.
All lines were in very good condition. I also checked the control head connections in the dash which were good as well.
I then suspected the vacuum motor in the programmer as it did not move. I removed the programmer from the car. You can access it from underneath the dash on the passenger side or even better if you remove the glove box lining through the glove box.
From there you only have to unscrew 5 screws, unplug the wires and the vacuum lines to get it out.
When I had it out of the car I checked the vacuum motor. I just sucked air through the hose and it moved and held vacuum perfectly.
The transducer or the amplifier in the programmer were most likely the problem.
When I checked the transducer which regulates the vacuum supply to the vacuum motor, I noticed that it seemed to not be connected to the electrical board as it should. I pressed it in, so that it made good contact with the board again and put the programmer back into the car and connected everything again.
***UPDATE 2015 - its not connected with pins but soldered to the circuit board - 3 of this soldering points were broken - the “repair“ I made here only temporarily worked. You have to check the soldering points for a permanent fix***
I started the car and the AC came back to life again immediately. I could see how the vacuum motor went through all the modes as it should according to the position of the temperature dial on the control head.
The build quality of the programmer obviously is not very good and the transducer somehow came loose causing the ATC to not work as it should. ***Update 2015 - it did no come loose but the soldering points broke***
After I tested everything I put the parts back together and can now enjoy a full working ATC in my 78 Biarritz again ;-)
The programmer as seen through the glove box with the connectors and the plastic case removed
The 1977 / 1978 Eldorado MK II Automatic Temperature Control Programmer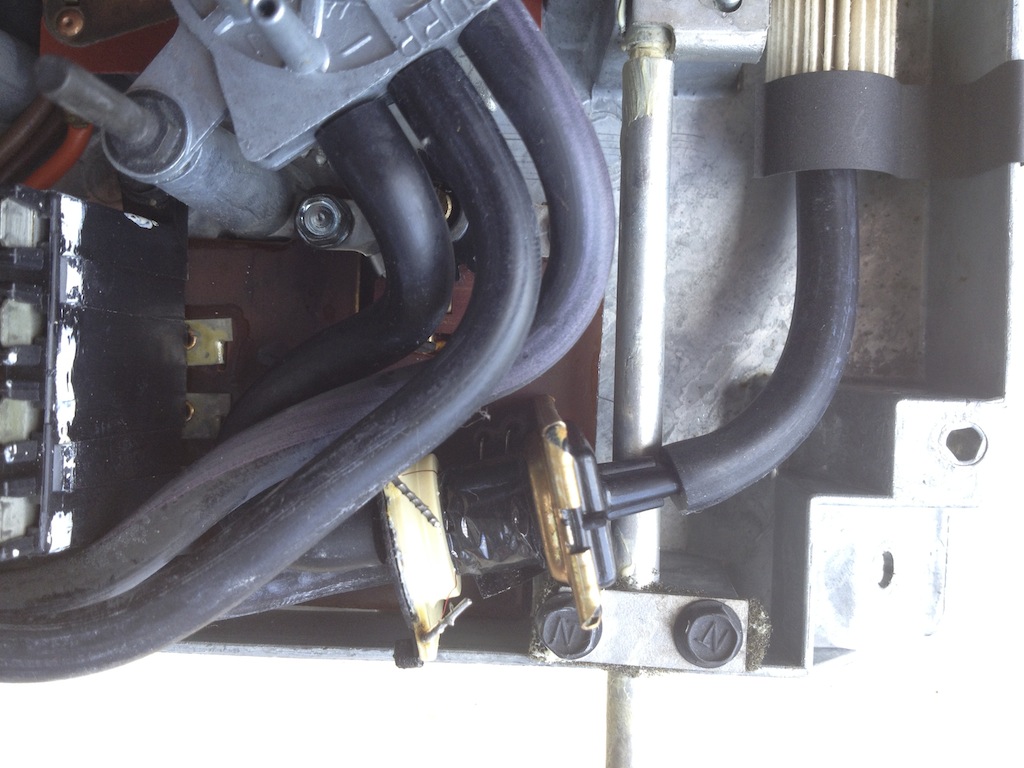
The transducer which caused the problem (the golden part with the single vacuum line going into it)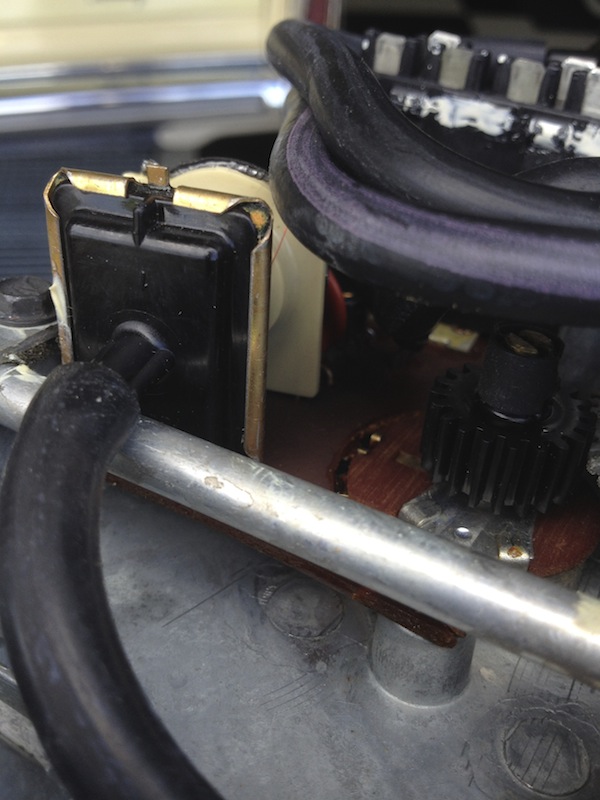
The transducer is connected to the electrical board through a couple of pins - it was not connected properly and somehow became loose over the years - that was why the system did not work.
***UPDATE 2015 - its not connected with pins but soldered to the circuit board - 3 of this soldering points were broken***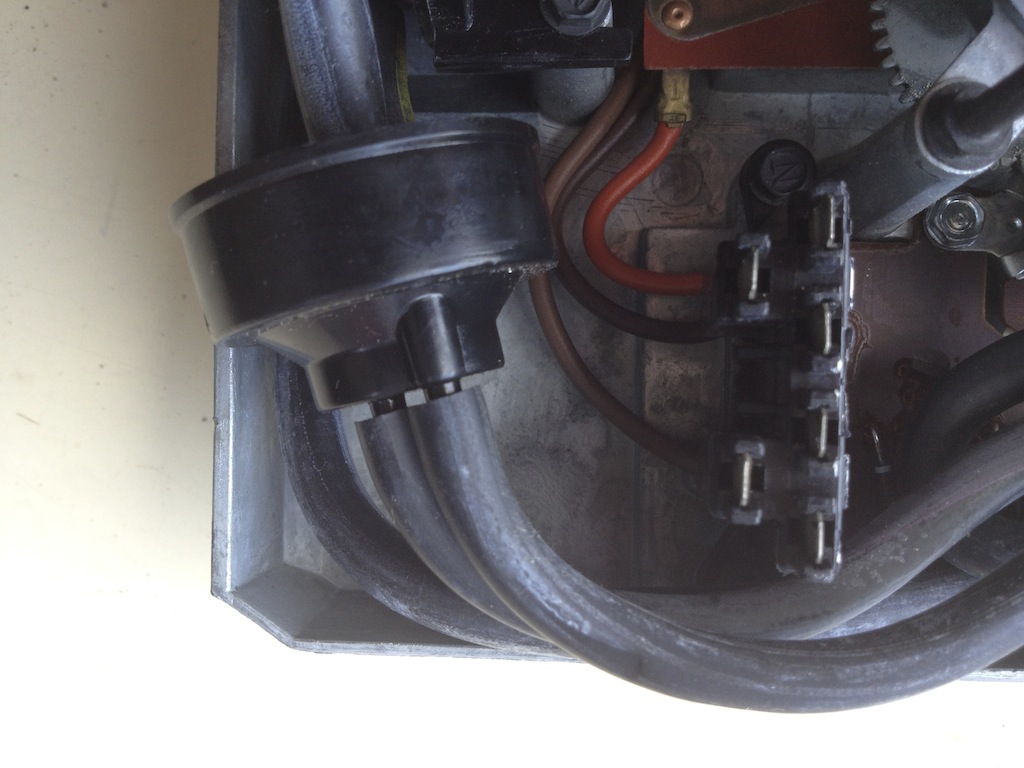
The vacuum checking relay and the electric connectors.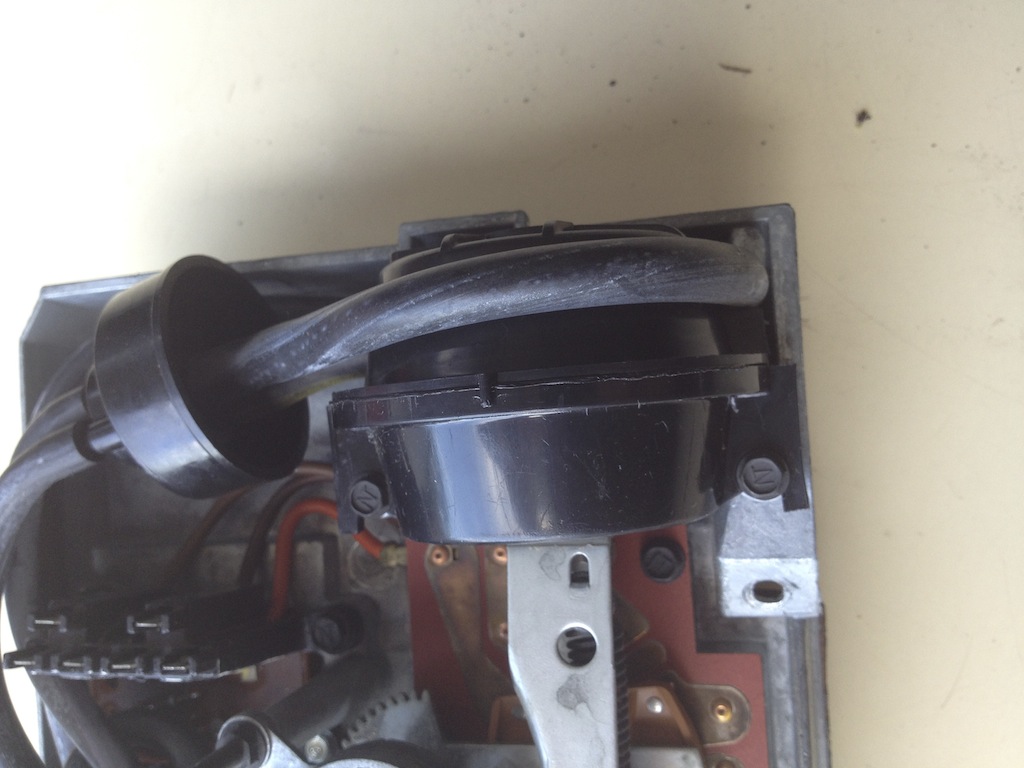
The vacuum power motor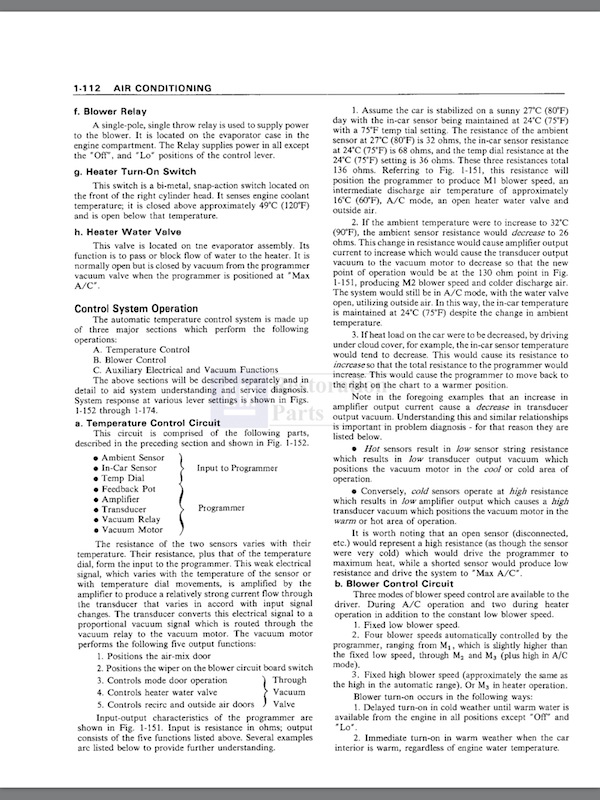
from the 1977 FSM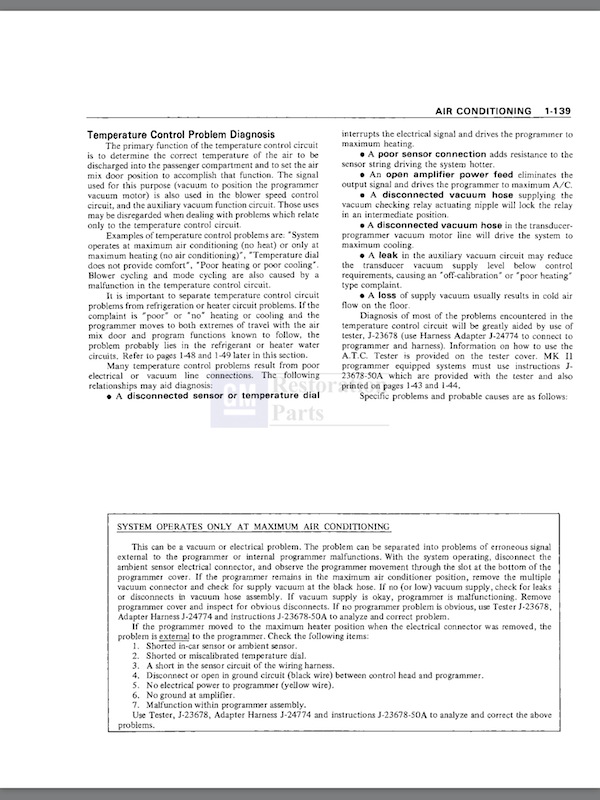
Trouble shooting guide for when the system works in full AC mode only.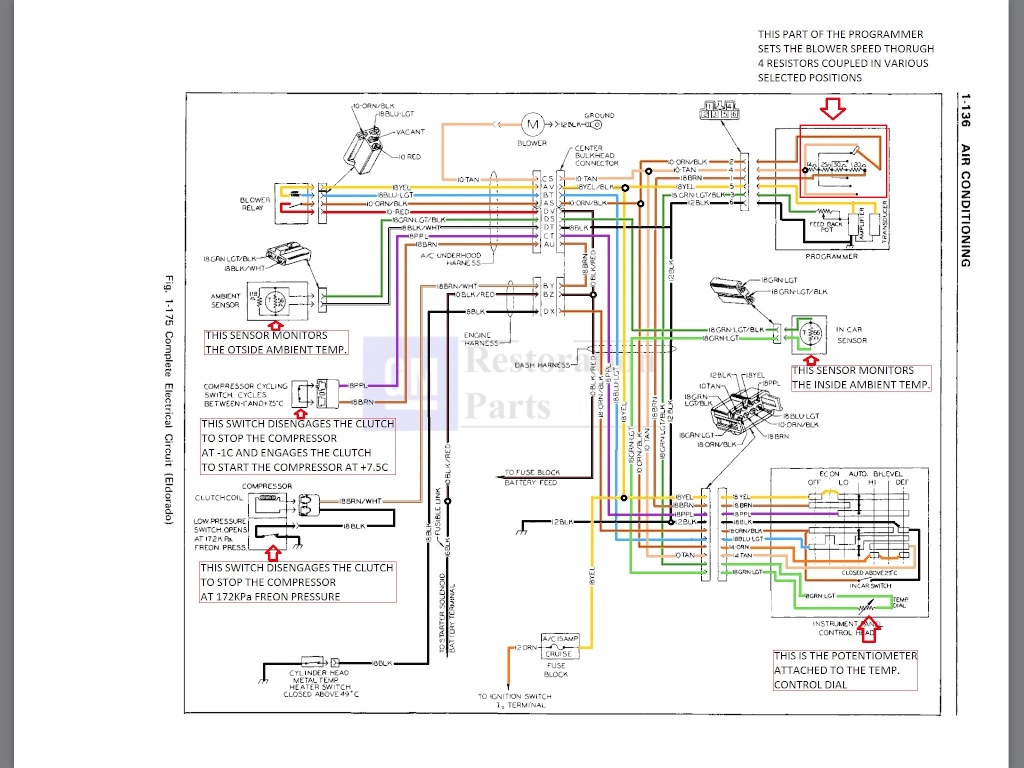
A color coordinated electrical schematic with annotations to describe the various functions of the system.
Detailing the paint of my 1978 Biarritz.
My goal is to make this mint car as good as it can get, while keeping everything as original as possible.
I´m really obsessed with cleanliness when it comes to cars... Everything has to be completely detailed and shining like new.
I completely cleaned the entire engine and gave it a good wash and afterwards applied some engine dressing.
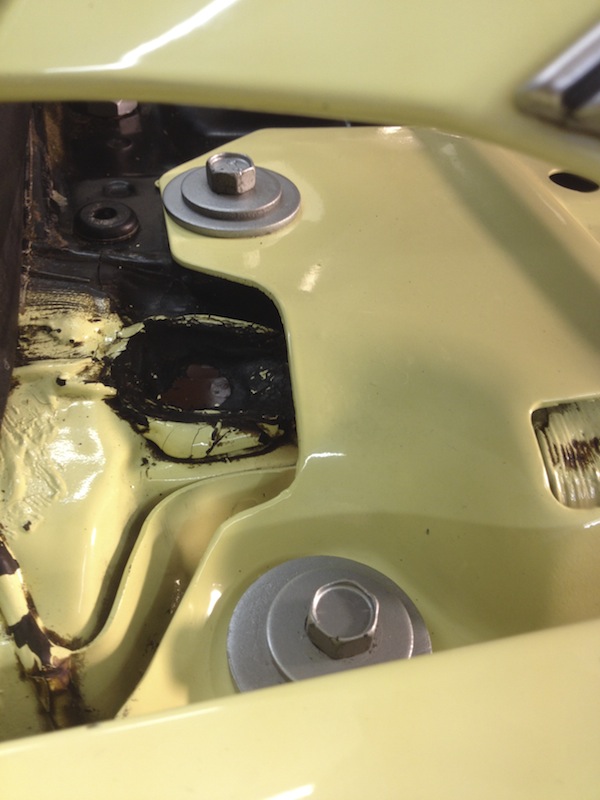
I then removed some screws and small parts which were left unpainted by the factory, like some screws, the hood latch, some brackets and some other smaller parts. Of course these parts developed some slight surface rust during the last 36 years...
As I had no real rust dissolver at hand, I soaked the rusty parts in vinegar over night, which completely removed all the surface rust. I then gave these parts a coat of primer and painted them with Eastwood paint, which looks like bare metal.
With this method I can keep the rust away, while the parts still look original. Only if you look very closely you might see that these few parts are now painted...
I then started to bring the original single stage paint back to like new condition.
I used a couple of Meguiars compounds and polishes to make the paint as smooth as possible. I had to carefully wet sand some of the deeper scratches with 2000 grit paper. Be very careful when doing this as the single stage paint was applied in only VERY thin layers during the 70s.
The car now shows almost no more paint imperfections and the swirl marks are gone. The original paint looks like on a new car now and is extremely shiny. When the car is out in the sun its almost blinding.
I sealed the paint with Meguairs #16 wax.
I used a Meguiars DA polisher (G125) for the paint correction work - which is not really that good, but I would like to have a more powerful machine for the future like the Flex 3401 or the Rupes Bigfoot .
I used the procedure explained in the following video for my paint correction:
Download his description as PDF file here
This gentleman, Larry Kosilla, has a lot more awesome video tutorials for people who love detailing their cars. Check him out!
I also started detailing the interior of the car. I treated the leather with Gliptone Leather Conditioner - which is the best conditioner I have tried so far. It really makes the leather very soft.
I´ll have to steam clean the carpet once its really warm outside so that it can dry fast afterwards.
I also cleaned the undercarriage a little and removed some of the factory applied undercoating from components where it does not belong to, on which they sprayed it on very carelessly at the factory. Looks much better now.
The car really looks spectacular already - I´ll continue with the chrome and stainless steel trim now. It should be shining in fully glory for the 2014 season beginning in May and also be ready for various car shows, especially the Cadillac BIG Meet in August.
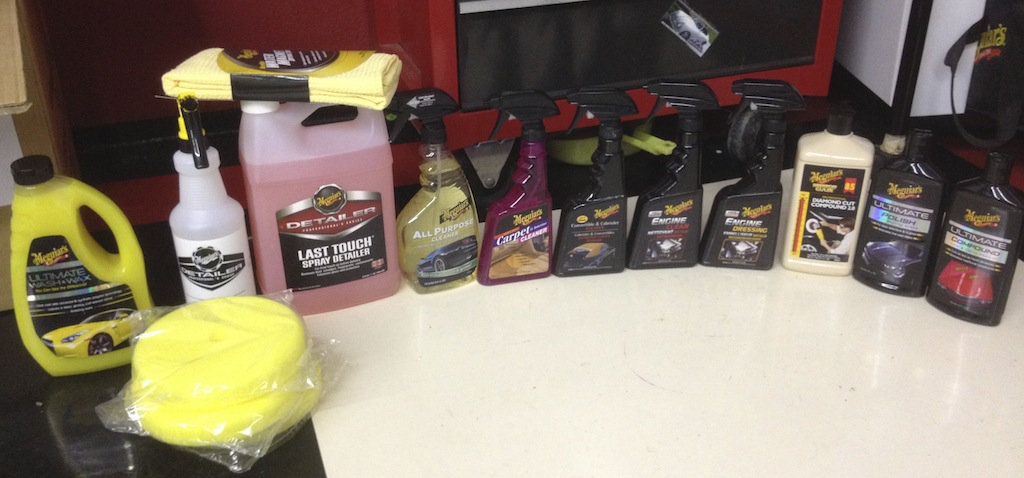
My weapons of choice came from the Meguiars dealer...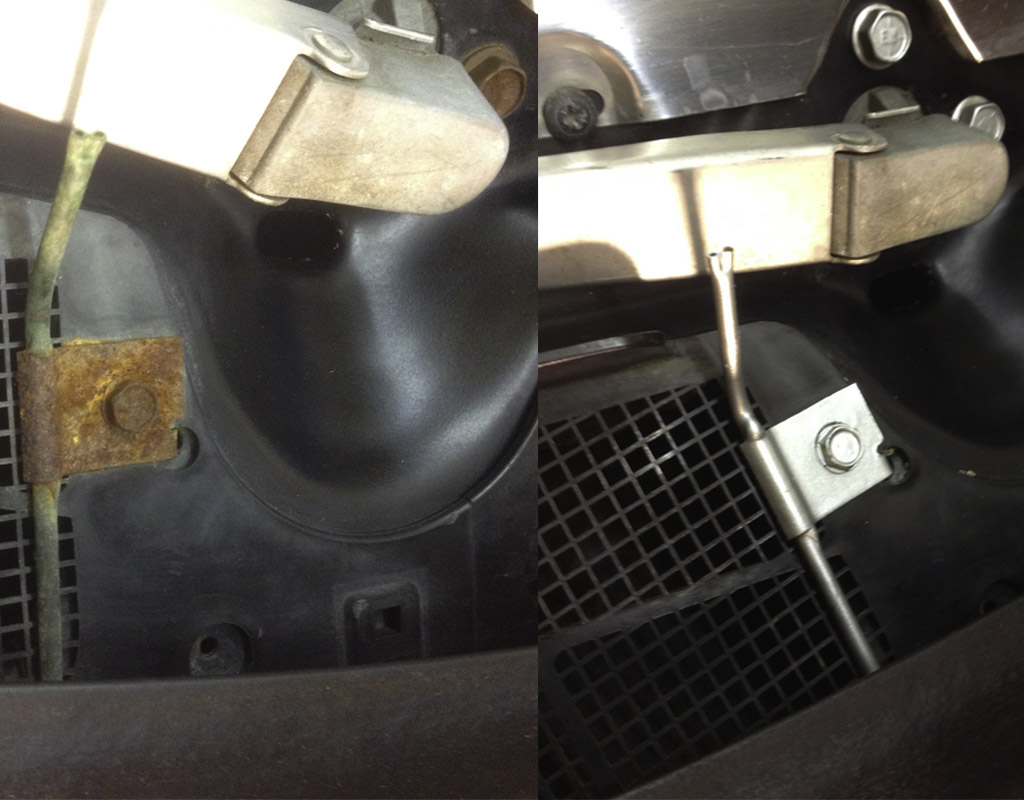
before and after cleaning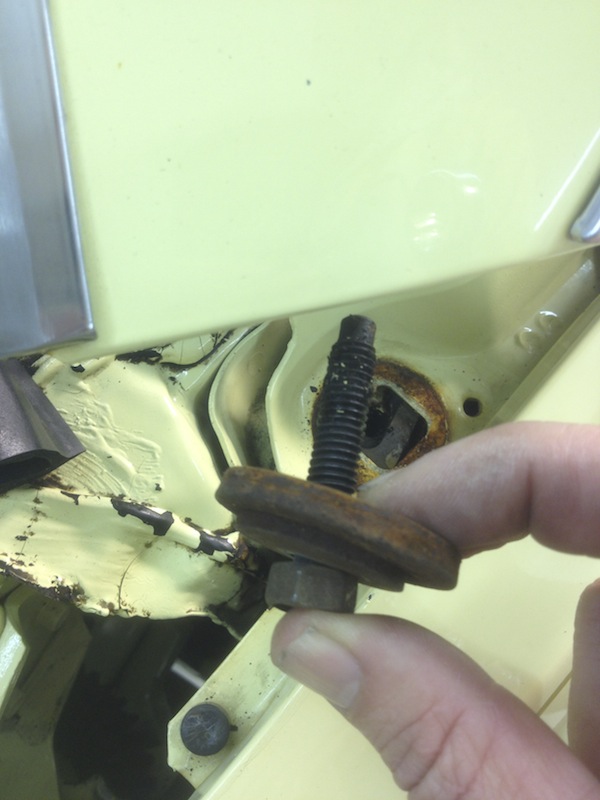
rusty bolts before and after cleaning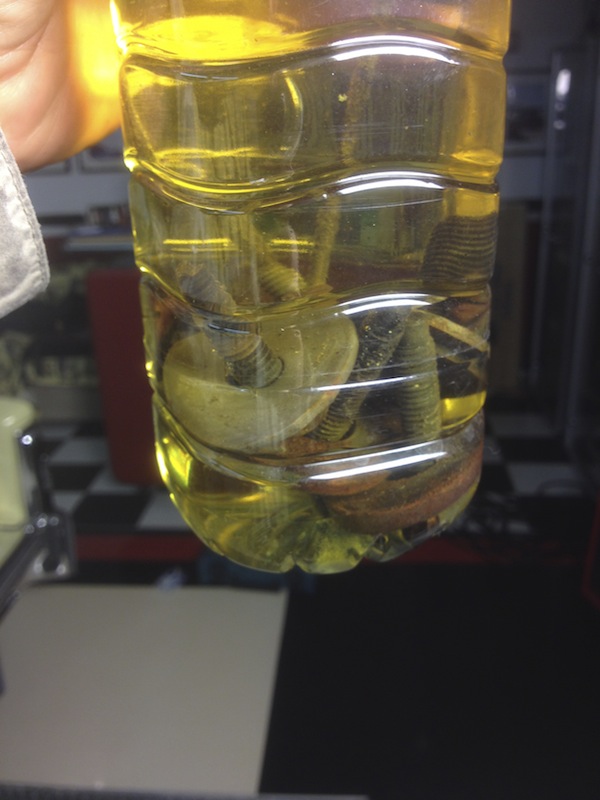
Soaking rusty parts in vinegar
Cleaning more rusty parts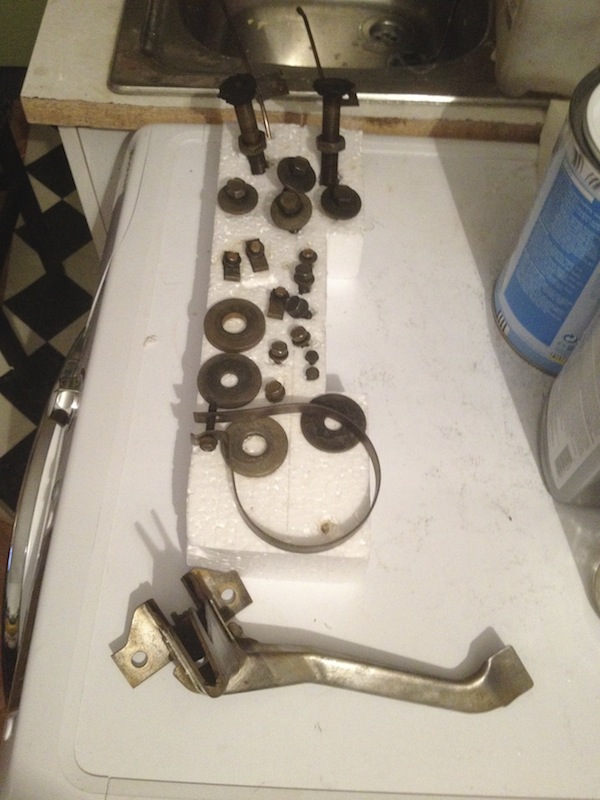
with the rust removed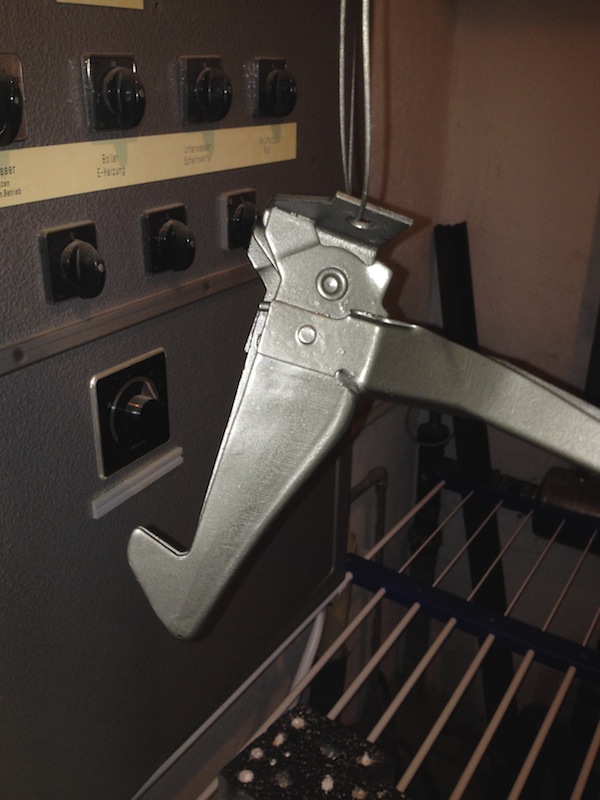
The Hood latch cleaned and painted with Eastwood Silver Cad Paint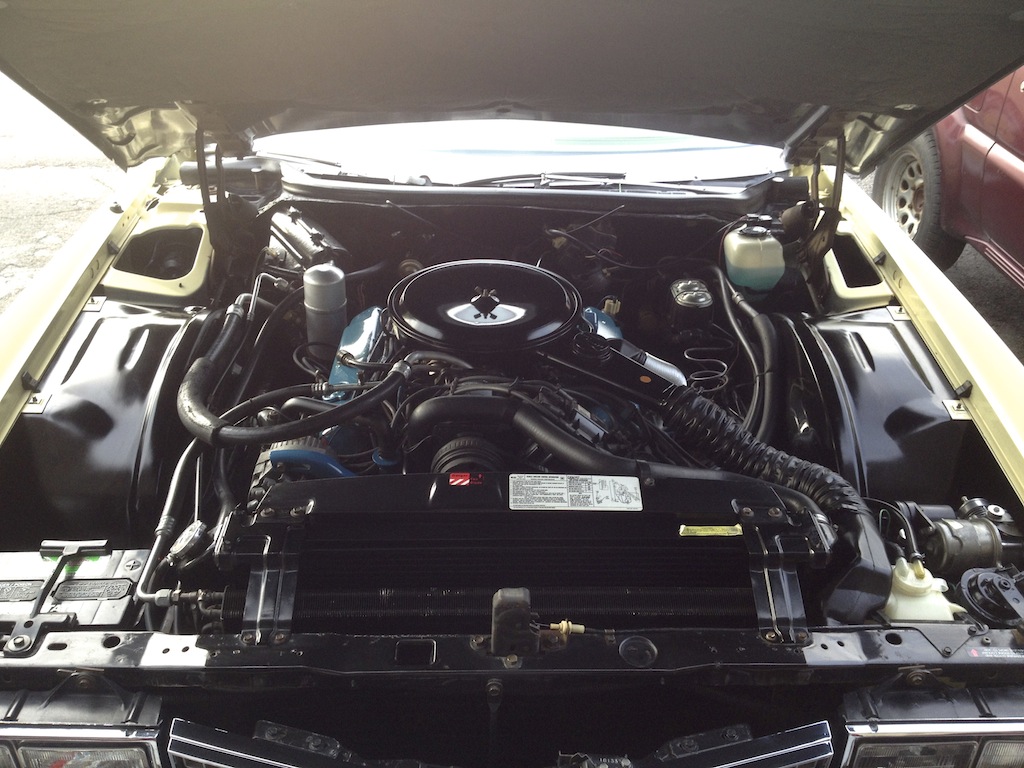
The cleaned engine bay
The car after polishing the paint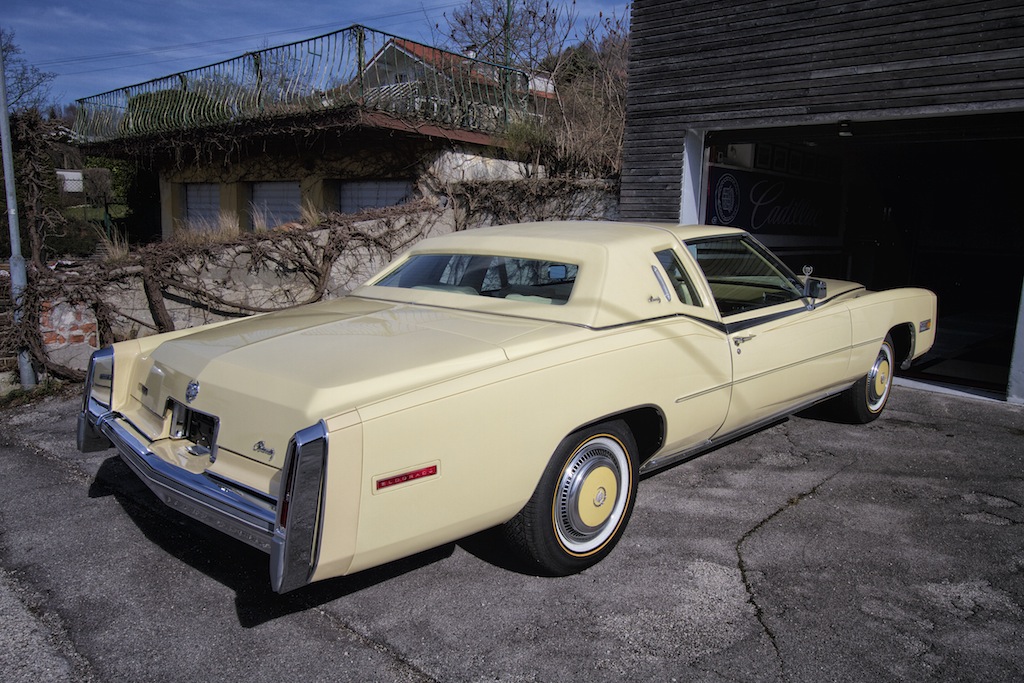
the polished paint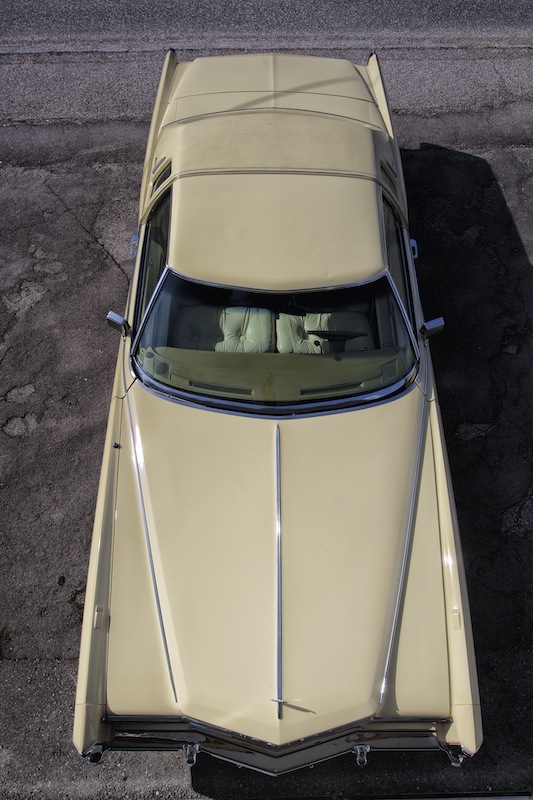
very shiny
Besides the carpet - the interior is already perfectly clean. The original floor mat is under the aftermarket mats.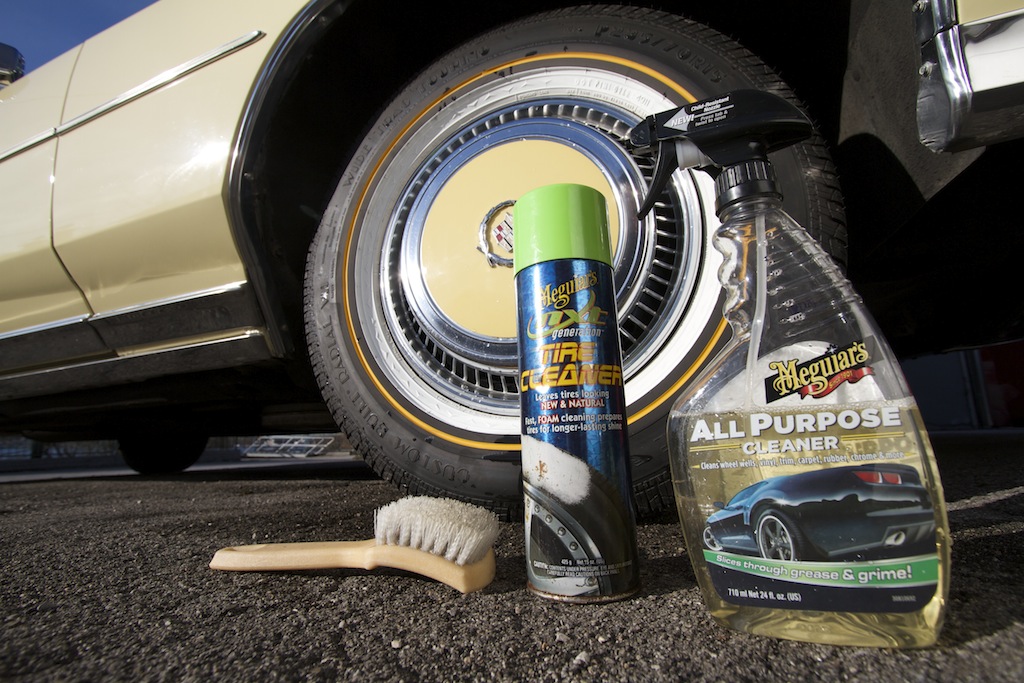
Cleaning the Vogue tires.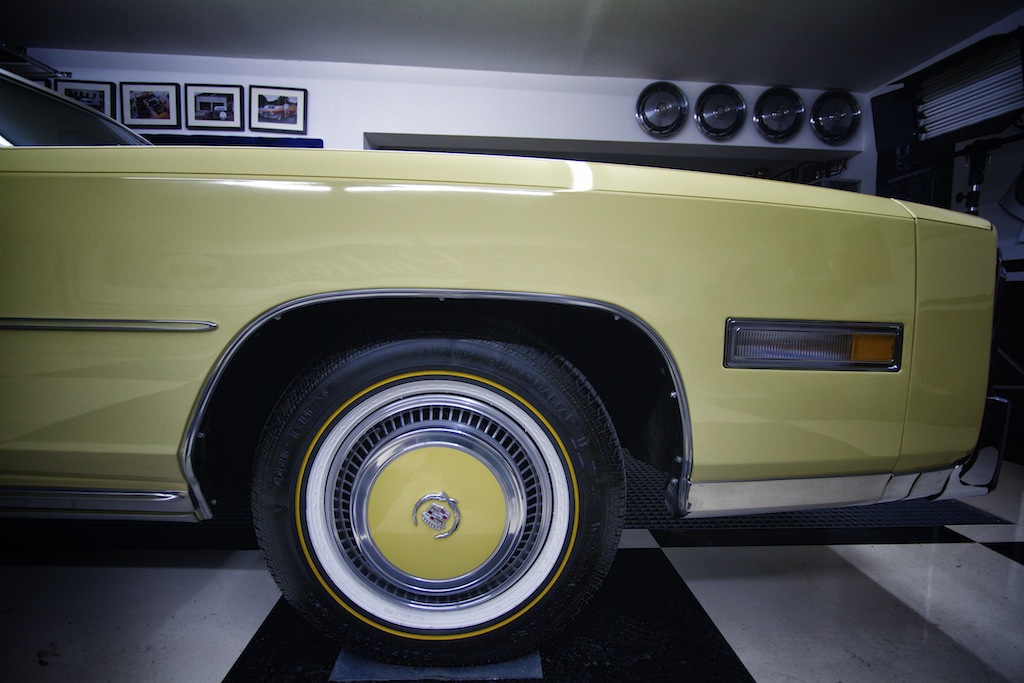
Clean paint and tires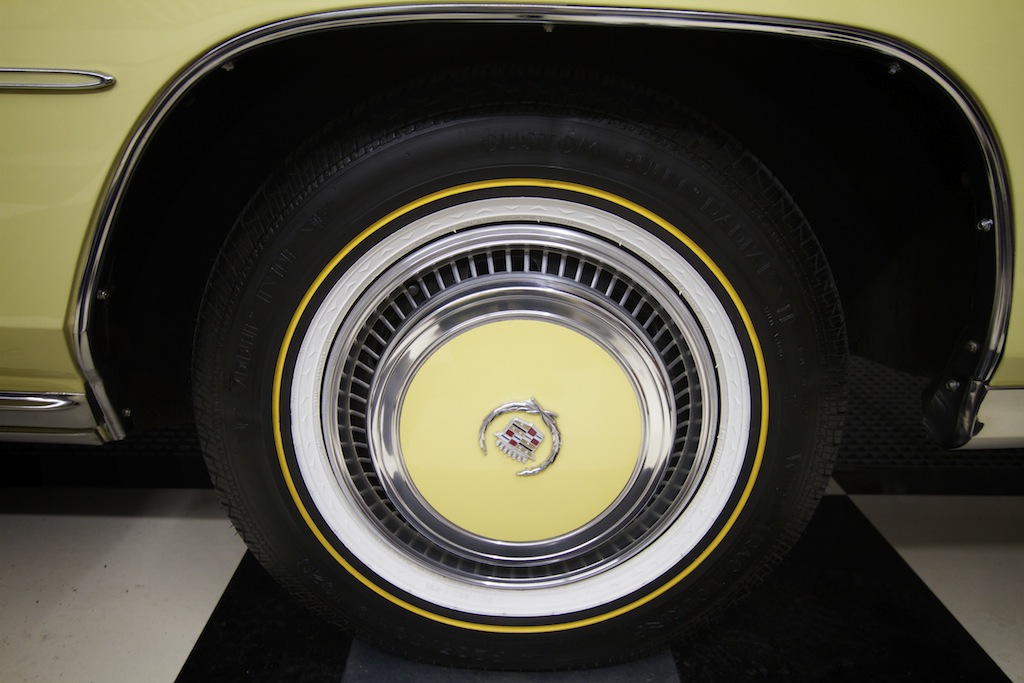
Clean tires and perfect hubcaps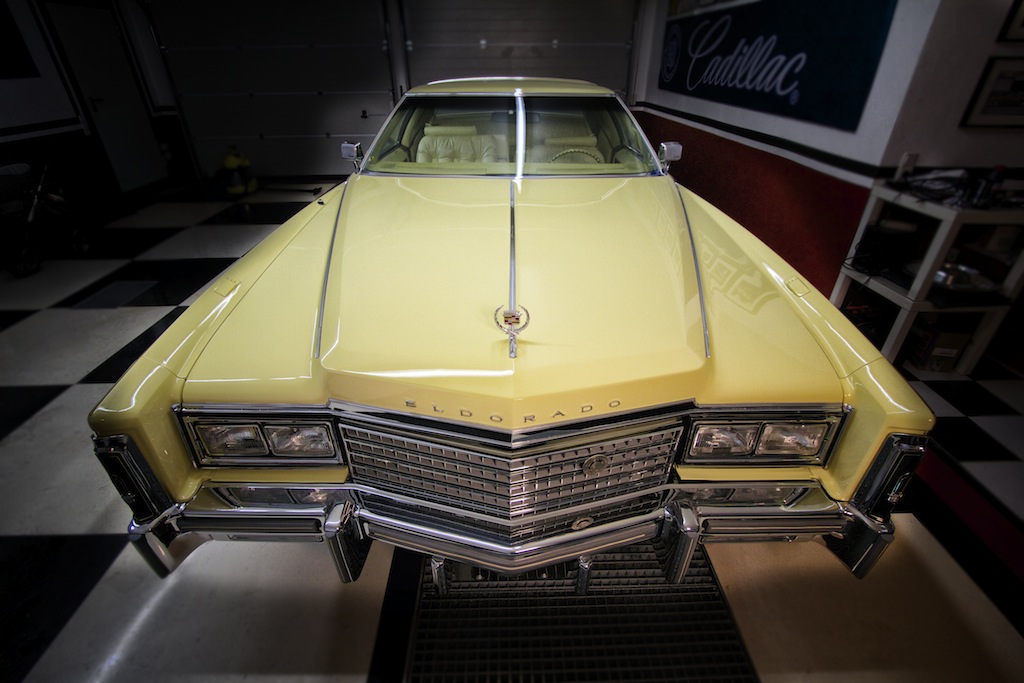
Before waxing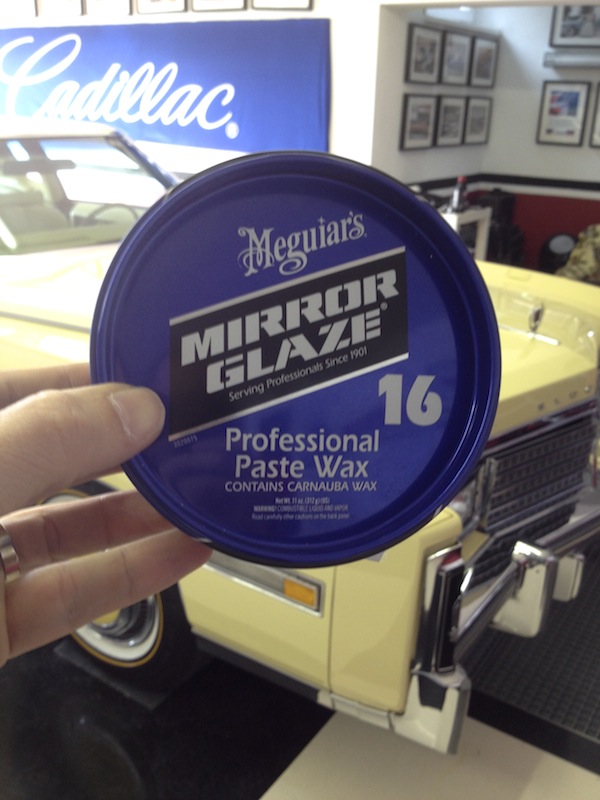
I really like this Meguiars wax. Its one of their cheapest but best waxes. A gentleman from Meguiars once told me that it is one of their oldest waxes, but contains a lot of carnauba wax, which makes it so good! Its also offering the best protection of their product range.
Here are some links to Meguiars products I like to use (link to german Amazon Shop):
1978 Eldorado - Choke problems.
The only way I could get it to normal idle speed was to manually release the fast idle cam on the carburetor. For some for me unknown reason it did not release itself - even when the car was fully warmed up...
As I´m not exactly an expert when it comes to carburetors, it took me a while to figure out what was going on and what the problem could be.
I got myself the Rochester M4MC / M4ME Carburetor Manual online and started reading. The trouble shooting section did not mention my problem and symptoms though, at least I learned a lot by reading through the manual...
The carburetor in my 1978 Eldorado is a Rochester M4ME # 17058531 (late Federal).
After a lot of reading I suspected that the electric choke thermostat must be the problem.
I removed it to test it like it is described in the manual.
Electric Choke Diagnosis and Checking
In order to have good engine performance during warm up and be able to pass Federal exhaust emission standards, the electric choke must function properly .
Possible reasons for the choke not operating properly are listed below.
1. No engine oil pressure.
2. Malfunctioning oil pressure switch.
3. No current to oil pressure switch due to:
a. Burned out 15 amp "radio -idle stop" fuse.
b. Broken wire to switch (18 brown/double white).
4. No current between choke coil and oil pressure switch due to:
a. Broken 18 light blue lead wire.
b. Wire terminal not locked on coil terminal.
c. Ground circuit incomplete between grounding plate of choke assembly and housing.
5. Failed choke coil assembly.
A voltmeter or continuity light may be used to check the circuits for continuity to the oil pressure switch and the choke coil.
If it is suspected that the choke coil assembly has failed, the following check may be made.
1. Remove coil from carburetor and cool to room temperature (above 60°F).
2. Attach a jumper wire between positive battery terminal and terminal of coil assembly. Attach a second jumper wire between negative battery terminal and grounding plate of choke coil assembly.
3. The tang of the coil should rotate 45°in 54 to 90 seconds.
4. If coil fails to rotate or exceeds the above timing specification, replace coil assembly.
5. If coil is within above timing specification then coil is good and problem is elsewhere.
6. Reinstall coil and set to proper index (Fig. 52).
If coil is cooled off sufficiently the choke valve will close when throttle is opened slightly. Attach a jumper wire between the positive battery terminal and choke coil terminal. Choke coil should warm up and the choke blade can be observed opening, indicating a good and properly grounded choke coil assembly. At room temperature the choke blade should be wide open in approximately 90 seconds.
If the choke does not operate properly after the coil has been proven satisfactory , check out the other possibilities that prevent current from getting to the choke coil.
After I performed the test procedure above it was clear that the choke coil was the problem.
I ordered a new one from www.rockauto.com and it arrived within 3 days. The manual mentions the original part #17059968 (the original one on my car showed #17059969 though - but every parts list I checked does not list this number...?).
I got a replacement from Airtex # 2C1045 and it seems to fit.
I installed it today and the choke works as it should again.
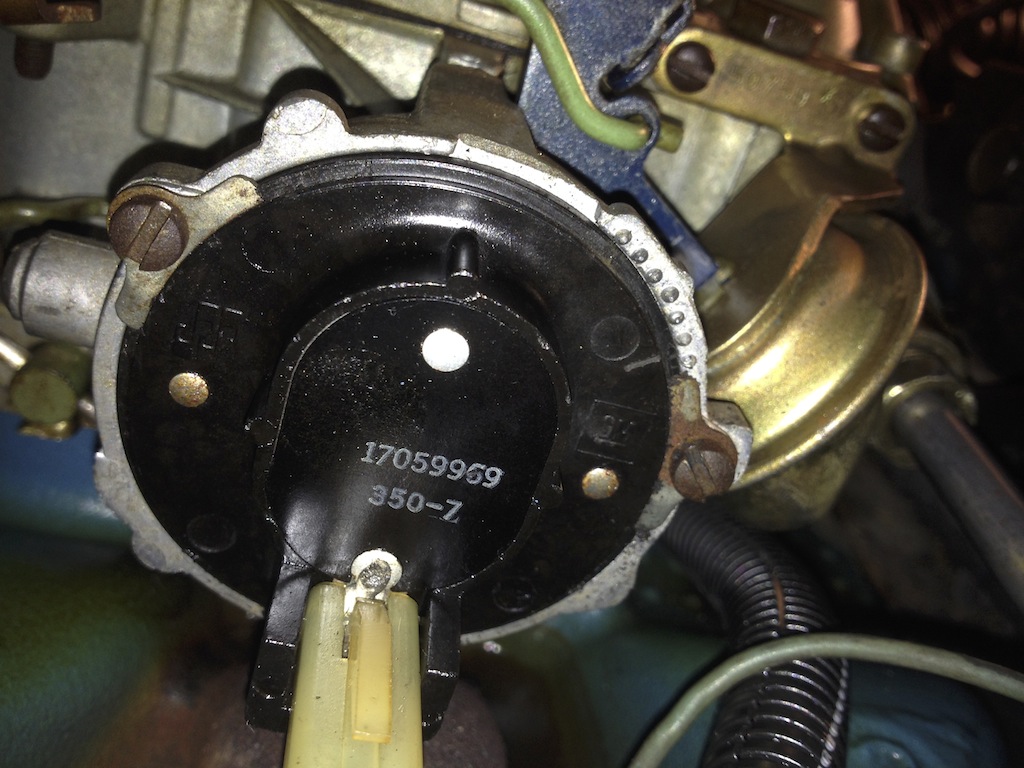
This was the original choke thermostat on the car . #17059969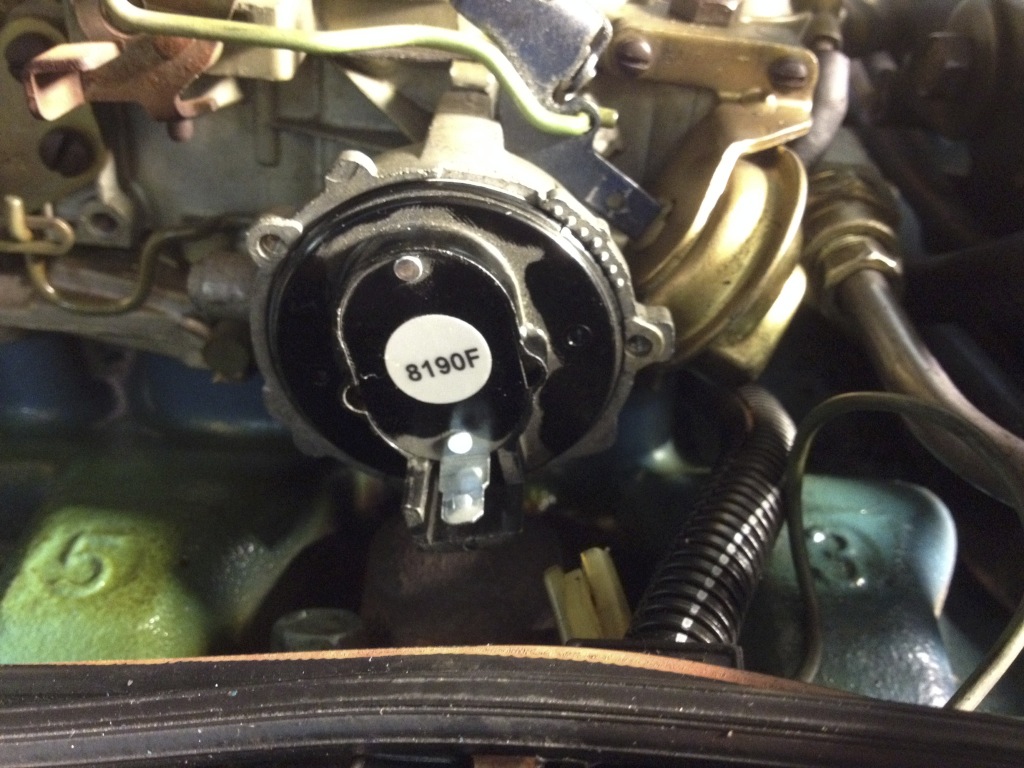
The Airtex replacement part in the car.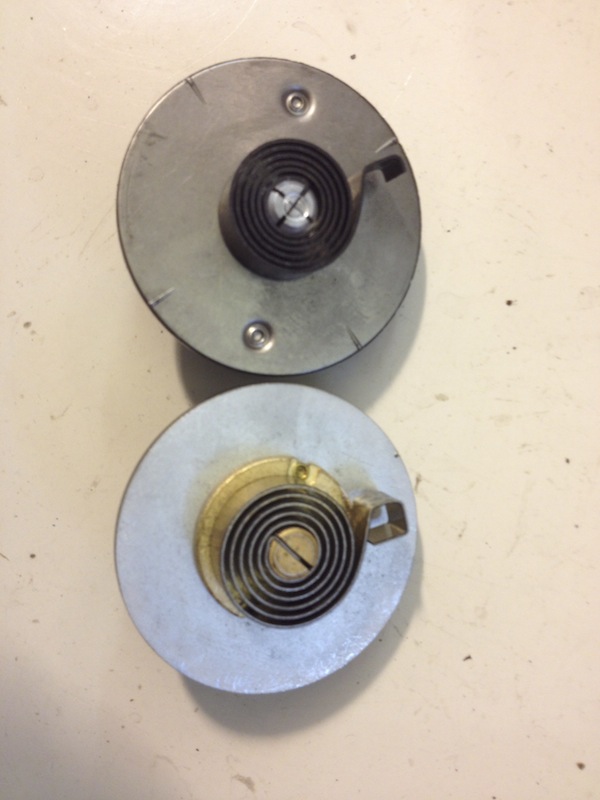
The original part and the new part - slightly different at the tang of the spring - but it works and fits perfectly...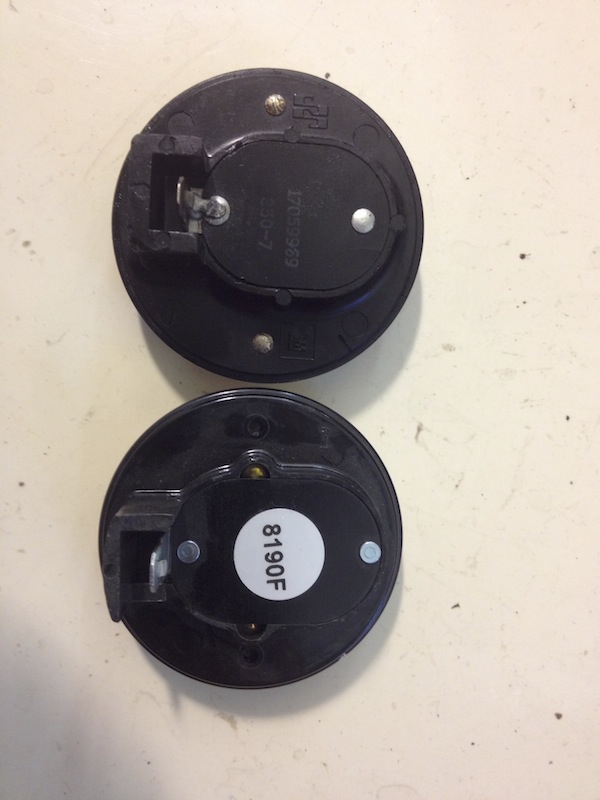
original and new part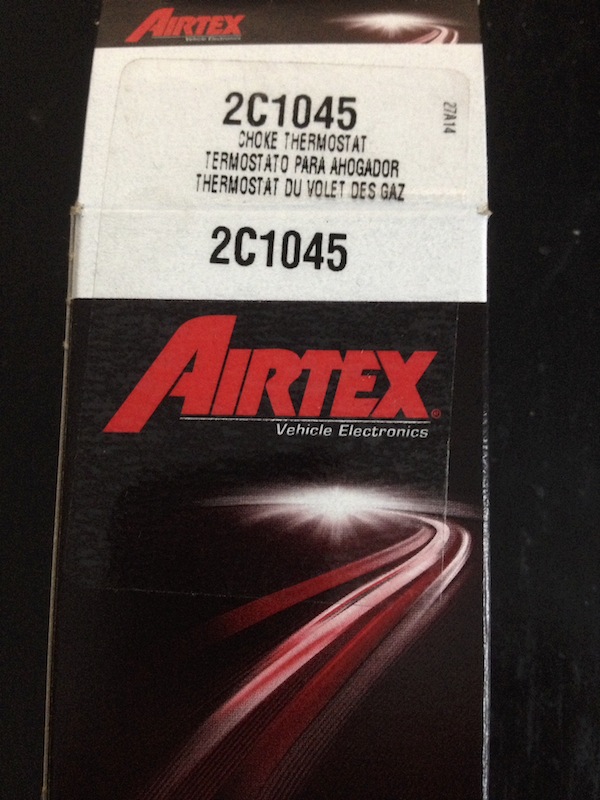
The Airtex replacement choke thermostat
The 1978 Eldorado Biarritz has arrived.
You can read more about how I found it here.
This morning I got a call from the truck driver that he got lost in my town with his big truck. So I had to find him and guide him near to my home to unload the truck.
The 78 rode on top so all of the other cars had to get unloaded first.
The Biarritz was quite dirty after its long journey and probably saw snow for the very first time.
I drove it home the short distance from the parking lot and it absolutely drives like a new car. I thought the car had stalled - but the engine simple is so quiet and is running so well that you can't hear or feel it from the inside...
Also the transmission is shifting unnoticeably.
My little boy helped me washing the car upon its arrival at my garage, which was not an easy task with temperatures below freezing. Ice was forming on the car immediately...
Eventually I managed to get the dirt off, and the best 1970s car I have ever seen appeared. It's an absolute stunning car. The interior is like new, the paint is super nice with almost no flaws, and the chrome is mirror like in its appearance. The undercarriage is super clean and rust free, as it was coated when new. The trunk is looking like it was never used. All the weatherstripping is like new as well. The leather is soft and clean with no tears or sign of any wear. The engine bay is all original and unbelievably clean as well.
The car was equipped with most available options that were available in 1978 except the sun/astroroof, fuel monitor system and the heavy duty cooling system.. Everything else you could order in 1978 is there and works as it should. Also brand-new Vogue tires were installed just recently. The previous owners took extremely good care of this Eldorado.
My friend Tayfun came to visit to help me detail it and bring it to my standard of cleanliness. It will take another few days until we will be finished with it.
As everybody knows build quality was not exactly the best in the 70s - but I have seen other 70s cars with lower mileage which were not as good as this one. Looks like it was built during a motivated shift ;-)
I will add a 1978 Biarritz section to my website soon with lots of info and pictures - stay tuned!
I have to thank my friend Alex who made this purchase possible. Thanks a lot my friend - you made a dream come true. Condition wise this car is the best in my humble collection.

The first time I saw the car - the driver had to back up for half a mile as he has hit a dead end street...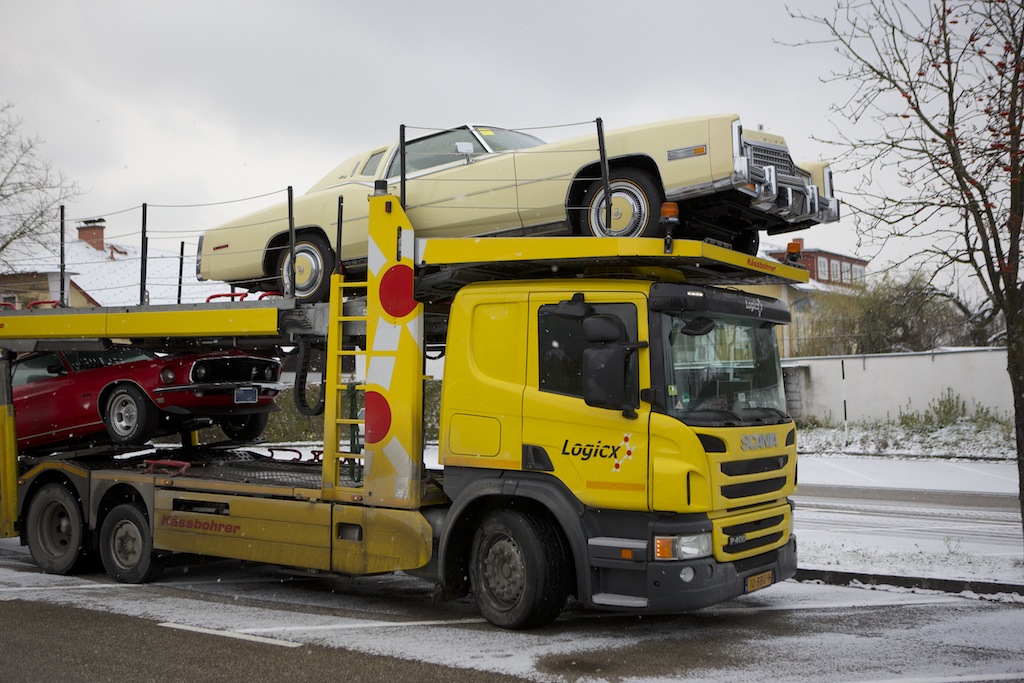
The Biarritz rode on top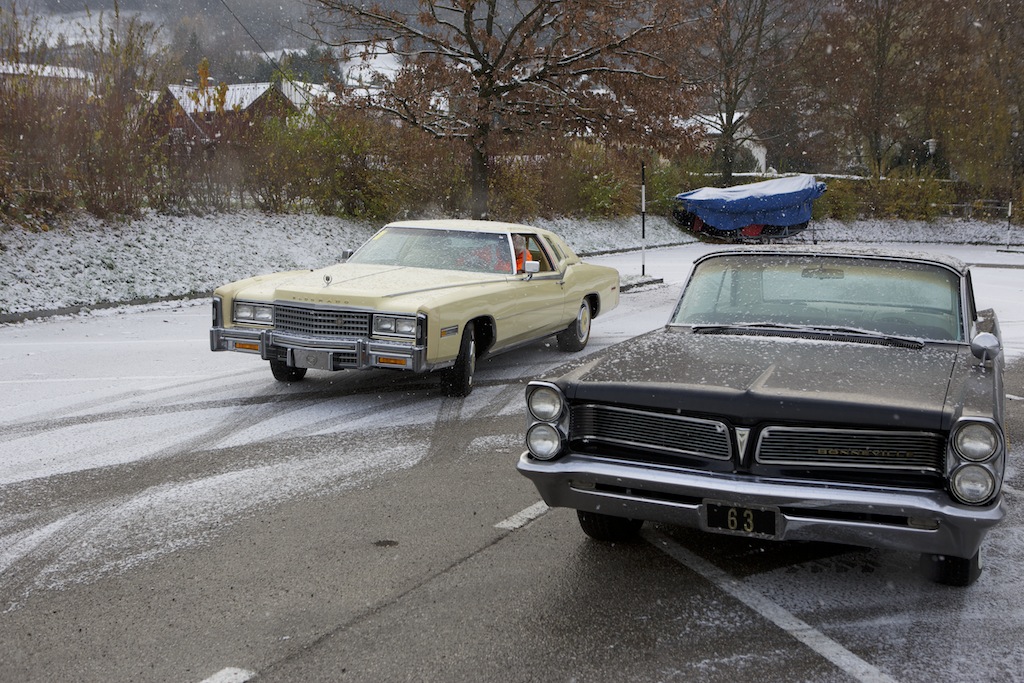
unloading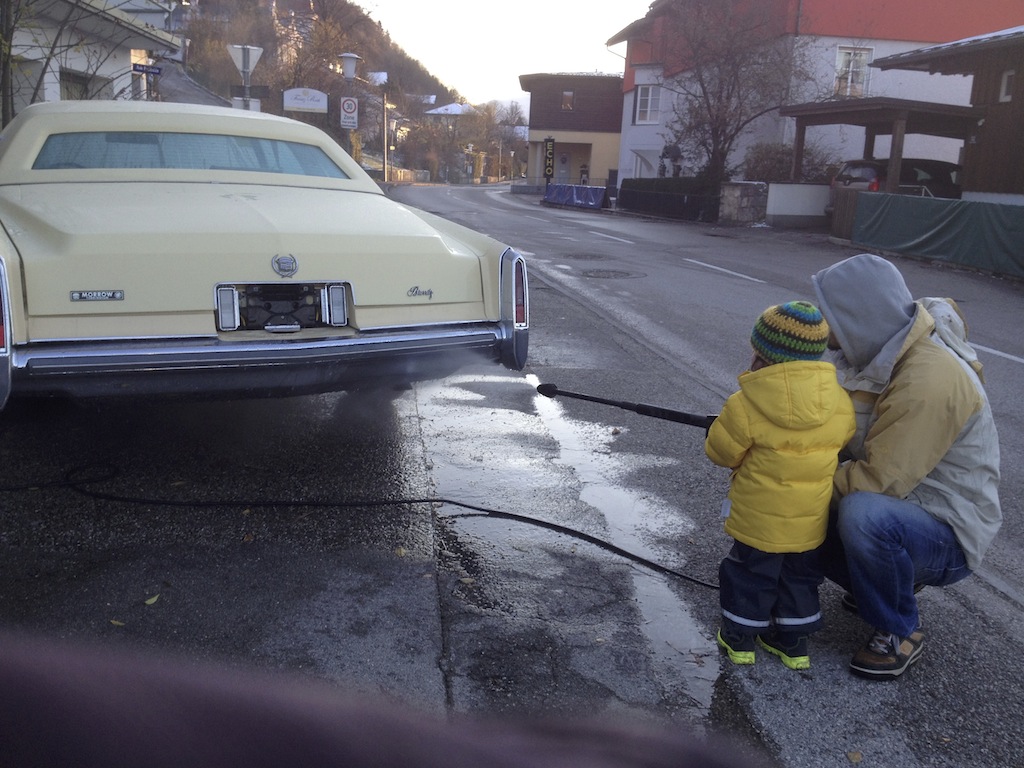
Little Elliot and me washing the car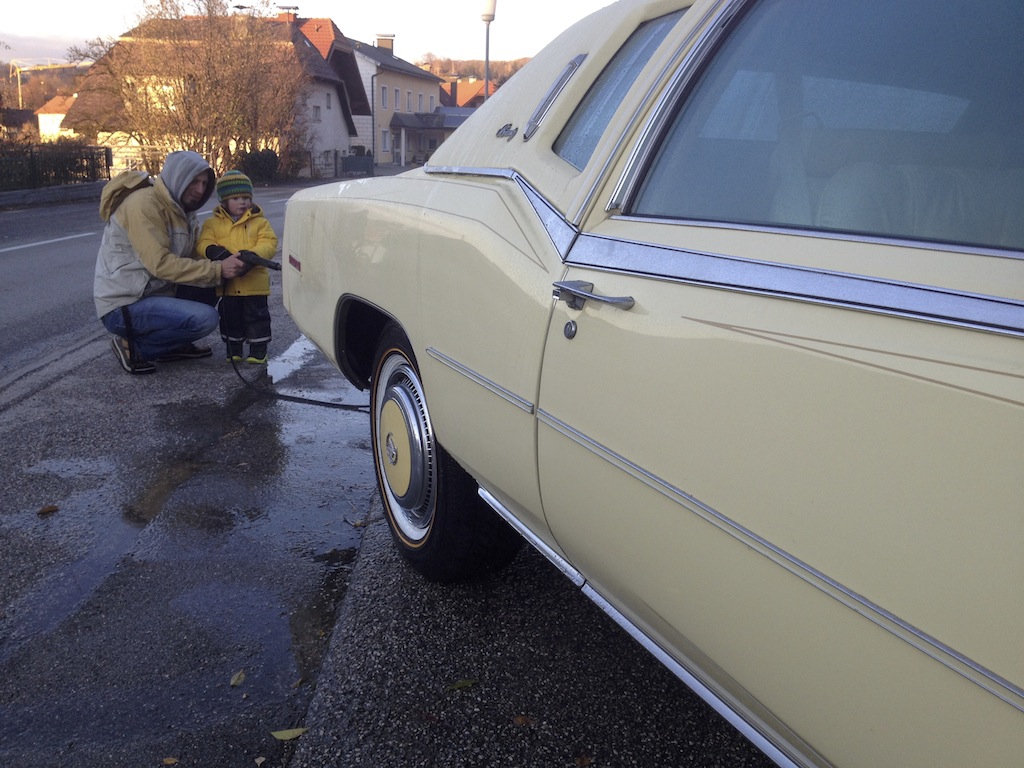
Cleaning in freezing temperatures with my little son Elliot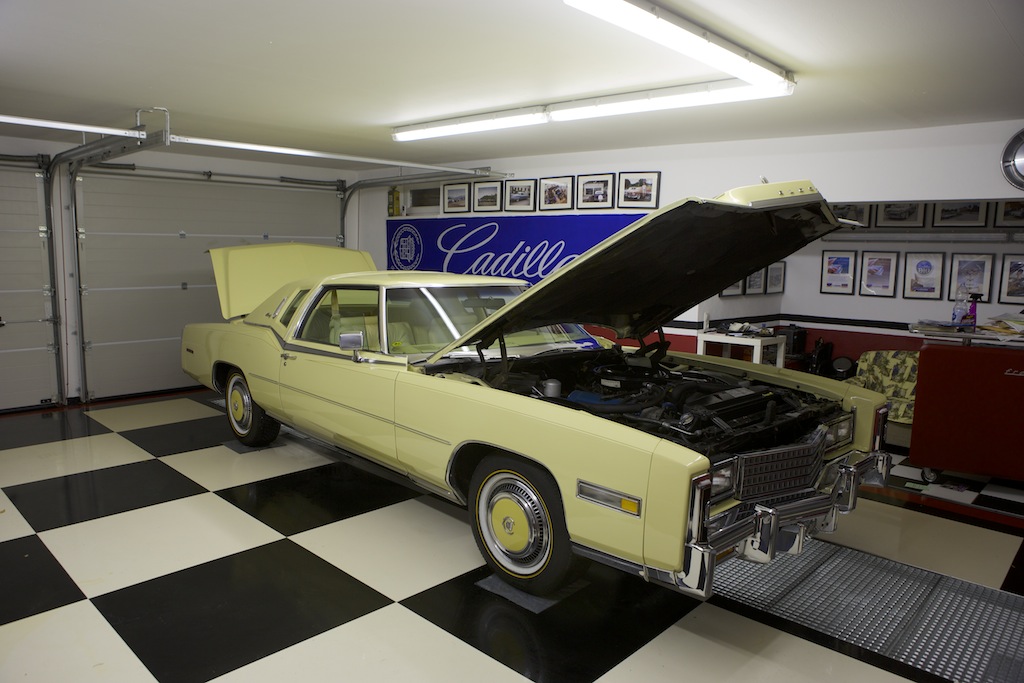
Drying in the garage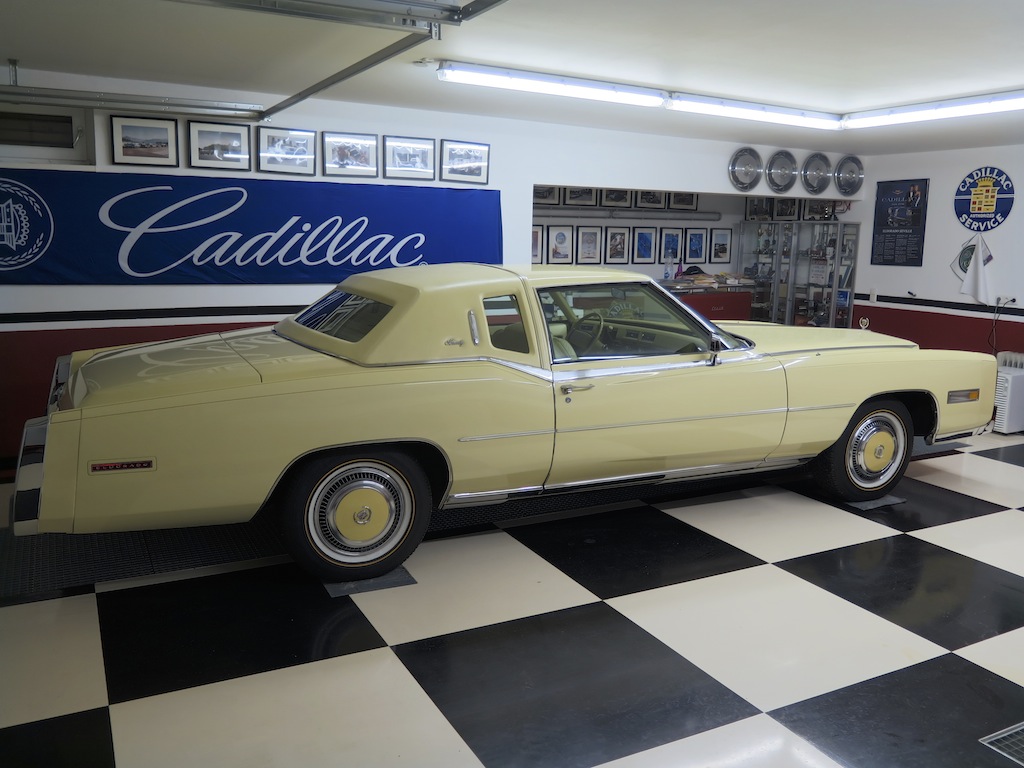
After drying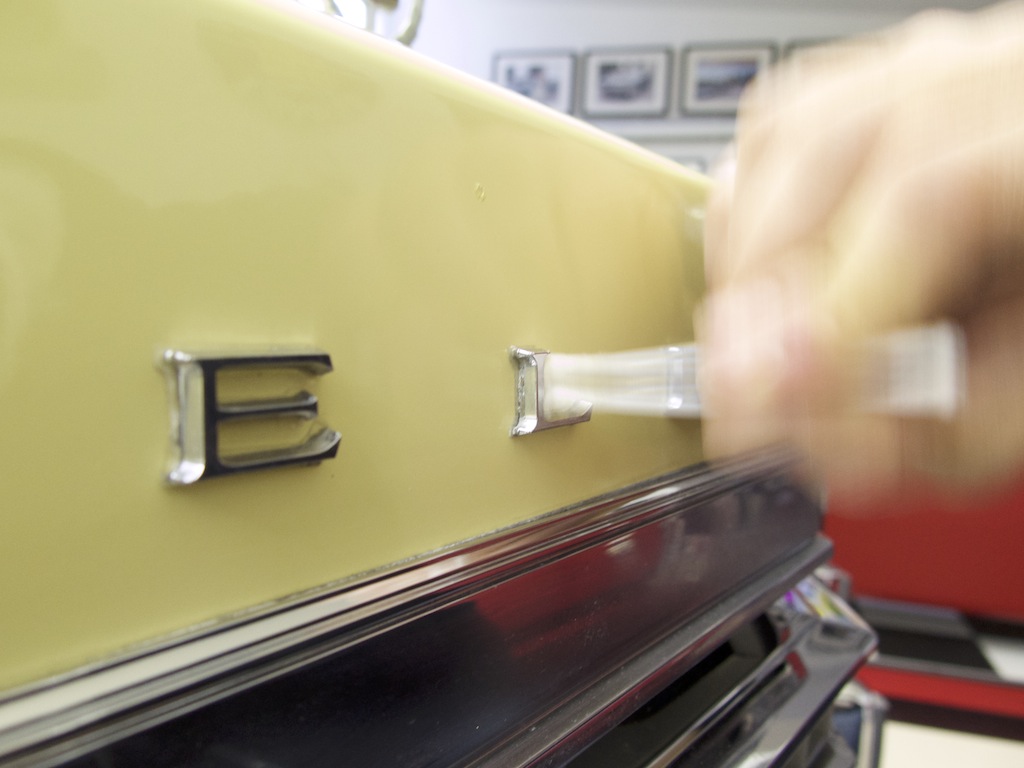
Detailing with q-tips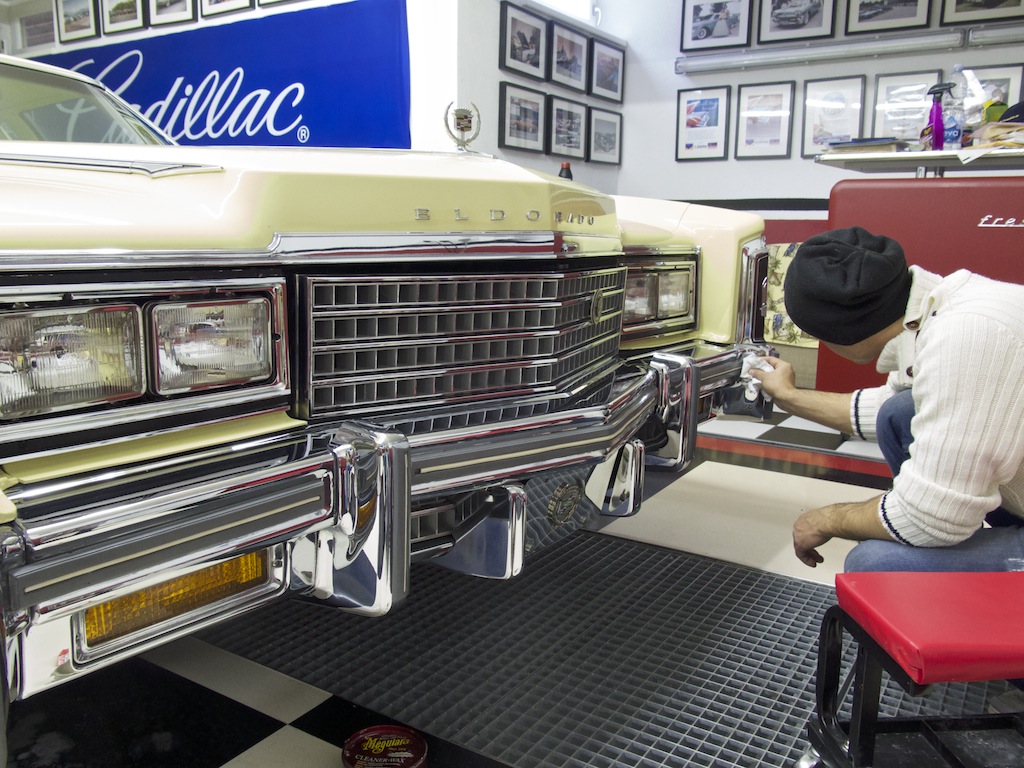
Look at that perfect chrome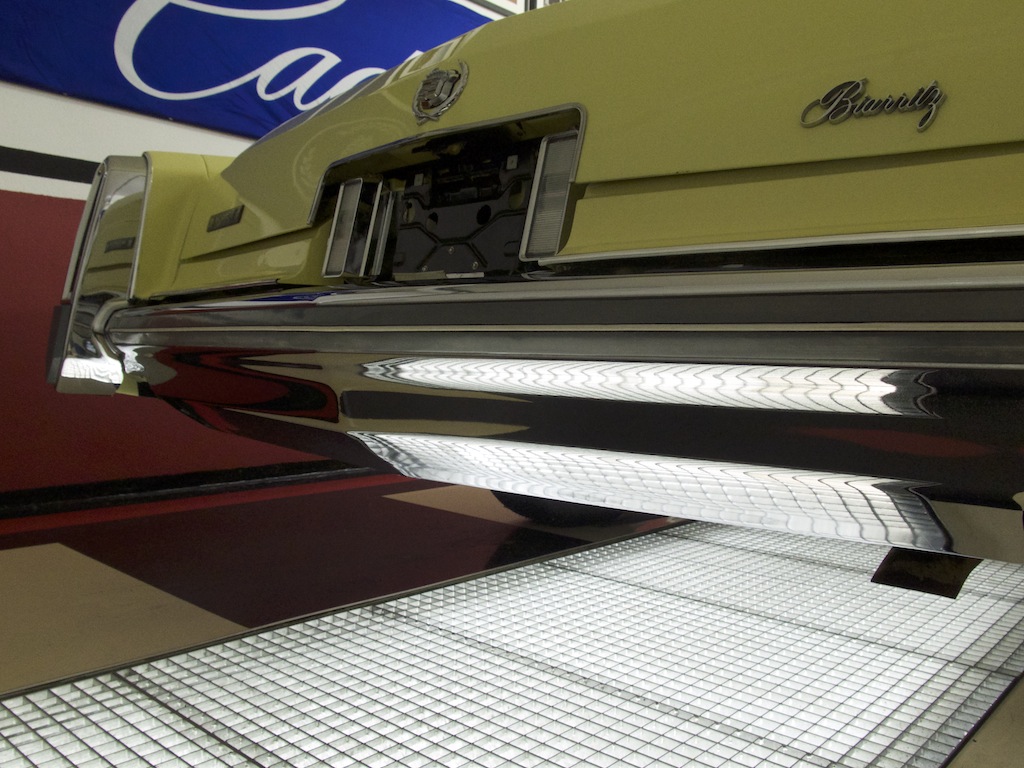
Mirror like chrome bumpers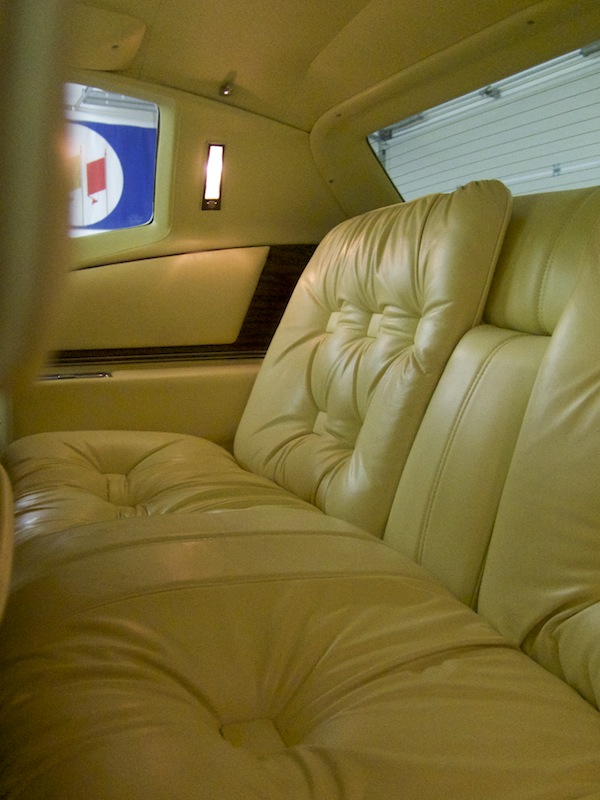
perfect leather - before cleaning
My friend Tayfun helped cleaning the leather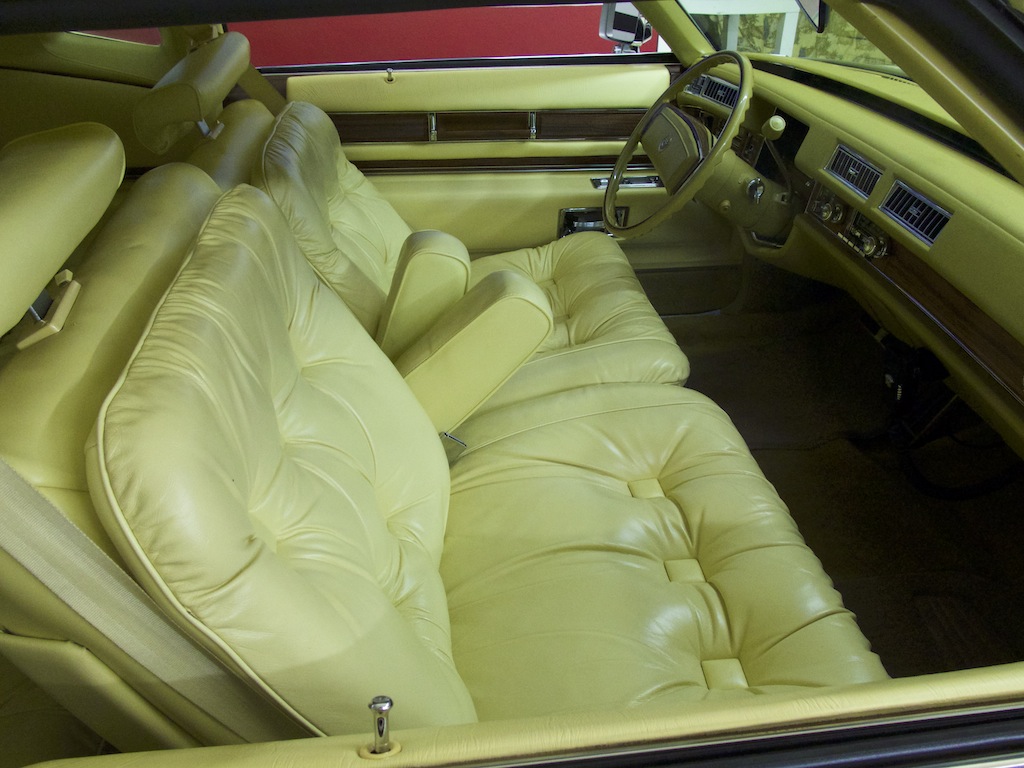
After cleaning and conditioning the front seats
only 11k miles
A spectacular low mileage 1978 Cadillac Eldorado Biarritz is on its way to my garage!
Lots of collectors seemed to have thought alike in 1978, when the new downsized 1979 Eldorado was introduced, as they began storing the last big ones aside, and started to tuck them away in their air conditioned garages. Because of this, some of the 1978 Biarritzes survived in spectacular condition, like the car that is coming to my garage hopefully soon all the way from Carrollton, TX.
It was another Cadillac fan who sent me a link to an ebay auction just for my viewing pleasure. When I looked closer, I recognized that this triple yellow, fully loaded, super low mileage Biarritz seemed to be in spectacular condition and that it was very well cared for.
The car did not sell on ebay and so I contacted the seller for more information and suggested a price to him. He was a pleasure to deal with and a real car guy and collector, who answered all my questions and sent me lots of great information. The seller seems to be a great guy.
After a couple of days a deal was made…Luckily a friend borrowed me the money for the purchase of the car.
The car was now picked up from the seller in Texas and is on its long way to Austria into my garage.
The first leg of its journey is to Houston - then it will be transported in an enclosed truck to Florida where it will be loaded into a container before it crosses the Atlantic to Rotterdam.
Cant wait to see this Colonial yellow car in real life - its probably the best 78 Biarritz I ever saw and know of.
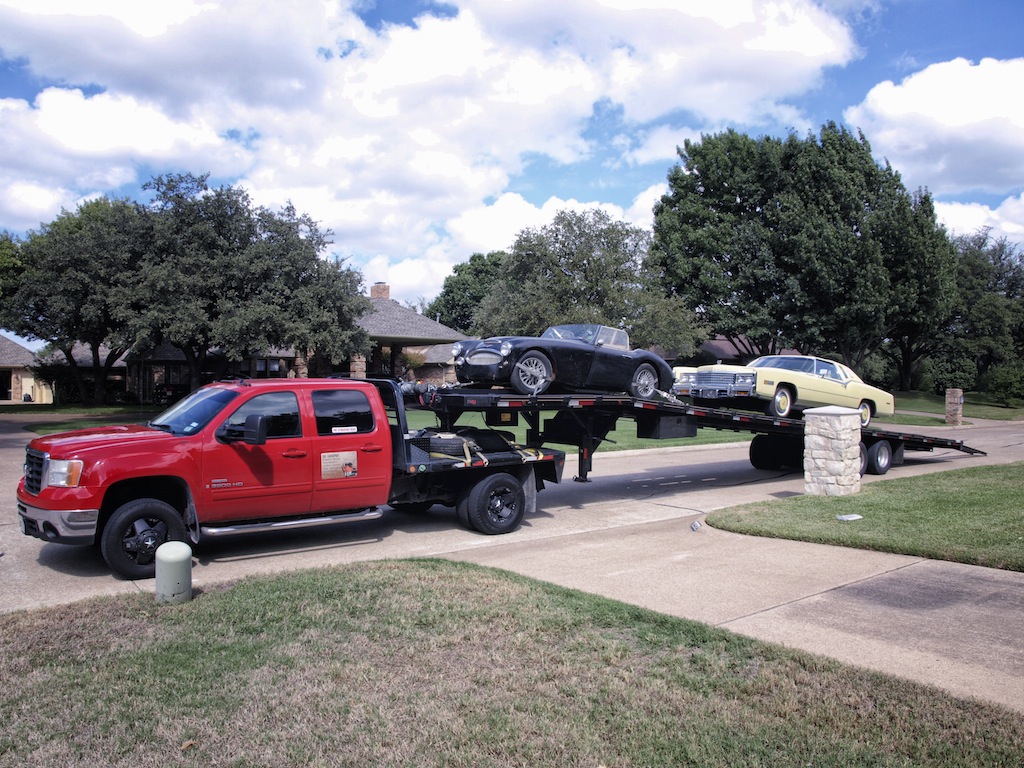
The car was loaded onto the truck in Carrollton, TX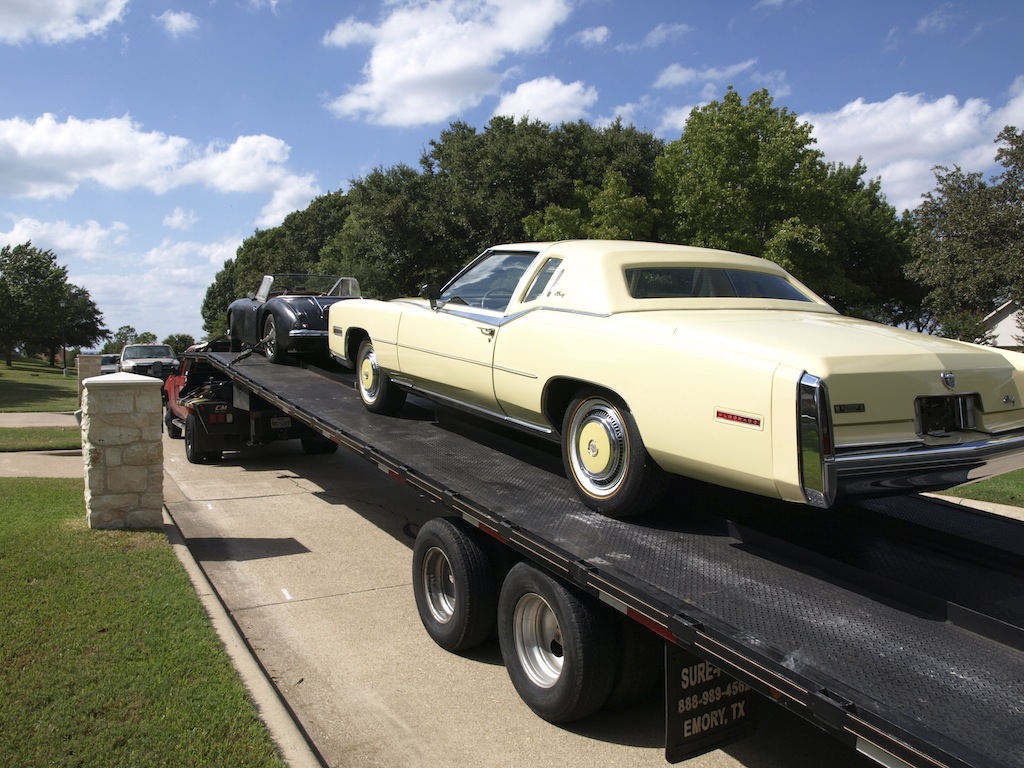
Heading towards Austria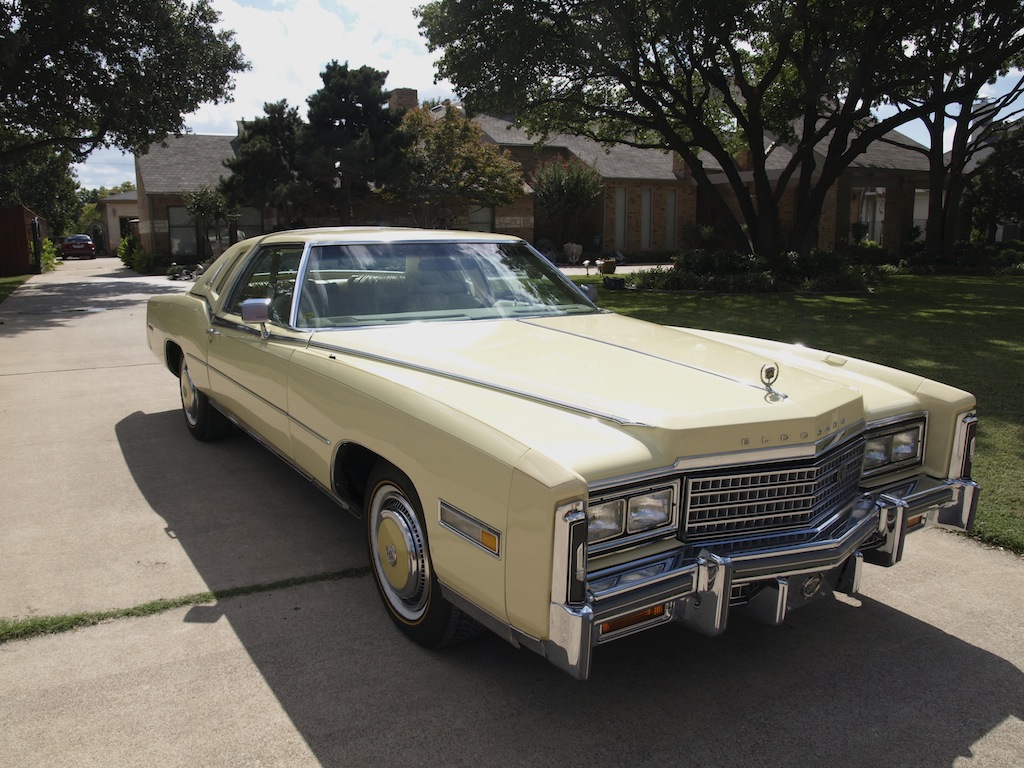
Short before pick up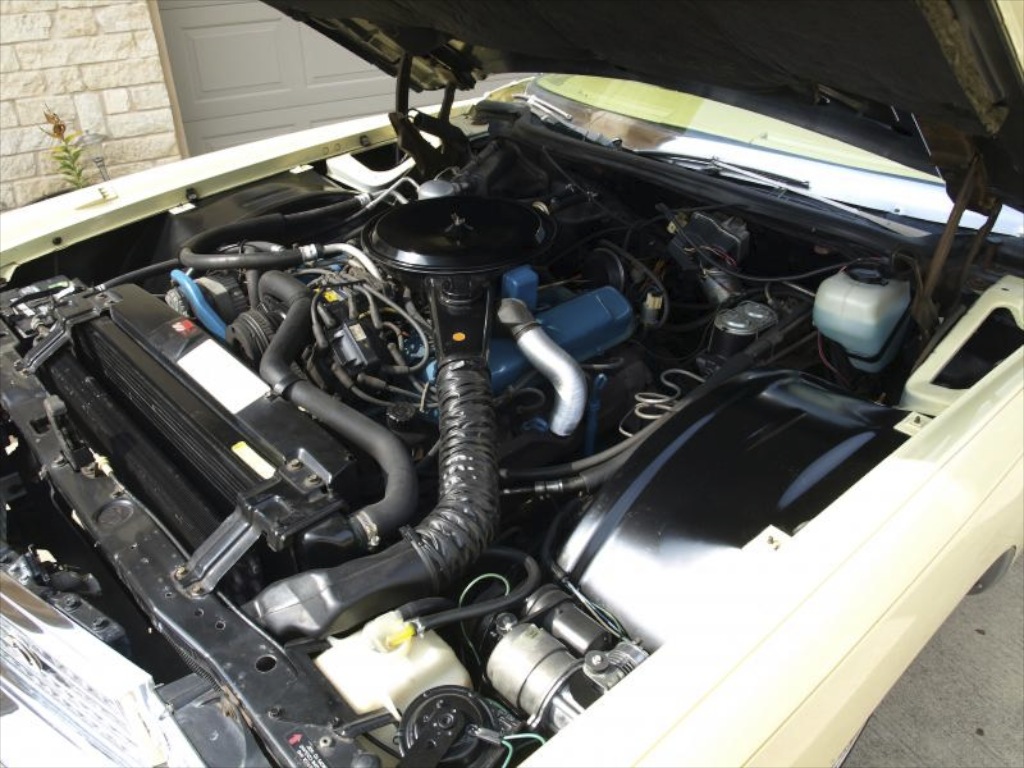
Look at that clean untouched engine bay!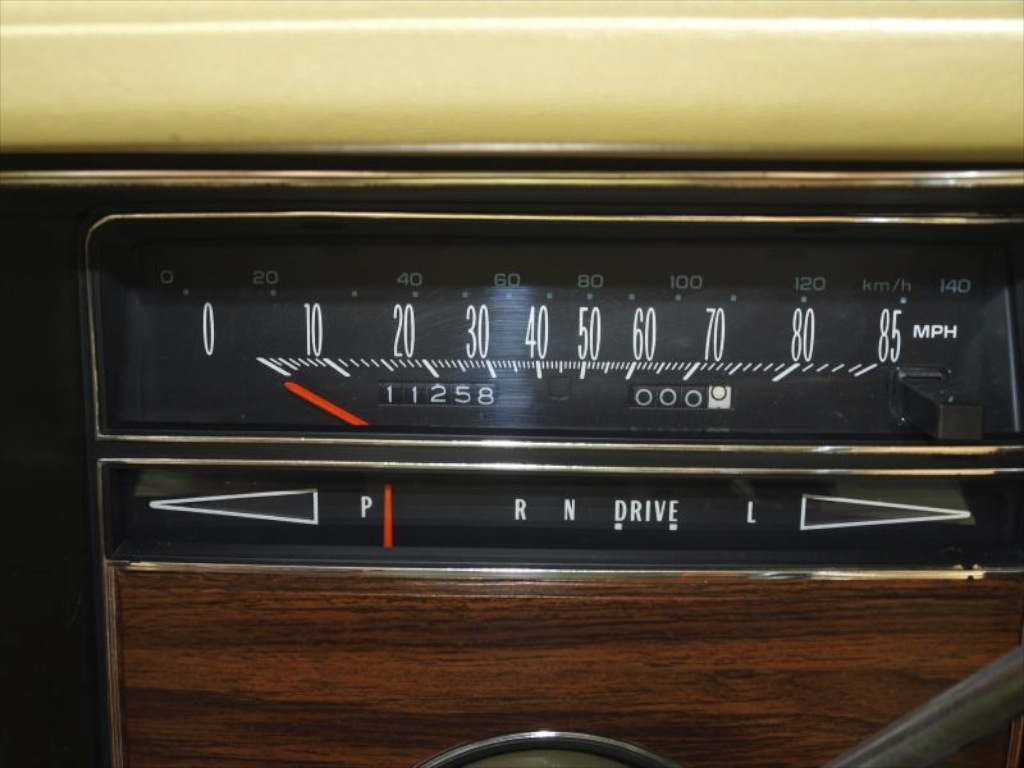
Low mileage!
What a beauty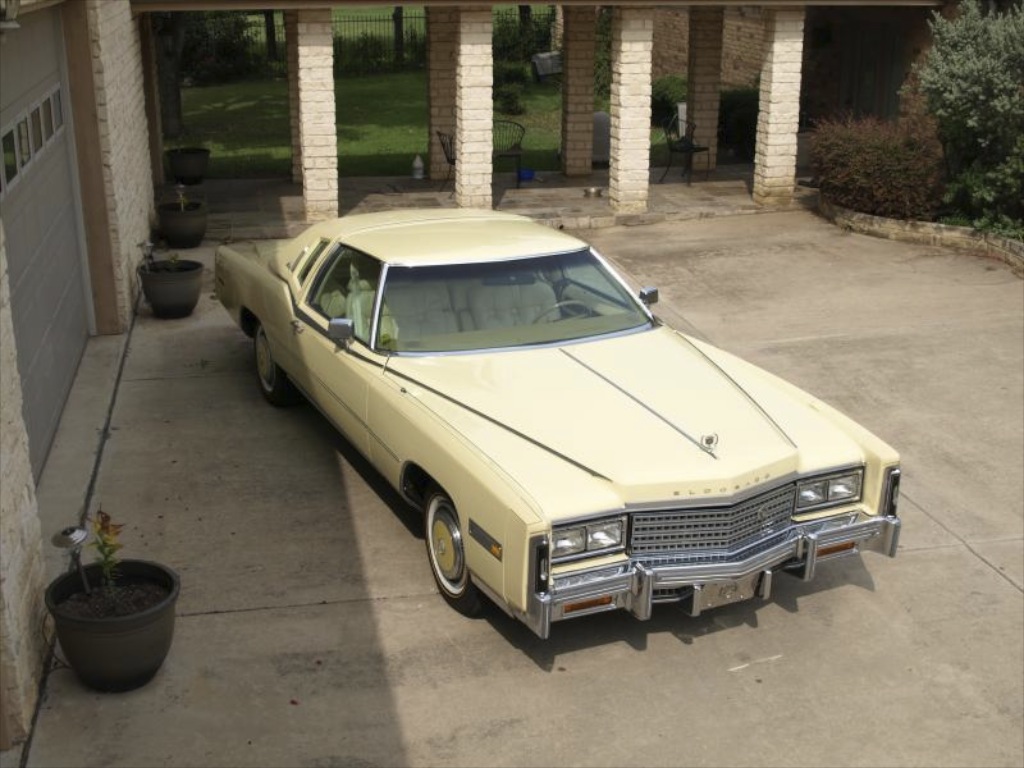
Looks like nobody ever sat in these pillowy seats...
1966 Cadillac Coupe deVille (15)
1967 Cadillac DeVille (54)
1967 Cadillac Eldorado (71)
1971 Lincoln Continental Mark III (23)
1974 Cadillac Coupe deVille (45)
1978 Cadillac Eldorado Biarritz (24)
1996 Buick Roadmaster (19)
Car Shows (53)
Cruising (4)
For Sale (3)
Garage Stuff (32)
Pacer (1)
Restoration (137)
Various (55)
Video (16)
Website News (30)
- 6 way power seat
- 8-track
- 10 Ohm
- 429
- 1932
- 1957
- 1958
- 1958 Cadillac Eldorado Seville
- 1958 Cadillac Repair Tip
- 1959 Cadillac Eldorado Seville
- 1964
- 1965
- 1966
- 1966 Cadillac Coupe deVille
- 1966 Cadillac Repair Tips
- 1967
- 1967 Cadillac DeVille
- 1967 Cadillac Eldorado Repair Tip
- 1967 Cadillac Repair Tip
- 1967 Eldorado
- 1968
- 1970 Cadillac Eldorado
- 1971
- 1971 Lincoln Continental Mark III
- 1974
- 1974 Cadillac Coupe DeVille
- 1974 Cadillac Repair Tip
- 1976
- 1977
- 1978
- 1978 Cadillac Eldorado Biarritz
- 1978 Cadillac Repair Tip
- 1980 Cadillac Eldorado Biarritz
- 1996
- 2012
- 2014
- 2017
- 2018
- 2019
- 2022
- 2023
- 3063206
- 7027235
- 7800483
- 7805675
- 7805676
- 12355706
- 17058531
- 17059968
- 17059969
- 22010515
- 22010661
- A.I.R
- A6
- AC
- AC Compressor
- AC Electrical Diagram
- ACC
- Accelerator Pump
- Accelorator pump
- Actuators
- Adriatic Blue Metallic
- Ads
- Aftermovie
- Air Pump
- Aircondition
- AIRPUMP
- ALC
- Alternator
- AM
- AM-Transmitter
- Antenna
- Anti Rattle Clips
- Antique Gold
- Arizona Vintage Parts
- Arrival
- Article
- ASC
- Ash Tray removal
- ATC
- Atlantis Blue Firemist
- Austria
- Austro Classic
- Autolite SP-459
- Automatic Seat Back Release
- Award
- Banner
- Barn Find
- Battery
- Battery Tray
- Beach Race
- Bearing
- Bendix
- Biarritz
- Bigfoot
- Bill Hirsch Engine Enamel
- Bleeder Screws
- Blower
- Bolts
- Borg
- Brake Booster
- Brake Fluid
- Brake Gray
- Brakes
- Broken Bolt
- Brougham
- Bucket seats
- Buick
- Bumper End
- Bushings
- Cadillac
- Cadillac BIG Meet
- Cadillac BIG Meet
- Cadillac birthday cake
- Cadillac Blue
- Cadillac Color Selections Dealer Book
- Cadillac Coupe deVille
- Cadillac Dealer
- Cadillac Meeting
- Cadillac Mini Meeting
- Camaro RS
- Caorle
- Car Show
- Carburetor
- Card
- Carpet
- Carter AFB
- Cavalry Twill Vinyl
- CB
- CBM
- CCCD
- Choke
- Christmas
- Citizens Band
- Classic Cadillac Club Deutschland
- Clay Towel
- Cleaning
- Clock
- Clockwork
- Clutch
- Clutch Coil
- Collector
- Colonial Yellow
- Color Coded Springs
- Commercial
- Compound
- Compressor
- Condenser
- Continental Mark III
- Control Head
- Conversion
- Convertible top
- Coolant
- Corona
- Cowl
- Cruise Control
- Cruising
- CV Boots
- CV JOINTS
- D6230
- Dash Trim
- Decal Removal
- Decals
- Decoration
- Dehumidifier
- Delco Moraine
- Der Standard
- detailing
- Deville
- Diagnosis Chart
- Diagram
- Dial
- Digital Rotary Drum Clock
- Diner
- Disc Brakes
- Distributor
- Diverter Valve
- Door Jamb Switch
- Door Rubber Conduit
- Dornbirn
- Dot3
- Drive Shaft
- Driving tour
- Drum brakes
- Dry Ice Blasting
- Dry Ice Cleaning
- DVD
- Eastwood
- Eldorado
- Electric Choke Thermostat
- Electrical schematic
- Elvis
- Engine Bay
- Ep
- Epoxy floor
- Europe
- Evaporator
- Exide
- Factory Markings
- Fender Skirt
- Floor
- Flushing
- Foam
- For Sale
- Front AXLE
- Front brakes
- Front bumper filler
- Front Floor
- Front wheel bearing
- Fuel Filter
- Fuel Pump
- Fuel Sending Unit
- Fusible Link
- Garage
- Garage Cabinets
- Gasket
- GE
- Gear indicator
- General Time
- Glove box light
- Grand European
- H4
- Haus of Hot Rod
- Headlight Actuator
- Headlight doors
- Headlights
- Heater Core
- Heater Hose
- Heater Valve
- High Idle
- Holley
- Honest John
- Hood
- Hood Emblem
- Hood Ornament
- Hose Clamp
- Hot Choke
- Hot Water Valve
- HotRod
- How to
- Hödlmayr
- Ignition Diagram
- Illuminated Entry
- John D‘Agostino
- John Foust
- Klassikwelt Bodensee
- Kremsmünster
- LaSalle
- Leather seats
- Light Switch
- Limited
- Lincoln
- Lincoln Mark III Repair Tip
- Low Mileage
- Magazine
- Marilyn Monroe
- Mark III
- Master Cylinder
- Master Switch
- Master Vacuum Switch
- Media Blasting
- Meeting
- Meguiras
- MK II
- Mobile
- Model
- Moldings
- Mom
- Mopar Nationals
- Mostkost Kustom
- Movie
- Neon
- NOS
- Oberösterreicher des Tages
- oilchange
- ORF
- Overspray
- Pacer
- Paint
- Paint correction
- Paintjob
- Part Number
- Parts
- Patch Panel
- Perfect Circle
- Permabag
- Persian Lime
- Photo shooting
- Photoshooting
- Pictures
- PinUp
- POA Valve
- Power Antenna
- Power Servo
- Power Vent Windows
- Power Window
- Printed Circuit Board
- Programmer
- Pulley
- Quadrajet
- Quarter Panel
- Quartz Conversion
- R134
- Radiator
- Radio
- Rattle
- Rear brakes
- Rebuild
- Recalibrate
- RediRad
- Reed Switch
- Relais
- Relaunch
- Removing Overspray
- Repaint
- Repair
- Restoration
- RIP
- Roadhouse
- Roadmaster
- Rochester
- Rocker Arm Cover
- Rocker Panel Extension Clips
- Rostio
- Rotary Valve
- Rotterdam
- Rupes
- Rust removal
- Rust removal gel
- Sabre Wheels
- Sand Blasting
- Sandblasting
- Screed
- Season Greetings
- Seasons Greetings
- Seat Back Locks
- Seat Padding
- Seat Transmission
- See through ornament
- Self adjusters
- Sepp's Garage
- Seville
- Sheetmetal
- Shocks
- shop manual
- short
- Sign
- Solenoid
- Spark Plug Wire Routing
- Speakers
- Special Award
- Speed Bleeder Screws
- Splash Guard
- Starter Diagram
- Starter Motor
- Steering Column
- Storage
- suction throttling valve
- sunroof
- suspension
- Swirl Mark removal
- Switzerland
- T3
- Taillight Cover
- Texan´s Choice Award
- Thermostat
- Tilt and Telescope
- Time capsule
- Tomsclub
- Torque Specifications
- Tower Hose Clamp
- Towtruck
- Transducer
- Transmission
- transmission control selector
- transmission control selector indicator light
- transmission shift indicator
- Treadle Vac
- Treffen
- Tri-Band
- Troubleshooting
- Trunk Cardboard Kit
- Trunk lining
- Trunk to bumper cover
- Turn Signal Switch
- TV
- Typisierung
- Ultimate Garage
- Underbody
- Undercarriage
- Undercoating
- Undercoating Removal
- Vacuum Booster
- Vacuum diagram
- Vacuum hoses
- Vacuum Master Switch
- Vacuum Schematic
- Vacuum Valve
- Valve Cover
- Various
- Vent Window Switch
- Vibration
- Vibrator
- Vicodec roof
- Video
- Vinegar
- Vinyl Roof
- Visitor
- Washer Fluid Float
- Washer Fluid Low Level Indicator
- Water Pump
- Wax
- Weatherstripping
- Website News
- Westclox
- Wheel Bearings
- Wheel Housing
- Wiesbaden
- Windlace
- Winter
- Wiring
- Wiring Diagram
- Wonderbar
- Workbench
- Zurzach