 GERALD´S CADILLACS - NEWS
CADILLAC BIG MEET 2023 - THE MOVIE
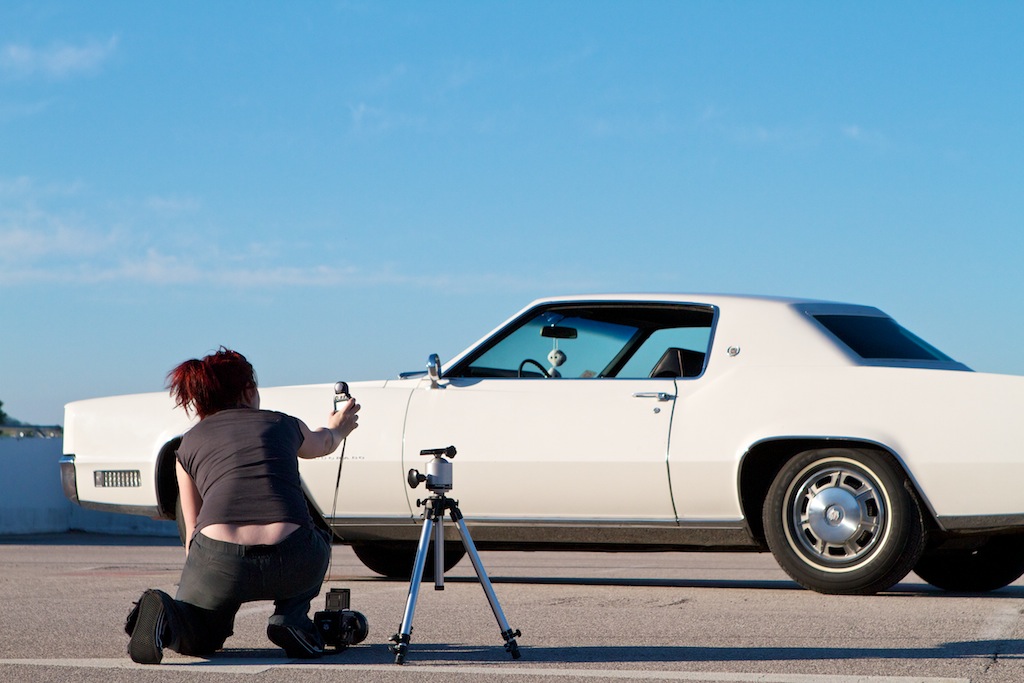
One of my many tasks is to do the website, photography, the videography and promotion for this event. We are a great team of friends and enthusiast and enjoy organising this event.
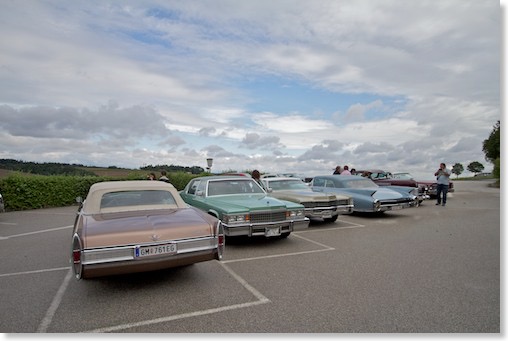
This year we had a very hot summer weekend and 101 Cadillacs attending the event.
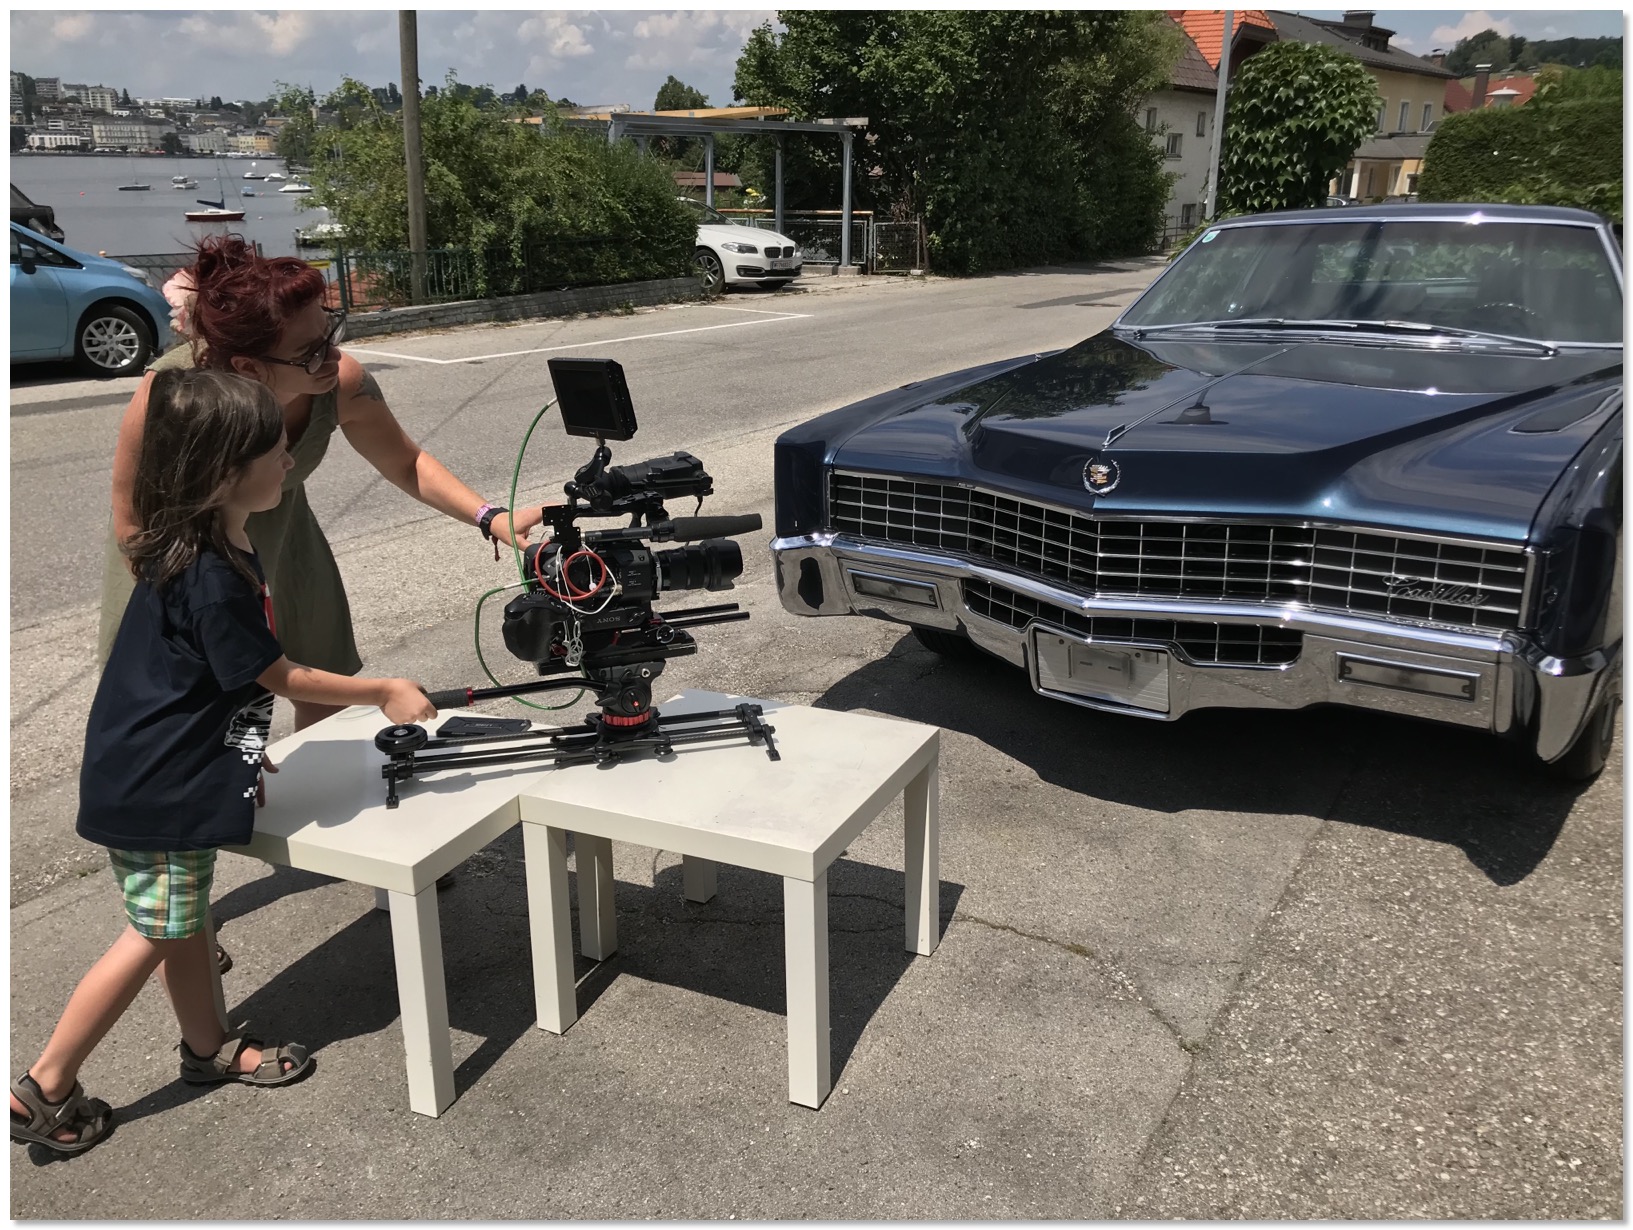
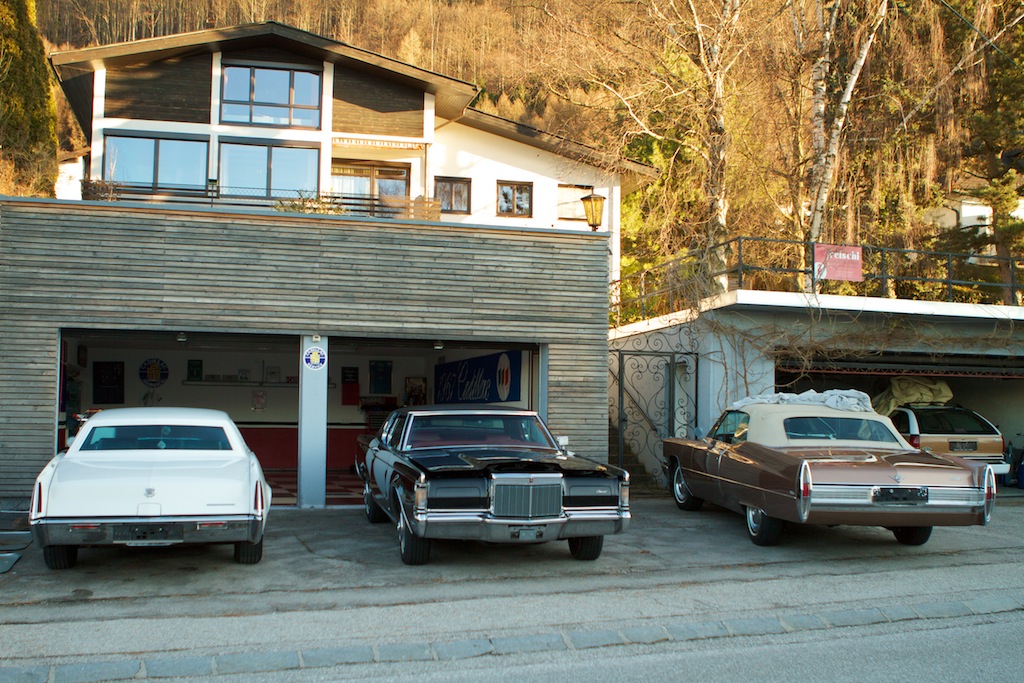
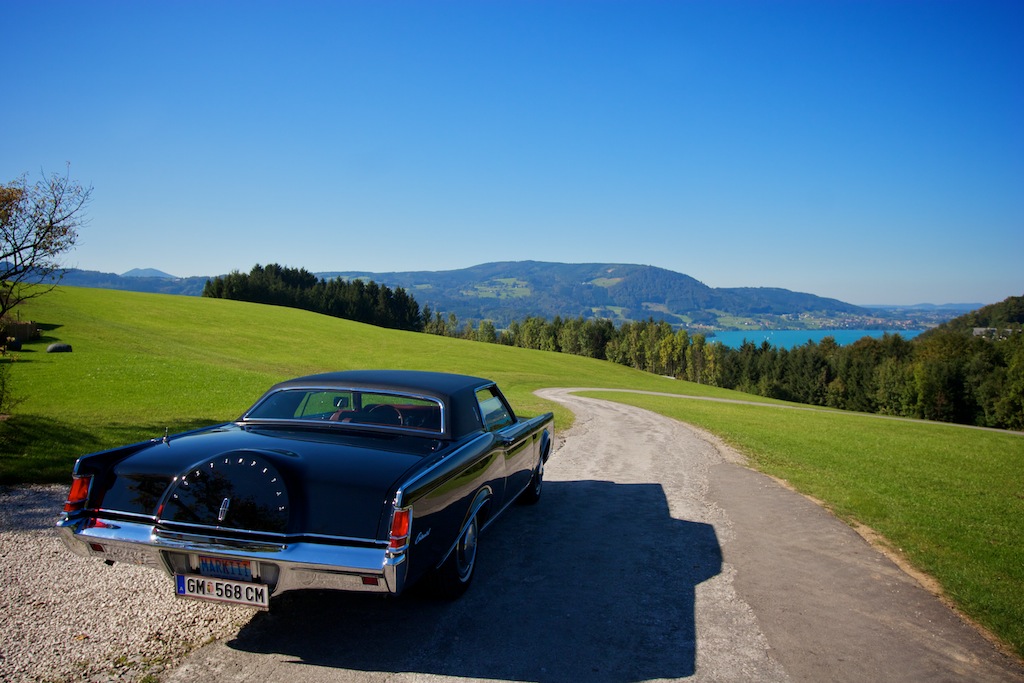
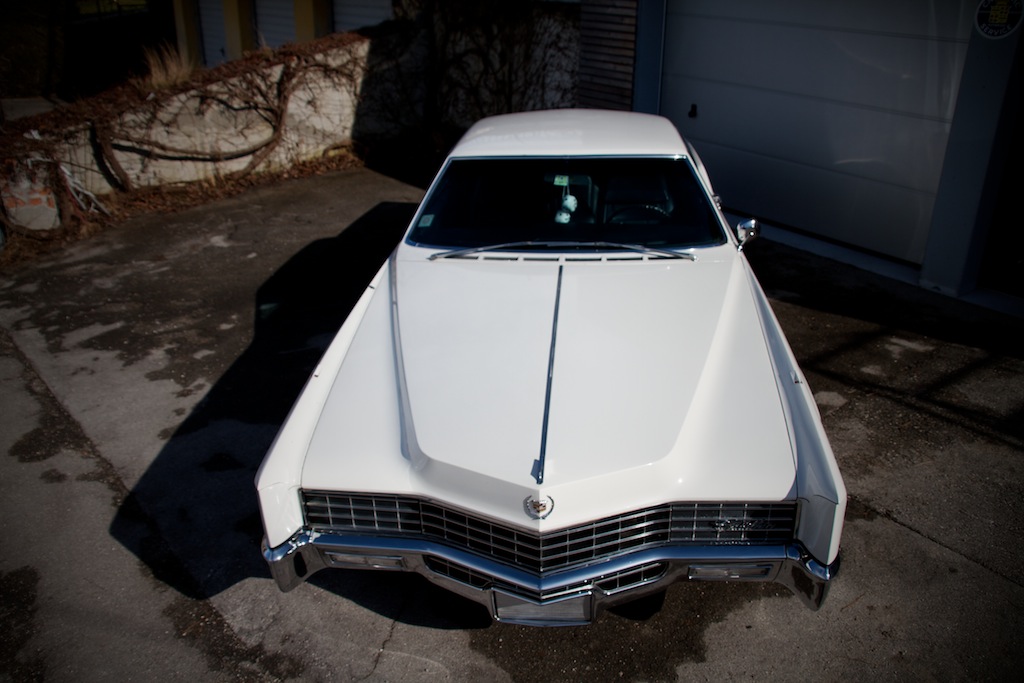
This year my wife and I took the 67 Eldorado and the 78 Biarritz to the event. During the 3 days there we shot a TV report and the official aftermovie, which can be seen here! Enjoy.
It's best viewed on a large screen in 4k resolution.
The official aftermovie
We also did a TV report for an Austrian TV-Channel.
We do not know yet when the next event can take place - I hope in 2025. Check the Cadillac BIG Meet website for updates- as soon as we have more info the website will be updated.
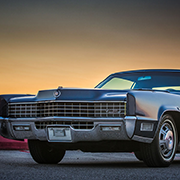
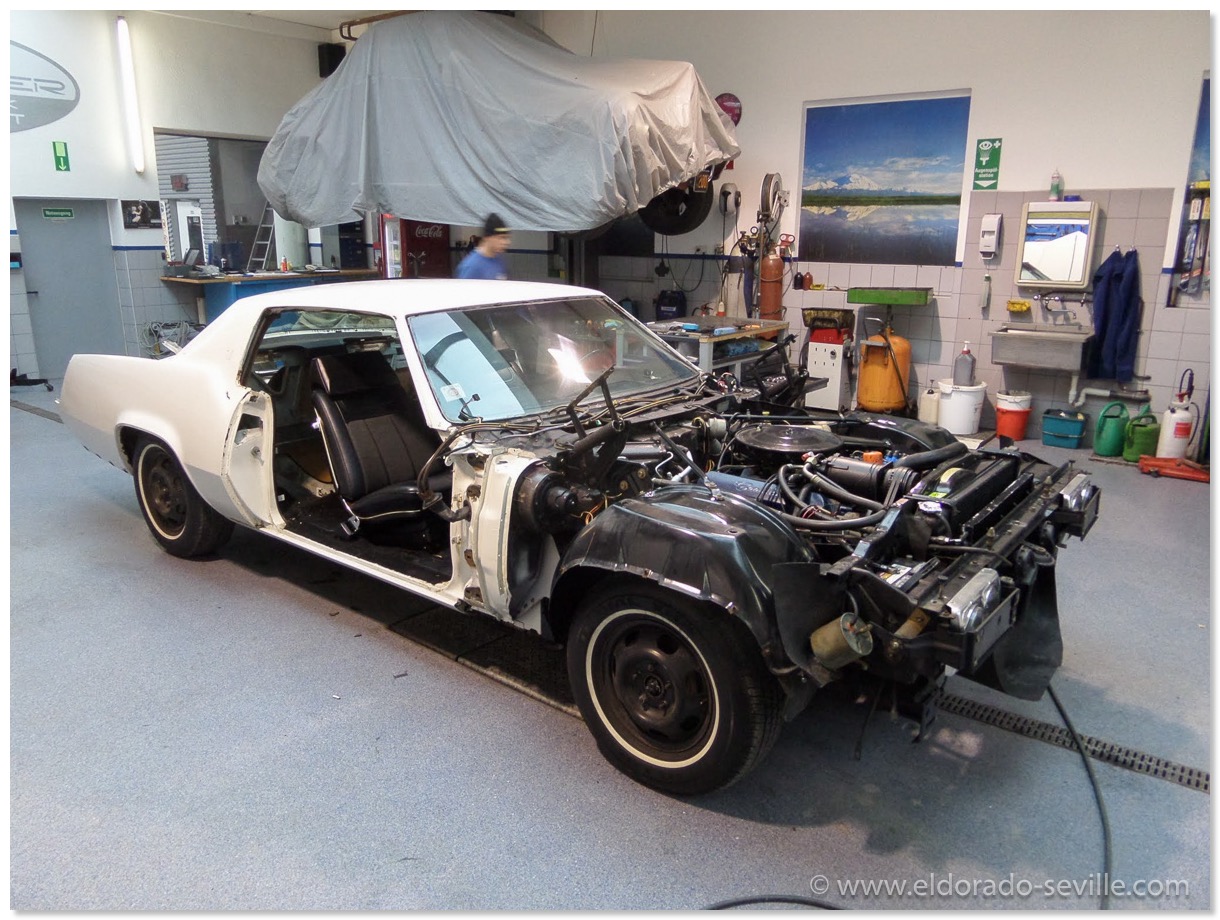
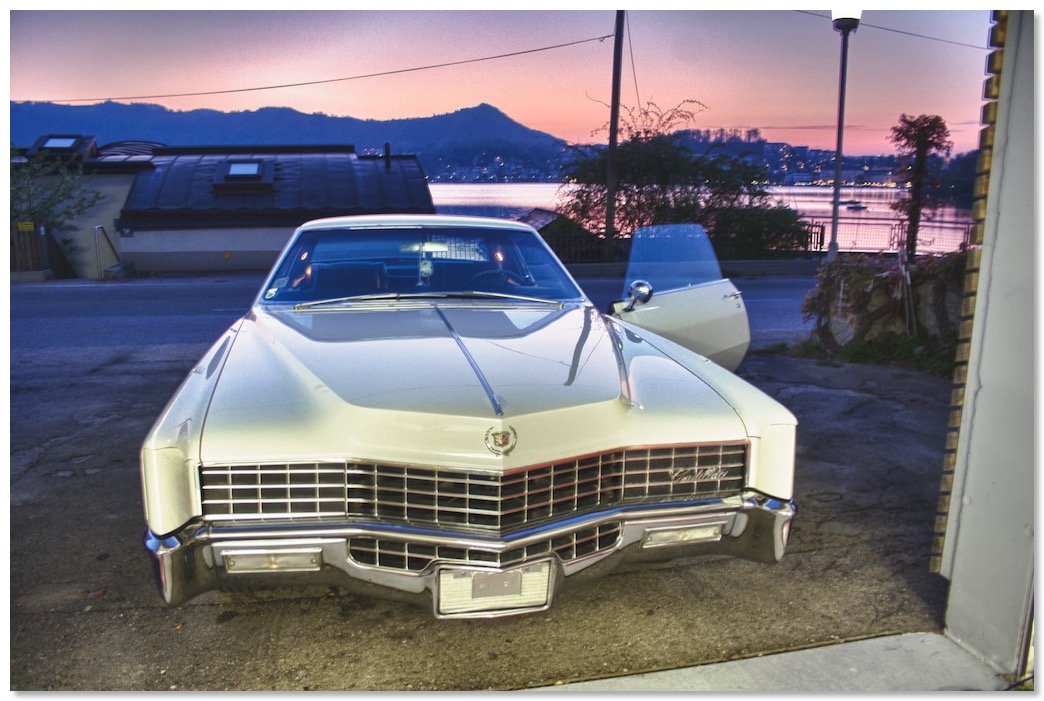
SPRING CLEANING THE 1967 ELDORADO
Unfortunately its very rainy and I can't test drive it.
Here is a short video.
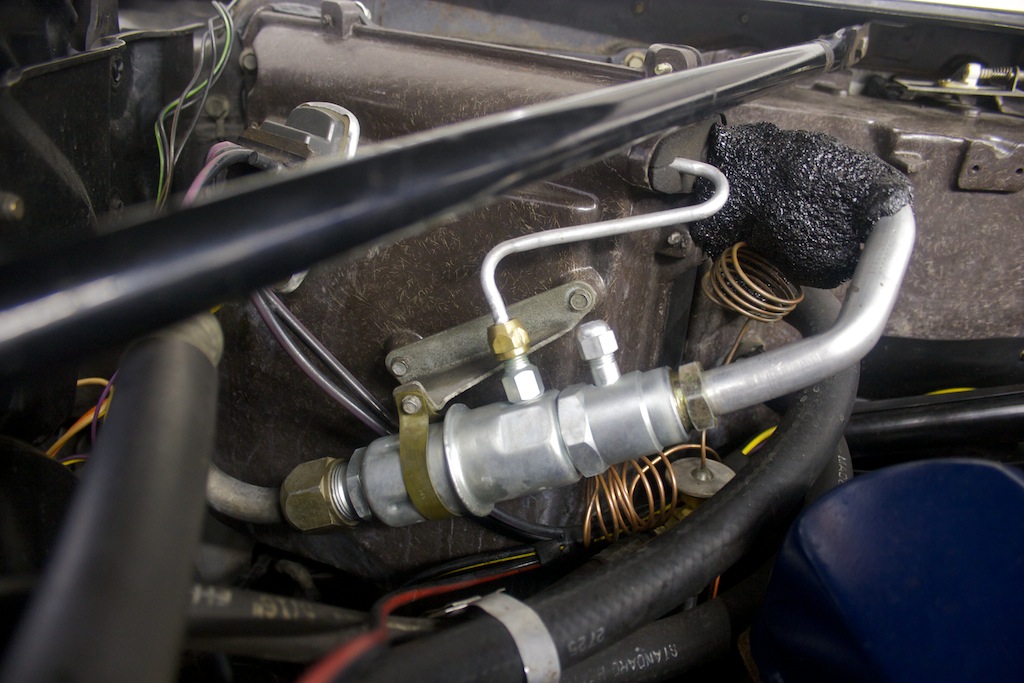
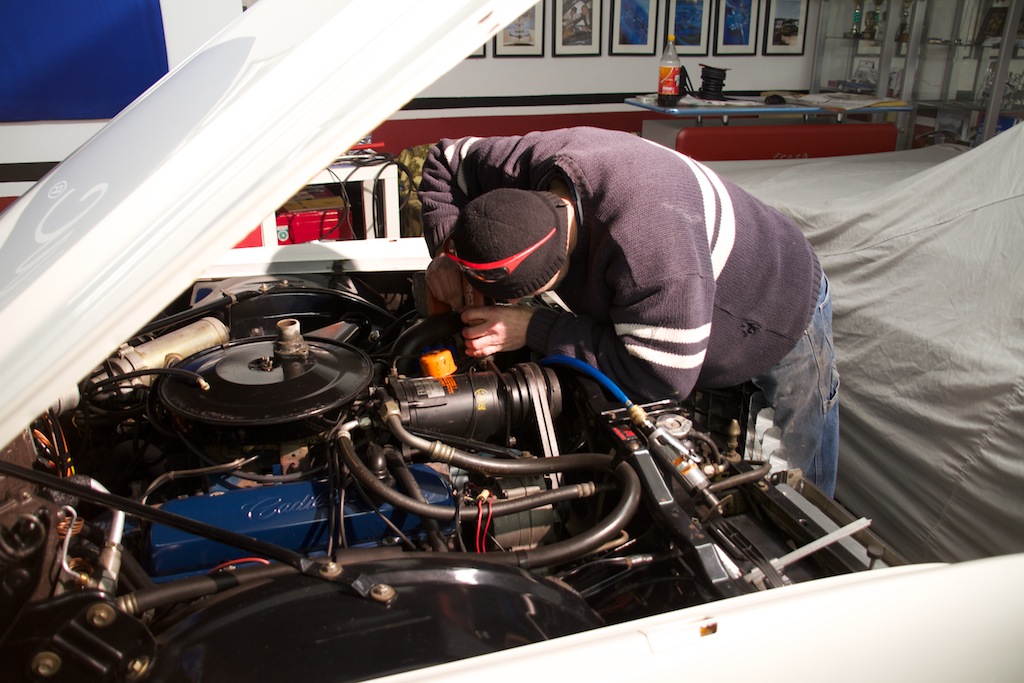
1967 ELDORADO CARBURETOR REPLACEMENT
The Eldorado now purrs like a kitten again with its new Quadrajet. I now have two more carburetors to do - the 1966 has a stuck choke and the 1978 needs a new accelerator pump.... The video is also available on YouTube in 4K HDR quality...
I took a short video of the installation process.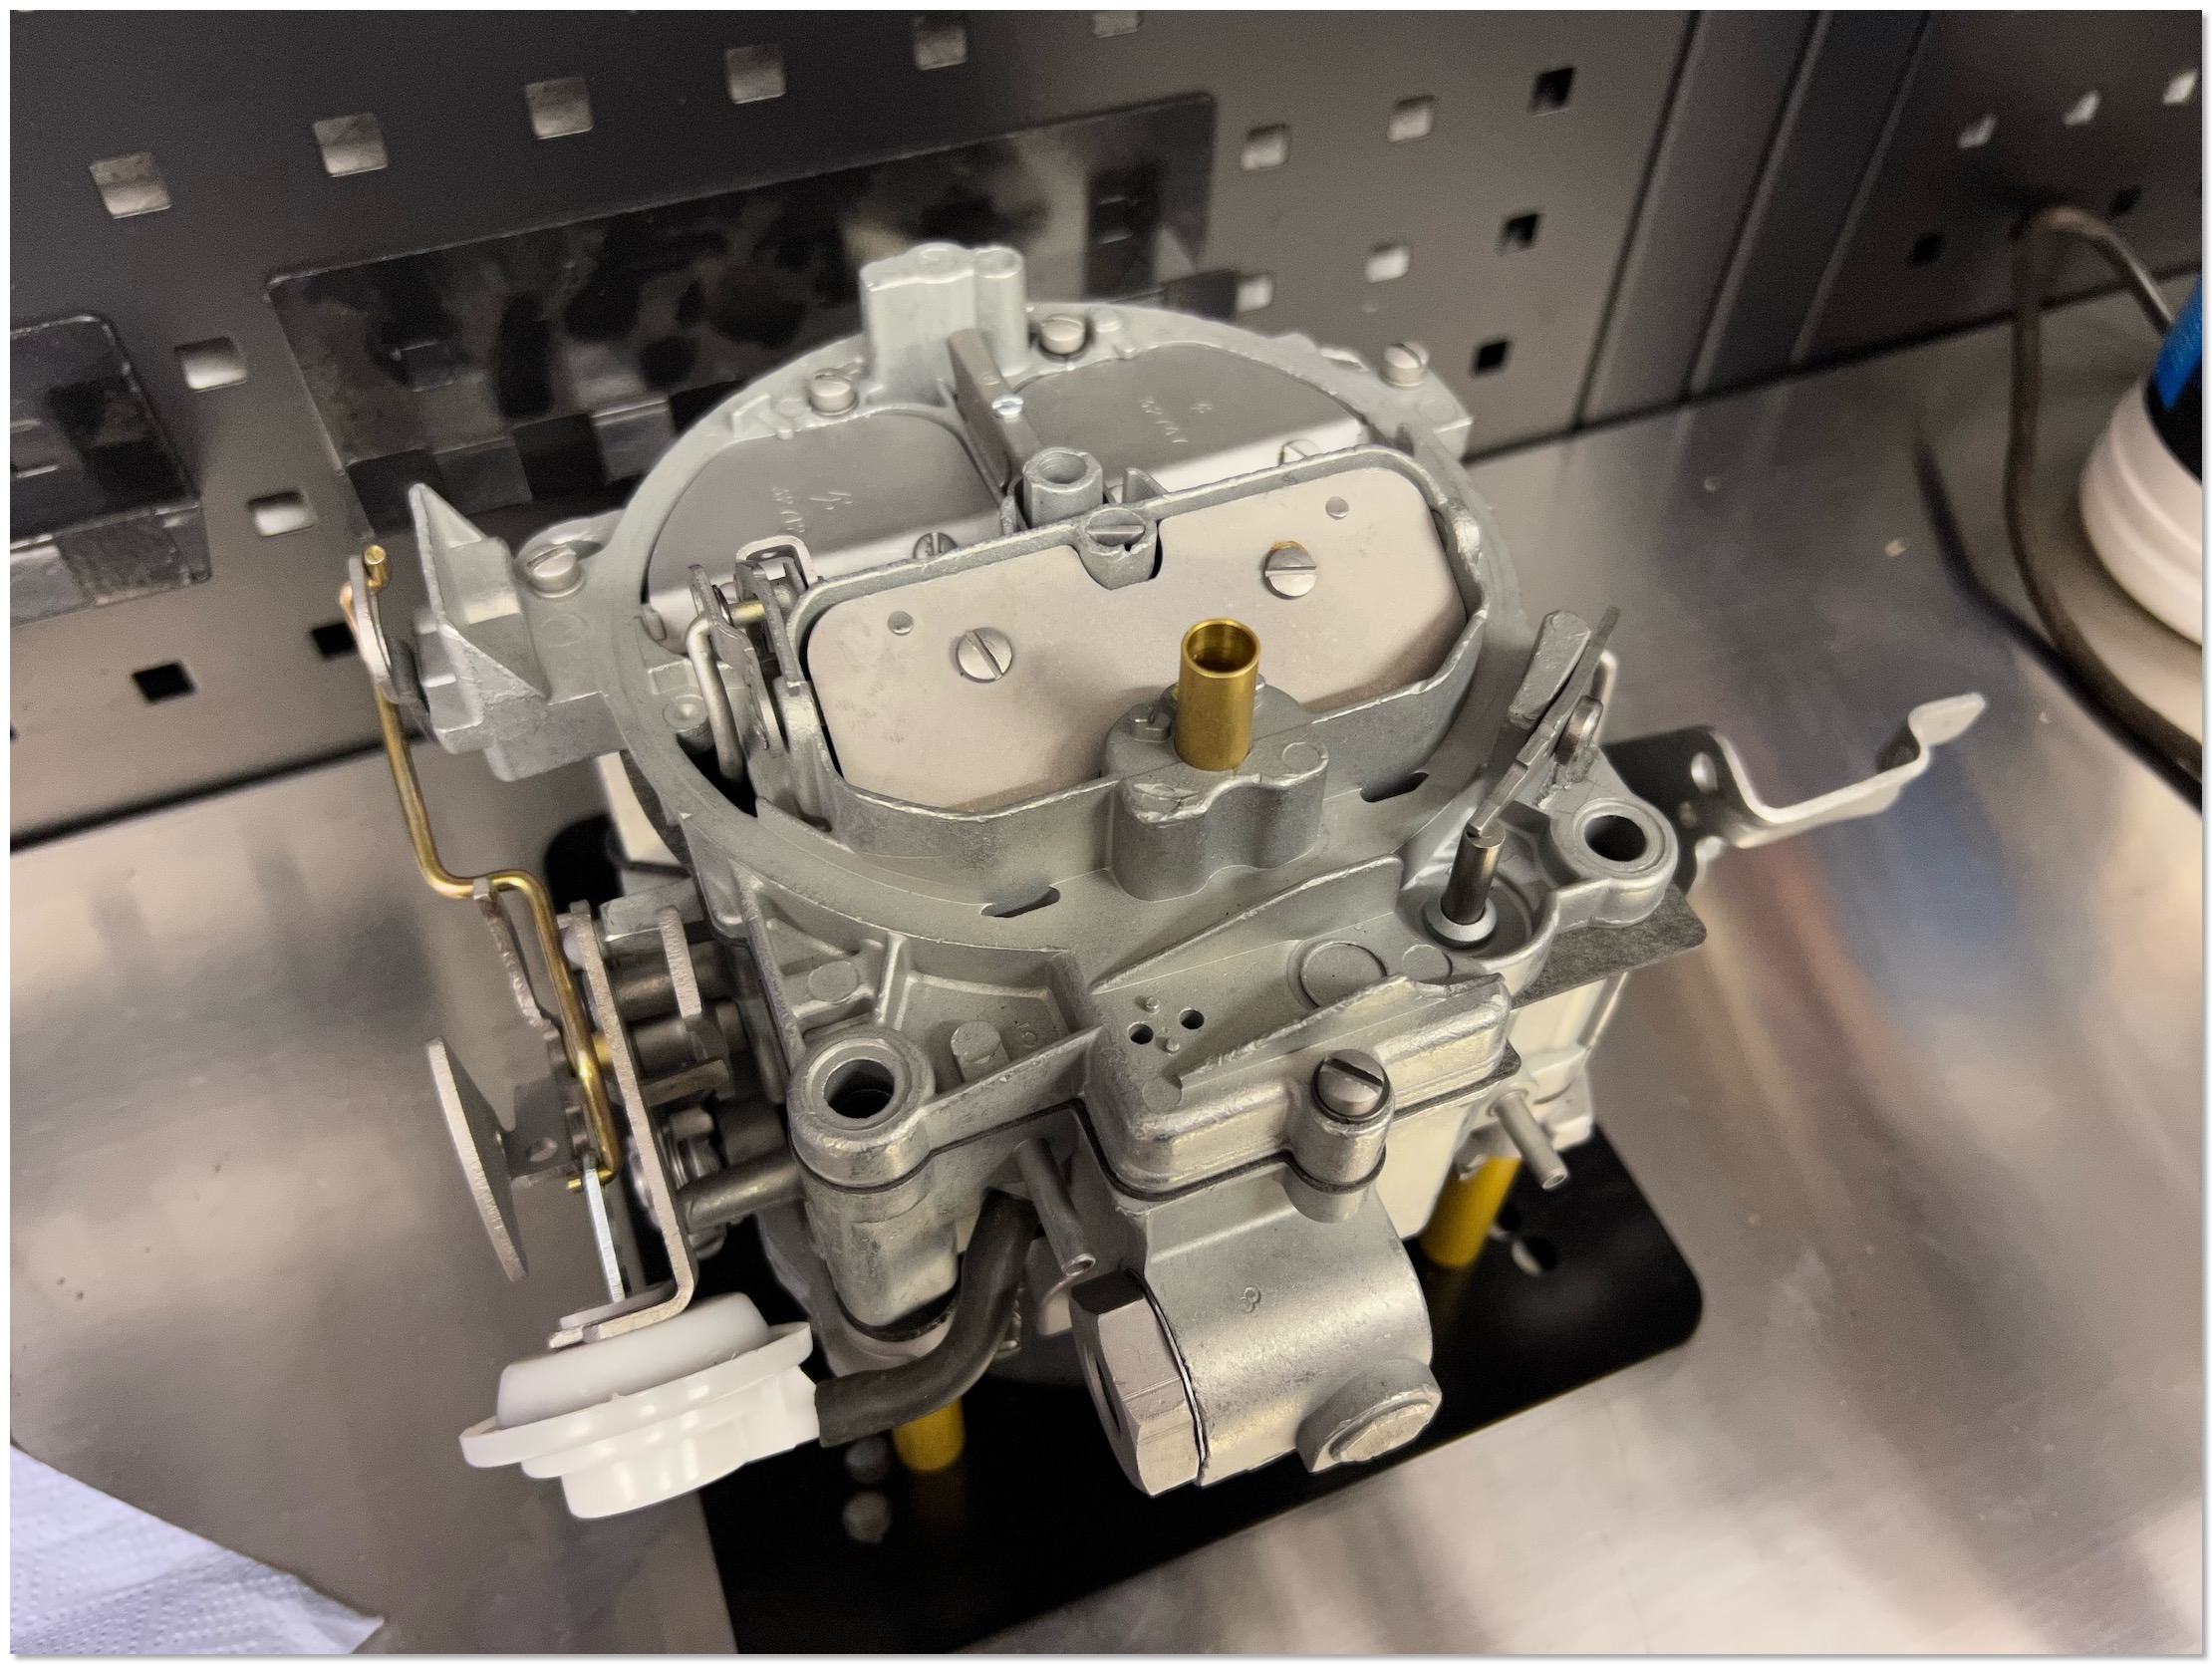
The rebuilt Quadrajet on the bench.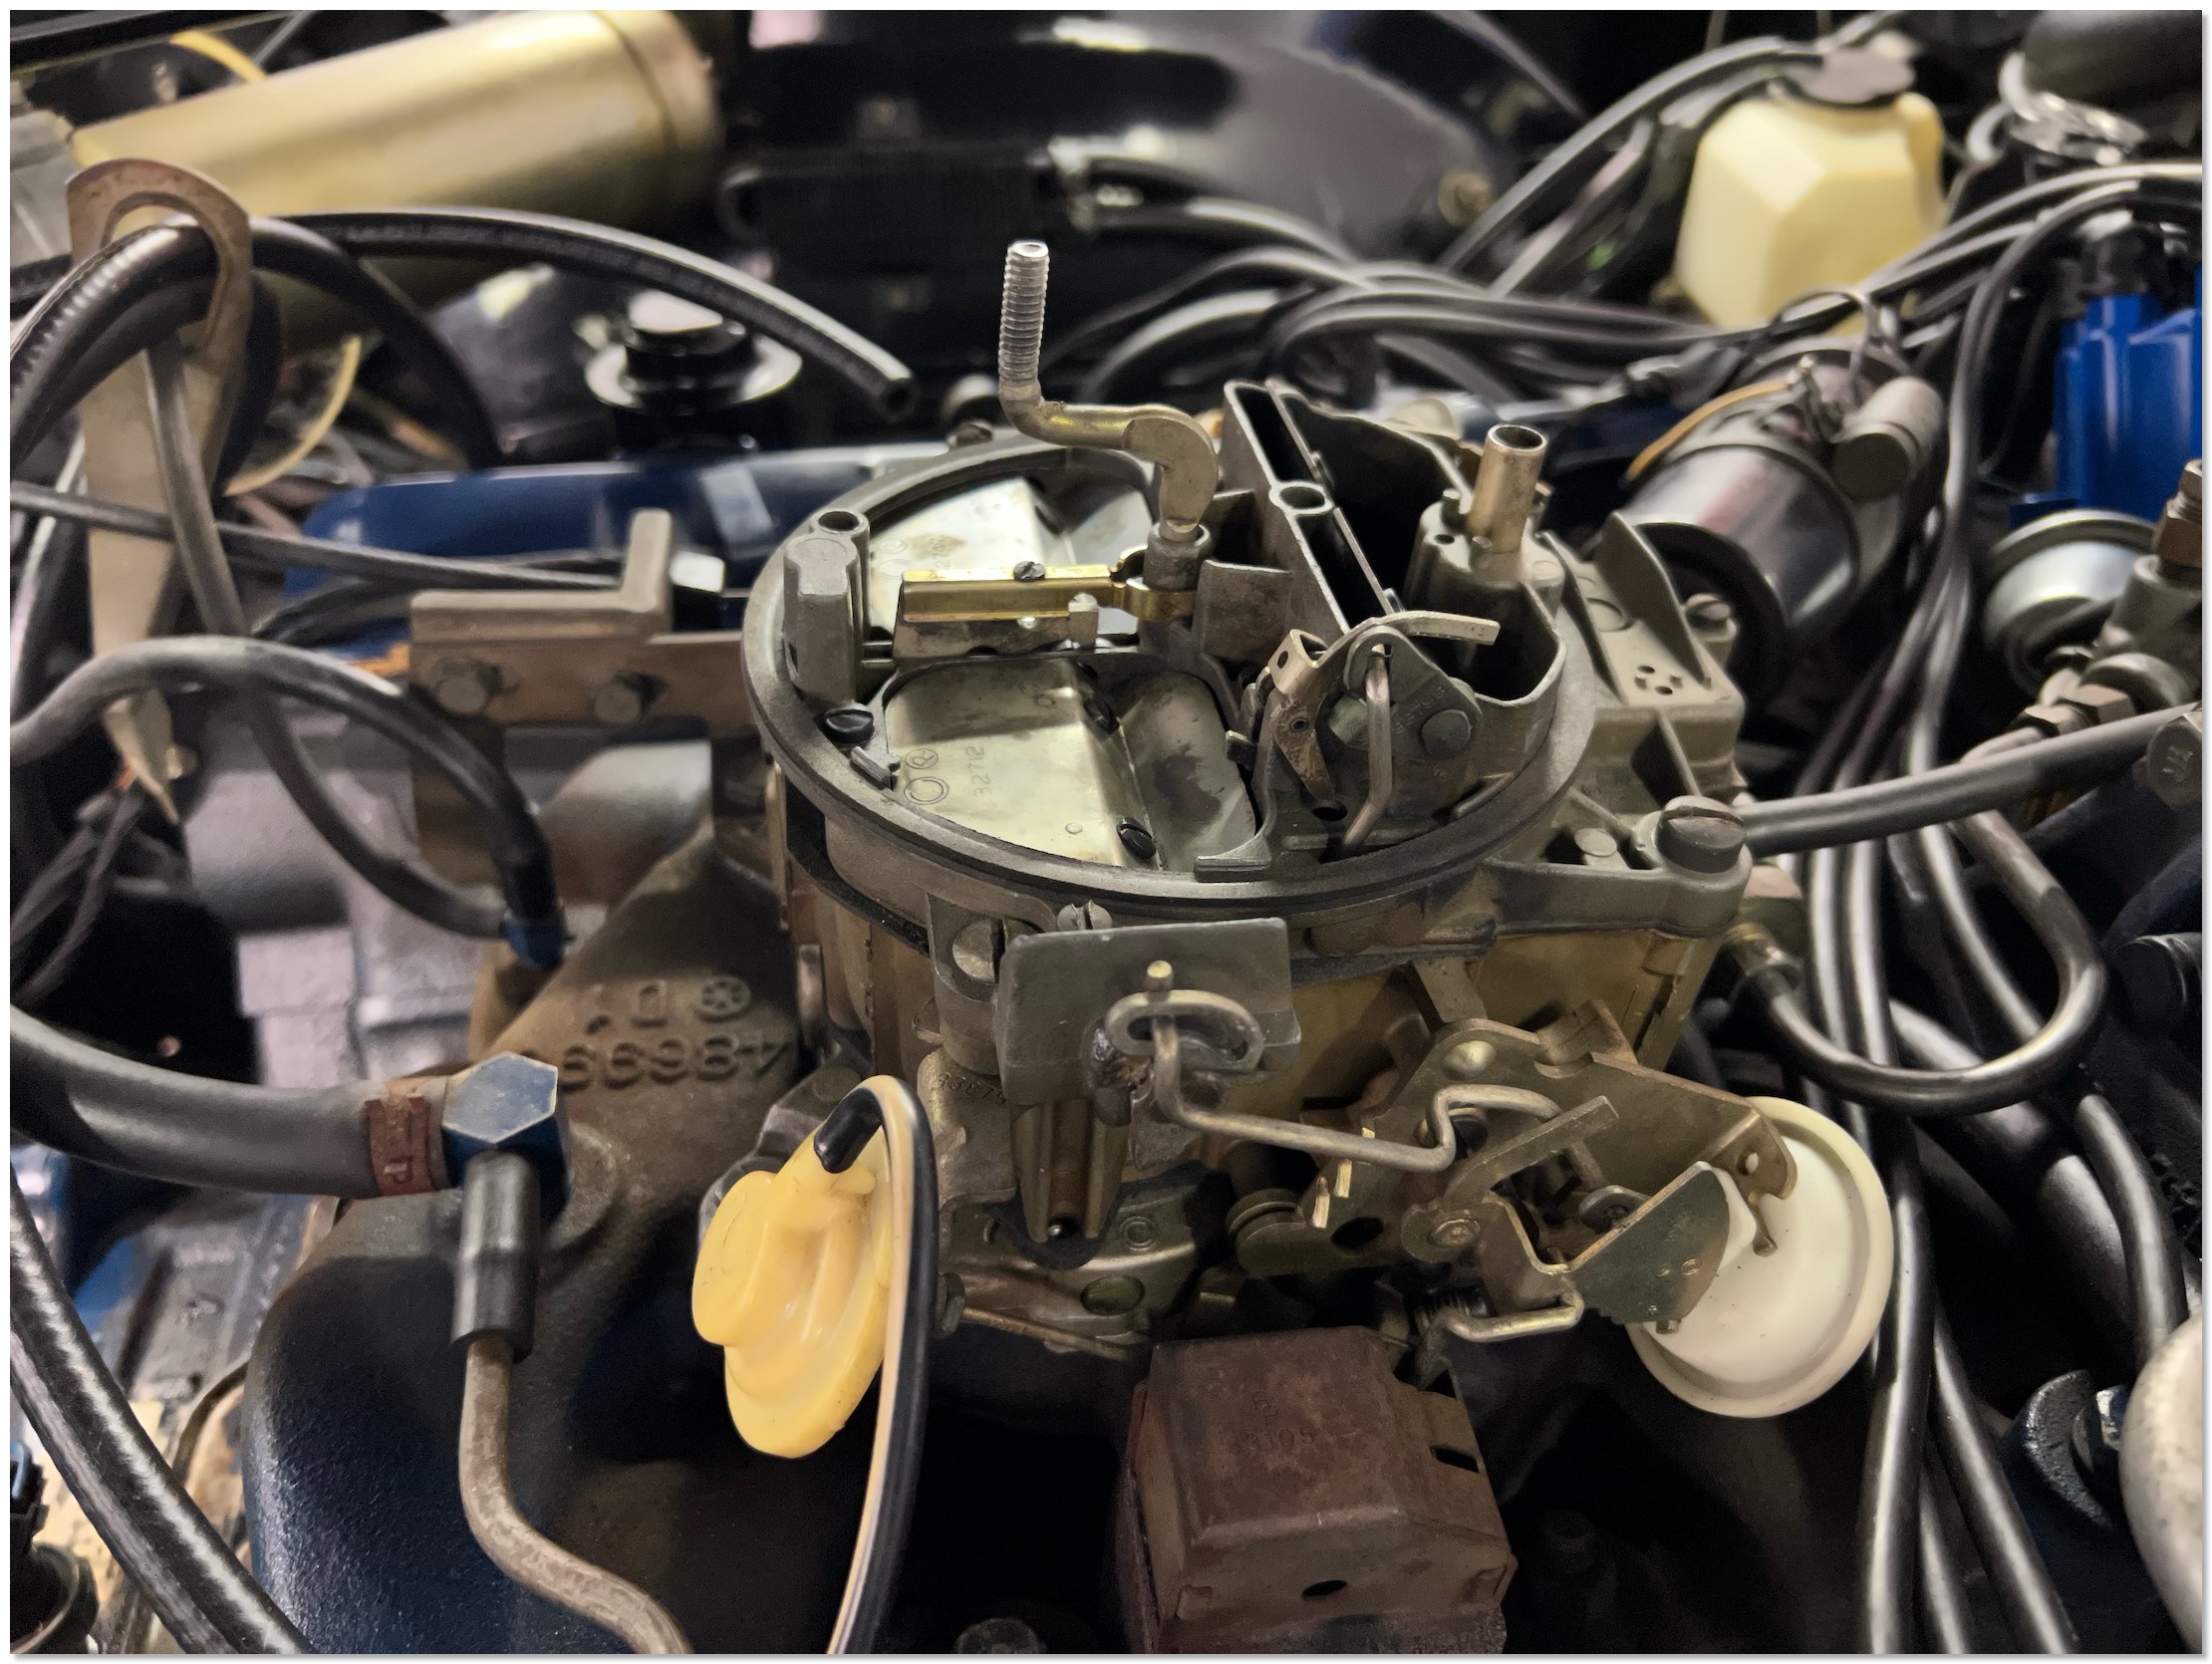
The old original 1967 Eldorado Quadrajet - this is the non California version.
The rebuilt Quadrajet installed.
ARTICLE ABOUT MY 67 ELDO IN THE NEWSPAPER
The article was published today and came out really nicely. My dear wife shot all the pictures for the paper during a quick photo shooting.
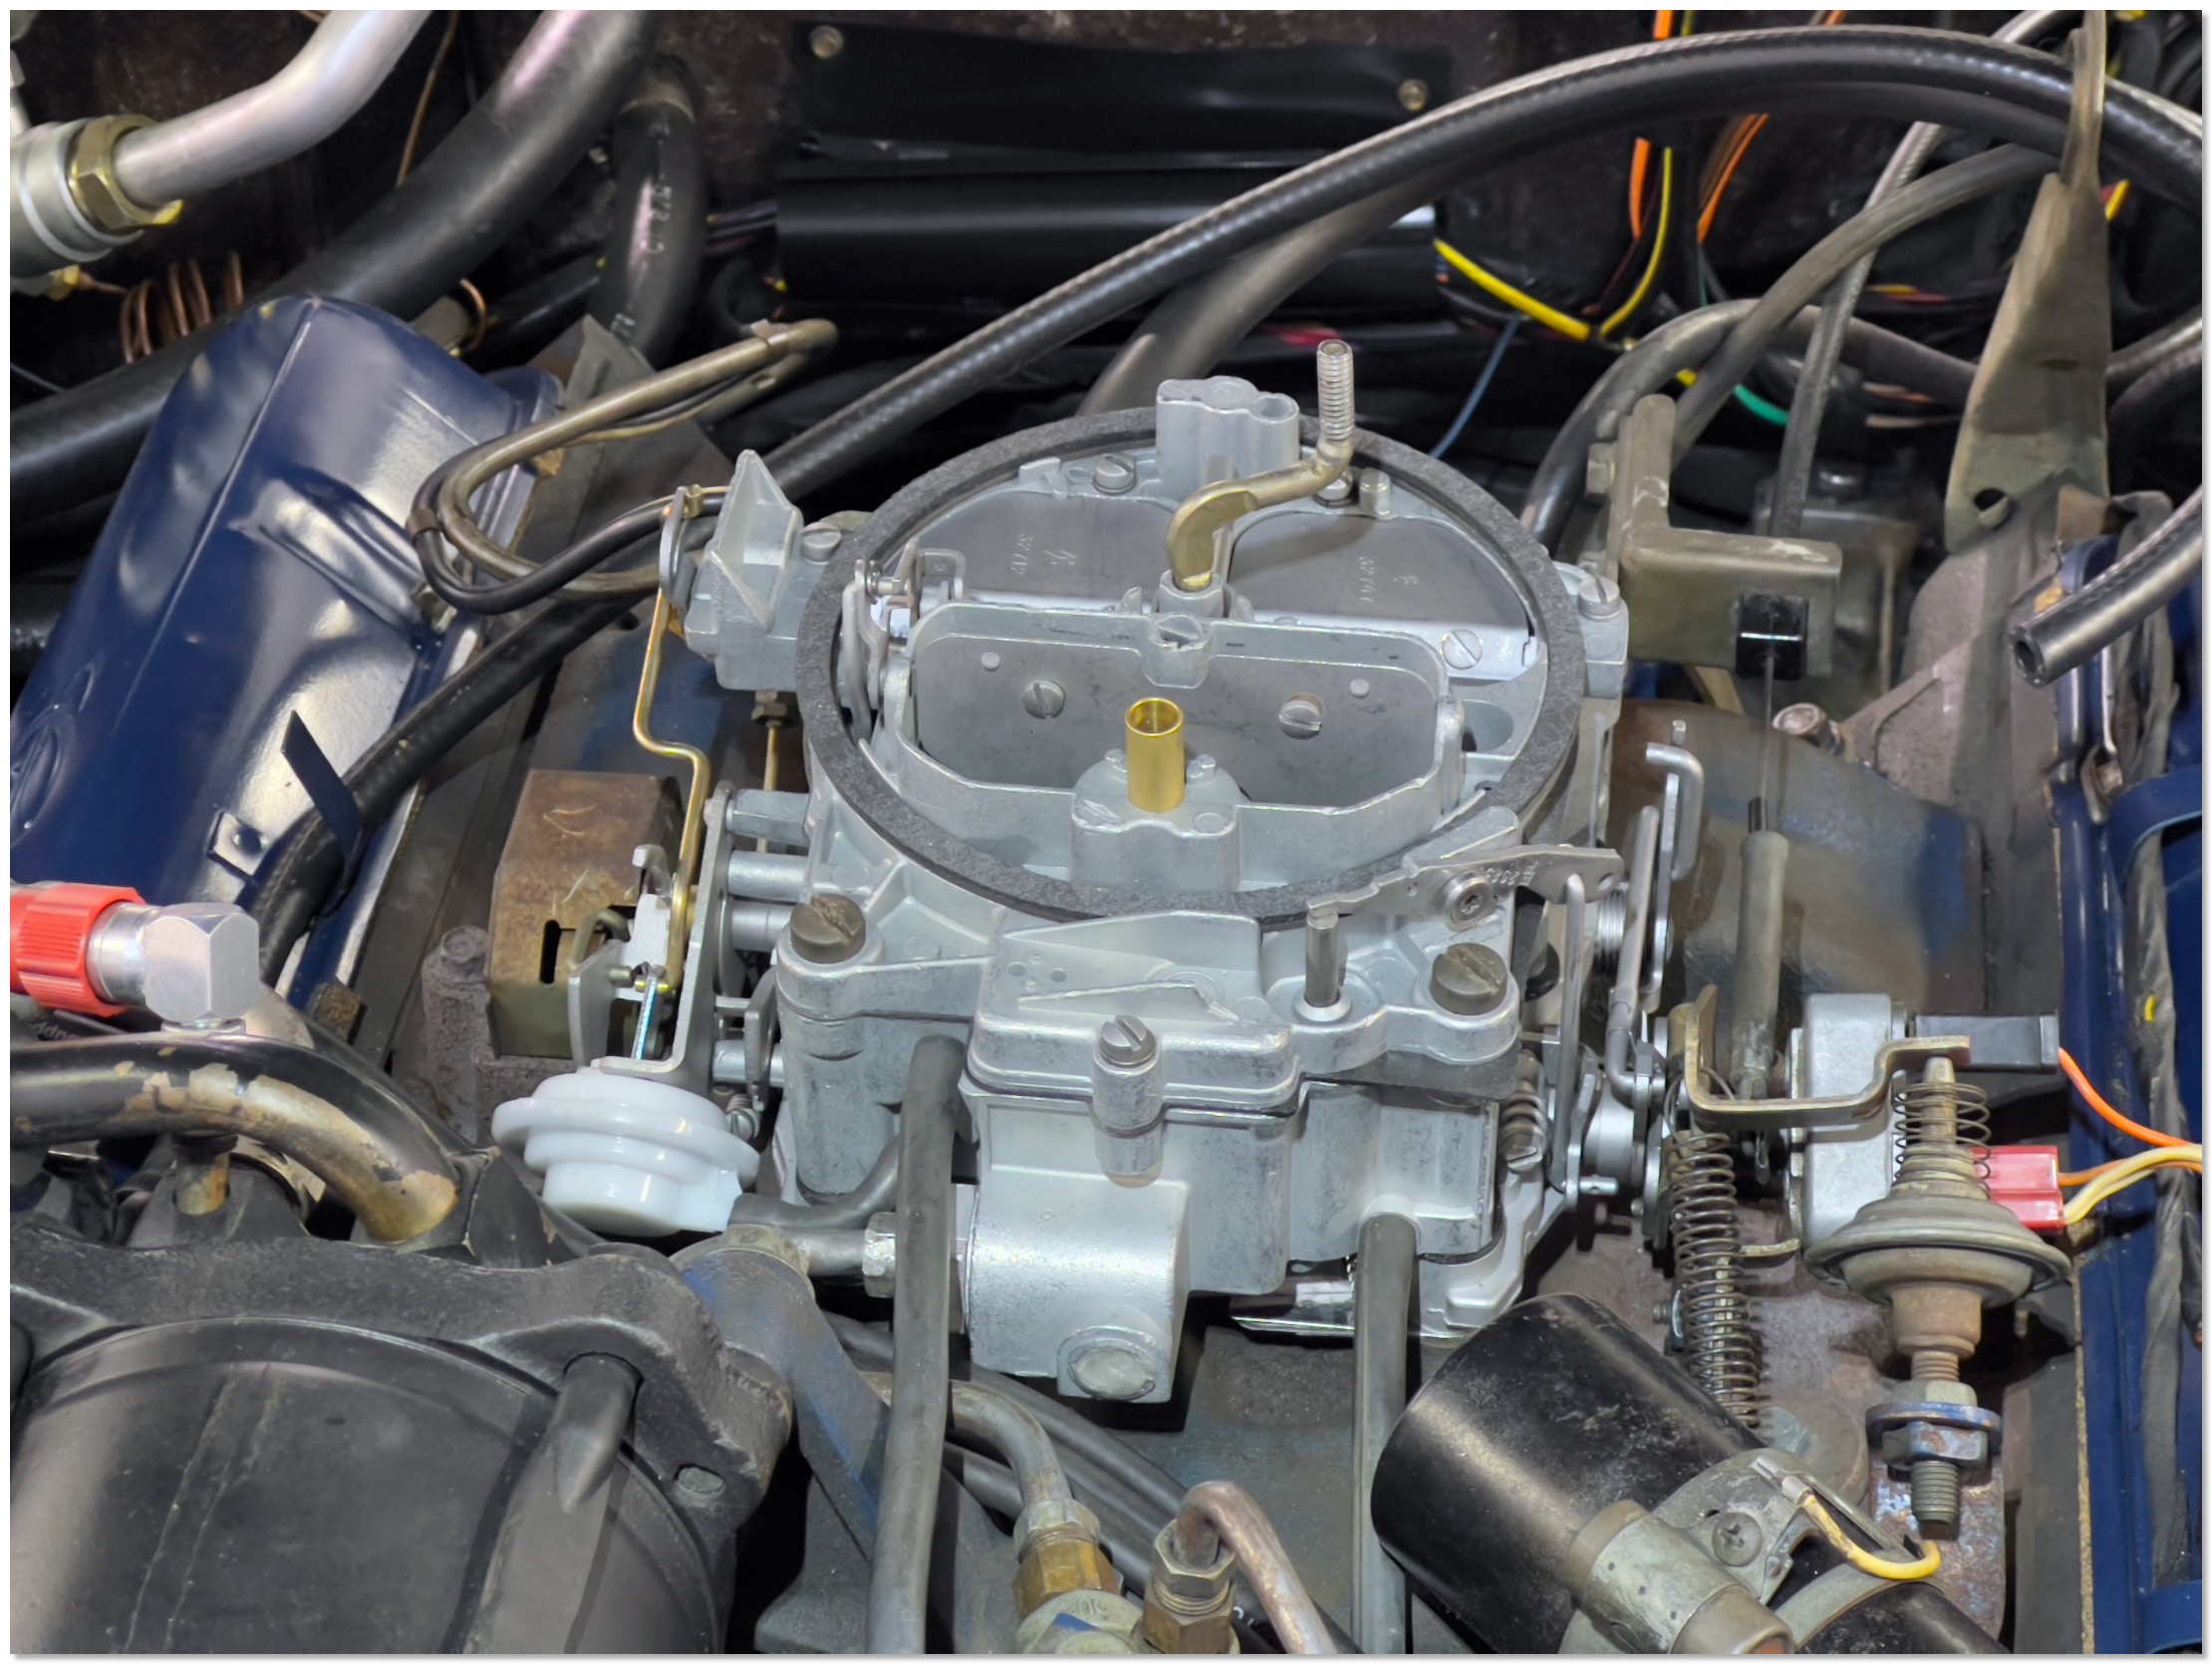
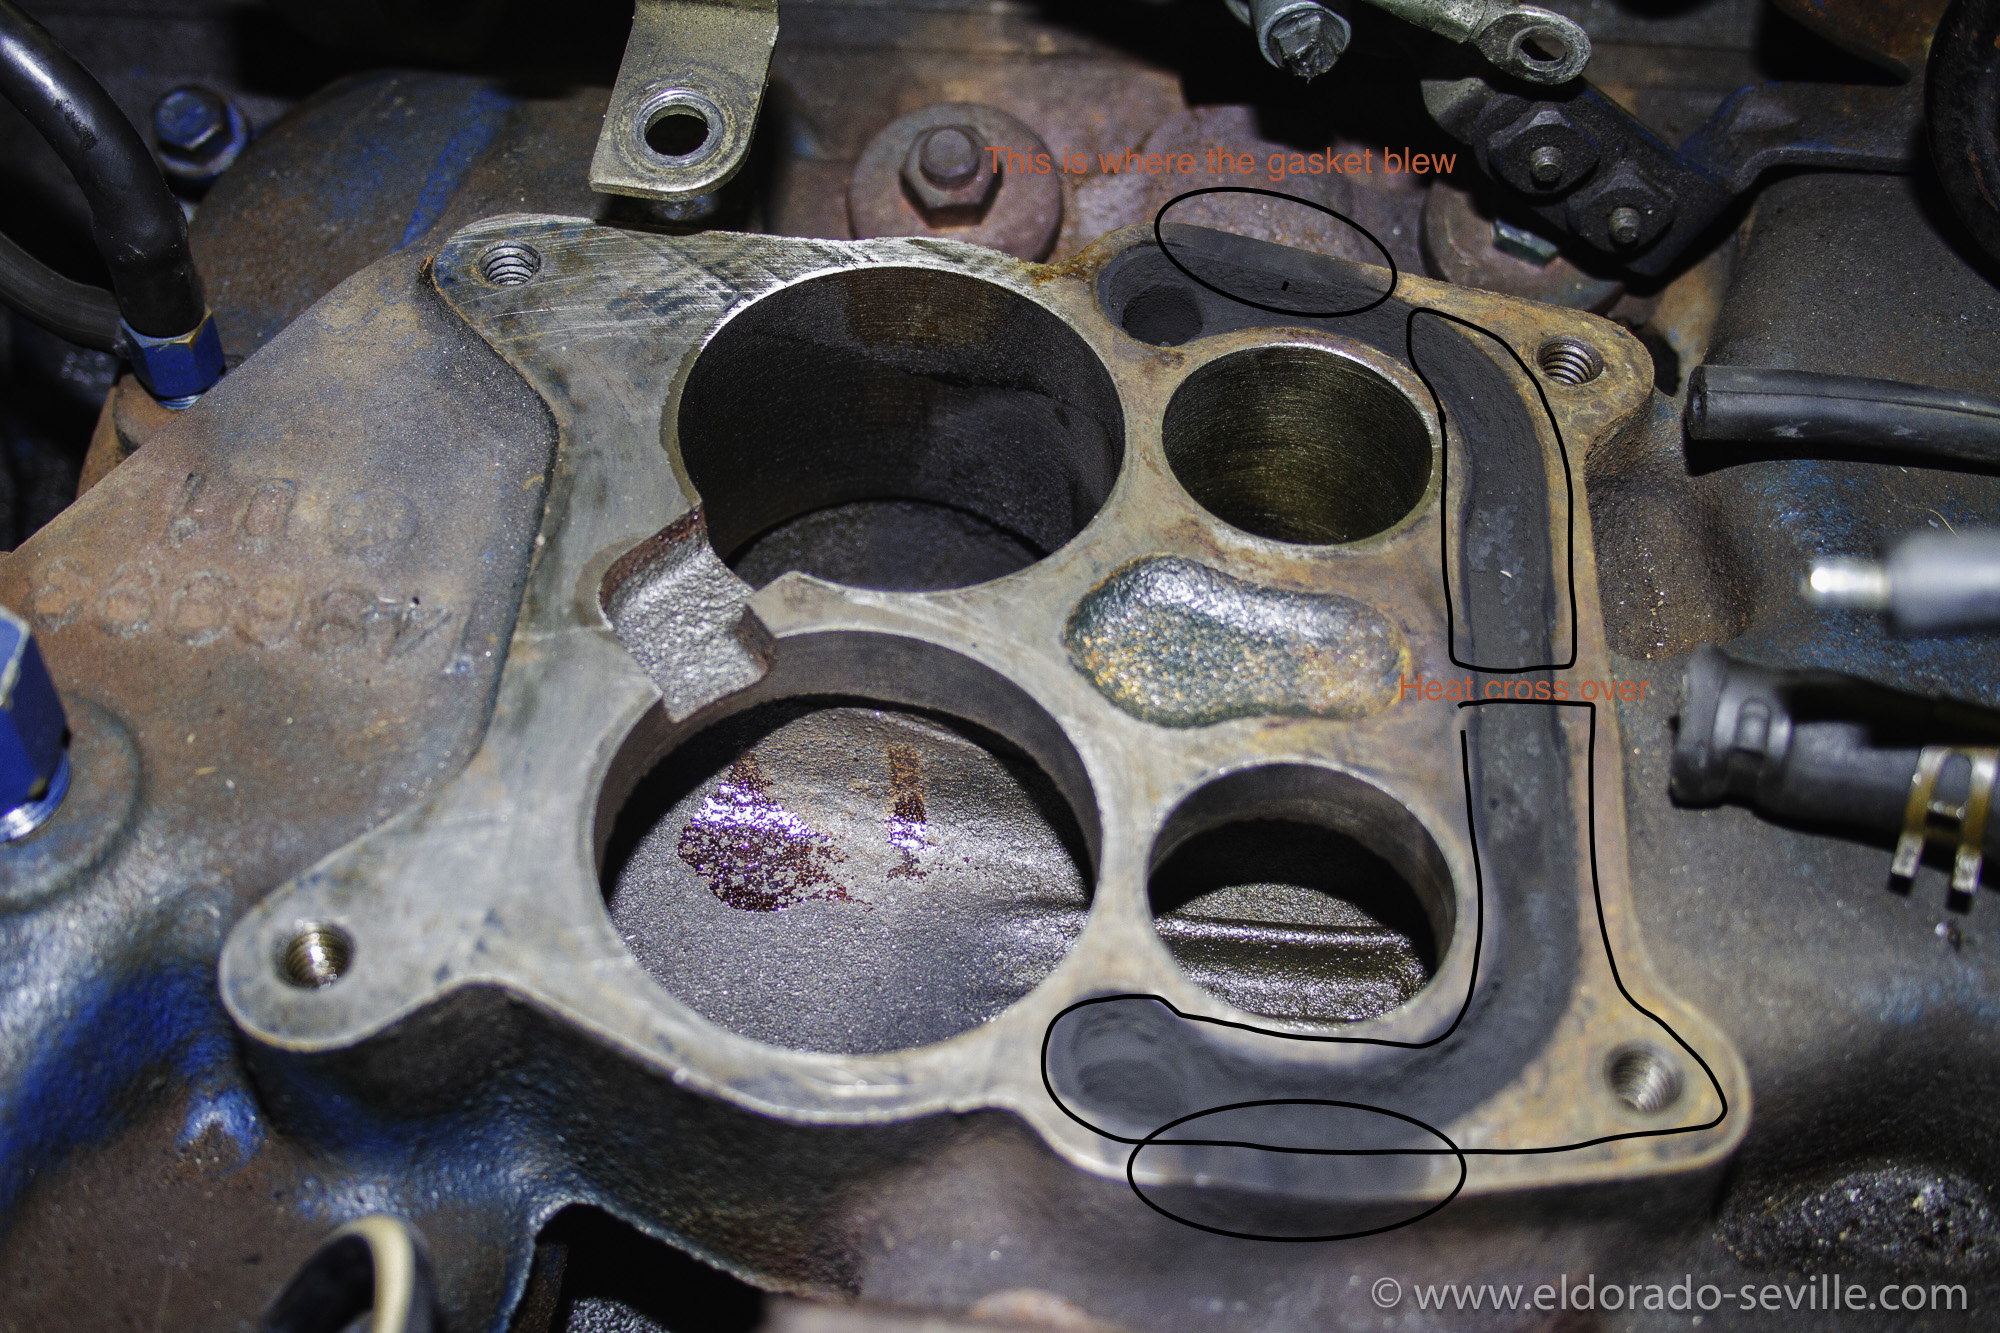
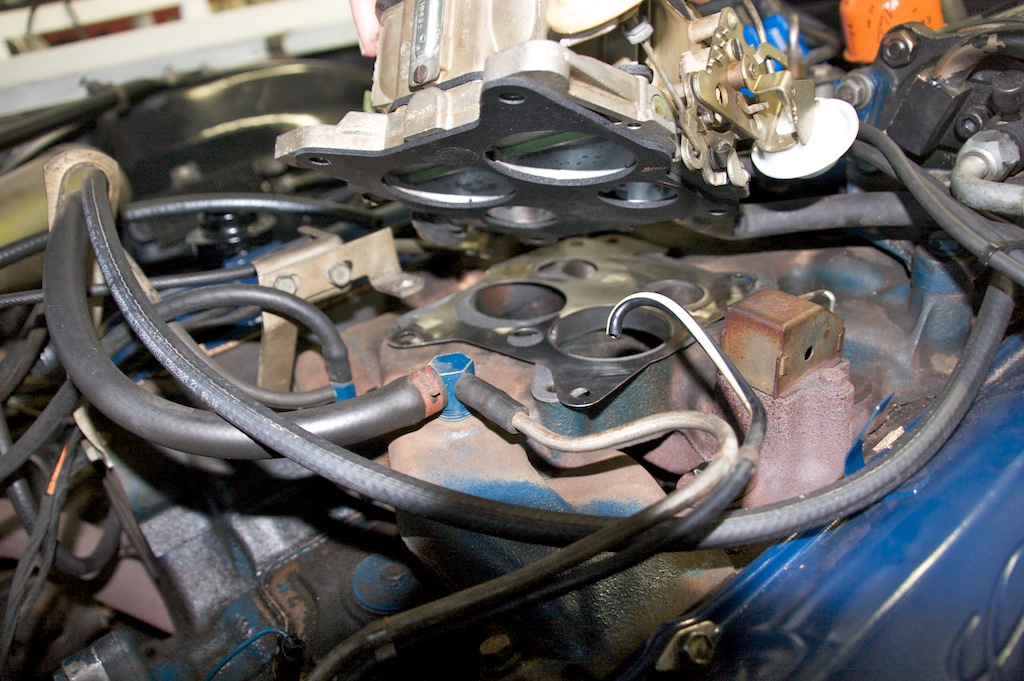
MY 1967 ELDORADO BLEW A CARBURETOR GASKET (AGAIN)
A new gasket was installed in the correct order then, and the car ran really good until recently, when the car suddenly had the exact same symptoms again…
I ordered new gaskets again and removed the carburetor from the car.
Click to READ MORE!
 Make sure to install the gasket and the metal shim in the correct order!
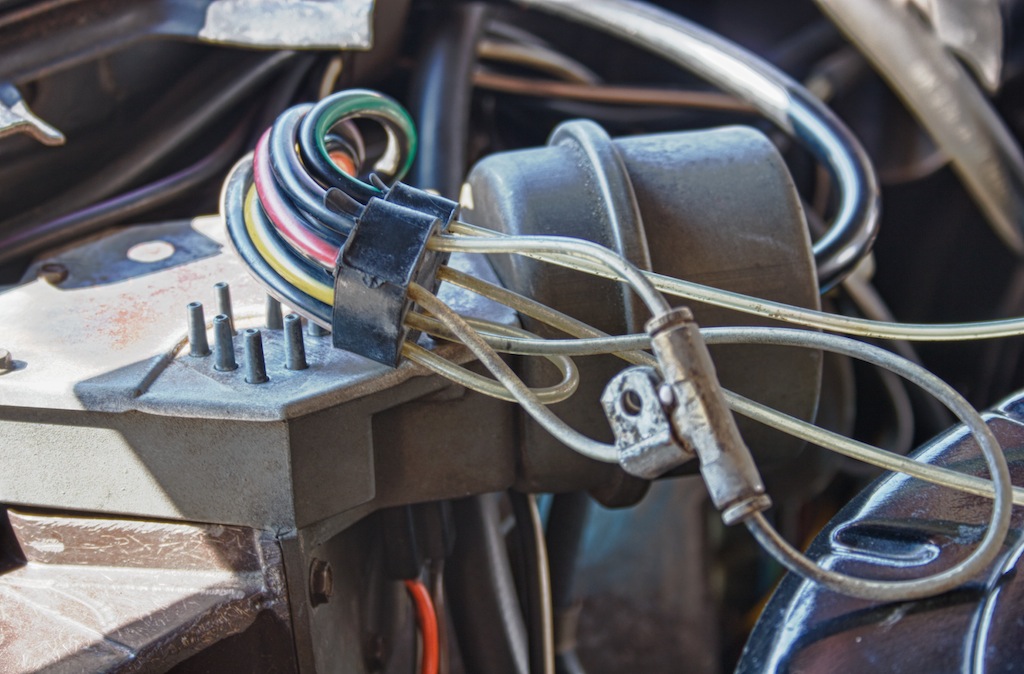
I FOUND A NOS 1967 CADILLAC T&T COLUMN TURN SIGNAL SWITCH.
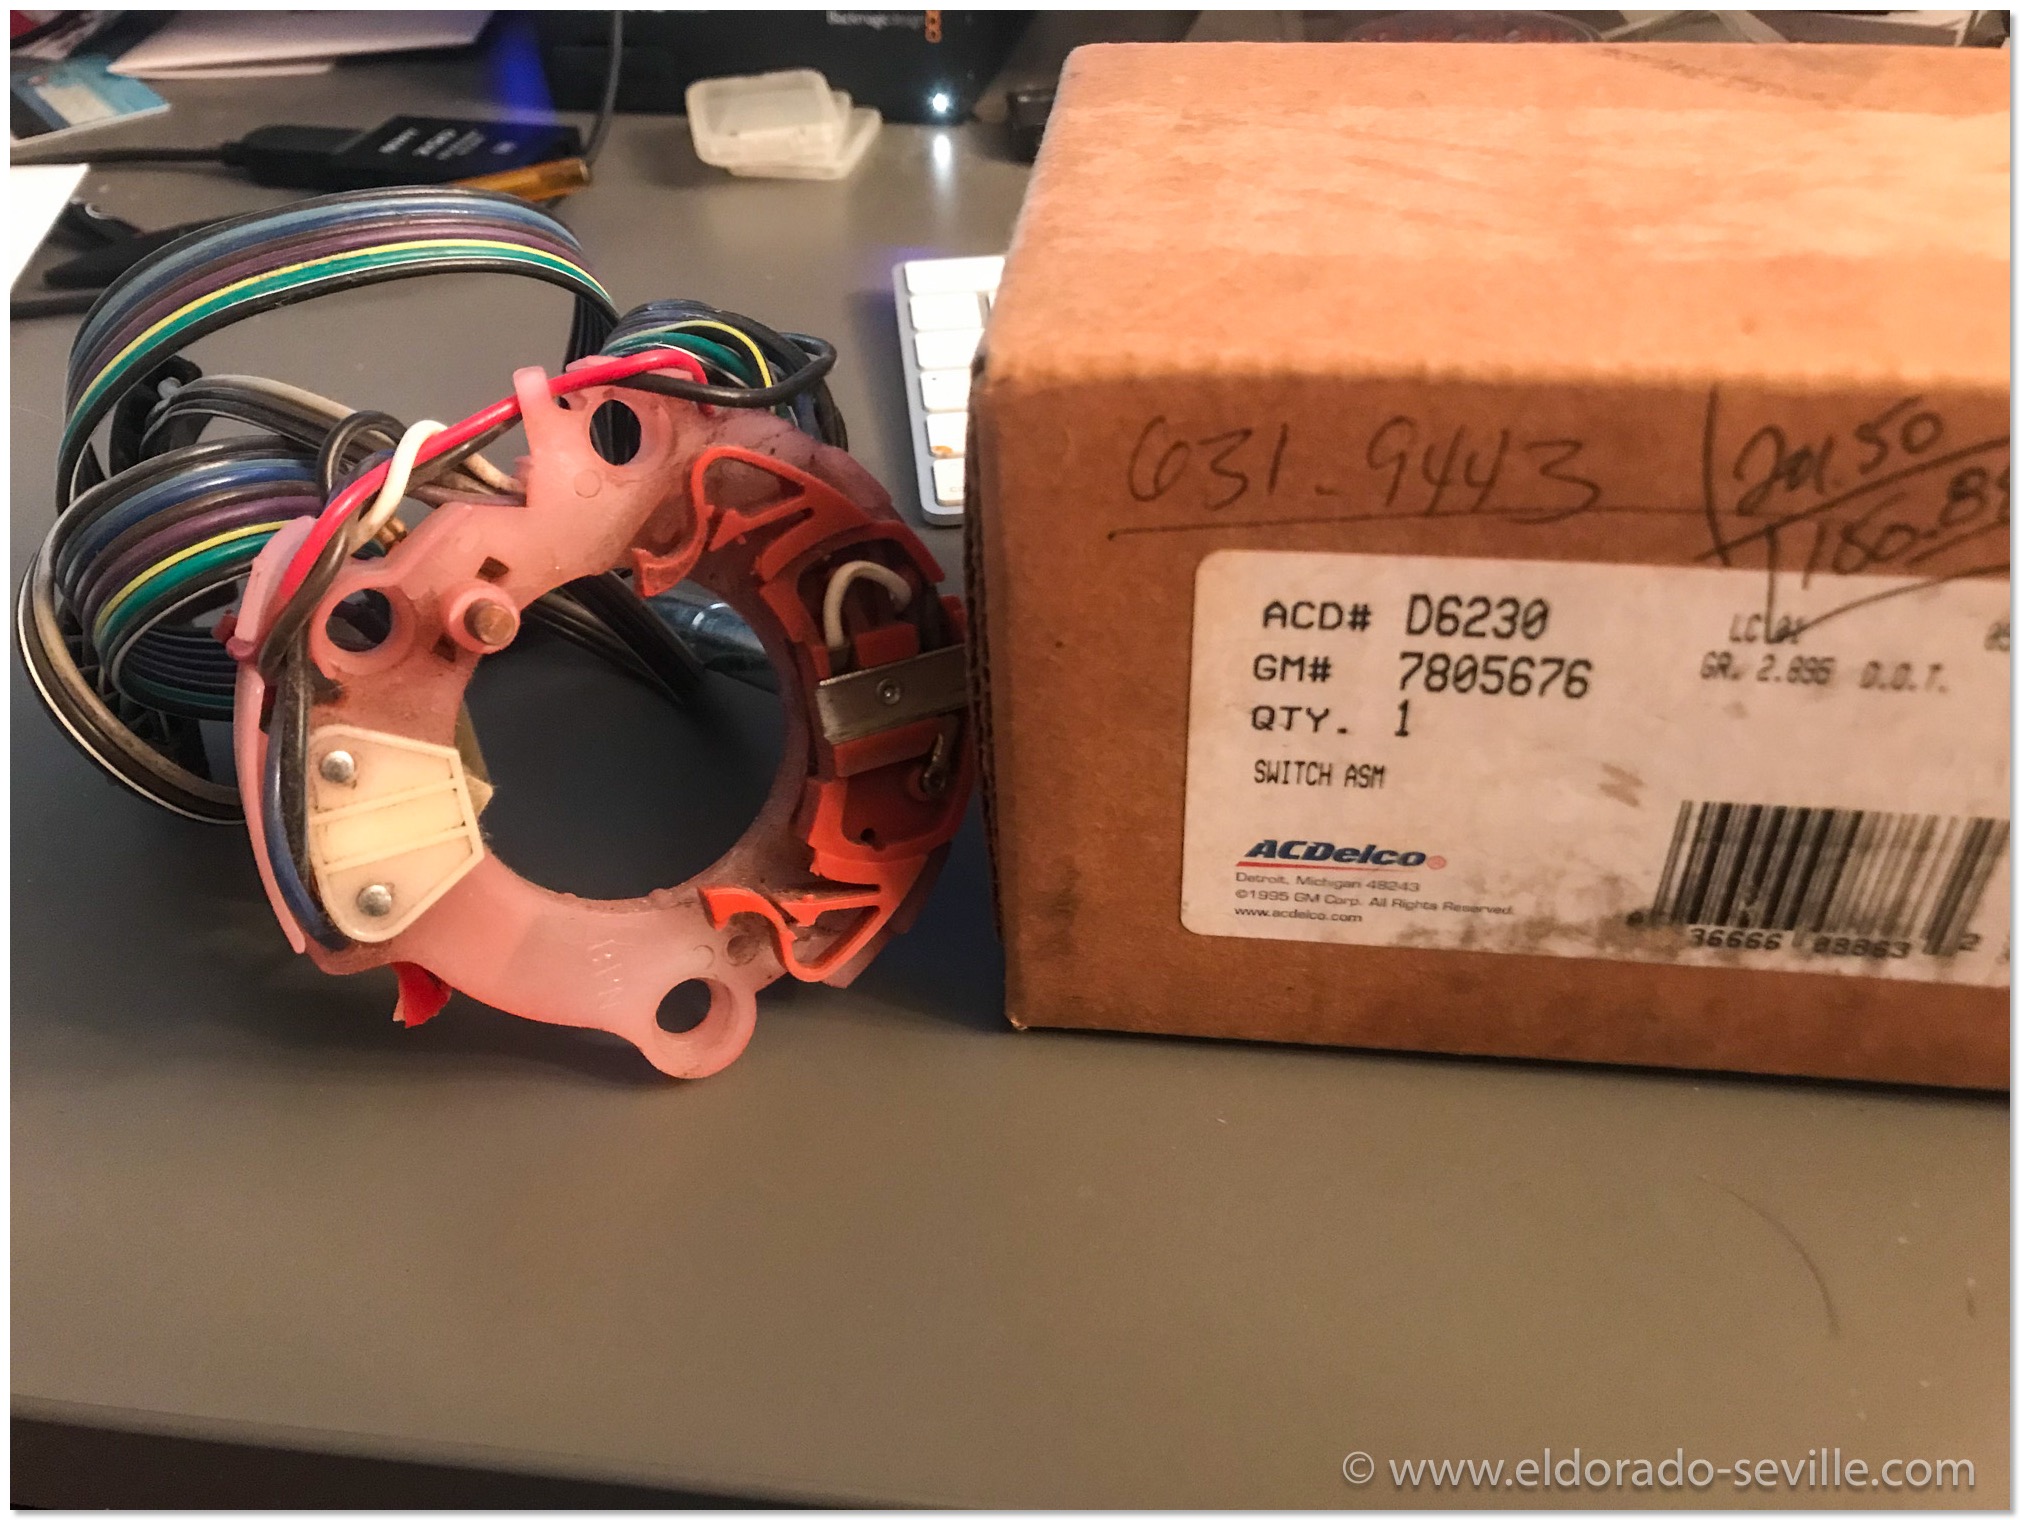
This switch is almost impossible to find GM #7805676 ACD# D6230. It is for 1967&68 Cadillacs with Tilt and Telescope column.
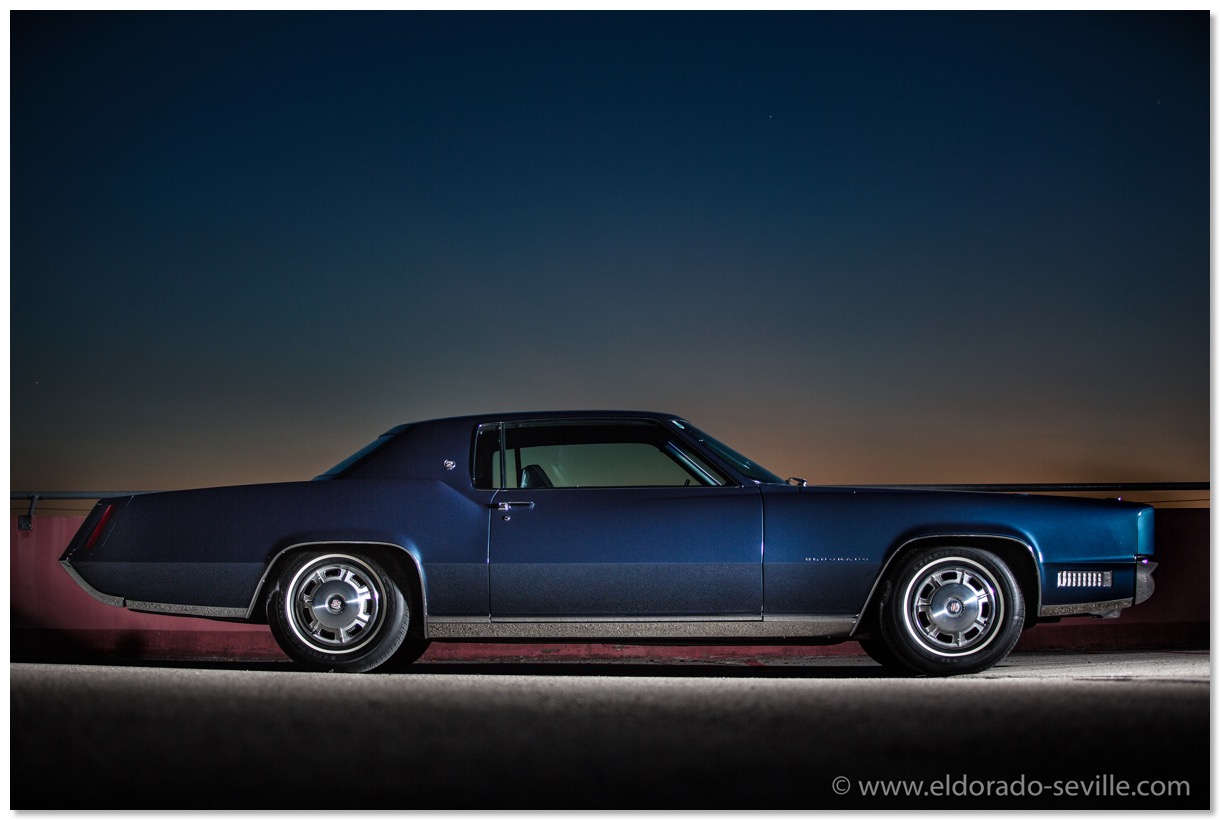
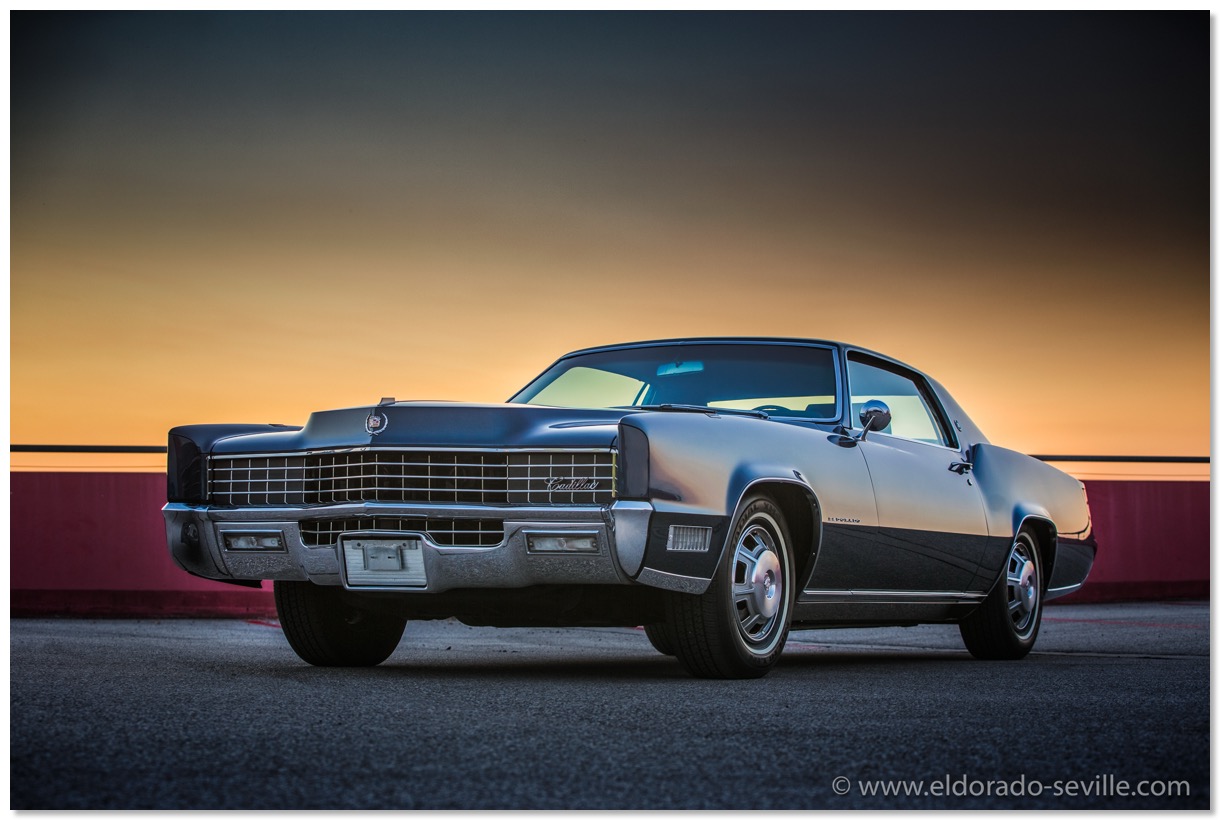
READ MORE...PHOTOSHOOTING WITH THE 1967 ELDORADO
I think they came out great. I especially like the night shots.
You can see all the results in the image gallery for the 67 Eldorado
 READ MORE...
THE 2018 CADILLAC BIG MEET IS JUST AROUND THE CORNER
The 2018 Cadillac BIG Meet spot
My wife and my son Elliot during filming
THE RESTORATION OF MY 1967 ELDORADO IS FINISHED
The restoration shop let me know that my 67 Eldorado was finished and ready for pick up.
After work my wife and I jumped into the car and drove 2 hours to Radstadt where the restoration shop is located.
I saw the finished car for the very first time.
The job Bernd Preussler and his small team did is amazing. The paint job is the best I have ever seen. Their commitment to details is outstanding.

The small team that restored my Cadillac. Thank you so much for your great work! You are my heroes!
Michael Hammer, Bernd Preussler, Angela Steiner (from left to right)
THE 67 ELDORADO RESTORATION IS IN ITS FINAL STAGE
The restoration shop on the other side did a fantastic job so far. There are some minor details they still want to address and the car should be ready for pick up sometimes in May.
Here is a short video I took with my phone at the shop when I delivered the bumper, showing the almost finished car. Make sure to watch in HD to see all the details
The almost finished car still in Bernds Restoration Shop
THE 1967 ELDORADO RESTORATION - WHAT WE HAVE LEARNED SO FAR...
Whenever you restore a car you can learn a lot about it. The ongoing restoration of my 67 Eldorado is taking a little break now, and here is a summary of things we have learned so far during the restoration process:
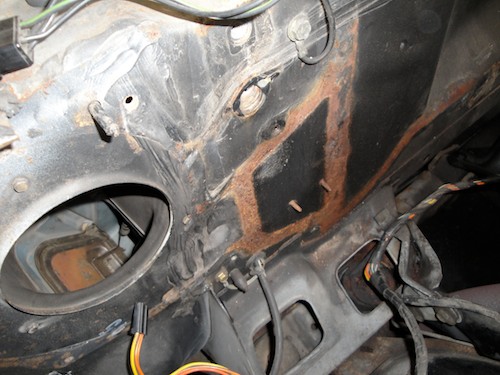
There seems to be a design and/or a problem at the front windshield which causes rotten floors and rust in the A- pilar:
Although my car is a low mileage car (28k miles) with no other real rust issues, the front floor of my car had to be replaced as we found out when the carpet was removed. I have heard some similar stories from fellow Eldorado owners who had the same problem with their cars. Some of them owned very low mileage texas cars and had rotten floors and/or rust in the A-pillar. The water seems to enter at the A-pillar and often causes rust through holes there. It can then seep into the car, where it ends on the front floor, from where it cant evaporate due to the rubber insulation used underneath the carpet. When the windshield on my car was re-installed, we made sure that it seals perfectly and we used some modern material to make sure there wont be any future issues. The front floor on my car had to be replaced as you can see on the pictures of my restoration gallery.
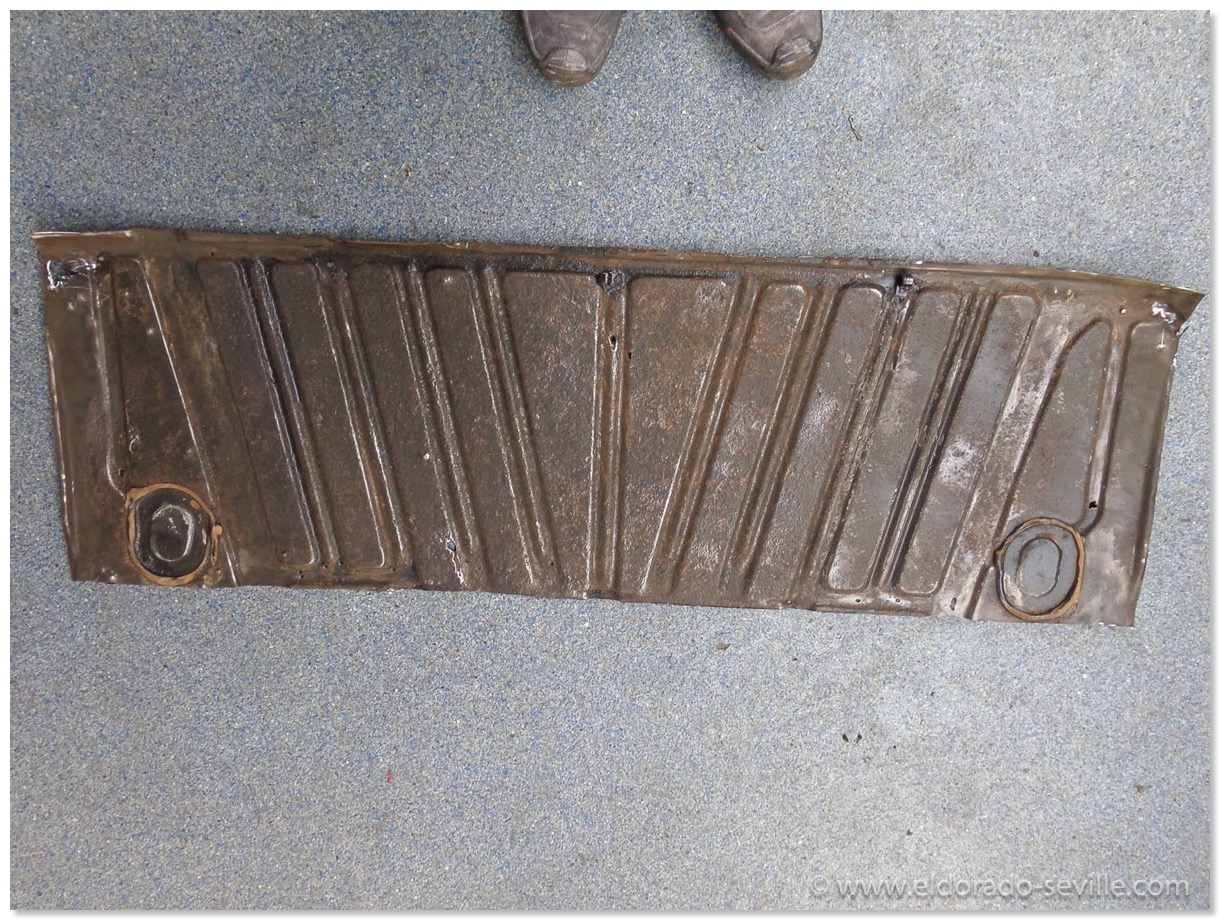
The cut out front floor.
REPLACING THE FRONT FLOOR OF THE 67 ELDORADO
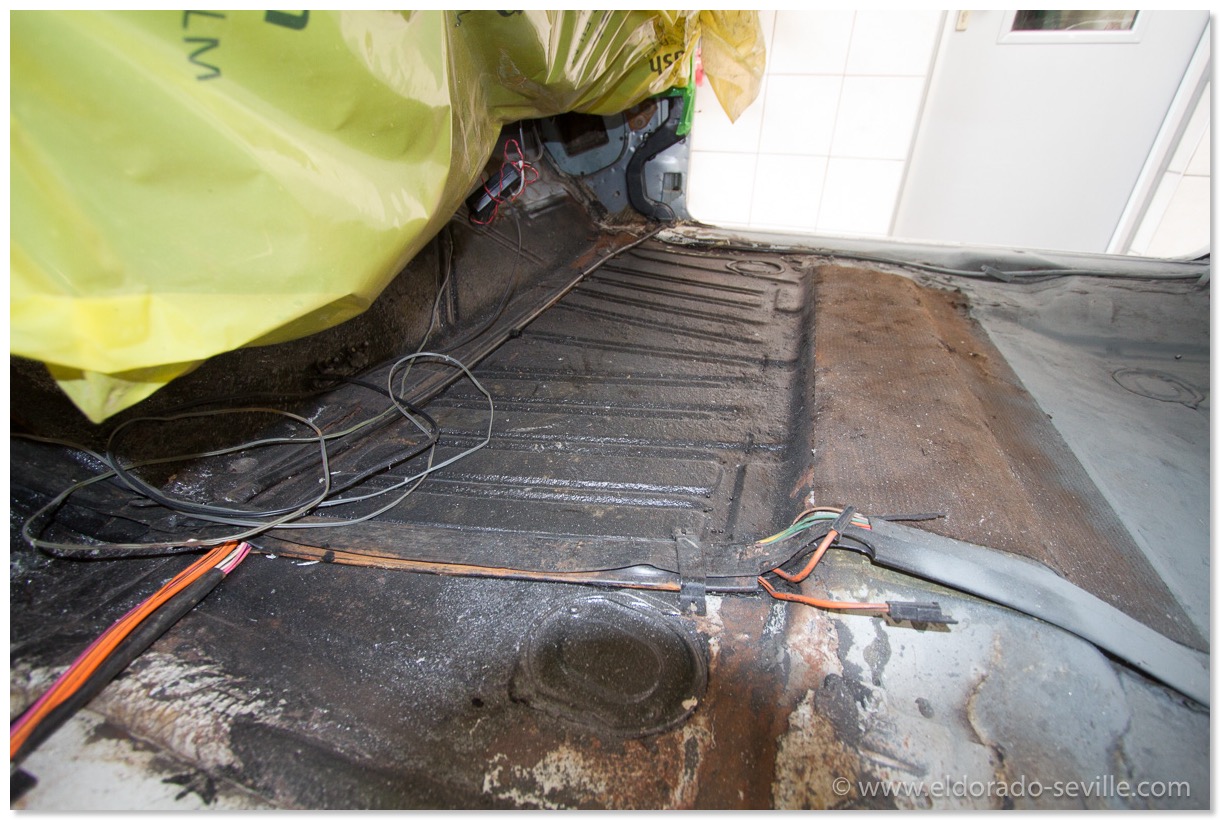
While the exterior of the car did not have much rust I was surprised that the front floor of the car had quite a bit of rust.
Some of the previous owners seems to have tried to stop the rust on the floor sometimes in the past by applying a good amount of rust converter, or whatever the black paint was , he applied over the rusty floor.
It seems that it did not help but just made the sheet metal oxidize underneath this sticky mess.
The restoration shop now started to remove this paint just to find some weak metal with some holes in it.
This is when they decided to cut the entire front floor out and replace it with some fresh metal instead.
They had to make a patch panel from scratch as no new panels are available for this car anywhere. The new custom made replacement floor was now welded in.
Like on the factory rubberized undercoating was reapplied underneath the car and the welding seams were sealed with seam sealer.
You can see all the detailed pictures in the restoration gallery here.
I hope this was the last unpleasant surprise for a while…
This showed up when the carpet and the seats were removed…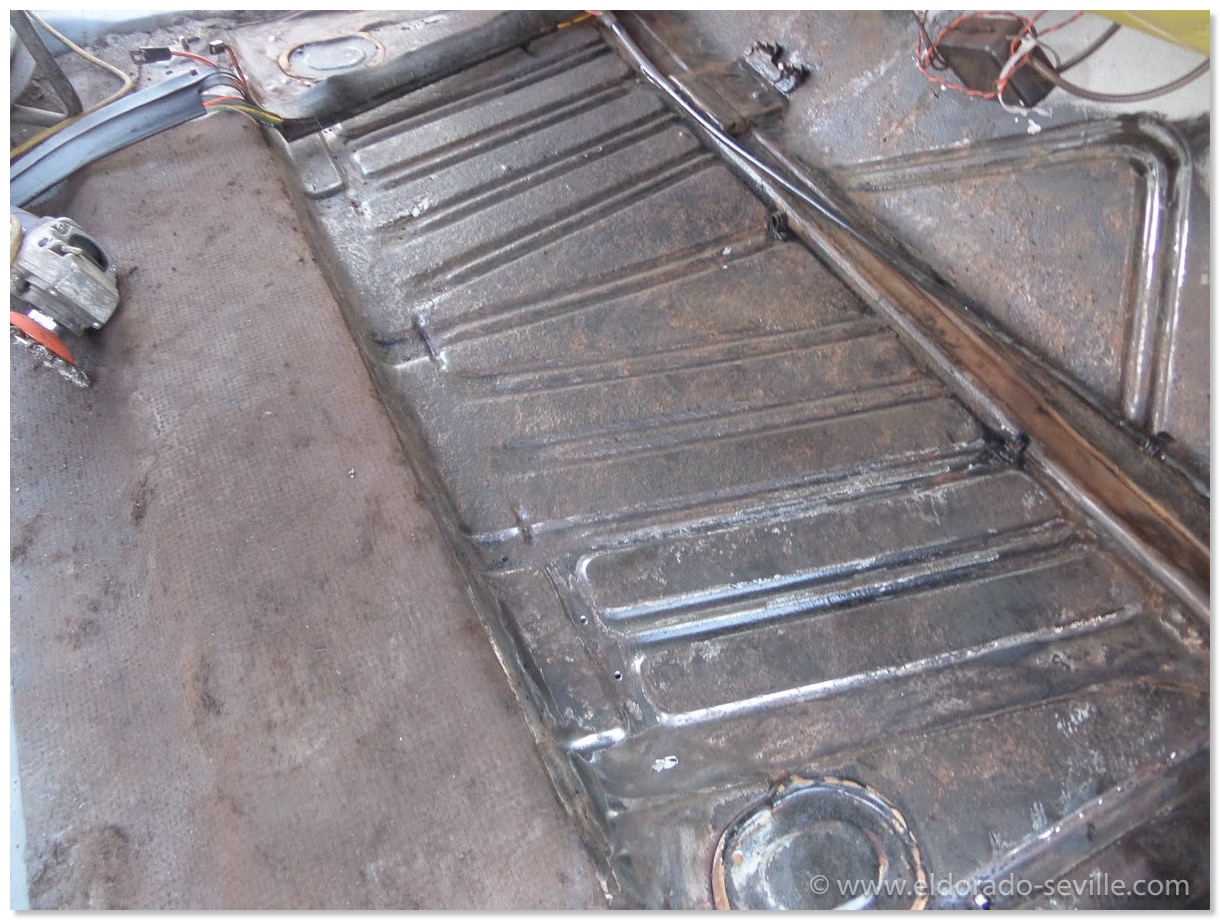
After removing the black mess, the weak metal and some rust holes showed up.
Unfortunately the original floor had to be cut out…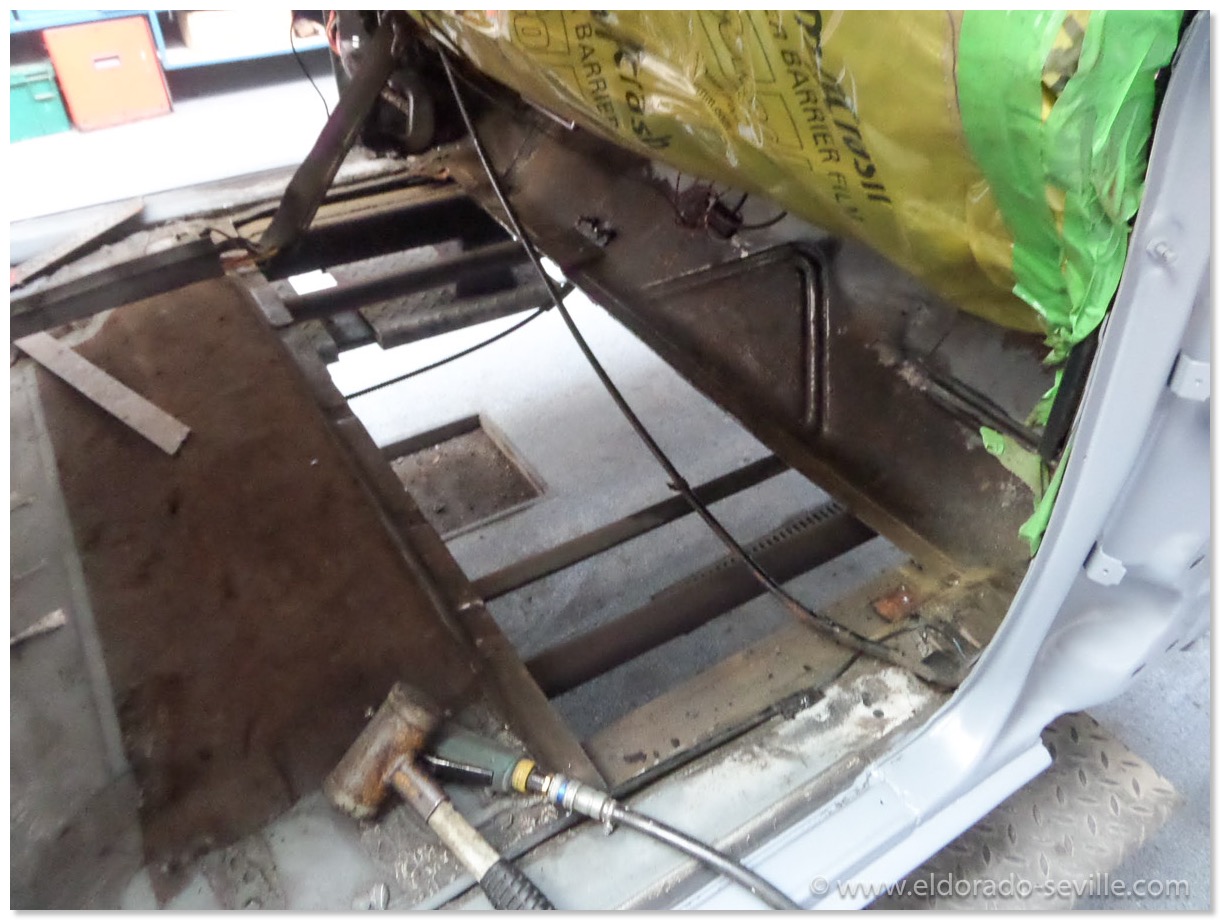
Big hole in the floor.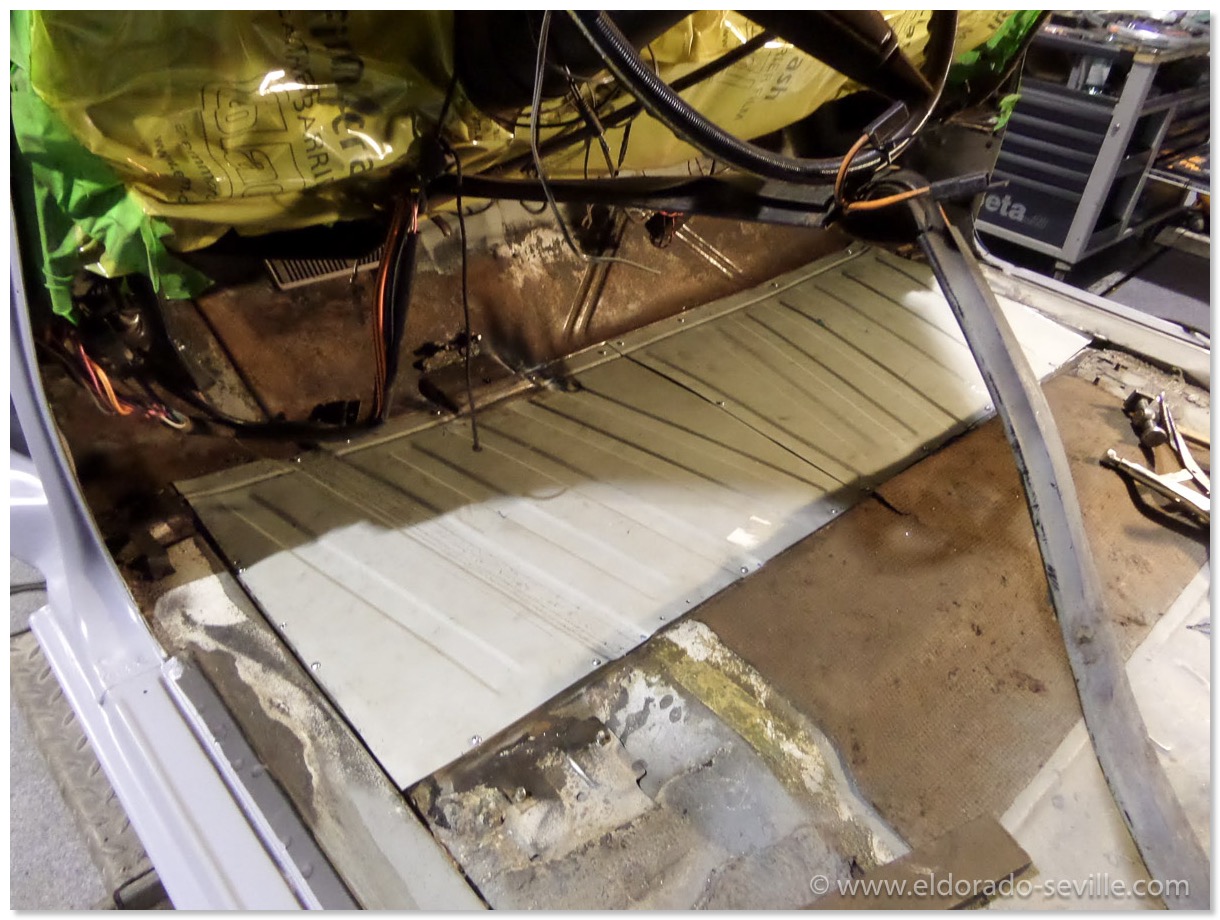
A new custom made patch panel is fitted and will be welded in.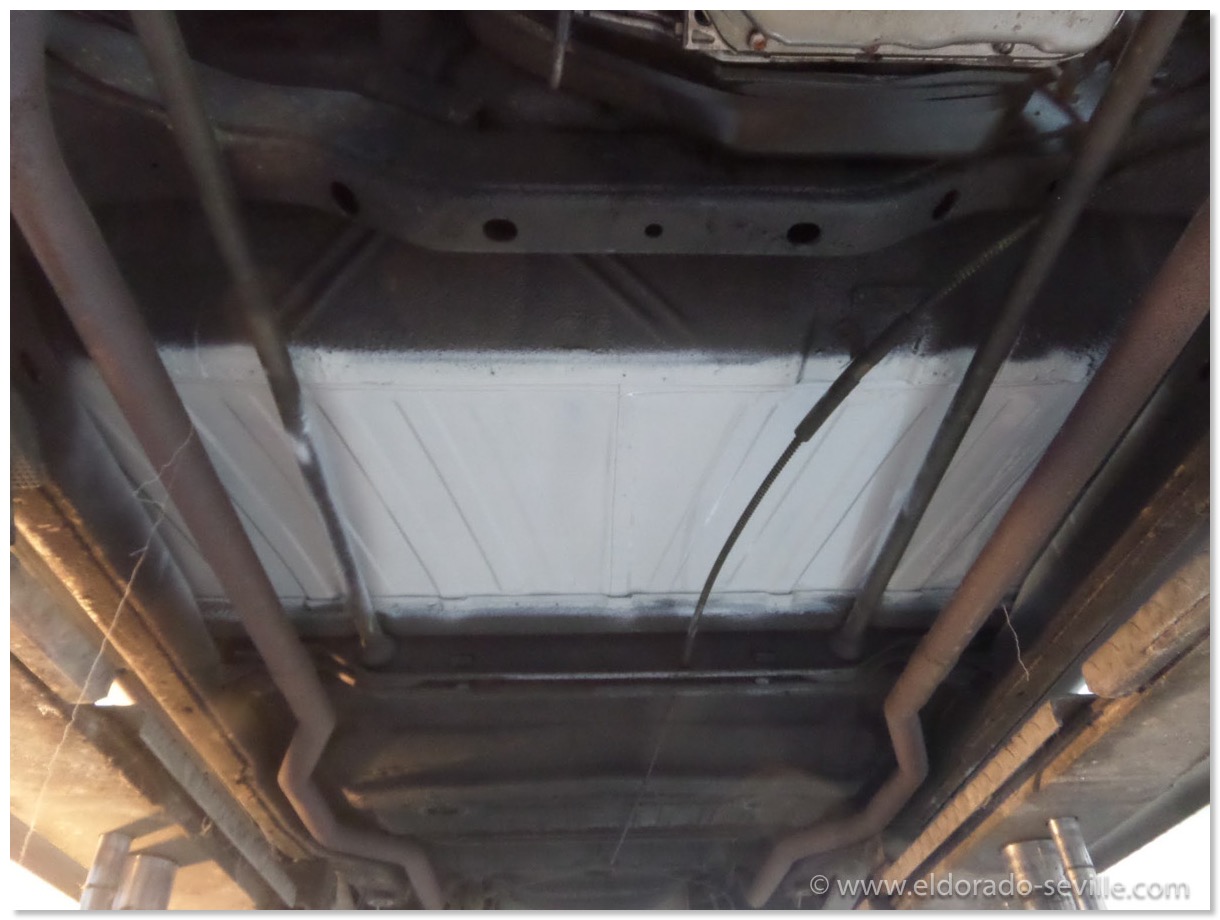
The new custom made patch panel as seen from the underside.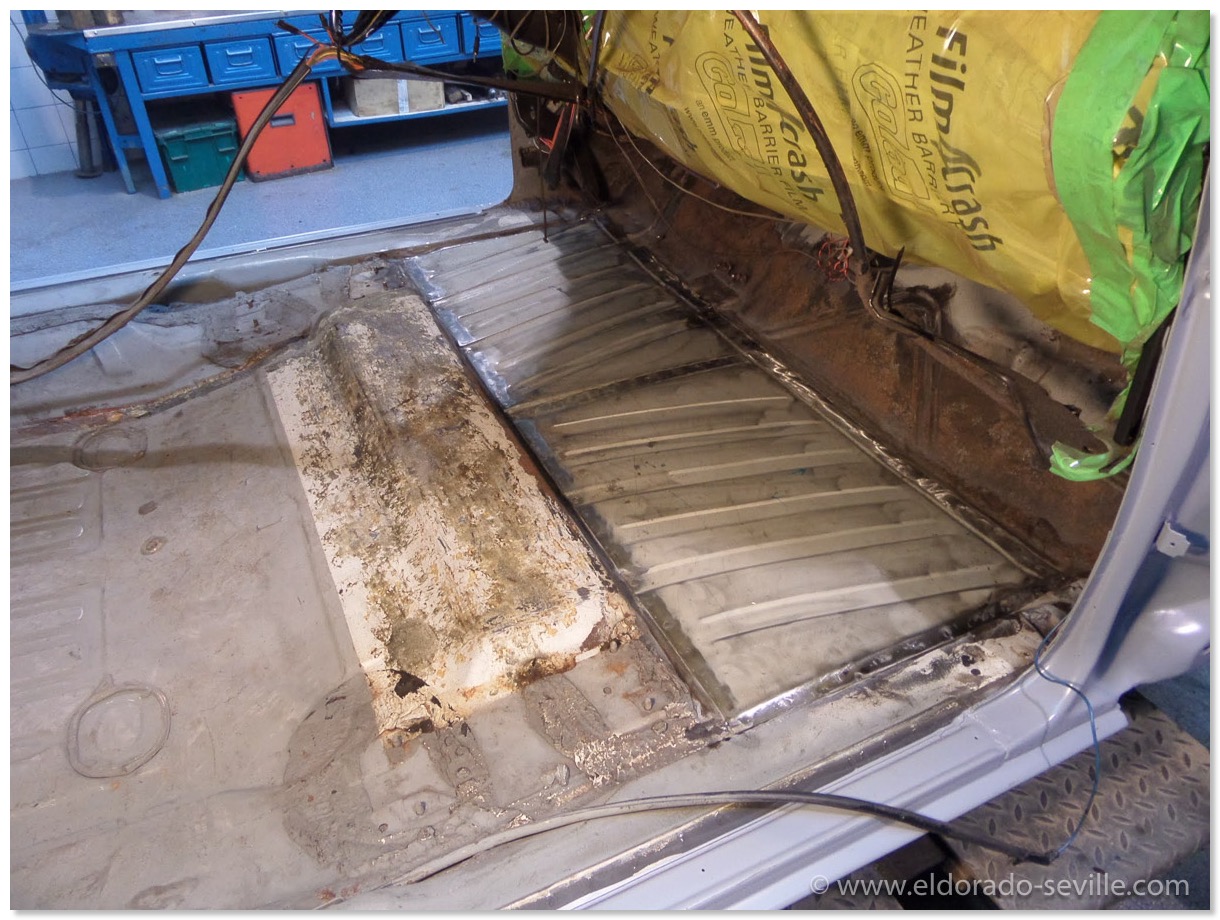
The new panel is completely patched in.
Seam sealer was applied like it was done at the factory. In the factory they just painted over the seam sealer. We will do the same here.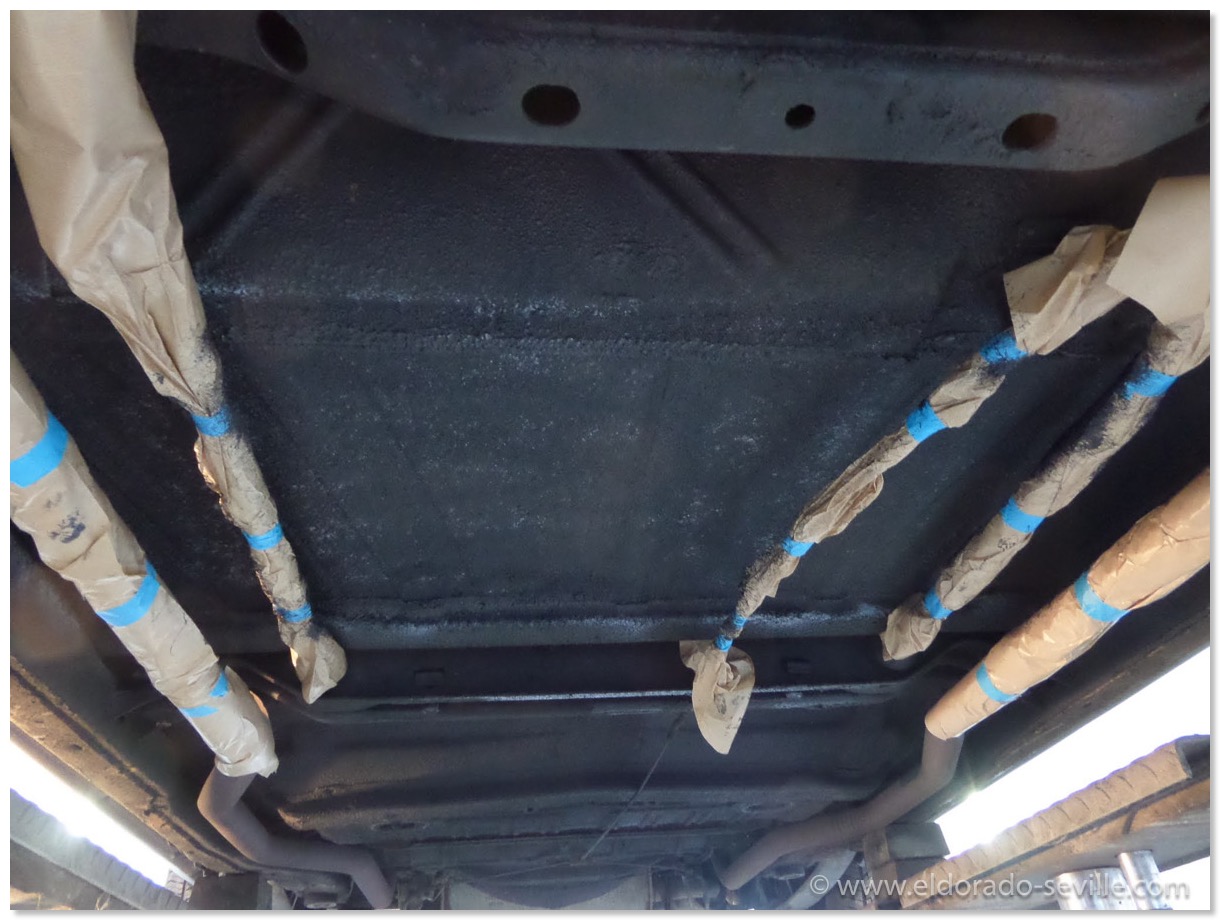
This car came with factory applied rubberized undercoating which was re-applied over the patched floor.
THE 1967 PAINTJOB PROJECT HAS STARTED
The restoration shop is sending me detailed pictures of the process. They are really doing a great job. Very exciting times.
Of course there are the first unpleasant surprises to be seen - there is a little more rust around the rear window than I expected, but still nothing serious. After disassembly we could see that the car is in fantastic shape.
You can find all the pictures of the restoration here on my website as high res pictures.
In the shop - disassembly began. They are cleaning everything up now.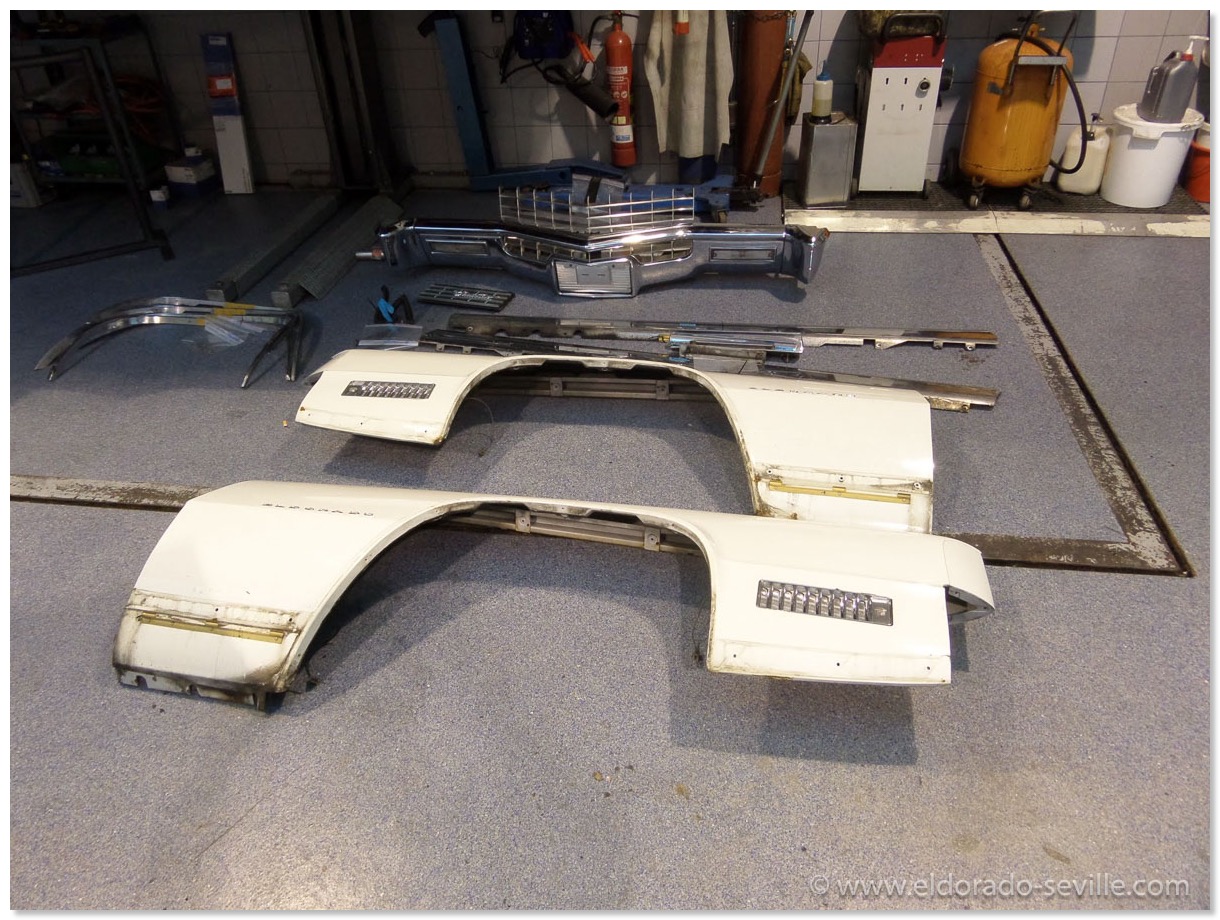
Removal of all the trim and sheet metal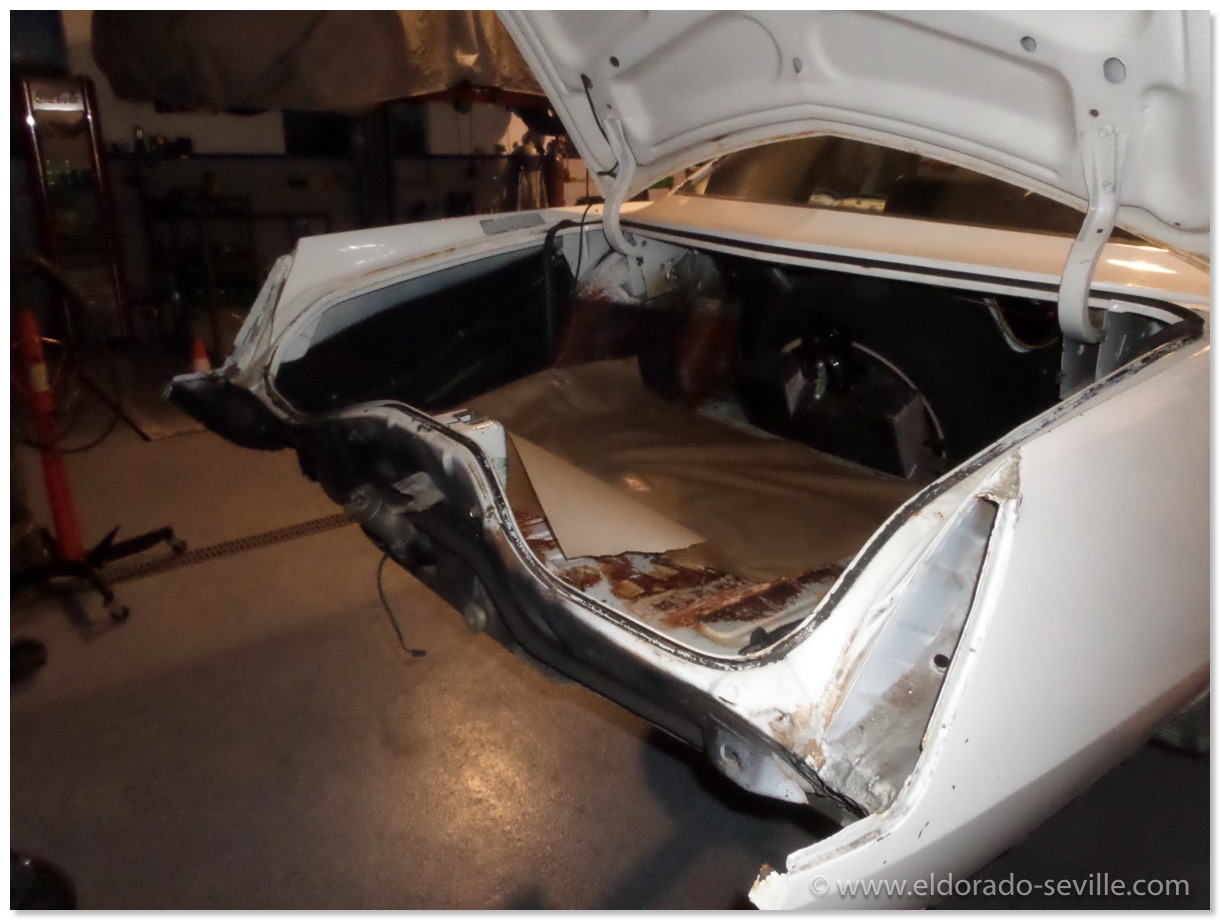
I will also redo the trunk.
FIXING A LEAKING VALVE COVER ON MY 1967 DEVILLE
The gasket was replaced a couple of times since I own the car, but it never was very successful in stoping the leakage.
After my last attempt it leaked even more than before…
The valve cover design of the 429 engine is not exactly the best from a technical standpoint. It's only held in place by 4 screws.
I did some research and tried a different approach this time to seal it.
First I used a different valve cover from a spare engine I have in my garage which did not show any signs of leakage.
I had to fully detail it first to make it look perfect. I repainted it with Bill Hirsch Engine enamel in the correct color.
I made sure that everything was flat as these cover often get warped at the bolt holes by over tightening them.
They checked out flat. I then glued the new cork gasket (I used a Fel-Pro gasket) to the valve cover with high temp gasket sealer. To make sure that it stayed where it belongs to I used a lot of cloth pins to keep the gasket in place.
I let it dry over night.
The next day I put some wheel bearing grease to the other side of the gasket and put it back on the heads. The grease helps to make sure that you can remove the gasket any time again.
I then tightened the four bolts to 28 INCH/Pounds of torque as specified by the shop manual. (thats 3,1 NM) I had to buy a small torque wrench for such a small torque rating first… I could have never guessed how much torque it is.
I then ran the engine and let it cool down and re-torqued the bolts afterwards.
After the first 25 miles test drive it seems that the valve cover is 100% leak free for the first time since I own this car.
I´m not sure what fixed it this time, but during my research I read multiple times, that for cork gaskets one should not use gasket sealer on the head side of the gasket, and one should only use grease instead. Some recommend that gasket adhesive (spray) should be used to keep the gasket in place in the valve cover.
I know it looks very strange, but I used cloth pins to make sure that the gasket is glued to the valve cover properly…
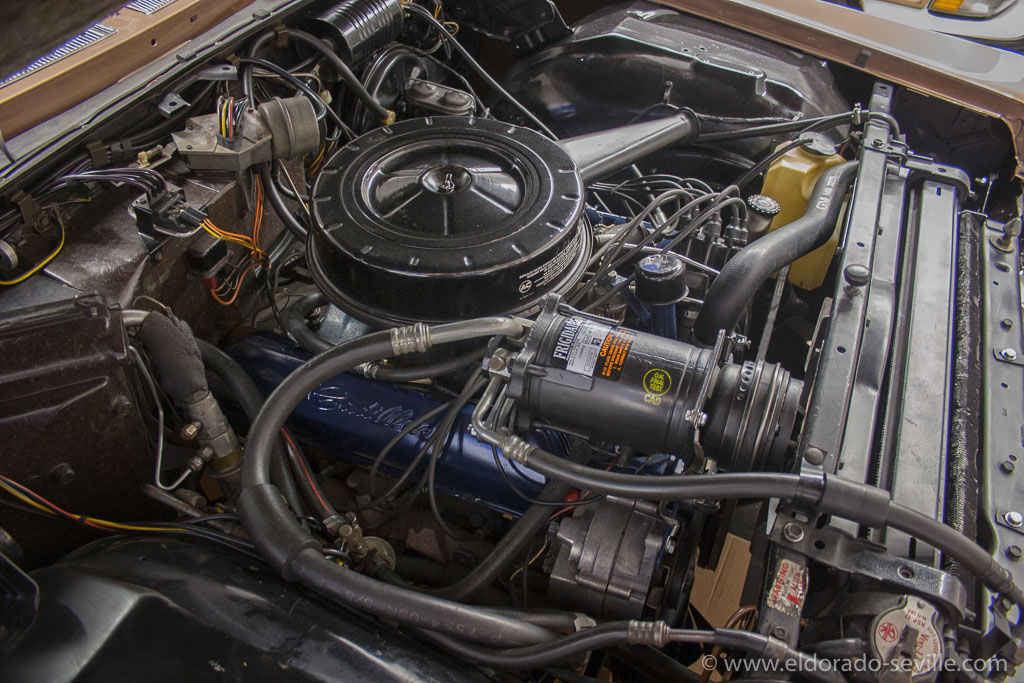
THE 1967 WATERPUMP PROJECT IS COMING TO AN END - DETAILING THE AC COMPRESSOR AND A LEAKING VALVE COVER
The project had a major delay as the reproduction radiator hoses were held by customs for 5 weeks. Its unbelievable…
I could now finally refill the cooling system and start the car again with the new water pump in place.
The car fired right up although I had also removed the distributor and forgot to mark how it was in. So I had to find TDC (top dead center) before I could install the distributor back into the car.
I also bought a cheap timing light and set the timing to 5 degrees. You have to set idling to 480 rpm, disconnect the vacuum hose to the distributor and the parking brake and plug the hoses to set timing correctly
After the first few miles I am quite satisfied with my work. I hope that everything will stay like this and that no leaks will show up.
Only the right valve cover where I had replaced the gasket seemed to have a slight leak with oil dropping on the exhaust manifold... Looks like I will have to take the compressor out again to be able to take the valve cover off again and install another new gasket… But first I will have to find out why it is actually leaking. I hope that the cover itself is not warped as it was already leaking before on exactly the same spot. Often these covers get tightened down too much. All it needs is 28 INCH pounds of torque (3,1 NM) I will also make sure the screw holes have not become dished (usually due to over-tightening of the screws). Use a small block of wood as an anvil and a small hammer to flatten the screw holes back out.
The engine somehow runs and idles better than before and has more power. It seems like the ignition was off before. I had the car tuned by a professional years ago - another thing they did not get right...
The new reproduction hoses I got from Fusik are also in place with the correct tower hose clamps. The hoses have the correct numbers stamped on, but compared to my original hoses the stamping looks different where the numbers are much smaller. The hoses fit very well, only the lower radiator hose had to be cut a little to fit.
I also detailed the replacement AC compressor I installed years ago. I bought a new reproduction decal which is a very good match to the original decal. In general I found out that all the reproduction decals available out there are not a 100% match. They look very similar but they all differ in size, spacing of the numbers, and most of the time the font used is very similar, but not exactly the same. I have no idea why the manufactures did not get it 100% right. Maybe I will have to produce my own decals in the future… Most of the AC compressor labels you can buy are incorrect for the year or model they are offered. If you want to get the correct one for the 67 Deville you will have to buy the one for the 67 Eldorado. Often these reproduction decals have the wrong colors, numbers and R12 capacity on them. So do your research to get the correct one.
Another challenge was to reproduce the O.K. inspection stamp. Years ago I found the stamp on ebay and experimented with different kinds of paint and never got any useable results.
Eventually I found a stamp kit set for Corvettes which included the correct yellow paint and a stamp felt and the Corvette stamp. I could not use the Corvette stamp of course, but the rest of the kit is perfect and finally I could apply the stamp to my AC compressor which now looks factory new again.
The engine is back together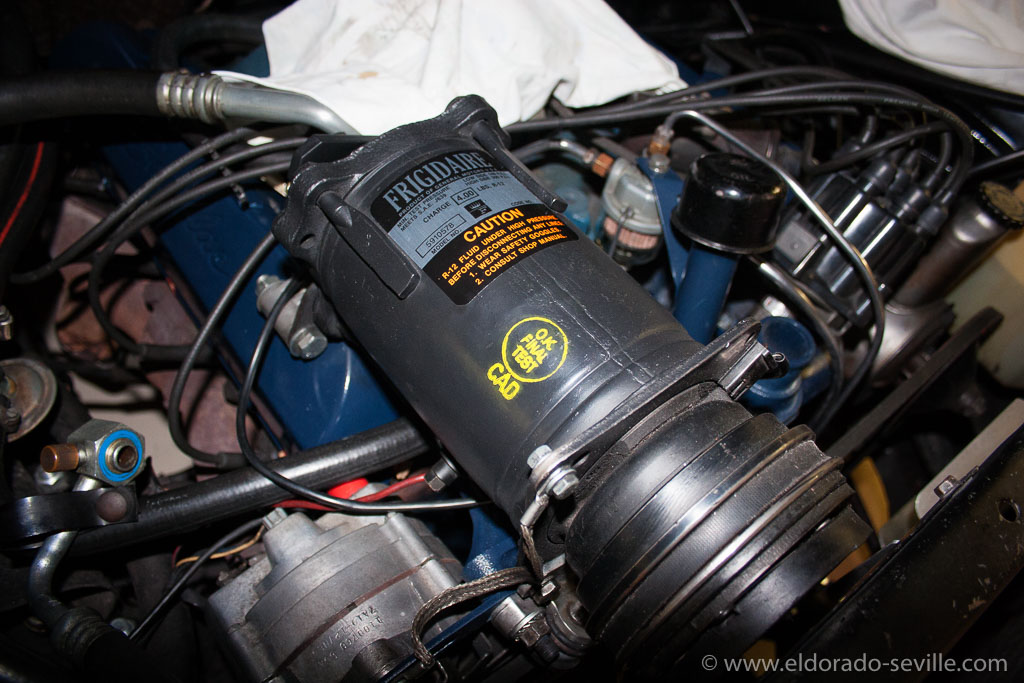
The detailed AC compressor
The O.K: final test stamp
A NEW WATER PUMP FOR THE 67 DEVILLE AND DETAILING THE ENGINE
So I ordered a new, high quality rebuilt water pump from one of my favorite sources. When I got it, I found out that it was one for a 64/65 Cadillac with an additional water outlet. This seems to be the type everybody is selling nowadays and it is much more common. It will fit the 1967 429 engine and it even has the additional water outlet pre-plugged with a rubber plug. The problem I had with it, is that it looks completely incorrect on the 1967 Cadillac, and so it was not acceptable for me.
I then found a very good source for Cadillac parts. They are priced higher than other outlets (if you can even find this parts anywhere else..), but David - the owner - offers only 100% correct and high quality parts. He also has a huge collection of NOS parts. I found some parts through him that I did not find anywhere else. His customer service is excellent as well - I can highly recommend him.
Until around 2009 I had most work on my cars performed by a restoration shop specialized in American Cars. Then I decided to no longer go there for a lot of reasons. With the growing numbers of cars I collected, I could no longer afford to pay somebody to have all the work done, and I no longer accepted to pay good money for lousy work and bear the shop owners terrible attitude against his clients.
Now that I´m trying to do everything by myself, I found a lot of bad work the professionals did, and sometimes I´m really shocked to see what I wasted my money for, but I had no idea about cars and they could have told me everything and I would have believed them…. Lots of work they did leaves a lot to be desired, and you can see some examples in the pictures below…
When they repainted parts of my 67 Deville´s engine, they used the completely incorrect Cadillac blue, which was used from 1977 on. I always hated it, and now that I had to disassemble so much to replace the water pump they did in 2001, I decided to paint everything correctly.
I detailed all the parts I took off and had them media blasted. After they were cleaned, I painted them with the correct shade of Cadillac Blue. Bill Hirsch engine enamel is the best and most correct engine enamel for Cadillacs. You can see lots of pictures below which document what I did. Besides the incorrect paint I found out that fuel lines were damaged, bolts were missing or broken off and many other small flaws which I corrected now.
I´m now waiting for the correct upper and lower radiator hoses to arrive, which are reproduced by Fusick, to replace the still original hoses from 1967! The originals still look great and would probably last for a long time, but I do not want to take any chances… I am now hoping that nothing is leaking and that I wont have to re-do any of the work.
When I took the radiator out, the overflow tube came loose. I already had the same problem years ago, and it was not fixed properly by the restoration shop… Luckily I found an old gentleman locally, who could brace it back together the old school way. I will of course detail the radiator as well before installing it back into the car.
This is a short video which shows the problem I had with the water pump and the bad bearing. You can clearly see the wobbling of the shaft and hear the shot bearing.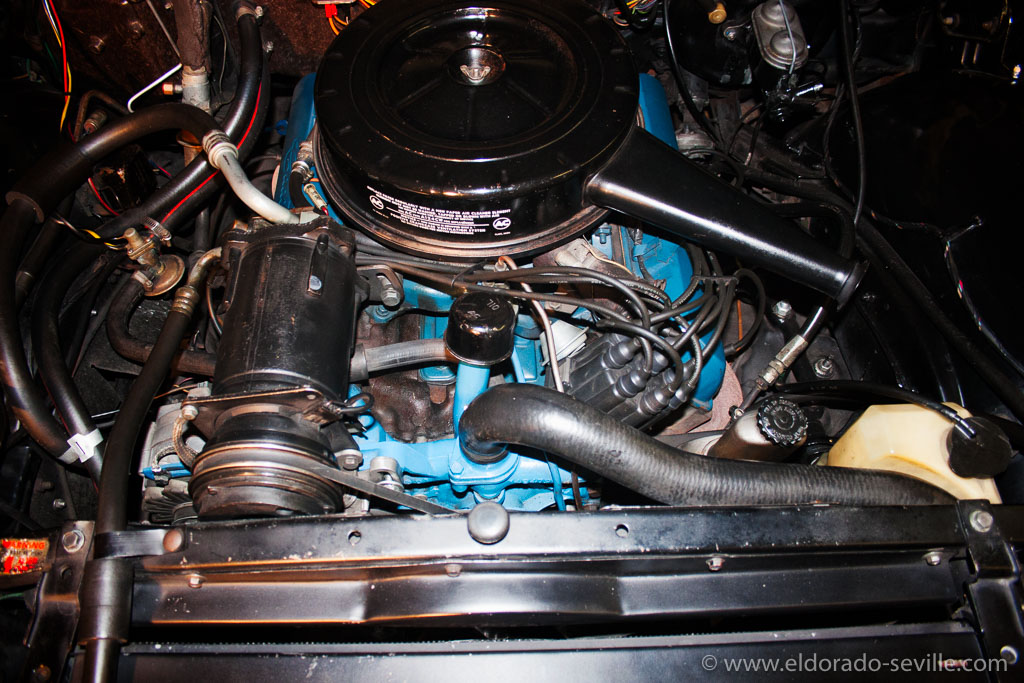
This is how the engine bay looked like before, with everything painted in the incorrect later Cadilllac Blue...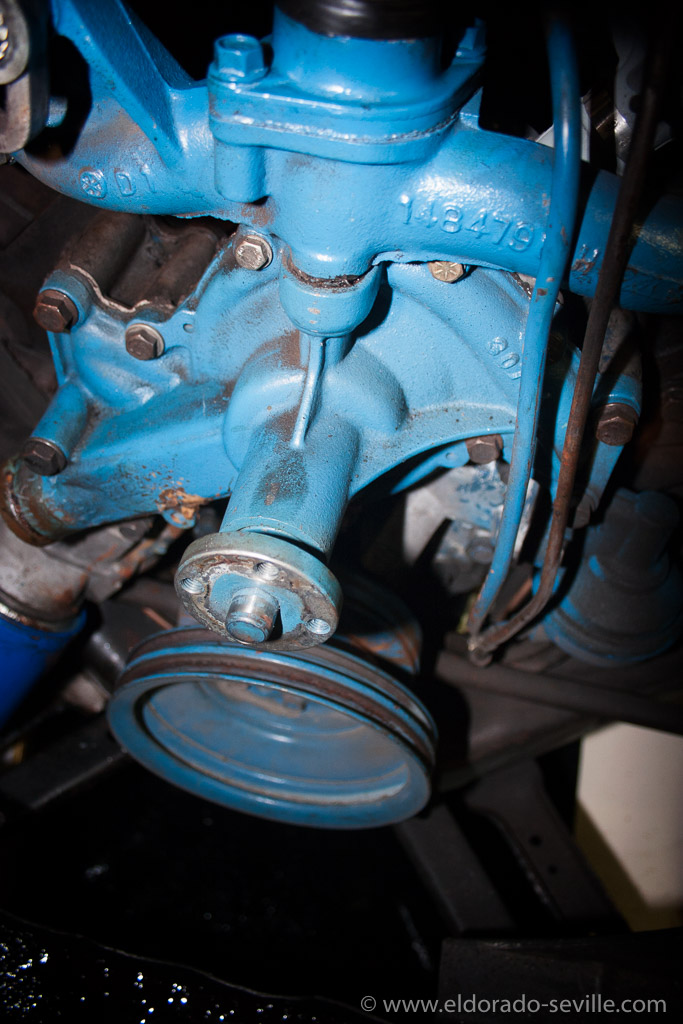
The defective water pump is about to come out. I will also replace the painted fuel line with a correct one from a spare engine I have. The water pump made a loud bearing noise and the shaft was a little loose.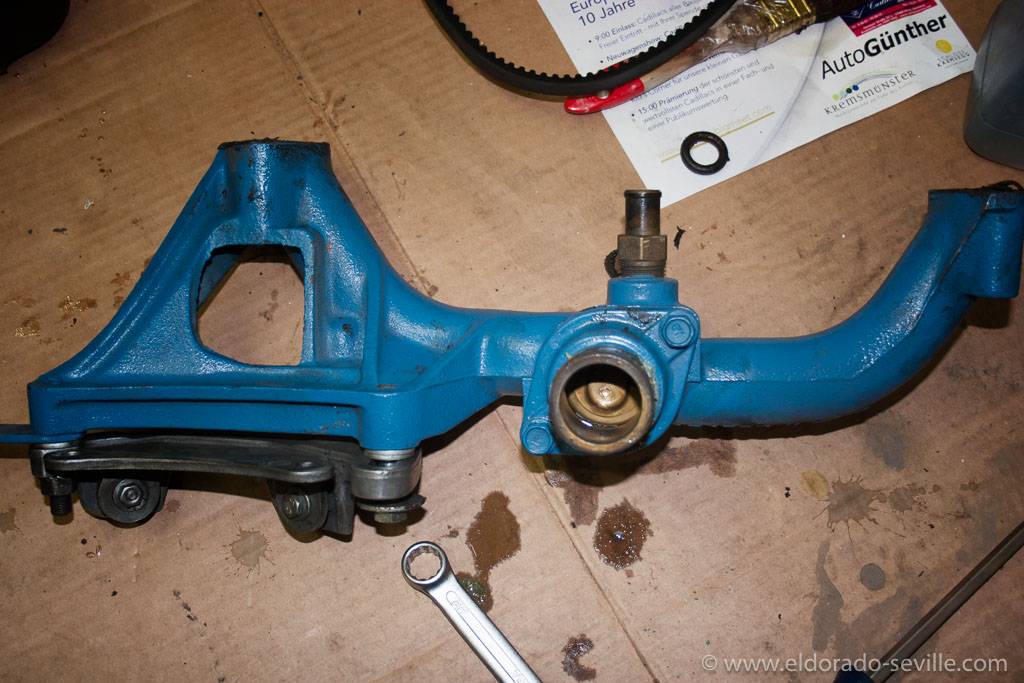
I will sandblast and repaint the hot water crossover passage.
Water pump, radiator and valve covers removed.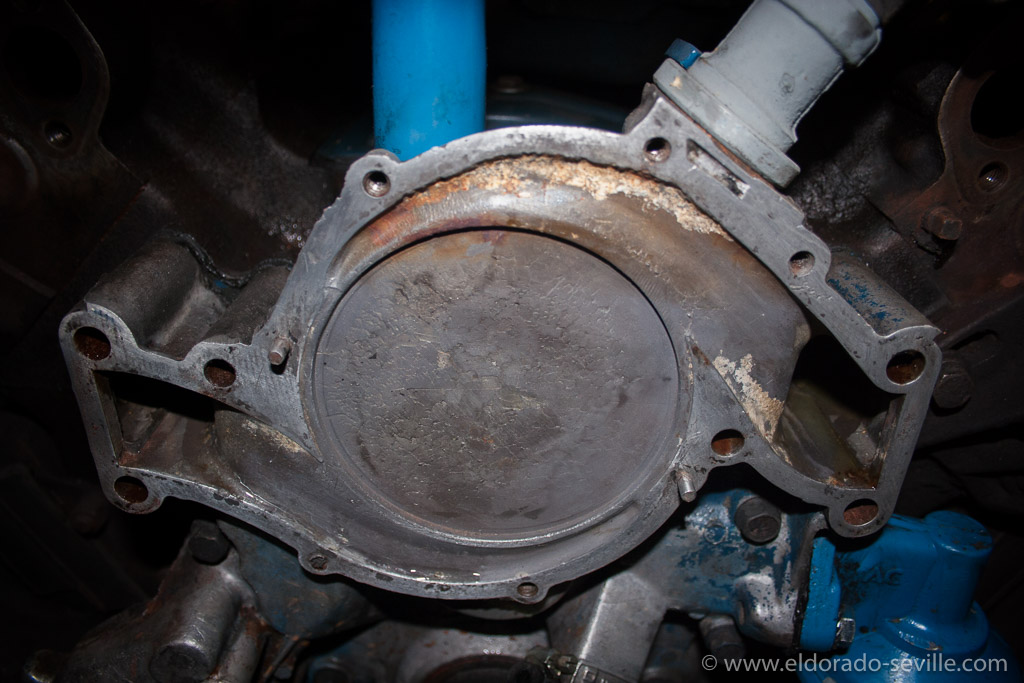
The water pump was removed - the front cover looks pretty good.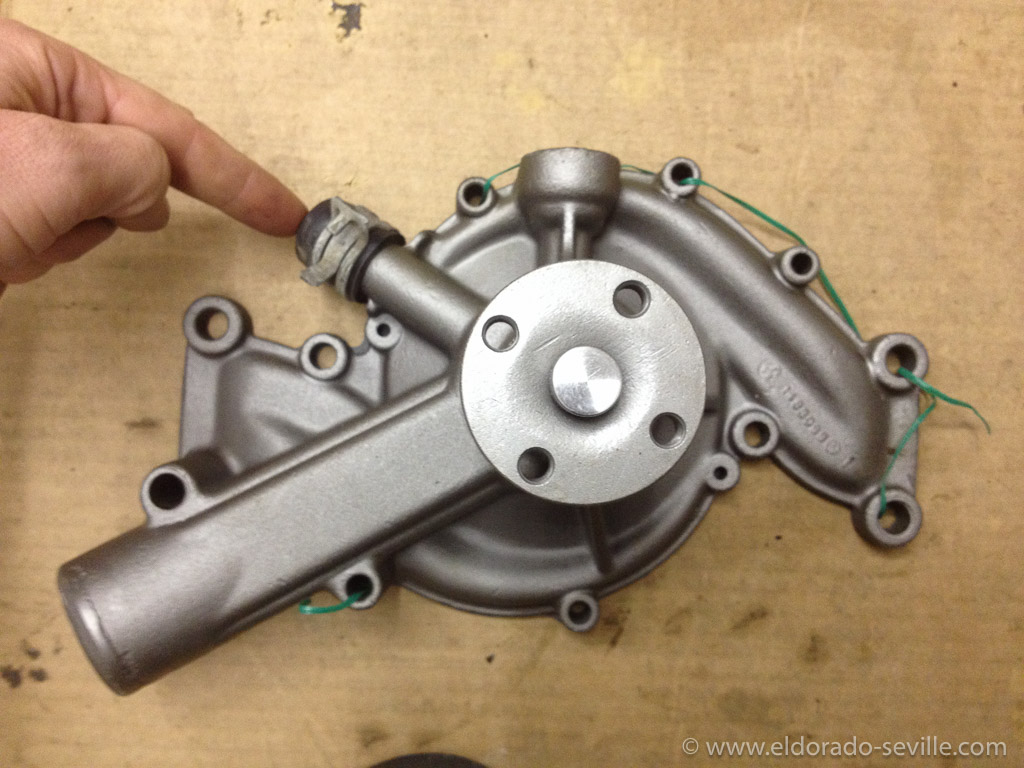
This is the incorrect 1965 water pump everybody is selling for the 429 engines. It will work with the 66 and 67 Cadillacs as well, but it has an additional water outlet which was not used from 1966 on. If you buy them for your 66 or 67 the no longer used outlet is often blocked like you can see on this picture. The correct 1966/67 pumps are much harder to find and way more expensive.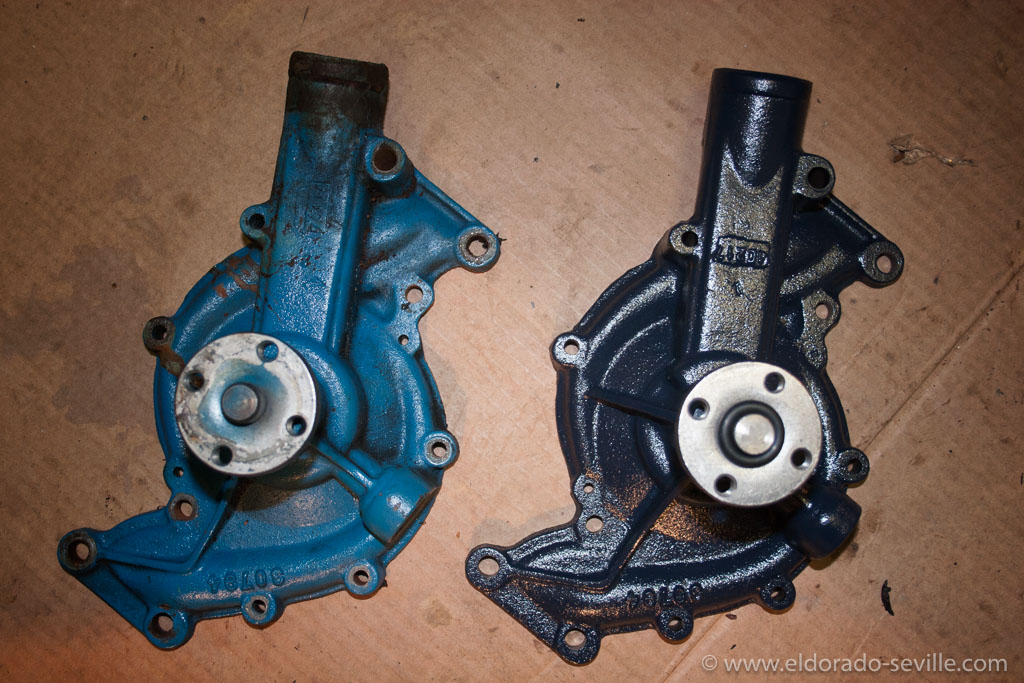
The original water pump on the left and the correct rebuilt 1966/67 Cadillac pump on the right in the correct color.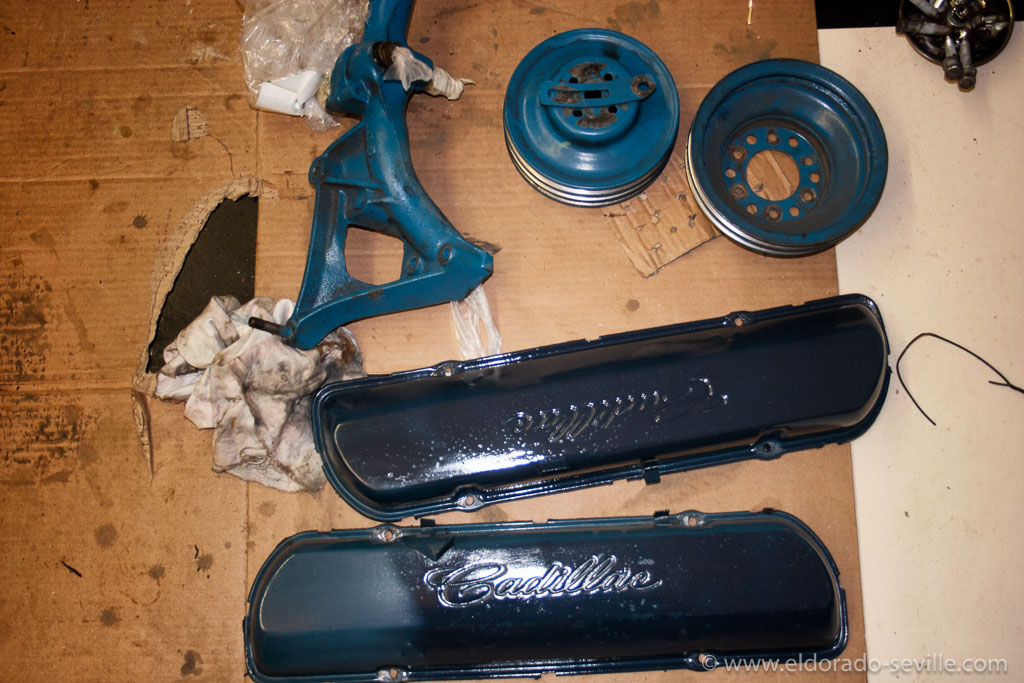
I will sandblast and repaint all this parts soon.
I do have two bigger projects in my garage at the moment and it looks like a mess in there.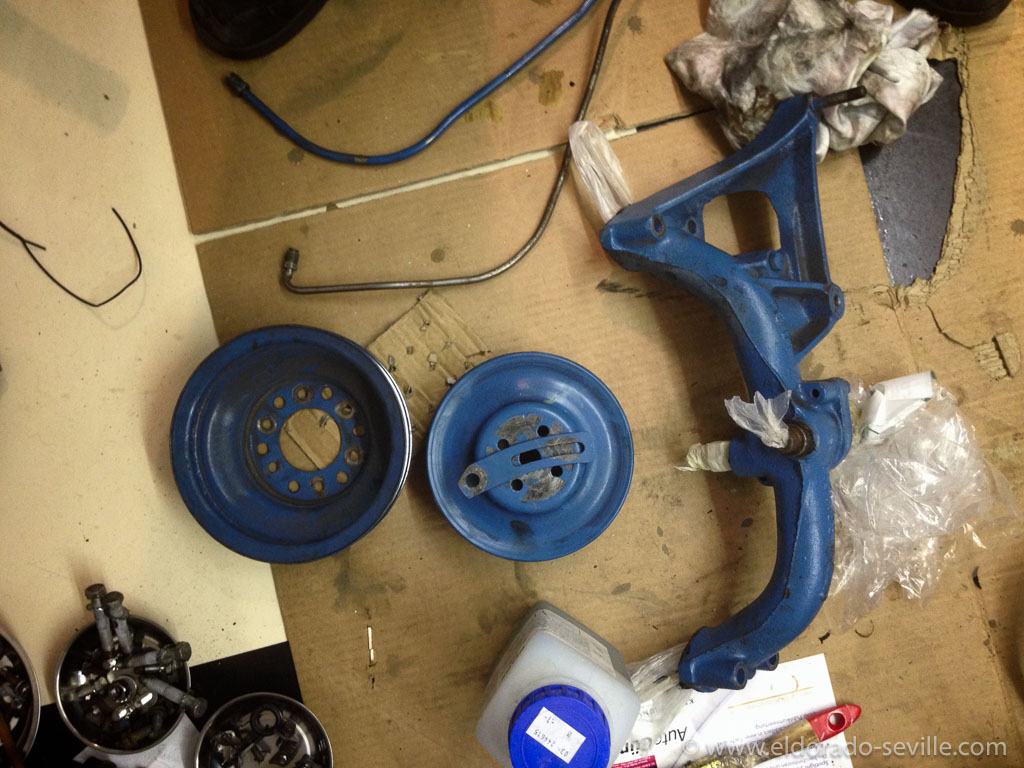
The parts before they were media blasted.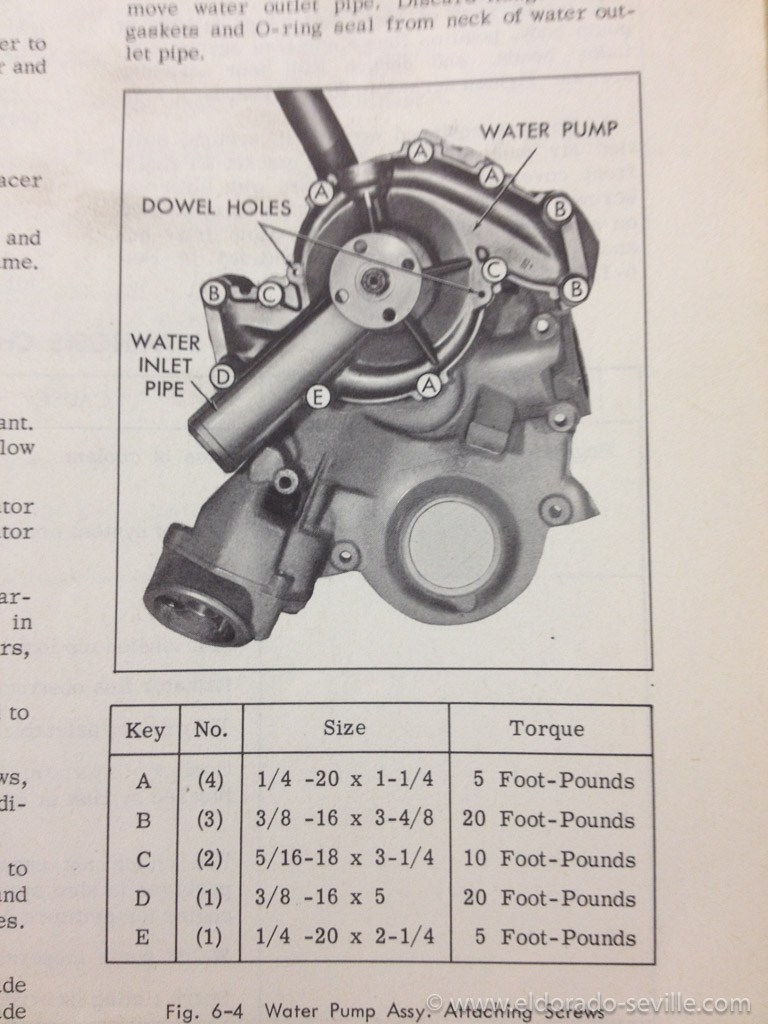
1967 Cadillac Water Pump torque specifications - make sure to follow them EXACTLY!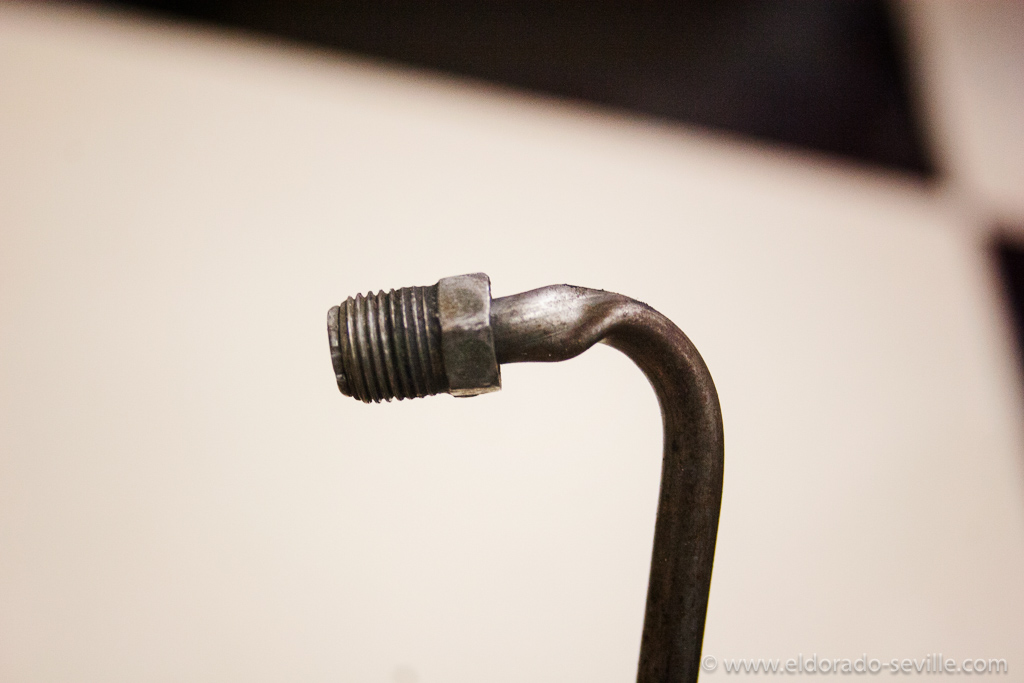
This is how a professional restoration shop damaged the original fuel line when it tightened it 15 years ago during a carburetor rebuild. i think I was lucky that it did not leak and still let fuel through...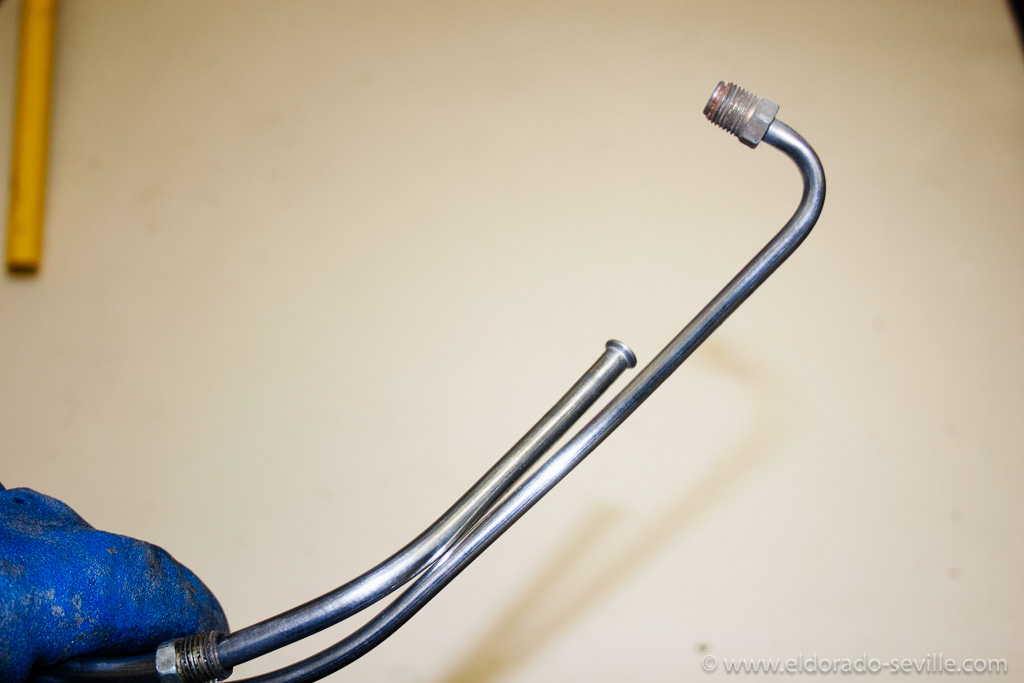
I detailed the fuel lines I have from my spare engine and installed these instead..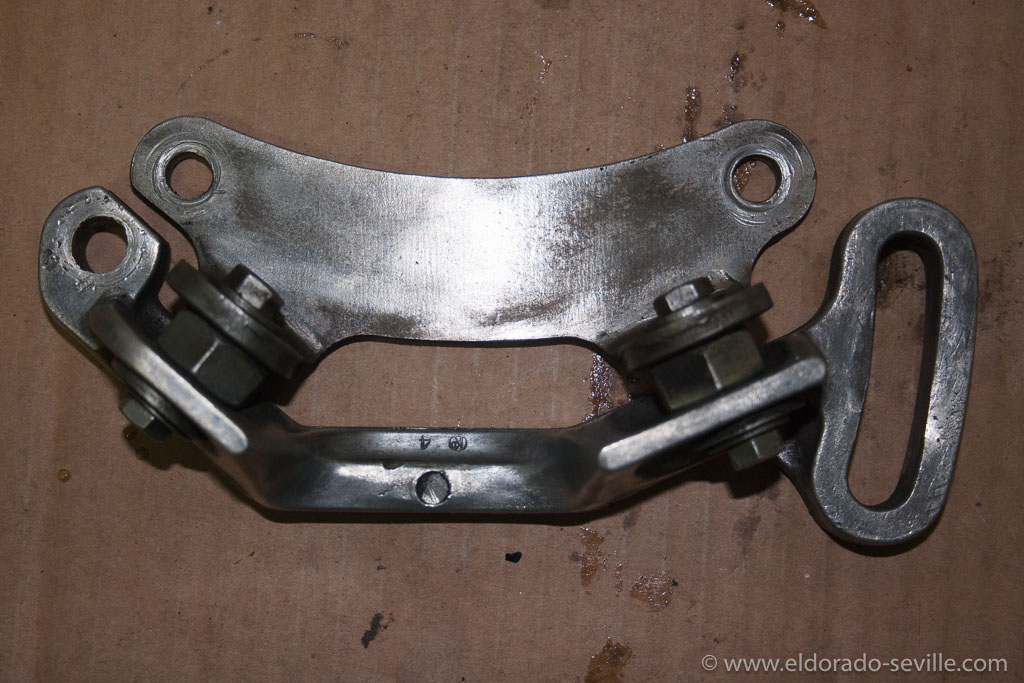
Another construction the restoration shop made for the AC compressor bracket: - instead of rubber bushings they installed this nuts, bolts and washer construction ...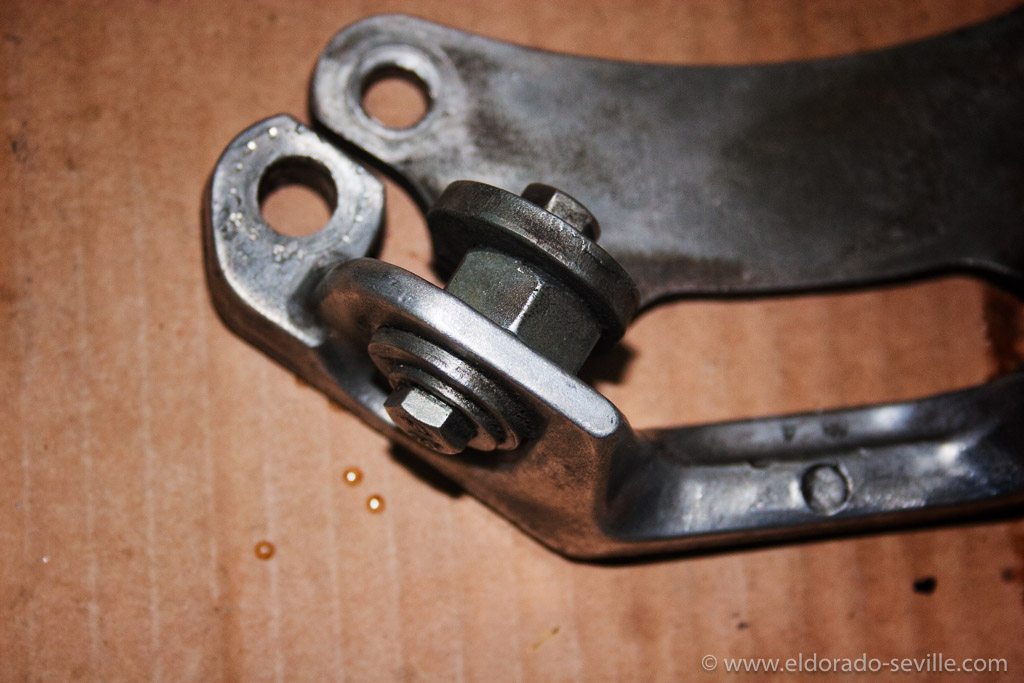
Another construction the restoration shop made for the AC compressor bracket: - instead of rubber bushings they installed this nuts, bolts and washer construction ...
I changed it back to original with the correct bolts and rubber bushings which I soaked in silicone lubricant for a couple of hours to make them soft again...
When I removed the overflow hose from the radiator the neck came loose. Luckily I found an older gentleman locally, who could brace it back together the old school way. I will of course detail the radiator as well before installing it back into the car.
I did not want to remove the front cover so I had to repaint the oil filler tube inside the car... First I brought it back to bare metal.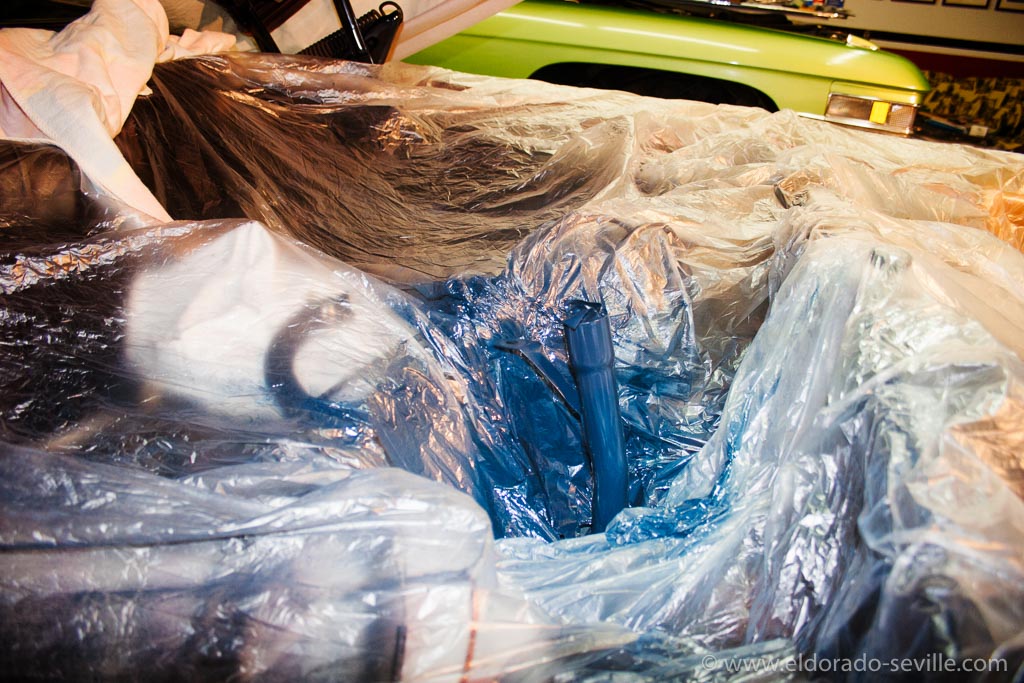
Oil filler tube - painted in the correct shade of Cadillac Engine Blue.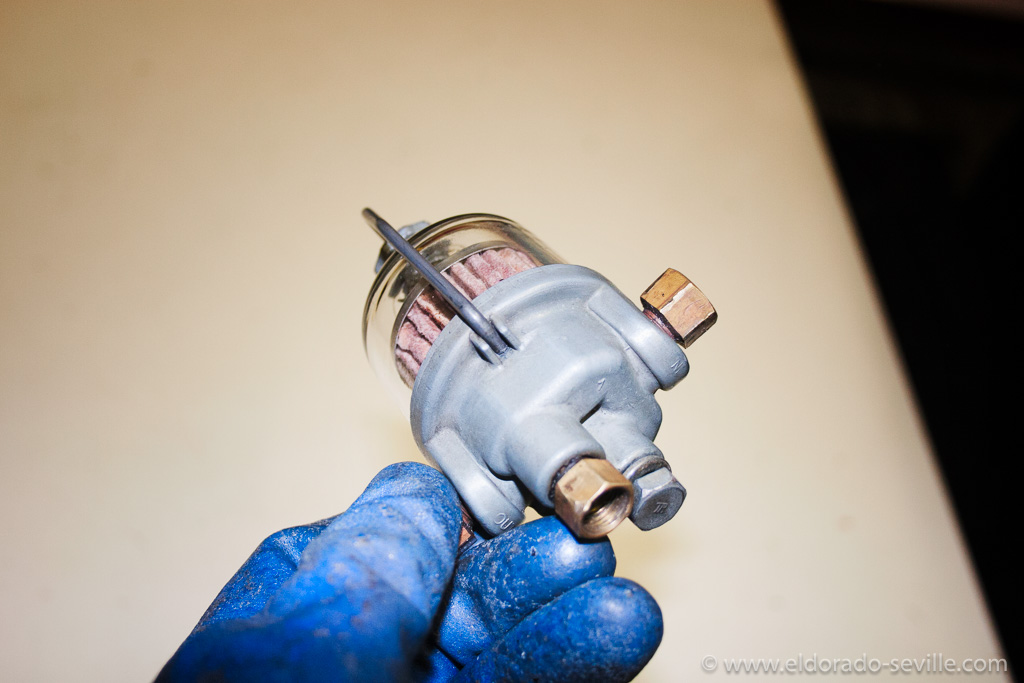
I detailed everything I removed from the car.
I primered and fillered the valve covers and sanded them to perfection before painting.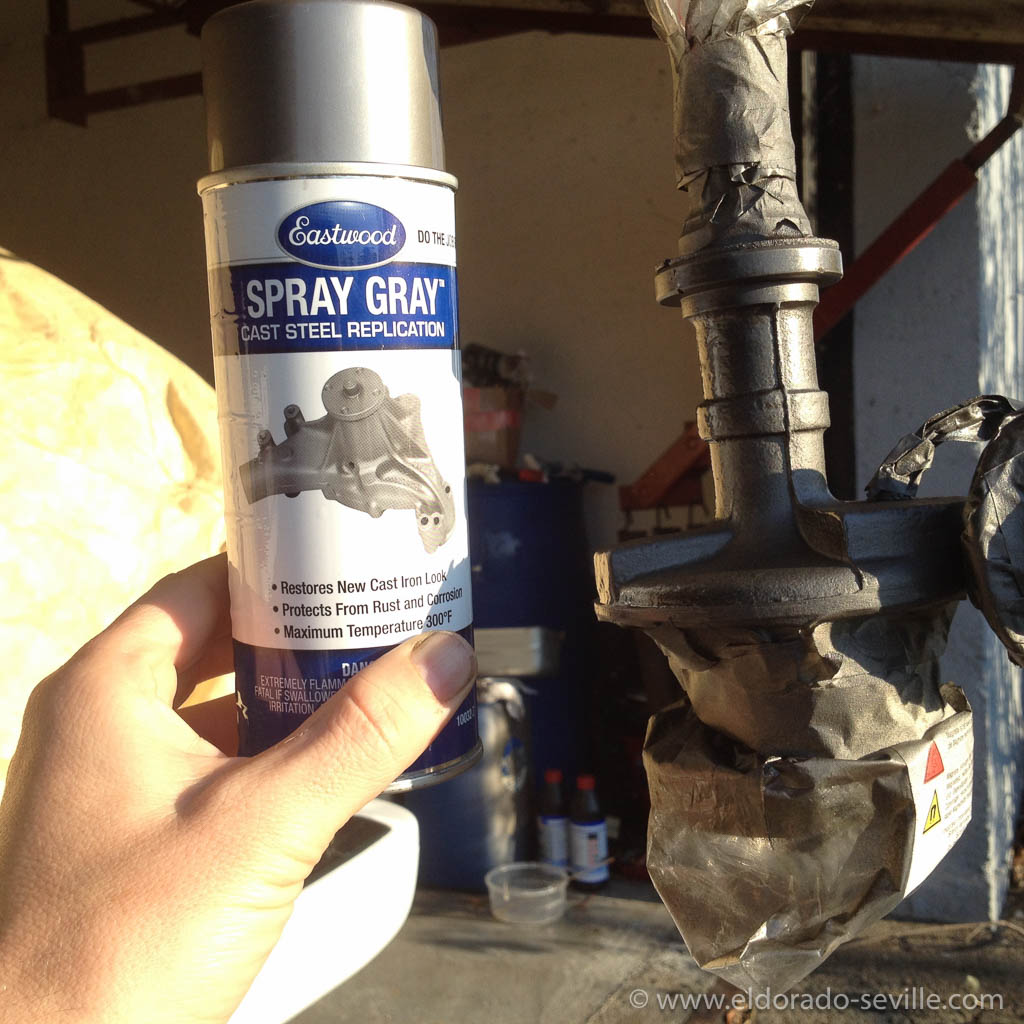
The distributor after painting. This spray gray paint from Eastwood replicates cast steel very very well. I tricked a lot of people with this paint who insisted that it must be bare metal.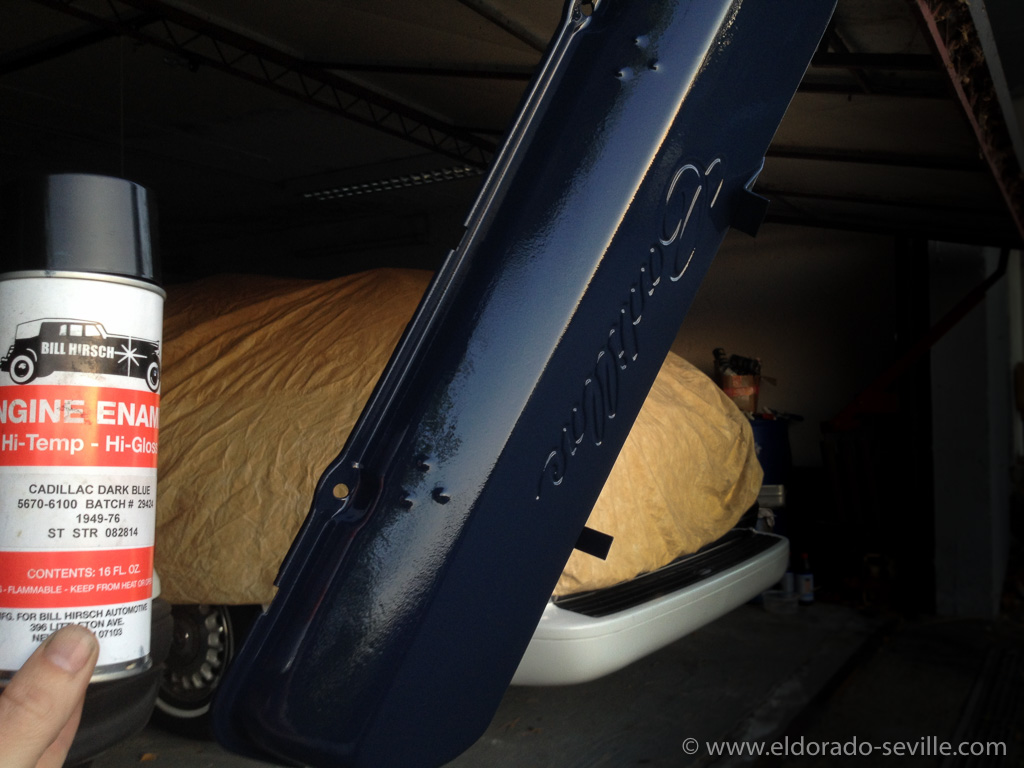
I used Bill Hirsch engine enamel to paint all the engine parts.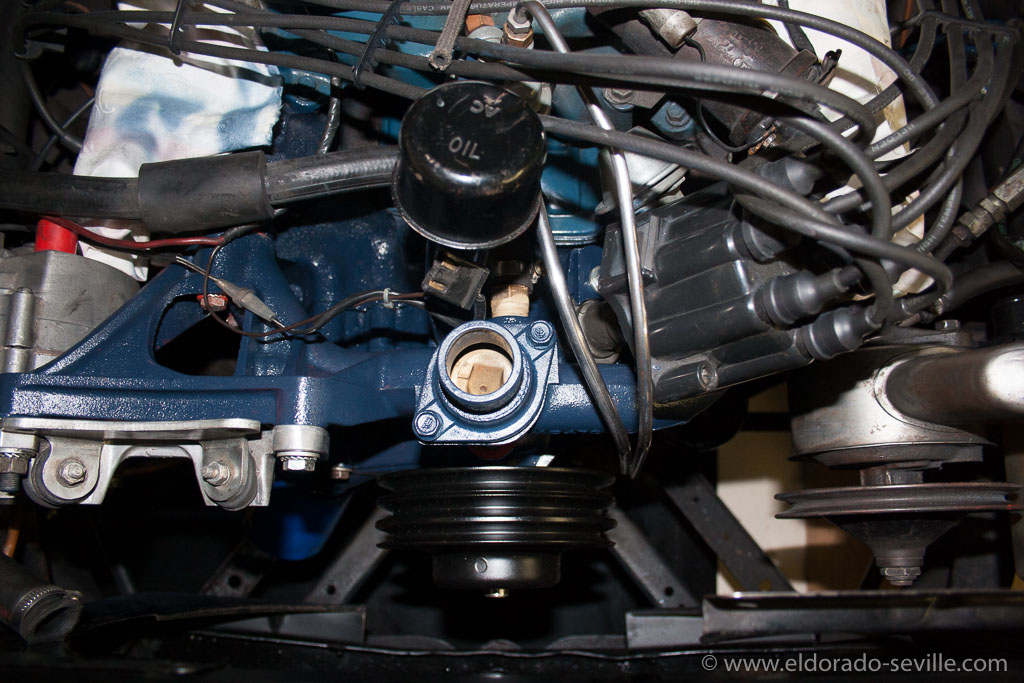
The new water pump and the mediablasted and then repainted parts back in the car. Also painted the water pump pulley in the correct color now (black).
Most things are back together. I am still waiting for the correct reproduction radiator hoses to arrive. I did not repaint the intake manifold in the correct color as I did not have the necessary gaskets to reinstall it. I will do this eventually later, in the case that I have to remove the carburetor...
1967 CADILLAC BORG CLOCKS REPAIR AND A PROBLEM WITH A PRINTED CIRCUIT BOARD.
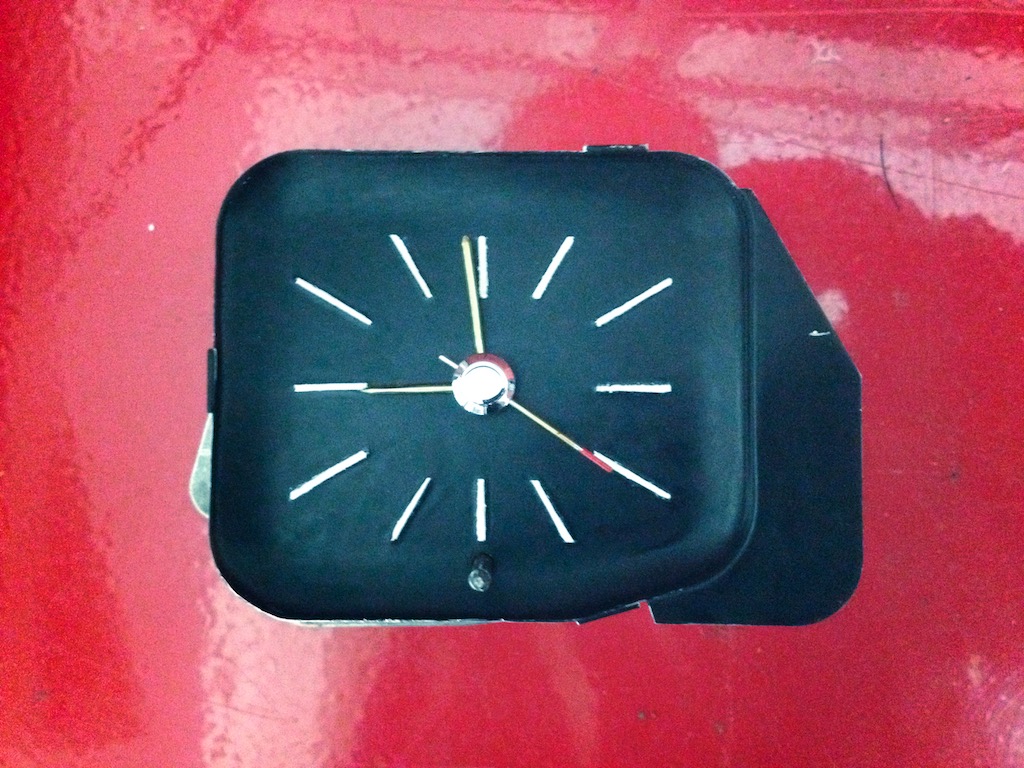
The 1967/1968 Cadillac Westclox clock out of my 67 Eldorado.
The last time I tried to repair the clock in my 67 Cadillac DeVille I totally failed. This was in 1998…
After I got the clocks in all the other Cadillacs moving again - I could no longer stand watching the dead clocks in my 67 Eldorado and DeVille.
So I decided to try to repair them as well.
The last repair attempt at my 67 Eldorado was very disappointing.
In 1998 I took the clock out of my 67 DeVille the last time, and after my repair attempt the hands started spinning in an extremely fast pace - like a ventilator. So I had to disconnect the power to the clock at the printed circuit at the back of the instrument cluster. When I did that I forgot to disconnect the battery and when the power feed touched some metal I had a short somewhere and some smoke came out of the dash… I could not locate where the smoke was coming from - all wires looked perfect. So I just insulated the clock coil power feed and gave up on the repair and forgot about what had happened.
As I found out now - some connection of the printed circuit board got burned back then…
After the failed repair of the 67 Eldorados clock last fall, I decided to try to find a good used clock. Once again Arizona Vintage Parts - my favorite source for parts - came to the rescue. He sold me two non working Borg clocks for a really good price. Unfortunately by now he has run out of stock for them.
So I tried to repair the clocks he sent me - appearance wise they were in very good condition, and I got one back to life for a short time by just cleaning it.
So I put it back into the car and then I made a stupid mistake and ruined it completely. I wanted to tighten the mounting screws and accidentally grabbed the connector for the coil - as you have to work inside the dash without being able to see what you are doing - and so I overtightened it… This stripped the threads of the coil… I had to cut the nut off then and somehow the oscillator wheel inside the mechanism did no longer work properly and when I tried to adjust the stepper it broke off :-(
BTW - Do not use WD40 for cleaning and lubricating a clock like I did… This will ruin the clock as I found out when it was already too late… There are special clock oils available to lubricate clocks.
The other clock I got had a defective oscillator wheel and I could not repair it as well…
So I contacted Arizona Vintage Parts once again for some new clocks but he had sold all his stock on clocks to Sweden…
I had to contact all the Cadillac Parts dealers I found in Hemmings Motor News for two Borg clocks, but I was unsuccessful or they were exorbitantly expensive. Some of the well known Cadillac Parts dealers either did not have them, did not react to my inquiries or asked up to $ 385.- for a used, rebuilt clock. Others asked up to $180.- for a non working clock.
Luckily I found a company called “The Clockworks" which was highly recommended on some Cadillac and other classic car forums for their good work in repairing clocks and also converting them to a quartz movement.
Everybody seems to recommend to convert your clock to a much more reliable and cheaper quartz movement. I thought about it for a while but I decided that I wanted to go for an original movement for authenticity reasons. If you convert to quartz the "tic-toc" movement will be gone and you can tell by just looking at the clock…
I ordered two rebuilt Borg clock movements for my clocks from "The Clockworks". Their service was excellent and they were a great help. Great customer service! I would buy from them again or have my clocks rebuilt by them anytime.
After I received the movements I installed them and put everything back together. You have the keep the adjustment stem and the housing from your old clocks if you replace the movement.
When I put the clock back into the 67 DeVille it did not work though. I soon found out that no power was coming to the coil through the printed circuit board.
I then remembered about my failed repair attempt 17 years ago and the smoke that came out of the dash… Somewhere the circuit board was burned. So I connected the orange cable going into the multiple terminal connector at #7 terminal to the clock directly and it worked again.
So I installed a cable directly to the clock. This is a temporary fix until I´ll have a new circuit board. Installing a new board requires to take the dash completely apart to replace it.
A printed circuit board is available new here: https://www.opgi.com/cadillac/CE11091/
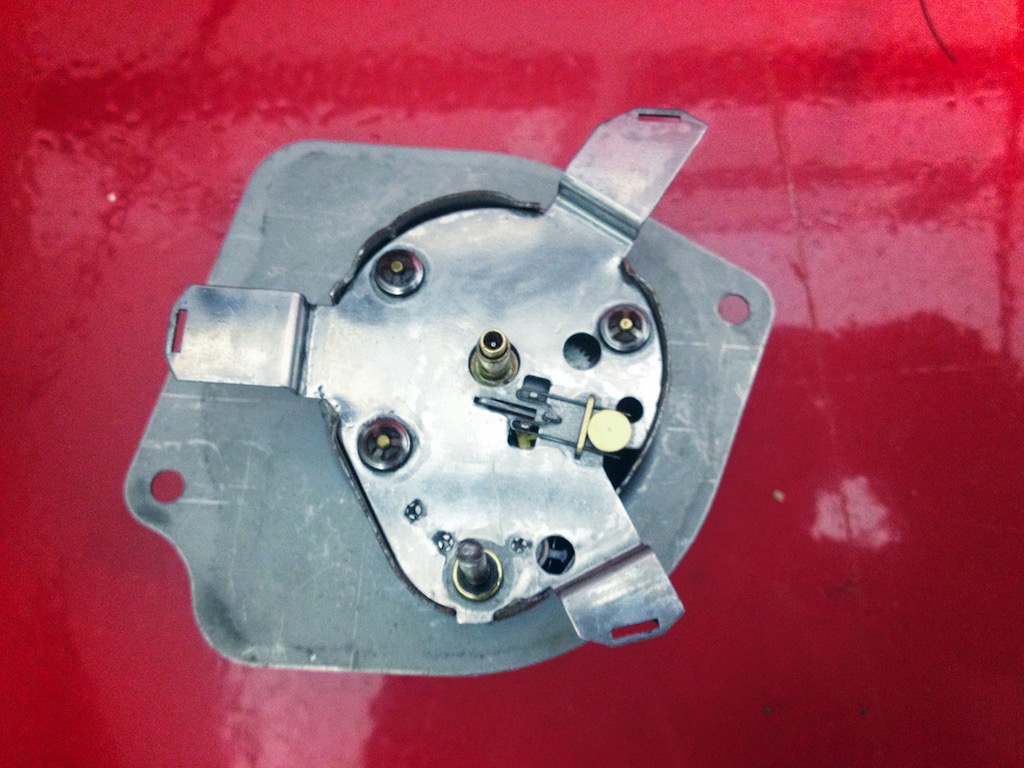
The 1967 Cadillac Westclox clock out of my 67 Eldorado. Seen from the top with the clock face removed. The clock face on the Westclox is mounted differently than on the Borg.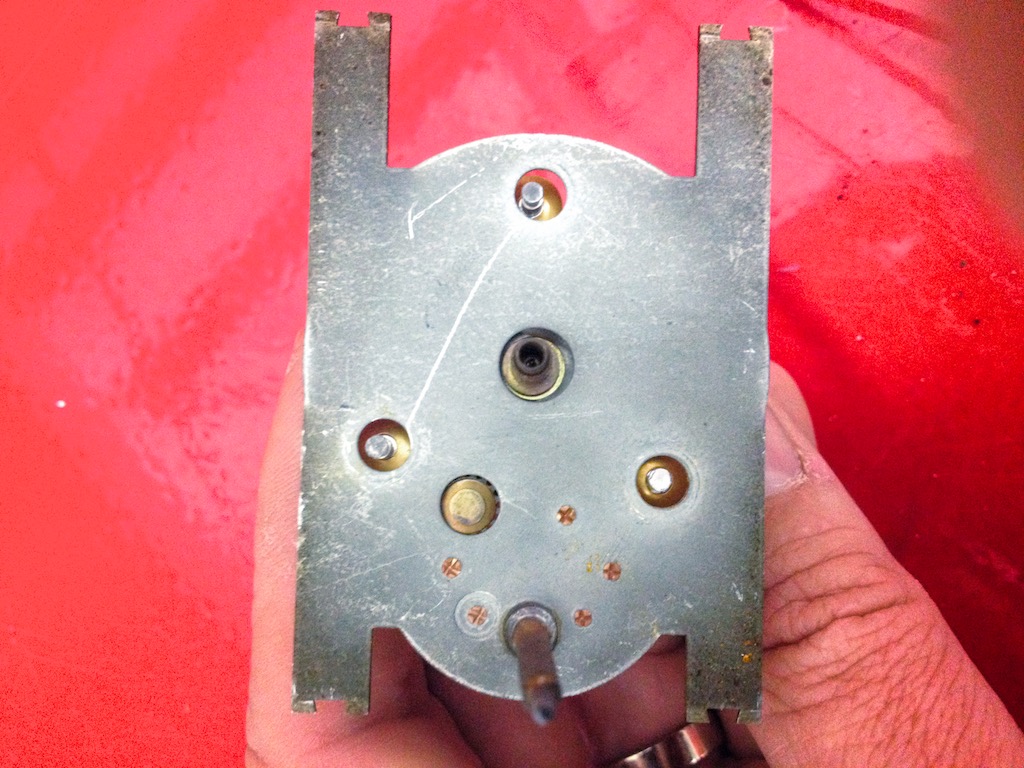
The 1967 Cadillac Borg clock. The housing cover in place - as you can see it looks completely different than the one on the Westclox.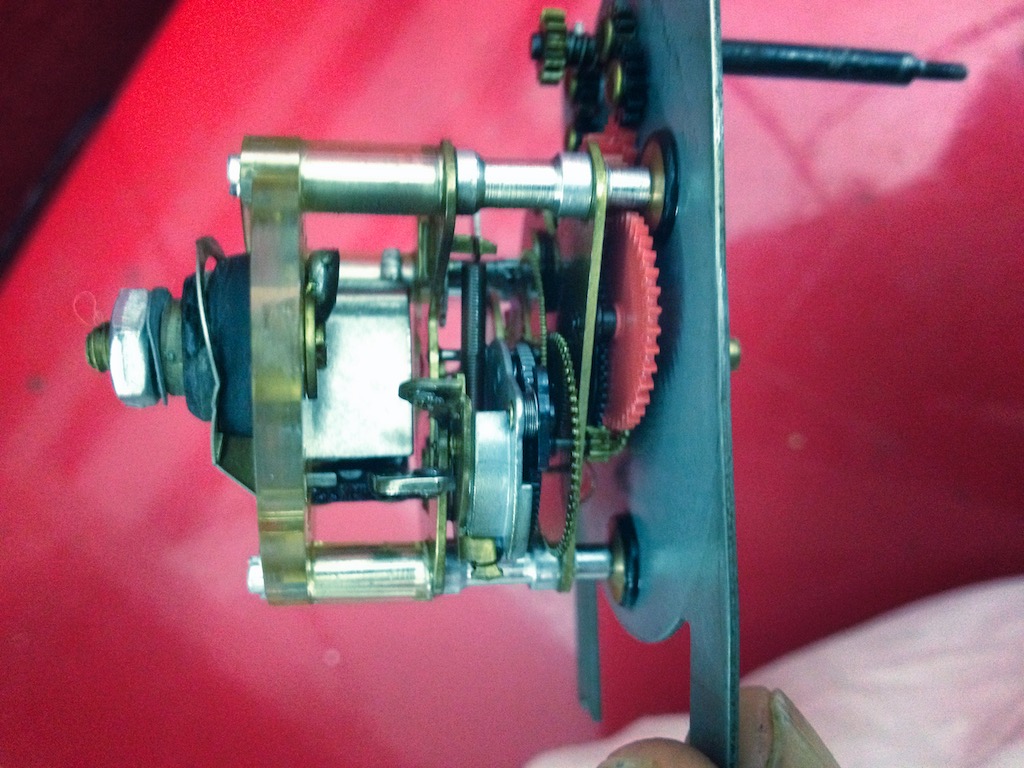
The 1967 Cadillac Borg clock out of my 67 DeVille.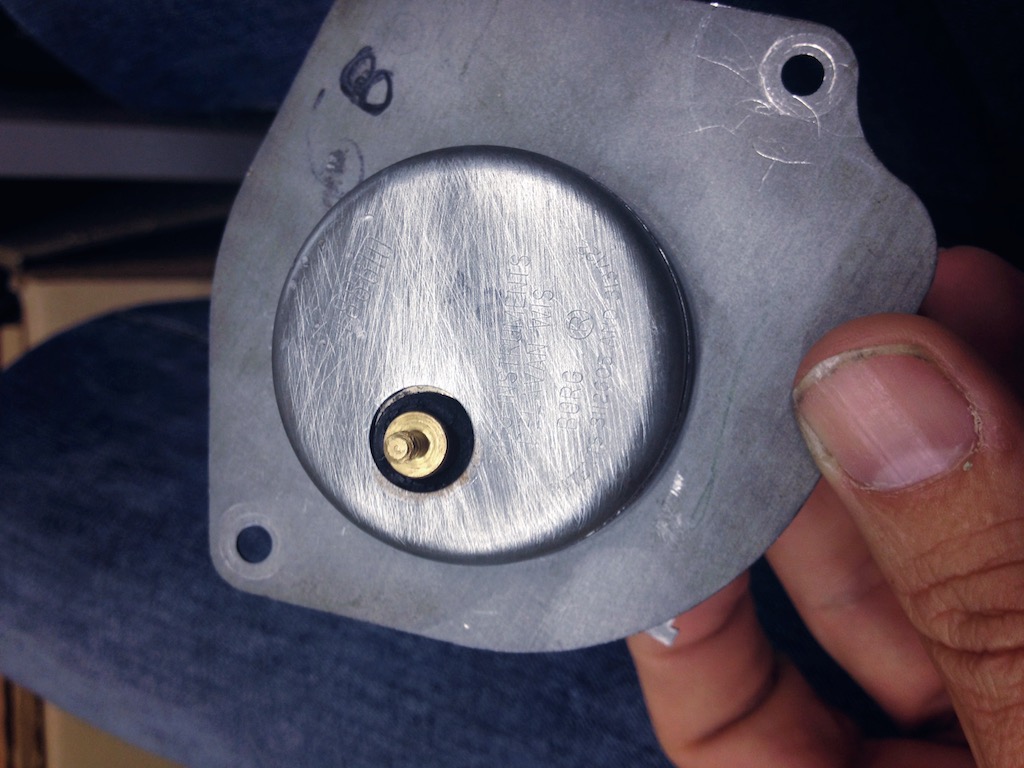
The Borg replacement clock I got from Arizona Vintage Parts. 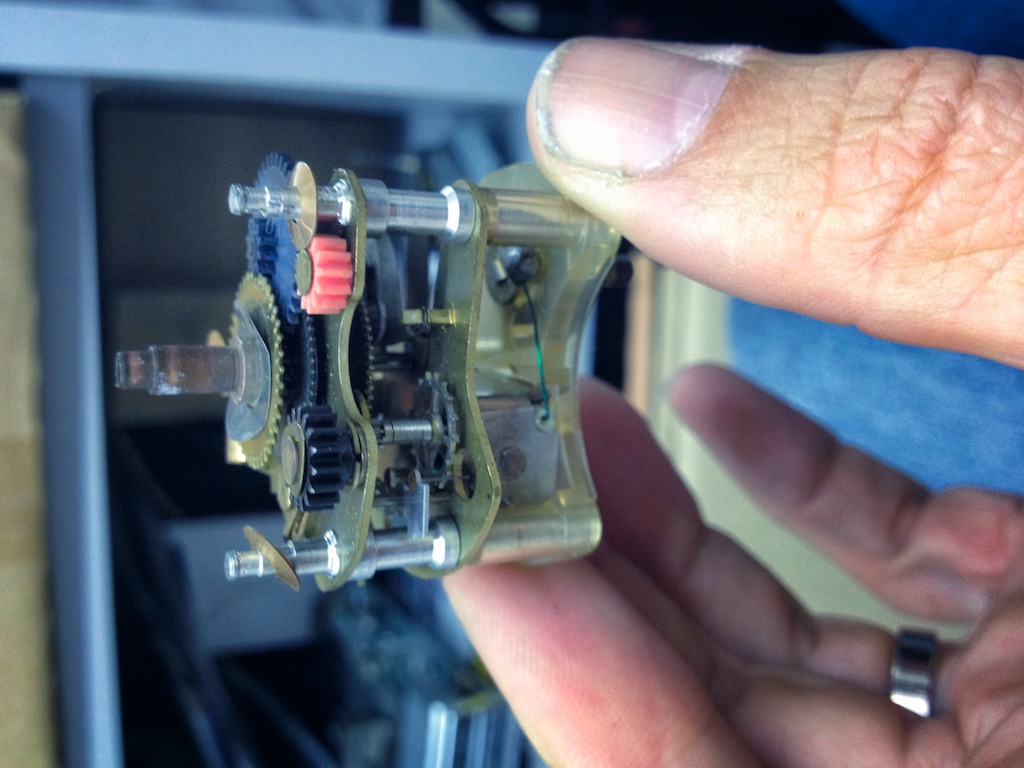
The Borg replacement clock I got from Arizona Vintage Parts - this is the original movement removed from the housing.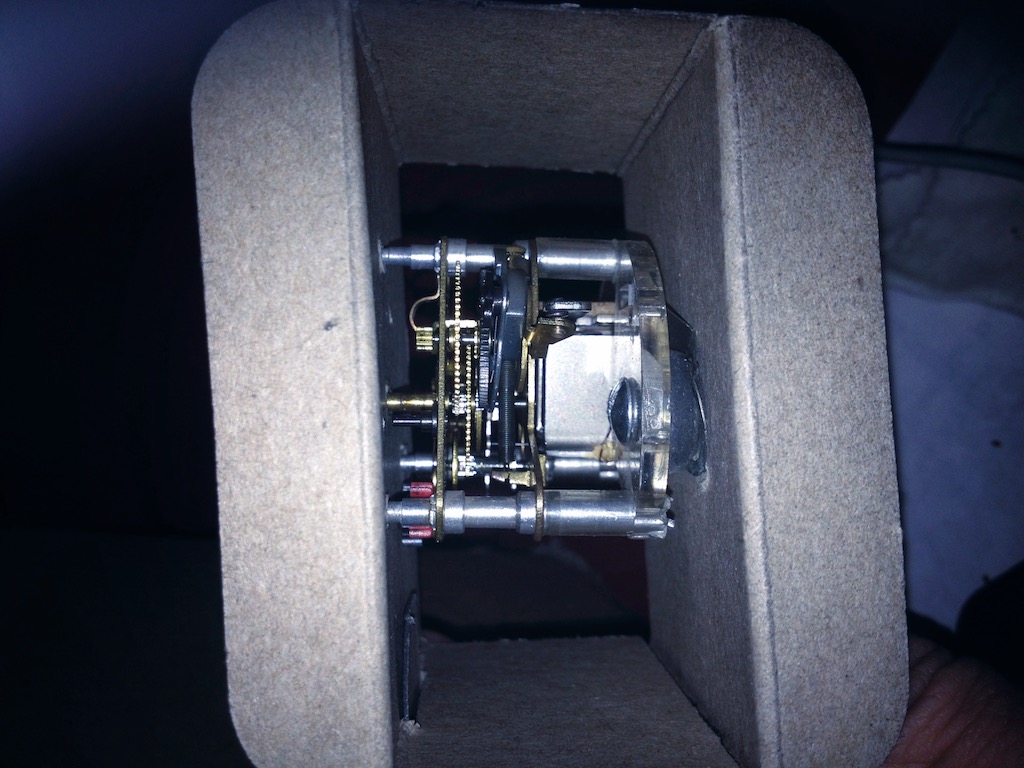
The rebuilt Borg movement I got from "The Clockworks"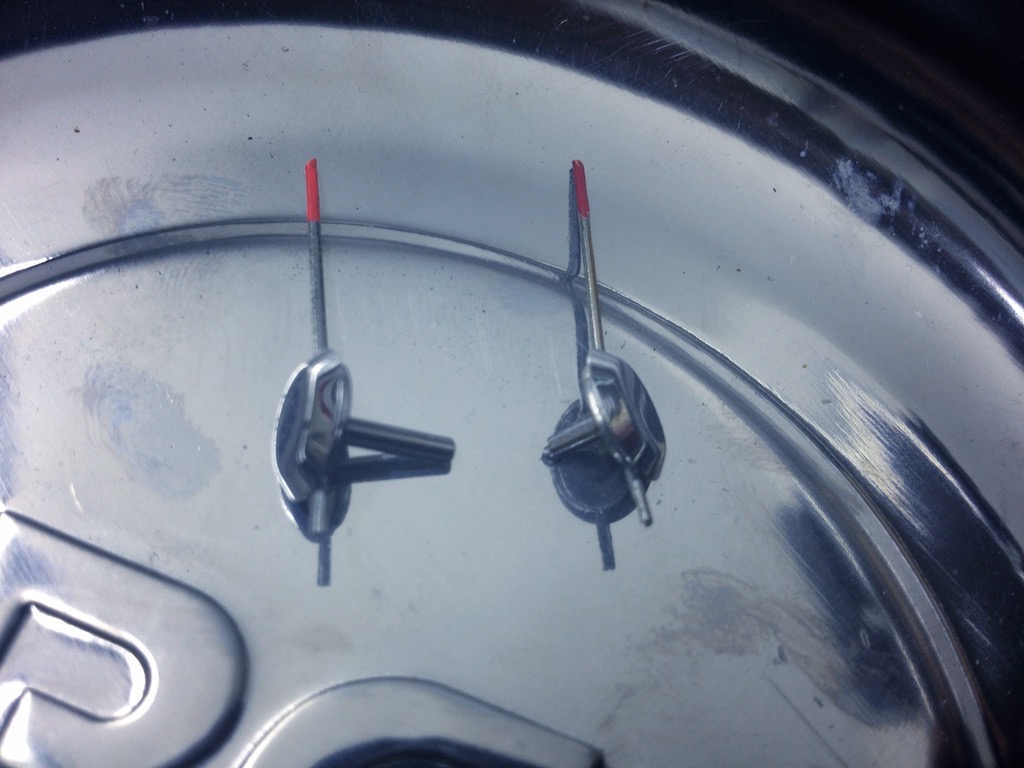
There is a difference in the second arms: On the left the one from a Borg Clock - on the right one from a Westclox. They are not interchangeable. Also the housing of the clocks is different. You cant interchange parts between these two clock types.
I repainted the setting stem in semi gloss black.
The 1967 Cadillac printed circuit. The one for the Eldorado is slightly different though.
1967 AND 1968 CADILLAC ELDORADO HEADLIGHT ACTUATOR REPAIR ARTICLE UPDATED
After many years they tend to fail for many owners of the 1967 and 1968 Eldorados.
One company has offered a reproduction, but from the experience some people made with it, it was said that it was very poorly made and extremely expensive. I can´t tell anything about it from my own experience though.
But there is a better and much cheaper solution to the problem in the form of a modified reproduction 1969 Camaro RS actuator which is readily available. I´ve written an article a couple of years ago what could be done and I have now updated it, as one reader sent me some excellent description and pictures of how he modified the Camaro actuator to work perfectly on his 1968 Eldorado.
Thanks for the tip Mark Maromonte from Marks Truck and Auto Repair.
Click on the picture to go to the updated article.
REPAIRING THE CLOCKS OF THE 1958, 1966 AND 1967 CADILLAC
So it was time to service some of the clocks which stopped working over the years.
The clock in the 66 did not work at all.
It's extremely simple to remove on the 66 as you can get it out of the instrument panel by just unscrewing one bolt.
The clock was very dirty in the clock work and needed a good cleaning and some good lubrication. Also the contact of the coil was a little worn and this was fixed. It then happily ticked back to life and now works perfectly.
The clock on my 58 stopped working a couple of years ago. So it came out as well. It's a little more complicated to get it out though...
When it was finally out - it could be seen that the coil was burnt and that it needed some very good cleaning as well. Some of the melted insulation material was all over the clock mechanism and of course I had no spare coil for it - so the original one had to be rewound with some good wire from a left over light solenoid...
Wow - this really took a while - but now the clock works perfectly again!
I was not so lucky with the clock on the 67 Eldorado which only worked when the car was warm. To take it out you have to remove the upper dash and then get out some light bulbs and disconnect it from the printed circuit.
It was also cleaned and lubricated and the clock worked, but it made a very loud noise when the coil rewound the spring of the clock.
The sound got better over night, but then the clock stopped working completely... It's a Westcox clock which uses a double coil and is much more complicated to rebuild than the Borg clocks. Its also almost impossible to find parts for it, as Borg clocks are much more widely used.
Looks like I will need a new 1967 clock and replace it with a Borg unit :-(
The clock in the 66 is now working perfectly again.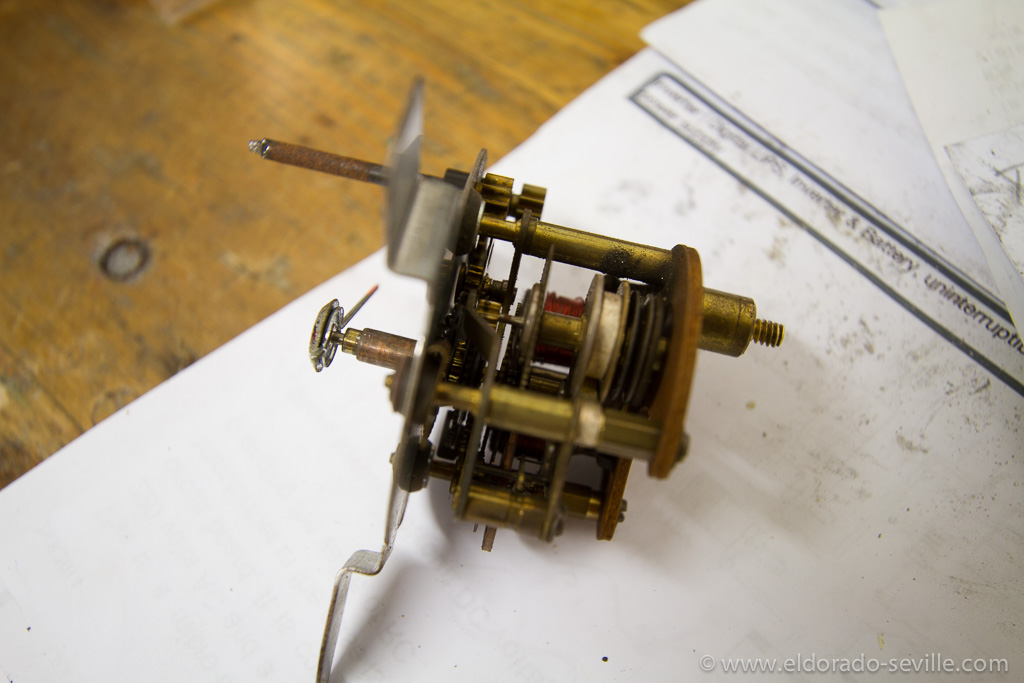
The disassembled clock of the 58 Eldorado.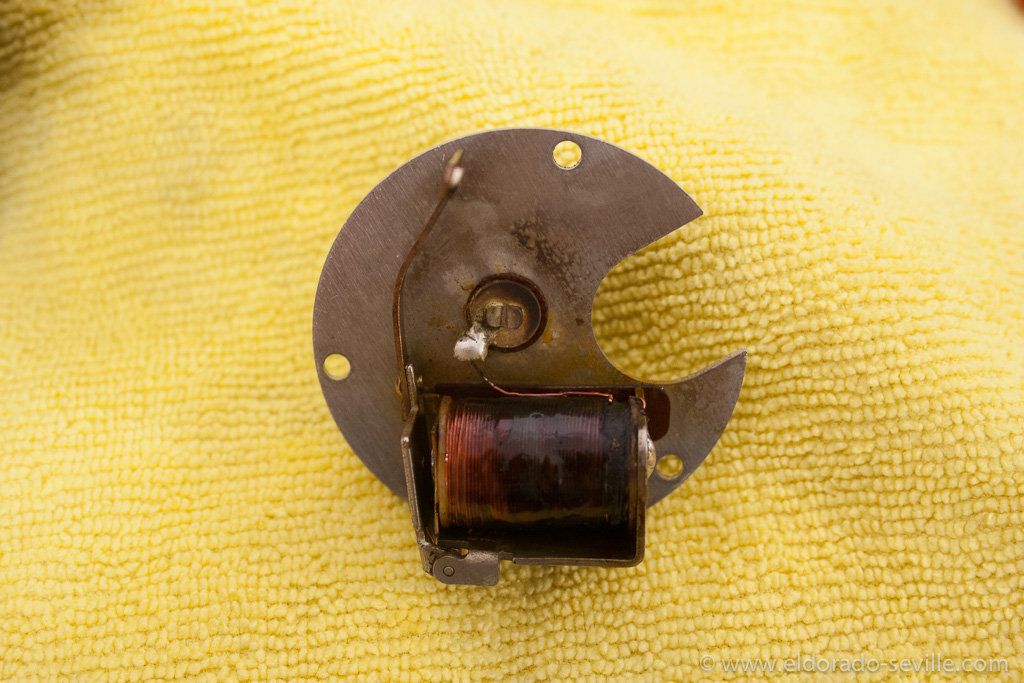
The coil was burnt on the 58 clock.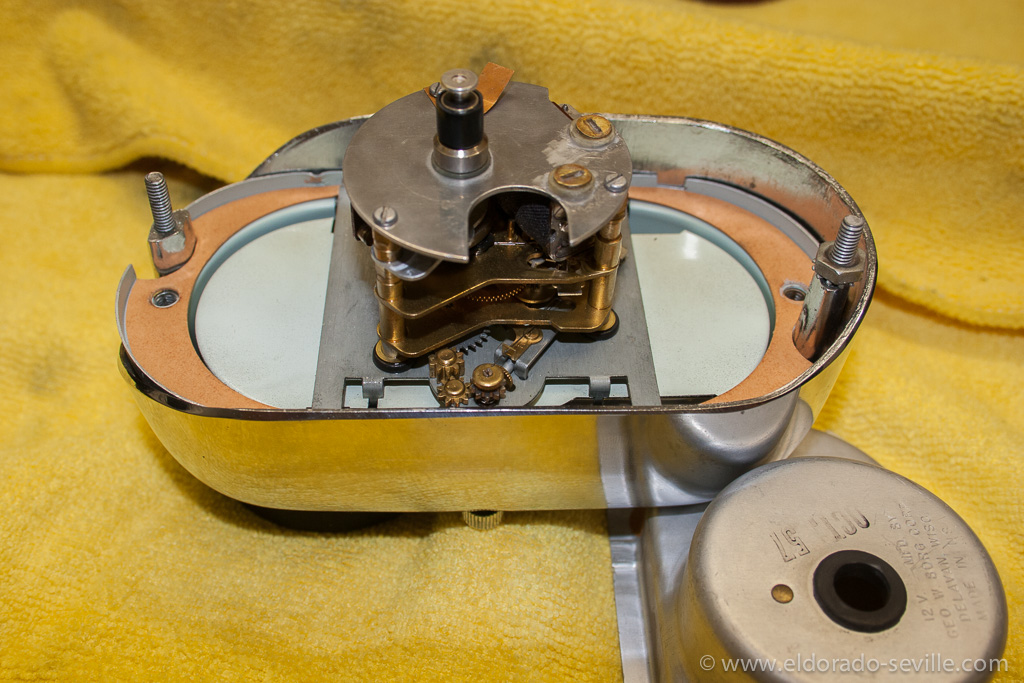
Fully cleaned clock. 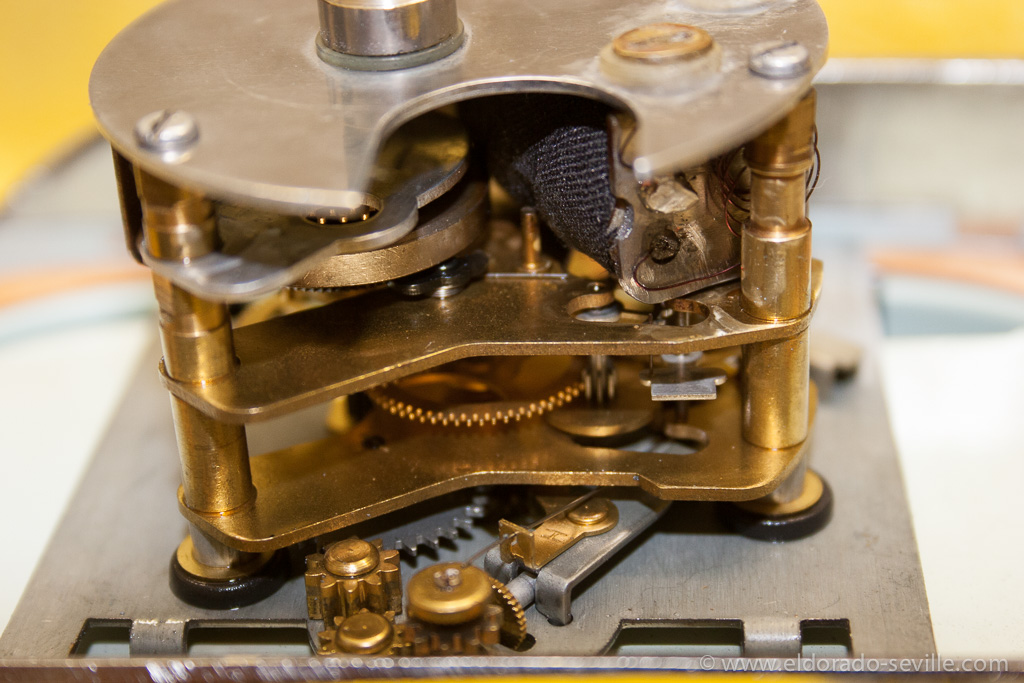
Back together with a rewound coil.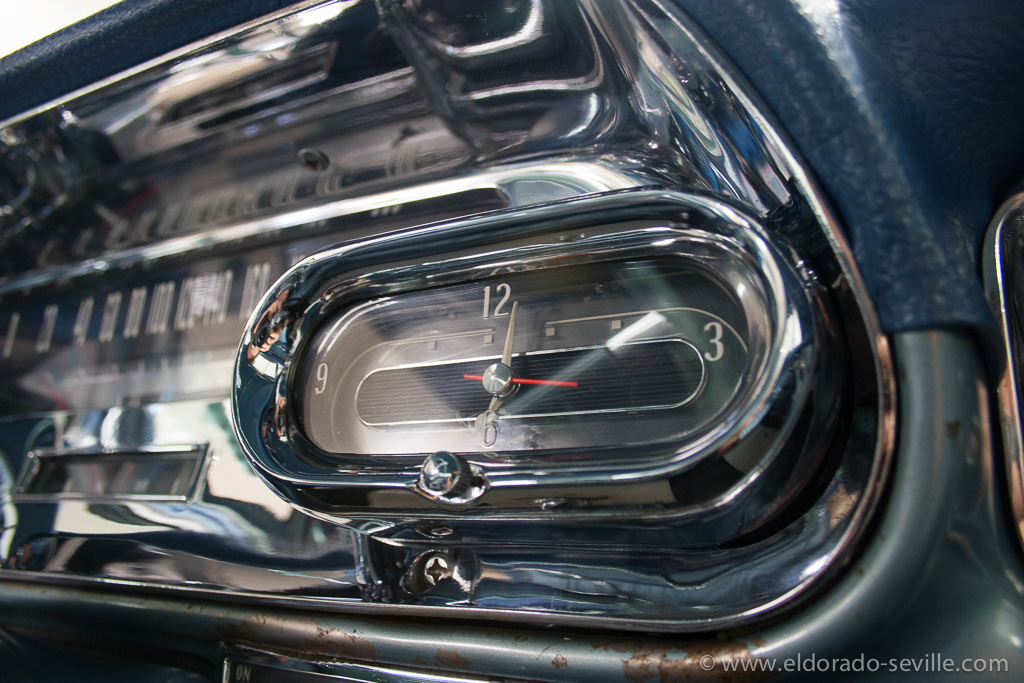
Back in the car - working perfectly again.
1967 Eldorado headlights did not work
When I took the car out of the garage I noticed that the headlights did not come on, but the taillights worked.
I suspected that the light switch must be the problem... I unplugged the connector of the switch and tested if 12V power was coming to the switch through the wiring.
There was one hot wire and I connected it directly to the headlights and they came on.
I then wrongfully assumed that the switch must be the problem then...
So I decided to take it out and inspect it.
Getting this switch out is a real pain as there is one screw thats almost impossible to reach. You can only get to the switch from underneath the dash btw...
It took me a couple of hours to get it out lying on my back under the dash...
I then opened up the switch and when I opened it up it fell apart immediately. I had a really hard time getting it back together correctly. Before that I cleaned everything inside.
I measured it with the multimeter and everything was fine.
Getting the switch back into the car was even more difficult than taking it out... There is this one d*mn screw thats almost impossible to get back in. Try to avoid to take the switch out, as you can measure if it works with the multimeter. I did not read the electrical diagrams carefully enough, so I did not measure it correctly and so I took it out.
!!! Be aware that the headlight switch on the 67 Eldorado is almost impossible to find, as it is a very special switch with the vacuum valves! If yours has twilight or auto dimming its even harder to come by!!!
As it turned out my switch was o.k. and the headlights did not work for another unknown reason... So I googled the problem and to my surprise I found my own website with a solution!
I had completely forgotten that I had the very same problem with my headlights a couple of years before and found a solution back then. I was just lucky that I do use my website as a sort of diary for the repairs I do on my cars.
As it turned out the same fusible link had burned through again. It runs very closely to the headers to the starter on the positive battery cable. Maybe it got too hot and failed or just broke apart. I could not see any melting or signs that it had burned through. It looked fully intact from the outside and I could only see that it was defective when I removed the insulation...
To replace the fusible link you have to take out the positive battery cable and replace the fusible link. Thats not a big deal. I rerouted the cables a little bit this time and hope that it wont fail again.
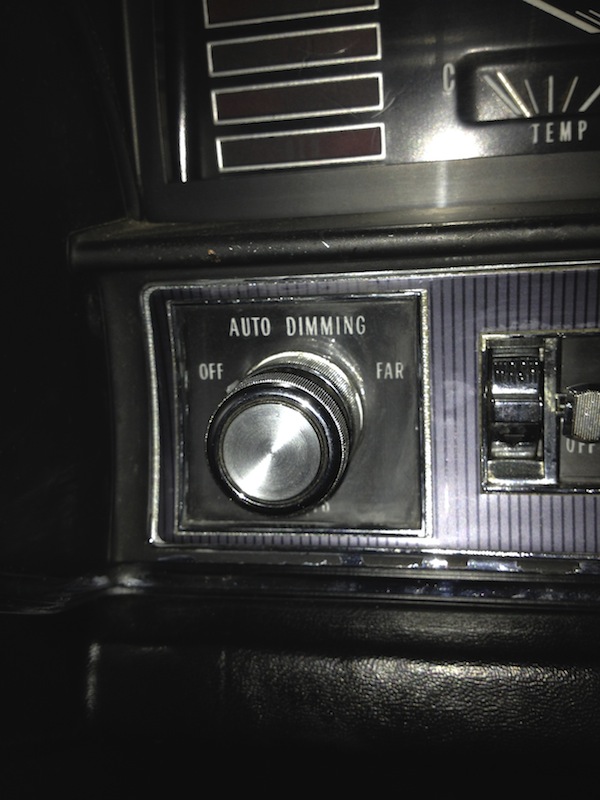
The 1967 headlight switch with automatic dimming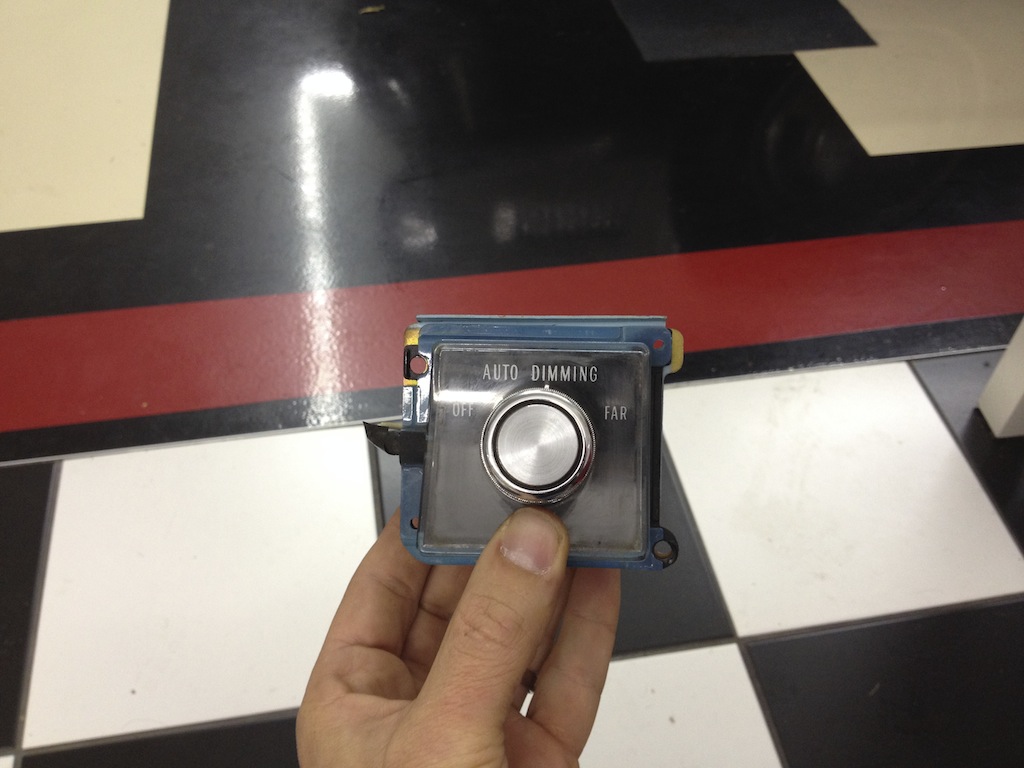
the light switch out of the car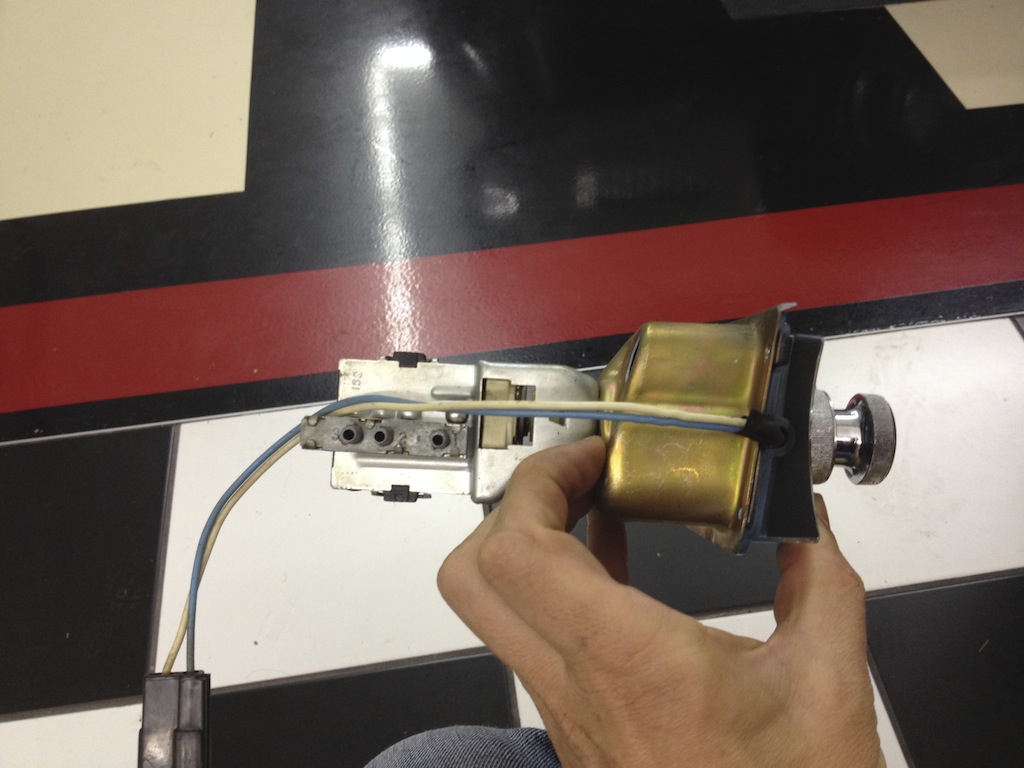
Seen from the side - you can see the vacuum valves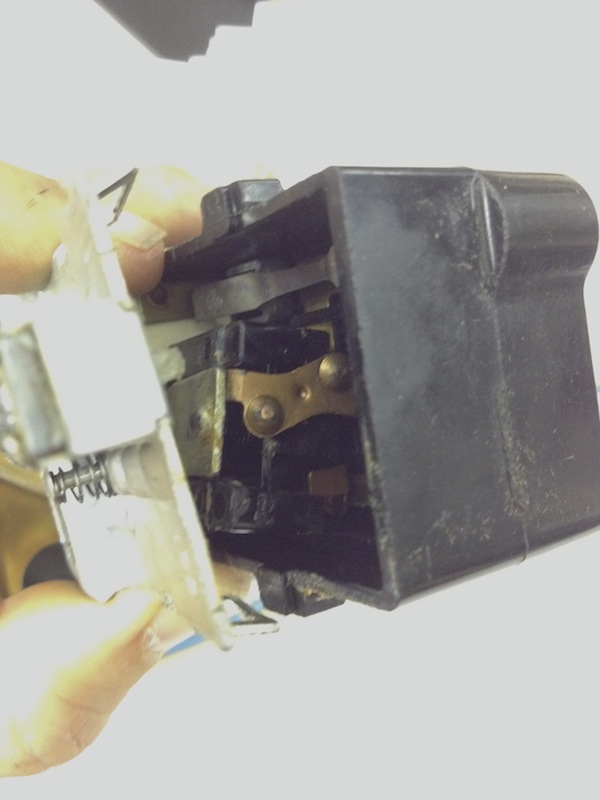
Be very careful if you take the switch apart - as some parts will fall out...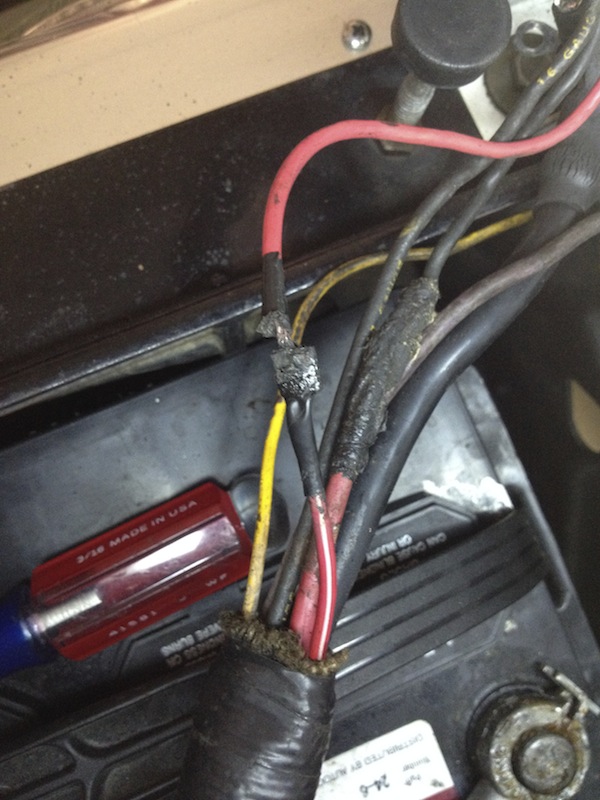
The red cable on top is a fusible link and it caused the problem. I could not see from the outside that it was broken under the insulation.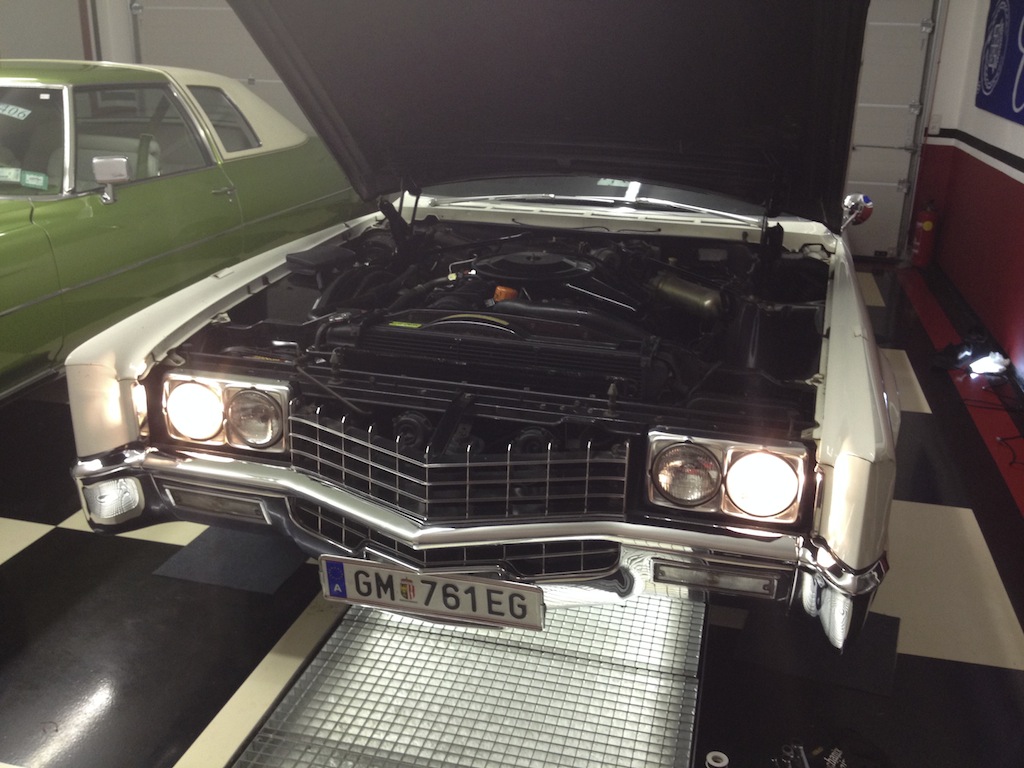
The headlights are back in working order
My 1967 Eldorado Article in the German Cadillac Club Magazine.
The Cadillac Club of Finland will also feature this article in one of their next club magazines.
The first page of the article © "Der Standard"
Cleaning the Vicodec roof of the 58 and the convertible top of the 67.
I have tried a variety of cleaning methods and cleaners over the years.
This time I used Meguiars professional vinyl cleaner #M39 ( I think this product is no longer available and they only offer #M40 now) along with their stiff nylon brush followed by a special nano foam sponge which is called "dirt eraser". It really removes dirt very thoroughly even from textured materials.
Both tops came out very clean - I then used Meguiars Convertible top impregnation to protect them from getting dirty again soon. It also weatherproofs the tops. (not that I would ever drive in rain with my cars... ;-) )
I have heard really good things about Meguiars Convertible Top Cleaner as well - will try it out next time...
Disclaimer: I´m not getting paid or receive any free products from the companies I´m mentioning here. If I like products or services I mention them and if I dislike things I will also talk about them in a less positive way ;-) I just like to share my findings.
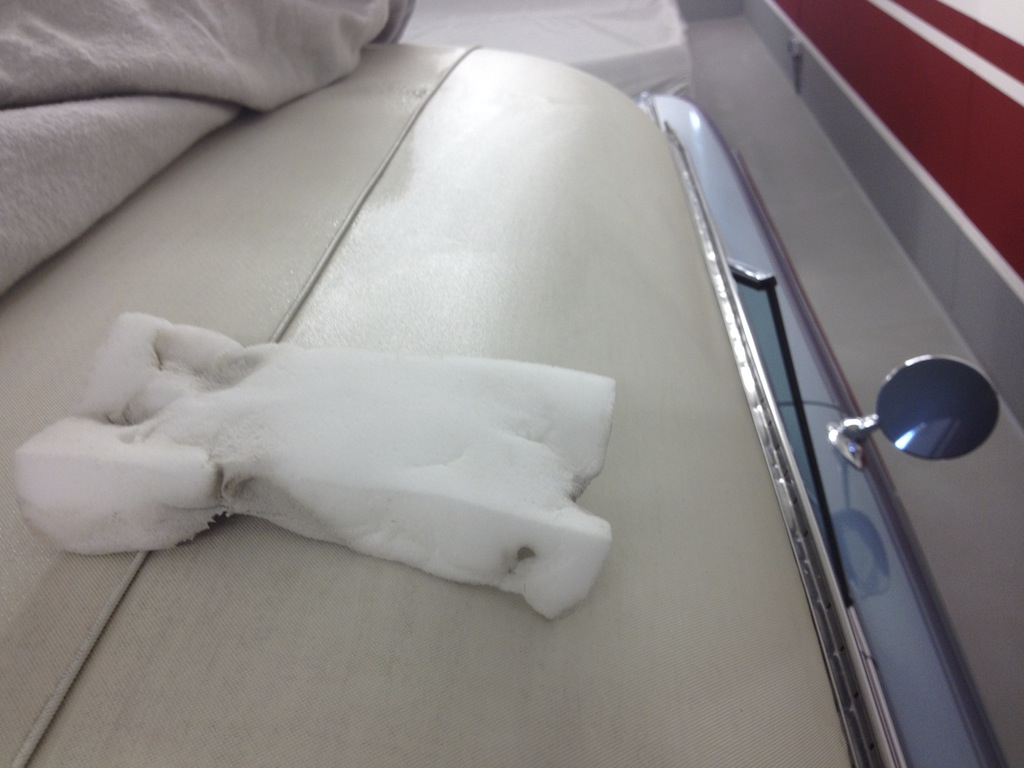
One of the dirt eraser sponges in action on the original roof from 1958. White tops are a pain to keep clean...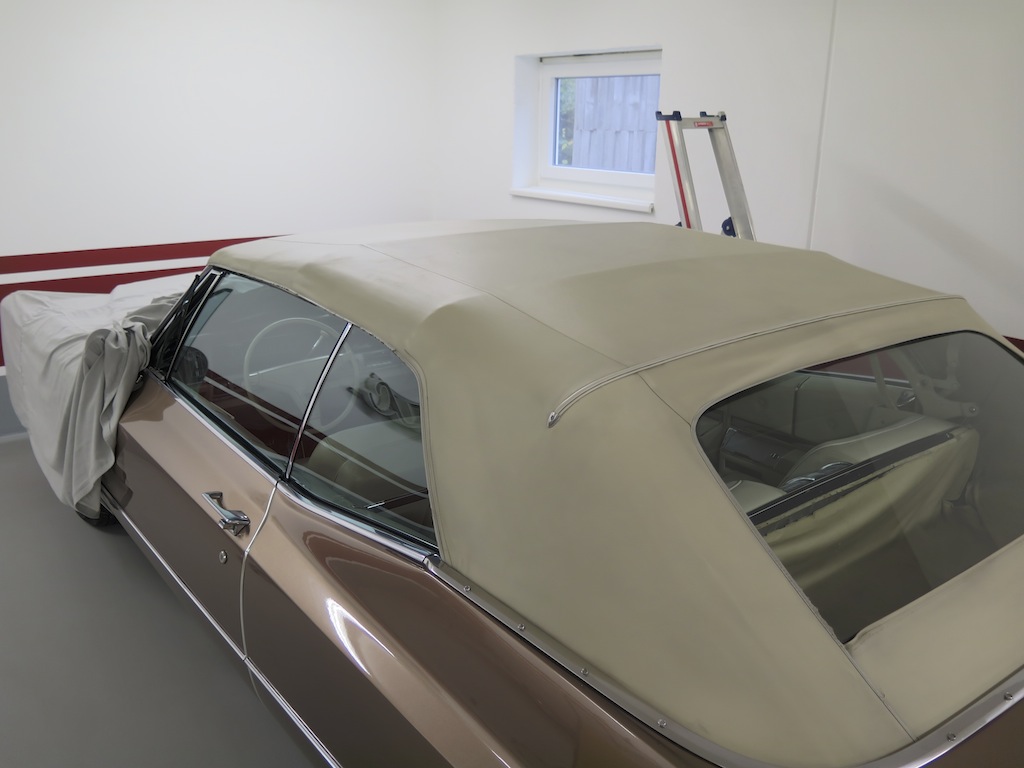
Looking o.k. now - its still the original top from 1967...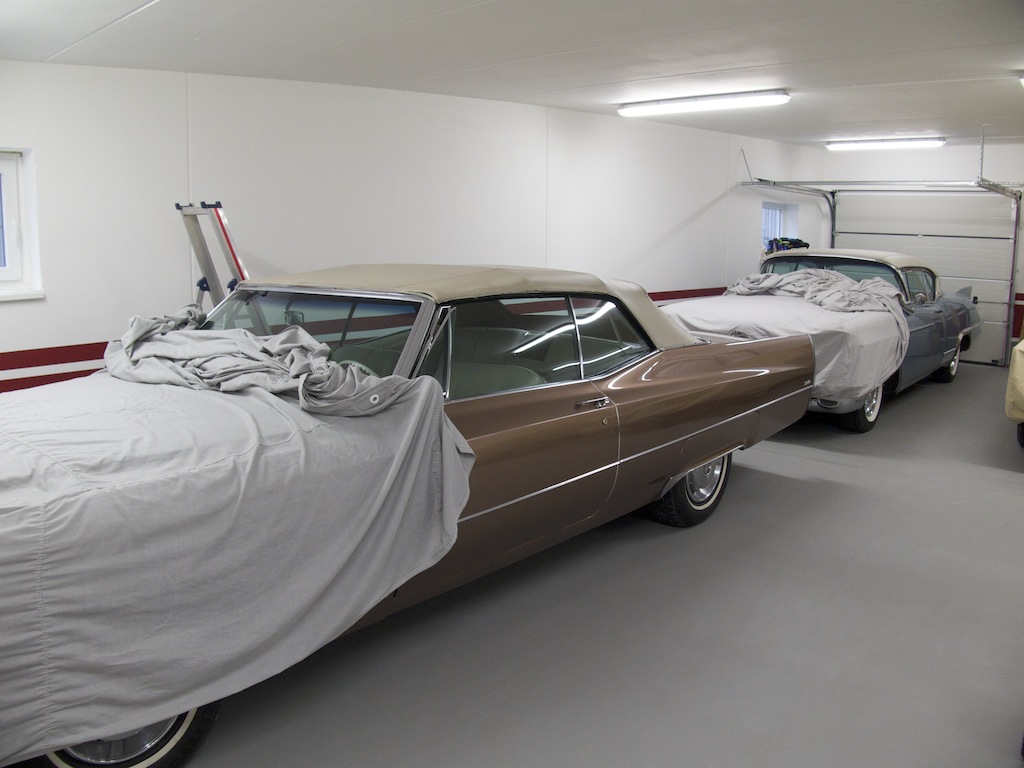
In the garage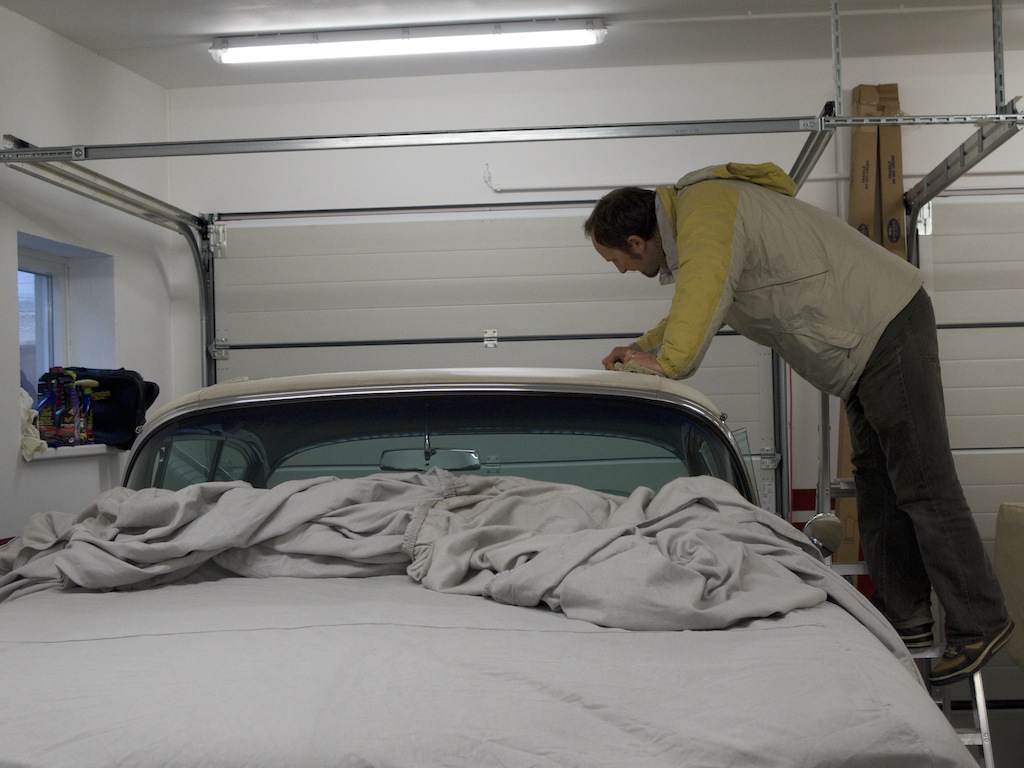
Thoroughly cleaning the Vicodec roof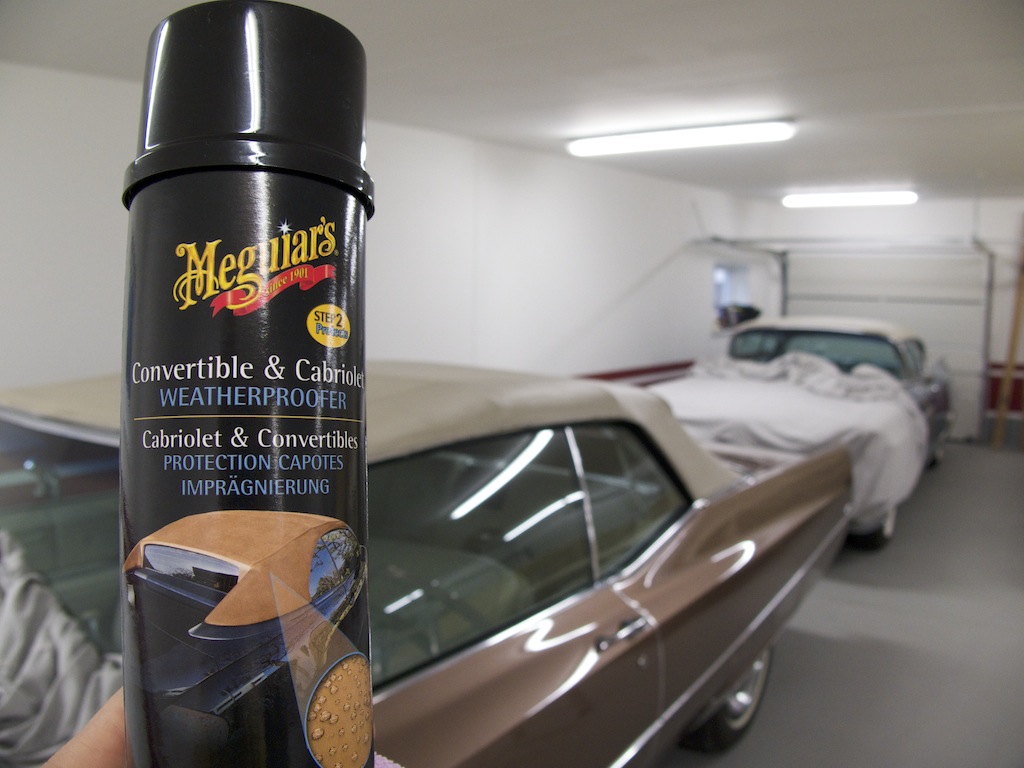
Meguiars weatherproofer for additional protection
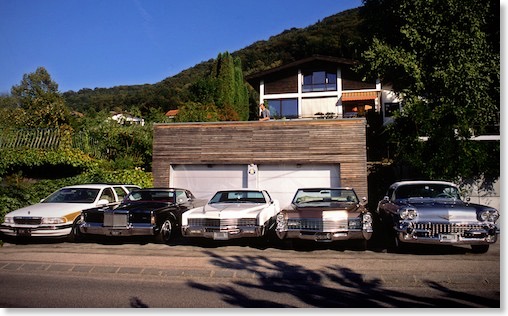
Preparations for the Cadillac BIG Meet 2012
In the garage with the Brougham and the 1967´s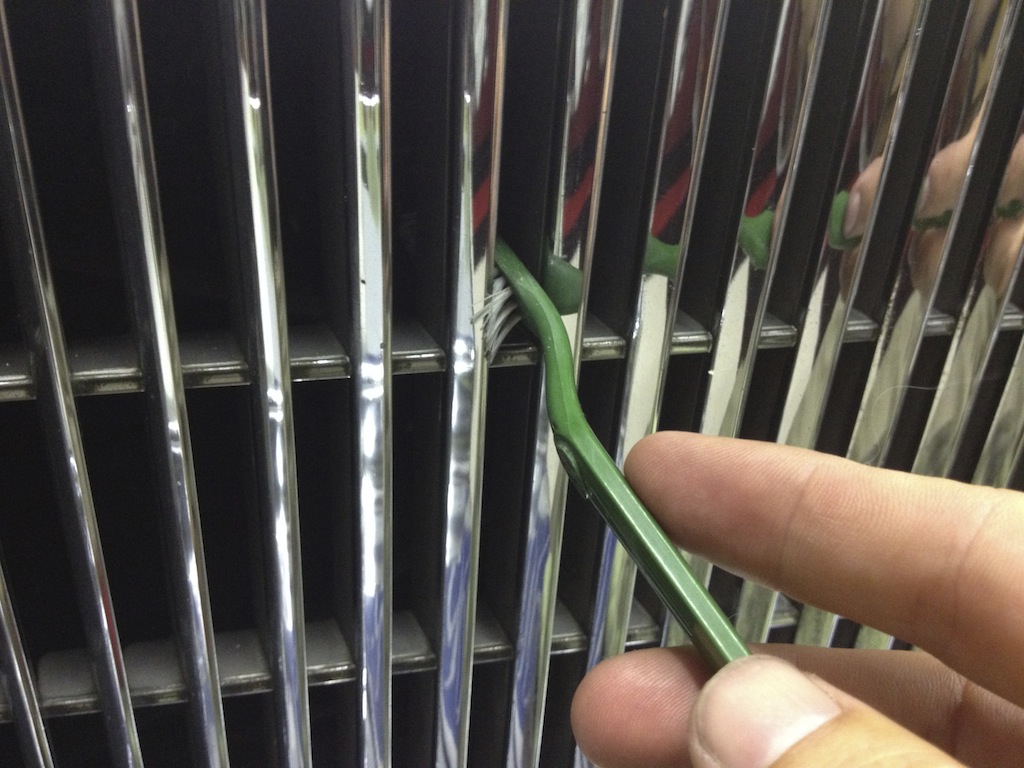
Detailing the grille of the Brougham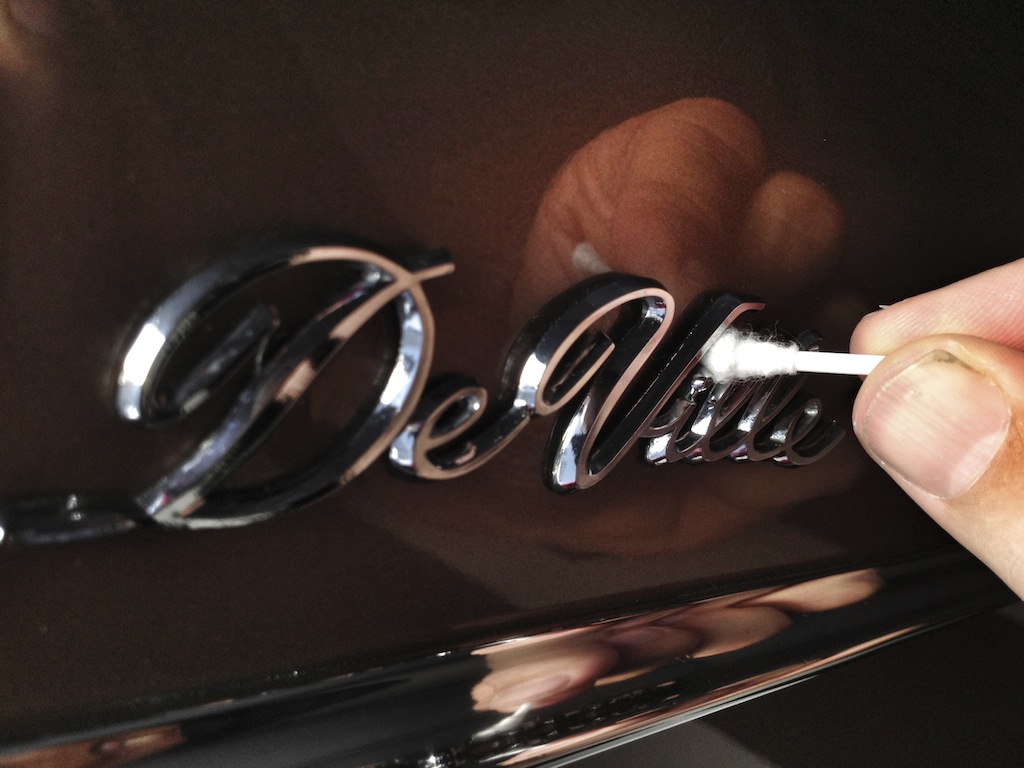
Detailing work
Cadillac BIG Meet 2012 - Bad weather but great cars.
86 Cadillacs from the nineteen forties to the present day have been put on show and many of them were awarded with prices from a distinguished international jury.
Even with this year’s number of cars below it’s record mark of 160 – due to the rather unfavorable weather situation – the Cadillac BIG Meet in Kremsmünster is still regarded as the largest annual Cadillac meeting in Europe.
It is open to all Cadillac owners, regardless of age and history of the vehicle.
This year, the special focus was on cars from the nineteen seventies, represented by 20 cars from this decade, with the Eldorado convertibles clearly outnumbering other body styles.
Organizer Georg Pfeiffer and moderator Ulla Theussl handed over the trophies in pouring rain this year – but the weather could not dampen the enthusiasm of the participants and the spectators. We took the 1967 DeVille this year.
On the day before the meeting we held a driving tour for 40 registered Cadillacs. The participants were rewarded with breathtaking vistas along the whole route.
You can find a huge gallery of the pictures my wife and I shot from the driving tour and the show on the Cadillac BIG Meet website.
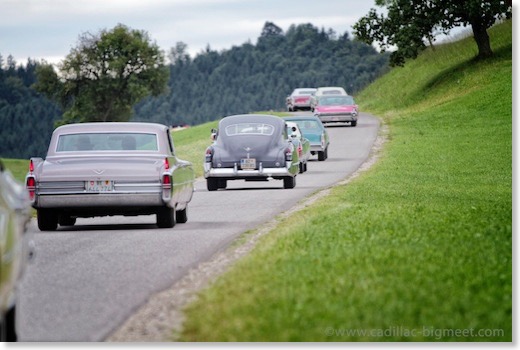
At the driving tour!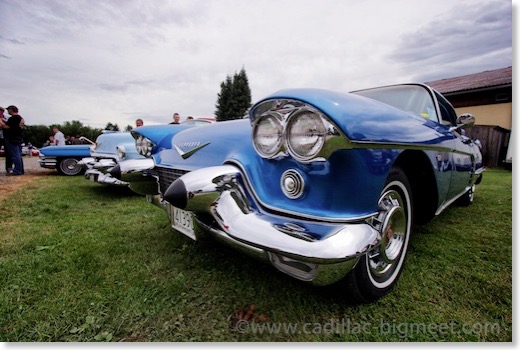
My personal favorite car at the show - the 1958 Eldorado Brougham!
This years special theme was the 1970´s Cadillacs
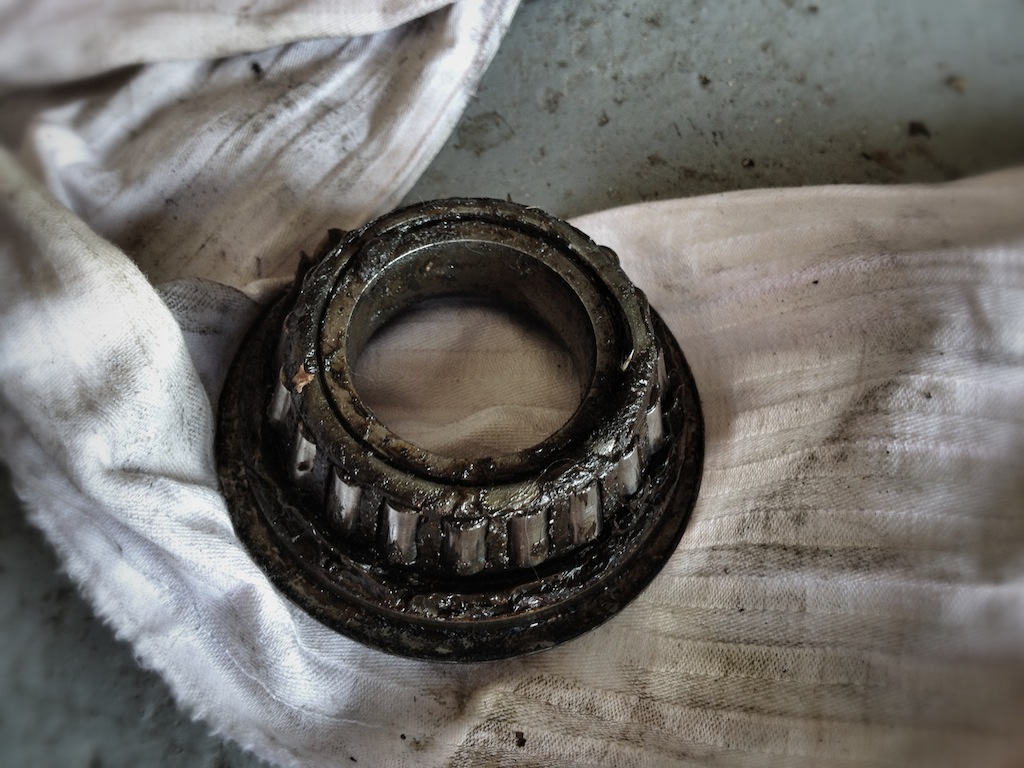
Front wheel bearings replacement on my 1967 Cadillac DeVille
As we had the first really warm and sunny days this weekend, I took the car out of storage and put it into my old garage to do the work. It's a pretty easy job on the 1967 Deville - you do not even need any special tools or presses.
I got a set of inner and outer wheel bearings for both front axles from Rockauto.com - I got a set made by “Moog“ as I have heard good things about their quality.
You just have to remove the tires, remove the pin at the axle, remove the big nut and pull off the brake drum. The outer bearings can just be pulled out - the inner bearings have to be tapped out with a long screwdriver, as they are held in place by a dust cap. A very slight tap is all it needs to get it out. I cleaned everything and put the greased new wheel bearings in and put everything back together. I also readjusted the front brakes and also found that one of the new brake hoses was a little loose and loosing a little brake fluid, so I tightened it.
As I had the front wheel tires off the car - I also cleaned the entire front suspension and detailed it. Everything is squeaky clean now again. No more noise is coming from the wheel bearings now…
The old inner wheel bearing is out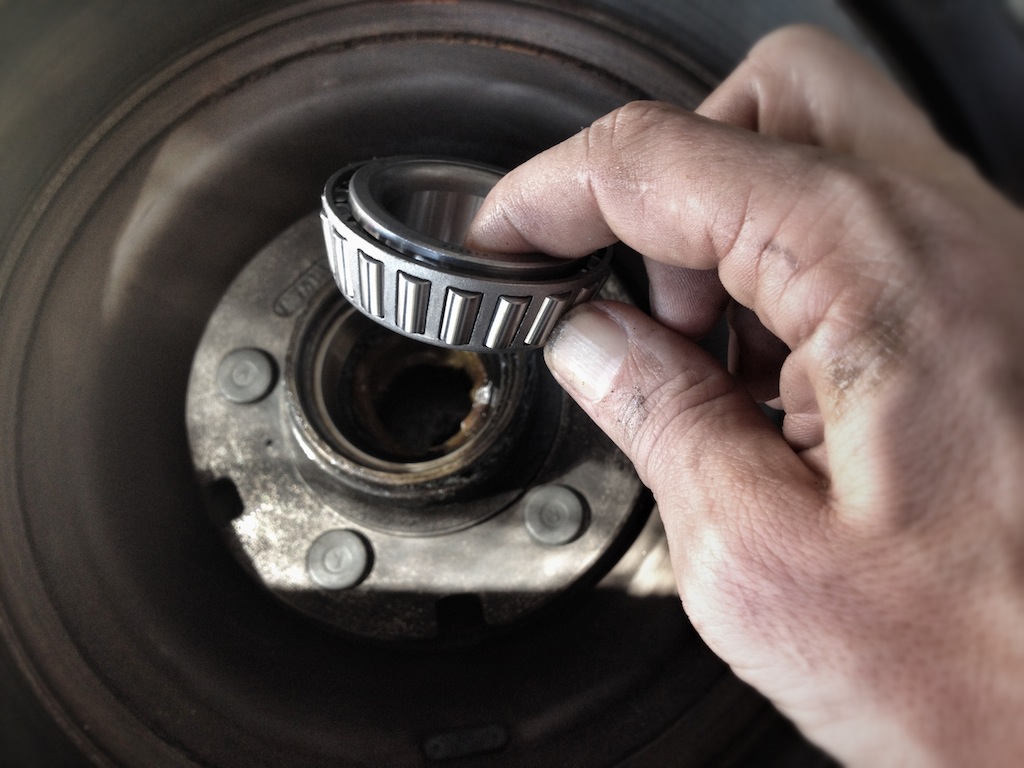
The new inner bearing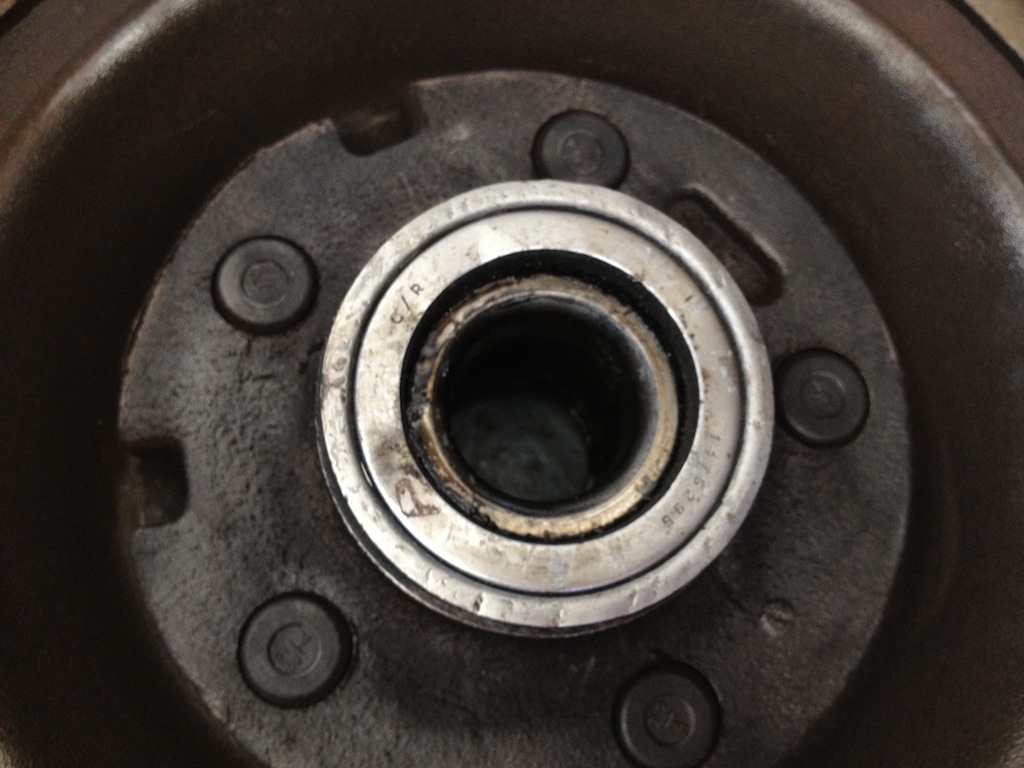
There is a dust cap which you have to tap out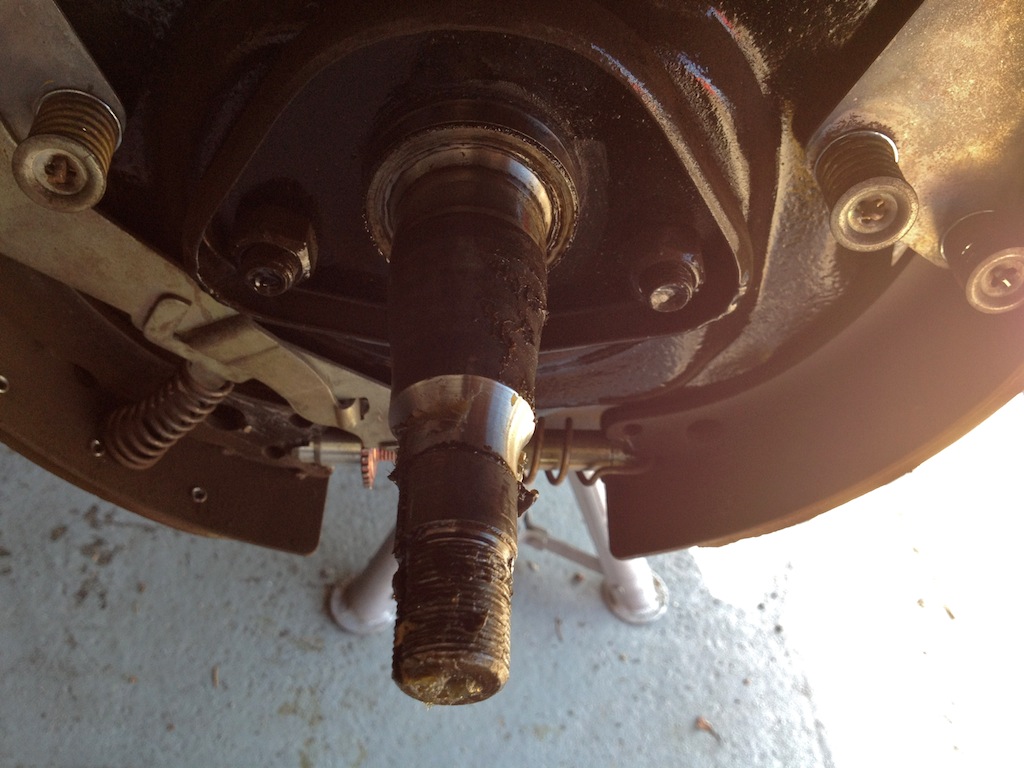
the front axle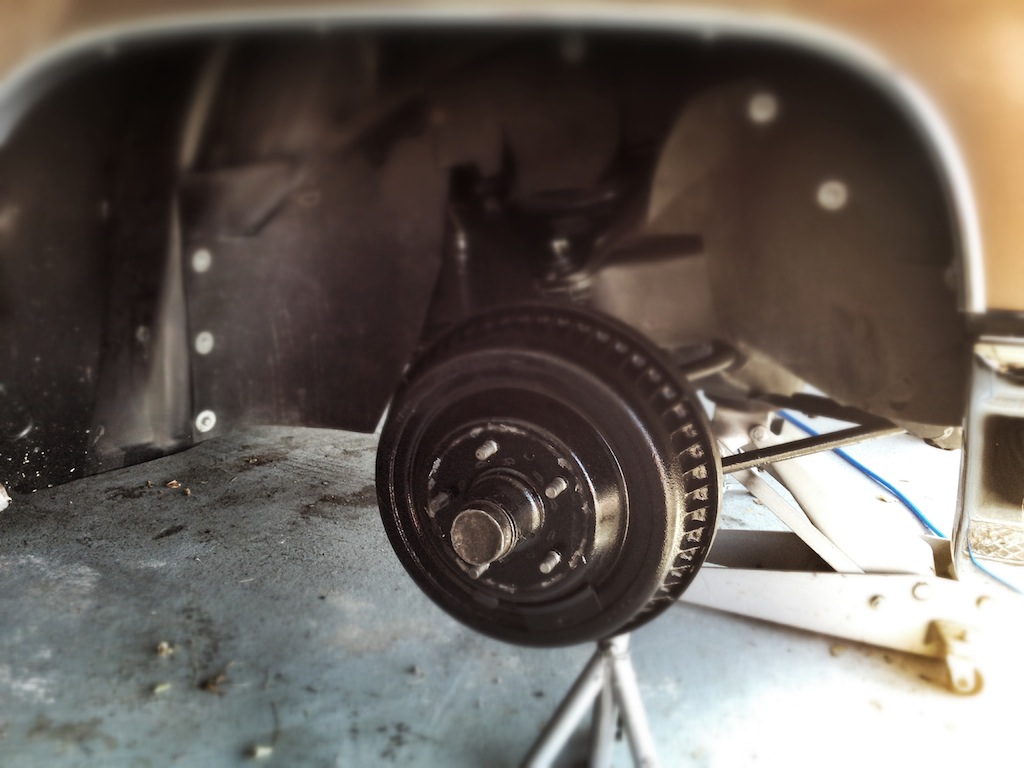
Back together - before detailing the wheel housing and front suspension
Outlook to the 2012 season - doing the first repairs 2012
The following work is planed for the next few months before the cars will be put back on the road in May 2012.
1971 Mark III
- new vinyl roof (the original one was damaged during transport and the insurance will pay for a new one)
1967 DeVille
- needs new front wheel bearings (I already have the spare parts)
- will try to find a rebuilt OEM Bendix master cylinder and vacuum booster. These are very difficult to find. Everybody seems to offer Delco Moraine parts only. I have replaced my original booster and master cylinder 2 years ago and I´m not quite happy with the power assist of the new units. It seems that the after market master cylinders from Delco have a smaller bore diameter and therefore you will have to depress the pedal with more force. There is a discussion going on on the topic of finding the correct booster and master cylinder in the CLC forum - check it out for more detail! If you know where I could find a correct Bendix booster and master cylinder or where I could get my original core rebuilt, please let me know!! The parts number for the Bendix Master Cylinder is #1489981 and for the Bendix booster it is: #1489071
- re-adjust the gear indicator as it's slightly out of line.
1967 Eldorado
- I will remove the starter motor and have it rebuilt - it sometimes is acting up
1958 Eldorado
- It needs some new front wheel bearings as well. I already bought the parts.
I will of course post the repair progress here on my website
A new garage?
The biggest planned project for 2012 will be to find a solution for my storage problem. I hope to be able to build another garage or to rent one. I will have to find a solution until the spring of 2012. I´m dreaming of building a building which can hold 8 Cadillacs, but I do not know yet if I will be able to afford it...
Car Shows
I hope to attend and visit the „Klassikwelt Bodensee“ from May 17th to 20th and of course the best meeting in Europe - the Cadillac BIG Meet August 25th to 26th. I will also hopefully make it to some local shows here in Austria.
As we had a dry winter day I took the cars out of the garage - they fired right up after some months of sleeping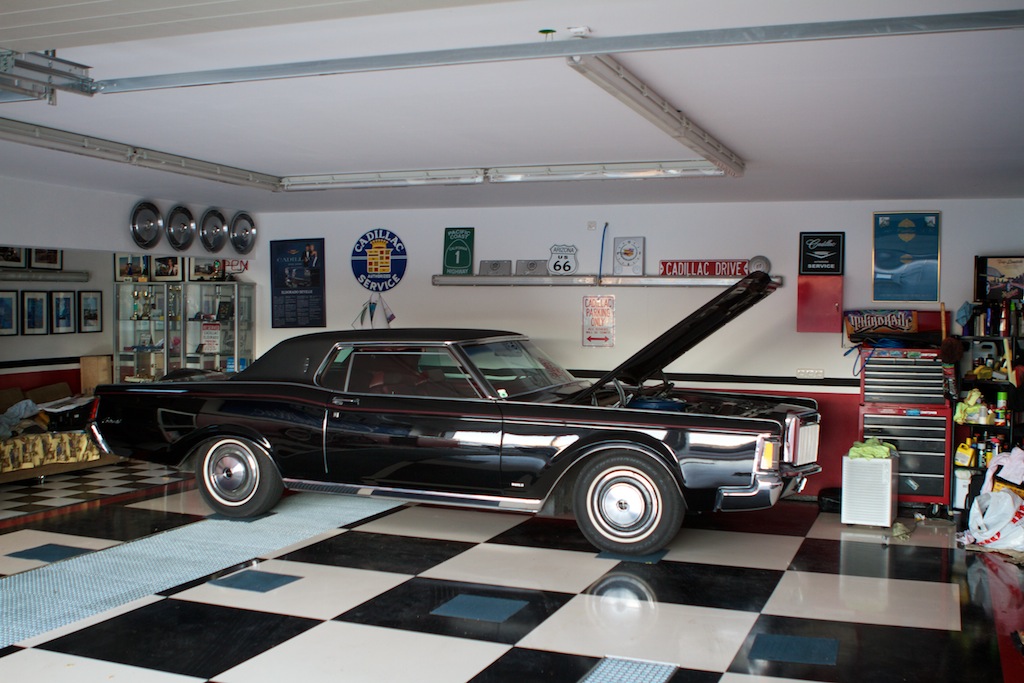
The Mark III was moved to the back of the garage, so that I can start working on the other cars first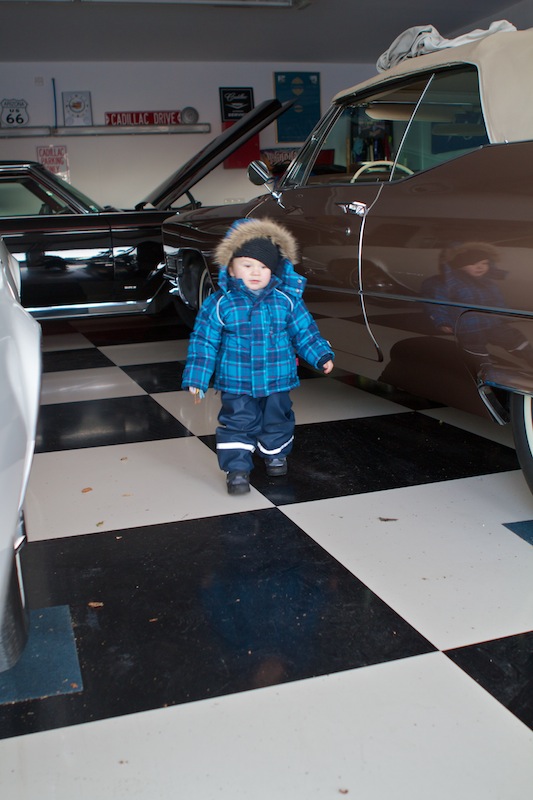
Little Elliot loves Daddy´s cars as well ;-)
The cars are in winter storage :-(
The cars are now in their cosy garages and will all get a new wax-, lubrication- and thorough cleaning job during the next few weeks. I usually also disconnect all the batteries, give the weatherstripping and rubber a good coat of silicone spray and treat all leather areas with leather conditioner. I also clean the interior carefully and over-inflate the tires to make sure that they do not get any flat spots. I will also park the tires on styrofoam. I really hate winter and snow and I am already looking forward to next spring... Over the winter I will rebuild the starter motor of my 1967 Eldorado and detail the undercarriage. The Lincolns undercarriage will get a very good cleaning as well. The 67 DeVille will get some new front wheel bearings and probably a new wheel cylinder and power booster. The 58 Eldorado will also need new front wheel bearings. So there will be a lot of minor things that will keep me busy over the winter...
Below are some pictures of our very last cruising tour this week with the Mark III
Cruising through the scenic landscape of Austria looking down at a lake
The Mark III enjoying the last sun rays...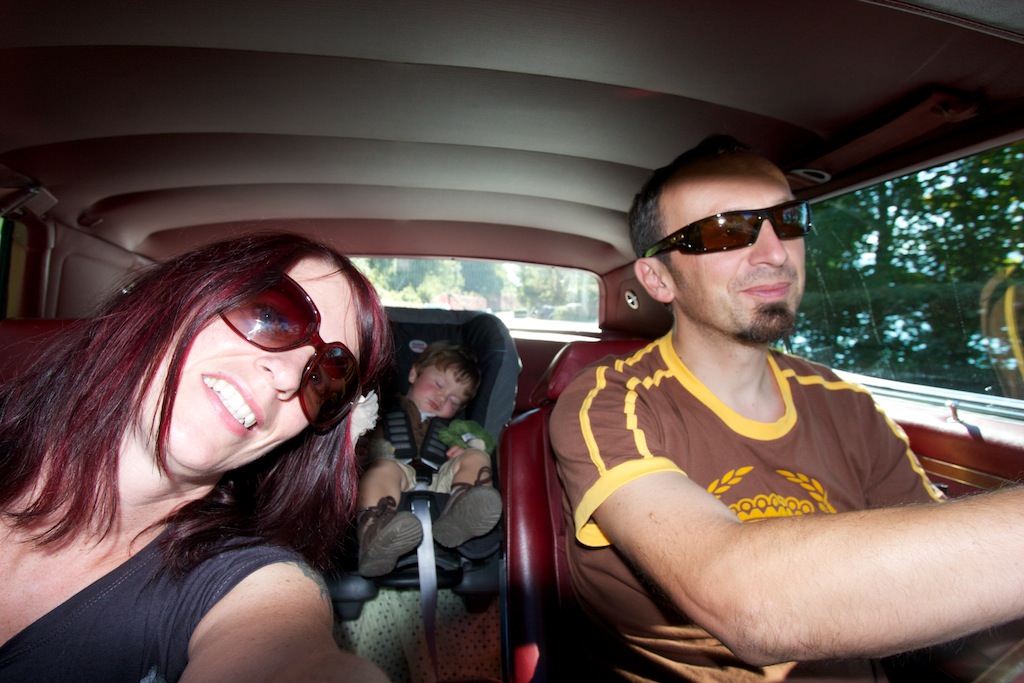
The whole family in the Lincoln - little Elliot is taking a nap as usual - nothing beats the soothing sound of the V8...
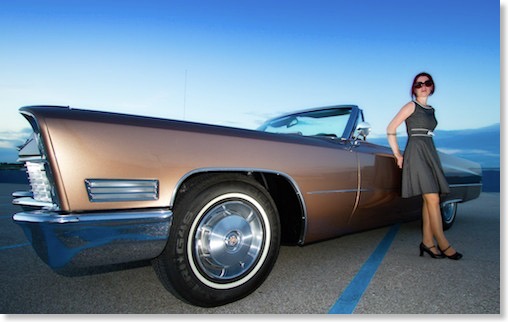
A Photoshooting with my Cars
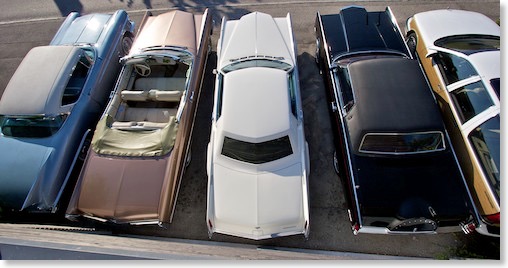
Seen from the roof top of the garage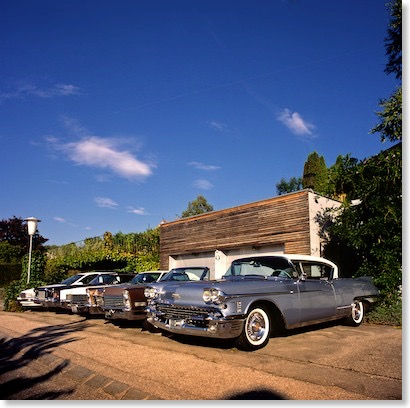
Most of my American cars in front of the garage...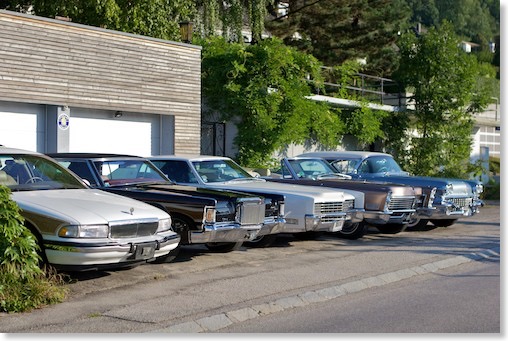
Mostkost Kustom Show 2011 and Sepp's Garage
We took the 67 Eldorado to the show.
My wife and I shot lots of great images which are available in this gallery.

Sepp during a burn out with one of his Hotrods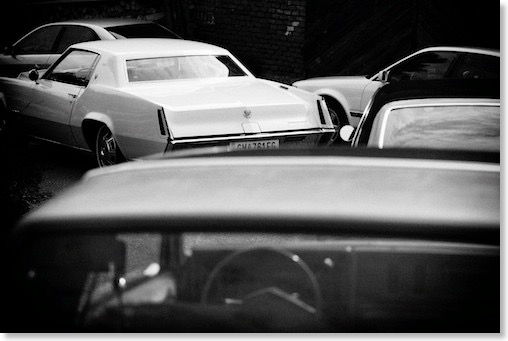
We took the 67 Eldorado to the show
Replacing the rear shocks on the 67 DeVille
The right shock came out pretty easily and as planned - it was great to work with Richards awesome collection of tools he has in his workshop. I could not help my friends as much as I would have liked as I had snapped one of my ribs two days ago while changing tires and so I cant even hold a wrench properly at the moment... So my great friends did most of the work for me.
As it turned out the new Monroe shocks I had bought were delivered with one wrong bolt - the other 3 bolts were correct though. Fortunately I had a correct bolt as a spare from another set I had bought. When we wanted to take out the left shock we ran into a problem with the top bolt which would not want to loosen up. Its also pretty difficult to get access to it - as it is hiding behind the curve of the exhaust pipe. After 1,5 hours of sweating and bad cursing it finally gave up due to the help of a heavy duty metal saw. The new left shock went in pretty quickly afterwards but then it was already 1 am.... Thank you my friends for your great help and support!
At work in Richards garage around midnight... In the background Richards 65 Impala and Alex´s 63 Riviera in the front...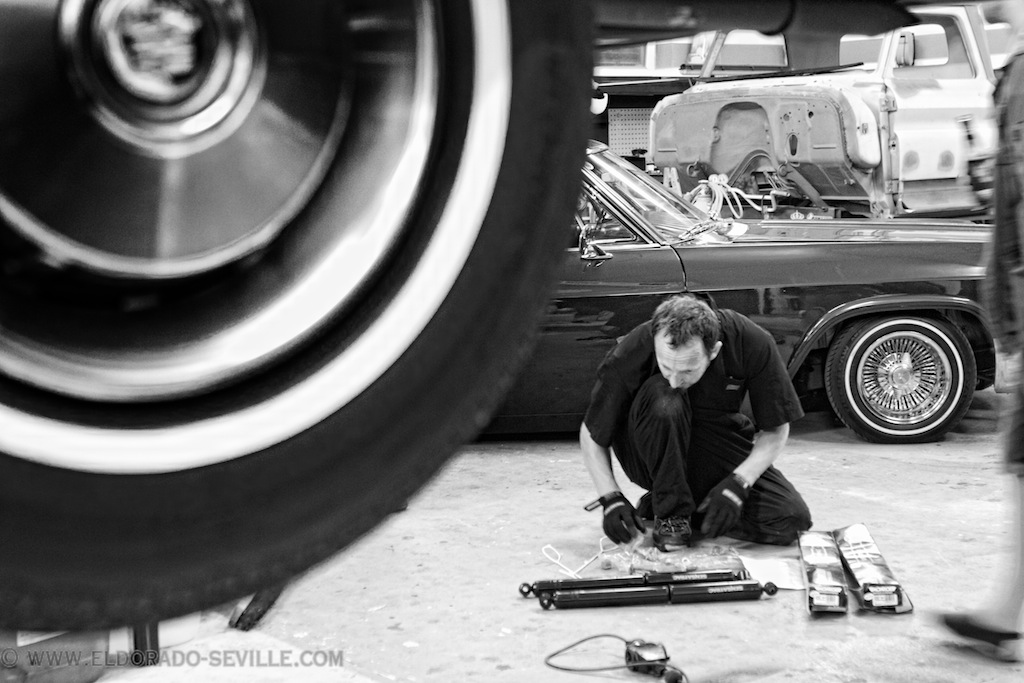
Unpacking the new shocks
Richard and me at work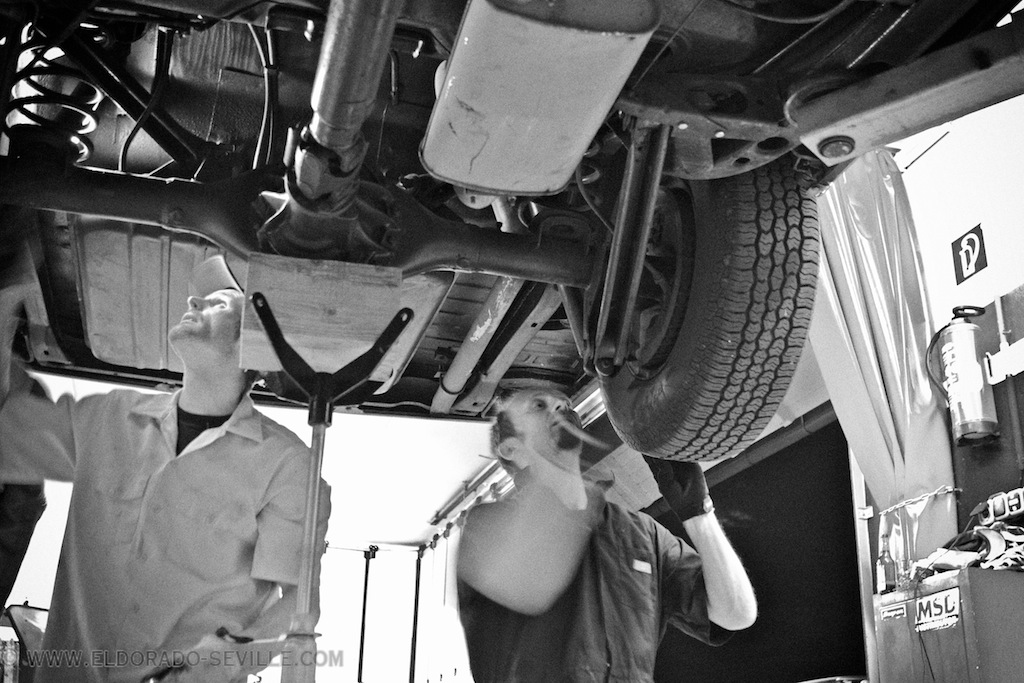
Unscrewing the old shocks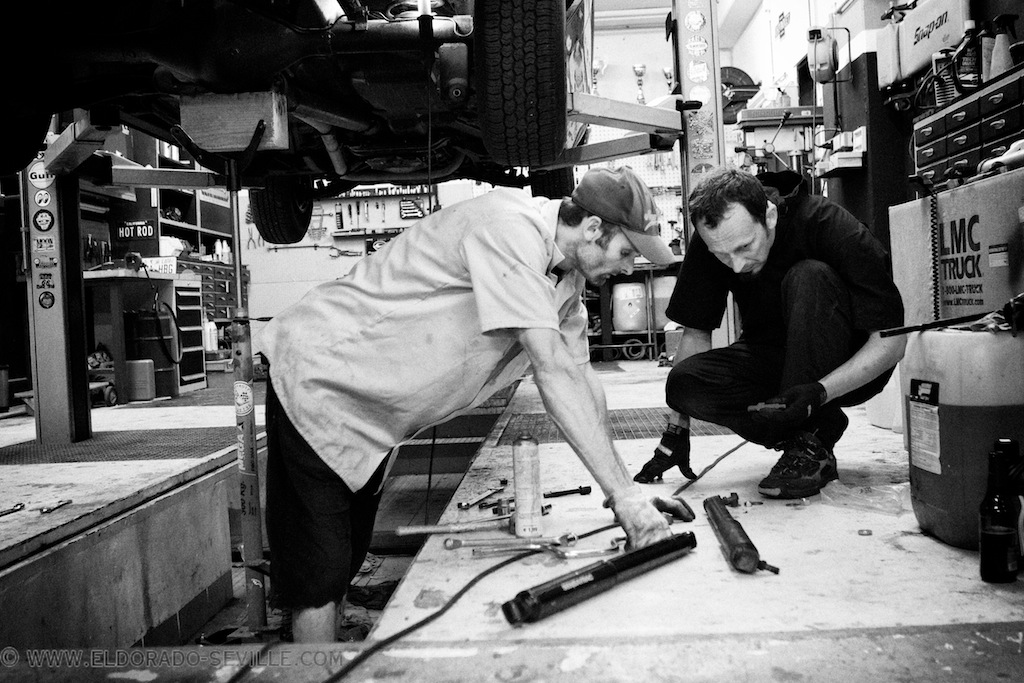
Figuring out how to mount the new Monroe shocks...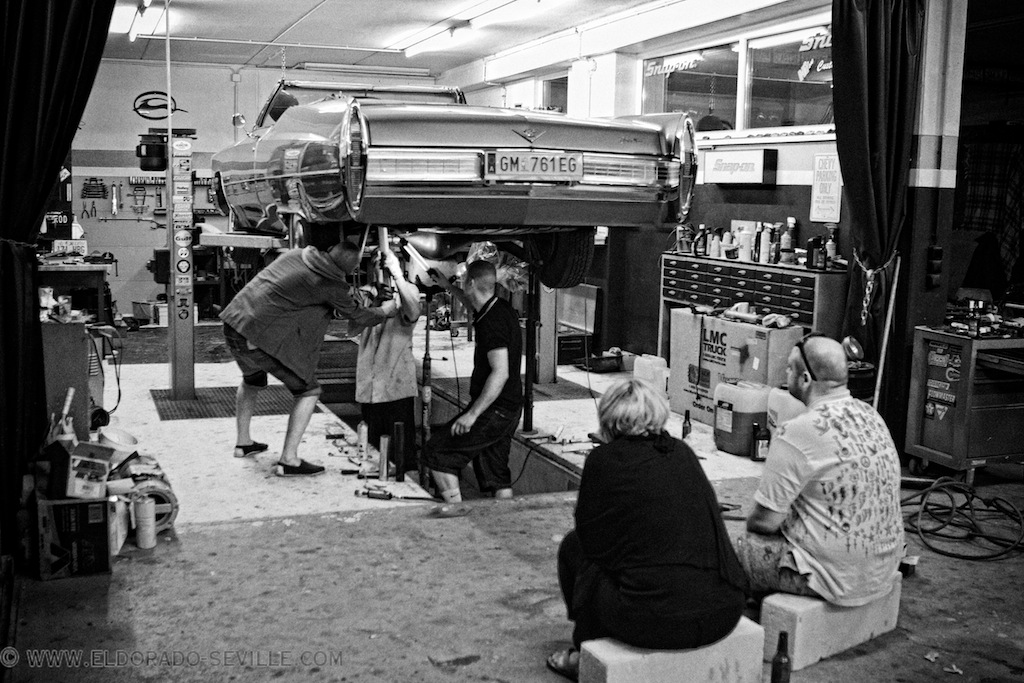
the left shock just did not want to come out...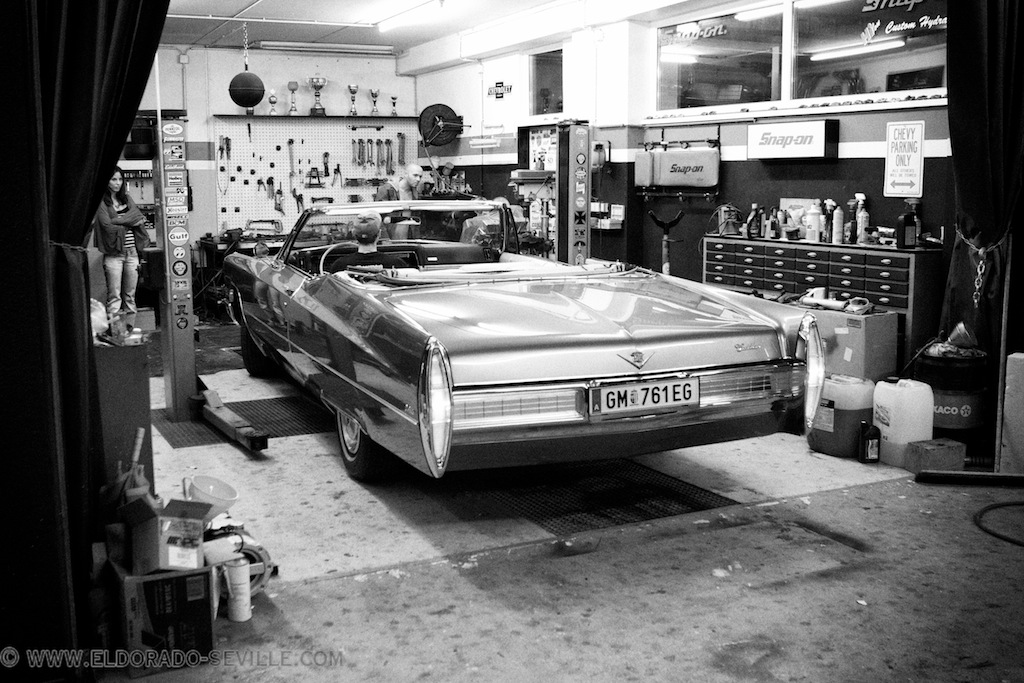
Backing out of Richards garage...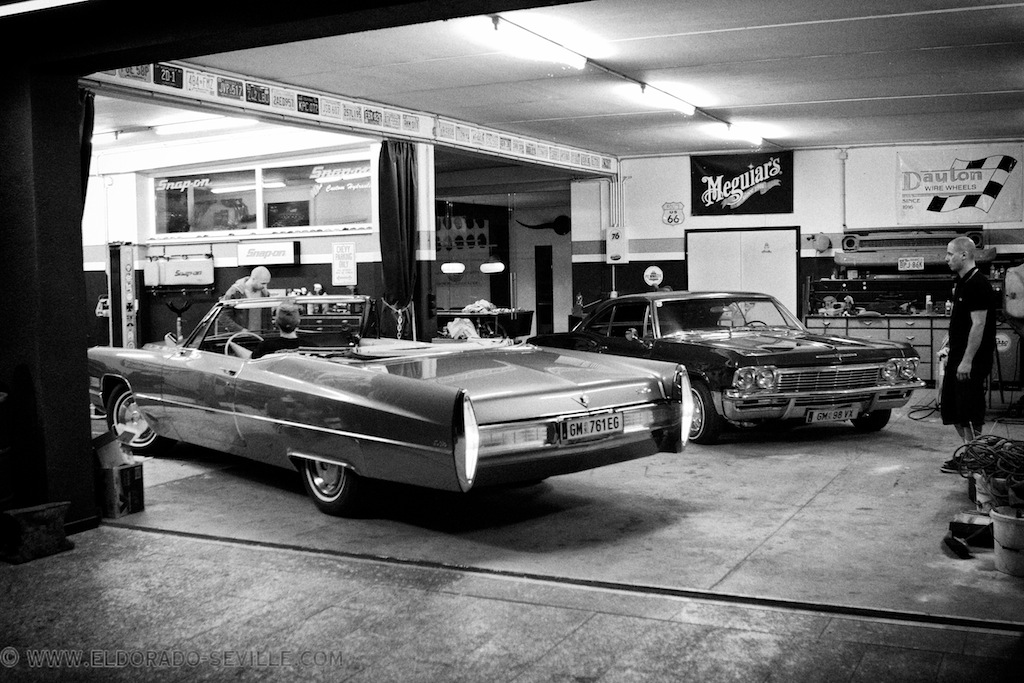
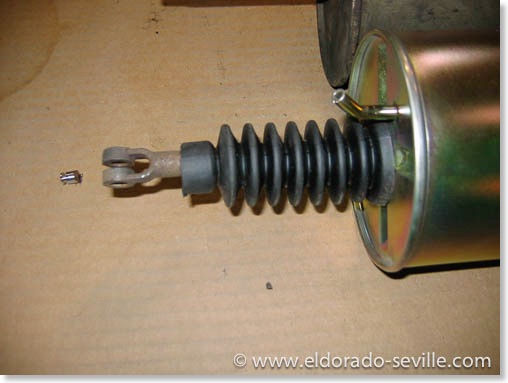
The 67 Eldorados new POA valve and recharge of the AC
I got a new remanufactured POA valve (suction throttling valve) from Classic Auto Air to make sure that the system can cope with the much higher pressures of R134. Classic Auto Air was very helpful with providing the factory correct parts. Classic Auto Air says that the re-calibrated valve can make a 15-20º F / 6º C difference.
Yesterday I got the Eldo back from the shop and so far it seems to cool the car down properly. The air discharged out of the vents is 10º C / 50º F cold - not bad for R134.
This is what Classic Auto Air is recommending for a change from R12 to R134:
Minimum Requirements
- Change or restore the filter-drier.
- Drain the compressor oil and recharge with 134a compatible oil. (PAG or Ester Oil)
- Insure that the system is clean and free of contaminants (Depending on component condition, this may be a simple matter of blowing out with compressed air or liquid flushing with an air-conditioning flushing agent)
- Replace or restore all rubber hoses with barrier hose.
- Install 134a charge port adapters
- Send POA valve in to be calibrated
- Charge with 134a between 70-80% of the original R12 charge amount.
- Replace any o-rings with 134a compatible
Recommended:
- Install hi/lo pressure switch
HELPFUL HINTS
- Ignore the sight-glass. A properly charged 134a system will likely show bubbles in the sight-glass.
- Typical 134a charge rate will be approximately 70-80% of the factory R12 charge amount.
The new factory correct POA valve. Internally it was calibrated for the use of R134 instead of R12. The expansion valve was also replaced together with the evaporator, condenser, compressor, O-rings, filter-dryer. I did not install a hi/lo pressure switch which would cycle the compressor on and off to keep the car original.
THE 1967 CADILLAC AUTOMATIC CLIMATE CONTROL SYSTEM - MORE ISSUES - AND A FINAL FIX? RESTORING THE POWER SERVO VALVE!
The 67 Eldorado lost its complete charge of refrigerant over the winter - so it will have to go back to the shop to see where it is leaking. All components were replaced with new ones last year and so I have no idea where it could have leaked out. A tracer was put in before the last recharge so we should be able to find the leak. I guess that it will be one of the original hoses are a bad fitting.
Another thing that bothered me was that the system basically worked most of the time, but sometimes I had to wait for a long time before the system came on, or I had to switch to “FOG“ or “ICE“ position before the blower would come on in the “Auto“ position. Then sometimes the blower would cut out again if the temperature dial was moved to a colder temperature. Sometimes the temperature would move to full heat regardless off the selected temperature in the 67 Eldorado.
I had the very same problems on my 67 Deville as well - but there also the “Vent“ and “Low“ position did not work at all...
So I started trying to find the issues and finally wanted to fix them. Sounded easy - but it took me 4 full days with long nights in the garage to fix it...
BTW - Cadillactim has an excellent trouble shooting guide for the ACC on his website - its for sale for $ 45.- and I can highly recommend it if you are troubleshooting your 1967 or 1968 Air Condition System.
A great troubleshooting guide for 1967 and 1968 Cadillac´s Automatic Climate Control Systems I got from Gary Sisk - owner of a 1968 Cadillac.
This is a very easy to follow explanation which will save you a lot of time and you do not even need any special tools.
It was written by Lynn Nicholls and can be found on Stampies Cadillac page - here is the direct link to it. I used some excerpts from his document in the explanation below:
I first suspected a vacuum leak to be responsible for most of the erratic behavior of the system. A clear indication was that the system would initially have to be switched to the “ICE“ position to make the blower come on.
Lynn Nicholls writes:
“Sometimes the dash control can be switched to the fog or ice positions to bring the blower motor on and then when it is switched back to auto the blower may stay on and the system seems to work fine until the car is shut off. If the vacuum leak is only moderate there may be enough vacuum to hold the master switch closed once it gets , but not enough to pull it closed in the first place. When the dash control is switched to fog or ice, it assumes the air temperature is cold and that the engine is not yet warmed up, but that the blower is needed immediately for defrosting the windshield. So it supplies vacuum to the master switch through another circuit, bypassing the temperature controlled vacuum switch on the heater core shutoff valve on the right fender well. This source of vacuum is enough to close the master switch.When the dash control is switched back to auto this vacuum source is shut off, but there may be just enough vacuum left from other circuits to hold the switch closed. This routine will work for a while but as the leak gets worse, there won’t be enough vacuum left to hold the master switch closed anymore and the blower will shut off again as soon as the system is switched back to auto.With these symptoms and behavior the problem is most likely the power servo. This is half the brains of the system; the other half is the control panel in the dash. The power servo is controlled by a varying vacuum signal from the transducer. This vacuum supply is a completely separate circuit from that which supplies vacuum to the master switch. High vacuum moves the servo to the maximum heater position, and with low vacuum, a return spring moves it to the maximum AC position. In between these two extremes, it regulates the air temperature door to blend warm air and cool air, and simultaneously regulates the blower speed. It also spins an internal rotary vacuum valve back and forth that makes various connections between the several small vacuum lines on the top. This rotary valve controls the various vacuum motors of the system that operate the AC, heater, and defrost functions. It is this rotary valve that goes bad. l have seen these things visibly warped, and very badly so. It must be caused by engine heat, because there is also one inside the car on the control panel that is moved back and forth by the dash control lever, but that one seldom seems to cause any trouble. A warped rotary valve leaks all kinds of vacuum and the first part of the system to be affected by low vacuum is the master switch; there’s not enough vacuum there to close it and turn on the blower. To verify this is the problem, take some spare vacuum line, some scraps of 1/8 inch pressure line (like for air shocks), and a vacuum T and manually make the connections that the rotary valve should make in the maximum AC position. The connections that the rotary valve makes in various positions are shown in the factory shop manual. Disconnect the black connector with the striped vacuum lines from the power servo. Connect the yellow, red, and purple lines together with a T; also connect the tan and blue lines together and connect the orange and green lines together. If this rotary valve is the one and only culprit the AC will now work beautifully and the blower motor will come on every time, like magic. With the dash control on high the system should be recirculating air and there will be a lot of air noise coming from under the right side of the dash; when the dash control is moved to auto the air door should move to provide fresh air and the system will become much quieter. Of course with these manual connections the system is not fully automatic and the heater won’t work right at all, however this is enough to diagnose the problem.“
I did this test (see picture below) - and with the power servo bypassed everything worked as it should. This way I knew that the power servo was to blame for some of my problems.
So this rotary valve needed to be repaired...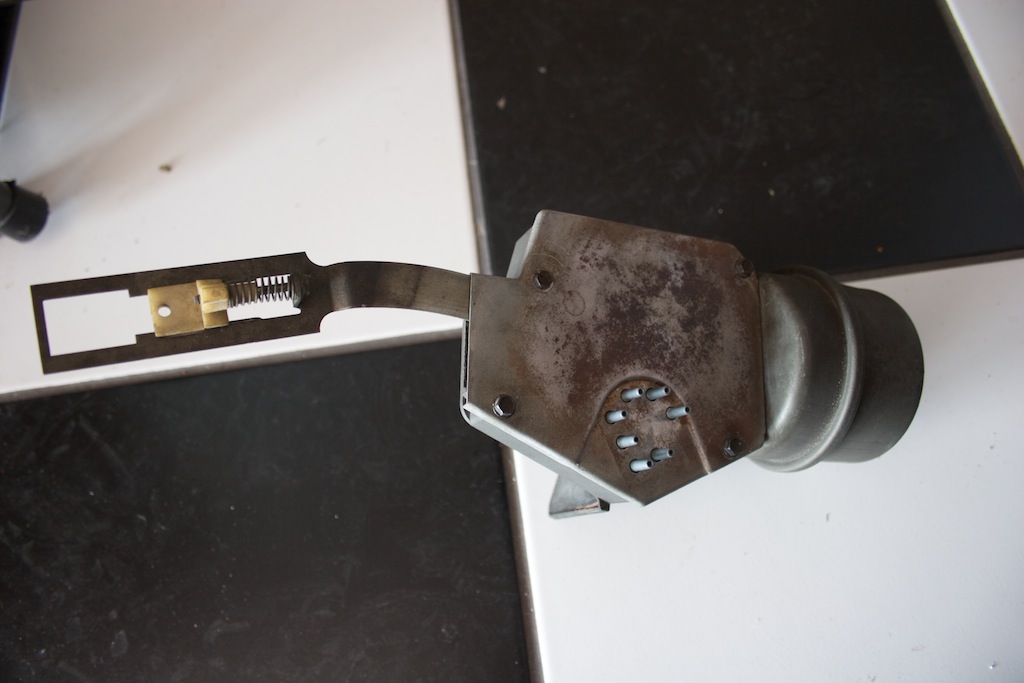
I removed it from the power servo and disassembled everything.
The removed power servo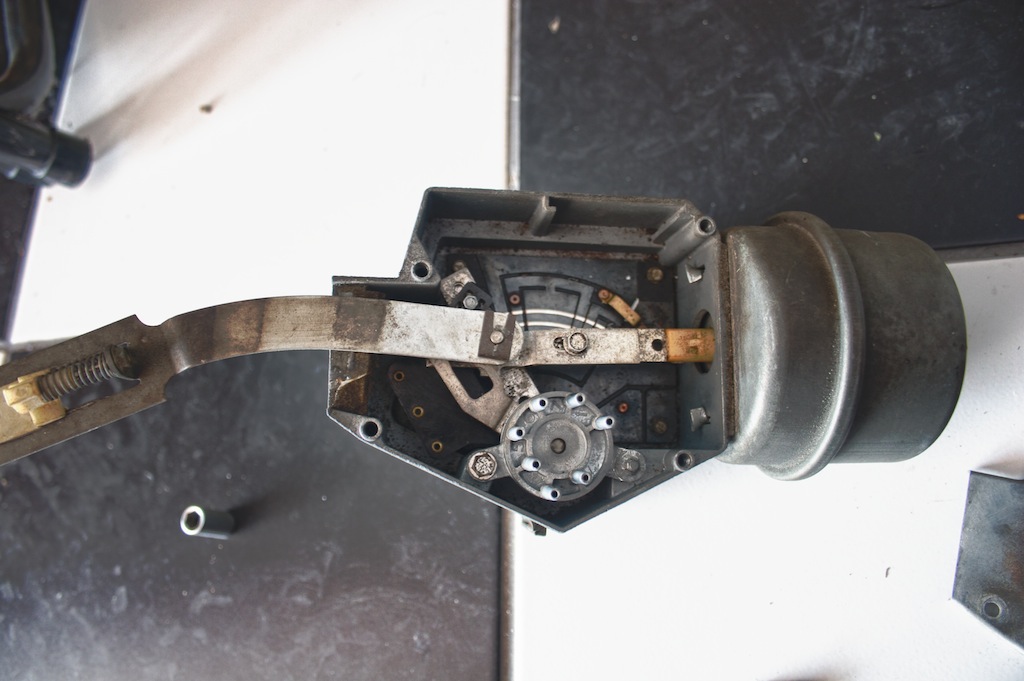
After opening the cover, you can see the rotary valve in the lower center.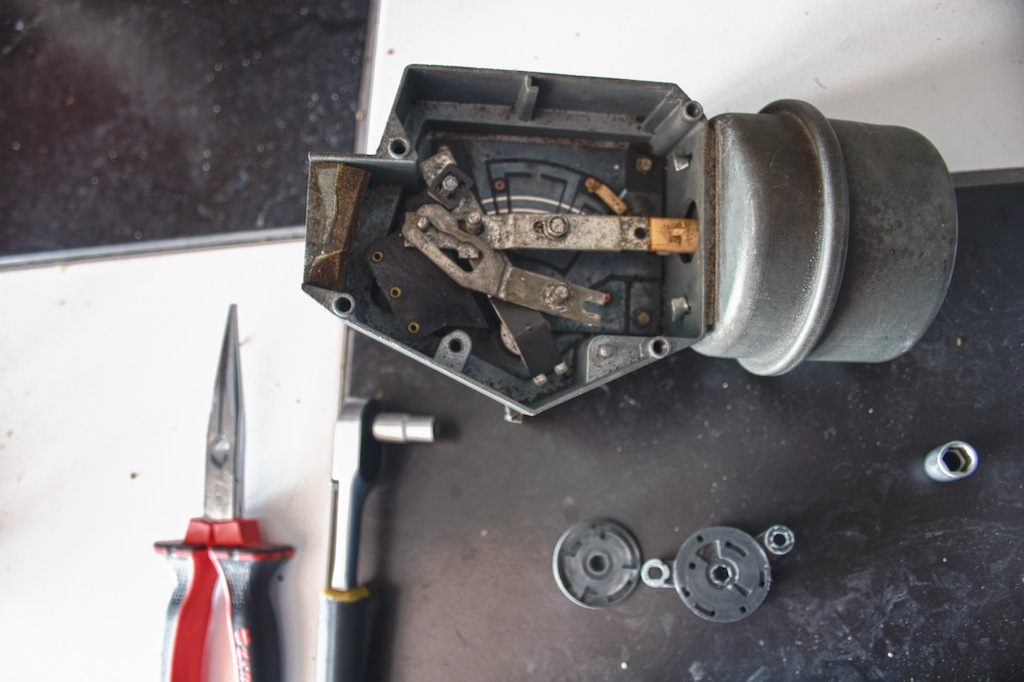
Remove one screw and a clip and the rotary valve comes out.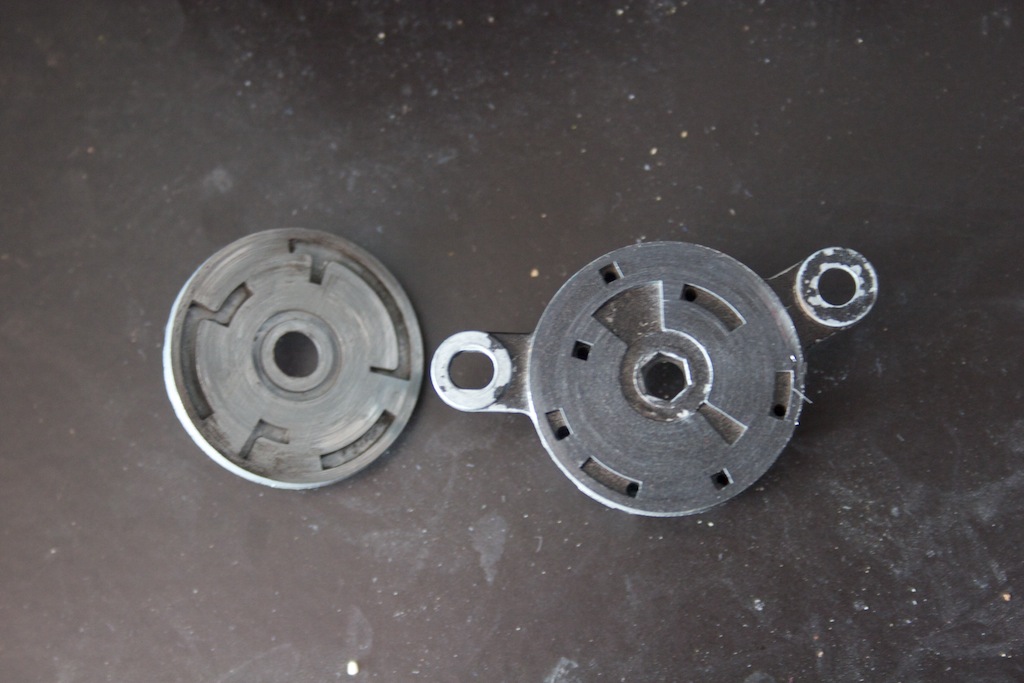
The rotary valve consists of two halves which make the connections - as you can see it was very dirty and rough - and slightly warped.
I started to wet sand both halves with 800 grit sandpaper.
When everything was flat and shiny again I used some 2000 grit sandpaper for a perfect finish.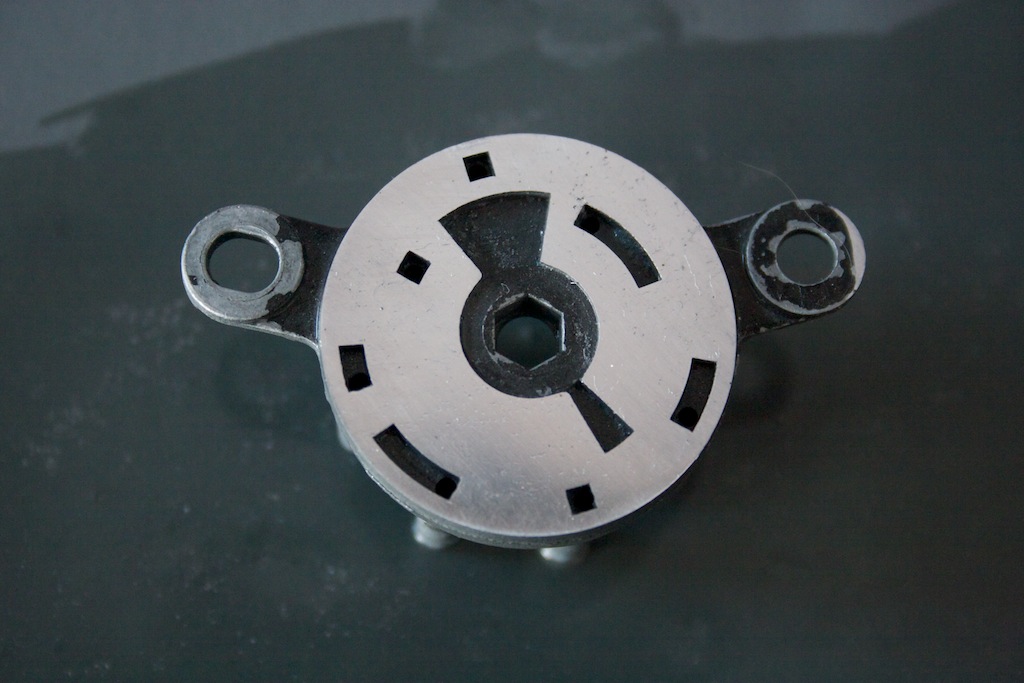
Looks shiny and flat again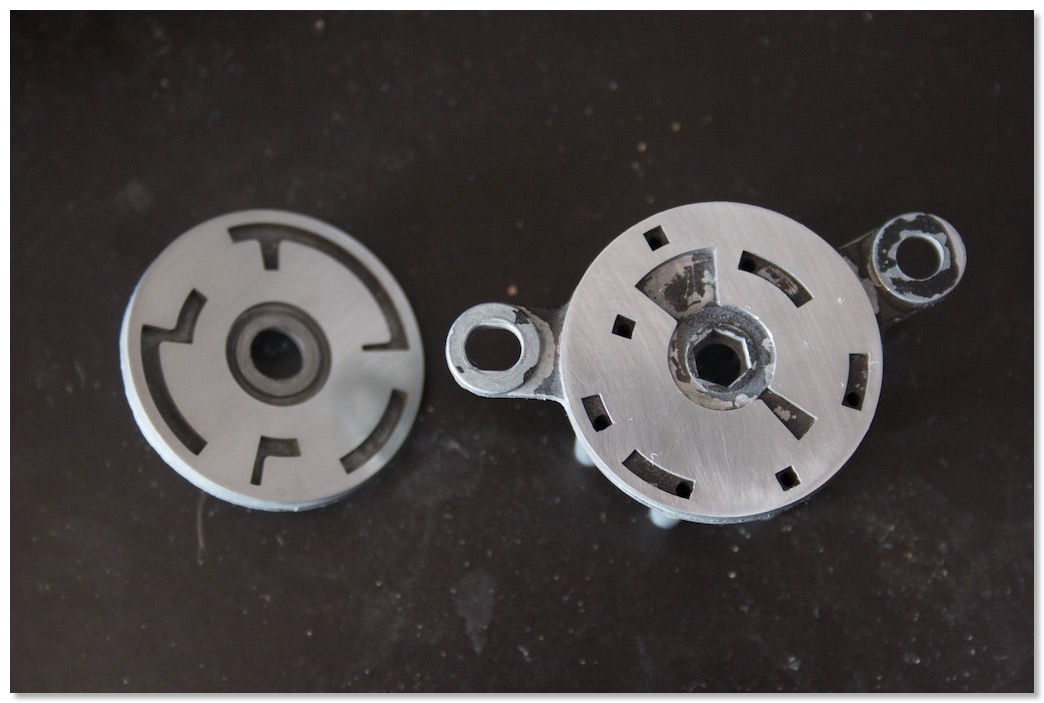
Make sure that none of the ports are clogged - I used compressed air to clean everything.
When you put the two halves together lubricate with WD40 to make sure that when you put them back into the power servo that they are properly held together with the underlying spring.
After I reinstalled them into my cars - almost everything worked as it should. In the 67 Eldorado I still had the problem that in the “AUTO“ position the fan would always be slow - so I knew that the control head in the dash had a problem with the “LOW - AUTO“ switch as well.
In the 67 DeVille the “VENT“ and “LOW“ position still did not work at all...
So I switched the control panels between the two cars and suddenly everything in the 67 Eldorado worked perfectly. I never had such a perfectly working system before. Its like it just left the factory!
In the DeVille I still had no “VENT“ and “LOW“ settings working... So out came the control panels again... (its a pain in the a*** to remove and install them...)
As it turned out the “LOW-AUTO“ switch on one panel was stuck in the “LOW“ position. You can easily remove it and readjust it to work again - sorry I forgot to take pictures. Make sure that all switches on the control head are adjusted properly or they wont work as they should!
So I knew that both control heads were working correctly by installing it back to the 67 Eldorado and the other panel back to the 67 DeVille.
While the 67 Eldorado was perfectly fixed now with everything working as it should - the 67 DeVille was still giving me the problem with a non working “VENT“ position...
I studied the shop manual for hours and could not find what the problem could be. I knew that the power servo was working perfectly now and I knew that the control head was in perfectly working order as well. I verified this once again by switching these parts between the cars once again and everything worked as it should in the Eldorado but not in the DeVille.. I´m really good in switching these parts between my cars now ;-)
I started to look for electric connection problems and finally found out that no electricity was coming out of one of the three power servo connectors, but I did not know why...
After I removed the power servo once again to re-check it again it struck me - one of the pins was slightly bent and the wire connector did not make proper contact. This problem was not visible with the power servo installed in the car. It took me 2 long nights to find this little flaw... I just bent it straight and everything works as it should on both of my 67 Cadillacs. Now I have to recharge the systems and I should have perfectly working AC again... I will also install new dryers and a re-calibrated R134 POA valve before the recharge.
One the one hand the 1967 ACC is very complicated but once you know how it works its pretty easy to fix. The rotary valve in the power servo is pretty easy to refurbish, the dash servo valve is riveted together unfortunately, so its not such an easy fix, but NOS valves are still available at “Classic Auto Air“
*UPDATE 2022* - Check out this article and video as well as I had to repair my switch again in 2022 on my 66 DeVille!
Here is a video about the Master Switch that a gentleman posted on youtube
The 67 Eldorado in front of the garage after the AC system was fixed.
1967 Eldorado with Sunroof from ASC
A 1967 Eldorado with sunroof?
A while ago I was contacted by fellow 67 Eldorado owner Mark Bristol. He owns a very rare 1967 Eldorado with a sunroof done by ASC (American Sunroof Company). He asked me if I knew anything about it.I had never heard anything about a sunroof in a 1967 Eldorado unfortunately, and so I could not help him out with any kind of information.
So Mark Bristol did a lot of great investigation work and found out the following:
“ I have found quite a bit out from my research. I spoke with Christian Prechter, President owner of ASC West on the phone. He was brought over from Germany when he was 19 in 1966 to help his brother Heinz Prechter do installs at the ASC West location and stayed there doing custom installs when ASC opened the Southgate Factory in Michigan. He told me that he did over 50 1967 Eldorados that year for various Stars and VIPS. He recalled doing mine for William Morris and even told me what color it was without me volunteering it to him. He said it was the only Marina Blue one he did! I quizzed him several times in a cross examination method to make sure he was not just telling me what he thought I wanted to hear. He said he is 100% certain he did it personally as he was actually doing the installs himself back then. The conversation went like this: „Hi I am Mark Bristol from Tomball, TX sorry to bother you at your home residence. I have a 1967 Eldorado with a sunroof.Did you ever install any sunroofs in 1967 in Eldorados?“. Prechter, " I installed over 50 for people like Sinatra, Dean Martin, Sammy Davis Jr. and William Morris.“ „Wow that many?“ Prechter "Yes it was very popular that year." „The car I have was William Morris' car do you recall doing it?“Prechter, "I sure do it was the only Blue one I did that year" „So you did a Marina Blue one for William Morris. That was a long time ago and you remember specifically doing this car, that is incredible are you sure?“ Prechter "I am 100% certain I did it" „So your division didn't get sold off to Inalfa.“ Prechter "Yes, I kept the custom install portion ASC West as it is the most profitable segment."„How involved are you with the actual operation of the company?“ Prechter "ASC West is still doing custom installs daily and I personally over see the operation." „Christian, Thank you for your time, you have been very helpful in understanding how these sunroof Eldorados came to be.“ It was a fairly short conversation I'd say 3-5 minutes with a very revealing content. I intend to mail him a packet with a photograph of "Elle" to autograph and several pictures to review and a certificate of authenticity for him to sign. Hopefully he will take the few minutes it will take and return it to me in the mail. A former President of the Cadillac Lasalle Club lives here in Tomball. He was president from 2004-2008. He stated he has seen 2 sunroof cars in person mine would make number 3. So they are floating around out there somewhere 50+ of them. My rule of thumb is 10% left in any condition after 40 years. That would mean there are 2 more out there some where!!!“ Mark Bristol
Mark Bristols - Ultra rare 67 Eldorado with sunroof.
Thank you Mark for providing all this information! Mark allowed me to post his info here, to help other 67 Eldorado fans with what he found out. Some more pics of his car can be found here:
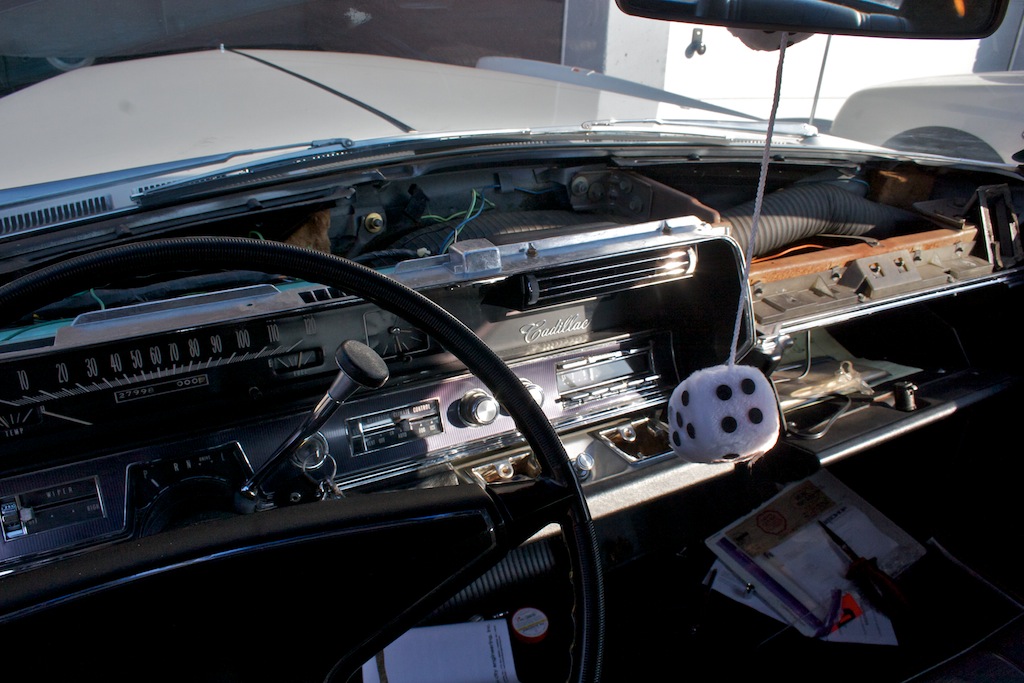
The 67 Eldorado now has a working radio!
Up first was the radio. The Eldorado came with the original AM radio. When it was turned on nothing happened though... The power antenna worked flawlessly and the signal seeking feature worked as well, but it would not make any sound at all. So I assumed that the speakers were shot and got a new front and rear speaker from Greg Thompson from Turnswitch. They have exactly the same size as the original ones. Cadillac used 10 Ohm speakers for all their cars in 1967. I installed them today and the radio came back to life. As there are no AM stations around any longer I came across a great solution which would enable me to use an Ipod or Iphone to play over the original radio, without having to do any non original conversions to my car. Its a plug and play solution which can be undone in 2 minutes and does not involve any cutting or screwing. The product is called RediRad and it works perfectly. Just tune the radio to 1000 khz on the AM band and plug in the audio source and you can hear your favorite music on your original radio! It is simple and affordable and undetectable as its hidden under the dash.
I also tried to repair the broken stem on my clock and it took me a while to get the clock out only to find out that my replacement stem would not fit. So I had to reinstall it. But at least it seems that it has a better electrical connection to the printed circuit now and the clock works all the time now. Problem is that I can only set the time with long nose pliers at the moment. Looks like I will need an entire new clock or live with it the way it is now. At least it works...
It was great to spend some time with the car again after the long winter months!
The removed dash.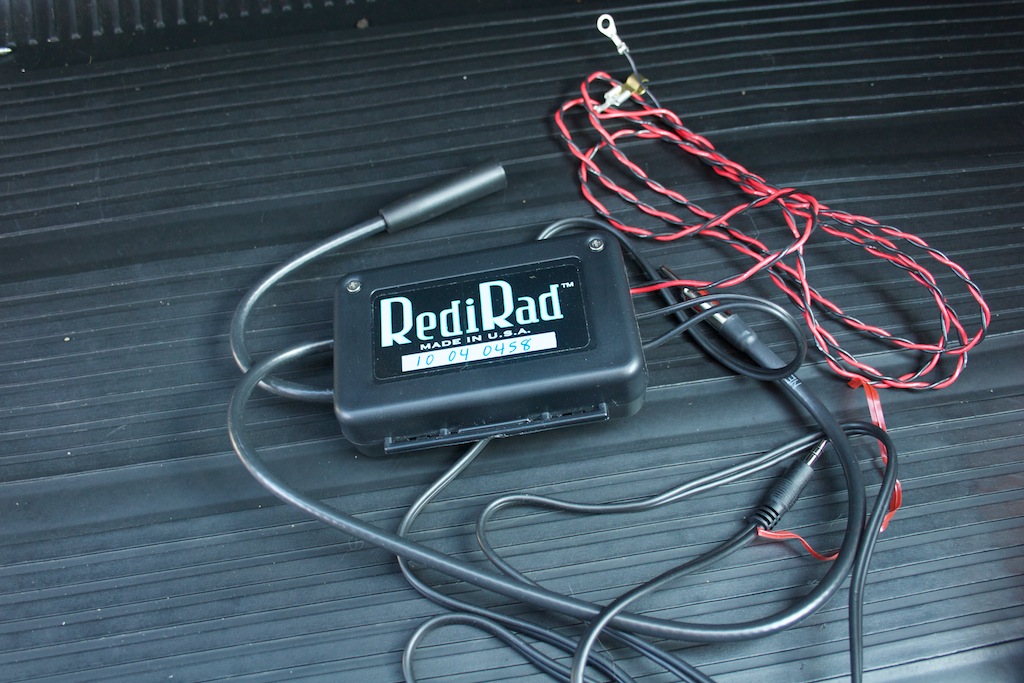
The RediRad system! Great stuff!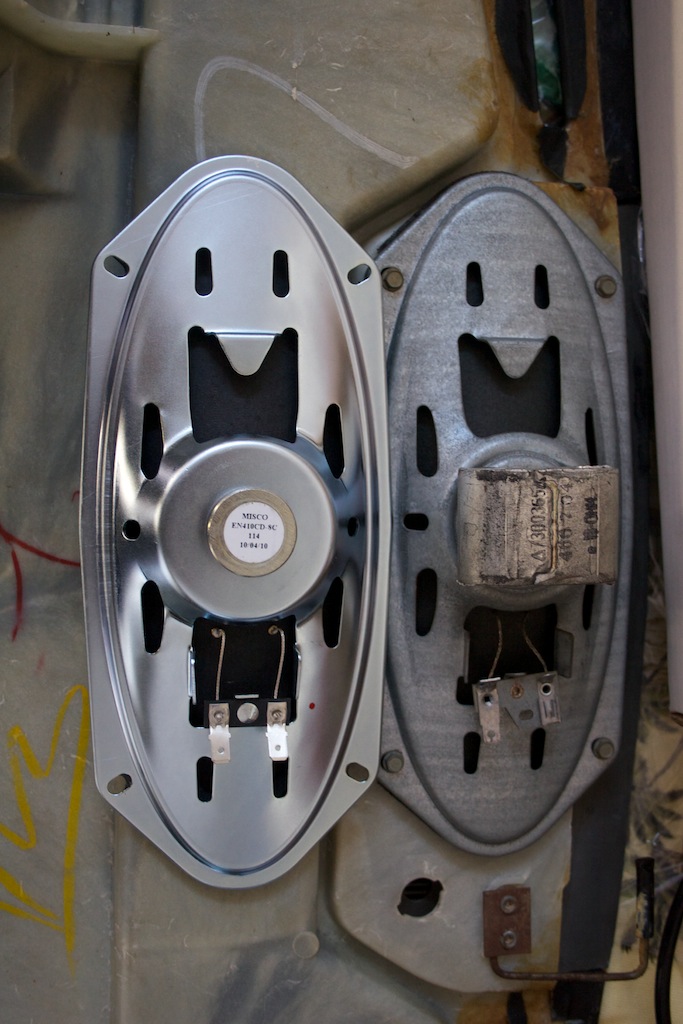
The replacement speaker on the left and the original one on the right.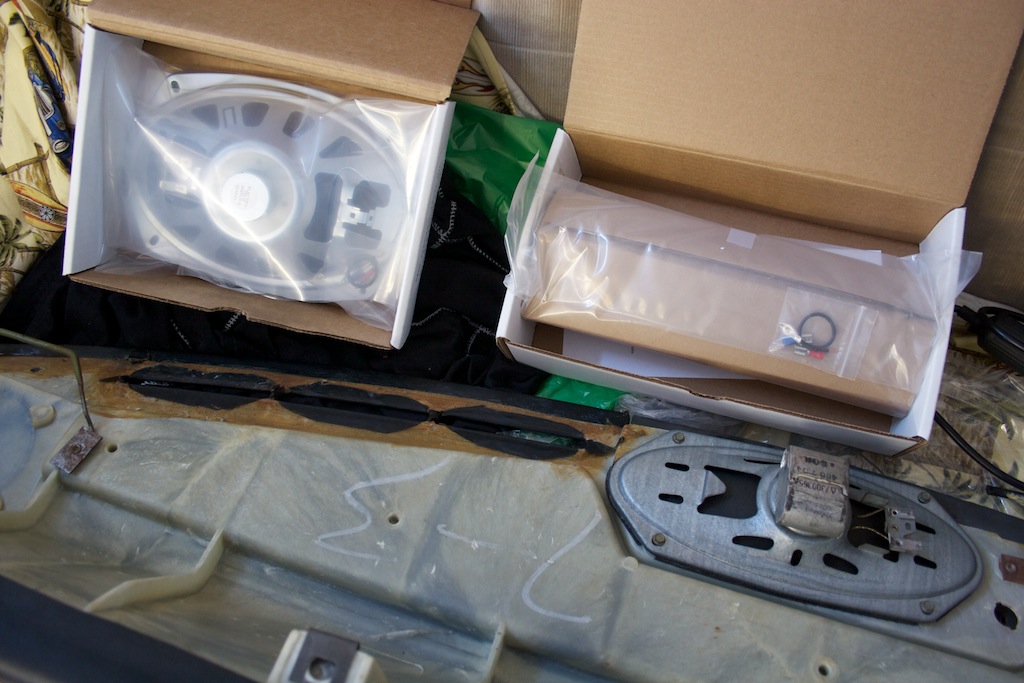
The new speakers with the old one.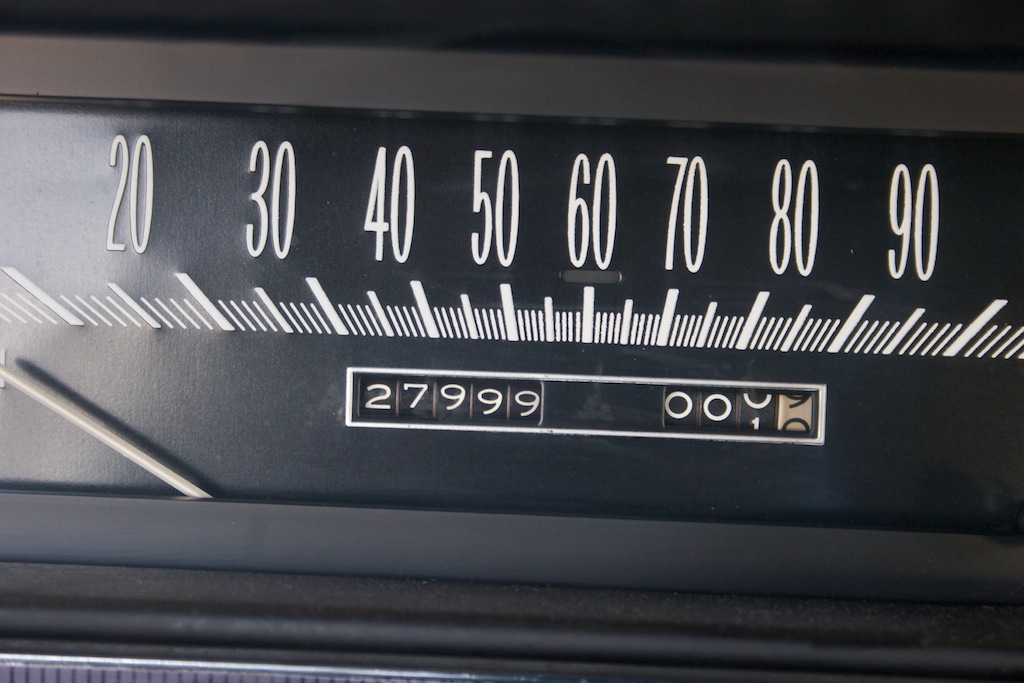
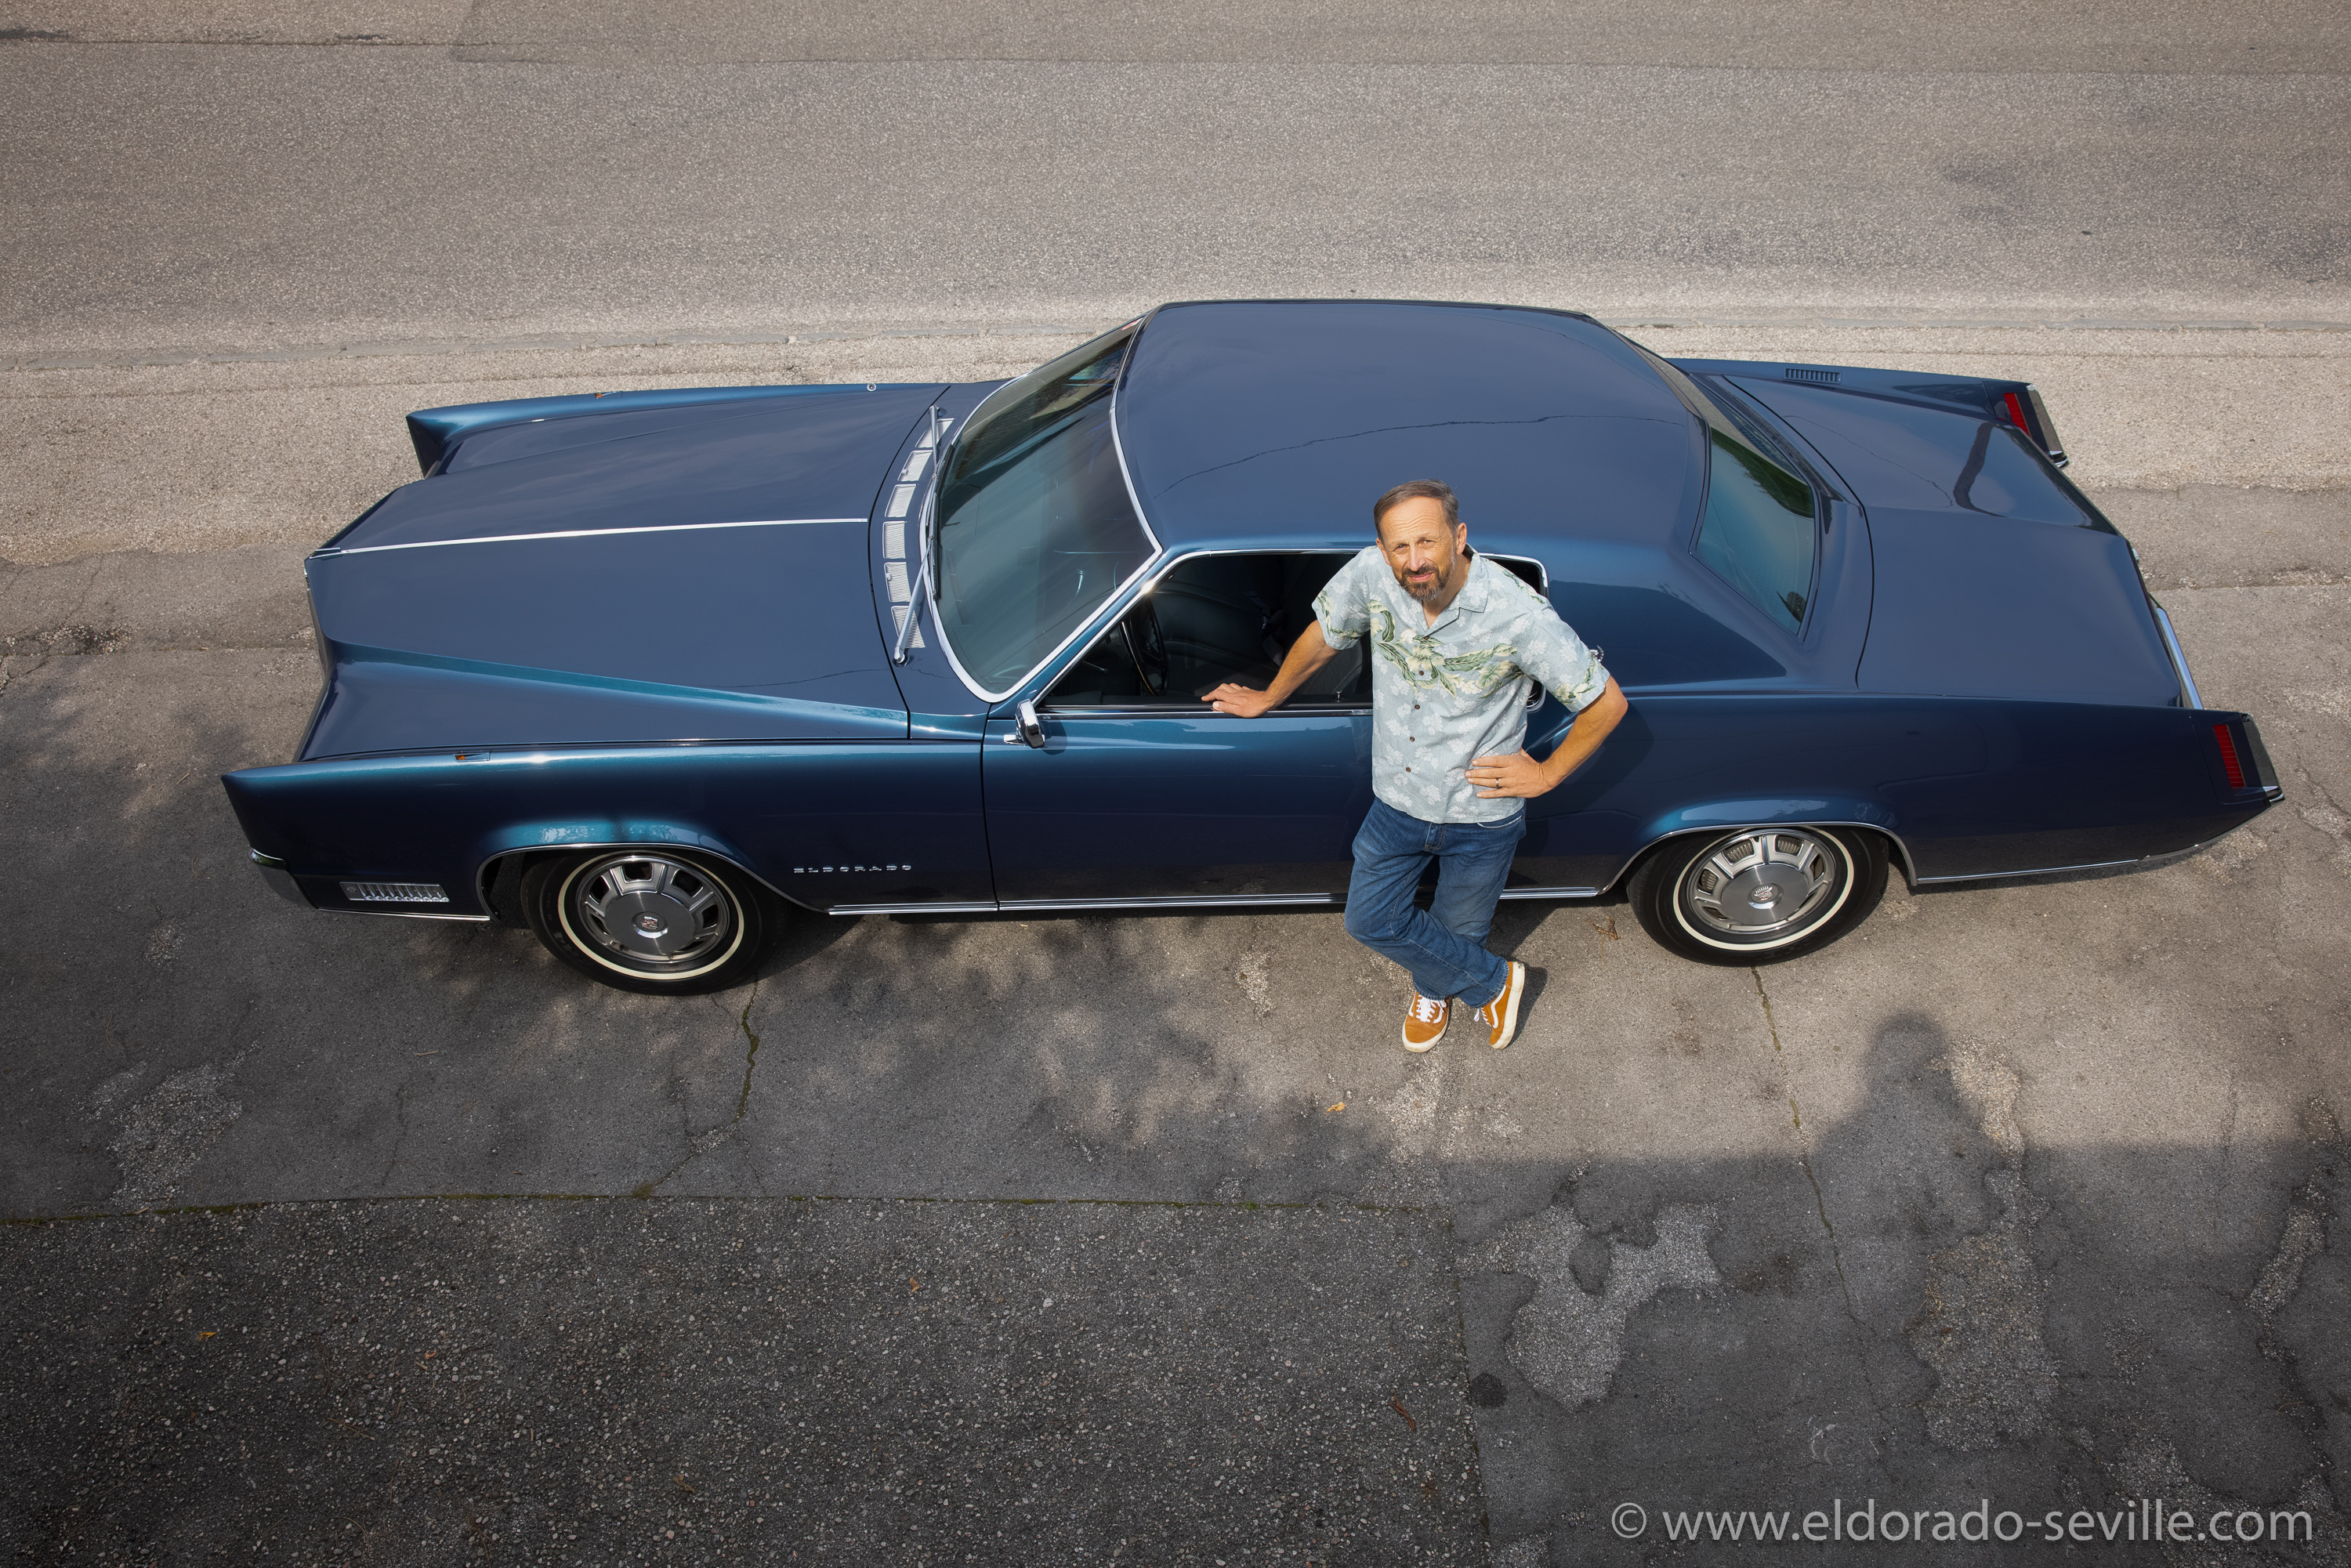
The Eldorado is coming close to the 28k mark... Still a low mileage car ;-)
A picture of my 67 Deville made it on the cover of a hardrock EP
With a beautiful Cadillac like this on the cover nothing can go wrong ;-) I think it is about the 6th picture that made it on a cover of a CD which I´m all proudly displaying in my garage.CornFed Bruiser is a four-barrel, full-throttle rock and roll flame-thrower out of Cedar Rapids, Iowa.Congealed from the primordial ooze of the underground dirt-rock scene, the Bruiser combines heavy riff-driven guitars and fat grooves, topped-off by a soul-shredding vocal.Late 2010, CornFed Bruiser set out to record its first EP entitled “Road Rash” scheduled to be released early 2011. Feature tracks “Road Rash” and “Fu Man” are just two of the tracks that define a new sound with an old school vibe.

Cadillac BIG Meet 2010
I´m already looking forward to the Cadillac BIG Meet 2011 on August 29th 2011.
the first cars are gathering before the start of the Cruising tour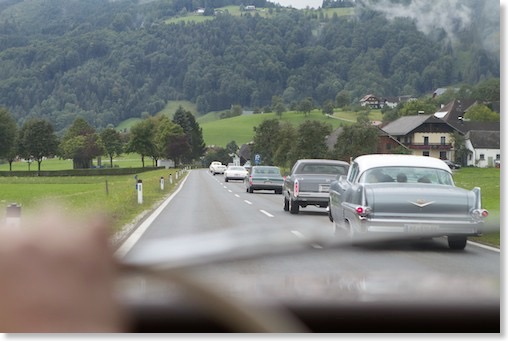
During the Cruising tour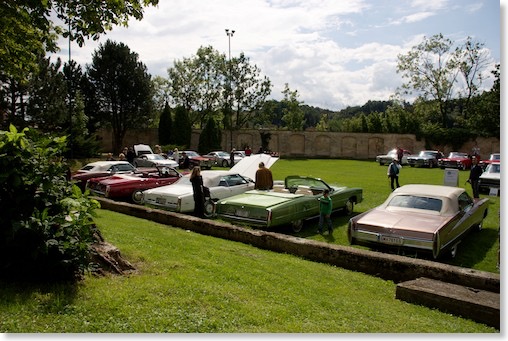
a special area of the show field was reserved for convertibles only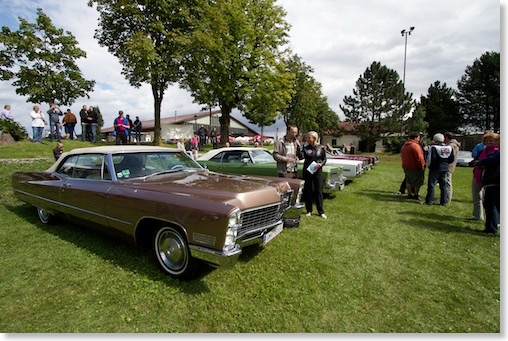
the 67 at the show field...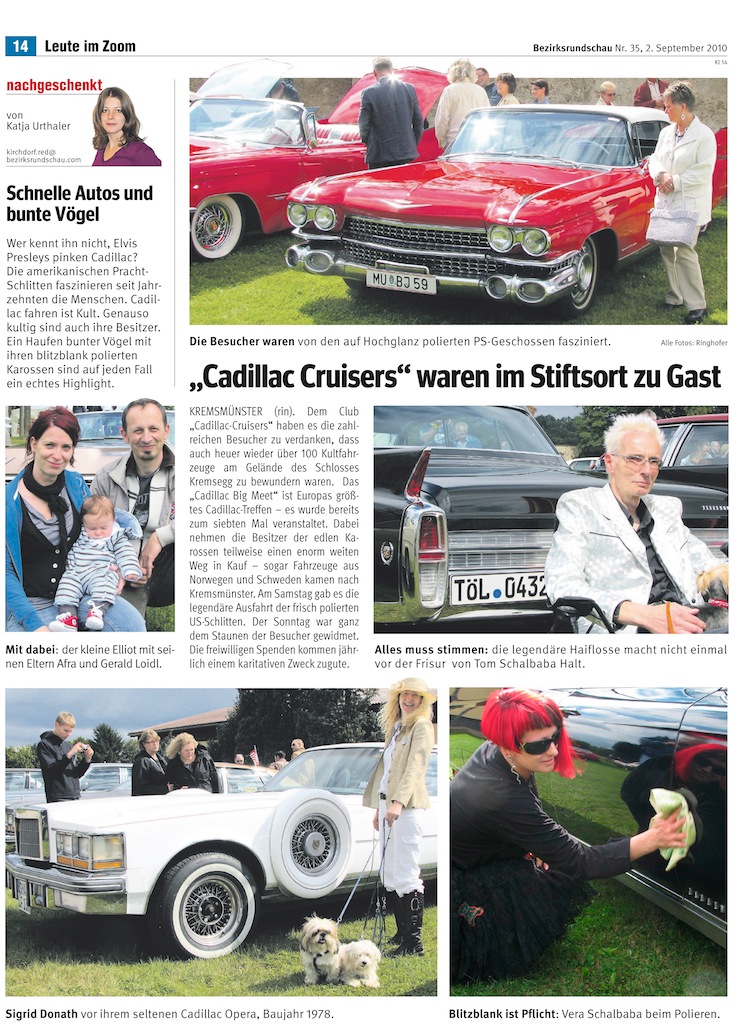
A report from the local newspaper “Rundschau“ - click for larger view
A photoshooting with the family
Click on the image below to go to the photo gallery with more pictures.

Detailing the paint of the 1967 Eldorado
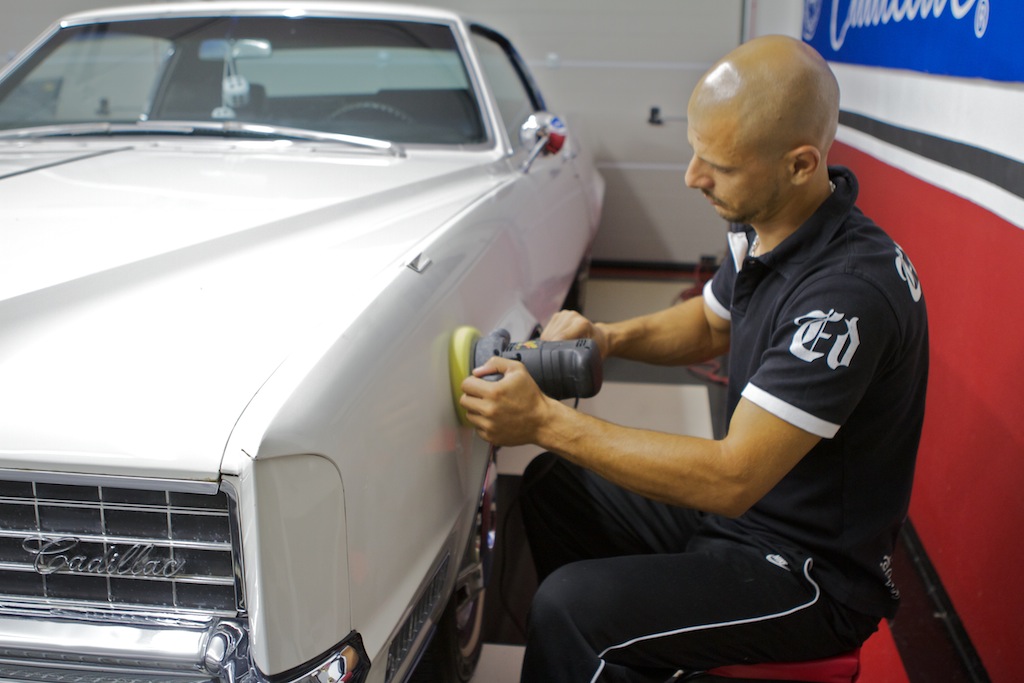
My friend Tayfun polishing the paint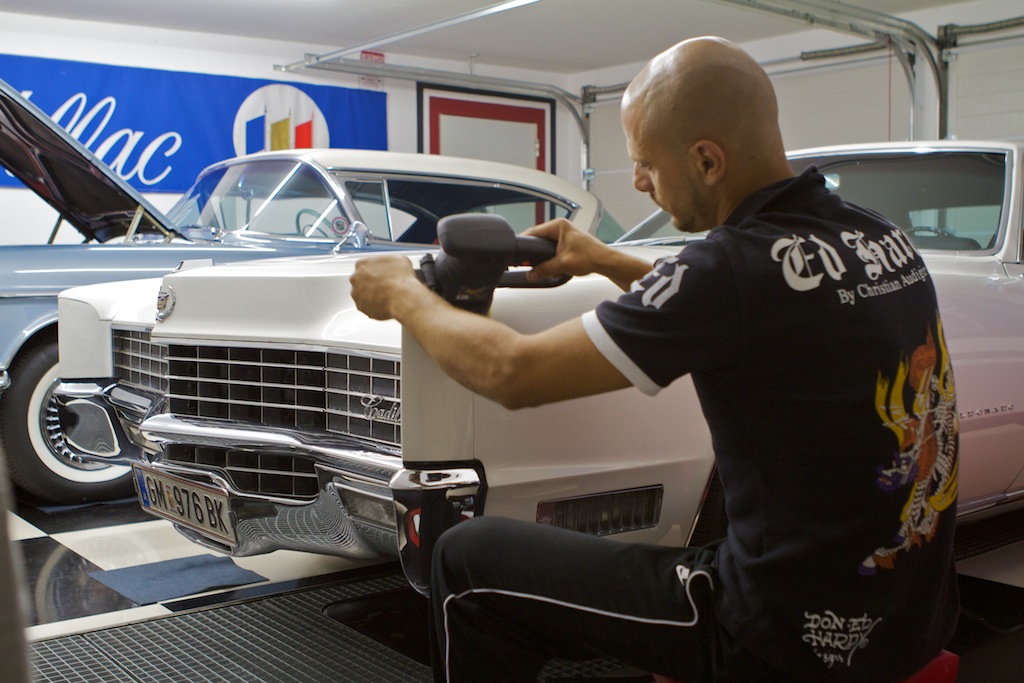
it took 7 steps for a smooth surface...
A photoshooting with the 1967 Eldorado
Afra used her old trusty Hasselblad camera which, even in the digital area, is better than any new camera, and shot a roll of good old black and white film and another roll of color slide film. She now scanned the films and the results can be seen here!
At the photoshooting with the light meter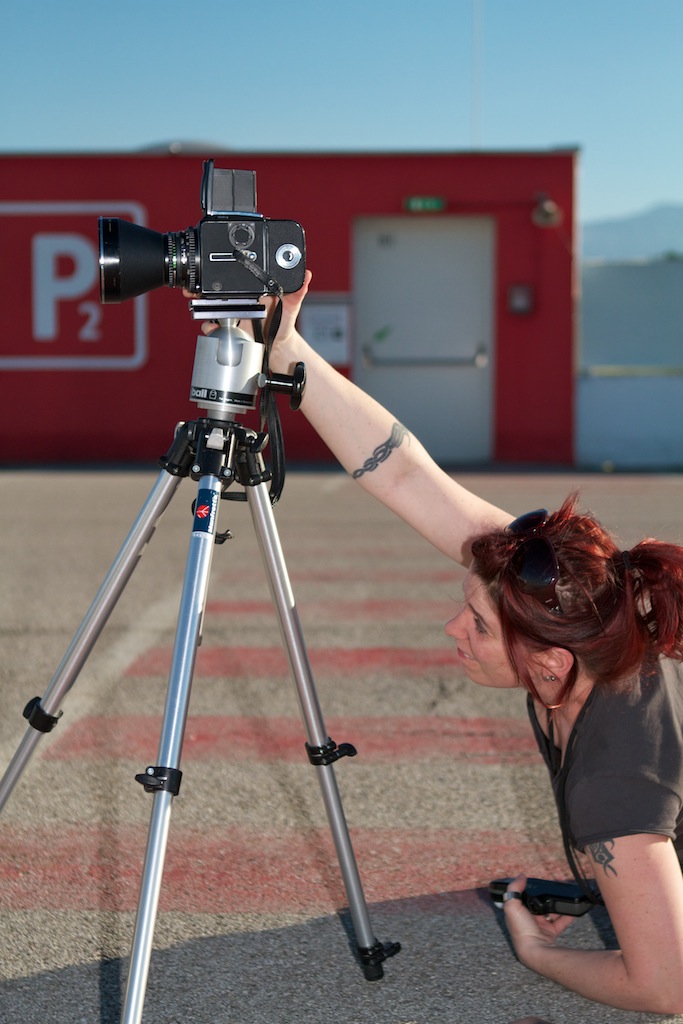
Afra giving her best to avoid any reflections in the chrome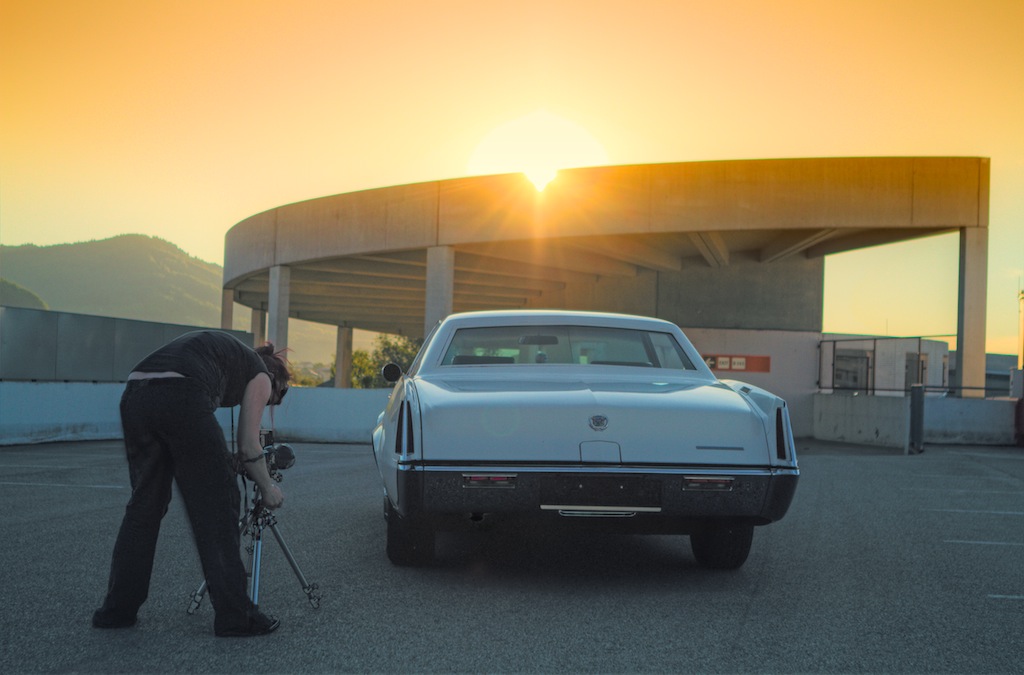
the sun is setting
click on the image to see all the images from this shooting
click on the image to see all the images from this shooting
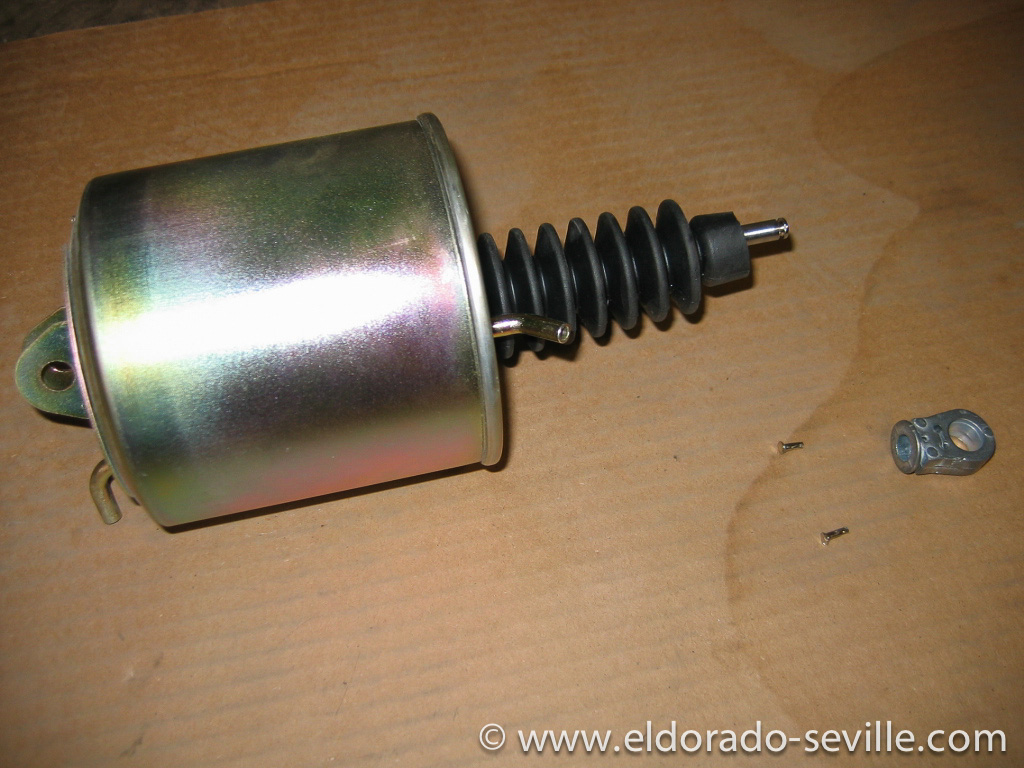
1967 Eldorado Headlight Actuator repaired
The instructions on the reproduction part mentioned that one could use silicone spray to lube the internals of the actuator through the vacuum inlets - this would also make the rubber parts in there soft for a better sealing. So I thought it might be a good idea to spray something in my old part and really soak it...
I had the impression that the rod was easier to move after application. I also put some gasket sealant around the vacuum inlets, just to make sure that there is no leak anywhere.
So I installed the old unit once again and it still did not work properly - but it worked fine if I only installed one vacuum line at a time. Suddenly it rang a bell. There are some T-connectors which also act as a valve going to each actuator. They do vent the system on one side when the doors are operated.
I cleaned the connector valve and reinstalled one hose going there and suddenly everything was back in working order! It now works like it should again!
Looks like I bought the new actuator for nothing... It cant hurt to have a spare though, as they are pretty fragile and even failed when new in 1967... In the meantime I might also find a way to install the original rod ends... Let me know if you have an idea!
If you are looking for a vacuum diagram for the Eldorados headlight doors you can find it on my website.
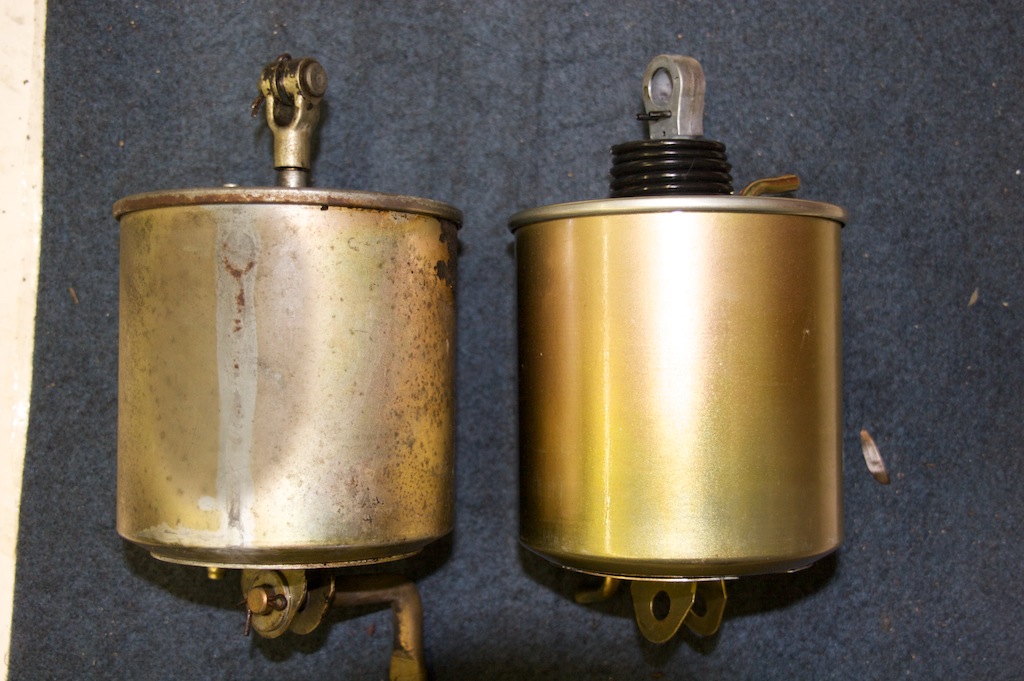
on the left the original actuator - on the right the reproduction unit from a 1969 Camaro RS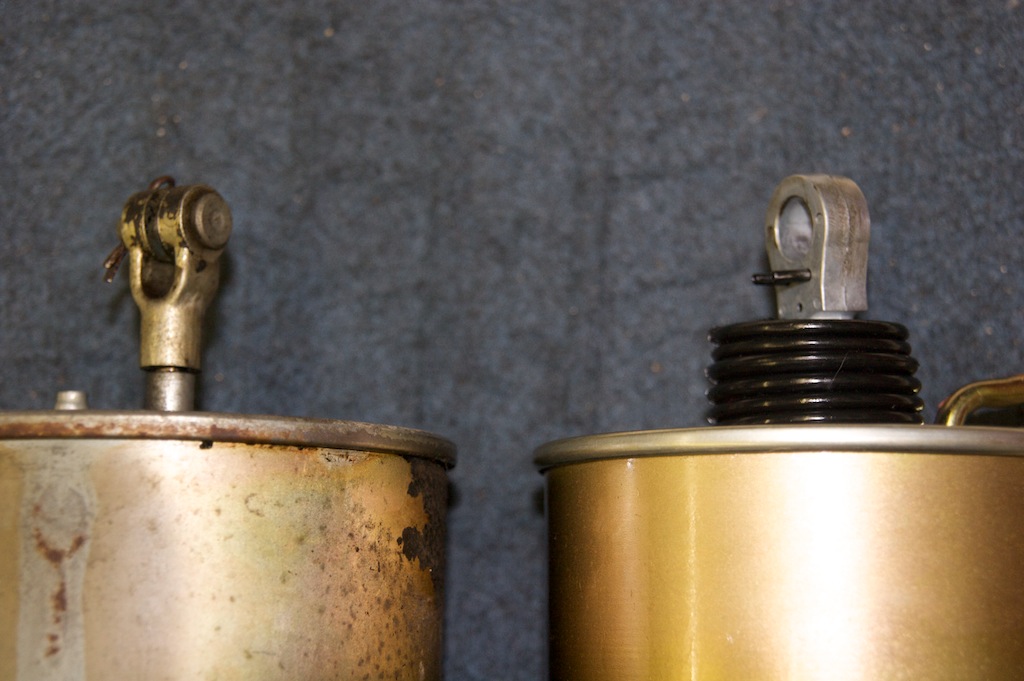
The different rod ends - the original one on the left - the headlight door mechanism is installed in the center of the rod end with a pin.
On the Camaro unit one could probably install it on the side using a bushing.
I have heard that this worked fine for some Eldorado owners as you can see on the picture below.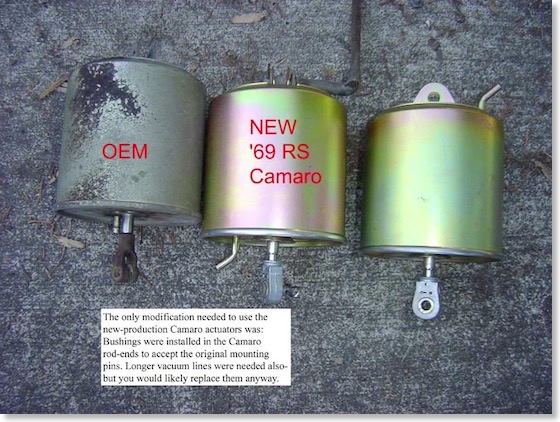
This is how it worked for another Eldorado owner - he installed some bushings on the new unit.
I found this picture on ebay at the auction for a 1967 Eldorado recently.
Update November 2014:
I have been in contact with Mark Maromonte who found this post on my website and replaced his bad OEM actuator with the 69 Camaro RS unit. He did some modifications and sent me some pictures to share here. Thanks Mark! I´m sure its helpful to others as well:
Mark wrote (all pictures below were provided by © Mark Maromonte):
I bought an actuator for a 1969 Camaro RS. I removed the two pins that held the attachment to the end of the rod. Then I cut 3/8 of a inch of the rod off, so the rods were the same length. Then I beveled the end of the rod on a grinding wheel, for about a ½ inch at the end of the rod. This was done so that I could start a ¼ tap on the end of the rod. After the tap was done. I threaded on the Eldo clevis pin. Done! 20 minuets, $76 vs $245. Works fine. Thanks again for suggesting that in your post. Take care, Mark
The 1969 Camaro RS headlight actuator is slightly different from the original Cadillac actuator. It can be made to fit though.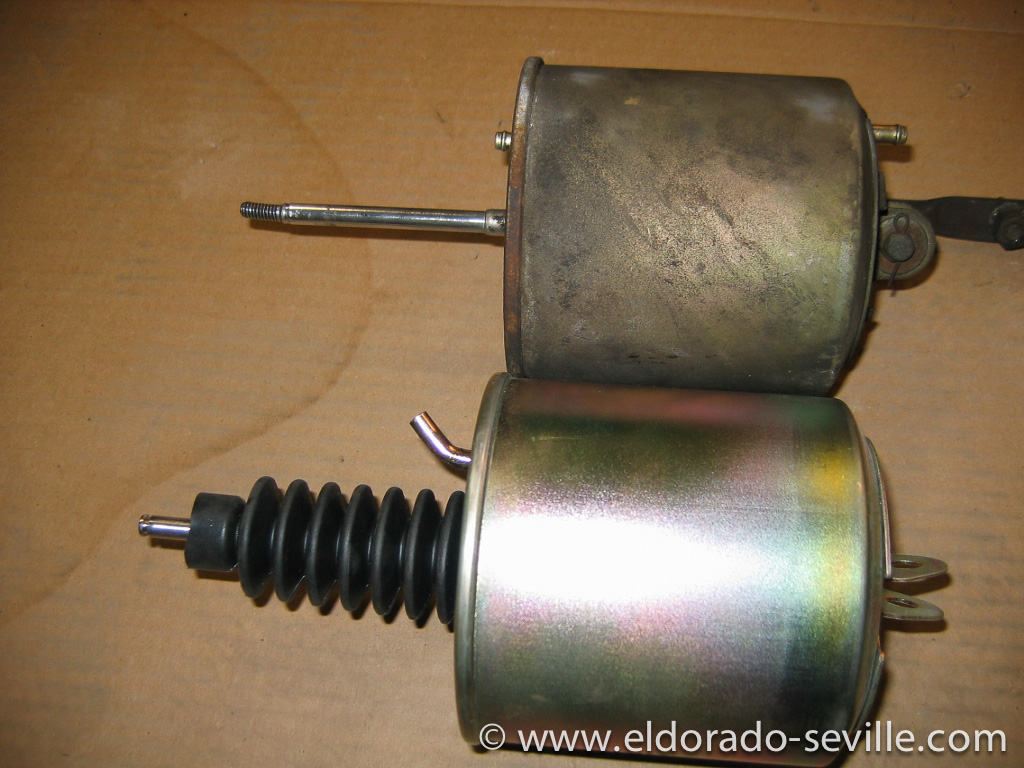
The original Cadillac OEM actuator on top and the Camaro RS actuator below. You can see the difference on the mounting. Also the air outlet is slightly curved on the Camaro. There is a thread on the Cadillac actuator and a clevis pin on the Camaro rod end.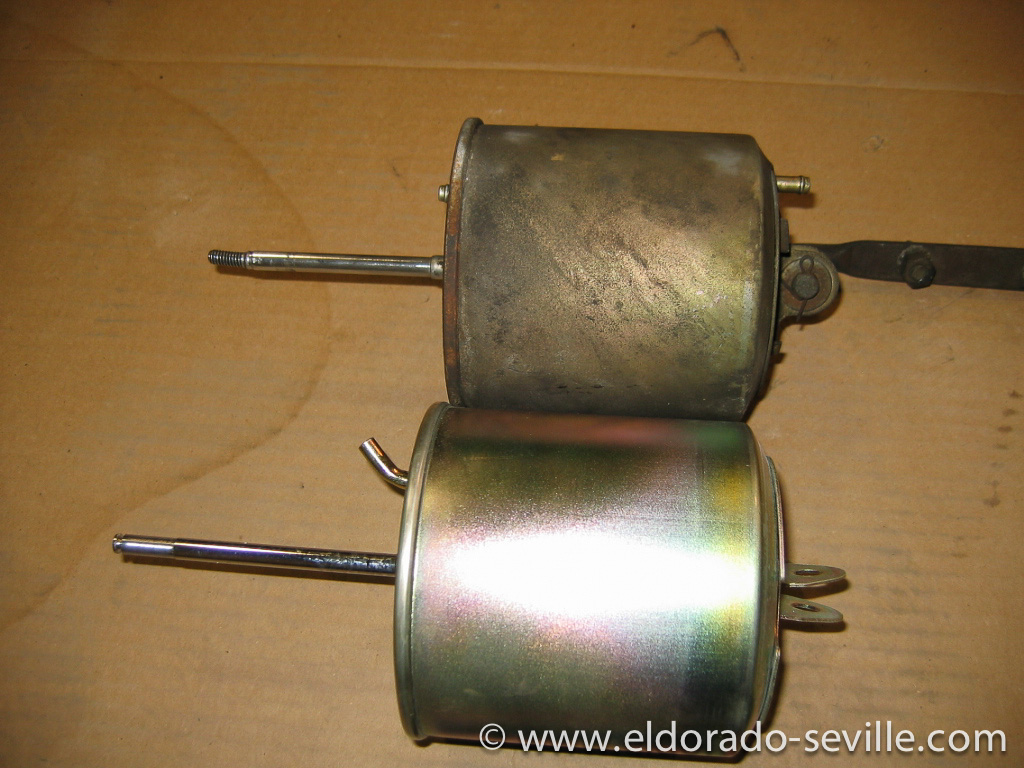
The original Cadillac OEM actuator on top and the Camaro RS actuator below. You can see the difference on the mounting. Also the air outlet is slightly curved on the Camaro. There is a thread on the Cadillac actuator and a clevis pin on the Camaro.
Mark beveled the end of the rod on a grinding wheel, for about a ½ inch at the end of the rod.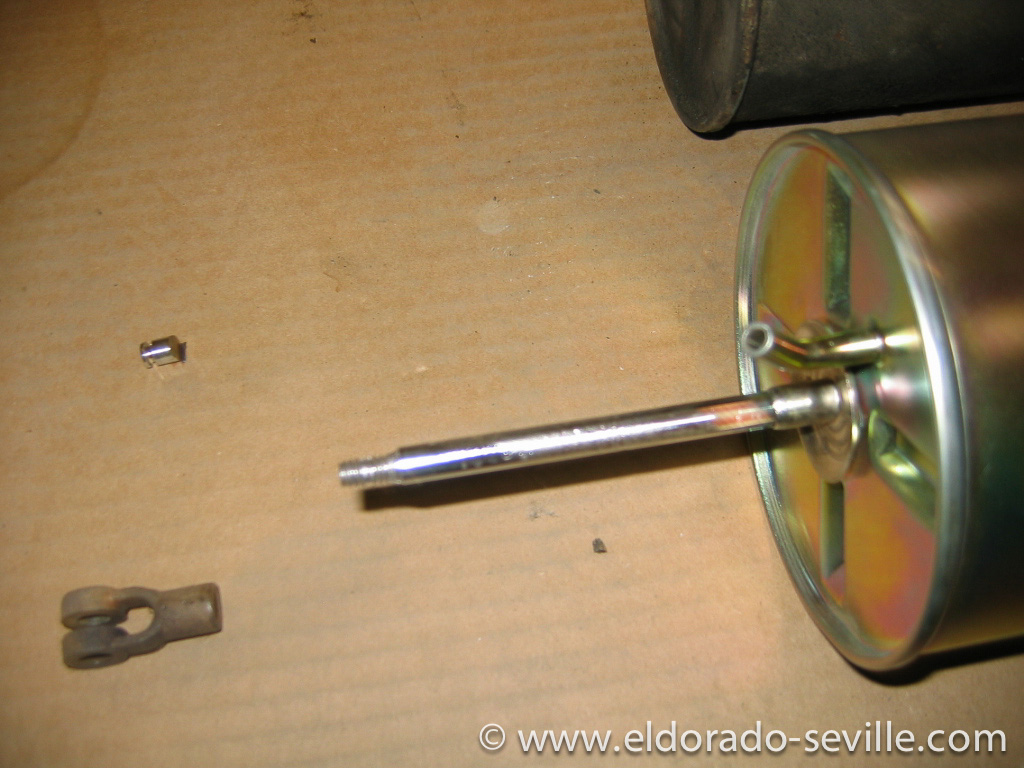
Mark cut a thread onto the Camaro shaft so that the original Cadillac clevis would fit.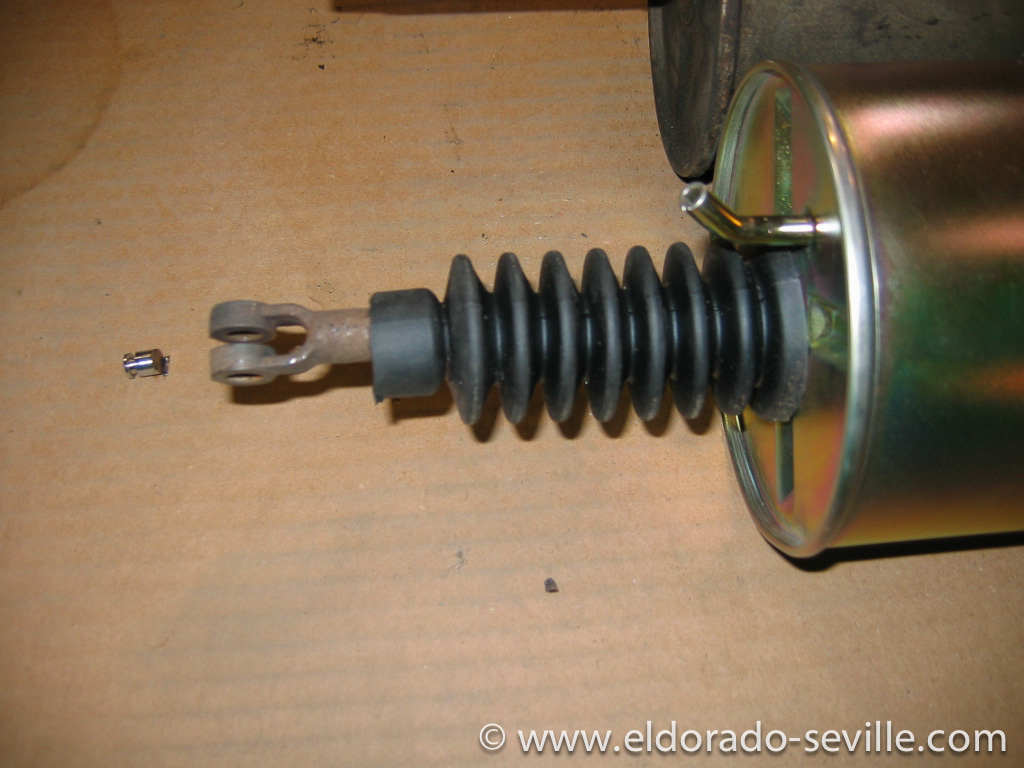
Finished- works perfectly. The modification is done.
It´s a boy! Welcome Elliot!
Of course his first trip in a car was in a Cadillac - I used the 1967 Eldorado to drive him home from the hospital. You can´t start early enough with the Cadillac education!
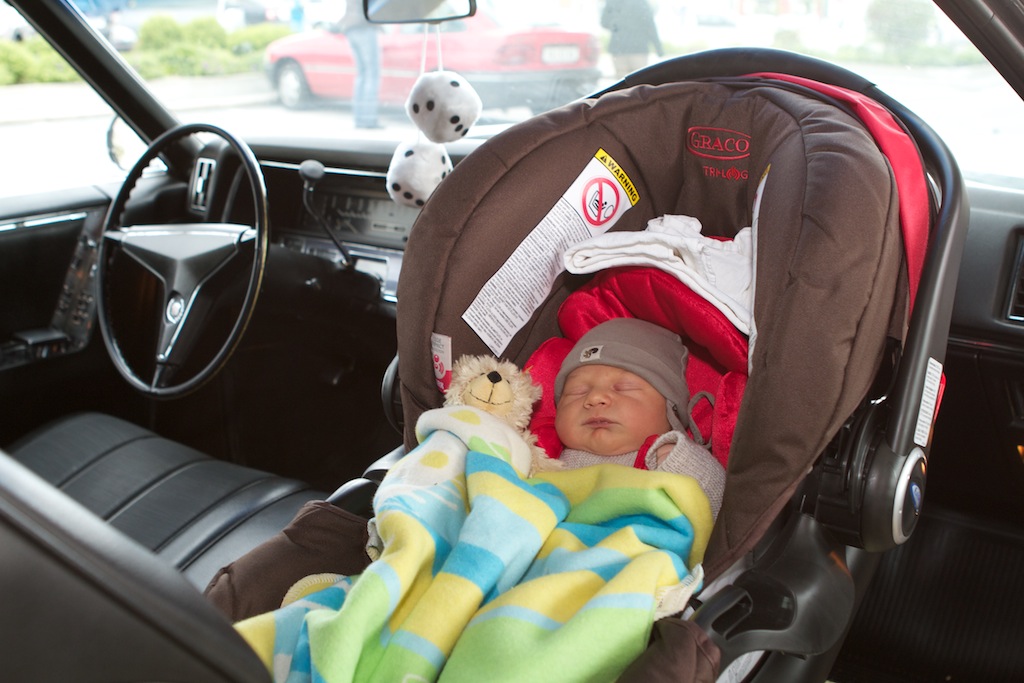
Our son Elliot on the way home from the hospital in Cadillac style!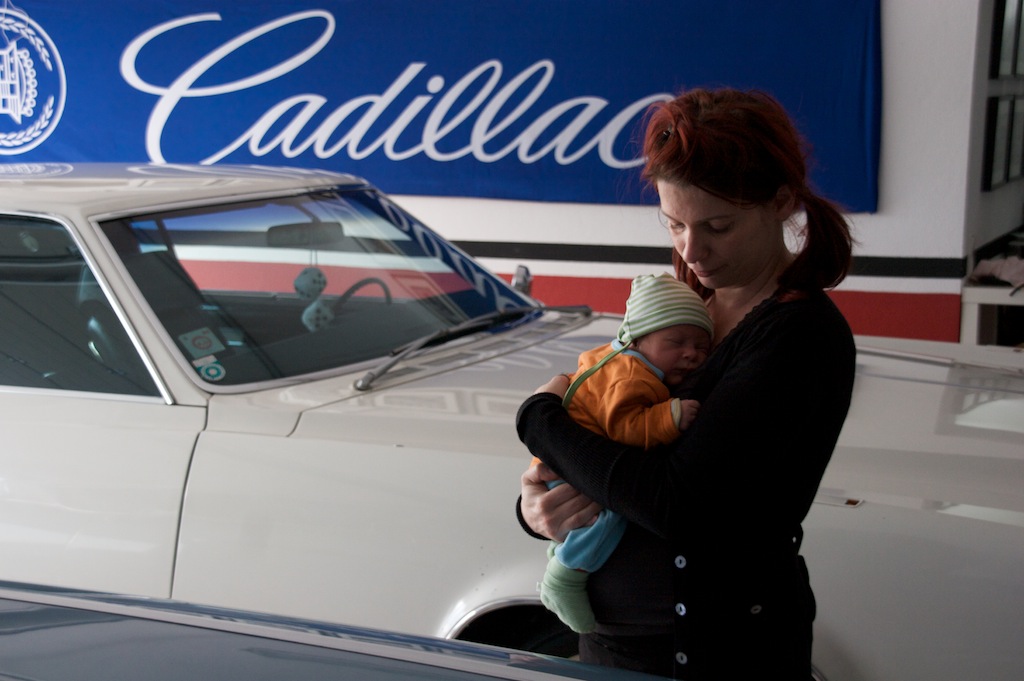
Elliot and his mum at the first visit in the garage...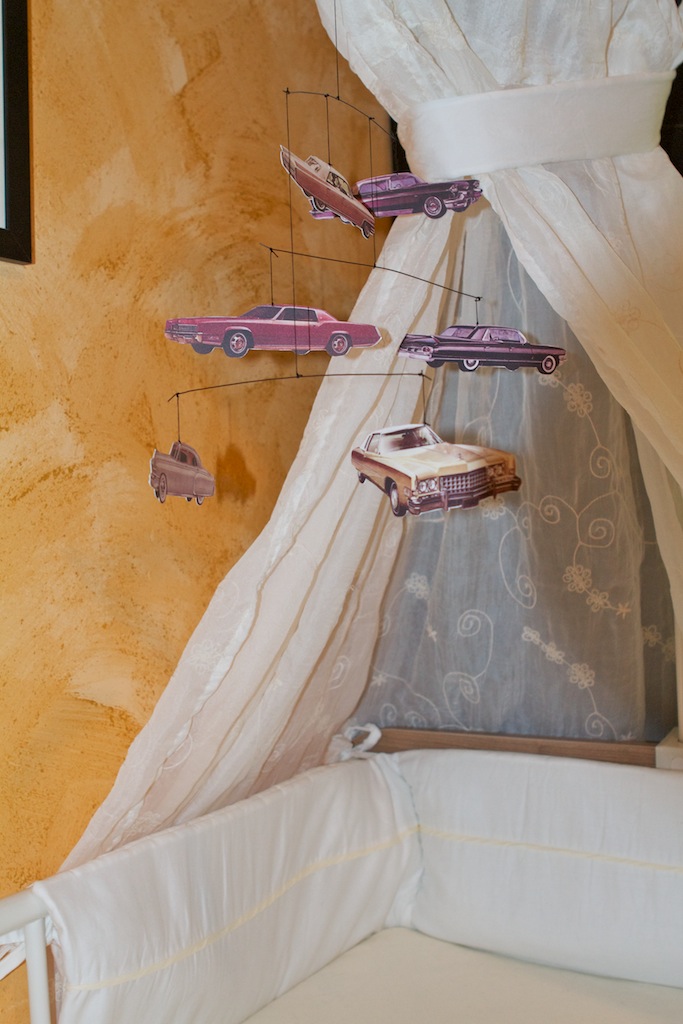
The Cadillac Mobile we made for his crib...
A problem with the 67 Eldorados carburetor
The right headlight door actuator also suddenly no longer works correctly. All hoses are new and it worked perfectly until recently. I can now only make it close if I jiggle on the actuator. Is there any way to rebuild them? A source for new or rebuilt ones? I have heard that the ones from the 1969 Camaro is very similar and only needs some minor modifications to work on the Eldorado as well. So I went ahead and ordered one. But the worst thing was that the freshly rebuilt carburetor made strange ticking noises and sounded like a tractor while accelerating. It worked well though, but the sound was unbearable. Could it be a defective gasket? It was also idling quite badly. Acceleration was superb though, its much more powerful than before, but still something was wrong... The ignition also was completely rebuilt. So I played around with the ignition first, but the ticking sound did not go away, no matter in which direction I changed the timing... Almost sounded like an exhaust leak, but there seemed to be none... It was LOUD! Before I had the carb and ignition rebuilt, it was extremely quiet and idling smoothly but had misses while accelerating.
I got some very valuable tips from fellow Cadillac aficionados and the previous owner of this Eldorado even called me from the USA to give me some tips to solve this issue, and he was spot on with his diagnosis...
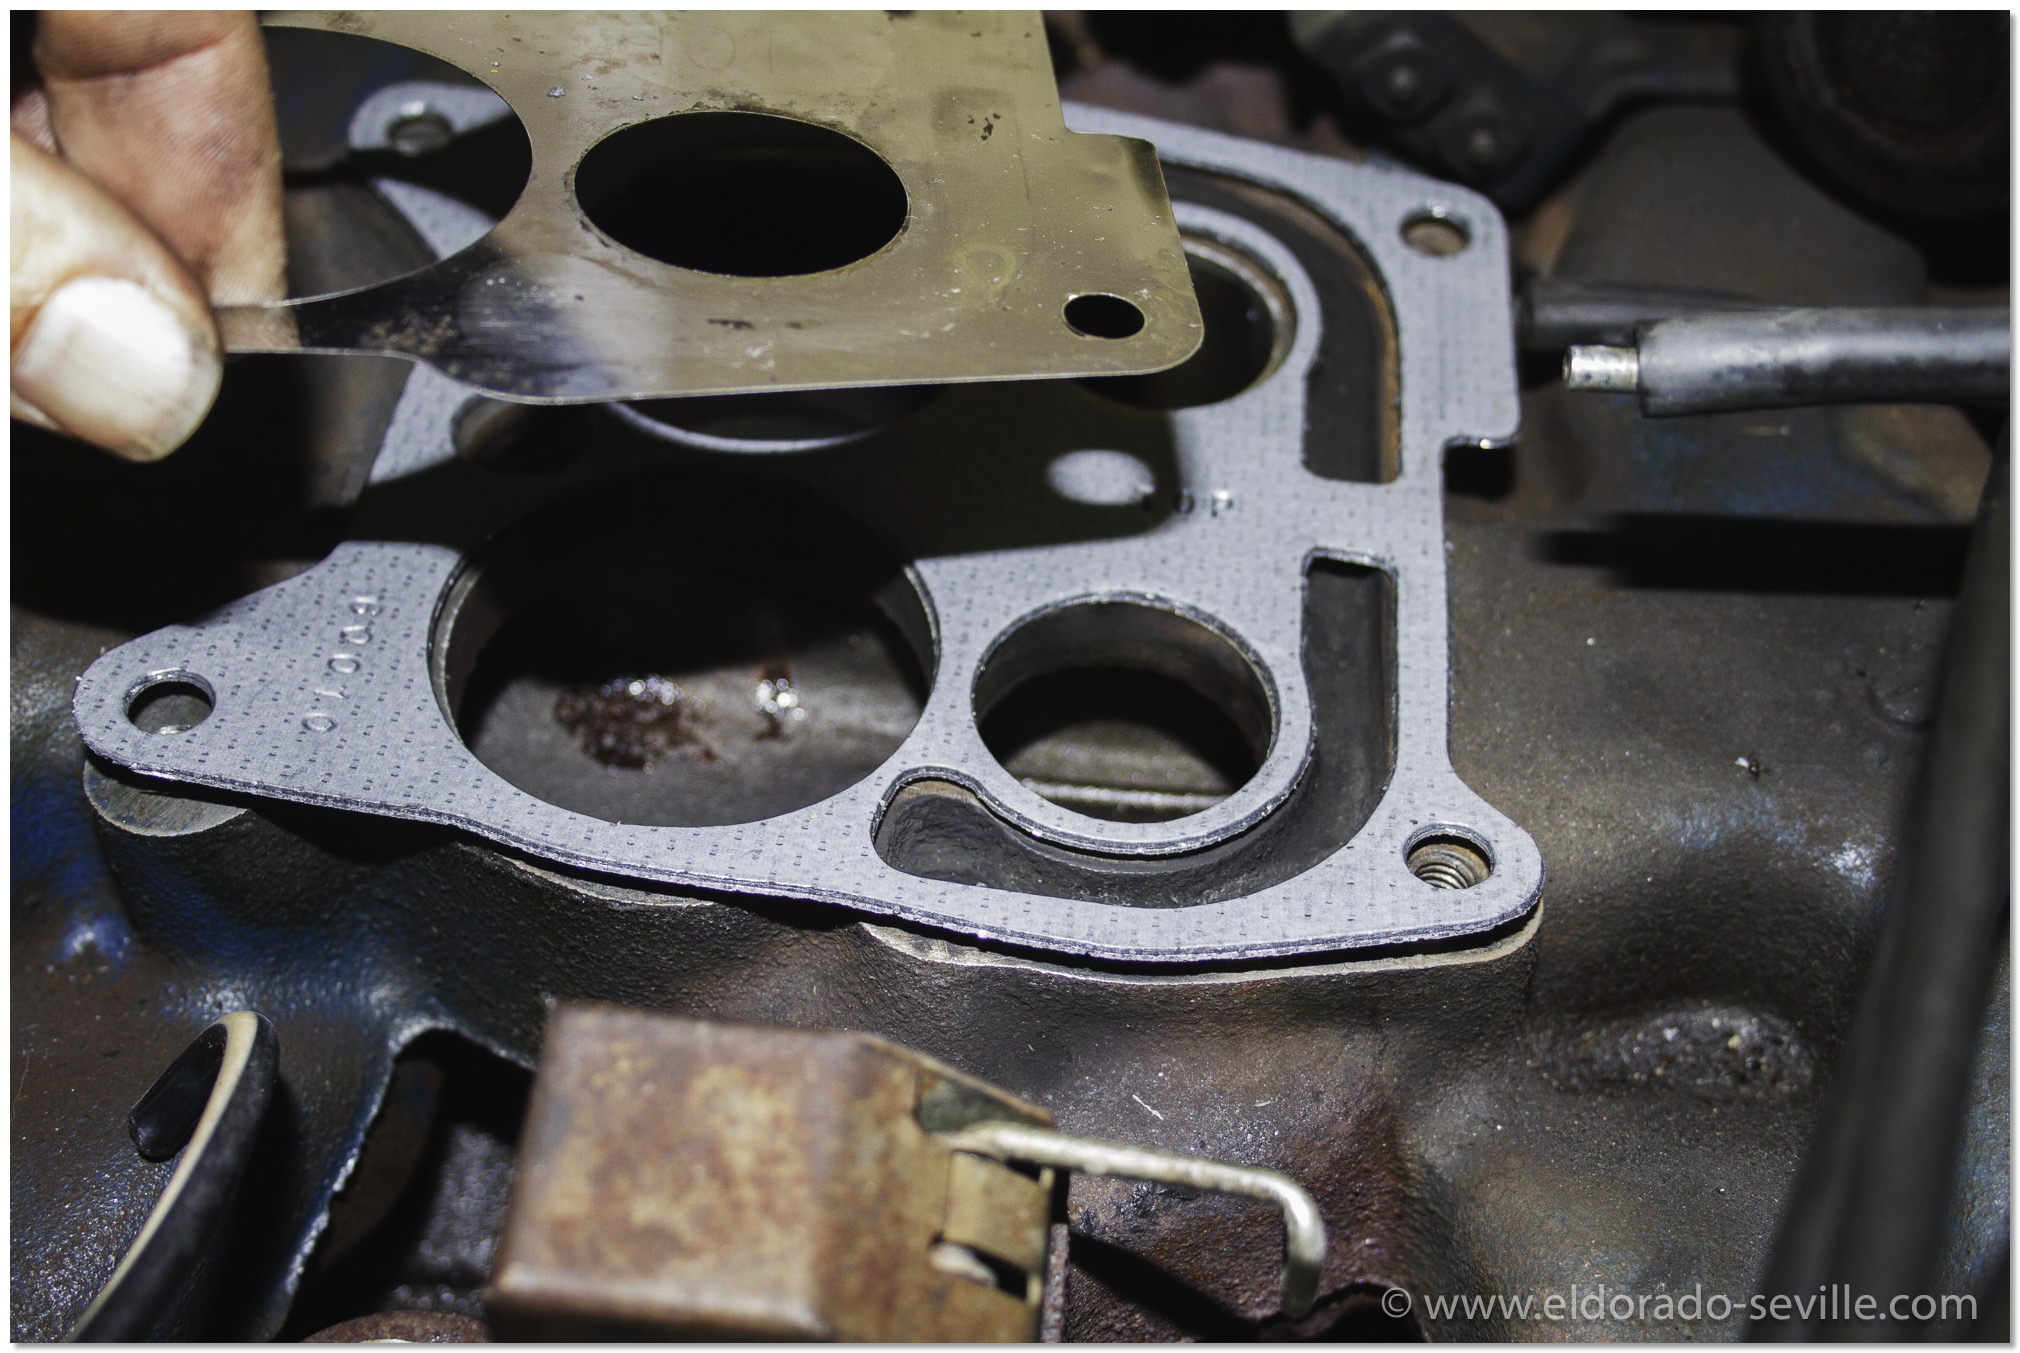
With a hose held to my ear and the other end to the carburetor, I was able to locate the source of the noise. It came from the carburetor below the choke assembly. So I took the freshly rebuilt Rochester Quadrajet out again, only to find out that the gasket and the metal shim were installed the wrong way around. This burned a hole into the brand new gasket where the exhaust gases from the heat crossover passage could escape and make this noise.
Of course I did not have a new gasket at hand, so I carefully removed the old one from my spare engine, which was in pretty good shape and installed it.
No more ticking - no more noises, no more bad idling.
The car now drives amazingly good and is silky smooth. It could not be any better.
The shim was installed first and then the carb - thats wrong! The gasket has to go on the intake manifold first - then comes the metal shim.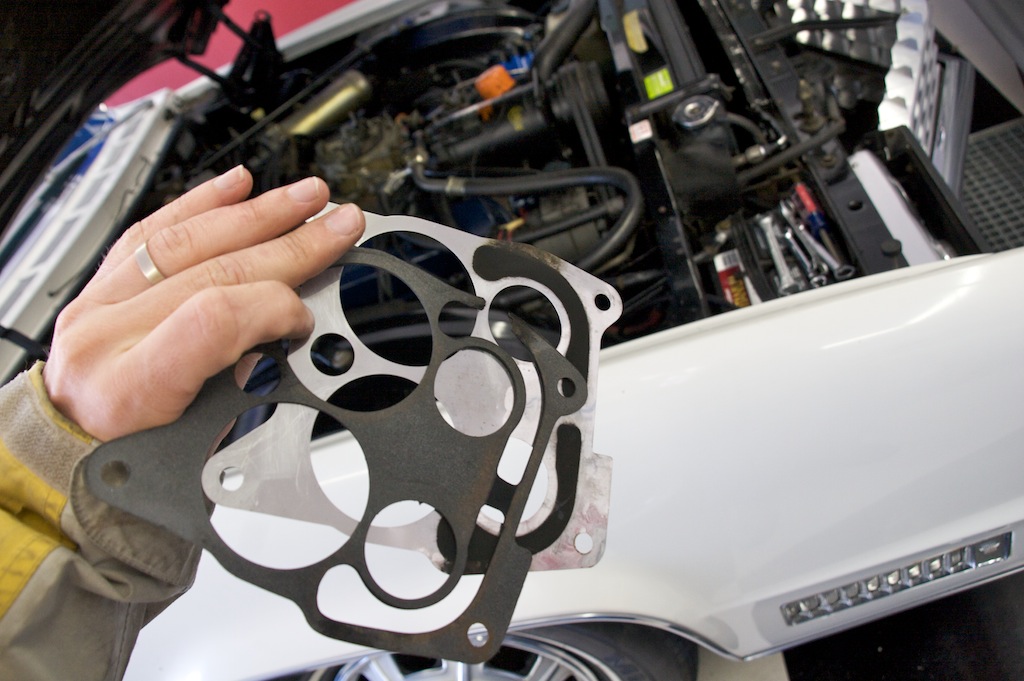
Here you can see the burnt gasket and the metal shim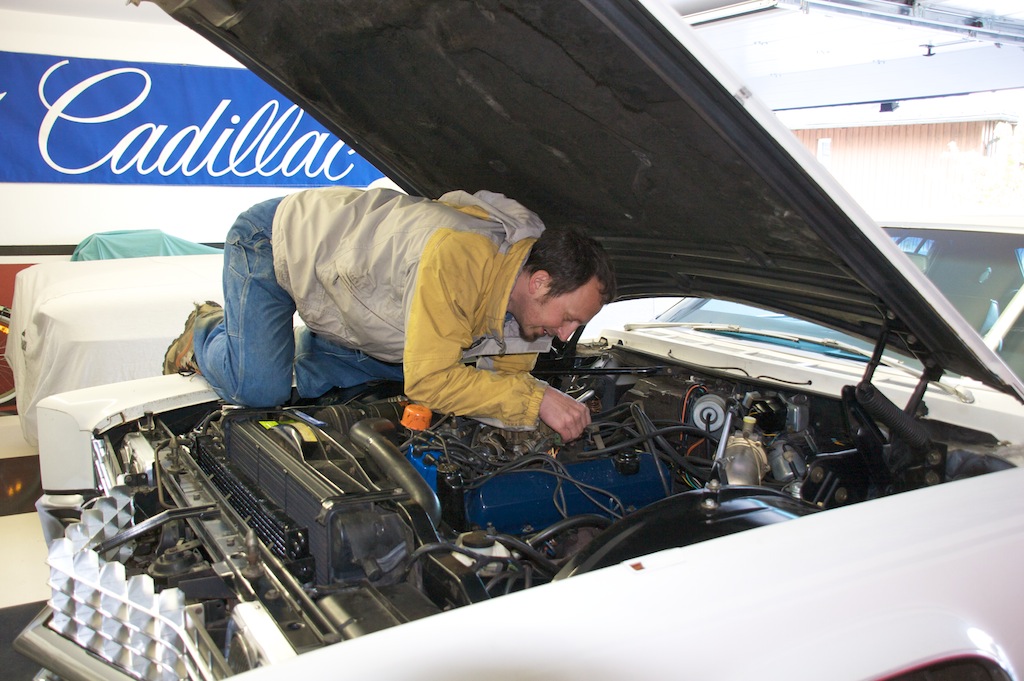
Putting everything back together again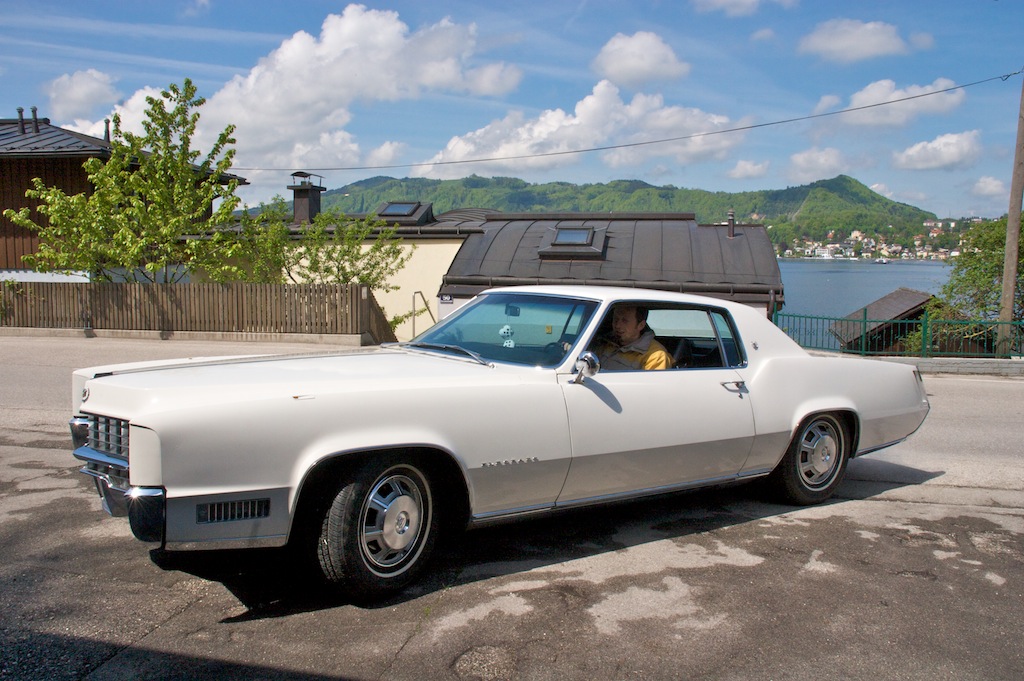
Test drive after the repair - perfect!
The 67 Eldorado is at the restoration shop again
Also on the „to do list“ is to install a new condenser for the air condition, recharge it with good old R12 and to fix a problem with the ignition timing. Cant wait to have the car back!
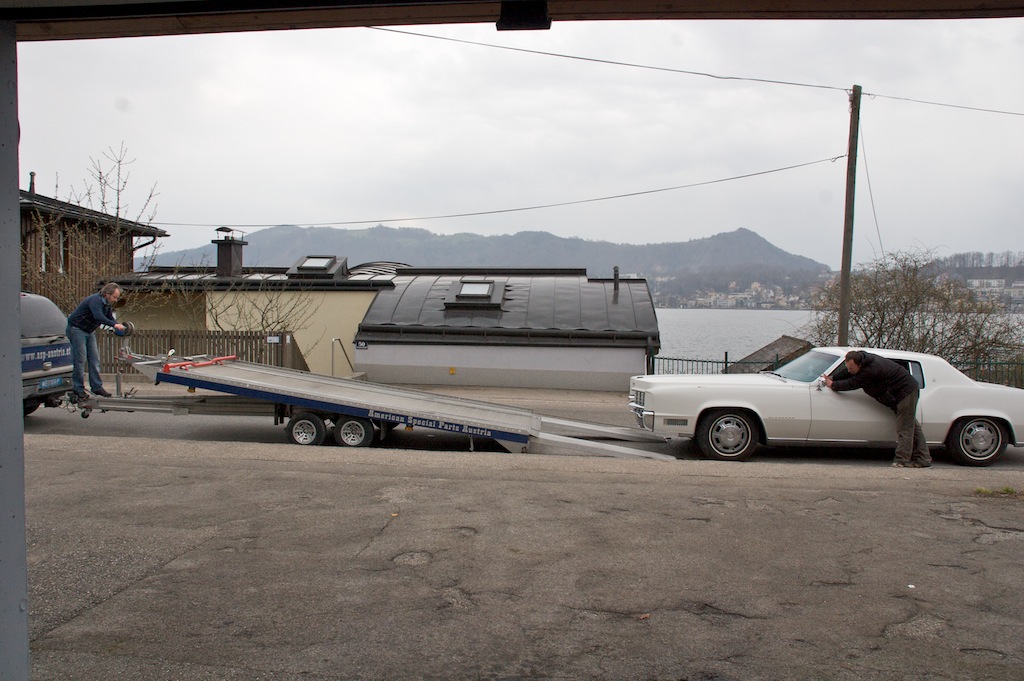
As I could not start the car we had to winch it up onto the trailer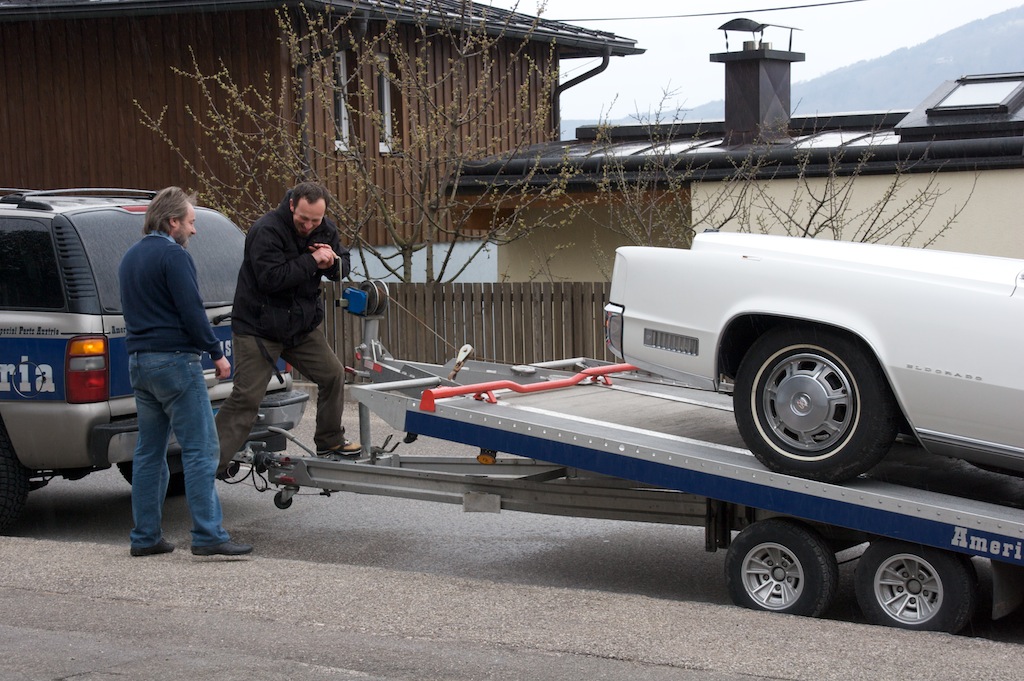
Its pretty heavy...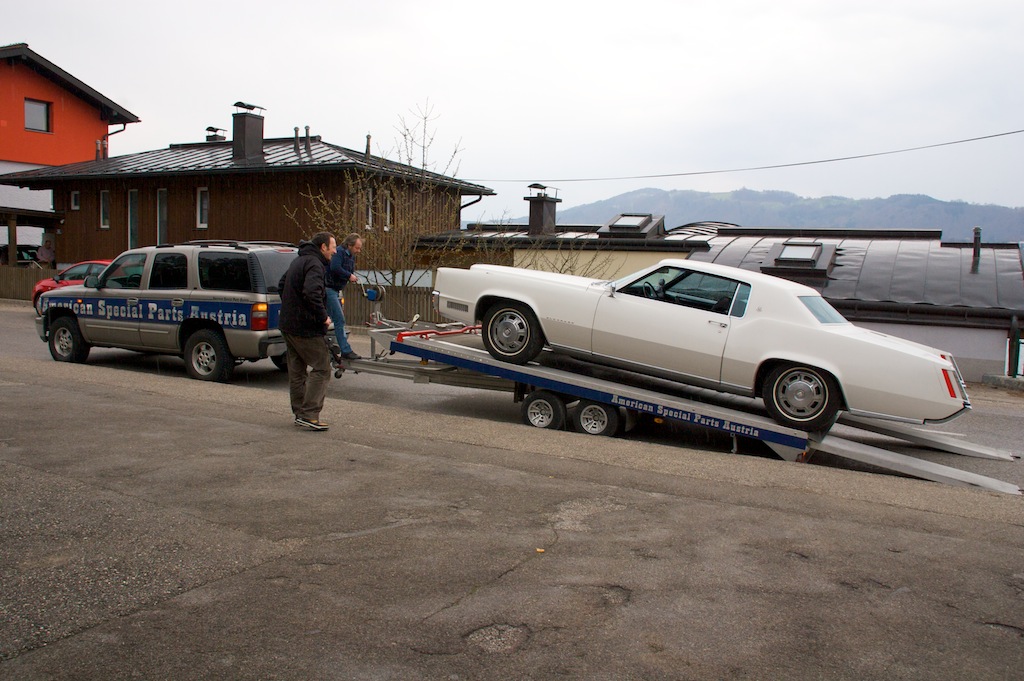
Almost up...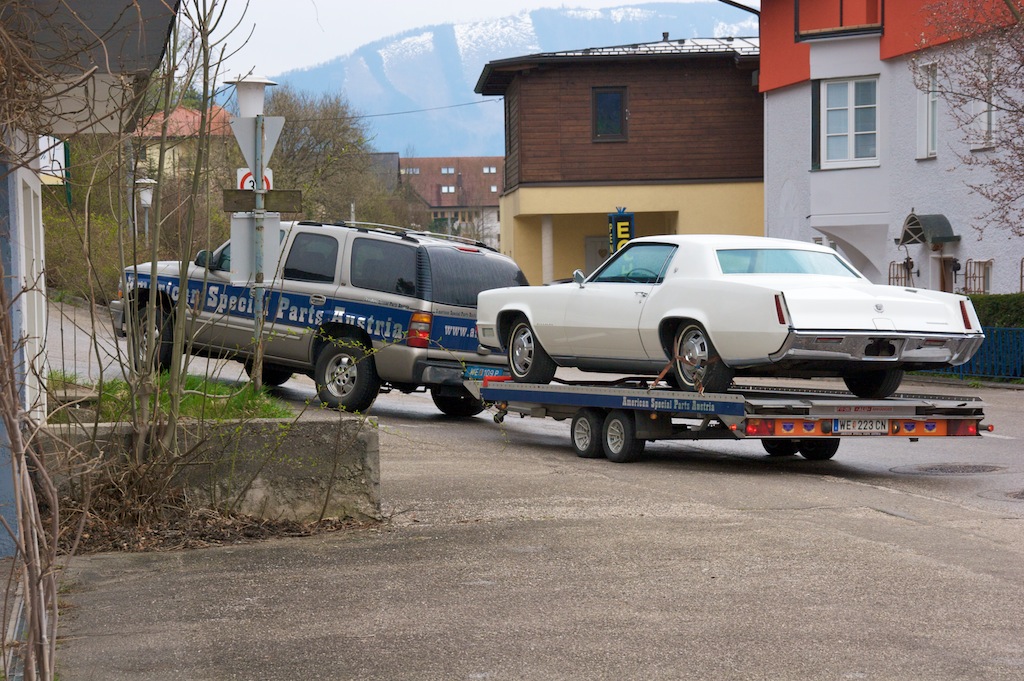
Good bye!
The 67 Eldorado´s waterpump is defective
There are only very few possibilities why this could have happened.
- The thermostat did no longer open
- The waterpump failed
- Air was trapped somewhere in the cooling system
So I removed the thermostat housing first to check the thermostat. This is when disaster struck. The two bolts in the thermostat housing snapped off immediately when I tried to unscrew them. *Cr*p”
I then removed the thermostat and put it into boiling water and it worked perfectly. So I think I can rule out the thermostat.
As the upper radiator hose stayed pretty cool and it did not feel like there is any coolant circulating through it, I suspected the water pump. Maybe the impeller does no longer work. I will have to remove the pump to check it.
My friend Richard came over to help me to try removing the broken bolts which got stuck in the cylinder head water outlet pipe. As all methods we tried to remove the broken bolts failed, we began drilling the remains out. This did not turn out very successful either... The threads also got damaged with this method. Of course one could now rethread this part, but I decided to order a good used one.
Once again Arizona Vintage Parts is the company where I ordered all the spare parts. They are really a great company! They are reasonably priced and so far they had everything I ever needed and inquired for. They are a pleasure to deal with and I can highly recommend them. I´m looking forward for the parts to arrive, as the car in its current state is immobile and blocking the garage...
UPDATE 03/09: The parts from Arizona Vintage parts already arrived within a couple of days after ordering! Wow thats fast! Now I need some time and warmer temperatures to install them...
My friend Richard drilling out the snapped off bolts...
Normally the thermostat is in there. You can see the mounting holes from where we drilled out the bolts. Unfortunately the threads did not survive this treatment...
1967 Eldorado Seat Transmission repaired
I removed it from under the seat, what was a little tricky and involved getting in some strange positions to access all the screws. It would be easier if one removes the seat from the car, but thats a rather unpleasant work as well...
Eventually it came out of the car. I disassembled it and at first everything looked pretty good, but it soon showed that the old grease became rather hard and sticky and one of the three solenoids was no longer able to push the gear into a locked position.
I thoroughly removed all of the old grease and re-greased everything with white lithium grease. I then reassembled everything, reconnected the gear cables, reinstalled the transmission under the seat (thats a very tricky part...) and everything worked like new!
I now have perfectly working power seats again!
![]()
The seat transmission disassembled - you can see the brownish old grease everywhere.![]()
Part of the gears and the solenoids![]()
The transmission part![]()
The three solenoids![]()
The cleaned and re-greased transmission
1967 Eldorado Door Jamb Switch Repair
This is how the doorjamb switch looks like on a 1967 Eldorado when removed. Sorry for the crappy cell phone picture!
I will have to clean the paint in the doorjambs soon as you can see in this picture...
The 1967 Eldorado headlight door repairs - first spring outing
While I had the 67 Eldorado out I also turned on the headlights and was once again annoyed by the fact that the right one opened simultaneously, but closed slightly slower than the left one when I turned the lights off. There was a difference of around 1 second in movement between the two headlight doors.
Being a perfectionist I could not stand this, so I began searching for the problem. I already had spent some time in the past trying to fix this, but I did not succeed. The system is driven by vacuum only, so I started to look through the vacuum hoses once again. I had already exchanged a couple of them last year. I found another two brittle ones going through the firewall to the headlight switch from where a slight hissing sound was coming when the lights were on. When I touched them the hissing would become even more noticeable. I then tried to press them onto the connector of the switch and the first hose began to crumble into pieces. So I replaced all the hoses on the switch and rerouted them through firewall through the rubber insulation. There are three hoses . One is the vacuum feed (the one in the middle - I think it was yellow), one is for opening the doors (green) and one for closing (red). I also replaced the red hose behind the firewall going to a T-connector from where the vacuum is fed to the headlight door actuators. I had already replaced the two hoses after the T-connector in the past. With all new hoses in place the doors now perform almost simultaneously and quite fast. So when you run into troubles with your headlight doors, check and replace all the according vacuum hoses first. Its amazing how brittle the hoses going to the headlight switch inside the car can become over the years. It looks like they used a quite different material for these three hoses, as all other vacuum hoses are in much better shape and do not show any sign of deterioration at all.
You can see a video of the headlight doors in action below. On this video they are slightly out of sync. As it looks like they are slightly different every day, depending on temperature and engine idle...
watch on youtube or below
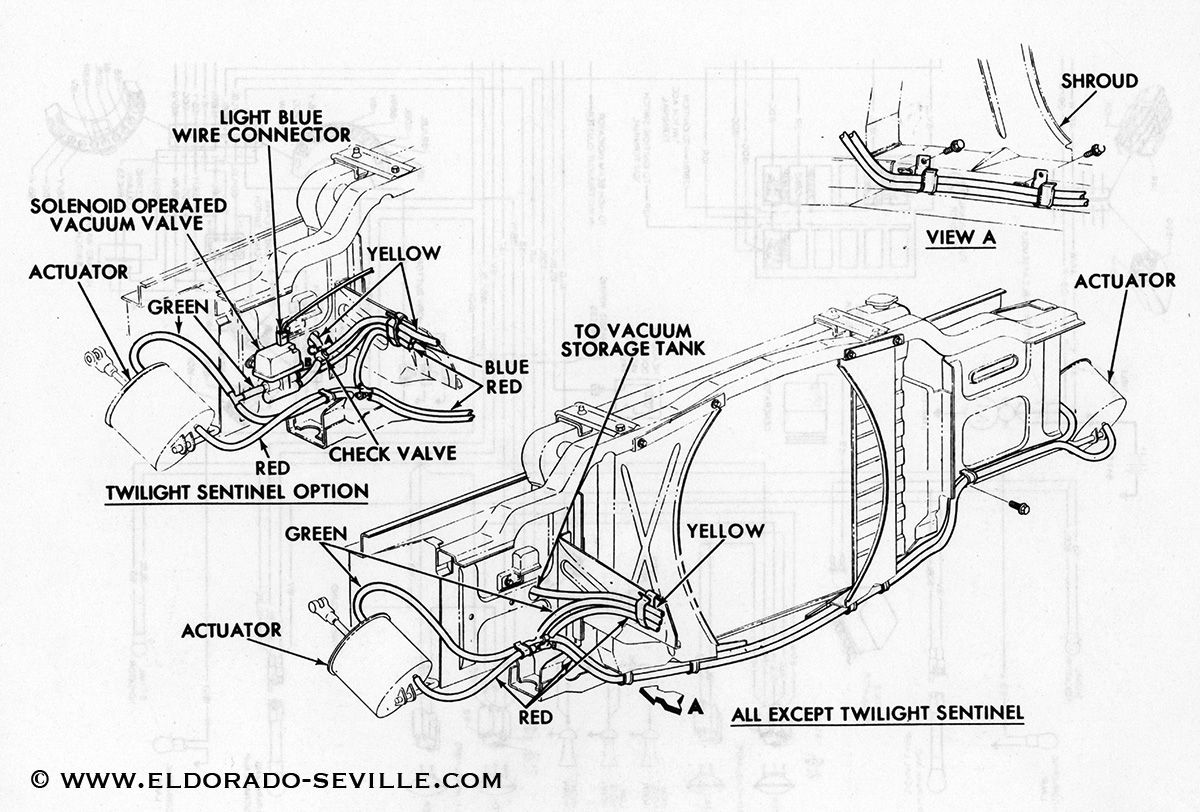
the vacuum diagram for the headlight doors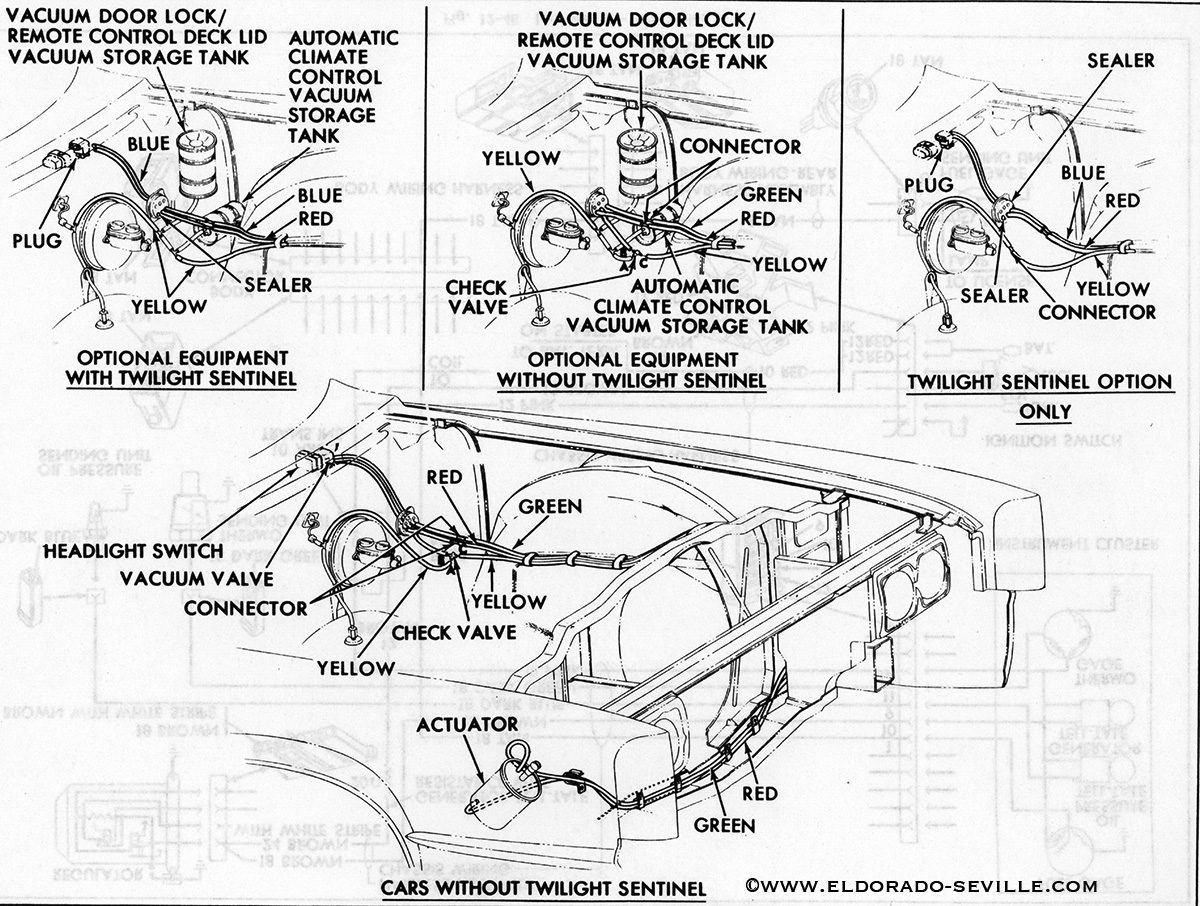
The vacuum diagram for the headlight doors
While the Eldorados were outside the garage my wife used the opportunity to shoot a couple of pictures she had in her mind, which she is planning to hang into the kids room. Cant wait until the medium format film is back from the photo lab. Below you can see only some digital snap shots I took.
Despite the last two unusual warm and beautiful days unfortunately winter is not over yet here in Austria, as some more snow is predicted for next week and the cars are back in the garage desperately waiting for April to come...
The Eldorado is enjoying some sun rays for the first time this year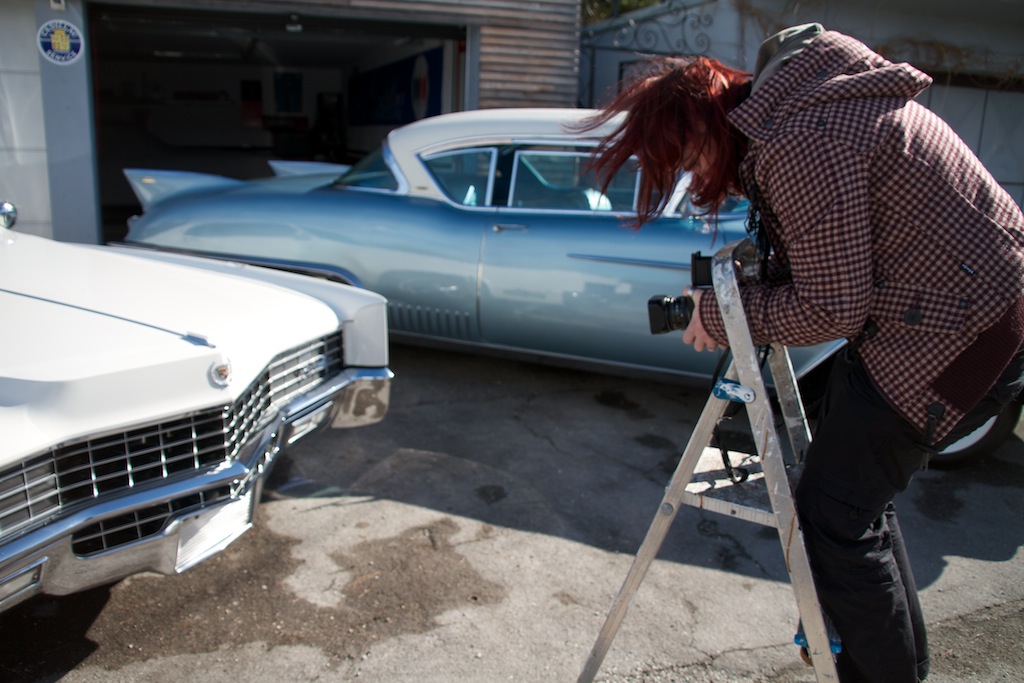
Although she is 7 months pregnant, my wife Afra is still climbing ladders to get the best angle for her shots...
The two Eldorados in front of the garage where the snow has just melted away.
Cleaning the 1967 Eldorado´s Engine Bay
Below you can find some pictures of the now clean engine bay.
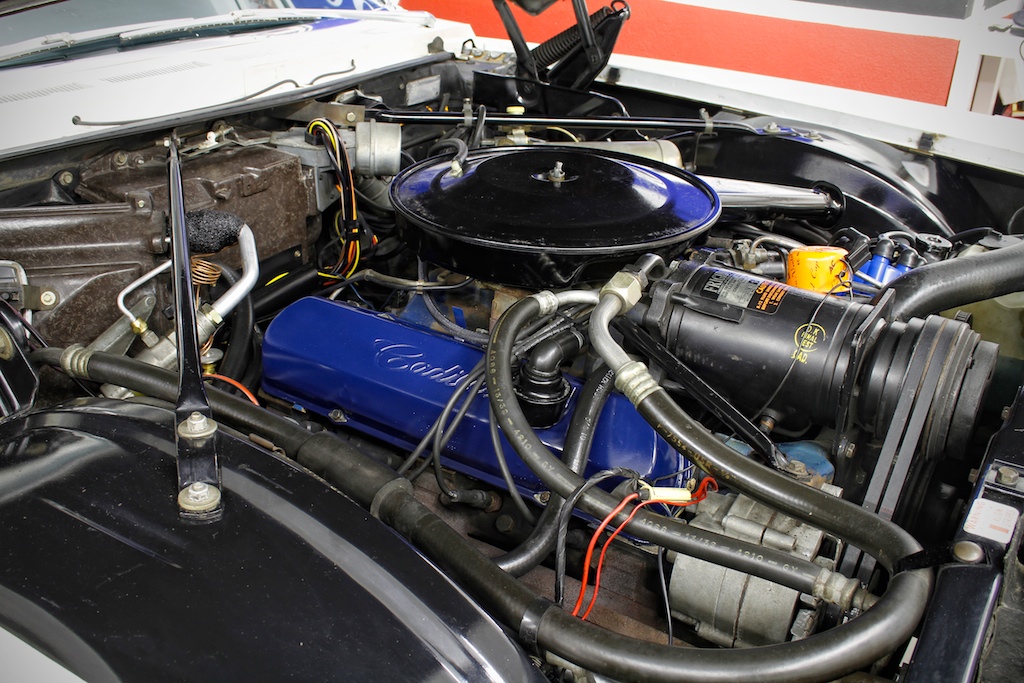
As seen from the passenger side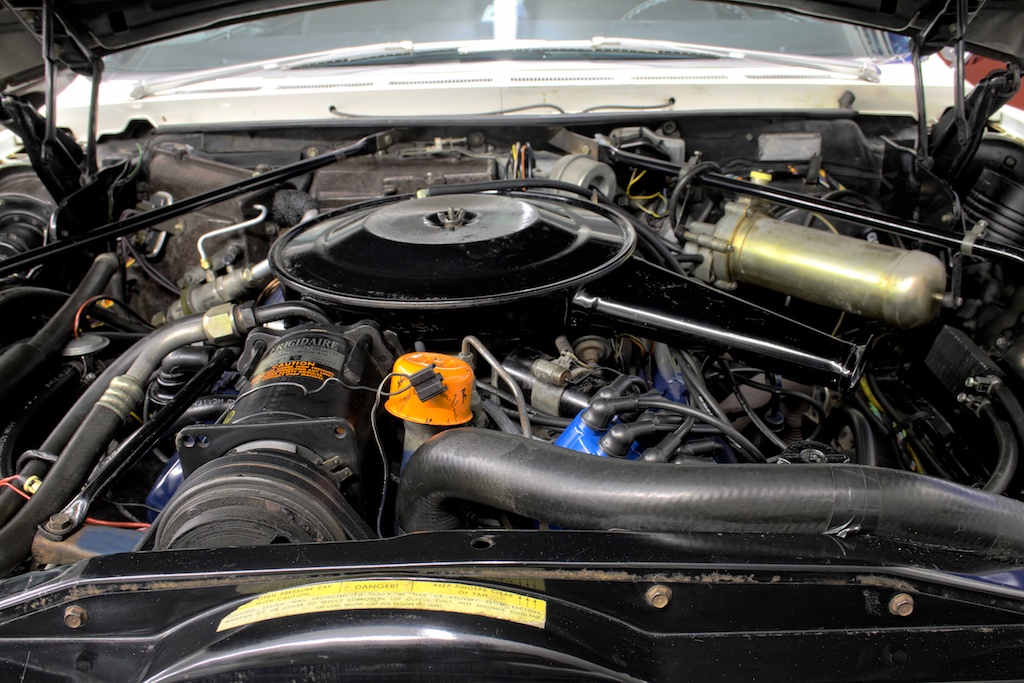
From the front
From the left
The 67 Eldorado´s Automatic Climate Control System is back in working order
I suspected a vacuum leak somewhere in the system. Troubleshooting began with going through all the vacuum hoses. I replaced some which were a little worn out at the connectors. I also cut off the ends of most hoses, as they were all becoming a little loose during the last 40 years. I then plugged them in again.
Not much did change though.
When I came to the hose of the hot water valve and the delay relay, I had the first success. At least the blower motor would stay on in all “Auto” modes, even when the car was idling - but would still go off in “Fog” and “Ice”. I then suspected a leak in the power servo or in the dash controller. So I installed the power servo from my 67 DeVille where everything works perfectly, to be able to rule out any problems. Nothing changed though - the blower would still come on and off depending on the throttle position.
I then soon found the culprit of the whole issue - it was the master vacuum switch - which seems to have a problem with the internal electric switch. As I had a spare one around I installed it - and voilá - everything worked as it should. It always looked good when I checked it before.
I´m very happy that everything is back in working order. The only thing which I still have to repair is the fast idle diaphragm which completely dried out and is no longer functioning. Fortunately I do have a spare 429 engine in the garage from where I can grab and use this part - so I will repair it soon.
I then need a new condenser which is already on the way across the Atlantic coming from Old Auto Air.
By the way - Cadillactim has an excellent trouble shooting guide for the ACC on his website.
The evaporator had to be replaced as well along with the heater core. This is a pretty big task as you can see on the pictures below. You even have to remove the hood to get access to the whole unit. The fiberglass AC enclosure had to be repaired at my car as well as the previous owner tried to repair the evaporator and missed a screw and made a tear into the enclosure. The restoration shop repaired this professionally and it looks like new now.
The best troubleshooting guide for 1967 and 1968 Cadillac´s Automatic Climate Control Systems I got today from Gary Sisk - owner of a 1968 Cadillac.
This is a very easy to follow explanation which will save you a lot of time and you do not even need any special tools.
It was written by Lynn Nicholls and can be found on Stampies Cadillac page - here is the direct link to it.
Below you can find some pictures of my system:
The whole AC unit has to be removed to get access to the evaporator and heater core... The slight surface rust that showed up where the gaskets were, was removed as well of course...
The big hole on the left is where the blower motor is installed.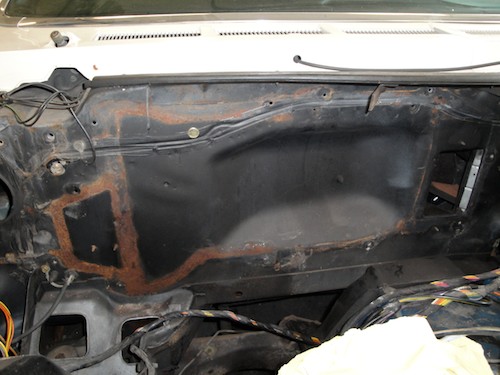
This is where the AC box usually is installed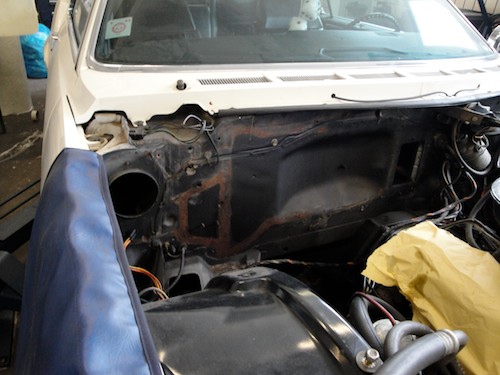
You can see how much has be removed just to get to the evaporator and heater core...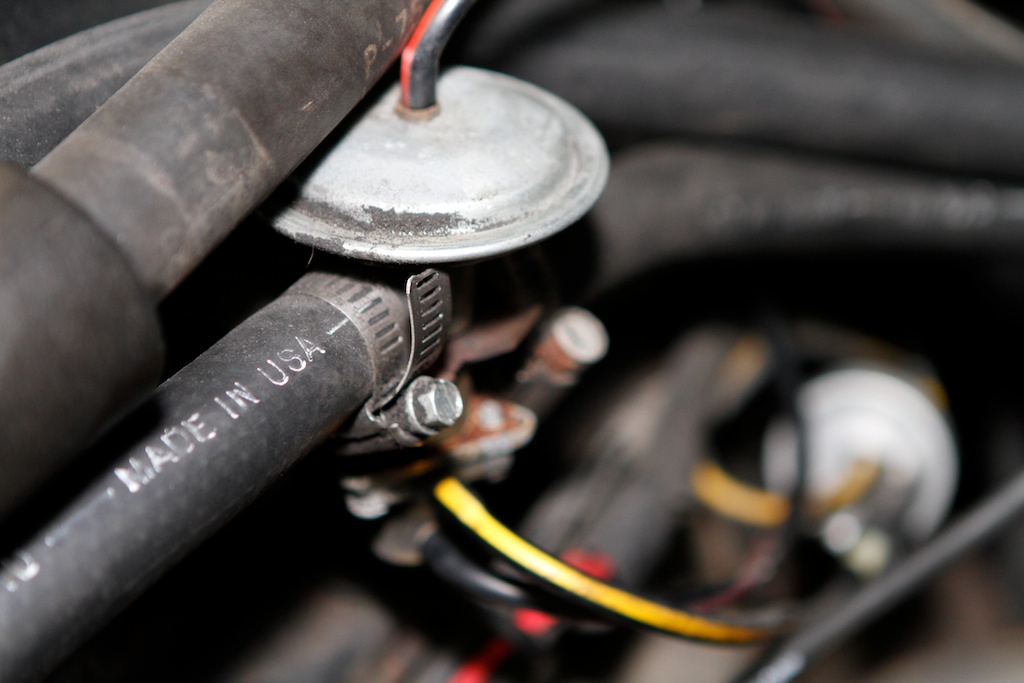
I discovered the first issue at the hot water valve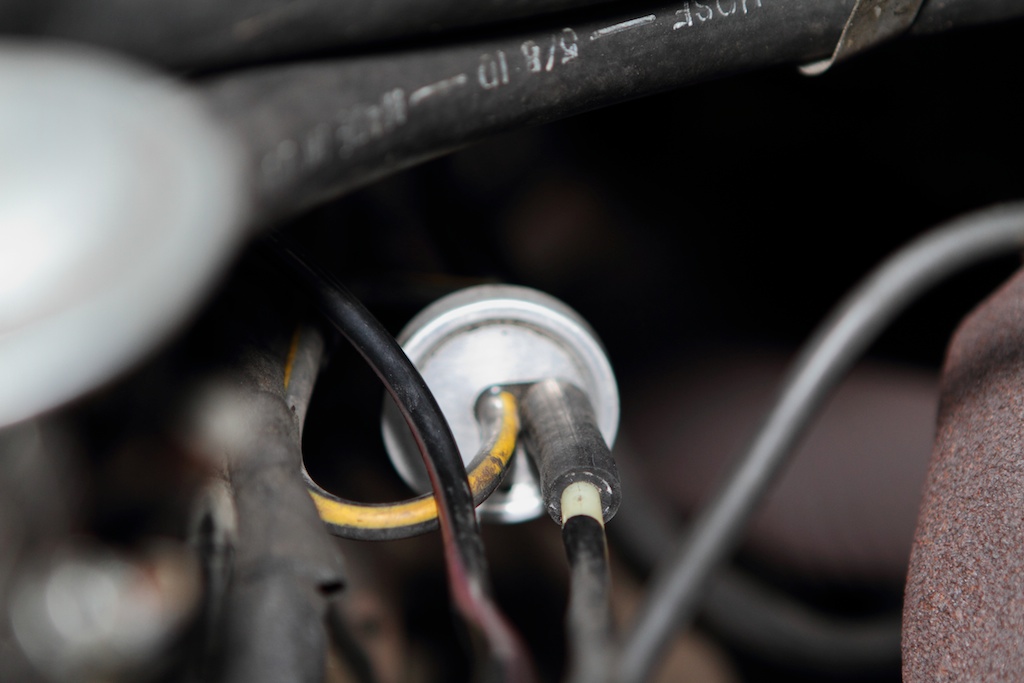
The hoses around the time relay delay were leaking a little bit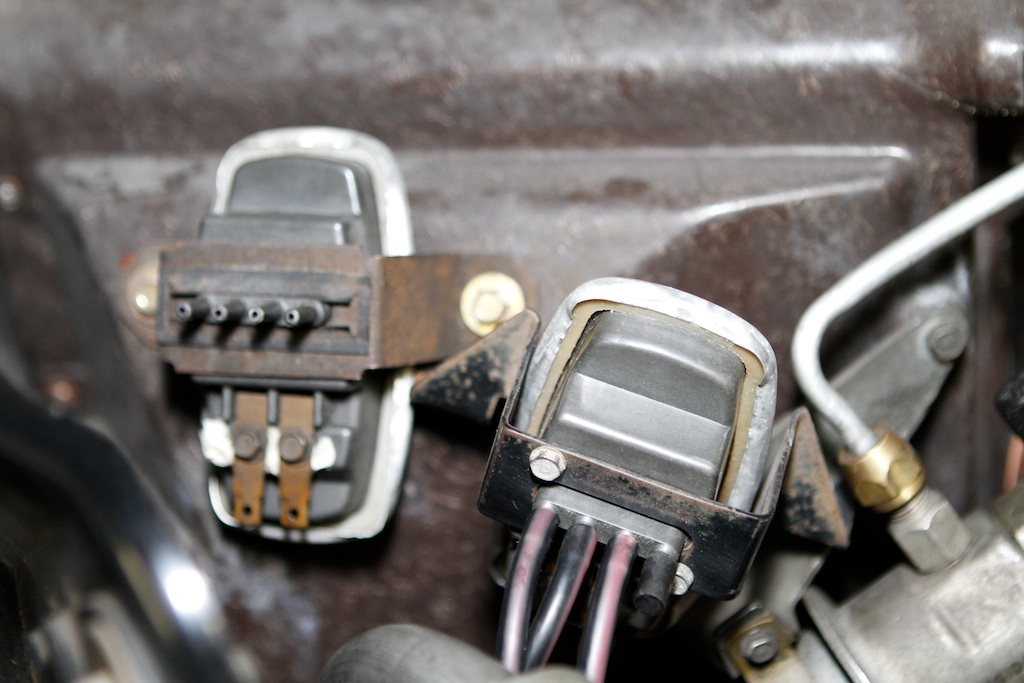
For testing purposes I hung a spare master vacuum switch into the car - this solved the problem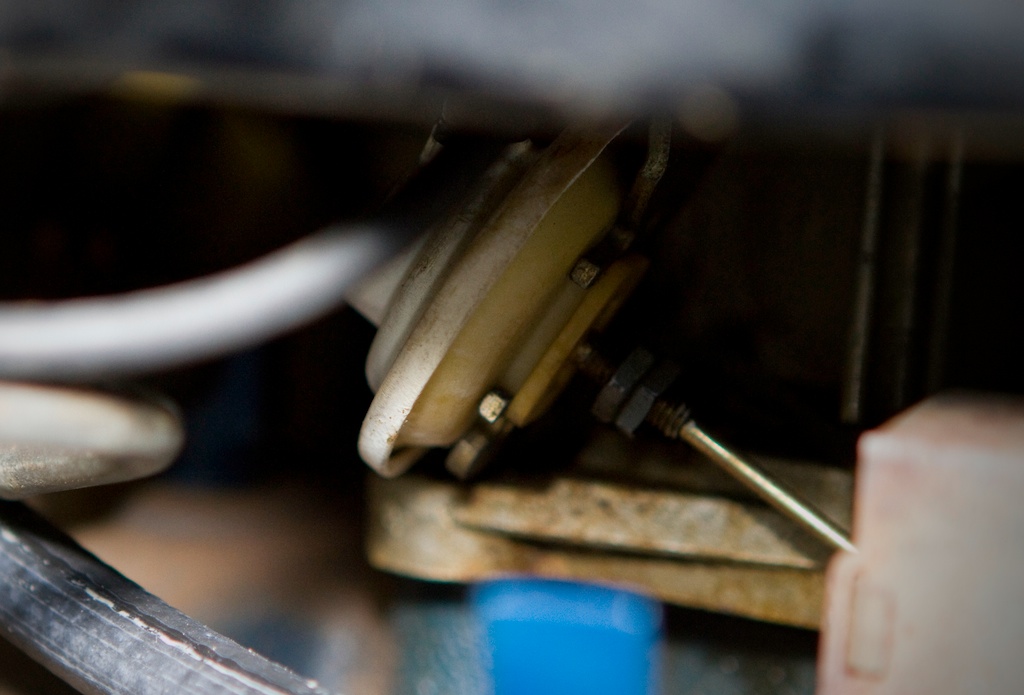
The old fast idle diaphragm was leaking and brittle and was replaced with a better one...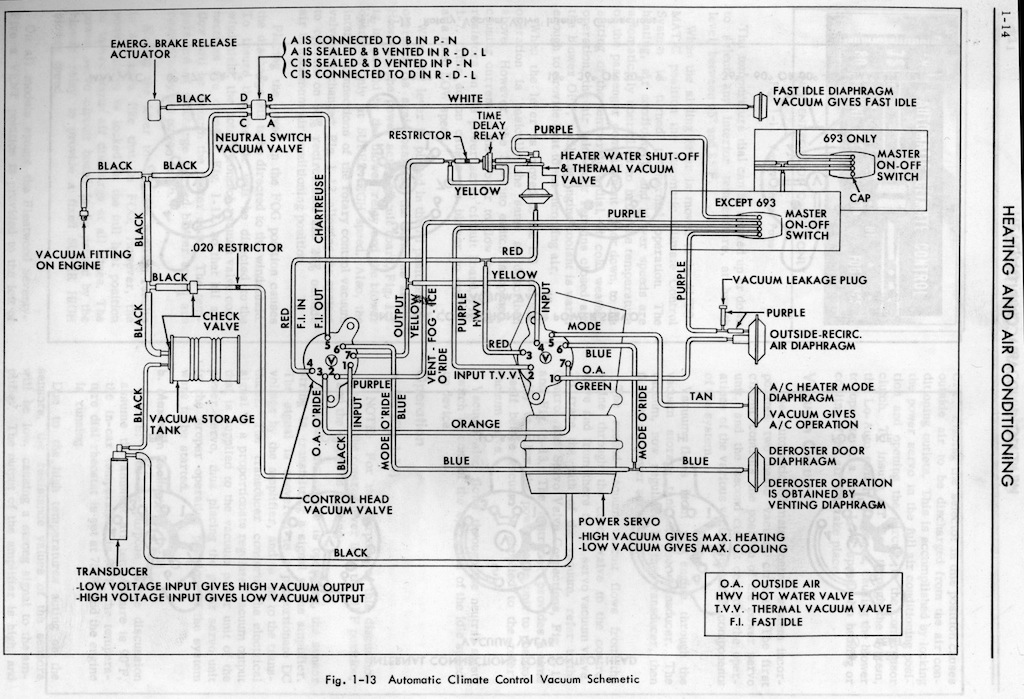
The 1967 Cadillac Automatic Climate Control Vacuum Schematic from the shop manual -
1968 is almost identical BTW... Click on the image for a larger view!
Here is a video about the Master Switch that a gentleman posted on youtube
The 67 Eldorado´s vacuum hoses - Blower issue
During the rebuild of the whole AC system I found out that I´m also having a little issue with the blower which does not always come on at full heat. So as a first step I started to go through the numerous vacuum hoses in the car yesterday. I soon found some old and brittle ones which fell apart when I just touched them. The two hoses that fell apart were the ones going to the right headlight doors.
Original color coded hoses seem no longer available anywhere. Thats why I had to buy regular black ones and paint the red and green stripes on them. Looks almost perfect - I did not think that it would turn out this nice.
Will go through the rest of the hoses soon. With the replaced hoses the headlight doors now work 100% simultaneously, whereas before one was slower.
I still have to find the issue with the blower motor - but I now suspect either the AC controller or the power servo. It works perfectly in full cold - only when I set a higher temperature the blower will cut out. Another problem to solve over the winter... I had almost the same problem with the 67 DeVille before which I could successfully repair.
BTW - if you know of any source for the GM OEM style color coded vacuum hoses please let me know.
You can find a vacuum diagram for the headlight doors here!
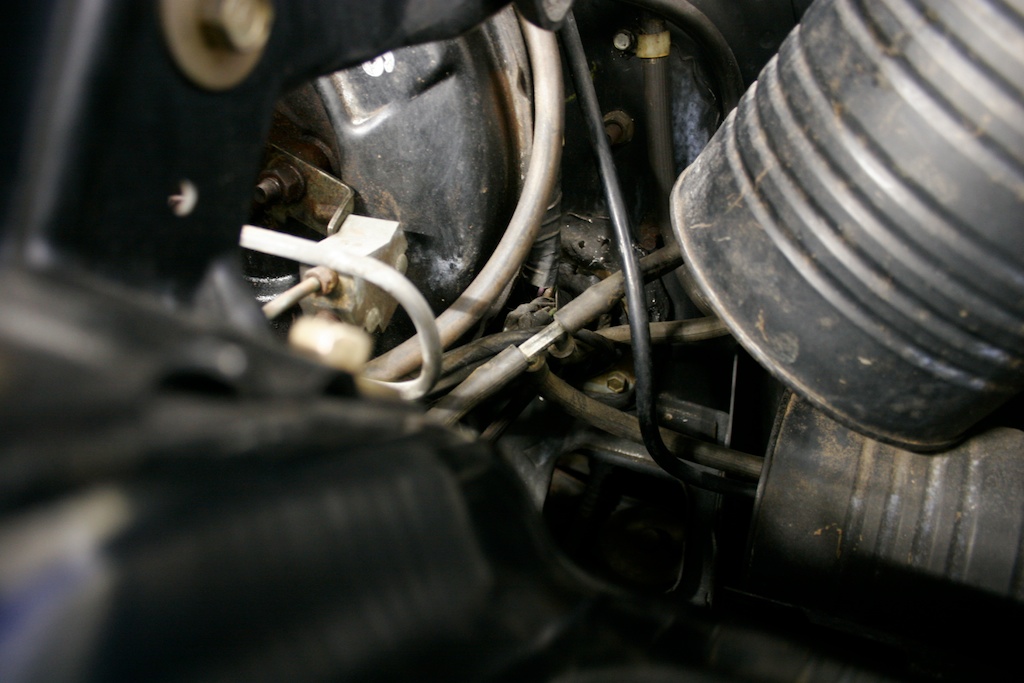
There are lots and lots of vacuum hoses in the Eldorado to check - here are only a few going to the storage tanks...
I will also give them a good cleaning during the winter.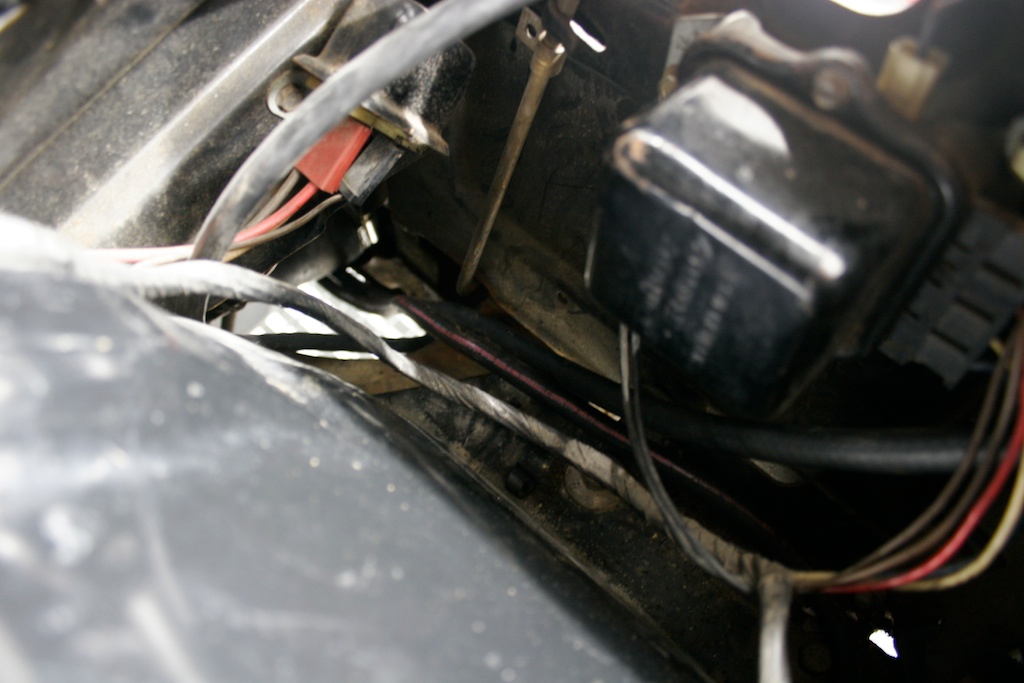
The new hose with the painted red stripe is already in place - looks some kind of original...
The 67 Eldorado passed the inspection
The completely rebuilt AC will get a recharge next week and I can then pick up the car and put it into winter storage together with the other Cadillacs. Can´t wait for the next cruising season.
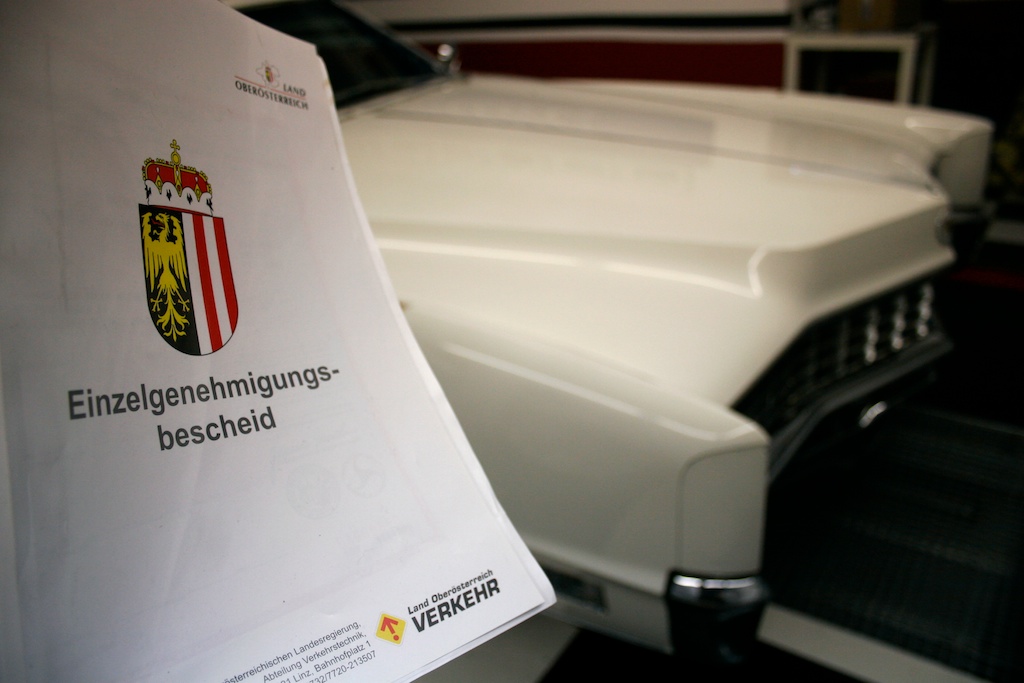
These are the documents which now allow me to register the car in Austria.
Visiting the 67 Eldorado at the restoration shop
Here are some pictures of what is going on in the shop. You can also see all the restoration pictures here!
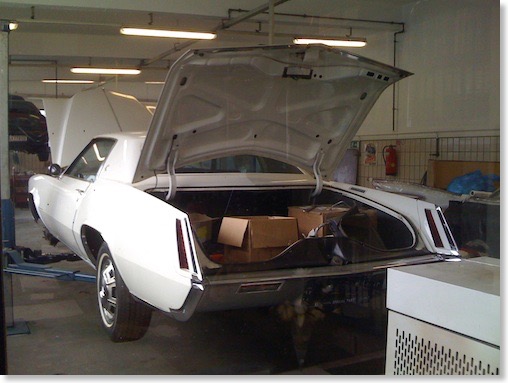
The 1967 Eldorado at the lift - the trunk is full of parts
Look how clean the 429 engine looks inside - it only has 27k miles on it - the valve covers will get a repaint and new gaskets will be installed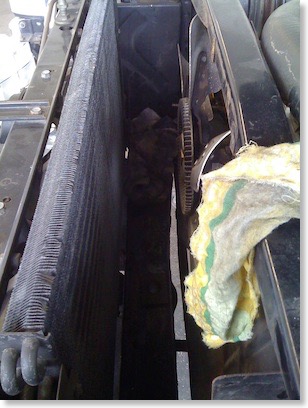
The radiator is out for re-coring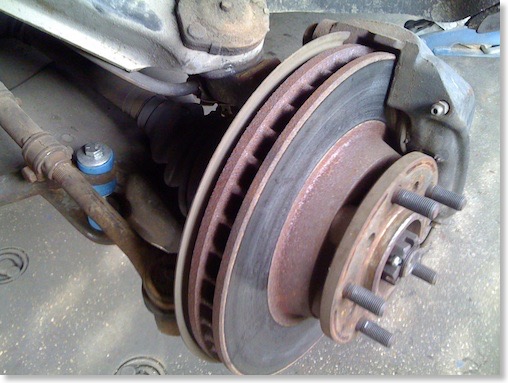
The left front disc brake is sticking a little - it will be completely overhauled as well soon.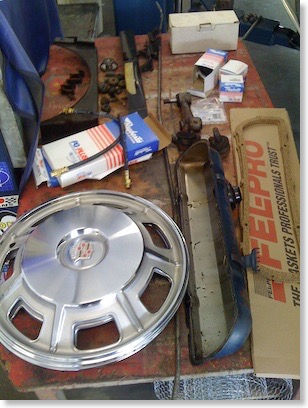
Some of the parts - the old ball joints are out. New brake hoses and brake parts are waiting for installation.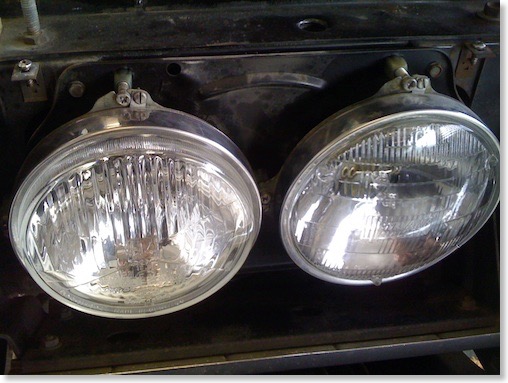
New H4 headlights had to be installed as the original T3 headlights are not street legal in Austria
The 67 Eldorado is now at the shop to get an Austrian license
The cars have to be safe and in very good condition. They check the brakes, all the suspension parts, rust, emissions and everything else what is important. The regulations are very strict - so basically everything has to be in perfect order. We even have to change the lighting system. Its obligatory to have amber rear turning signals, which makes it impossible to keep the rear lighting system in original condition (at least for the time of the inspection...). Often there is no other way than to install additional amber turn signals somewhere on the rear bumper or trunklid. (!)
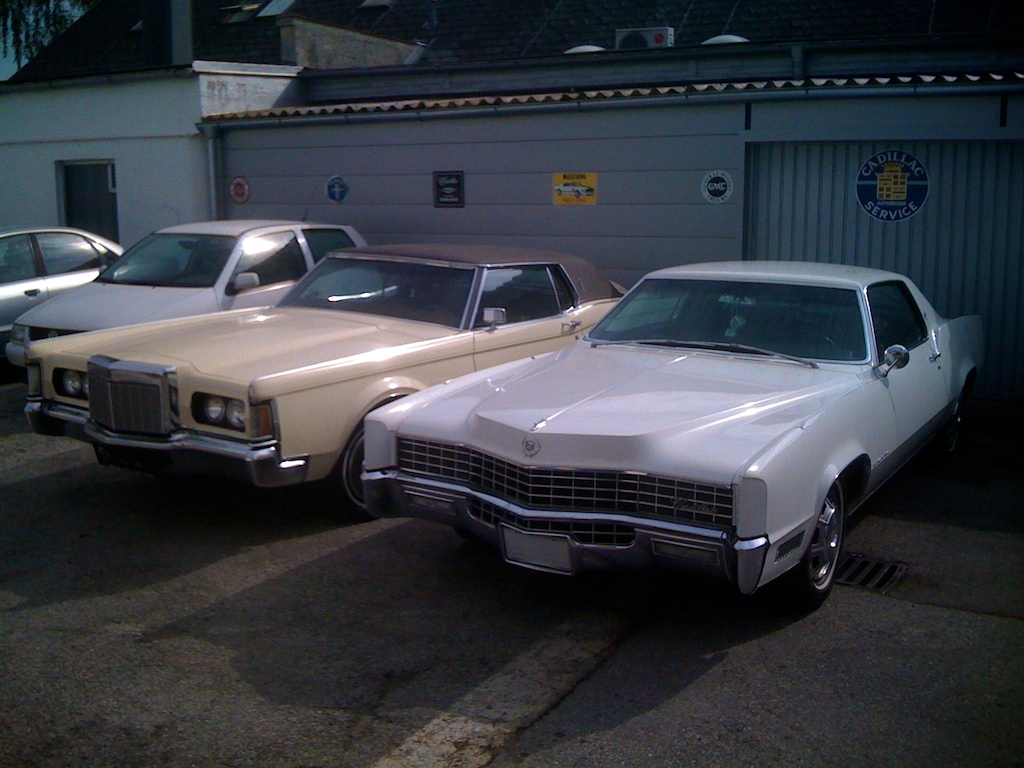
The 1967 Eldorado is now at the restoration shop - here it is on the side of a nice low mileage 1971 Lincoln Mark III.
As I finally want to be able to drive the Eldorado on our roads, today I delivered the Eldorado to my restoration shop, where they will do some of the necessary conversions and repairs. They already helped me with my 67 Deville and the 58 Eldorado.
The Eldorado will now get a new radiator as the original one is leaking badly. Actually I will have the original one recored and repaired. The front disc brake will get an overhaul due to a partly sticking piston, together with all new brake hoses. The fuel line will be replaced as it started to leak as well. The lower ball joints and the idler arm will get exchanged along with some rubber bushings. Besides of this list of repairs the rear lights will be converted for the inspection.
After the Eldorado is back in perfectly working condition, the inspector will check the car and hopefully approve it... Unfortunately until all this will be done it will take some time, and the winter is just around the corner - so it will go right back in winter storage after this procedure.
The 1996 Buick Roadmaster - new rear wheel cylinders
As our 96 RMW did not pass the technical inspection 3 weeks ago I had to order new rear wheel cylinders which were installed today as well. It then passed the annual inspection and can be driven for another year.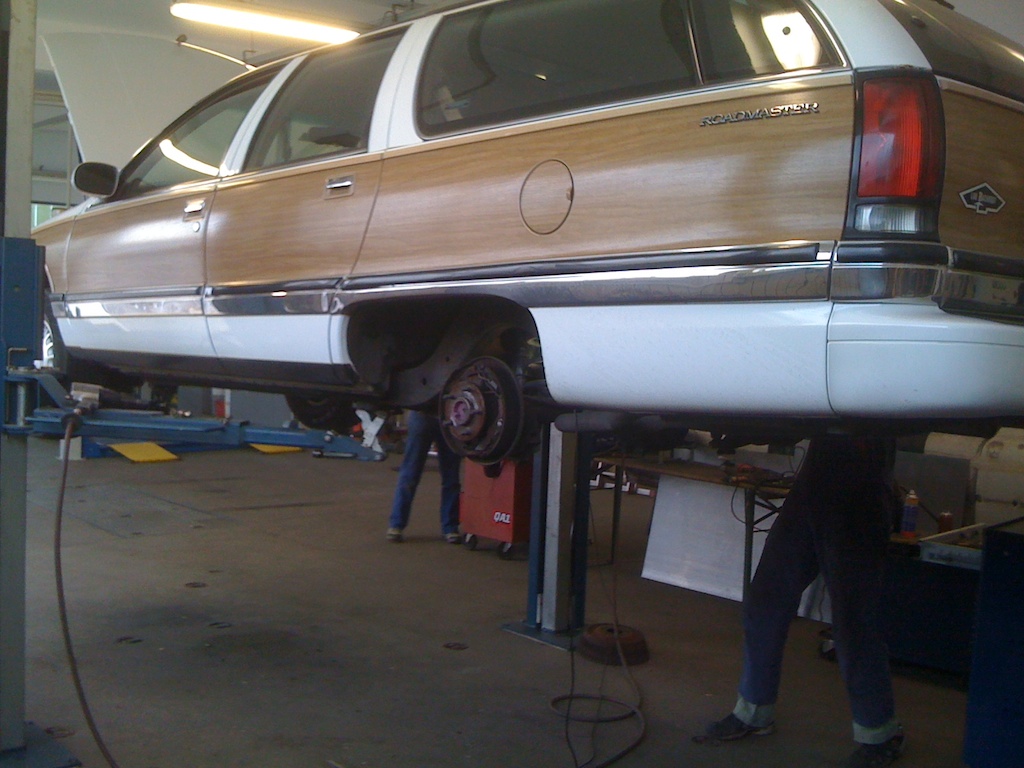
My 67 DeVille under palm trees...
“Hi, Gerald....I saw your photos on Flickr. I snagged one of the photos of your 67 and made a Photoshop creation of it. Be looking for it.”
And here is the picture he sent - my 67 under palm trees, something I have never seen before as those huge palm trees are not existent over here in Austria! What a cool photoshop creation and idea - Thanks Scott!
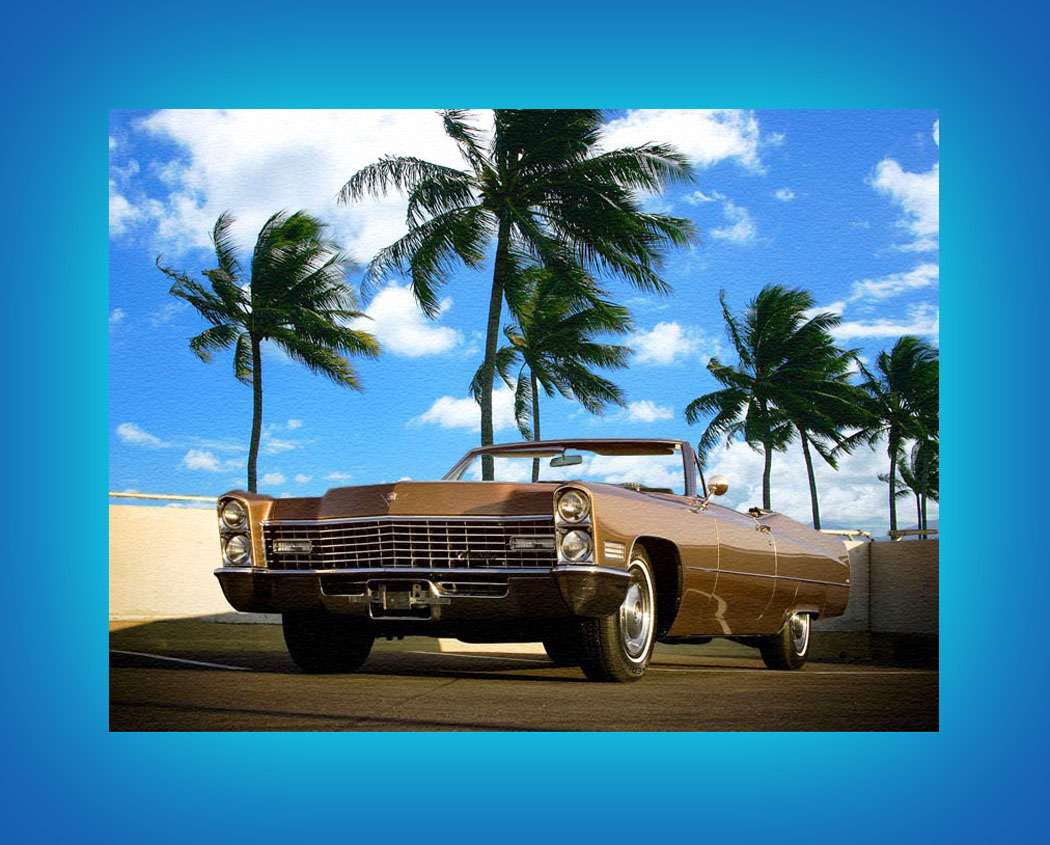
1967 Eldorado - the headlights and the ALC work again
I also got a new control valve for the ALC compressor from Arizona Vintage Parts (a company I highly recommend). With this new valve the ALC is back in working order and the car is now raising its rear to the correct riding height again.
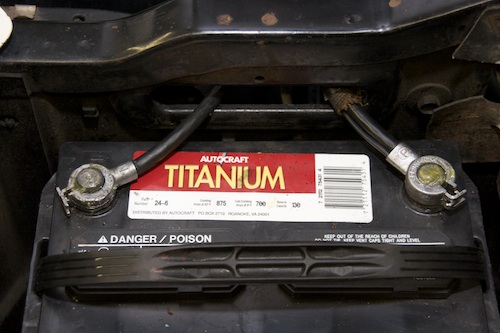
the new original style spring clamp battery cables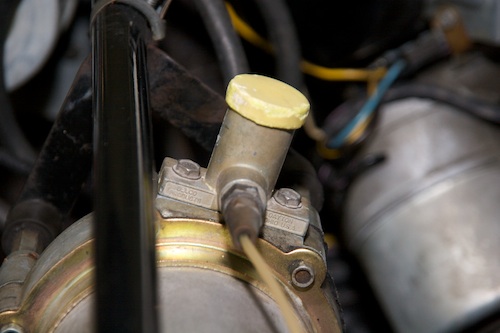
a new used ALC control valve is also in place.
A night photoshooting with the 67 DeVille
I also took some "making of" pictures of her in action.
Click on the image below to go to the gallery with all the pictures.
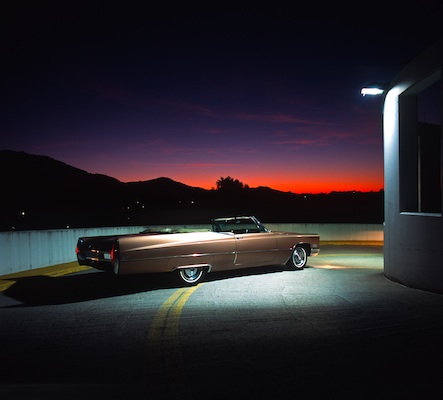
The first 1967 Eldorado parts arrived
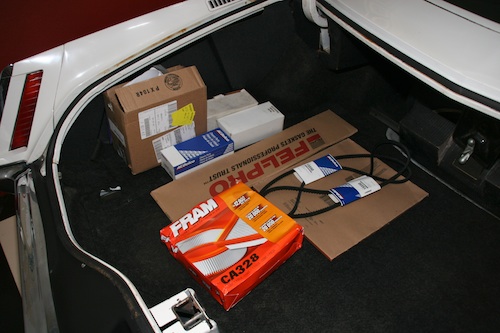
The first few parts that arrived - belts, filters, gaskets, caliper repair kits, dryer, pitman arm, air filter and some other stuff....
1967 ELDORADO HEADLIGHT ISSUE - ONE STEP FURTHER
Glen wrote the following:
“If you take the panel under the steering column off I think you can reach up and disconnect the connector from the light switch. Or you maybe able to get a meter probe up there to check voltage. The battery connection to the switch for the headlights is on the 14 gauge yellow wire. This only supplies the headlights and front parking lights. If you have 12 volts there then your problem is in the switch. There is a circuit breaker in the switch and it may be bad or the contacts in the switch are bad. IIRC these switches have a vacuum switch on the side that operates the headlight doors. This makes them hard to find. They do not interchange with the 68 Eldorado because in 67 the parking lights only come on when the switch is pulled out to the first position while in 68 the parking lights come on with the headlights also. If you do not have voltage on the yellow wire then you should check the fusible link on the starter. It is an 18 gauge dark green wire that changes to a 14 gauge red with white tracer before it gets to the connector. Check for 12 volts at the connector and check the contacts in the connector. “
Glen was spot on with his diagnose and it turned out that the green 18 gauge fusible link was the culprit for my headlight problem as it came apart for unknown reasons.
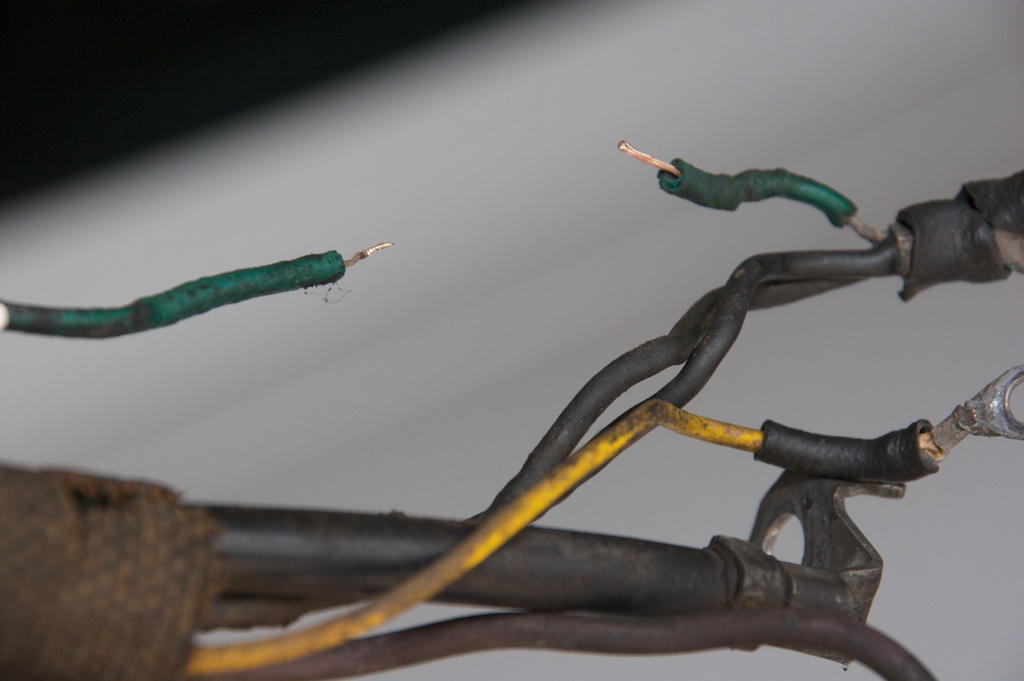
the green wire once was a fusible link - it fell into pieces when I slightly pulled on it
As a follow-up Glen recommended the following:
“You might want to look closely at the break in the link. See if it is melted or did was it broken by mechanical means. If it was just pulled apart or cut then you have to check what caused that.
To trouble shoot this if it was actually melted due to over current, I would unplug the headlights and front parking lights, and temporarily connect a headlight or other big light bulb, in place of the fusible link. You can then try things without blowing fuses. With the troubleshooting light in place it will light up brightly if there is a direct short. With the headlights and front parking lights disconnected the test light should not light up at all under any condition. You should be able to move change the position of the headlight switch, switch from high to low beam (light switch in the headlight position); wiggle the wire harness anywhere and not light up the test light. If it does you have found the short.”
I did this procedure today but it did not show any shorts. I then reconnected the front lights and everything did work again. I will now have to find a replacement fusible link which is very uncommon over here in Europe. I will replace it together with the positive battery cable where the clamp is almost falling apart. I hope the issue wont come back. It looks like the fusible link maybe only fell apart due to age as it did not show any signs of burning. Its located very close to the starter and the exhaust manifold - so maybe 42 years of dirt and heat just made it crumble into pieces....

the completely removed positive battery cable harness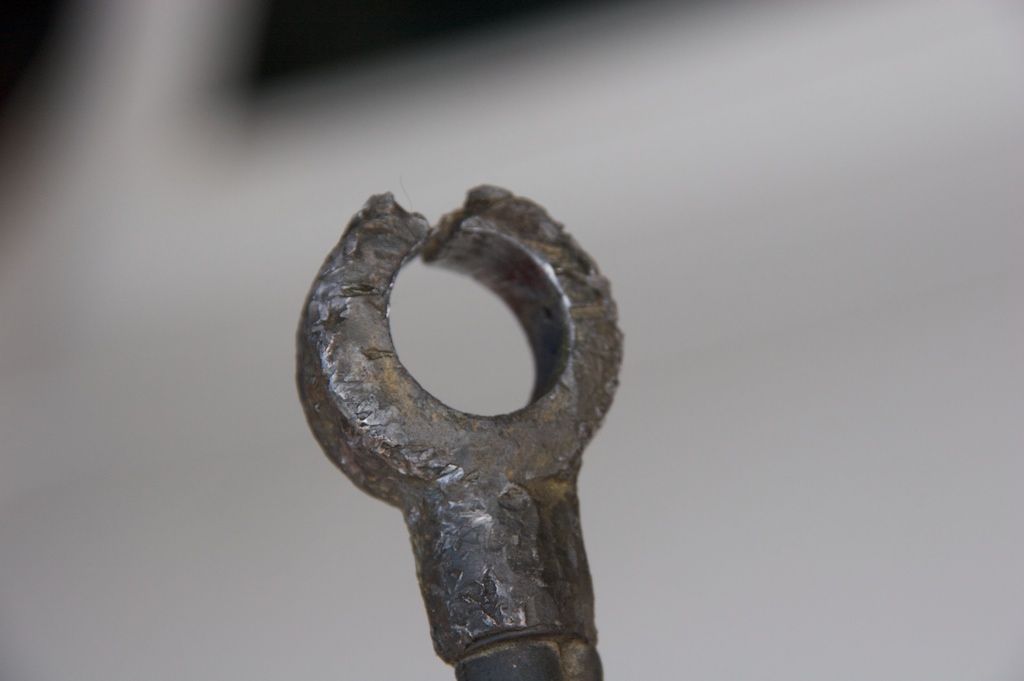
the original battery clamp - its already missing the spring part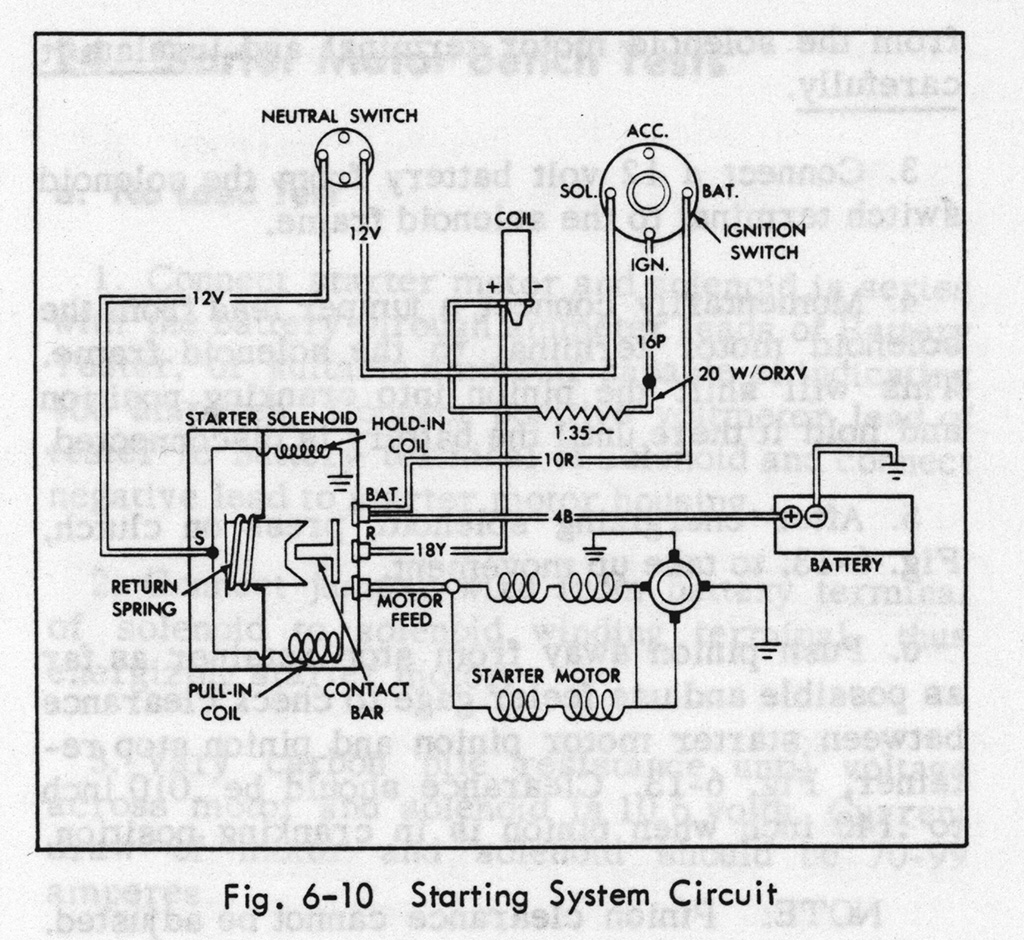
The starting circuit diagram is showing the battery cables - Click for larger picture!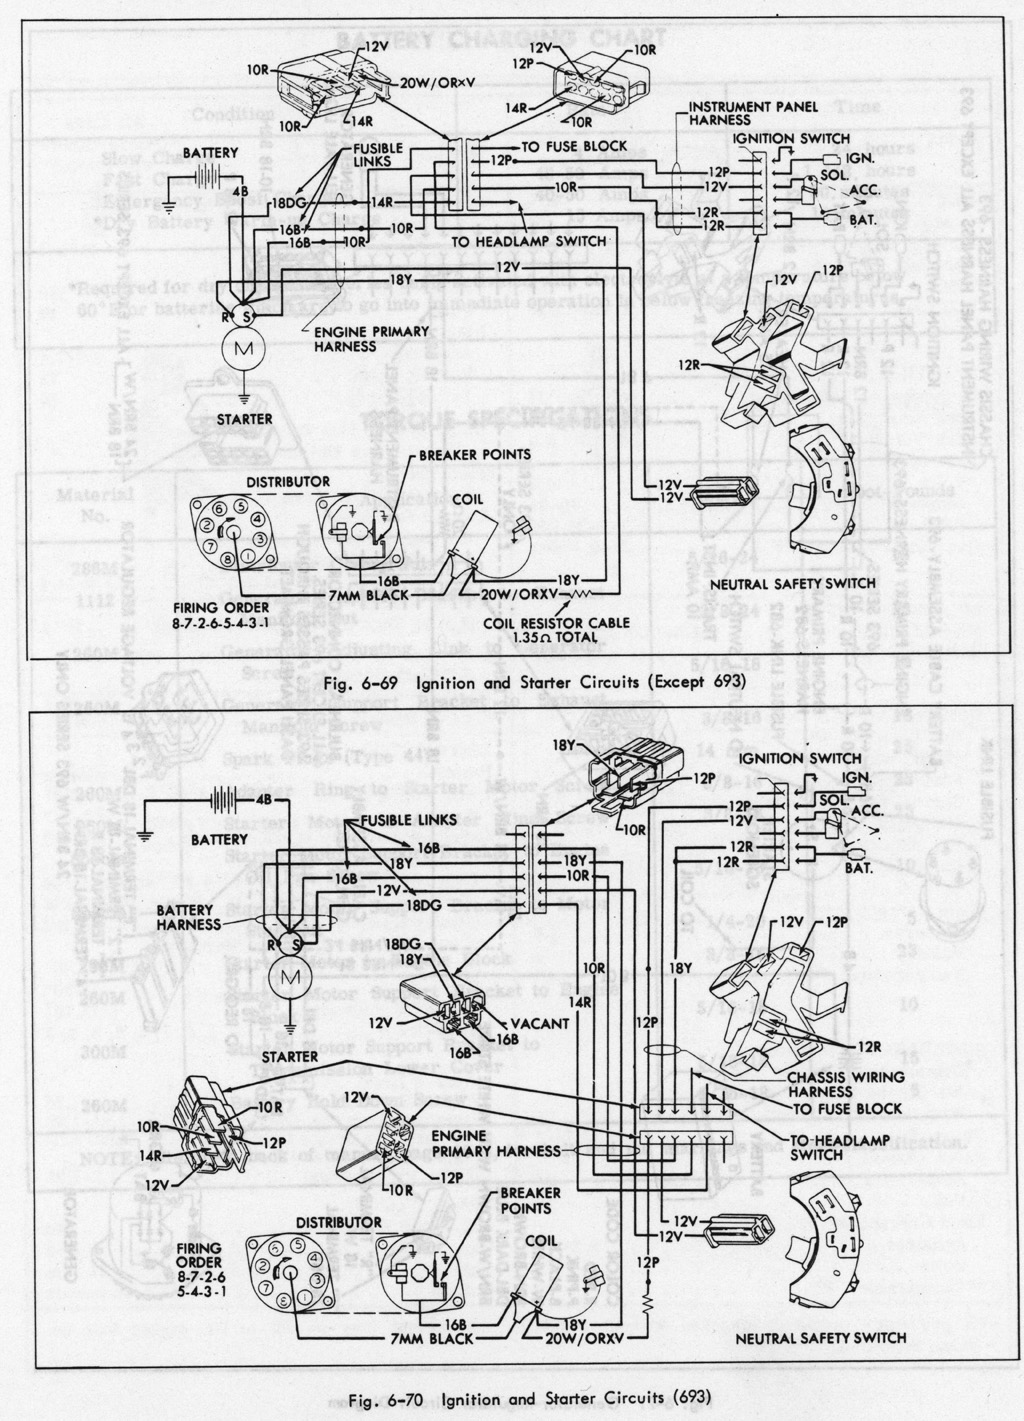
The Iginition and Starter Circuit Diagram for the Eldorado (693) and the other Cadillacs of 1967.
Click for larger version!
New pictures of my 1967 Eldorado on my website
You can find them in the Eldorados gallery.

1967 Eldorado Inspection - ALC issues and dead headlights
When I arrived there the headlights did no longer work. They did not have any problem before.
When the inspector wanted to turn them on - the headlight doors did open but the lights did not come on.
Also the parking lights and high beams do no longer work. The taillights did come on though and the cornering lights and turn signal do work as well.
Very strange… Checking the fuse panel I found out that there is no fuse for the headlights. My guess is now that it must be the headlight switch - can this be repaired? The shop manual mentions a 25amp circuit breaker in the switch but it does not mention how to repair it or check it.
The other thing which stopped working yesterday was the Automatic Level Control. The vacuum operated compressor in the engine bay seems to work as I can hear a ticking noise, but the car does not raise. I also added some pressure (100psi) to the service valve at the compressor but the rear of the car did not raise at all. When I depressurized the compressor the car did not come down any further either. Very strange… I really need to get this fixed - non working parts are making me crazy!
The car lost the yellow plastic cap which is located on the top of the regulator valve while driving it into the shop. Unfortunately it landed directly below one of the tires and was crushed to tiny little pieces. I will have to try to find a replacement. I have no idea how this could have come loose.
The car did not pass the inspection for some other reasons as well , like a sticky front disc brake, worn ball joints and pitman arm and some other minor things . It will keep me busy repairing all this for a while. Whats worrying me most is the headlights and the ALC as I do not have any clue at all.
On the positive side - the car was a pleasure to drive the 60 miles to the shop - its so much different to the “regular” Cadillacs - Big, silent and powerful and no big boat ride ;-)
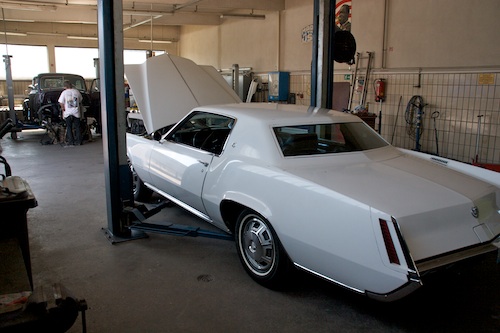
in the shop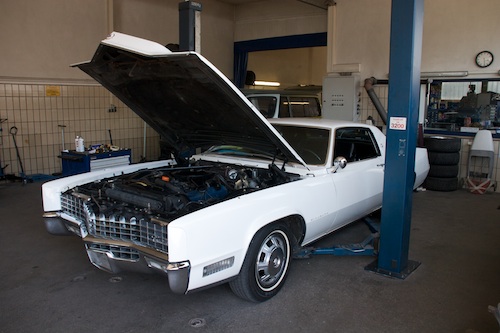
67 DeVille Brakes finally fixed
As I replaced the complete front end including the entire front brakes last year, I did not think that the drum brakes might only need a simple re-adjustment. As it turned out the front brakes were out of the range where the star-wheel can adjust itself while driving the car backwards and applying the brakes.
I now adjusted the front brakes pretty tightly and the pedal is now pretty firm again. I hope it will stay like this. If not - there must be something wrong with the automatic self adjuster, but I´m very optimistic that the problem is now solved. I also gave the rear drums a check - they turned out fine. I just wished the DeVille had front disc brakes like my 67 Eldorado...
checking the rear drums - crappy cell phone picture...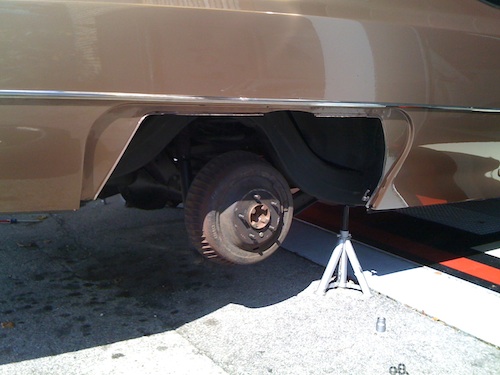
the rear drums
1967 Eldorado detailing
The Eldorado got a wet cleaning treatment of the carpet and trunk and a full detailing of the interior - which looks like from a new car now. We also started to clean and polish the original paint but ran out of time. We only finished the hood - but the before and after difference is amazing. More work will be done soon.
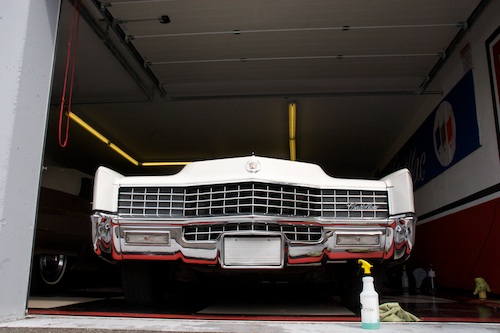
The Eldorado is lurking out of the garage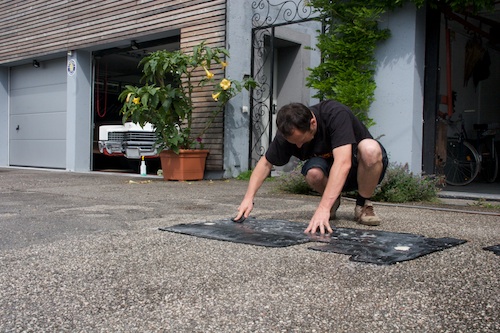
washing and brushing the original rubber floormats...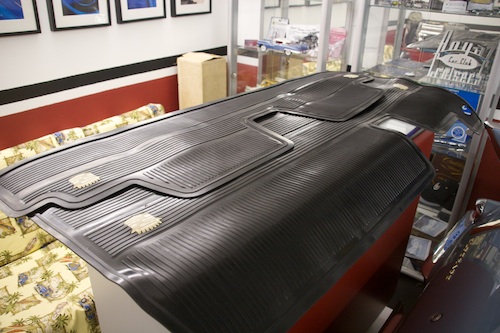
...they turned out as if they just left the factory - awesome - this Meguiars rubber treatment is more than fantastic!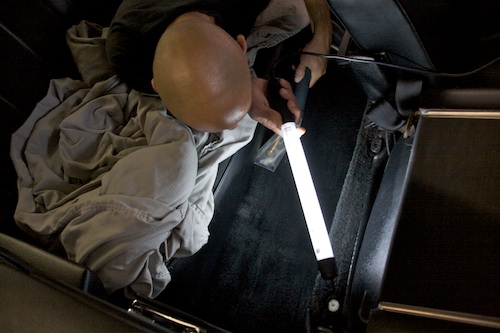
Tayfun - wet cleaning the carpet and trunk - looks like new now as well - the low miles are showing on the interior pretty well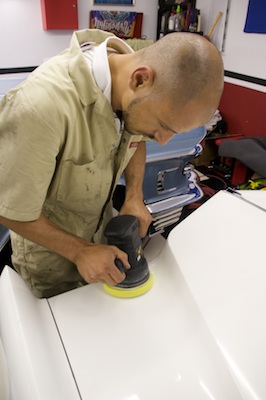
My buddy Tayfun polishing the hood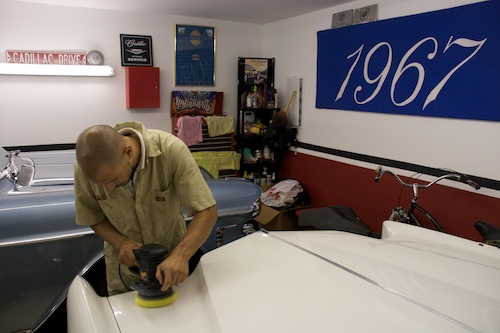
Tayfun at work
The hood´s paint came out really fine and smooth - unfortunately we ran out of time and could not finish the rest of the paint
1967 DeVille got new brake booster and power cylinder
Everything went pretty smoothly at first - only bleeding the brakes was a little complicated and it did not help either that I spilled some brake fluid into the engine bay. Some harm was done to the black paint which had to be repainted immediately. So it took us some unplanned time to get everything back in working order. As it was raining heavily we could not even test the brakes. In the meantime I did a test drive and found out that the pedal travel is way too long. Looks like the push rod in the booster needs adjustment... D*mn this means removing the master cylinder once again... I hope I will find the time to do this soon.
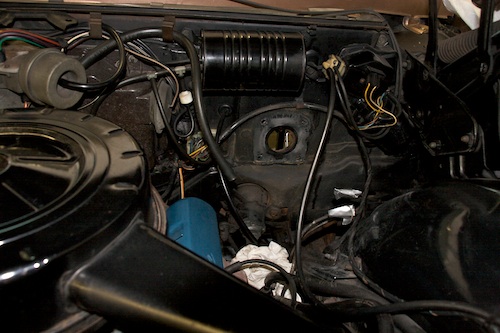
the removed brake booster - the hole in the firewall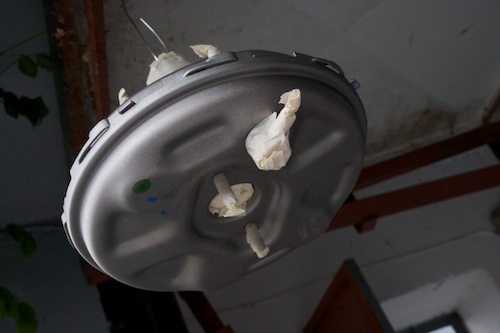
the new booster needed some paint before installation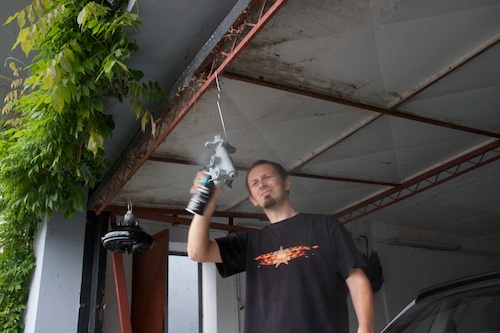
painting the master cylinder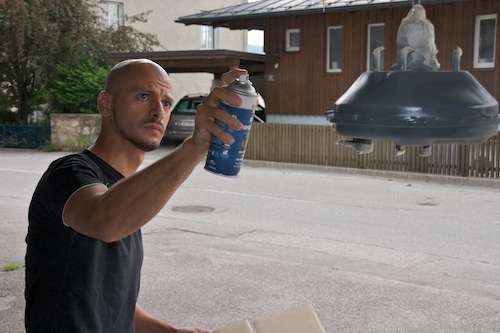
Tayfun painting the primered booster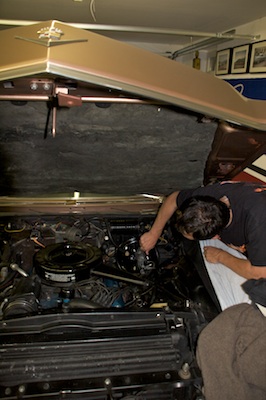
reinstalling the whole unit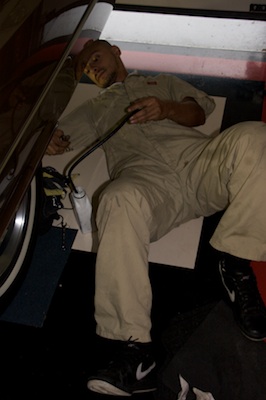
Tayfun bleeding the brakes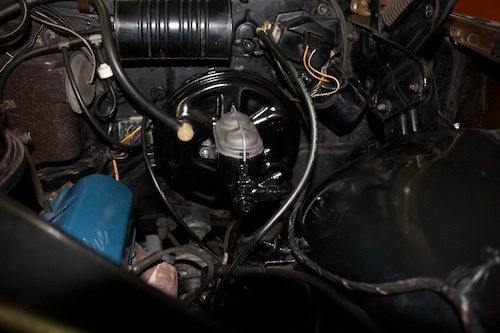
finished - looking good
1967 Cadillac Eldorado radio replacement attempt
Today my wife helped me trying to replace it. It is always a pain to get the old radios out, as the electrical connectors are pretty hard to reach if you have big hands like me... After some fiddling and lots of bad cursing, the radio eventually came out. During this procedure I found out that somebody messed around with the speaker cables which go to the rear speakers and installed new ones - which were connected directly to the front speaker. They cut the wire going to the front speakers and spliced in the rear speakers. Not very well done...
When I finally managed to install the “new” AM/FM radio I found out that it does not fit at all... It either comes from a 66 or a 69 Cadillac?
So I installed the old AM radio coming from my convertible where I did the same procedure 2 years ago - only to find out that non of the 2 speakers seem to work anyways...
I now have to find a good used 1967 AM/FM radio and 2 speakers - the list of things I need is getting longer everyday. I will also have to repair the wiring of the rear speaker back to original.
Thanks to my wife Afra for helping me!
removing the dash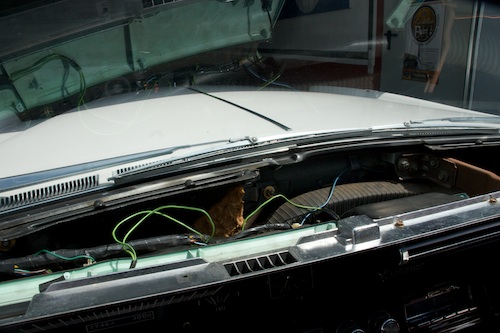
the removed dash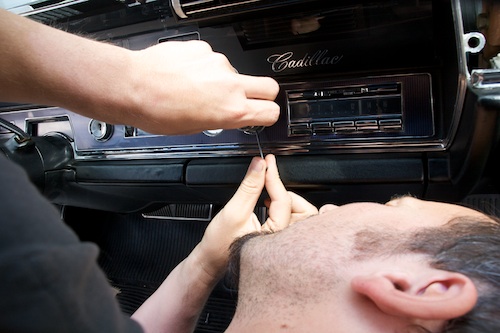
removing the radio buttons was the easiest part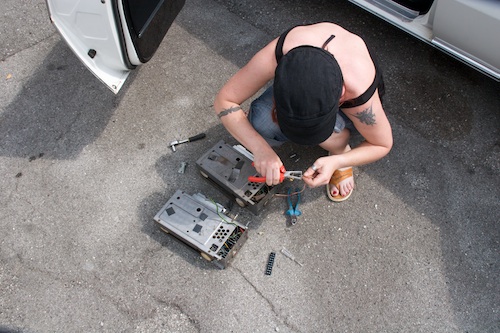
Afra repairing the wiring of the old radio
Cleaning the engine bay
I hope though, that I will ever be able to get my hands clean again as well... I guess I should wear a pair of gloves next time...
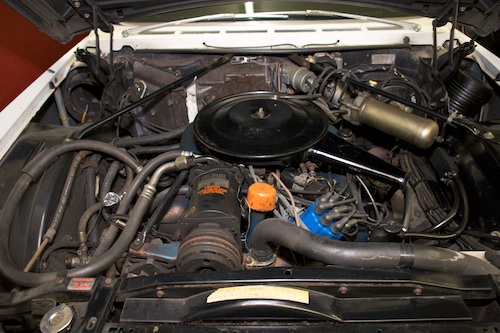
This is how the engine bay of my 1967 Eldorado looked before cleaning - I will also have to install the new evaporator later, reinstall the blower motor, connect all the AC hoses and recharge the AC... lots of work ahead
.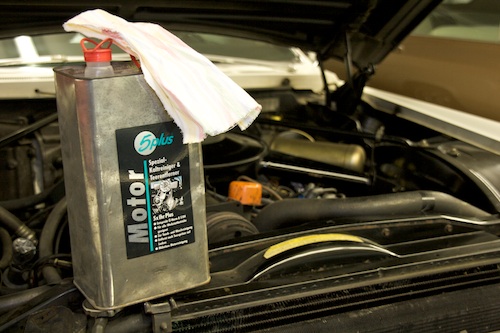
The engine degreaser is pretty aggressive on the oily gunk and dirt.
Time to change the engine oil
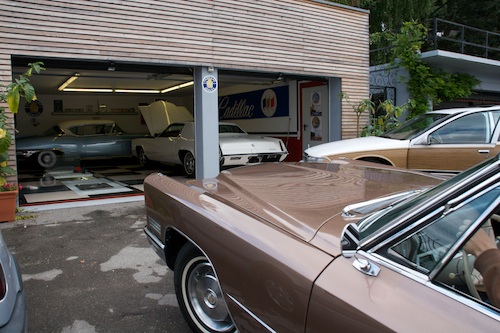
I had to drive one after each other over the pit...
somehow its always a mess to change the oil...
The 67 Eldorado arrived!
The truck arrived at 3 pm with the 67 Eldo and the 69 DeVille which I bought for a dealer here in Austria. Both cars had empty fuel tanks and dead batteries so we could not start them and had to push and pull them from the truck, what took as quite a while. This was very exhausting work, but eventually we had the cars parked in front of the garage. I poured some gas into the tanks and installed batteries from my other Cadillacs. I then turned the keys and the cars roared back to life without any problem. The 67 is a very nice survivor with only 27k miles on the odometer. It drives like a dream - I´m very impressed. The biggest surprise for me was that it has disc brakes on the front - I always thought it would come with the basic drums and not with this very rare option.
The cars got a quick wash and were then parked inside the garage.
Tired and exhausted, but very happy I finally went to bed thinking about all the work I will do in the upcoming weeks. Stayed tuned!
If you are interested about the cars history and how I found it visit my history page!
Here are some pictures of when the car arrived:
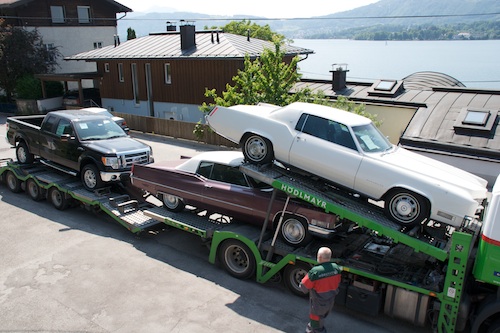
the truck as it arrived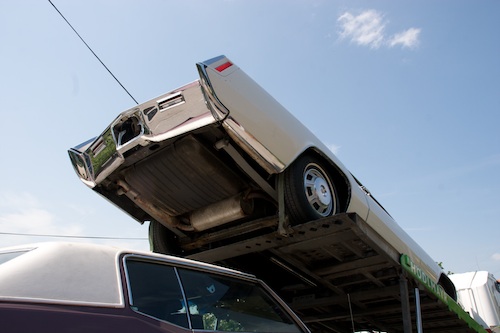
the 67 proudly rode on top...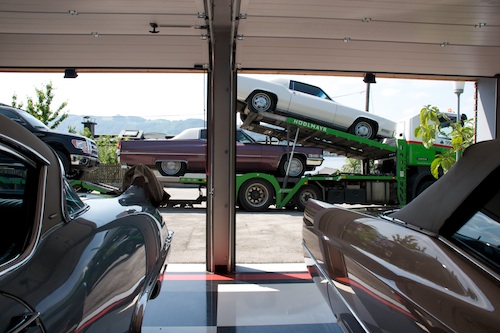
the old Cadillacs watching the new one arrive...
finally unloaded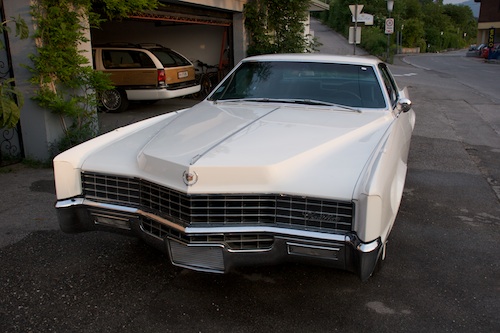
after a quick foam bath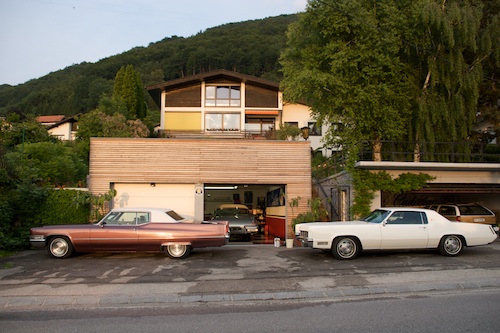
looking a little cleaner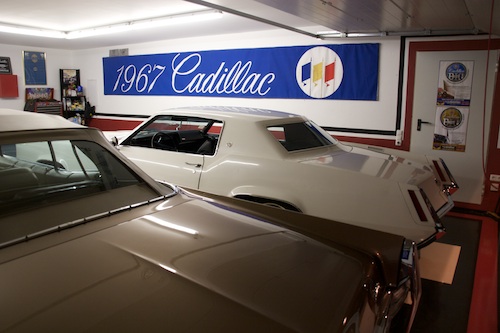
yes - they all fit in...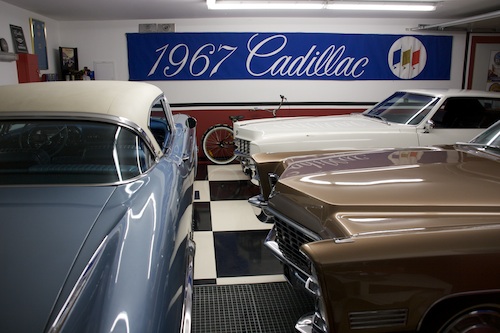
nice sight in front of the original 1967 Cadillac banner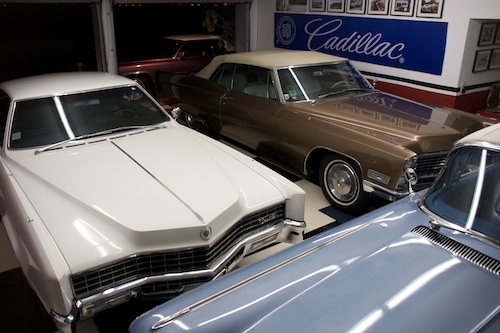
its narrow - but they do fit in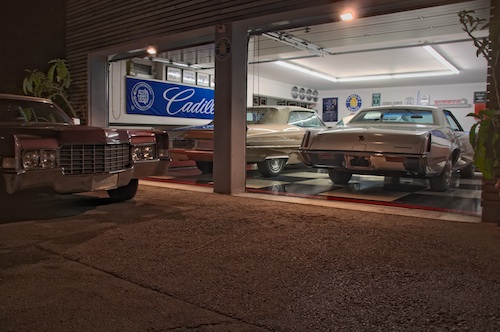
looking into the garage - nice view...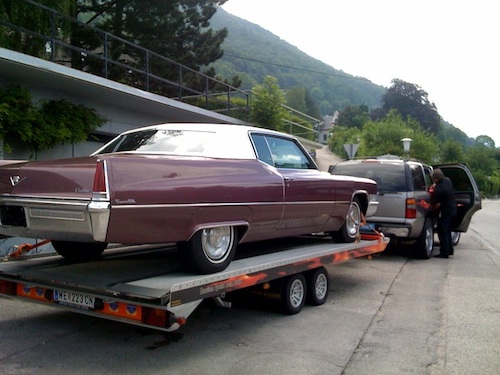
the mauve 69 was picked up by its new owner - a dealer in Austria - it will be for sale there soon. Its a really nice car which I would like to keep if my funds would allow it. Whoever will buy this car, will get a nice Cadillac in a stunning color combination!
The 67 Eldorado arrived in Rotterdam
Details about the 67 Eldorado shipment
the ship my 1967 Eldorado will sail on across the Atlantic Ocean
I bought a 1967 Eldorado
More details when the car arrives!
The 67 Eldorado was picked up
1967 Cadillac banner installed
It looks great!
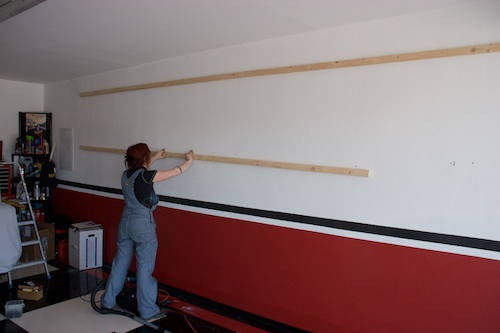
building the frame with my wife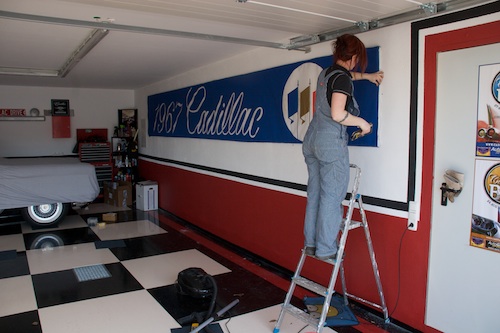
mounting the banner on the frame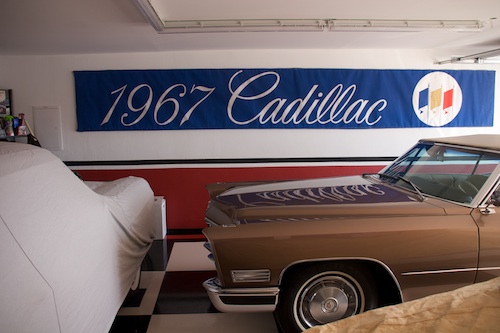
finished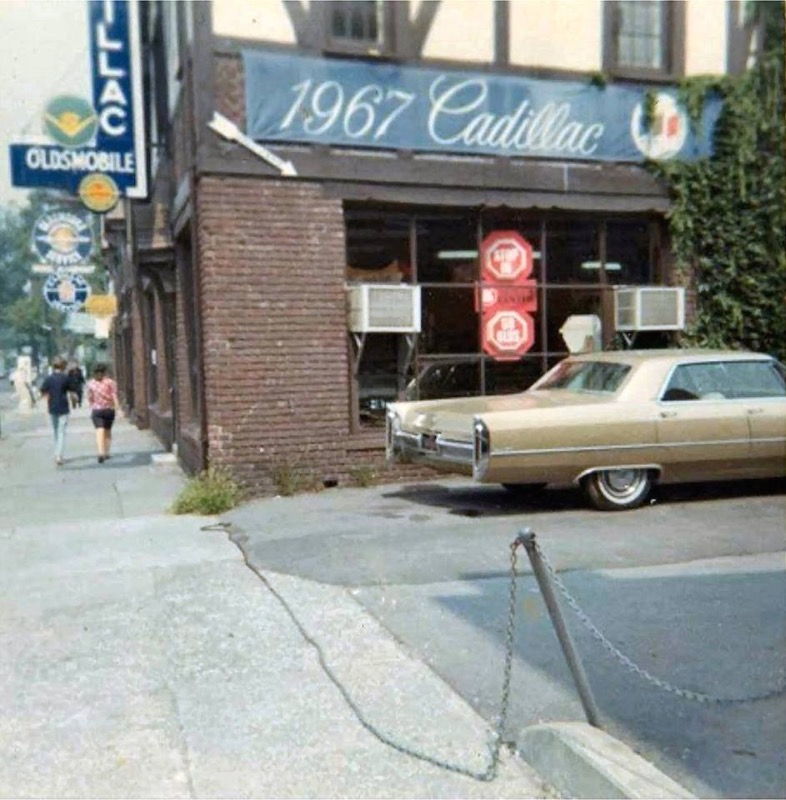
here is a picture of how these banners were used from 1966 to 1967. This pictures was taken sometimes in the fall of 1966 or in 1967.
Detailed seats are finally back in the 67
If you compare the new pictures to the “before” pictures below - you can clearly see the difference.
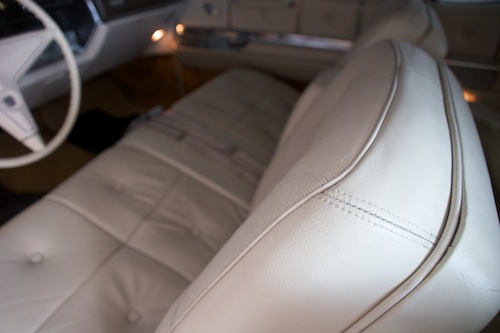
Thats the area which showed the most wear - looking perfect now!
the same area before detailing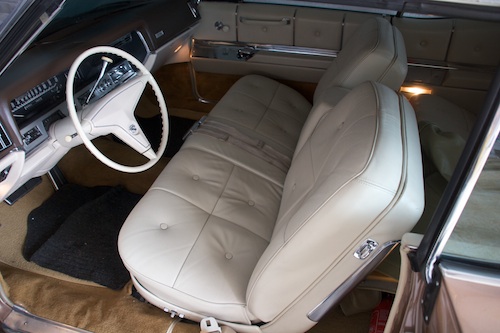
the interior is back together and now waiting for the cruising season
Very cool new garage decoration arrived
Its unused and still in the original box. Its almost 7 meters long.
I do not yet know where in the garage I will hang it, but as soon as it is getting warmer I will take care of this cool new decoration item. The best thing is that I got it pretty cheap.
the original box from Cadillac
The original box coming from Cadillac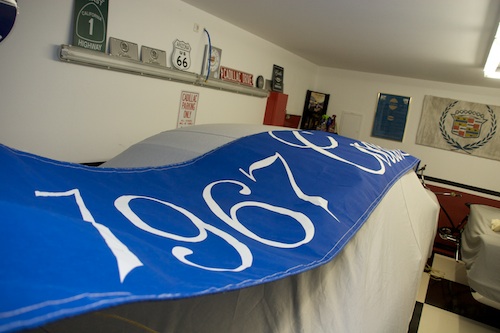
the banner is pretty long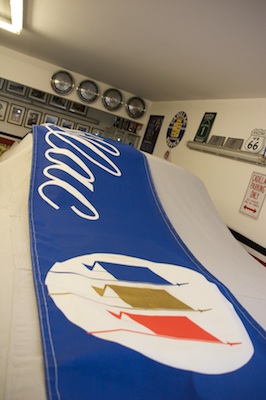
cool banner
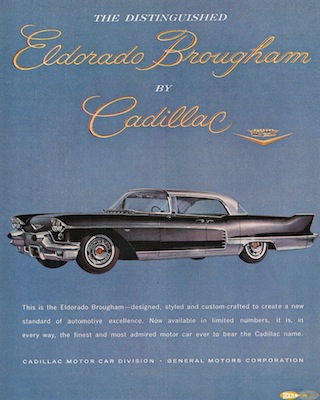
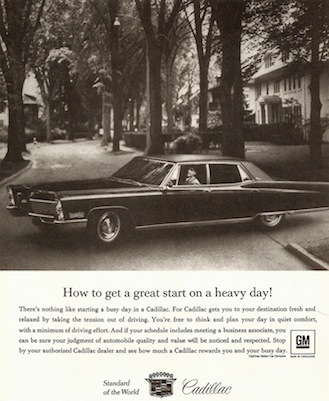
Leather seats are back from detailing!
They look like brand new leather seats now!
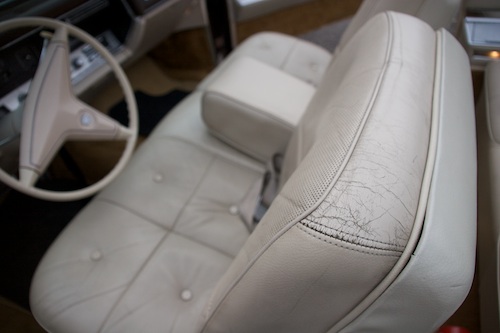
the front seat before
the front seat now - before installation
the rear bench before the repair
after the repair - all the tears and cracks are gone!
The 67 is back with a "New" Front Suspension!
Today I picked up my 1967 Cadillac DeVille from the shop where all my repairs and restoration work is done when I can´t do them for myself.
The car got a complete new front suspension including all bushings, ball joints and paint. Some of the old bushings already fell apart. As everything was apart we also did the complete front brakes.
Also the radiator was fixed and the car got a new ignition lock which I removed from a 67 limousine at a junkyard in California last year. Also the turn signal switch was finally fixed after it broke 3 years ago...
The car is in spectacular condition, now and with the new suspension it drives like a brand new car - I could not have imagined that the difference would be that big.
Below you can see a picture of the rebuilt front suspension. Its still a little dirty as I had to drive the car home through rain - it will be cleaned soon though.
1967 Cadillac turn signal switch arrived
UPDATE 2010: In the meantime (since 2009) the Boyne switches they are getting reproduced and show up on ebay all the time. Also OPGI shows them in their Cadillac catalog. Its harder to find one for a T&T column as they are not getting reproduced so far. I do not know where one could find a switch for T&T though. If you know of any resource for T&T switches please let me know, I would love to have a spare one for my Eldorado!
When I was looking for a switch for my 1967 Deville, I only investigated resources for cars without T&T columns and this is what I found out:
According to the 1971 parts manual there are two different ones for standard column cars and one for T & T
- 1967 - 1968 (Exc. T & T) Part # 7800483 - Switch, w/wiring harness (Delco-Remy)
- 1967 - 1968 (Exc. T & T) Part # 7805675 - Switch, w/wiring harness (Boyne Products)
- 1967 - 1968 (T &T) Part # 7805676 - Switch, w/wiring harness (Hazard warning switch an integral part)
The two different standard column switches can be identified without removal as the parts manual describes:
„Hazard warning switch is an integral part. Switches can be identified before disassembly as follows: The Delco Remy switch has a square hole for the hazard warning switch in the cover, the Boyne Products switch has a round hole for the hazard warning switch in the cover.“
The problem with the switch on my standard column DeVille was that the return cancel cam broke, and that non of the repair kits were available for the Boyne switch.
Replacing this switch in the steering column is quite a pain - below you can find the instructions from the shop manual on how to do it.
There is also a revised procedure for a much easier installation below in the “Cadillac Serviceman" from August 1967!

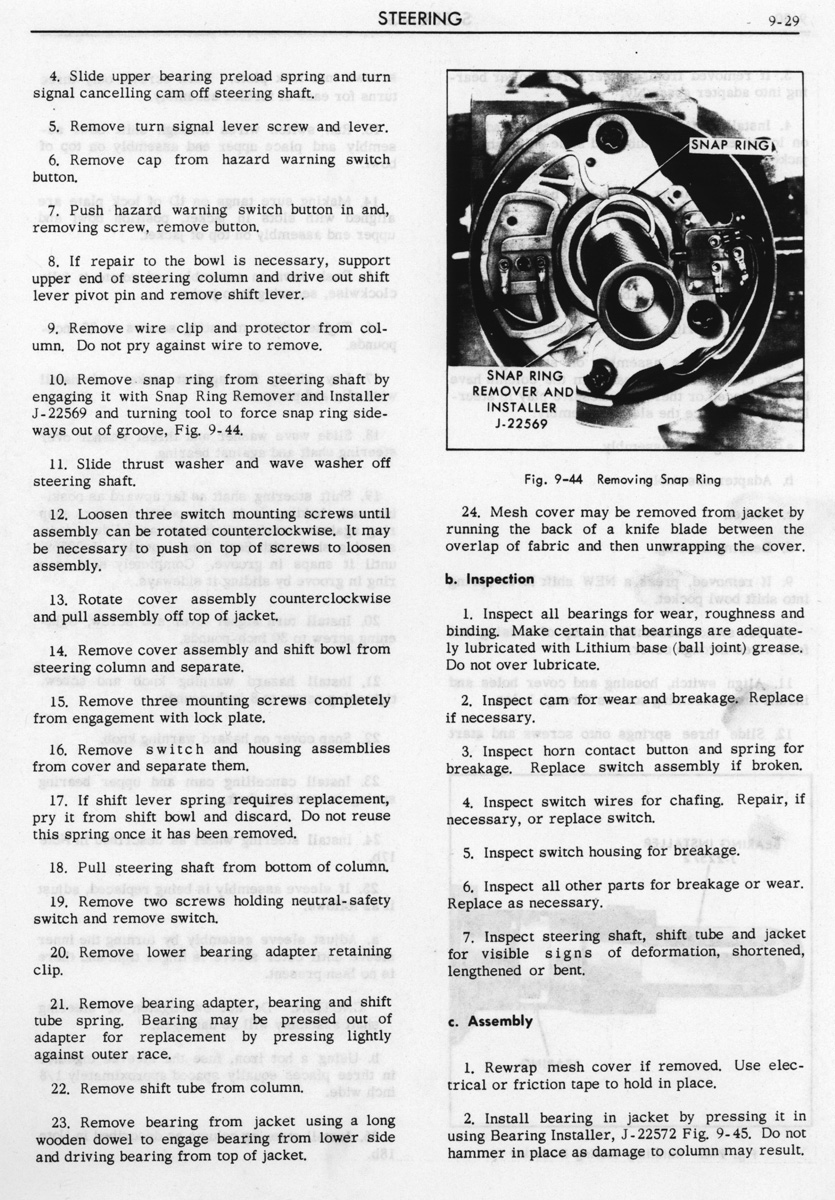
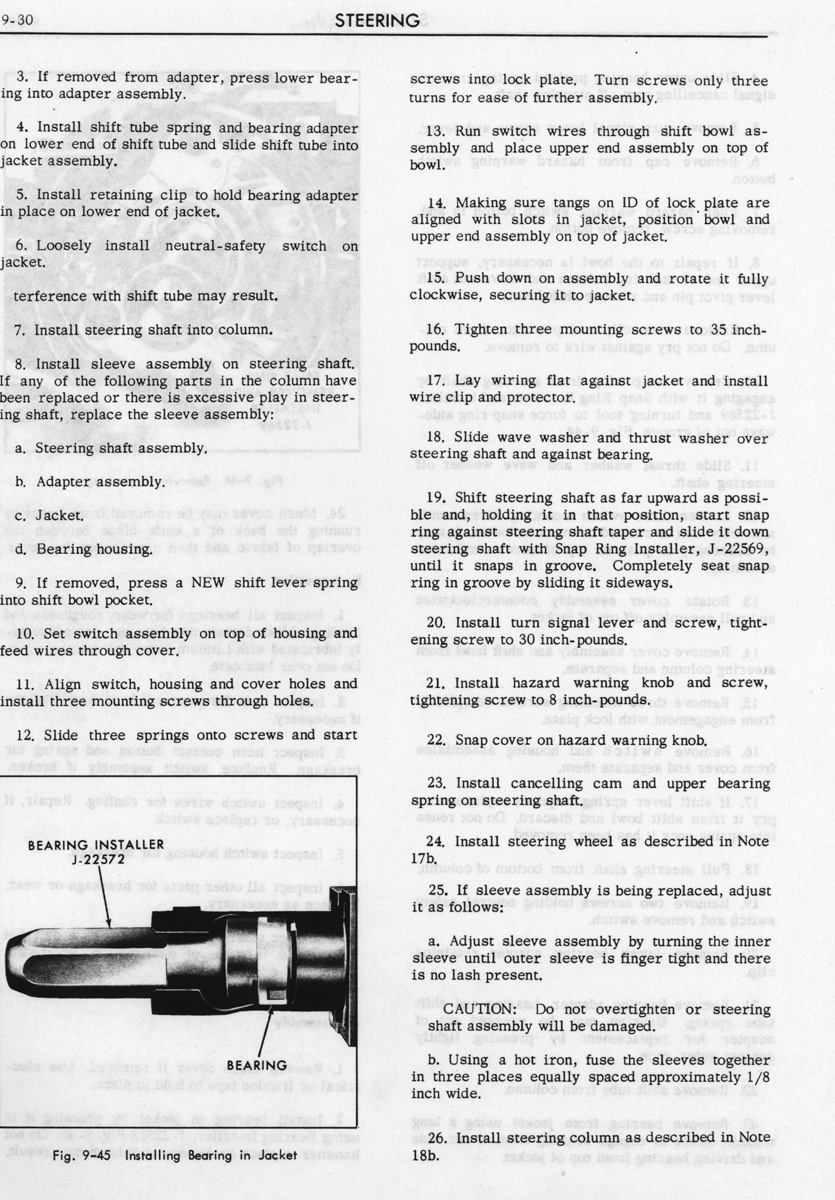
Click on each picture for a larger view!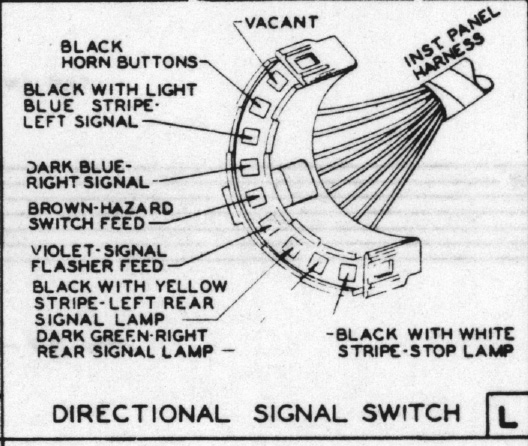
The connections going to the directional signal switch - the turn signal switch connector
The Cadillac Serviceman from August 1967 shows a revised procedure for a much easier installation of the switch.
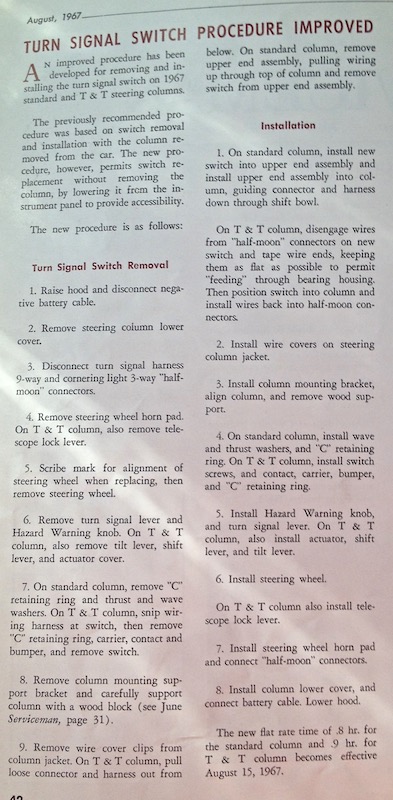
If you need the shop manual instructions for a tilt and telescope column click here! Or just use the procedure above!
Cleaning the 67´s front suspension
The brakes before I disassembled them - I hope I can clean the small metal parts with an ultrasonic cleaner
All these parts will be sandblasted and painted afterwards
The 67´s front suspension
After this the suspension will be in new condition - one of the last things that have to be done on the 67 before it is really in like new condition.
The only other thing which will need attention in the future will be the top which is still the original 40 year old one, but is still a little to good to be replaced…
The completely stripped front suspension
The 67 at the shop
The 67 is in the shop...
Later I also dropped off the 67 there as some smaller things have to be repaired as I do not have the necessary tools nor skills to do them myself.
- The front-suspension needs a rebuild and I do not have the presses to push some of the bushings in and out.
- The switch for the directional switch in the steering column has to be replaced
- Need a new ignition lock
- The transmission has some leaks I could not find
The guys from who helped me with the restoration of my cars will take over.
In a couple of weeks I should have the car back. It will go directly into winter storage then. Today also was the last day to drive the 58. I will return the plates over winter.
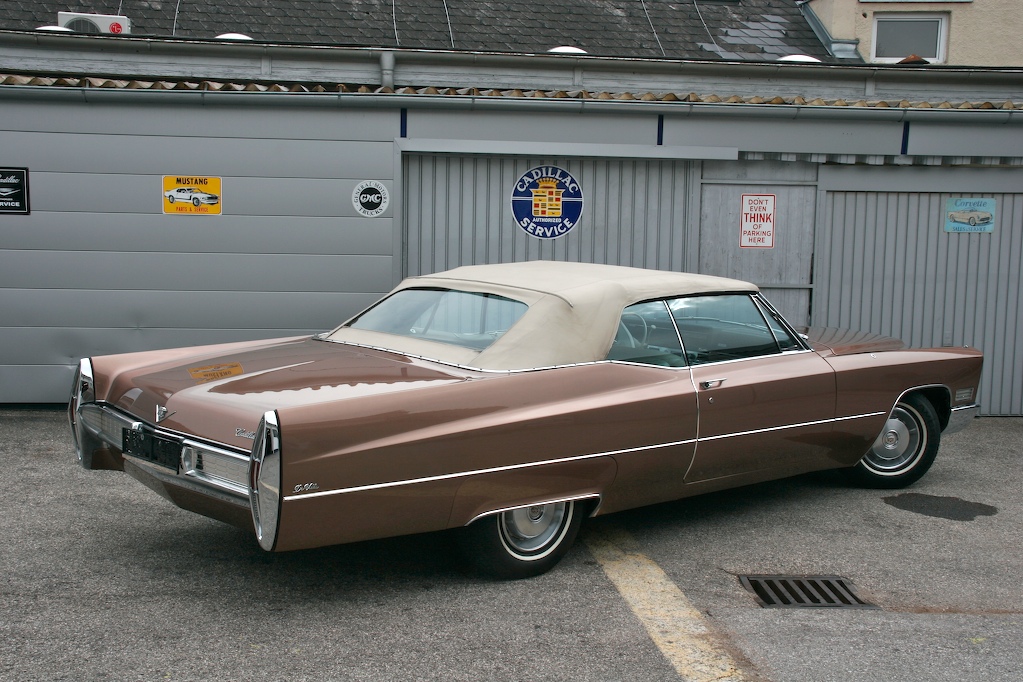
The 67 at American Special Parts
Preparations for the Cadillac BIG Meet
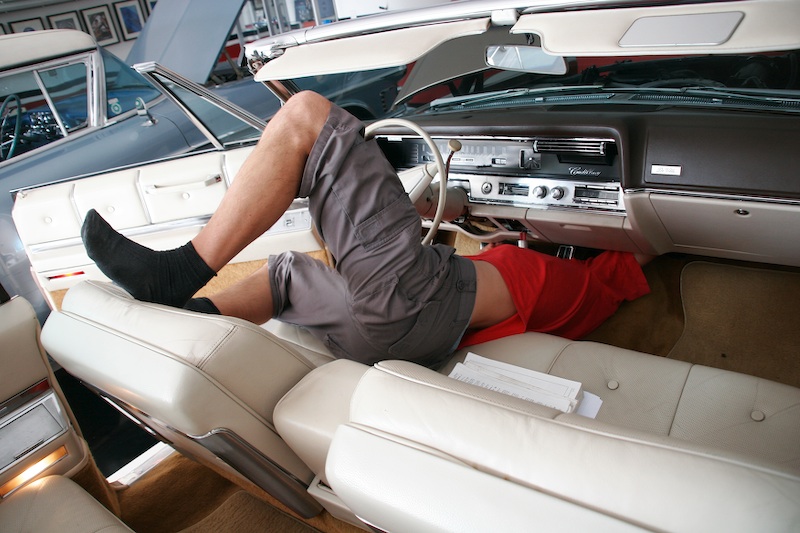
working on the AC
installing the new backup lenses - which had to be custom fitted...
AC Problem
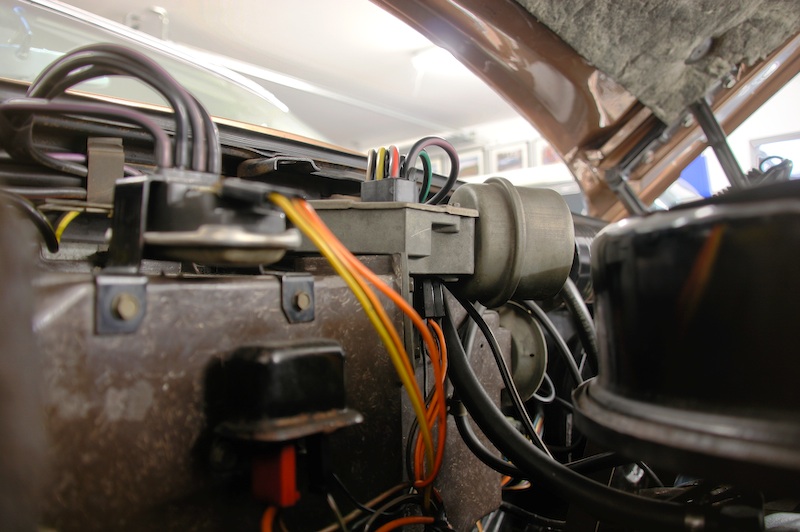
Three parts could cause this problem:
- The dash switch with its rotary valve from where I can hear a slight hissing noise,
- the power servo on the firewall
- or the master switch itself - what I doubt.
As I hate when something does not work on my cars I ordered all the parts. I found a good source which sells all these parts rebuilt. Hopefully they will arrive soon as I would like to have this issue resolved before the Cadillac Big Meet. It should not be too much of a hassle to install them when they are here.
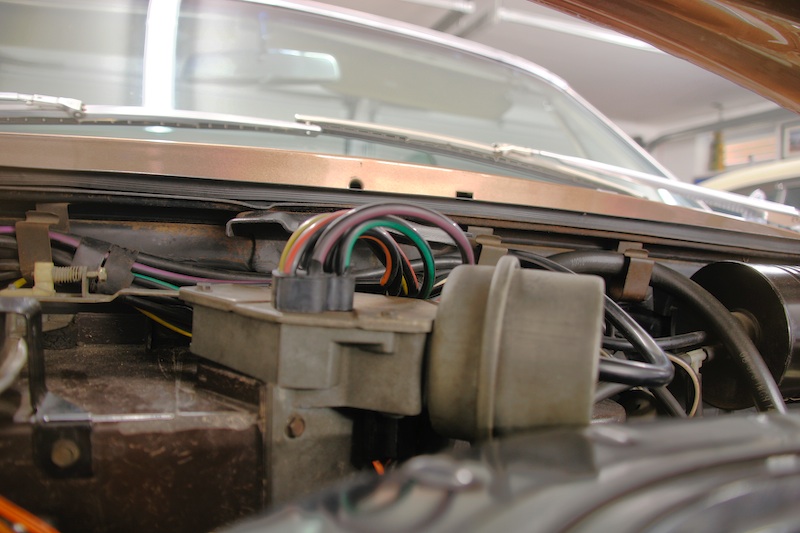
The power servo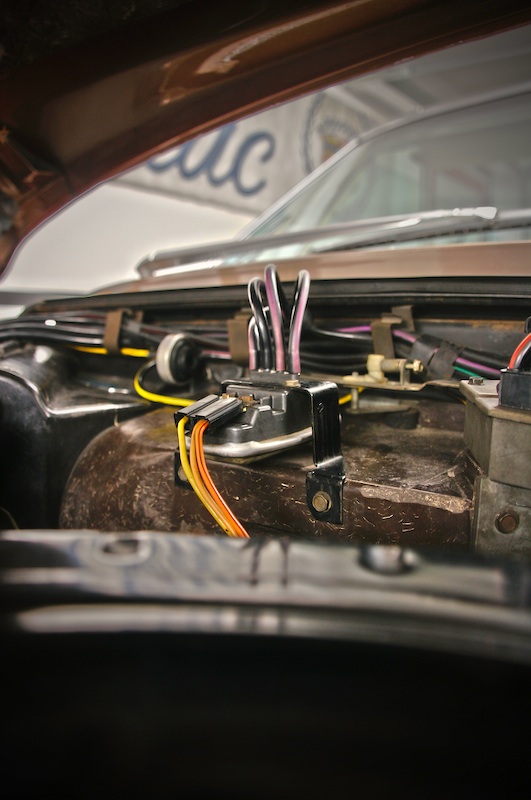
The power servo and master switch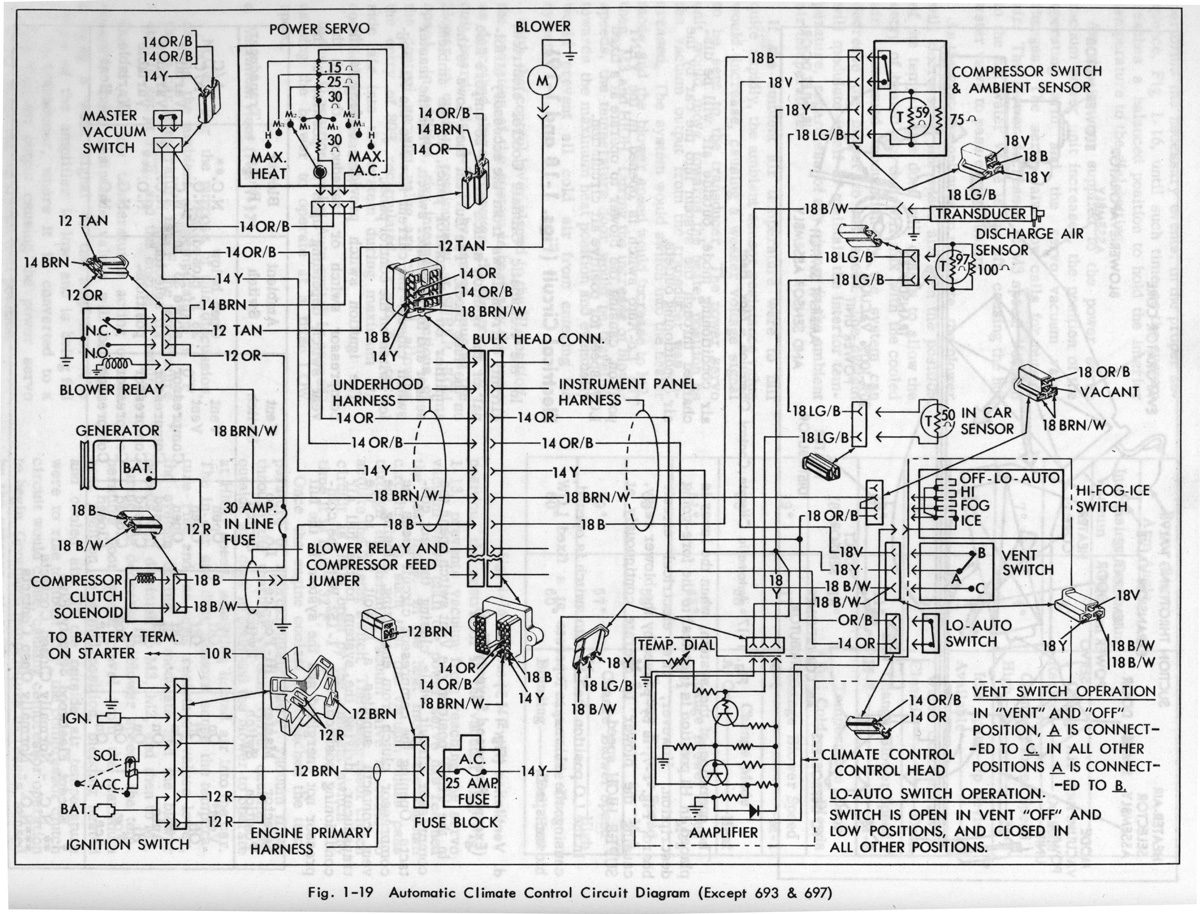
The electrical circuit of the Air Conditioning system of the 1967 Cadillac DeVille in a digram
Here is a video about the Master Switch that a gentleman posted on youtube
Cruising night with friends
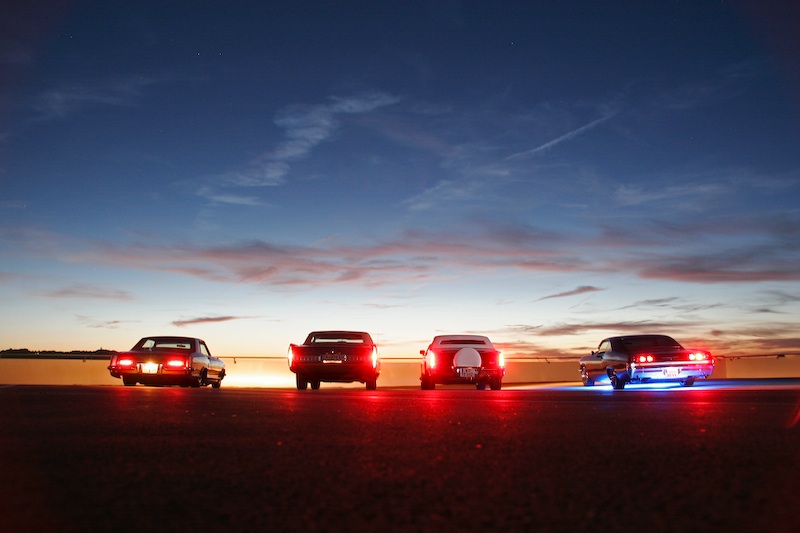
67 gets new fuel filter
Eventually I made it and when everything was back together, the bowl leaked. So I had to re-open everything. I readjusted the gasket and now everything is tight. The old filter was very dirty, because at the last big service I forgot to replace it...
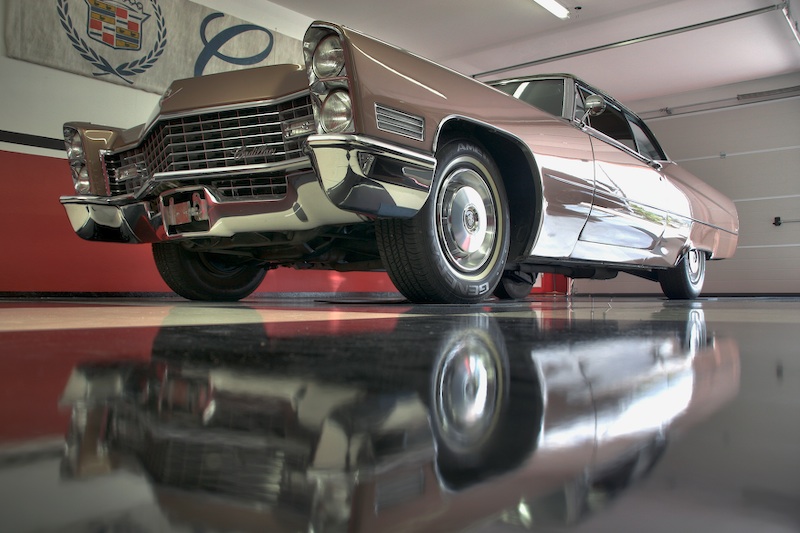
Two new pictures of my 67 added
I´ve added 2 images of the 67 in the new garage to the 67´s image gallery.

Preparing the 67 for the 2007 season
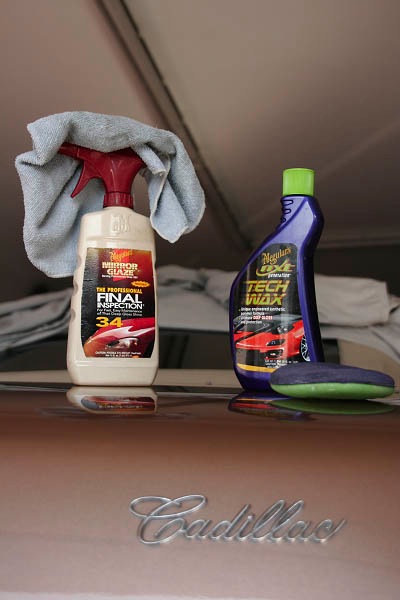
I started to clean the car and gave it a new coat of wax. In about 2 weeks I will bring it back to live and hopefully drive it a little bit more than last year when I only did about 300 miles.
1966 Cadillac Coupe deVille (15)
1967 Cadillac DeVille (54)
1967 Cadillac Eldorado (71)
1971 Lincoln Continental Mark III (23)
1974 Cadillac Coupe deVille (45)
1978 Cadillac Eldorado Biarritz (24)
1996 Buick Roadmaster (19)
Car Shows (53)
Cruising (4)
For Sale (3)
Garage Stuff (32)
Pacer (1)
Restoration (137)
Various (55)
Video (16)
Website News (30)
- 6 way power seat
- 8-track
- 10 Ohm
- 429
- 1932
- 1957
- 1958
- 1958 Cadillac Eldorado Seville
- 1958 Cadillac Repair Tip
- 1959 Cadillac Eldorado Seville
- 1964
- 1965
- 1966
- 1966 Cadillac Coupe deVille
- 1966 Cadillac Repair Tips
- 1967
- 1967 Cadillac DeVille
- 1967 Cadillac Eldorado Repair Tip
- 1967 Cadillac Repair Tip
- 1967 Eldorado
- 1968
- 1970 Cadillac Eldorado
- 1971
- 1971 Lincoln Continental Mark III
- 1974
- 1974 Cadillac Coupe DeVille
- 1974 Cadillac Repair Tip
- 1976
- 1977
- 1978
- 1978 Cadillac Eldorado Biarritz
- 1978 Cadillac Repair Tip
- 1980 Cadillac Eldorado Biarritz
- 1996
- 2012
- 2014
- 2017
- 2018
- 2019
- 2022
- 2023
- 3063206
- 7027235
- 7800483
- 7805675
- 7805676
- 12355706
- 17058531
- 17059968
- 17059969
- 22010515
- 22010661
- A.I.R
- A6
- AC
- AC Compressor
- AC Electrical Diagram
- ACC
- Accelerator Pump
- Accelorator pump
- Actuators
- Adriatic Blue Metallic
- Ads
- Aftermovie
- Air Pump
- Aircondition
- AIRPUMP
- ALC
- Alternator
- AM
- AM-Transmitter
- Antenna
- Anti Rattle Clips
- Antique Gold
- Arizona Vintage Parts
- Arrival
- Article
- ASC
- Ash Tray removal
- ATC
- Atlantis Blue Firemist
- Austria
- Austro Classic
- Autolite SP-459
- Automatic Seat Back Release
- Award
- Banner
- Barn Find
- Battery
- Battery Tray
- Beach Race
- Bearing
- Bendix
- Biarritz
- Bigfoot
- Bill Hirsch Engine Enamel
- Bleeder Screws
- Blower
- Bolts
- Borg
- Brake Booster
- Brake Fluid
- Brake Gray
- Brakes
- Broken Bolt
- Brougham
- Bucket seats
- Buick
- Bumper End
- Bushings
- Cadillac
- Cadillac BIG Meet
- Cadillac BIG Meet
- Cadillac birthday cake
- Cadillac Blue
- Cadillac Color Selections Dealer Book
- Cadillac Coupe deVille
- Cadillac Dealer
- Cadillac Meeting
- Cadillac Mini Meeting
- Camaro RS
- Caorle
- Car Show
- Carburetor
- Card
- Carpet
- Carter AFB
- Cavalry Twill Vinyl
- CB
- CBM
- CCCD
- Choke
- Christmas
- Citizens Band
- Classic Cadillac Club Deutschland
- Clay Towel
- Cleaning
- Clock
- Clockwork
- Clutch
- Clutch Coil
- Collector
- Colonial Yellow
- Color Coded Springs
- Commercial
- Compound
- Compressor
- Condenser
- Continental Mark III
- Control Head
- Conversion
- Convertible top
- Coolant
- Corona
- Cowl
- Cruise Control
- Cruising
- CV Boots
- CV JOINTS
- D6230
- Dash Trim
- Decal Removal
- Decals
- Decoration
- Dehumidifier
- Delco Moraine
- Der Standard
- detailing
- Deville
- Diagnosis Chart
- Diagram
- Dial
- Digital Rotary Drum Clock
- Diner
- Disc Brakes
- Distributor
- Diverter Valve
- Door Jamb Switch
- Door Rubber Conduit
- Dornbirn
- Dot3
- Drive Shaft
- Driving tour
- Drum brakes
- Dry Ice Blasting
- Dry Ice Cleaning
- DVD
- Eastwood
- Eldorado
- Electric Choke Thermostat
- Electrical schematic
- Elvis
- Engine Bay
- Ep
- Epoxy floor
- Europe
- Evaporator
- Exide
- Factory Markings
- Fender Skirt
- Floor
- Flushing
- Foam
- For Sale
- Front AXLE
- Front brakes
- Front bumper filler
- Front Floor
- Front wheel bearing
- Fuel Filter
- Fuel Pump
- Fuel Sending Unit
- Fusible Link
- Garage
- Garage Cabinets
- Gasket
- GE
- Gear indicator
- General Time
- Glove box light
- Grand European
- H4
- Haus of Hot Rod
- Headlight Actuator
- Headlight doors
- Headlights
- Heater Core
- Heater Hose
- Heater Valve
- High Idle
- Holley
- Honest John
- Hood
- Hood Emblem
- Hood Ornament
- Hose Clamp
- Hot Choke
- Hot Water Valve
- HotRod
- How to
- Hödlmayr
- Ignition Diagram
- Illuminated Entry
- John D‘Agostino
- John Foust
- Klassikwelt Bodensee
- Kremsmünster
- LaSalle
- Leather seats
- Light Switch
- Limited
- Lincoln
- Lincoln Mark III Repair Tip
- Low Mileage
- Magazine
- Marilyn Monroe
- Mark III
- Master Cylinder
- Master Switch
- Master Vacuum Switch
- Media Blasting
- Meeting
- Meguiras
- MK II
- Mobile
- Model
- Moldings
- Mom
- Mopar Nationals
- Mostkost Kustom
- Movie
- Neon
- NOS
- Oberösterreicher des Tages
- oilchange
- ORF
- Overspray
- Pacer
- Paint
- Paint correction
- Paintjob
- Part Number
- Parts
- Patch Panel
- Perfect Circle
- Permabag
- Persian Lime
- Photo shooting
- Photoshooting
- Pictures
- PinUp
- POA Valve
- Power Antenna
- Power Servo
- Power Vent Windows
- Power Window
- Printed Circuit Board
- Programmer
- Pulley
- Quadrajet
- Quarter Panel
- Quartz Conversion
- R134
- Radiator
- Radio
- Rattle
- Rear brakes
- Rebuild
- Recalibrate
- RediRad
- Reed Switch
- Relais
- Relaunch
- Removing Overspray
- Repaint
- Repair
- Restoration
- RIP
- Roadhouse
- Roadmaster
- Rochester
- Rocker Arm Cover
- Rocker Panel Extension Clips
- Rostio
- Rotary Valve
- Rotterdam
- Rupes
- Rust removal
- Rust removal gel
- Sabre Wheels
- Sand Blasting
- Sandblasting
- Screed
- Season Greetings
- Seasons Greetings
- Seat Back Locks
- Seat Padding
- Seat Transmission
- See through ornament
- Self adjusters
- Sepp's Garage
- Seville
- Sheetmetal
- Shocks
- shop manual
- short
- Sign
- Solenoid
- Spark Plug Wire Routing
- Speakers
- Special Award
- Speed Bleeder Screws
- Splash Guard
- Starter Diagram
- Starter Motor
- Steering Column
- Storage
- suction throttling valve
- sunroof
- suspension
- Swirl Mark removal
- Switzerland
- T3
- Taillight Cover
- Texan´s Choice Award
- Thermostat
- Tilt and Telescope
- Time capsule
- Tomsclub
- Torque Specifications
- Tower Hose Clamp
- Towtruck
- Transducer
- Transmission
- transmission control selector
- transmission control selector indicator light
- transmission shift indicator
- Treadle Vac
- Treffen
- Tri-Band
- Troubleshooting
- Trunk Cardboard Kit
- Trunk lining
- Trunk to bumper cover
- Turn Signal Switch
- TV
- Typisierung
- Ultimate Garage
- Underbody
- Undercarriage
- Undercoating
- Undercoating Removal
- Vacuum Booster
- Vacuum diagram
- Vacuum hoses
- Vacuum Master Switch
- Vacuum Schematic
- Vacuum Valve
- Valve Cover
- Various
- Vent Window Switch
- Vibration
- Vibrator
- Vicodec roof
- Video
- Vinegar
- Vinyl Roof
- Visitor
- Washer Fluid Float
- Washer Fluid Low Level Indicator
- Water Pump
- Wax
- Weatherstripping
- Website News
- Westclox
- Wheel Bearings
- Wheel Housing
- Wiesbaden
- Windlace
- Winter
- Wiring
- Wiring Diagram
- Wonderbar
- Workbench
- Zurzach