 GERALD´S CADILLACS - NEWS
REPAIRING THE CLOCKS OF THE 1958, 1966 AND 1967 CADILLAC
So it was time to service some of the clocks which stopped working over the years.
The clock in the 66 did not work at all.
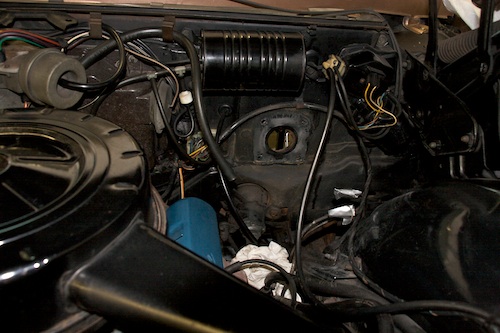
It's extremely simple to remove on the 66 as you can get it out of the instrument panel by just unscrewing one bolt.
The clock was very dirty in the clock work and needed a good cleaning and some good lubrication. Also the contact of the coil was a little worn and this was fixed. It then happily ticked back to life and now works perfectly.
The clock on my 58 stopped working a couple of years ago. So it came out as well. It's a little more complicated to get it out though...
When it was finally out - it could be seen that the coil was burnt and that it needed some very good cleaning as well. Some of the melted insulation material was all over the clock mechanism and of course I had no spare coil for it - so the original one had to be rewound with some good wire from a left over light solenoid...
Wow - this really took a while - but now the clock works perfectly again!
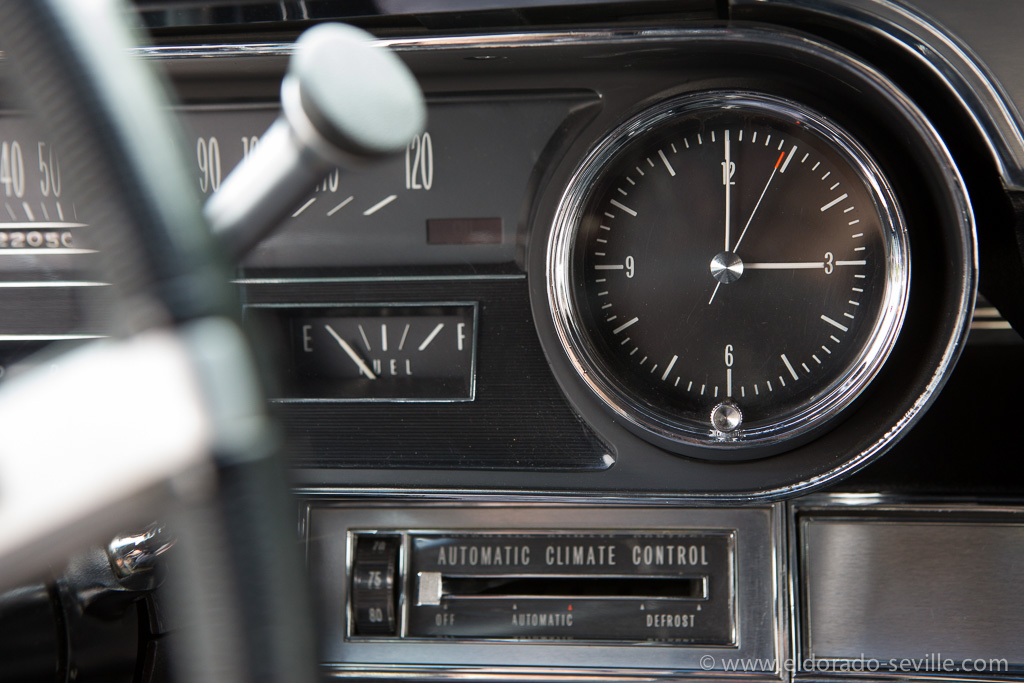
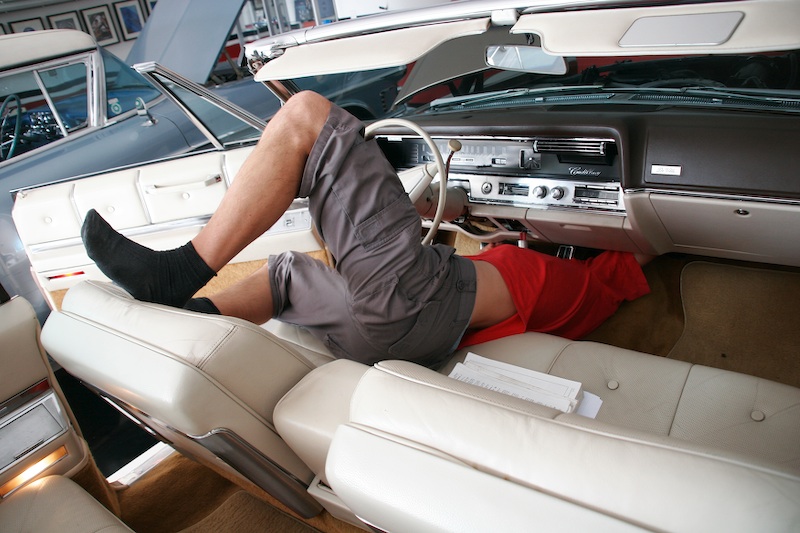
I was not so lucky with the clock on the 67 Eldorado which only worked when the car was warm. To take it out you have to remove the upper dash and then get out some light bulbs and disconnect it from the printed circuit.
It was also cleaned and lubricated and the clock worked, but it made a very loud noise when the coil rewound the spring of the clock.
The sound got better over night, but then the clock stopped working completely... It's a Westcox clock which uses a double coil and is much more complicated to rebuild than the Borg clocks. Its also almost impossible to find parts for it, as Borg clocks are much more widely used.
Looks like I will need a new 1967 clock and replace it with a Borg unit :-(
The clock in the 66 is now working perfectly again.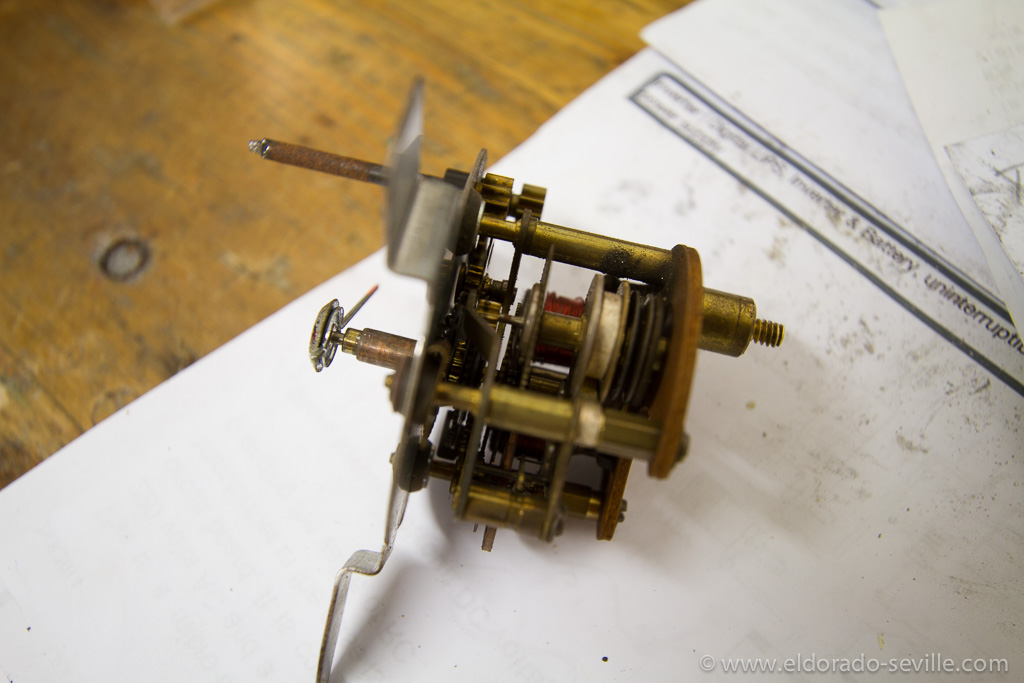
The disassembled clock of the 58 Eldorado.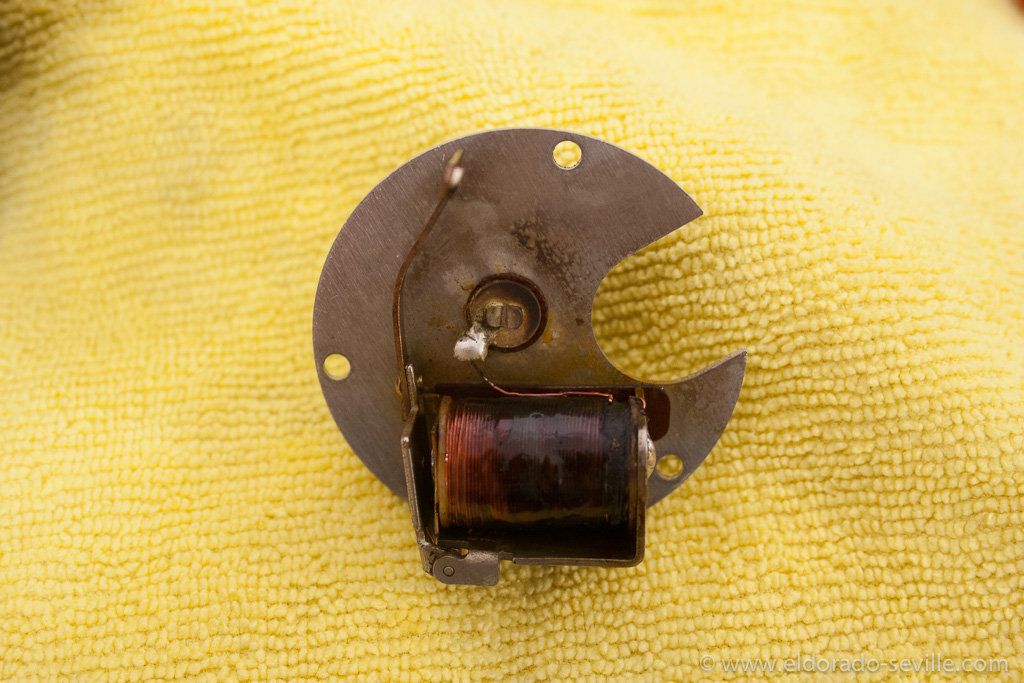
The coil was burnt on the 58 clock.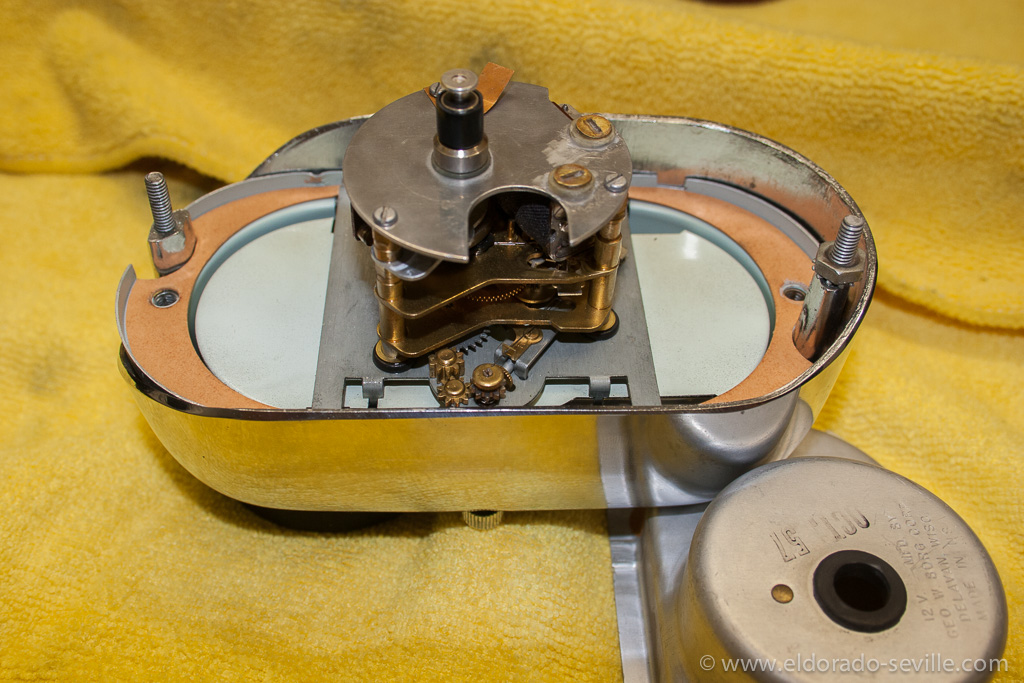
Fully cleaned clock. 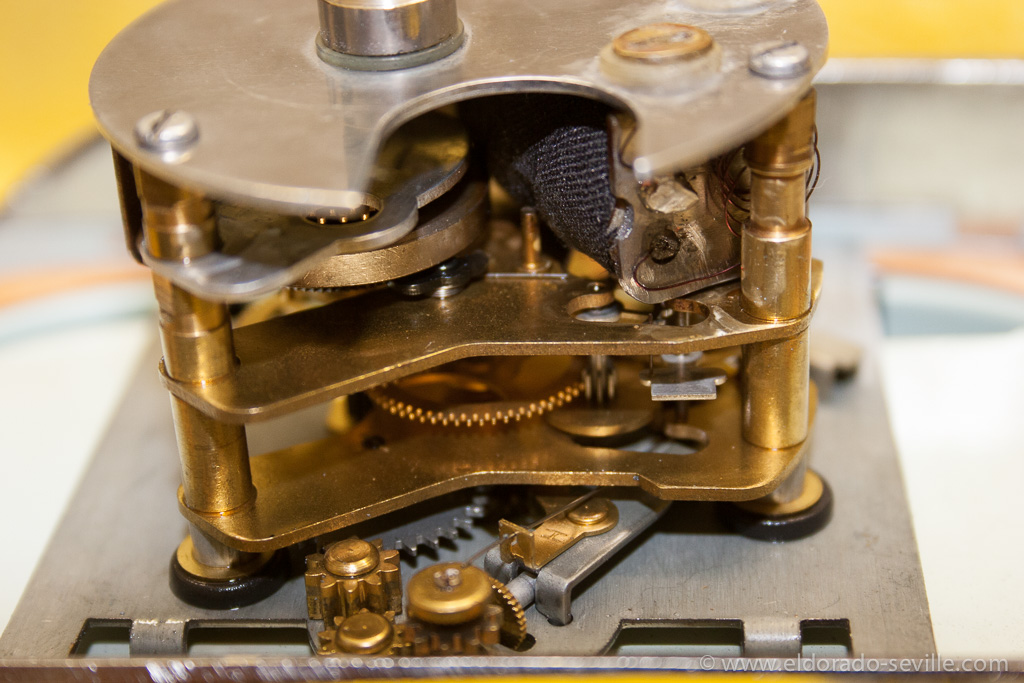
Back together with a rewound coil.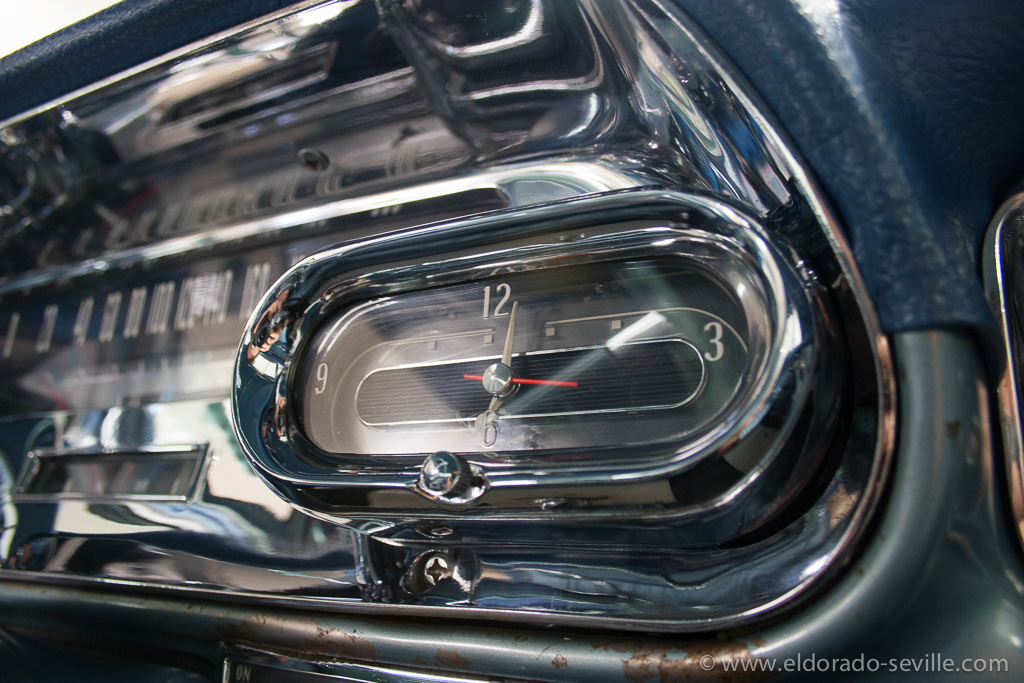
Back in the car - working perfectly again.
Cleaning the Vicodec roof of the 58 and the convertible top of the 67.
I have tried a variety of cleaning methods and cleaners over the years.
This time I used Meguiars professional vinyl cleaner #M39 ( I think this product is no longer available and they only offer #M40 now) along with their stiff nylon brush followed by a special nano foam sponge which is called "dirt eraser". It really removes dirt very thoroughly even from textured materials.
Both tops came out very clean - I then used Meguiars Convertible top impregnation to protect them from getting dirty again soon. It also weatherproofs the tops. (not that I would ever drive in rain with my cars... ;-) )
I have heard really good things about Meguiars Convertible Top Cleaner as well - will try it out next time...
Disclaimer: I´m not getting paid or receive any free products from the companies I´m mentioning here. If I like products or services I mention them and if I dislike things I will also talk about them in a less positive way ;-) I just like to share my findings.
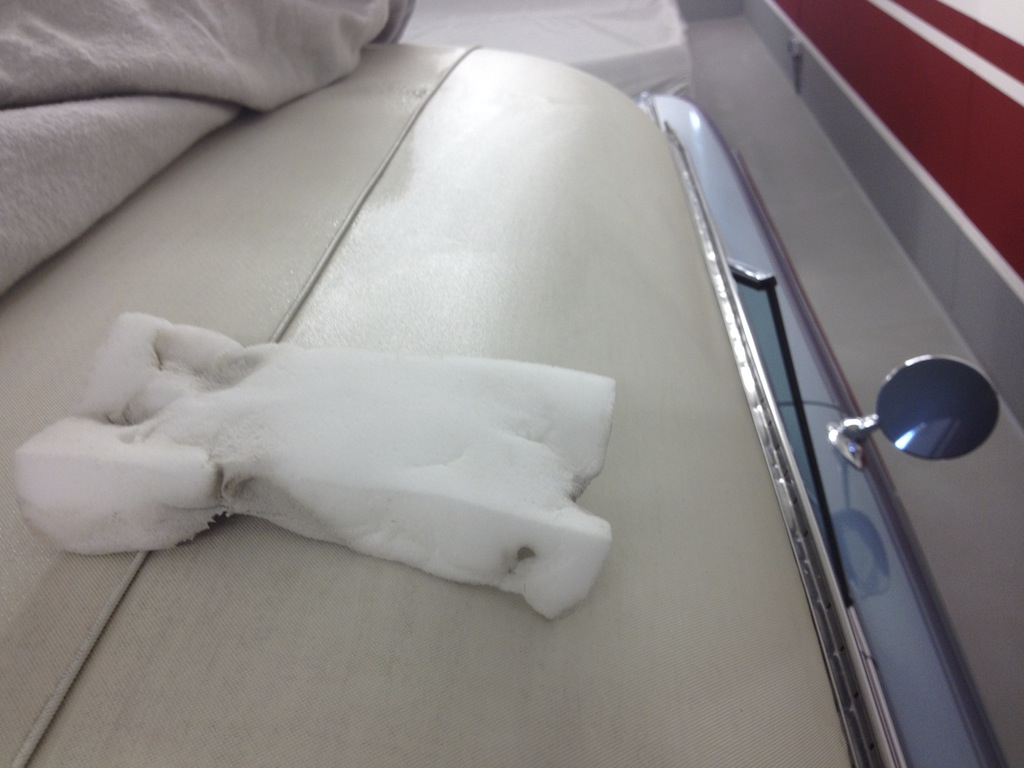
One of the dirt eraser sponges in action on the original roof from 1958. White tops are a pain to keep clean...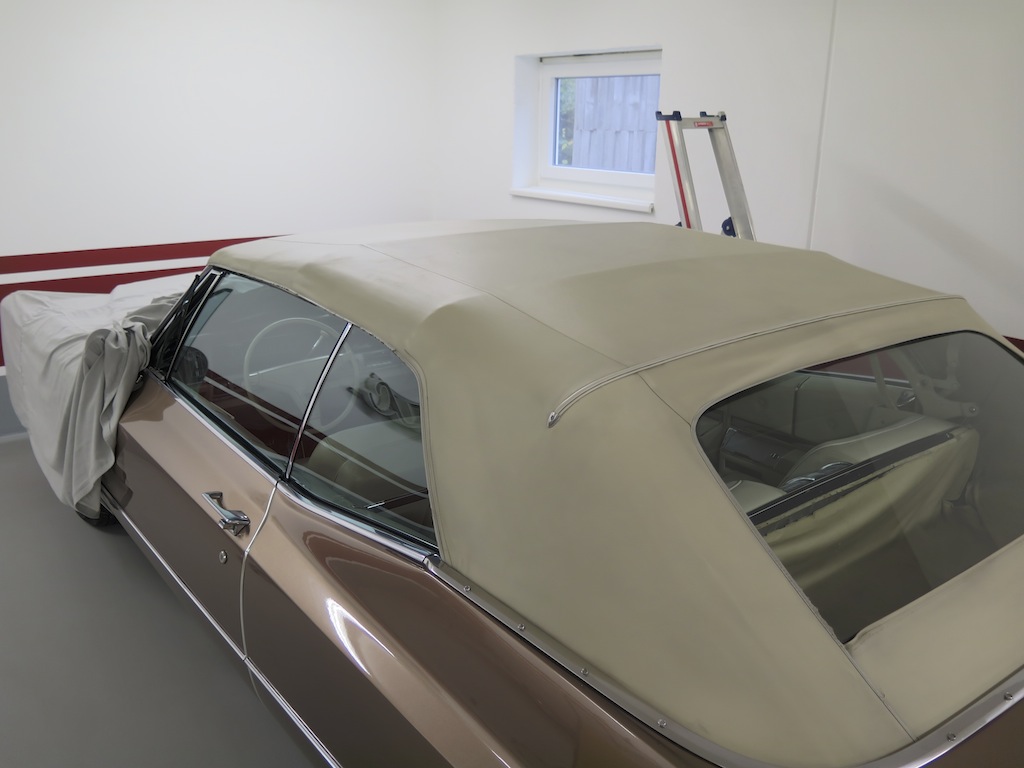
Looking o.k. now - its still the original top from 1967...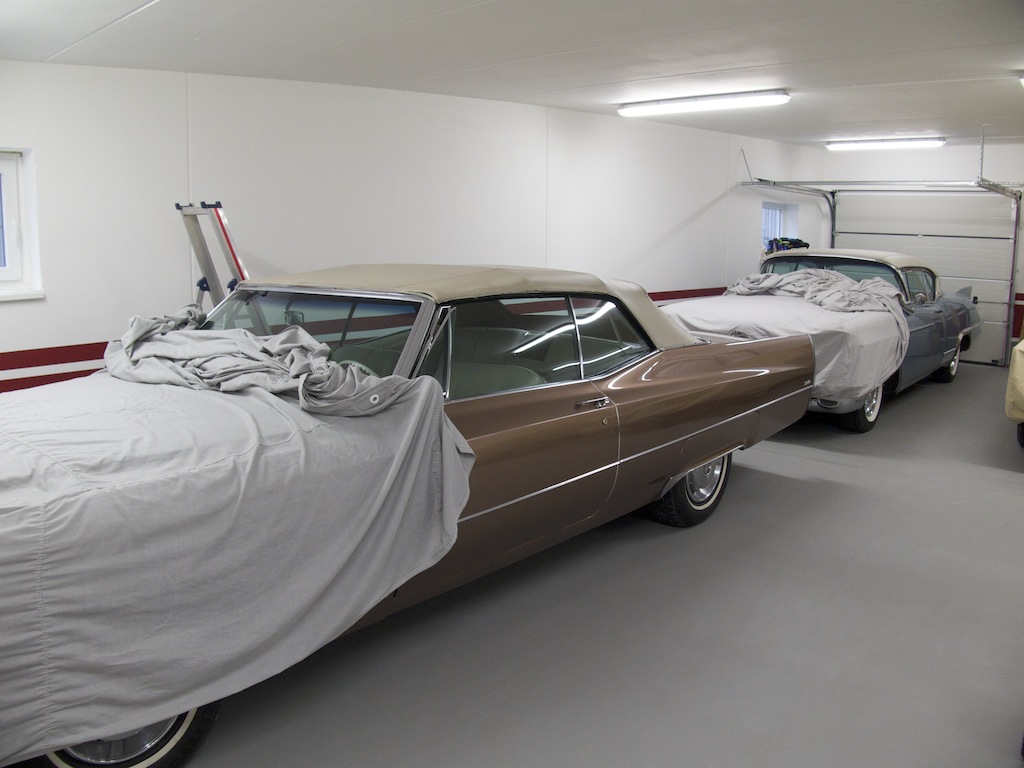
In the garage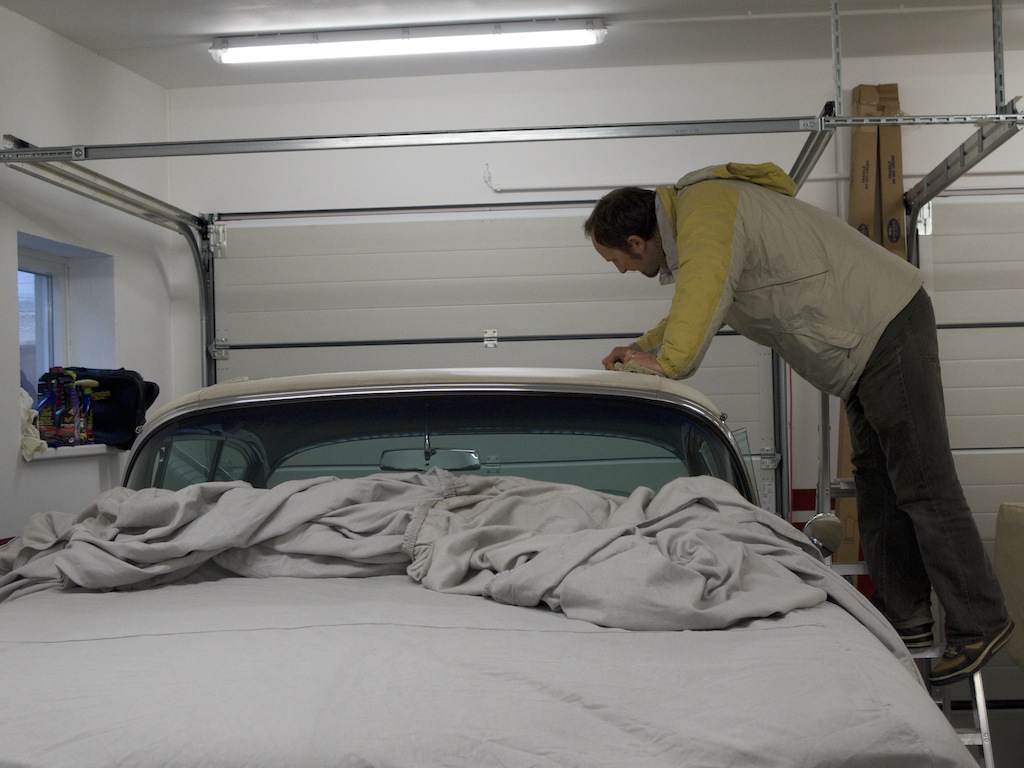
Thoroughly cleaning the Vicodec roof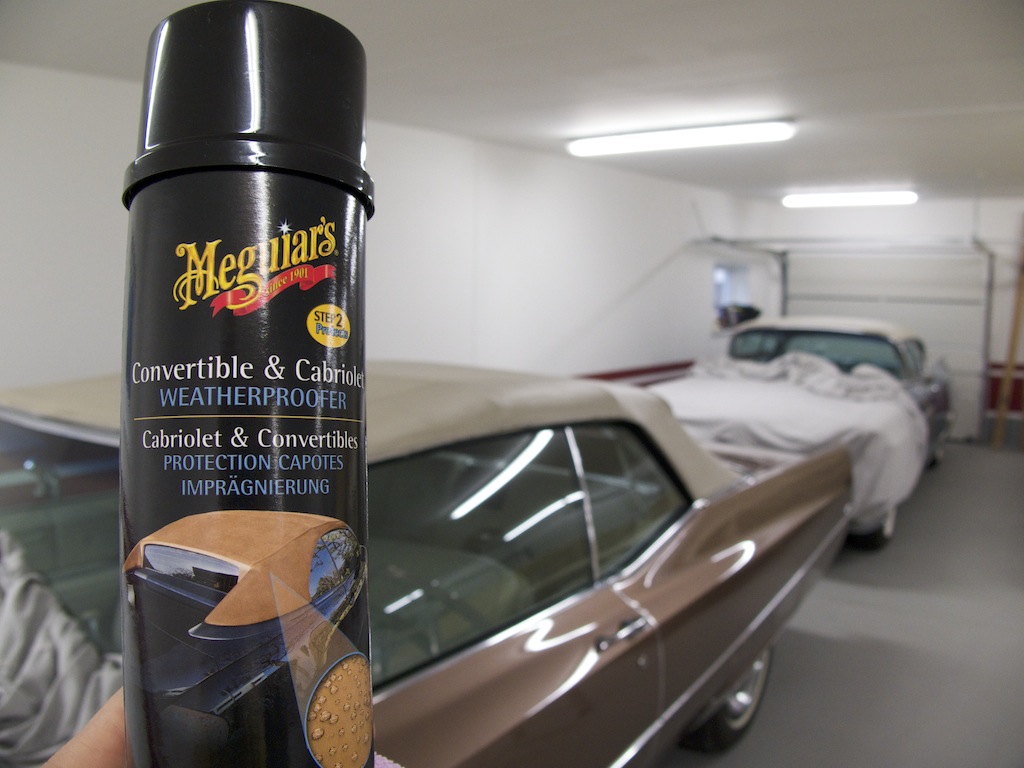
Meguiars weatherproofer for additional protection
Preparations for the Cadillac BIG Meet 2012
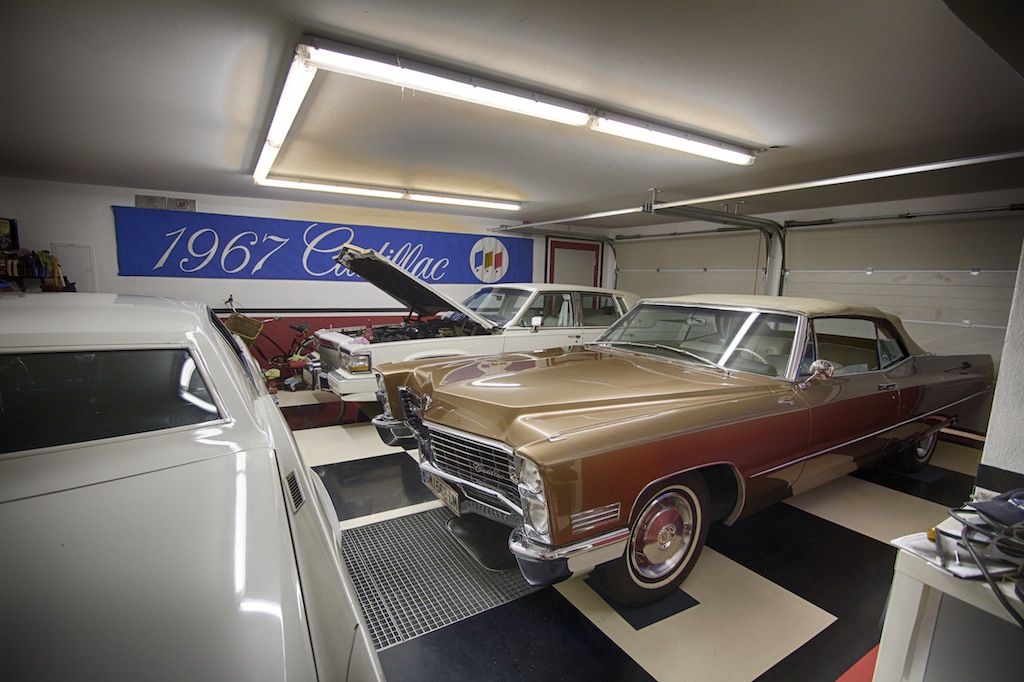
In the garage with the Brougham and the 1967´s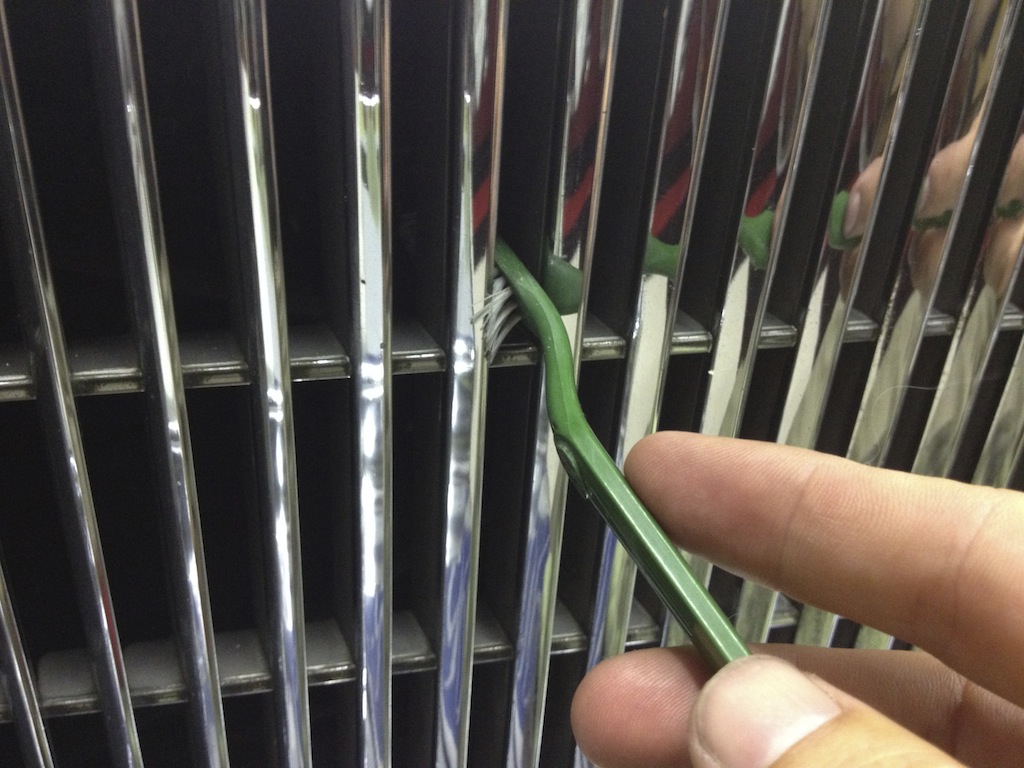
Detailing the grille of the Brougham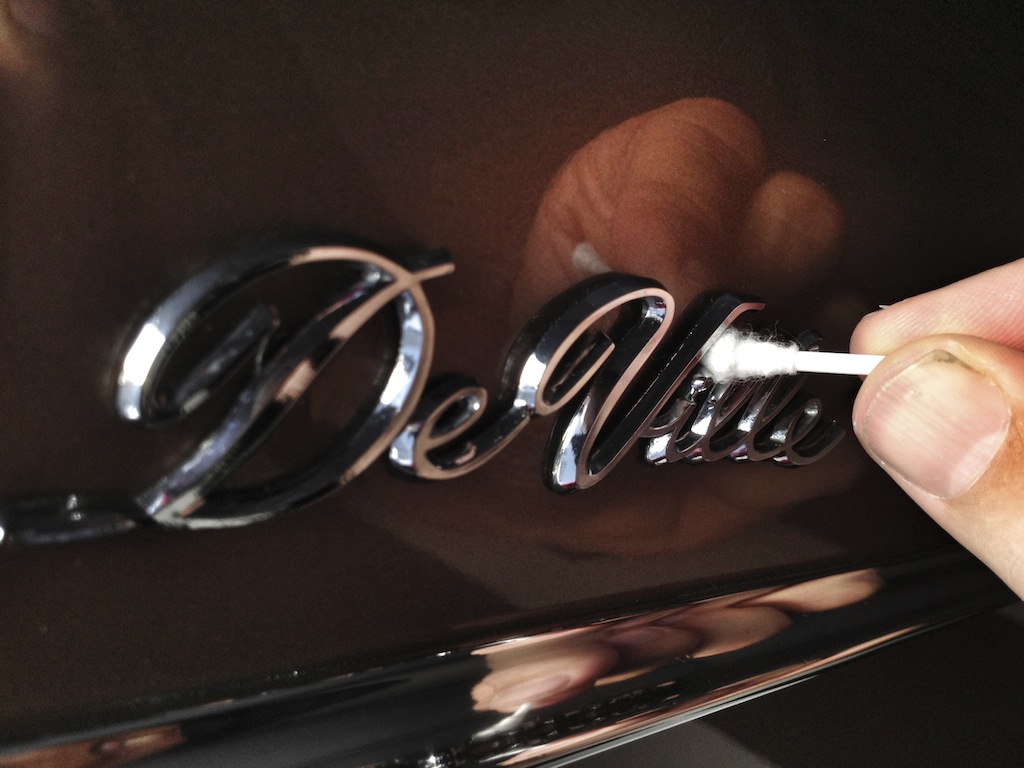
Detailing work
Cadillac BIG Meet 2012 - Bad weather but great cars.
86 Cadillacs from the nineteen forties to the present day have been put on show and many of them were awarded with prices from a distinguished international jury.
Even with this year’s number of cars below it’s record mark of 160 – due to the rather unfavorable weather situation – the Cadillac BIG Meet in Kremsmünster is still regarded as the largest annual Cadillac meeting in Europe.
It is open to all Cadillac owners, regardless of age and history of the vehicle.
This year, the special focus was on cars from the nineteen seventies, represented by 20 cars from this decade, with the Eldorado convertibles clearly outnumbering other body styles.
Organizer Georg Pfeiffer and moderator Ulla Theussl handed over the trophies in pouring rain this year – but the weather could not dampen the enthusiasm of the participants and the spectators. We took the 1967 DeVille this year.
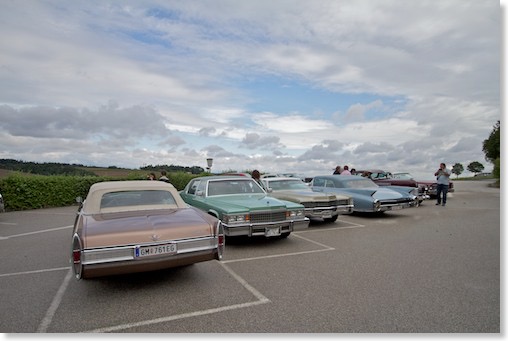
On the day before the meeting we held a driving tour for 40 registered Cadillacs. The participants were rewarded with breathtaking vistas along the whole route.
You can find a huge gallery of the pictures my wife and I shot from the driving tour and the show on the Cadillac BIG Meet website.
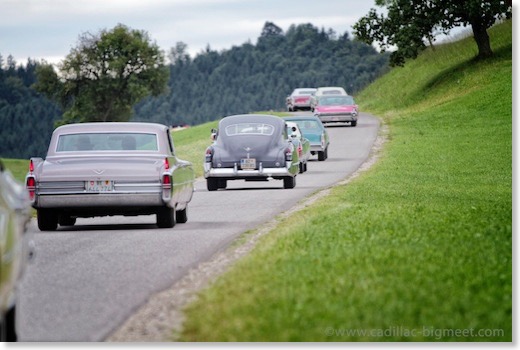
At the driving tour!
My personal favorite car at the show - the 1958 Eldorado Brougham!
This years special theme was the 1970´s Cadillacs
Front wheel bearings replacement on my 1967 Cadillac DeVille
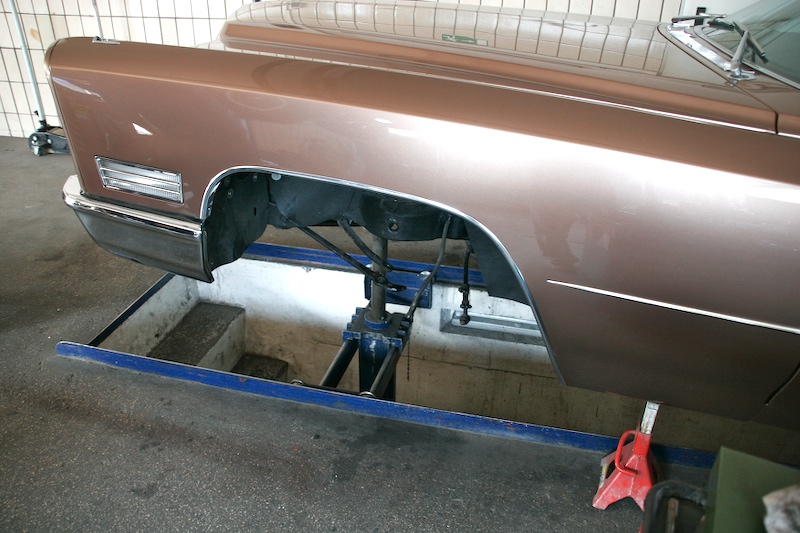
As we had the first really warm and sunny days this weekend, I took the car out of storage and put it into my old garage to do the work. It's a pretty easy job on the 1967 Deville - you do not even need any special tools or presses.
I got a set of inner and outer wheel bearings for both front axles from Rockauto.com - I got a set made by “Moog“ as I have heard good things about their quality.
You just have to remove the tires, remove the pin at the axle, remove the big nut and pull off the brake drum. The outer bearings can just be pulled out - the inner bearings have to be tapped out with a long screwdriver, as they are held in place by a dust cap. A very slight tap is all it needs to get it out. I cleaned everything and put the greased new wheel bearings in and put everything back together. I also readjusted the front brakes and also found that one of the new brake hoses was a little loose and loosing a little brake fluid, so I tightened it.
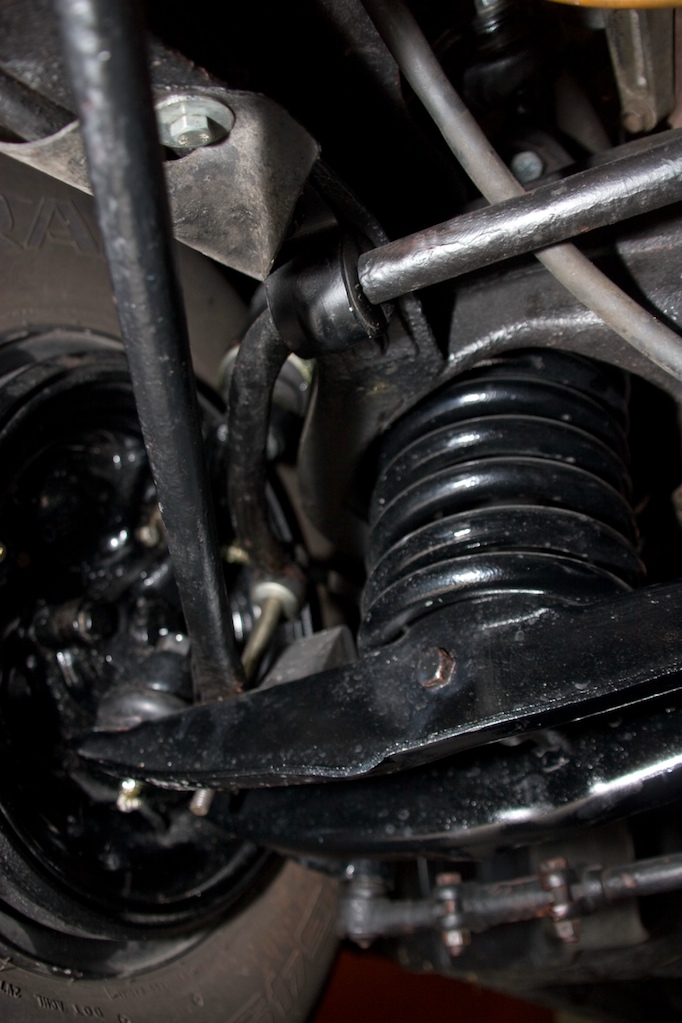
As I had the front wheel tires off the car - I also cleaned the entire front suspension and detailed it. Everything is squeaky clean now again. No more noise is coming from the wheel bearings now…
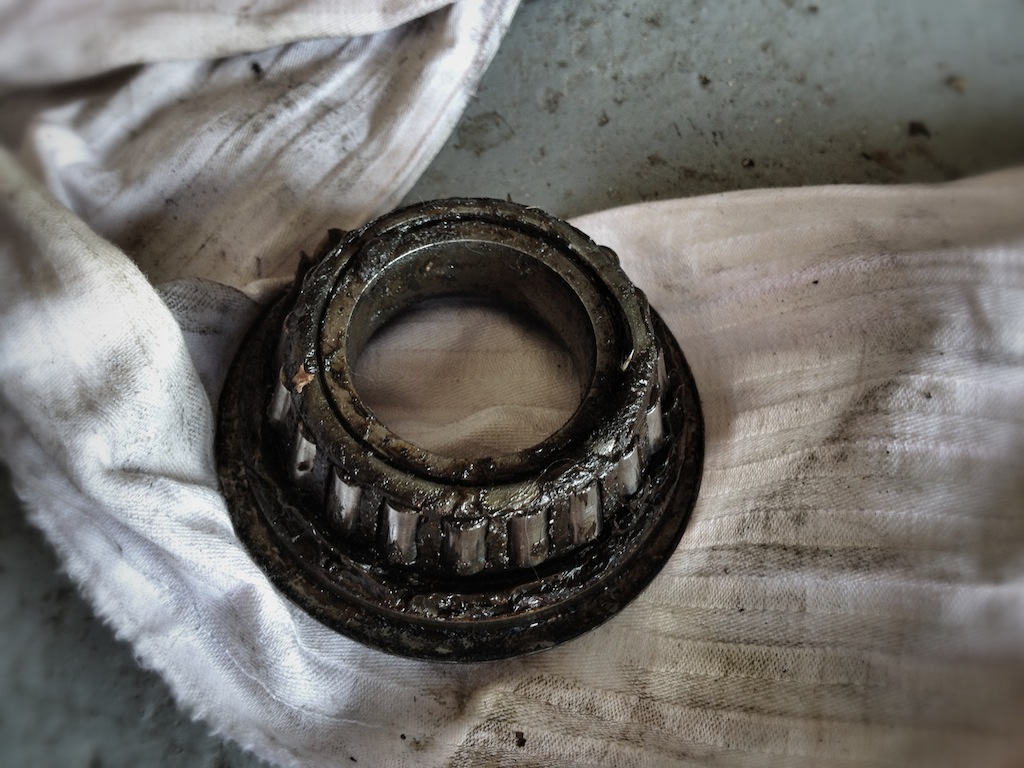
The old inner wheel bearing is out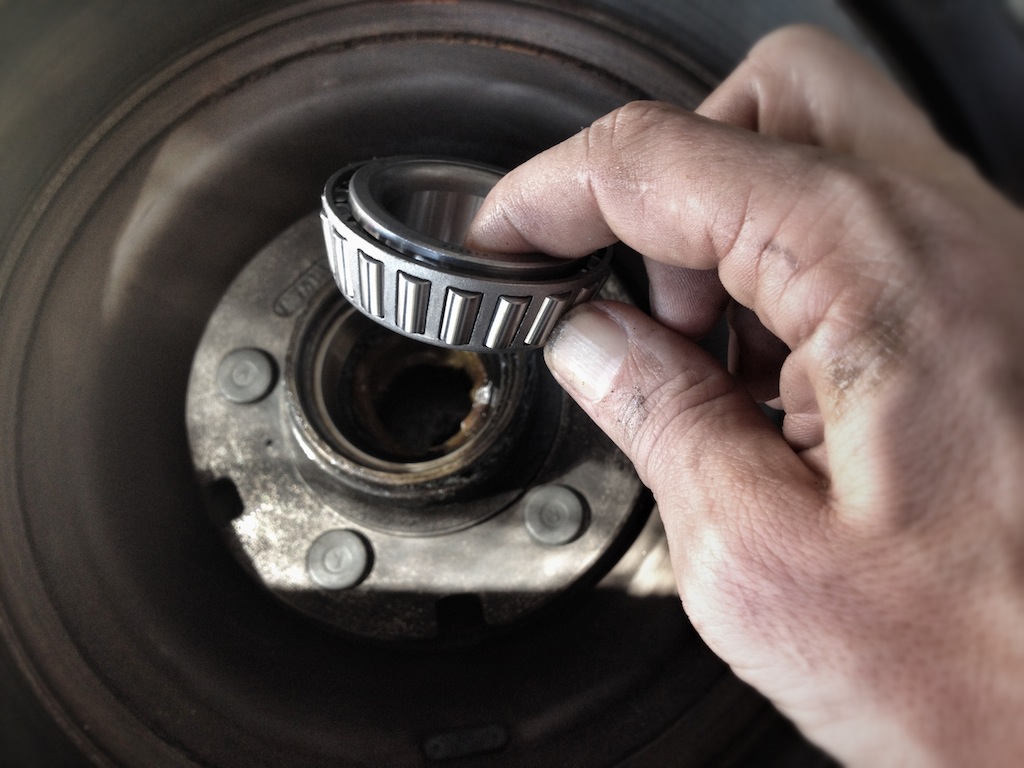
The new inner bearing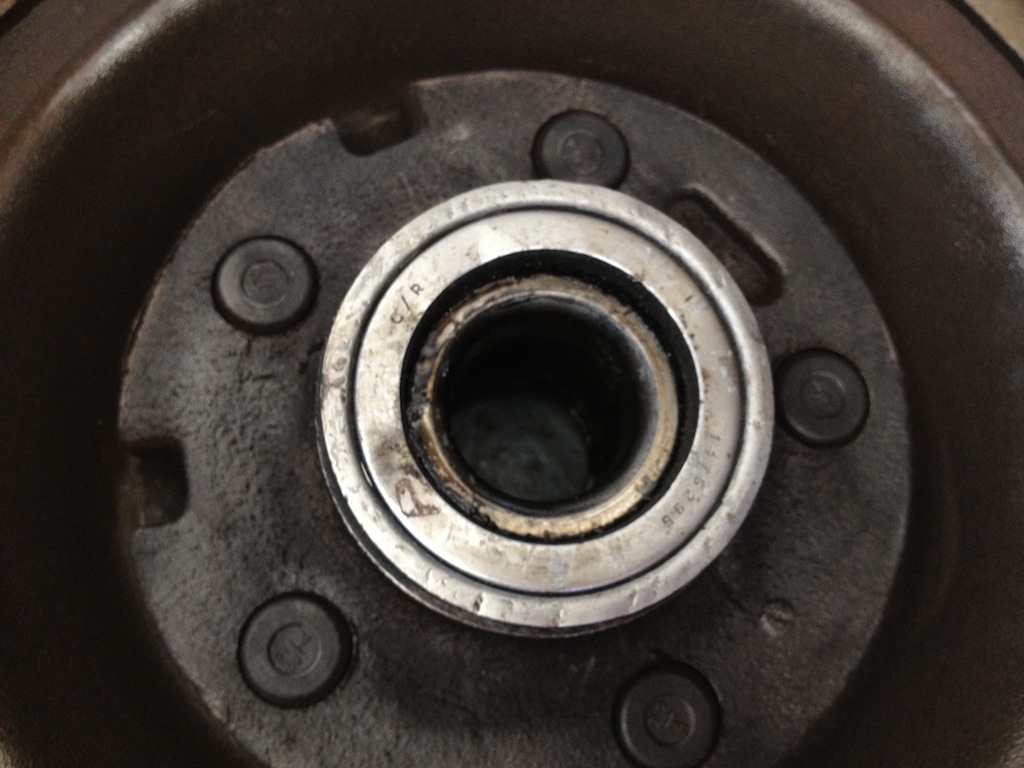
There is a dust cap which you have to tap out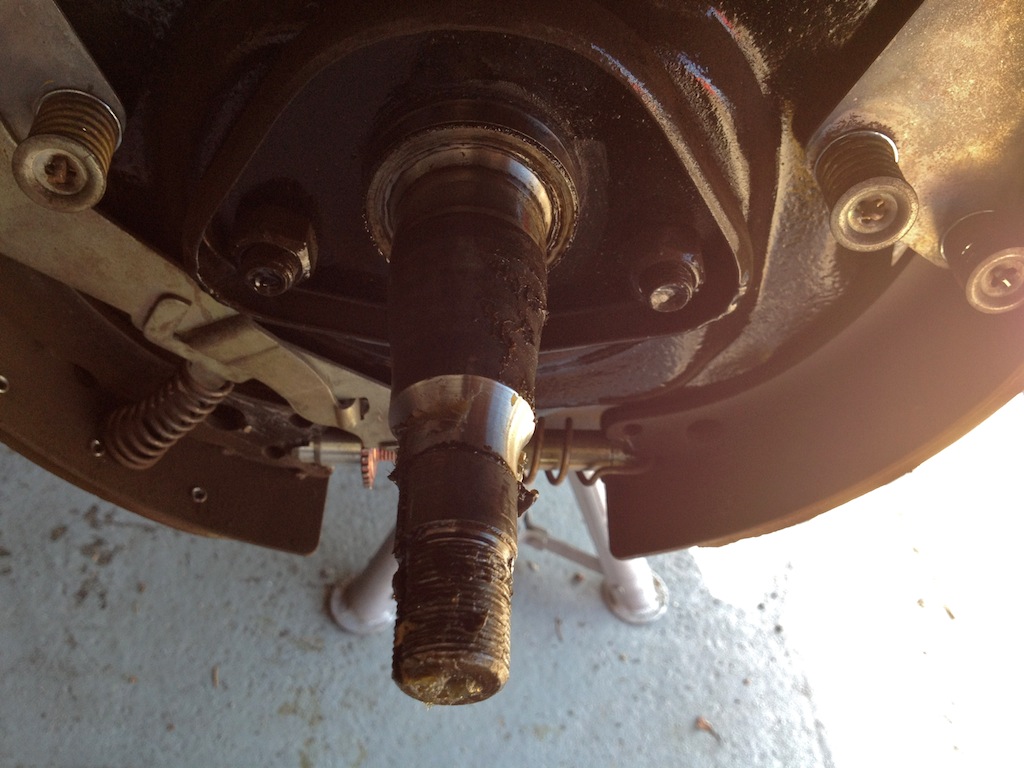
the front axle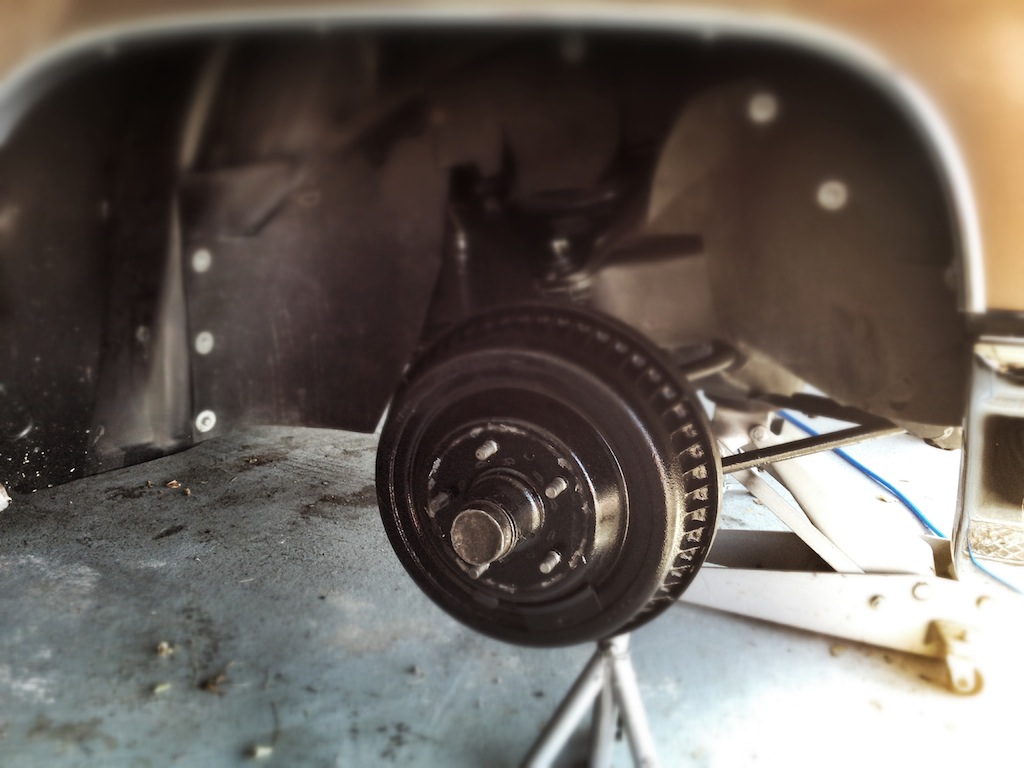
Back together - before detailing the wheel housing and front suspension
The cars are in winter storage :-(
The cars are now in their cosy garages and will all get a new wax-, lubrication- and thorough cleaning job during the next few weeks. I usually also disconnect all the batteries, give the weatherstripping and rubber a good coat of silicone spray and treat all leather areas with leather conditioner. I also clean the interior carefully and over-inflate the tires to make sure that they do not get any flat spots. I will also park the tires on styrofoam. I really hate winter and snow and I am already looking forward to next spring... Over the winter I will rebuild the starter motor of my 1967 Eldorado and detail the undercarriage. The Lincolns undercarriage will get a very good cleaning as well. The 67 DeVille will get some new front wheel bearings and probably a new wheel cylinder and power booster. The 58 Eldorado will also need new front wheel bearings. So there will be a lot of minor things that will keep me busy over the winter...
Below are some pictures of our very last cruising tour this week with the Mark III

Cruising through the scenic landscape of Austria looking down at a lake
The Mark III enjoying the last sun rays...
The whole family in the Lincoln - little Elliot is taking a nap as usual - nothing beats the soothing sound of the V8...
A Photoshooting with my Cars
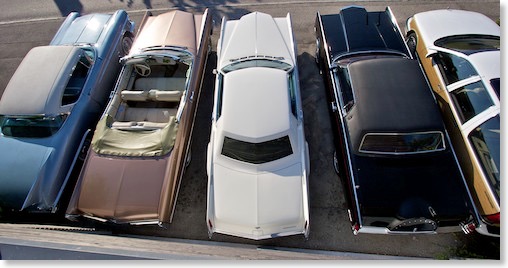
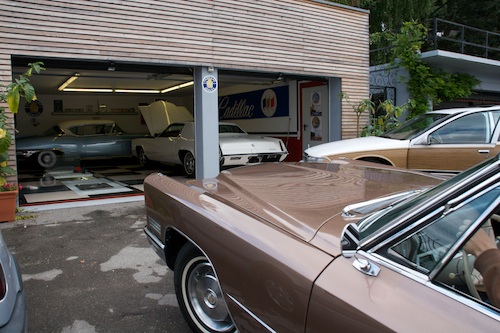
Seen from the roof top of the garage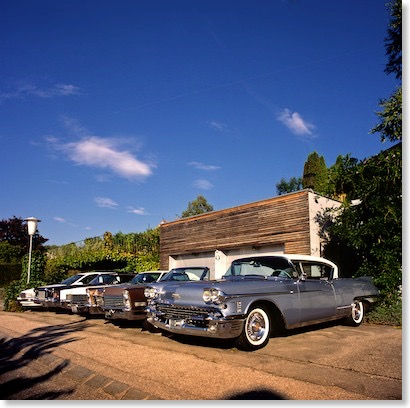
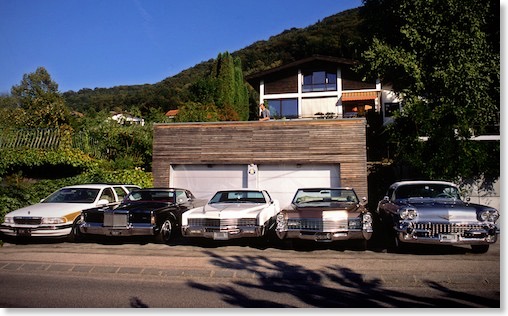
Most of my American cars in front of the garage...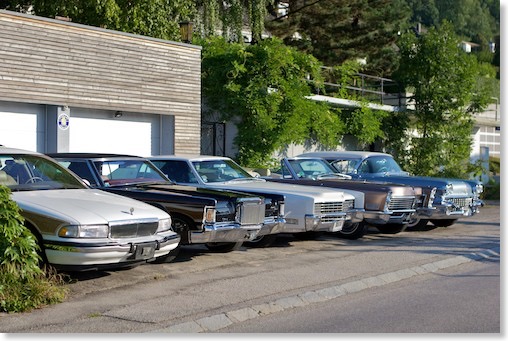
Replacing the rear shocks on the 67 DeVille
The right shock came out pretty easily and as planned - it was great to work with Richards awesome collection of tools he has in his workshop. I could not help my friends as much as I would have liked as I had snapped one of my ribs two days ago while changing tires and so I cant even hold a wrench properly at the moment... So my great friends did most of the work for me.
As it turned out the new Monroe shocks I had bought were delivered with one wrong bolt - the other 3 bolts were correct though. Fortunately I had a correct bolt as a spare from another set I had bought. When we wanted to take out the left shock we ran into a problem with the top bolt which would not want to loosen up. Its also pretty difficult to get access to it - as it is hiding behind the curve of the exhaust pipe. After 1,5 hours of sweating and bad cursing it finally gave up due to the help of a heavy duty metal saw. The new left shock went in pretty quickly afterwards but then it was already 1 am.... Thank you my friends for your great help and support!
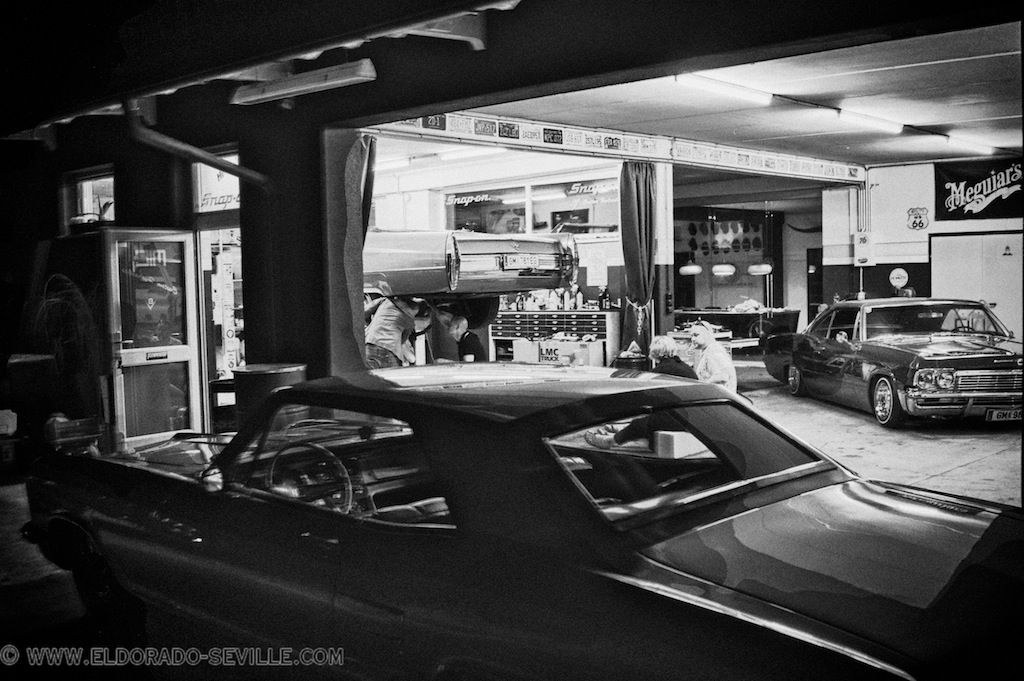
At work in Richards garage around midnight... In the background Richards 65 Impala and Alex´s 63 Riviera in the front...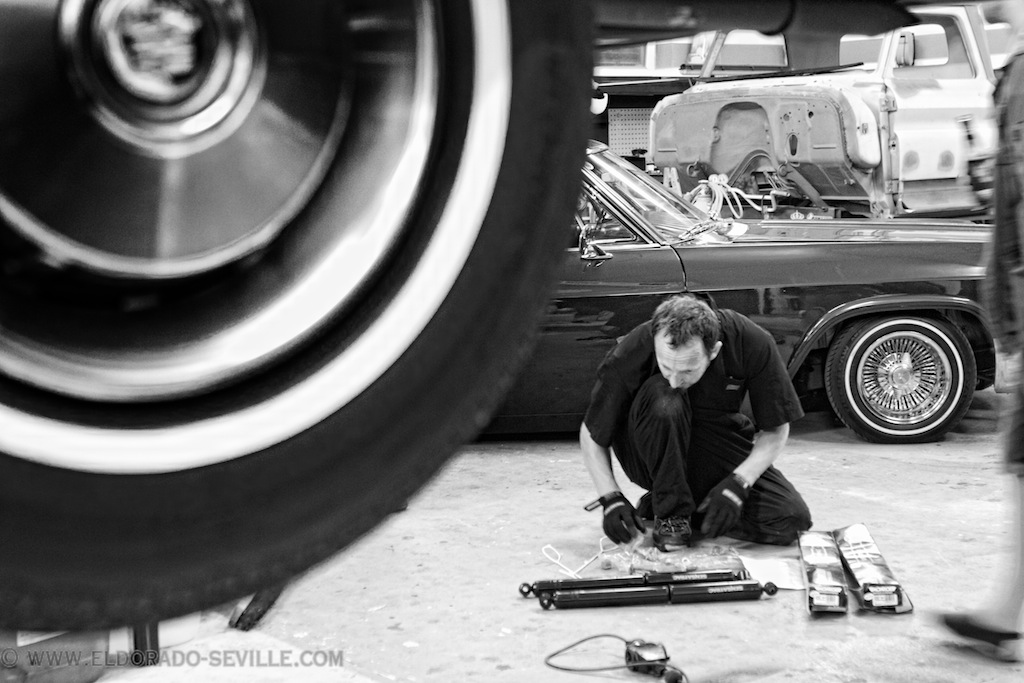
Unpacking the new shocks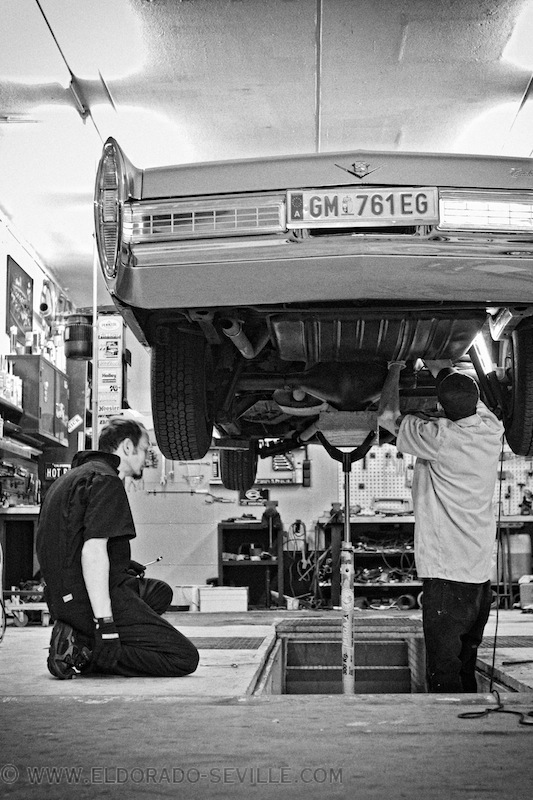
Richard and me at work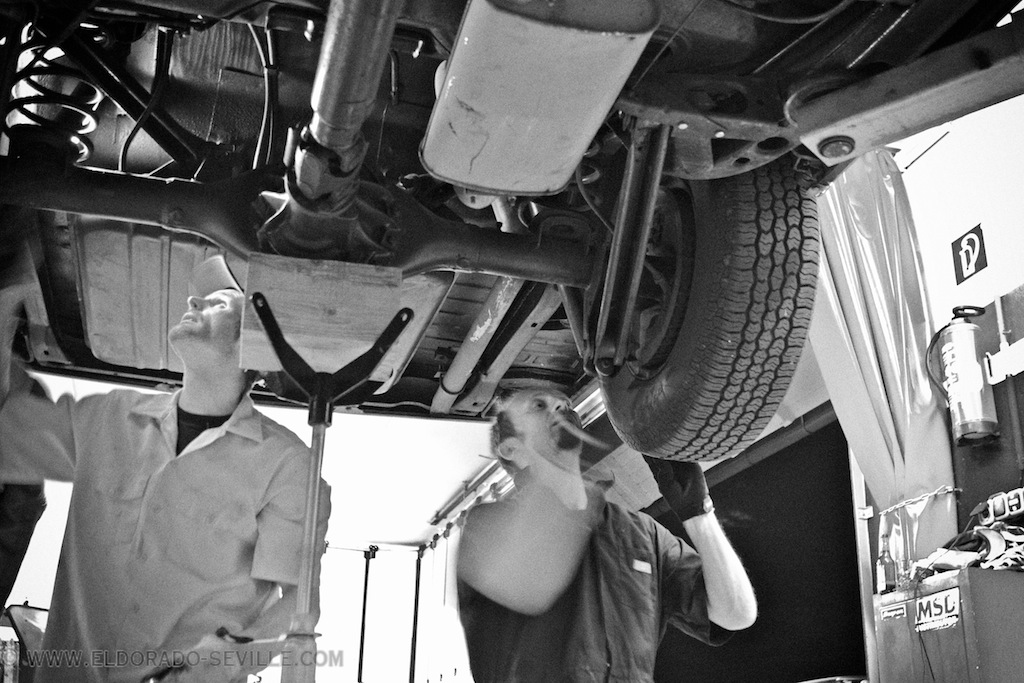
Unscrewing the old shocks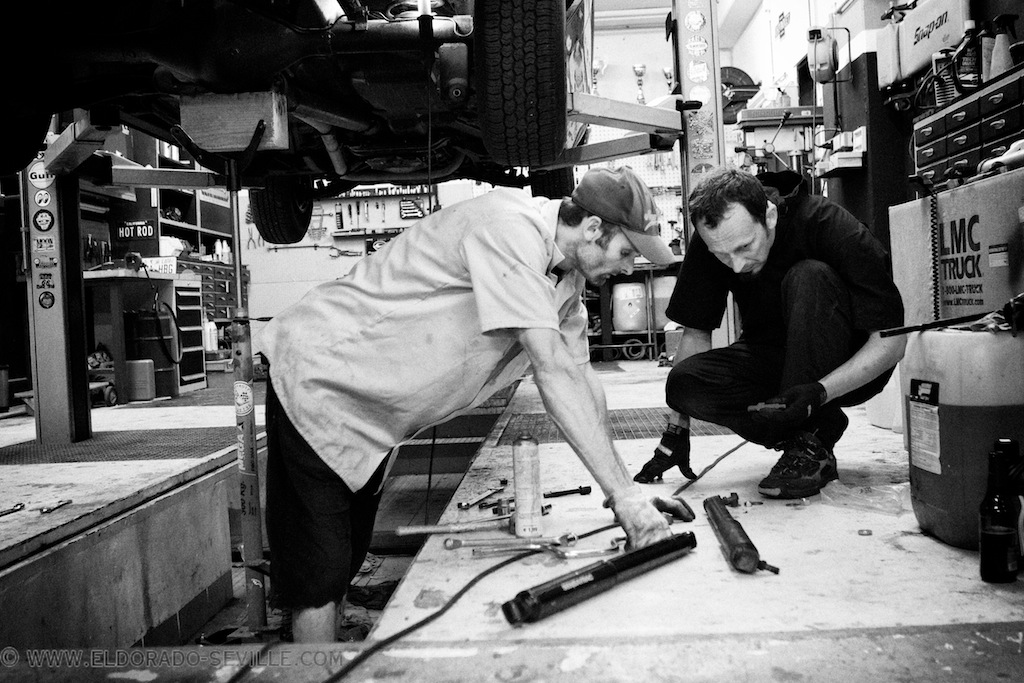
Figuring out how to mount the new Monroe shocks...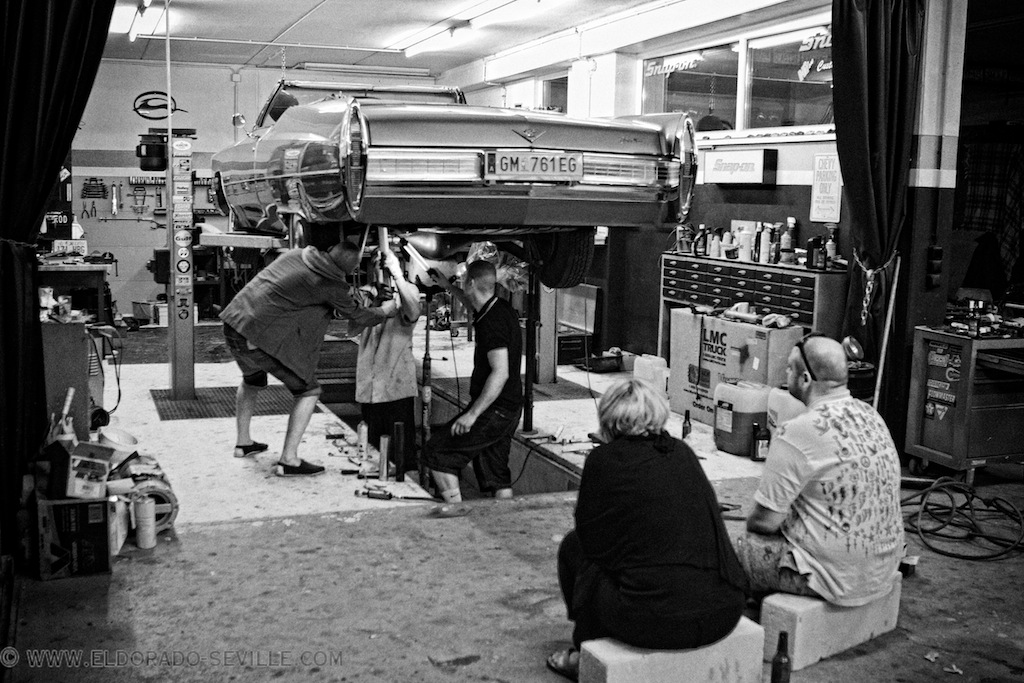
the left shock just did not want to come out...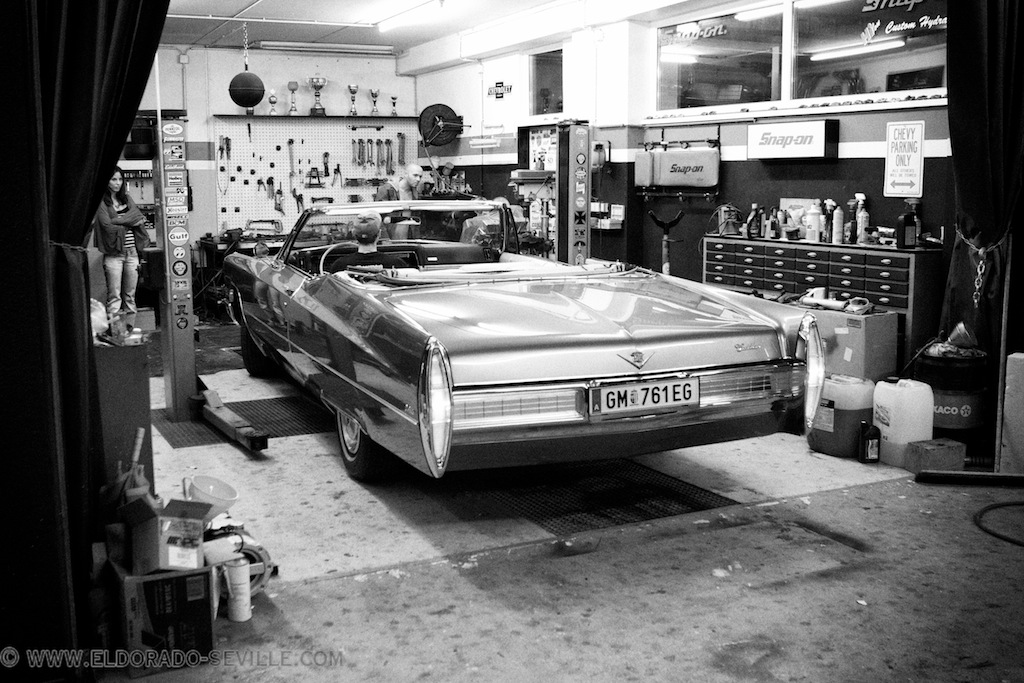
Backing out of Richards garage...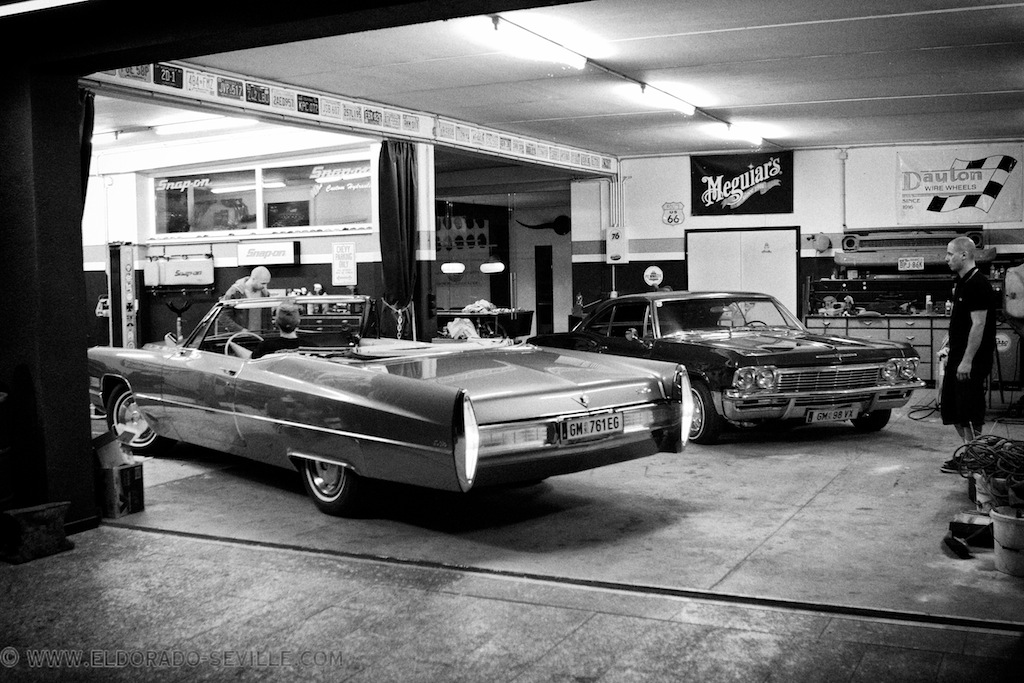
THE 1967 CADILLAC AUTOMATIC CLIMATE CONTROL SYSTEM - MORE ISSUES - AND A FINAL FIX? RESTORING THE POWER SERVO VALVE!
The 67 Eldorado lost its complete charge of refrigerant over the winter - so it will have to go back to the shop to see where it is leaking. All components were replaced with new ones last year and so I have no idea where it could have leaked out. A tracer was put in before the last recharge so we should be able to find the leak. I guess that it will be one of the original hoses are a bad fitting.
Another thing that bothered me was that the system basically worked most of the time, but sometimes I had to wait for a long time before the system came on, or I had to switch to “FOG“ or “ICE“ position before the blower would come on in the “Auto“ position. Then sometimes the blower would cut out again if the temperature dial was moved to a colder temperature. Sometimes the temperature would move to full heat regardless off the selected temperature in the 67 Eldorado.
I had the very same problems on my 67 Deville as well - but there also the “Vent“ and “Low“ position did not work at all...
So I started trying to find the issues and finally wanted to fix them. Sounded easy - but it took me 4 full days with long nights in the garage to fix it...
BTW - Cadillactim has an excellent trouble shooting guide for the ACC on his website - its for sale for $ 45.- and I can highly recommend it if you are troubleshooting your 1967 or 1968 Air Condition System.
A great troubleshooting guide for 1967 and 1968 Cadillac´s Automatic Climate Control Systems I got from Gary Sisk - owner of a 1968 Cadillac.
This is a very easy to follow explanation which will save you a lot of time and you do not even need any special tools.
It was written by Lynn Nicholls and can be found on Stampies Cadillac page - here is the direct link to it. I used some excerpts from his document in the explanation below:
I first suspected a vacuum leak to be responsible for most of the erratic behavior of the system. A clear indication was that the system would initially have to be switched to the “ICE“ position to make the blower come on.
Lynn Nicholls writes:
“Sometimes the dash control can be switched to the fog or ice positions to bring the blower motor on and then when it is switched back to auto the blower may stay on and the system seems to work fine until the car is shut off. If the vacuum leak is only moderate there may be enough vacuum to hold the master switch closed once it gets , but not enough to pull it closed in the first place. When the dash control is switched to fog or ice, it assumes the air temperature is cold and that the engine is not yet warmed up, but that the blower is needed immediately for defrosting the windshield. So it supplies vacuum to the master switch through another circuit, bypassing the temperature controlled vacuum switch on the heater core shutoff valve on the right fender well. This source of vacuum is enough to close the master switch.When the dash control is switched back to auto this vacuum source is shut off, but there may be just enough vacuum left from other circuits to hold the switch closed. This routine will work for a while but as the leak gets worse, there won’t be enough vacuum left to hold the master switch closed anymore and the blower will shut off again as soon as the system is switched back to auto.With these symptoms and behavior the problem is most likely the power servo. This is half the brains of the system; the other half is the control panel in the dash. The power servo is controlled by a varying vacuum signal from the transducer. This vacuum supply is a completely separate circuit from that which supplies vacuum to the master switch. High vacuum moves the servo to the maximum heater position, and with low vacuum, a return spring moves it to the maximum AC position. In between these two extremes, it regulates the air temperature door to blend warm air and cool air, and simultaneously regulates the blower speed. It also spins an internal rotary vacuum valve back and forth that makes various connections between the several small vacuum lines on the top. This rotary valve controls the various vacuum motors of the system that operate the AC, heater, and defrost functions. It is this rotary valve that goes bad. l have seen these things visibly warped, and very badly so. It must be caused by engine heat, because there is also one inside the car on the control panel that is moved back and forth by the dash control lever, but that one seldom seems to cause any trouble. A warped rotary valve leaks all kinds of vacuum and the first part of the system to be affected by low vacuum is the master switch; there’s not enough vacuum there to close it and turn on the blower. To verify this is the problem, take some spare vacuum line, some scraps of 1/8 inch pressure line (like for air shocks), and a vacuum T and manually make the connections that the rotary valve should make in the maximum AC position. The connections that the rotary valve makes in various positions are shown in the factory shop manual. Disconnect the black connector with the striped vacuum lines from the power servo. Connect the yellow, red, and purple lines together with a T; also connect the tan and blue lines together and connect the orange and green lines together. If this rotary valve is the one and only culprit the AC will now work beautifully and the blower motor will come on every time, like magic. With the dash control on high the system should be recirculating air and there will be a lot of air noise coming from under the right side of the dash; when the dash control is moved to auto the air door should move to provide fresh air and the system will become much quieter. Of course with these manual connections the system is not fully automatic and the heater won’t work right at all, however this is enough to diagnose the problem.“
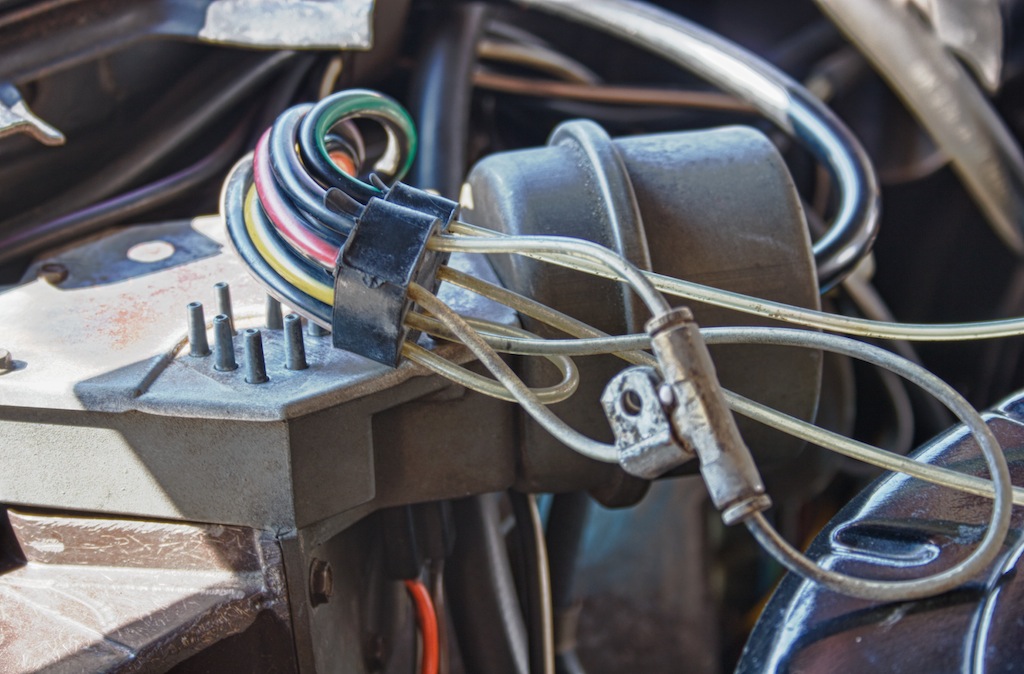
I did this test (see picture below) - and with the power servo bypassed everything worked as it should. This way I knew that the power servo was to blame for some of my problems.
So this rotary valve needed to be repaired...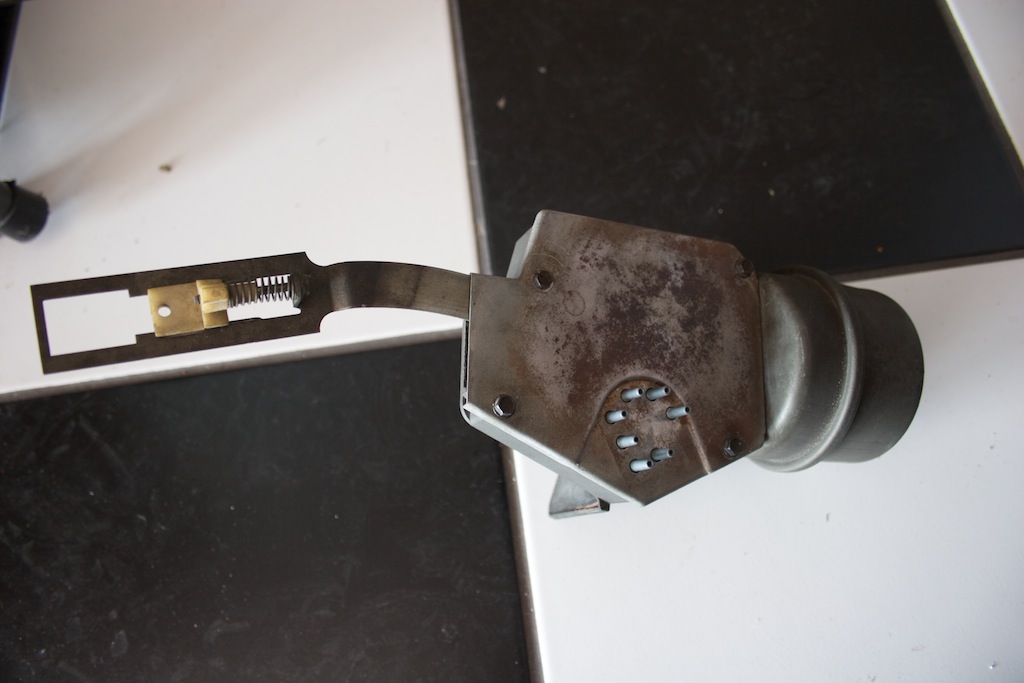
I removed it from the power servo and disassembled everything.
The removed power servo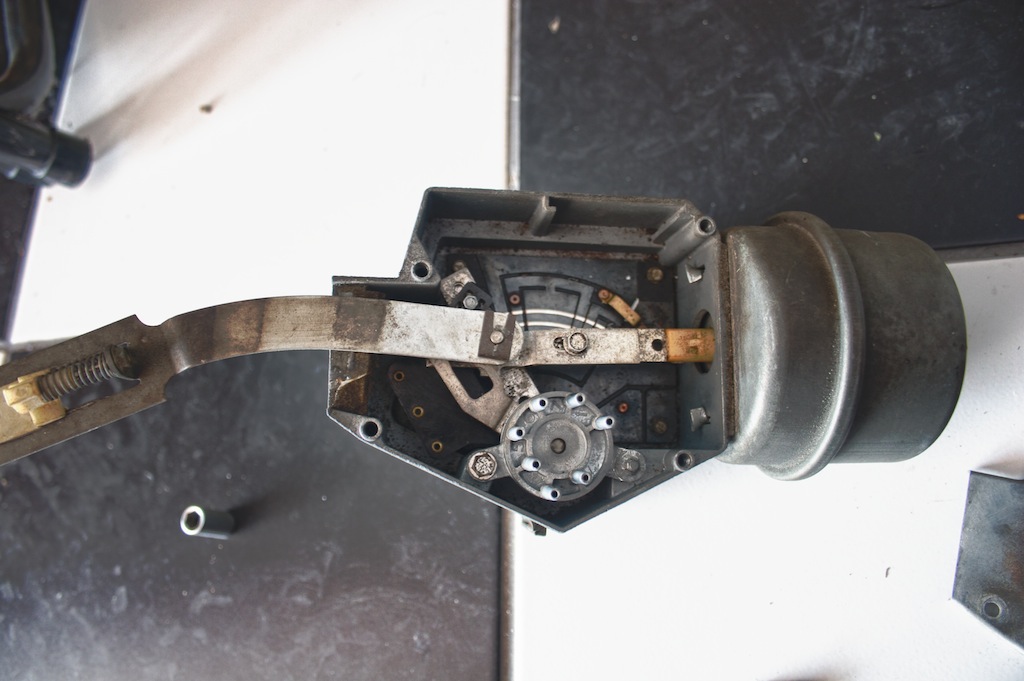
After opening the cover, you can see the rotary valve in the lower center.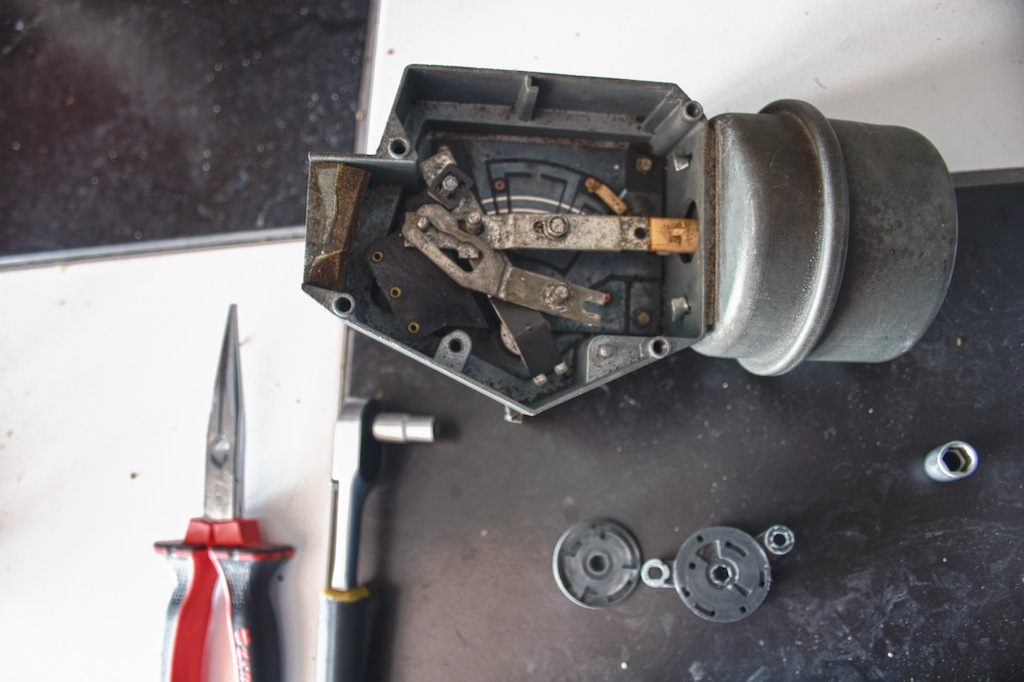
Remove one screw and a clip and the rotary valve comes out.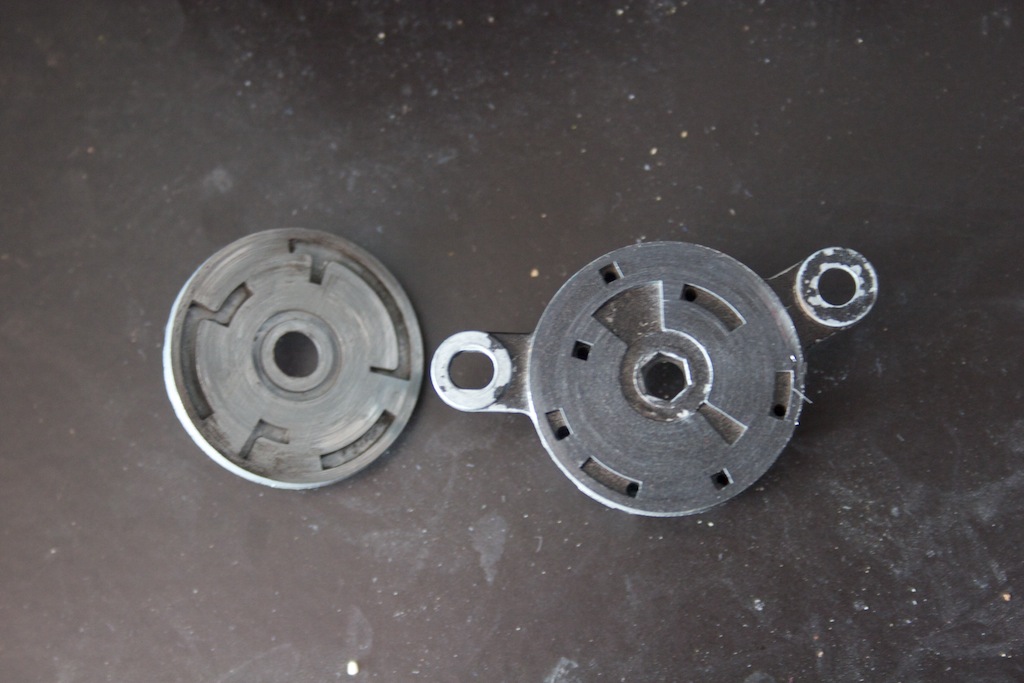
The rotary valve consists of two halves which make the connections - as you can see it was very dirty and rough - and slightly warped.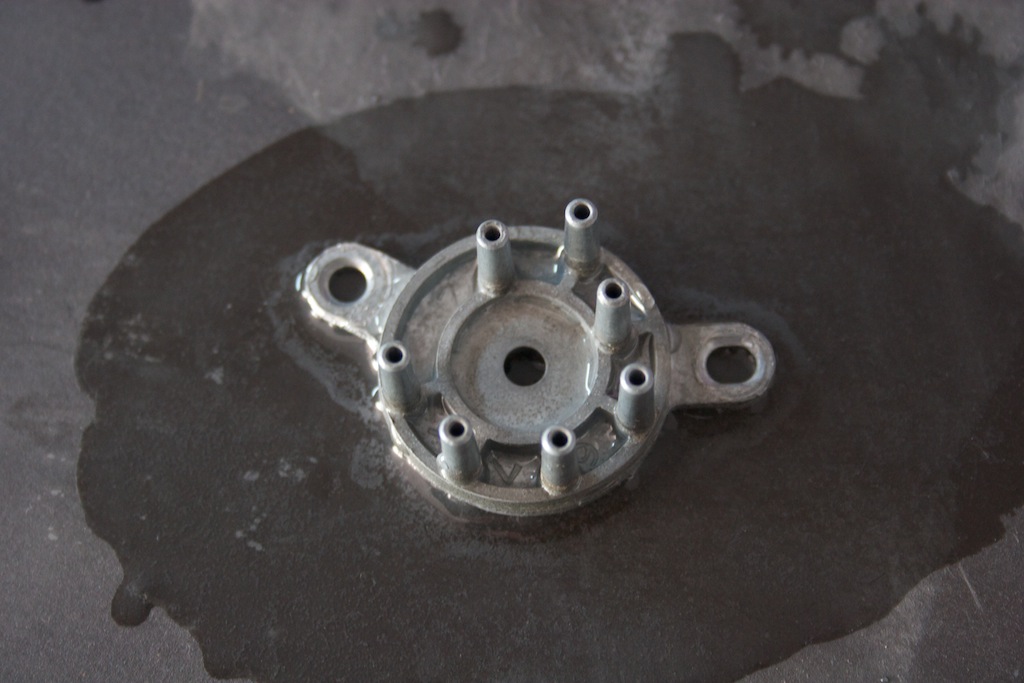
I started to wet sand both halves with 800 grit sandpaper.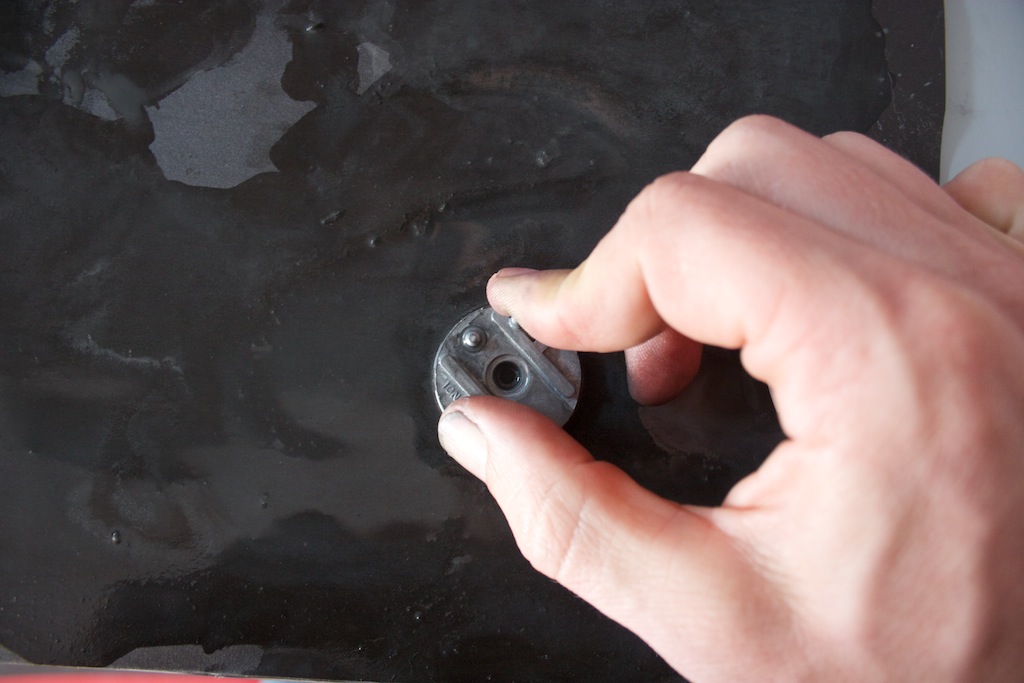
When everything was flat and shiny again I used some 2000 grit sandpaper for a perfect finish.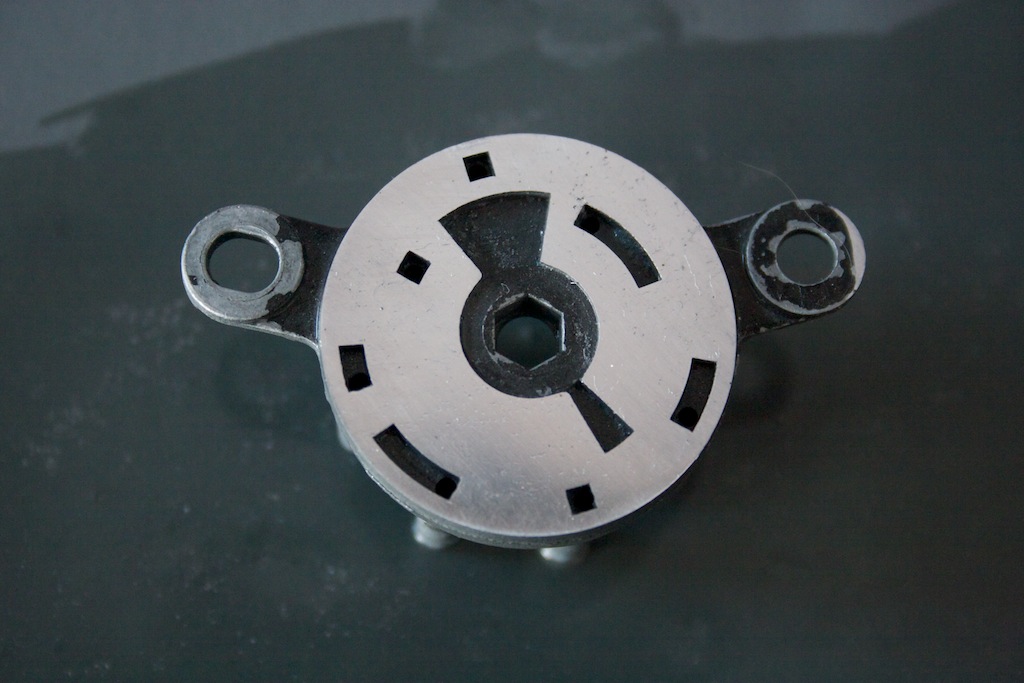
Looks shiny and flat again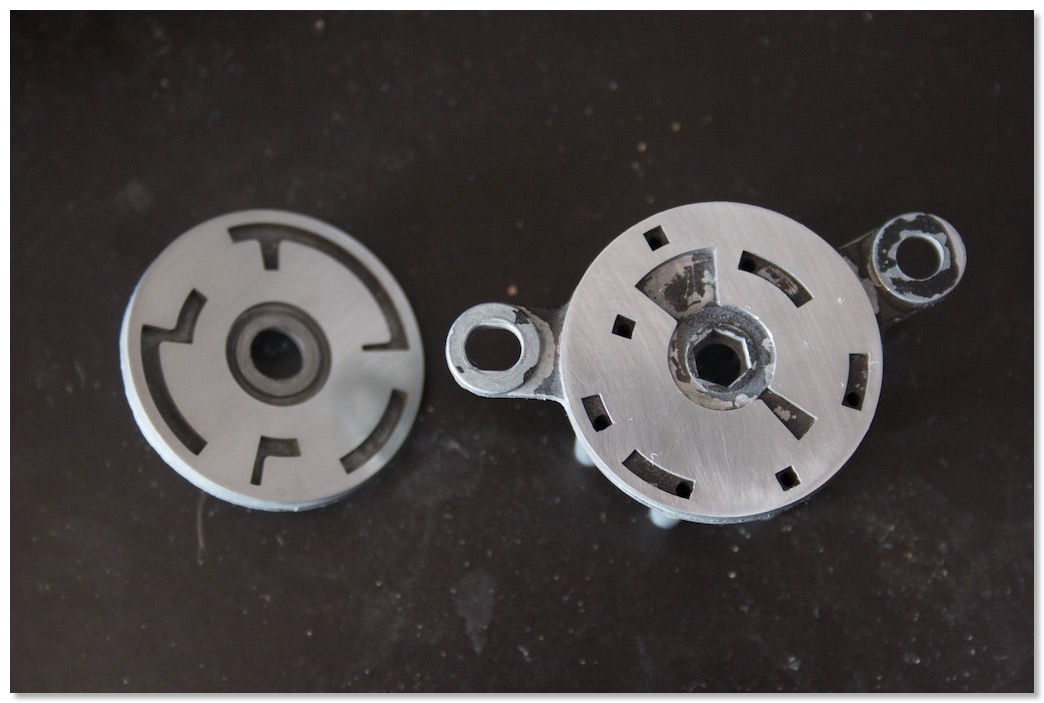
Make sure that none of the ports are clogged - I used compressed air to clean everything.
When you put the two halves together lubricate with WD40 to make sure that when you put them back into the power servo that they are properly held together with the underlying spring.
After I reinstalled them into my cars - almost everything worked as it should. In the 67 Eldorado I still had the problem that in the “AUTO“ position the fan would always be slow - so I knew that the control head in the dash had a problem with the “LOW - AUTO“ switch as well.
In the 67 DeVille the “VENT“ and “LOW“ position still did not work at all...
So I switched the control panels between the two cars and suddenly everything in the 67 Eldorado worked perfectly. I never had such a perfectly working system before. Its like it just left the factory!
In the DeVille I still had no “VENT“ and “LOW“ settings working... So out came the control panels again... (its a pain in the a*** to remove and install them...)
As it turned out the “LOW-AUTO“ switch on one panel was stuck in the “LOW“ position. You can easily remove it and readjust it to work again - sorry I forgot to take pictures. Make sure that all switches on the control head are adjusted properly or they wont work as they should!
So I knew that both control heads were working correctly by installing it back to the 67 Eldorado and the other panel back to the 67 DeVille.
While the 67 Eldorado was perfectly fixed now with everything working as it should - the 67 DeVille was still giving me the problem with a non working “VENT“ position...
I studied the shop manual for hours and could not find what the problem could be. I knew that the power servo was working perfectly now and I knew that the control head was in perfectly working order as well. I verified this once again by switching these parts between the cars once again and everything worked as it should in the Eldorado but not in the DeVille.. I´m really good in switching these parts between my cars now ;-)
I started to look for electric connection problems and finally found out that no electricity was coming out of one of the three power servo connectors, but I did not know why...
After I removed the power servo once again to re-check it again it struck me - one of the pins was slightly bent and the wire connector did not make proper contact. This problem was not visible with the power servo installed in the car. It took me 2 long nights to find this little flaw... I just bent it straight and everything works as it should on both of my 67 Cadillacs. Now I have to recharge the systems and I should have perfectly working AC again... I will also install new dryers and a re-calibrated R134 POA valve before the recharge.
One the one hand the 1967 ACC is very complicated but once you know how it works its pretty easy to fix. The rotary valve in the power servo is pretty easy to refurbish, the dash servo valve is riveted together unfortunately, so its not such an easy fix, but NOS valves are still available at “Classic Auto Air“
*UPDATE 2022* - Check out this article and video as well as I had to repair my switch again in 2022 on my 66 DeVille!
Here is a video about the Master Switch that a gentleman posted on youtube
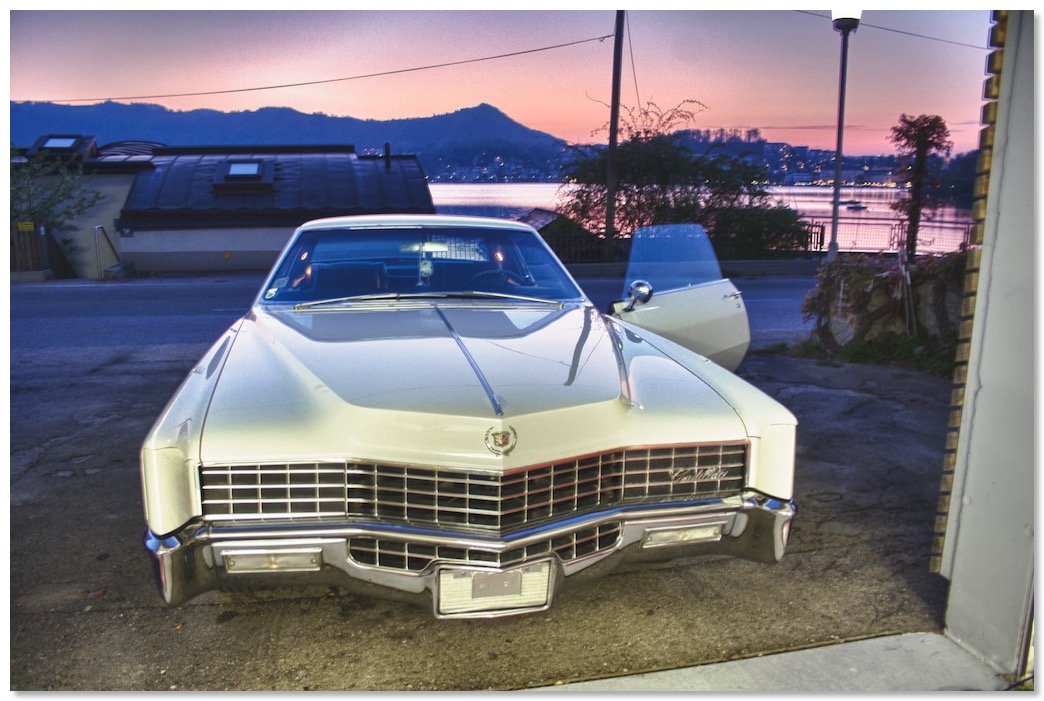
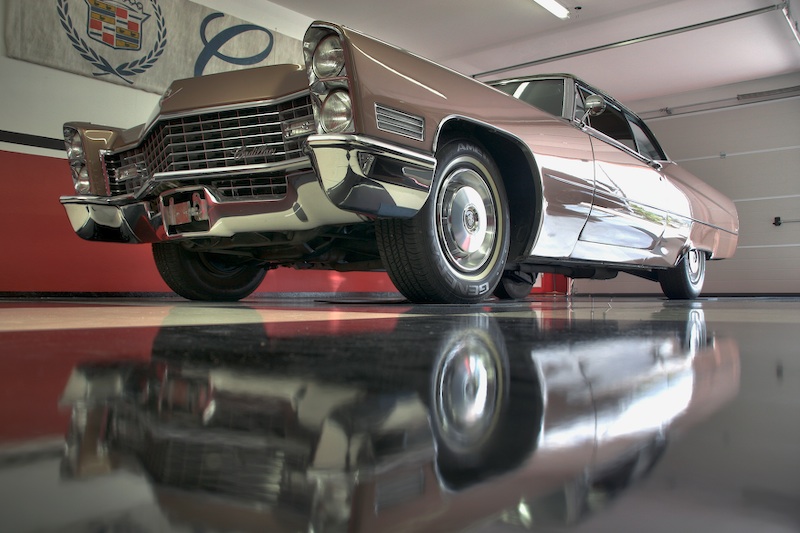
The 67 Eldorado in front of the garage after the AC system was fixed.
A picture of my 67 Deville made it on the cover of a hardrock EP
With a beautiful Cadillac like this on the cover nothing can go wrong ;-) I think it is about the 6th picture that made it on a cover of a CD which I´m all proudly displaying in my garage.CornFed Bruiser is a four-barrel, full-throttle rock and roll flame-thrower out of Cedar Rapids, Iowa.Congealed from the primordial ooze of the underground dirt-rock scene, the Bruiser combines heavy riff-driven guitars and fat grooves, topped-off by a soul-shredding vocal.Late 2010, CornFed Bruiser set out to record its first EP entitled “Road Rash” scheduled to be released early 2011. Feature tracks “Road Rash” and “Fu Man” are just two of the tracks that define a new sound with an old school vibe.

Cadillac BIG Meet 2010
I´m already looking forward to the Cadillac BIG Meet 2011 on August 29th 2011.
the first cars are gathering before the start of the Cruising tour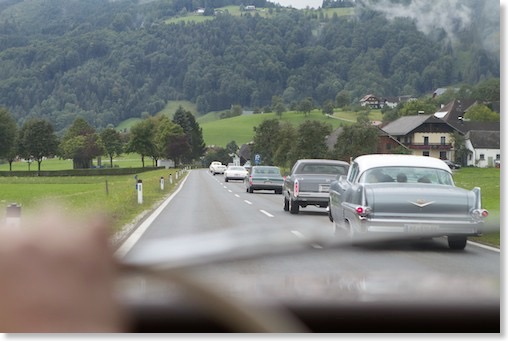
During the Cruising tour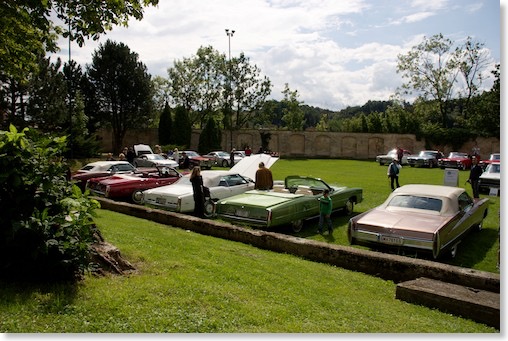
a special area of the show field was reserved for convertibles only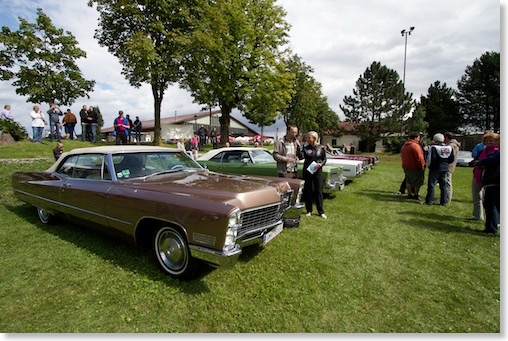
the 67 at the show field...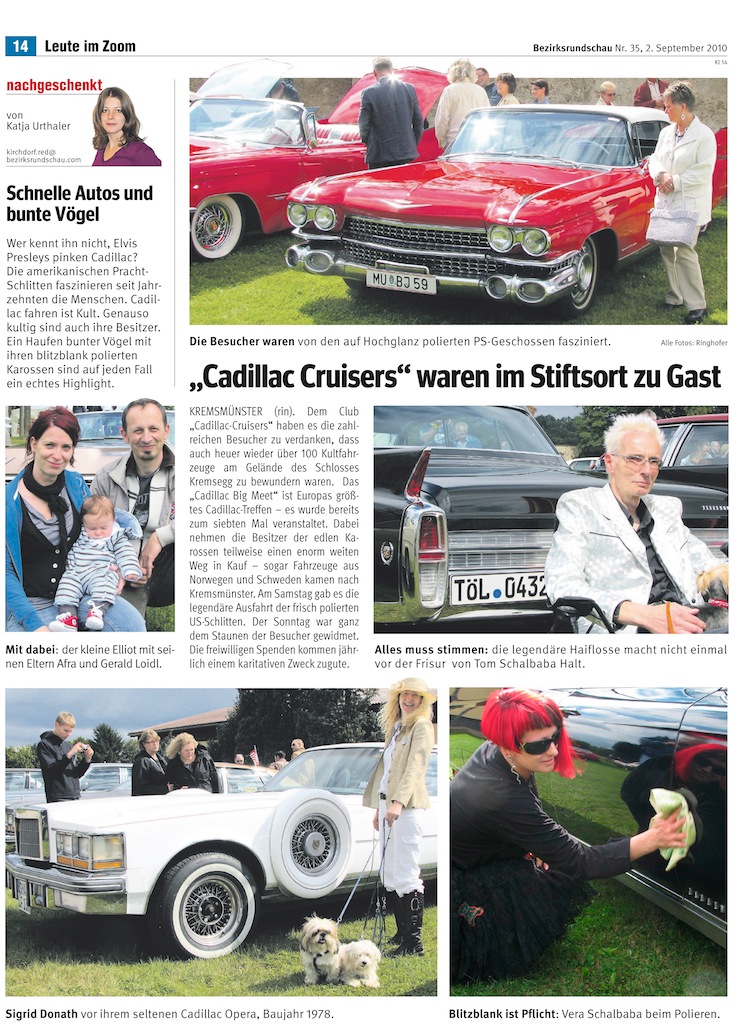
A report from the local newspaper “Rundschau“ - click for larger view
A photoshooting with the family
Click on the image below to go to the photo gallery with more pictures.
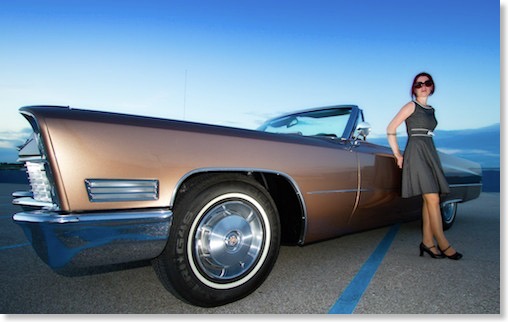

My 67 DeVille under palm trees...
“Hi, Gerald....I saw your photos on Flickr. I snagged one of the photos of your 67 and made a Photoshop creation of it. Be looking for it.”
And here is the picture he sent - my 67 under palm trees, something I have never seen before as those huge palm trees are not existent over here in Austria! What a cool photoshop creation and idea - Thanks Scott!

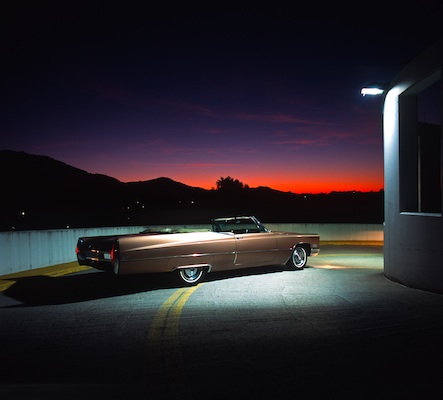
A night photoshooting with the 67 DeVille
I also took some "making of" pictures of her in action.
Click on the image below to go to the gallery with all the pictures.
67 DeVille Brakes finally fixed
As I replaced the complete front end including the entire front brakes last year, I did not think that the drum brakes might only need a simple re-adjustment. As it turned out the front brakes were out of the range where the star-wheel can adjust itself while driving the car backwards and applying the brakes.
I now adjusted the front brakes pretty tightly and the pedal is now pretty firm again. I hope it will stay like this. If not - there must be something wrong with the automatic self adjuster, but I´m very optimistic that the problem is now solved. I also gave the rear drums a check - they turned out fine. I just wished the DeVille had front disc brakes like my 67 Eldorado...
checking the rear drums - crappy cell phone picture...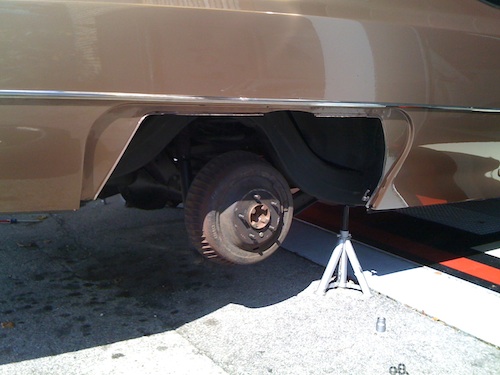
the rear drums
1967 DeVille got new brake booster and power cylinder
Everything went pretty smoothly at first - only bleeding the brakes was a little complicated and it did not help either that I spilled some brake fluid into the engine bay. Some harm was done to the black paint which had to be repainted immediately. So it took us some unplanned time to get everything back in working order. As it was raining heavily we could not even test the brakes. In the meantime I did a test drive and found out that the pedal travel is way too long. Looks like the push rod in the booster needs adjustment... D*mn this means removing the master cylinder once again... I hope I will find the time to do this soon.
the removed brake booster - the hole in the firewall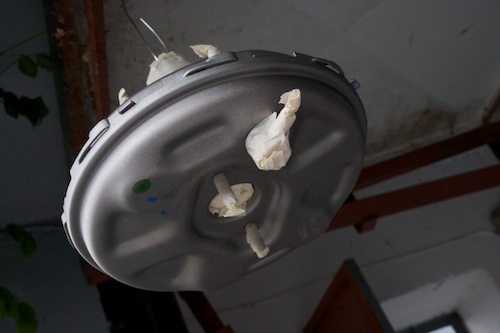
the new booster needed some paint before installation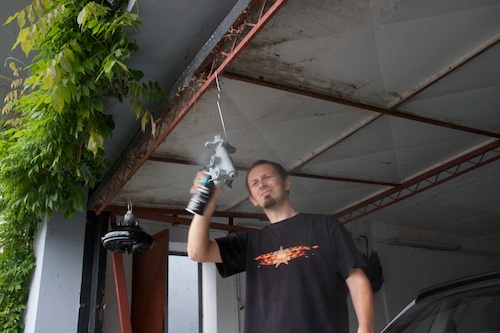
painting the master cylinder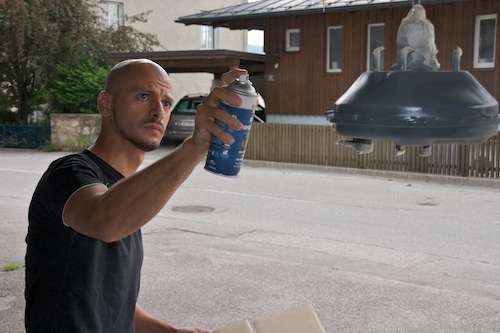
Tayfun painting the primered booster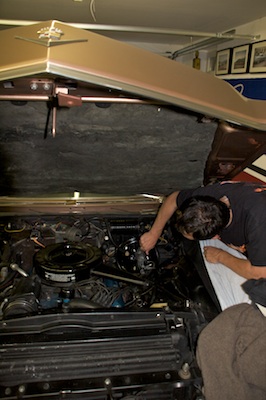
reinstalling the whole unit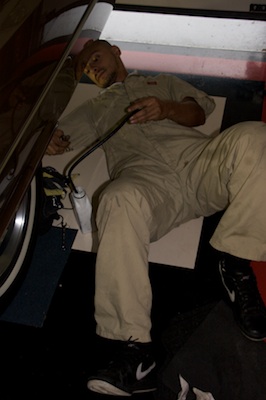
Tayfun bleeding the brakes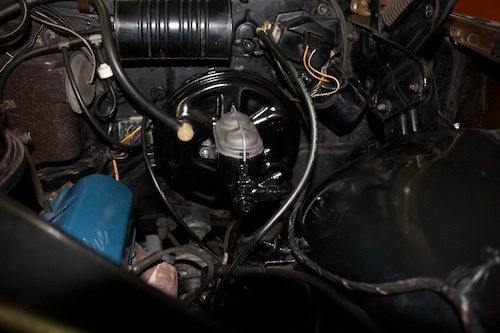
finished - looking good
Time to change the engine oil
I had to drive one after each other over the pit...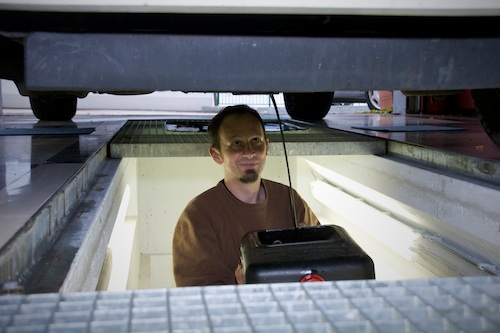
somehow its always a mess to change the oil...
The 67 is back with a "New" Front Suspension!
Today I picked up my 1967 Cadillac DeVille from the shop where all my repairs and restoration work is done when I can´t do them for myself.
The car got a complete new front suspension including all bushings, ball joints and paint. Some of the old bushings already fell apart. As everything was apart we also did the complete front brakes.
Also the radiator was fixed and the car got a new ignition lock which I removed from a 67 limousine at a junkyard in California last year. Also the turn signal switch was finally fixed after it broke 3 years ago...
The car is in spectacular condition, now and with the new suspension it drives like a brand new car - I could not have imagined that the difference would be that big.
Below you can see a picture of the rebuilt front suspension. Its still a little dirty as I had to drive the car home through rain - it will be cleaned soon though.
1967 Cadillac turn signal switch arrived
UPDATE 2010: In the meantime (since 2009) the Boyne switches they are getting reproduced and show up on ebay all the time. Also OPGI shows them in their Cadillac catalog. Its harder to find one for a T&T column as they are not getting reproduced so far. I do not know where one could find a switch for T&T though. If you know of any resource for T&T switches please let me know, I would love to have a spare one for my Eldorado!
When I was looking for a switch for my 1967 Deville, I only investigated resources for cars without T&T columns and this is what I found out:
According to the 1971 parts manual there are two different ones for standard column cars and one for T & T
- 1967 - 1968 (Exc. T & T) Part # 7800483 - Switch, w/wiring harness (Delco-Remy)
- 1967 - 1968 (Exc. T & T) Part # 7805675 - Switch, w/wiring harness (Boyne Products)
- 1967 - 1968 (T &T) Part # 7805676 - Switch, w/wiring harness (Hazard warning switch an integral part)
The two different standard column switches can be identified without removal as the parts manual describes:
„Hazard warning switch is an integral part. Switches can be identified before disassembly as follows: The Delco Remy switch has a square hole for the hazard warning switch in the cover, the Boyne Products switch has a round hole for the hazard warning switch in the cover.“
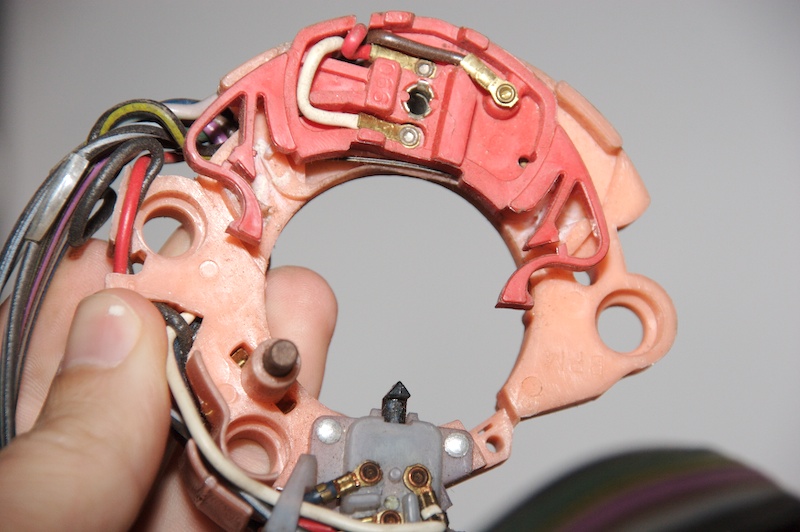
The problem with the switch on my standard column DeVille was that the return cancel cam broke, and that non of the repair kits were available for the Boyne switch.
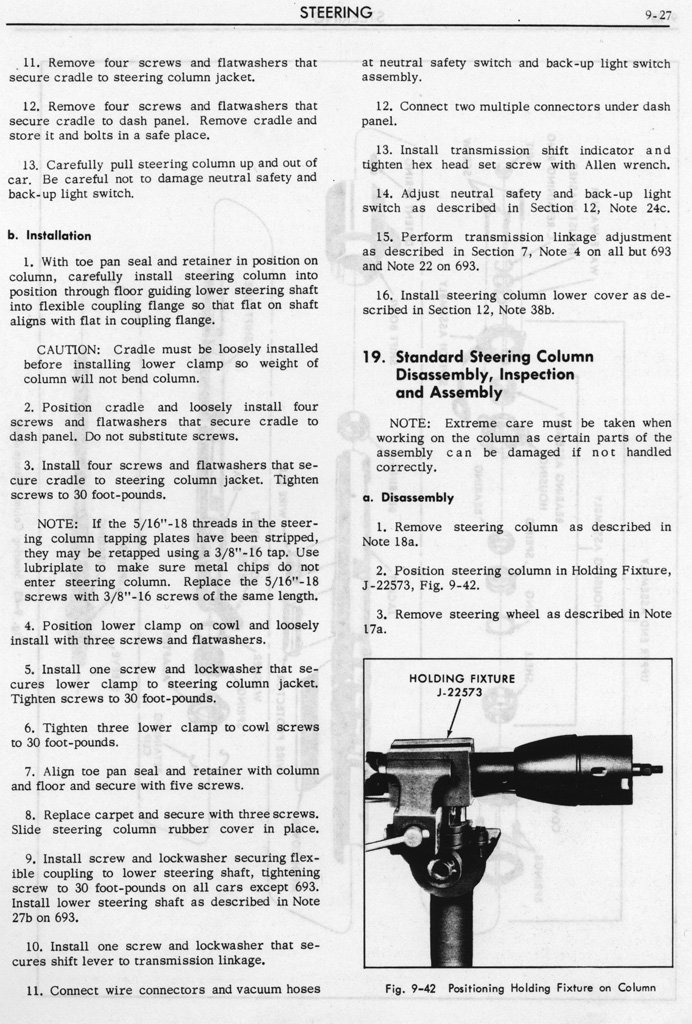
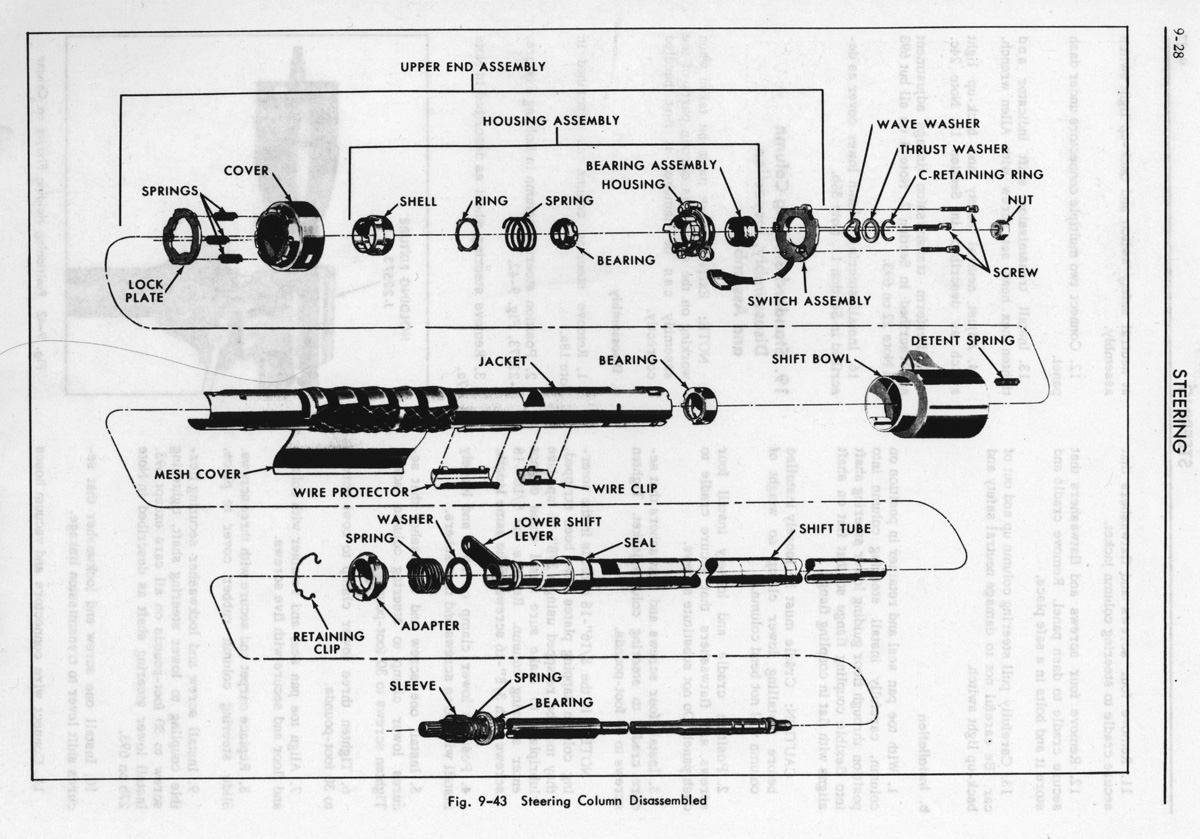
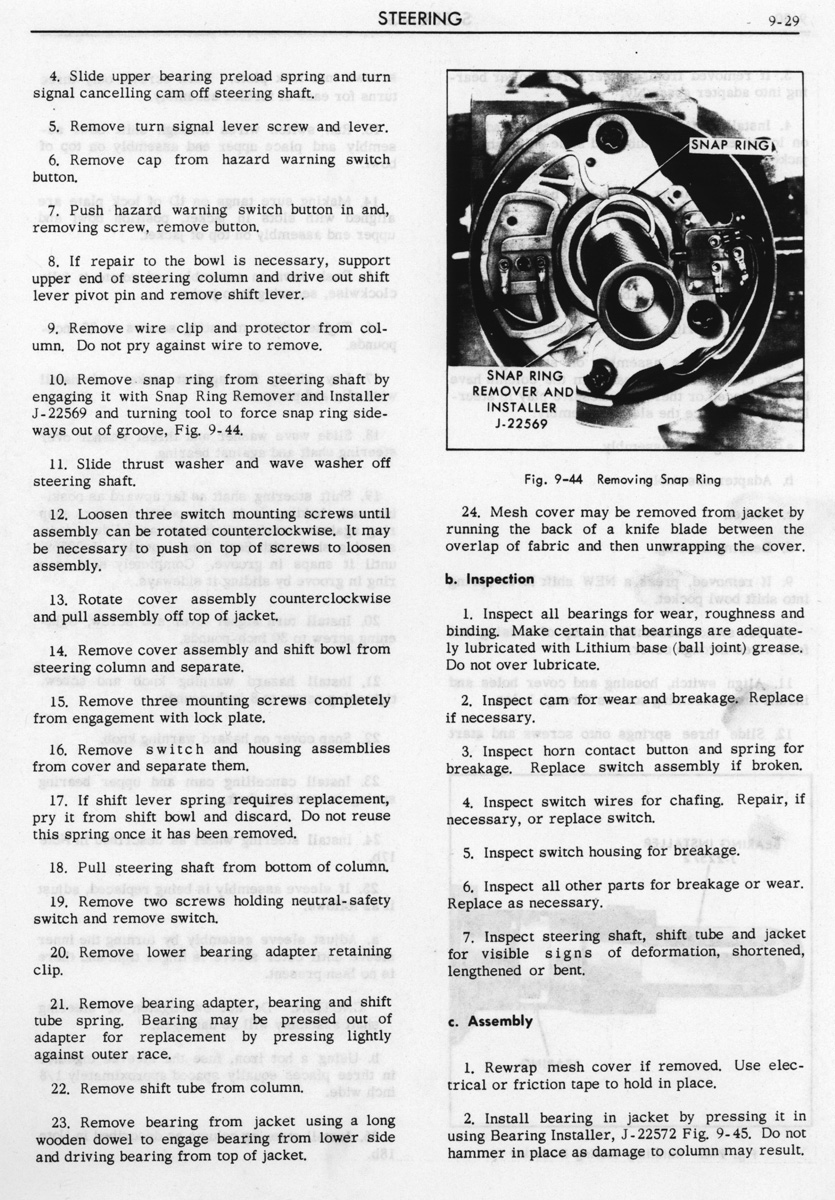
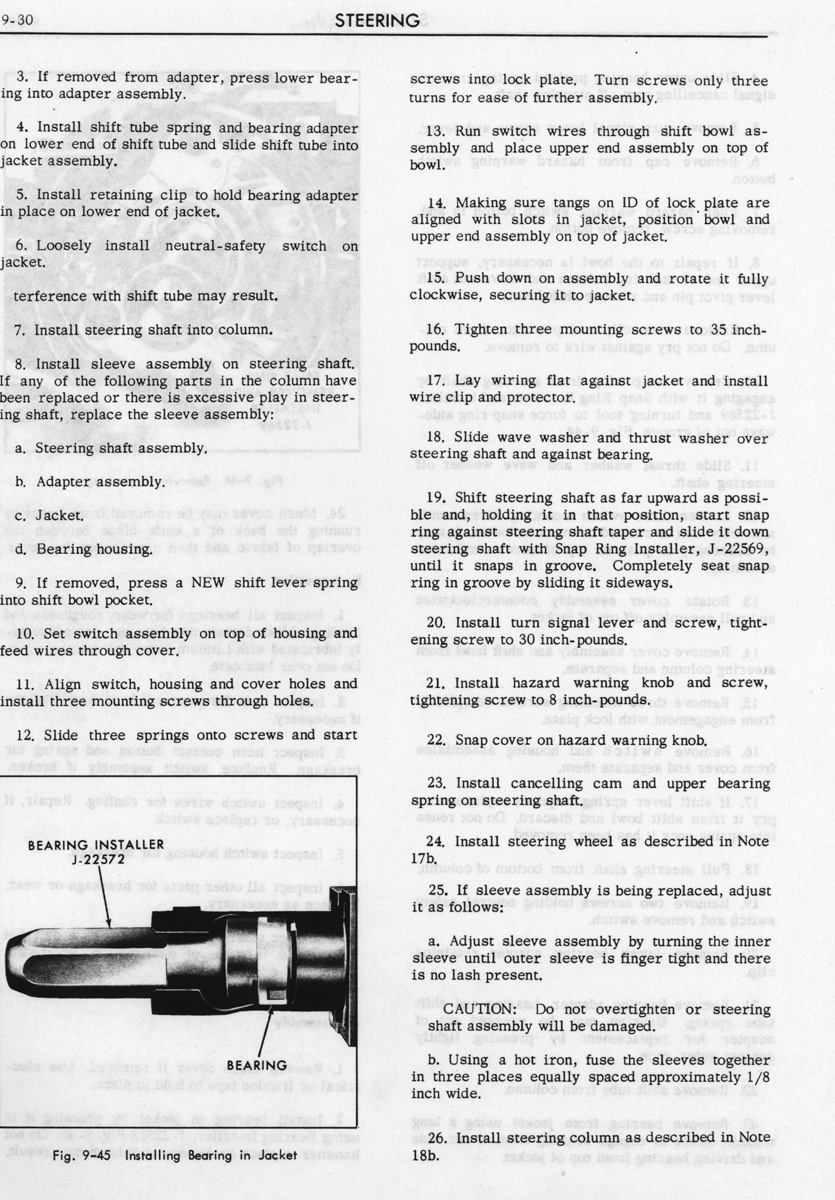
Replacing this switch in the steering column is quite a pain - below you can find the instructions from the shop manual on how to do it.
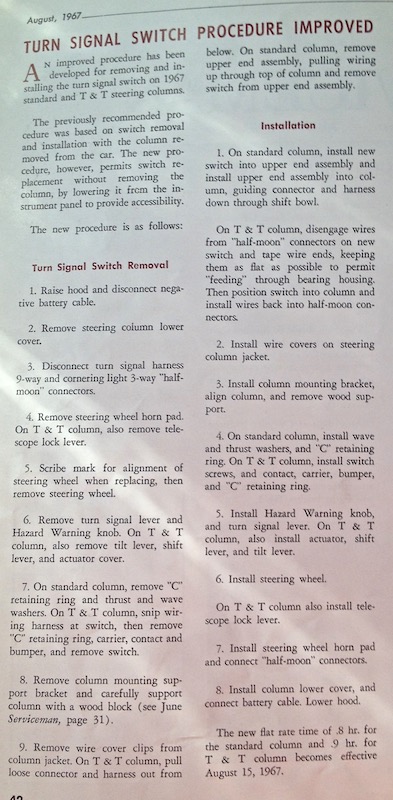
There is also a revised procedure for a much easier installation below in the “Cadillac Serviceman" from August 1967!

Click on each picture for a larger view!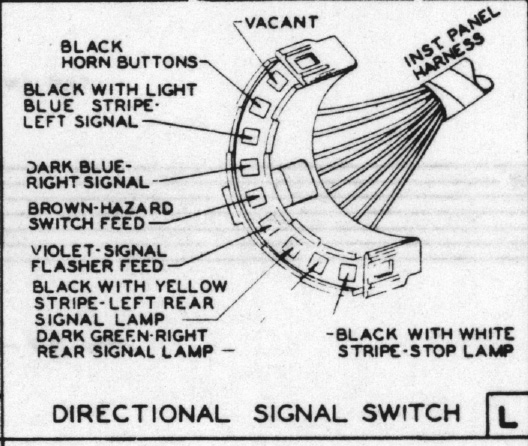
The connections going to the directional signal switch - the turn signal switch connector
The Cadillac Serviceman from August 1967 shows a revised procedure for a much easier installation of the switch.
If you need the shop manual instructions for a tilt and telescope column click here! Or just use the procedure above!
Cleaning the 67´s front suspension
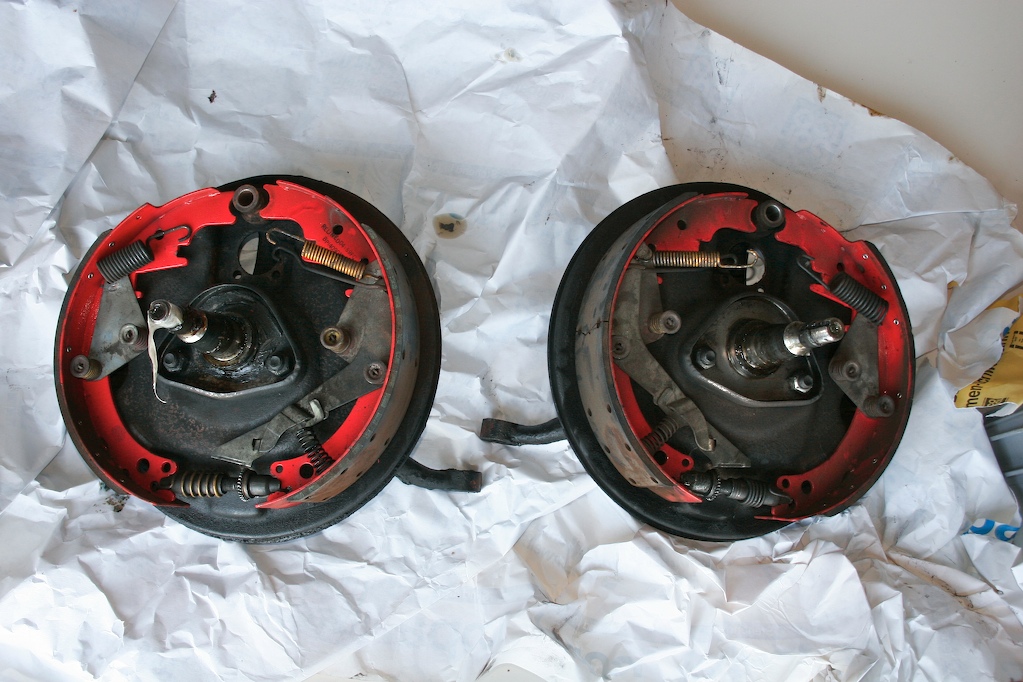
The brakes before I disassembled them - I hope I can clean the small metal parts with an ultrasonic cleaner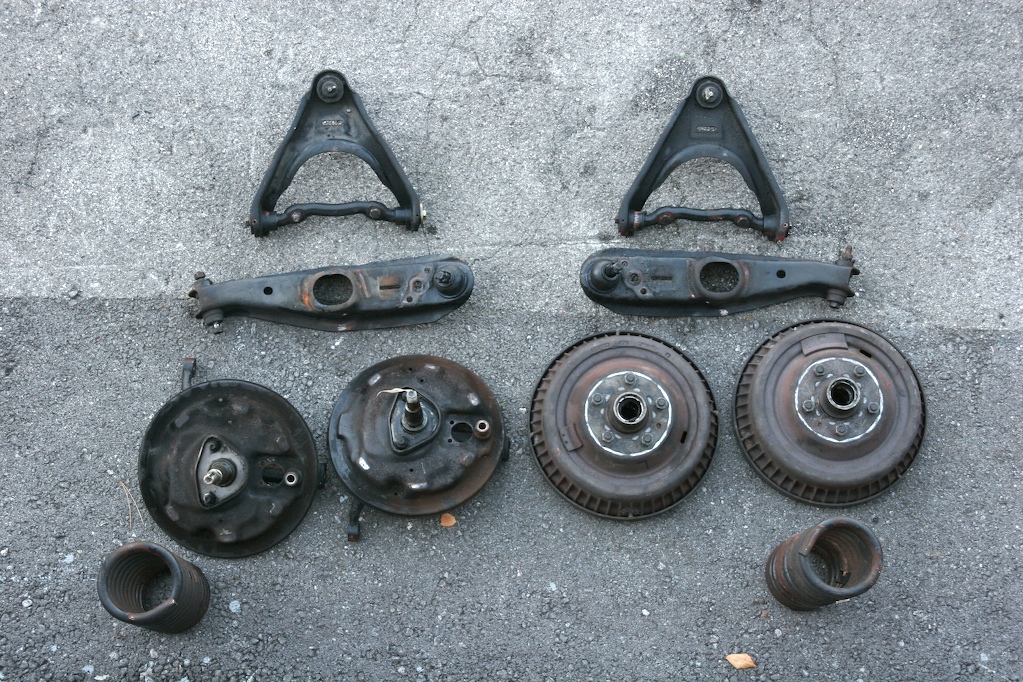
All these parts will be sandblasted and painted afterwards
The 67´s front suspension
After this the suspension will be in new condition - one of the last things that have to be done on the 67 before it is really in like new condition.
The only other thing which will need attention in the future will be the top which is still the original 40 year old one, but is still a little to good to be replaced…
The completely stripped front suspension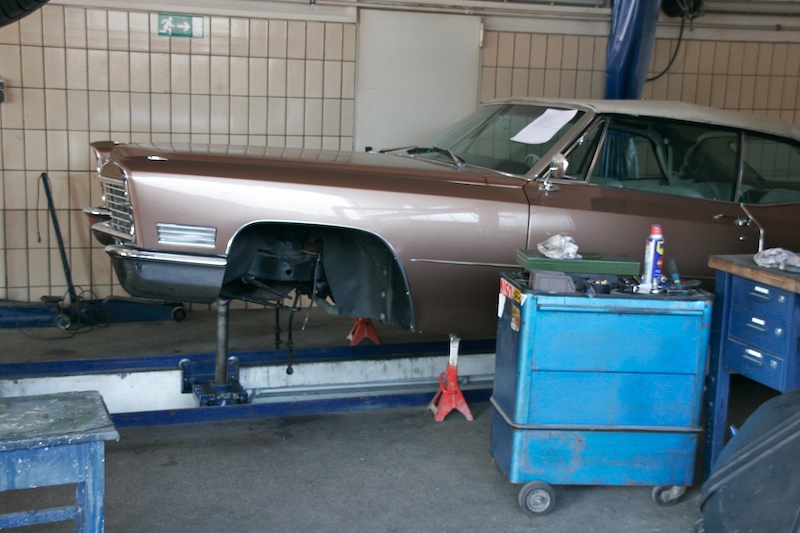
The 67 at the shop
Preparations for the Cadillac BIG Meet
working on the AC
installing the new backup lenses - which had to be custom fitted...
67 gets new fuel filter
Eventually I made it and when everything was back together, the bowl leaked. So I had to re-open everything. I readjusted the gasket and now everything is tight. The old filter was very dirty, because at the last big service I forgot to replace it...
1966 Cadillac Coupe deVille (15)
1967 Cadillac DeVille (54)
1967 Cadillac Eldorado (71)
1971 Lincoln Continental Mark III (23)
1974 Cadillac Coupe deVille (45)
1978 Cadillac Eldorado Biarritz (24)
1996 Buick Roadmaster (19)
Car Shows (53)
Cruising (4)
For Sale (3)
Garage Stuff (32)
Pacer (1)
Restoration (137)
Various (55)
Video (16)
Website News (30)
- 6 way power seat
- 8-track
- 10 Ohm
- 429
- 1932
- 1957
- 1958
- 1958 Cadillac Eldorado Seville
- 1958 Cadillac Repair Tip
- 1959 Cadillac Eldorado Seville
- 1964
- 1965
- 1966
- 1966 Cadillac Coupe deVille
- 1966 Cadillac Repair Tips
- 1967
- 1967 Cadillac DeVille
- 1967 Cadillac Eldorado Repair Tip
- 1967 Cadillac Repair Tip
- 1967 Eldorado
- 1968
- 1970 Cadillac Eldorado
- 1971
- 1971 Lincoln Continental Mark III
- 1974
- 1974 Cadillac Coupe DeVille
- 1974 Cadillac Repair Tip
- 1976
- 1977
- 1978
- 1978 Cadillac Eldorado Biarritz
- 1978 Cadillac Repair Tip
- 1980 Cadillac Eldorado Biarritz
- 1996
- 2012
- 2014
- 2017
- 2018
- 2019
- 2022
- 2023
- 3063206
- 7027235
- 7800483
- 7805675
- 7805676
- 12355706
- 17058531
- 17059968
- 17059969
- 22010515
- 22010661
- A.I.R
- A6
- AC
- AC Compressor
- AC Electrical Diagram
- ACC
- Accelerator Pump
- Accelorator pump
- Actuators
- Adriatic Blue Metallic
- Ads
- Aftermovie
- Air Pump
- Aircondition
- AIRPUMP
- ALC
- Alternator
- AM
- AM-Transmitter
- Antenna
- Anti Rattle Clips
- Antique Gold
- Arizona Vintage Parts
- Arrival
- Article
- ASC
- Ash Tray removal
- ATC
- Atlantis Blue Firemist
- Austria
- Austro Classic
- Autolite SP-459
- Automatic Seat Back Release
- Award
- Banner
- Barn Find
- Battery
- Battery Tray
- Beach Race
- Bearing
- Bendix
- Biarritz
- Bigfoot
- Bill Hirsch Engine Enamel
- Bleeder Screws
- Blower
- Bolts
- Borg
- Brake Booster
- Brake Fluid
- Brake Gray
- Brakes
- Broken Bolt
- Brougham
- Bucket seats
- Buick
- Bumper End
- Bushings
- Cadillac
- Cadillac BIG Meet
- Cadillac BIG Meet
- Cadillac birthday cake
- Cadillac Blue
- Cadillac Color Selections Dealer Book
- Cadillac Coupe deVille
- Cadillac Dealer
- Cadillac Meeting
- Cadillac Mini Meeting
- Camaro RS
- Caorle
- Car Show
- Carburetor
- Card
- Carpet
- Carter AFB
- Cavalry Twill Vinyl
- CB
- CBM
- CCCD
- Choke
- Christmas
- Citizens Band
- Classic Cadillac Club Deutschland
- Clay Towel
- Cleaning
- Clock
- Clockwork
- Clutch
- Clutch Coil
- Collector
- Colonial Yellow
- Color Coded Springs
- Commercial
- Compound
- Compressor
- Condenser
- Continental Mark III
- Control Head
- Conversion
- Convertible top
- Coolant
- Corona
- Cowl
- Cruise Control
- Cruising
- CV Boots
- CV JOINTS
- D6230
- Dash Trim
- Decal Removal
- Decals
- Decoration
- Dehumidifier
- Delco Moraine
- Der Standard
- detailing
- Deville
- Diagnosis Chart
- Diagram
- Dial
- Digital Rotary Drum Clock
- Diner
- Disc Brakes
- Distributor
- Diverter Valve
- Door Jamb Switch
- Door Rubber Conduit
- Dornbirn
- Dot3
- Drive Shaft
- Driving tour
- Drum brakes
- Dry Ice Blasting
- Dry Ice Cleaning
- DVD
- Eastwood
- Eldorado
- Electric Choke Thermostat
- Electrical schematic
- Elvis
- Engine Bay
- Ep
- Epoxy floor
- Europe
- Evaporator
- Exide
- Factory Markings
- Fender Skirt
- Floor
- Flushing
- Foam
- For Sale
- Front AXLE
- Front brakes
- Front bumper filler
- Front Floor
- Front wheel bearing
- Fuel Filter
- Fuel Pump
- Fuel Sending Unit
- Fusible Link
- Garage
- Garage Cabinets
- Gasket
- GE
- Gear indicator
- General Time
- Glove box light
- Grand European
- H4
- Haus of Hot Rod
- Headlight Actuator
- Headlight doors
- Headlights
- Heater Core
- Heater Hose
- Heater Valve
- High Idle
- Holley
- Honest John
- Hood
- Hood Emblem
- Hood Ornament
- Hose Clamp
- Hot Choke
- Hot Water Valve
- HotRod
- How to
- Hödlmayr
- Ignition Diagram
- Illuminated Entry
- John D‘Agostino
- John Foust
- Klassikwelt Bodensee
- Kremsmünster
- LaSalle
- Leather seats
- Light Switch
- Limited
- Lincoln
- Lincoln Mark III Repair Tip
- Low Mileage
- Magazine
- Marilyn Monroe
- Mark III
- Master Cylinder
- Master Switch
- Master Vacuum Switch
- Media Blasting
- Meeting
- Meguiras
- MK II
- Mobile
- Model
- Moldings
- Mom
- Mopar Nationals
- Mostkost Kustom
- Movie
- Neon
- NOS
- Oberösterreicher des Tages
- oilchange
- ORF
- Overspray
- Pacer
- Paint
- Paint correction
- Paintjob
- Part Number
- Parts
- Patch Panel
- Perfect Circle
- Permabag
- Persian Lime
- Photo shooting
- Photoshooting
- Pictures
- PinUp
- POA Valve
- Power Antenna
- Power Servo
- Power Vent Windows
- Power Window
- Printed Circuit Board
- Programmer
- Pulley
- Quadrajet
- Quarter Panel
- Quartz Conversion
- R134
- Radiator
- Radio
- Rattle
- Rear brakes
- Rebuild
- Recalibrate
- RediRad
- Reed Switch
- Relais
- Relaunch
- Removing Overspray
- Repaint
- Repair
- Restoration
- RIP
- Roadhouse
- Roadmaster
- Rochester
- Rocker Arm Cover
- Rocker Panel Extension Clips
- Rostio
- Rotary Valve
- Rotterdam
- Rupes
- Rust removal
- Rust removal gel
- Sabre Wheels
- Sand Blasting
- Sandblasting
- Screed
- Season Greetings
- Seasons Greetings
- Seat Back Locks
- Seat Padding
- Seat Transmission
- See through ornament
- Self adjusters
- Sepp's Garage
- Seville
- Sheetmetal
- Shocks
- shop manual
- short
- Sign
- Solenoid
- Spark Plug Wire Routing
- Speakers
- Special Award
- Speed Bleeder Screws
- Splash Guard
- Starter Diagram
- Starter Motor
- Steering Column
- Storage
- suction throttling valve
- sunroof
- suspension
- Swirl Mark removal
- Switzerland
- T3
- Taillight Cover
- Texan´s Choice Award
- Thermostat
- Tilt and Telescope
- Time capsule
- Tomsclub
- Torque Specifications
- Tower Hose Clamp
- Towtruck
- Transducer
- Transmission
- transmission control selector
- transmission control selector indicator light
- transmission shift indicator
- Treadle Vac
- Treffen
- Tri-Band
- Troubleshooting
- Trunk Cardboard Kit
- Trunk lining
- Trunk to bumper cover
- Turn Signal Switch
- TV
- Typisierung
- Ultimate Garage
- Underbody
- Undercarriage
- Undercoating
- Undercoating Removal
- Vacuum Booster
- Vacuum diagram
- Vacuum hoses
- Vacuum Master Switch
- Vacuum Schematic
- Vacuum Valve
- Valve Cover
- Various
- Vent Window Switch
- Vibration
- Vibrator
- Vicodec roof
- Video
- Vinegar
- Vinyl Roof
- Visitor
- Washer Fluid Float
- Washer Fluid Low Level Indicator
- Water Pump
- Wax
- Weatherstripping
- Website News
- Westclox
- Wheel Bearings
- Wheel Housing
- Wiesbaden
- Windlace
- Winter
- Wiring
- Wiring Diagram
- Wonderbar
- Workbench
- Zurzach