 GERALD´S CADILLACS - NEWS
1967 AND 1968 CADILLAC ELDORADO HEADLIGHT ACTUATOR REPAIR ARTICLE UPDATED
After many years they tend to fail for many owners of the 1967 and 1968 Eldorados.
One company has offered a reproduction, but from the experience some people made with it, it was said that it was very poorly made and extremely expensive. I can´t tell anything about it from my own experience though.
But there is a better and much cheaper solution to the problem in the form of a modified reproduction 1969 Camaro RS actuator which is readily available. I´ve written an article a couple of years ago what could be done and I have now updated it, as one reader sent me some excellent description and pictures of how he modified the Camaro actuator to work perfectly on his 1968 Eldorado.
Thanks for the tip Mark Maromonte from Marks Truck and Auto Repair.
Click on the picture to go to the updated article.
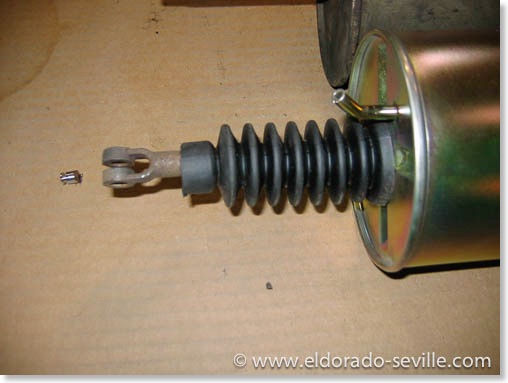
1967 Eldorado Headlight Actuator repaired
The instructions on the reproduction part mentioned that one could use silicone spray to lube the internals of the actuator through the vacuum inlets - this would also make the rubber parts in there soft for a better sealing. So I thought it might be a good idea to spray something in my old part and really soak it...
I had the impression that the rod was easier to move after application. I also put some gasket sealant around the vacuum inlets, just to make sure that there is no leak anywhere.
So I installed the old unit once again and it still did not work properly - but it worked fine if I only installed one vacuum line at a time. Suddenly it rang a bell. There are some T-connectors which also act as a valve going to each actuator. They do vent the system on one side when the doors are operated.
I cleaned the connector valve and reinstalled one hose going there and suddenly everything was back in working order! It now works like it should again!
Looks like I bought the new actuator for nothing... It cant hurt to have a spare though, as they are pretty fragile and even failed when new in 1967... In the meantime I might also find a way to install the original rod ends... Let me know if you have an idea!
If you are looking for a vacuum diagram for the Eldorados headlight doors you can find it on my website.
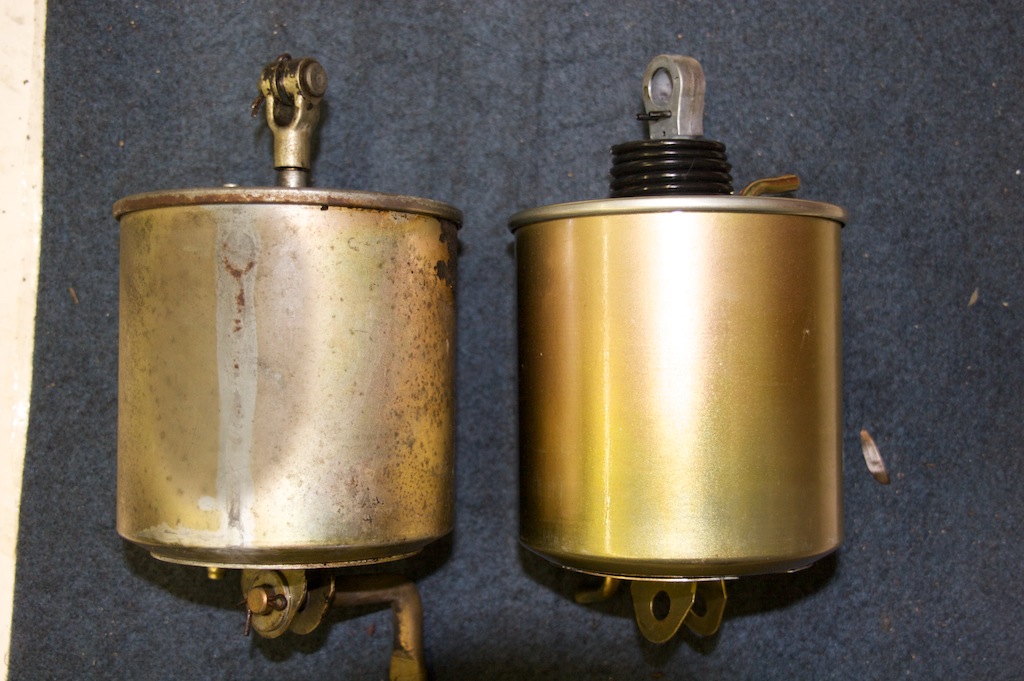
on the left the original actuator - on the right the reproduction unit from a 1969 Camaro RS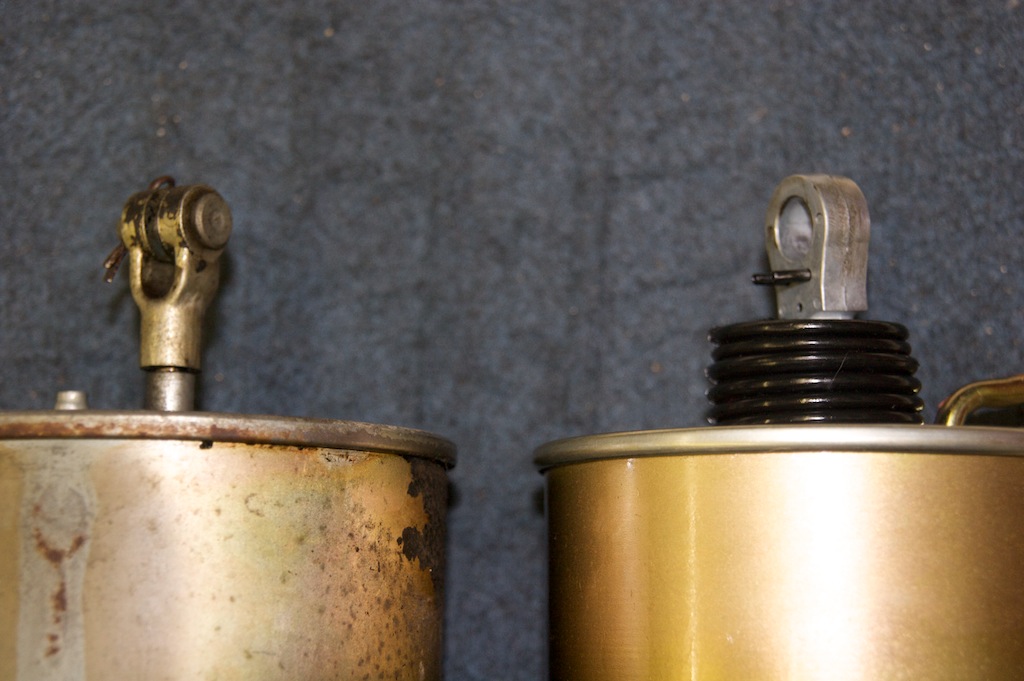
The different rod ends - the original one on the left - the headlight door mechanism is installed in the center of the rod end with a pin.
On the Camaro unit one could probably install it on the side using a bushing.
I have heard that this worked fine for some Eldorado owners as you can see on the picture below.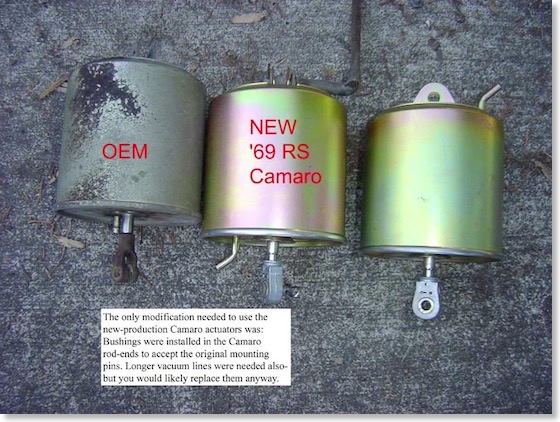
This is how it worked for another Eldorado owner - he installed some bushings on the new unit.
I found this picture on ebay at the auction for a 1967 Eldorado recently.
Update November 2014:
I have been in contact with Mark Maromonte who found this post on my website and replaced his bad OEM actuator with the 69 Camaro RS unit. He did some modifications and sent me some pictures to share here. Thanks Mark! I´m sure its helpful to others as well:
Mark wrote (all pictures below were provided by © Mark Maromonte):
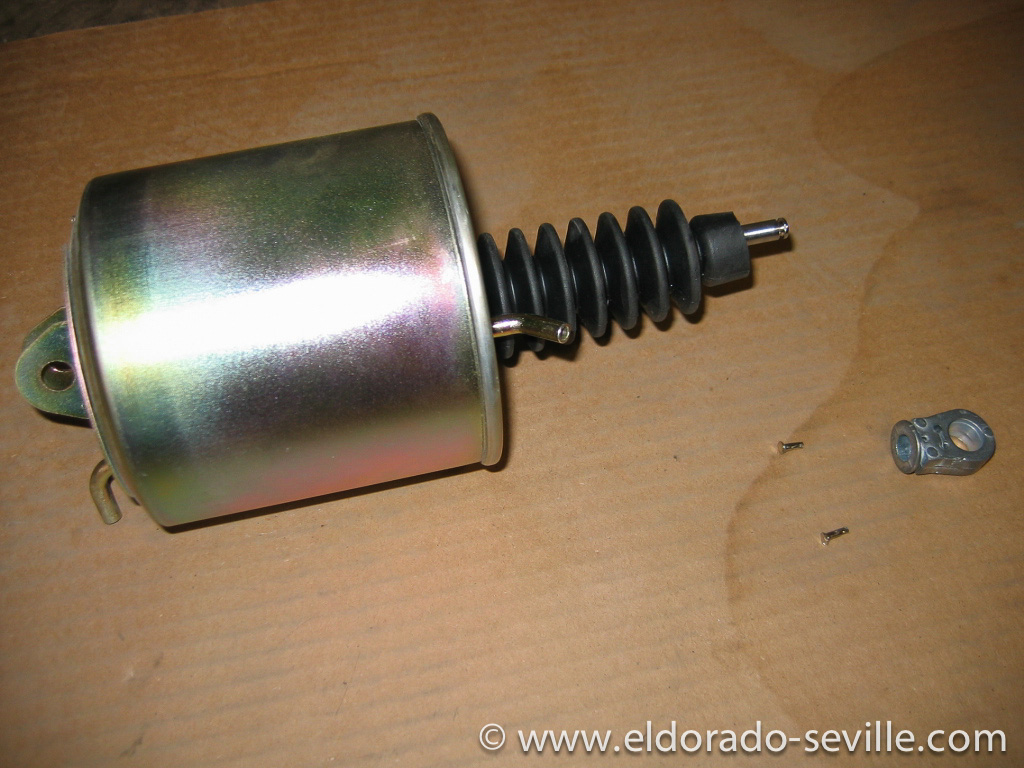
I bought an actuator for a 1969 Camaro RS. I removed the two pins that held the attachment to the end of the rod. Then I cut 3/8 of a inch of the rod off, so the rods were the same length. Then I beveled the end of the rod on a grinding wheel, for about a ½ inch at the end of the rod. This was done so that I could start a ¼ tap on the end of the rod. After the tap was done. I threaded on the Eldo clevis pin. Done! 20 minuets, $76 vs $245. Works fine. Thanks again for suggesting that in your post. Take care, Mark
The 1969 Camaro RS headlight actuator is slightly different from the original Cadillac actuator. It can be made to fit though.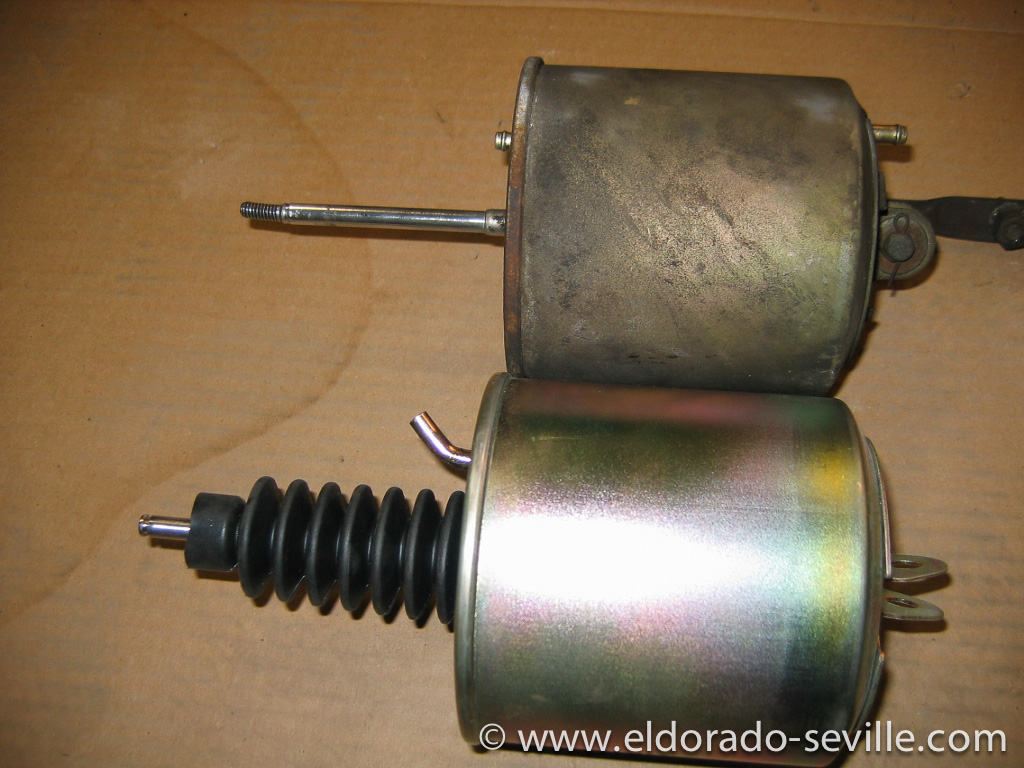
The original Cadillac OEM actuator on top and the Camaro RS actuator below. You can see the difference on the mounting. Also the air outlet is slightly curved on the Camaro. There is a thread on the Cadillac actuator and a clevis pin on the Camaro rod end.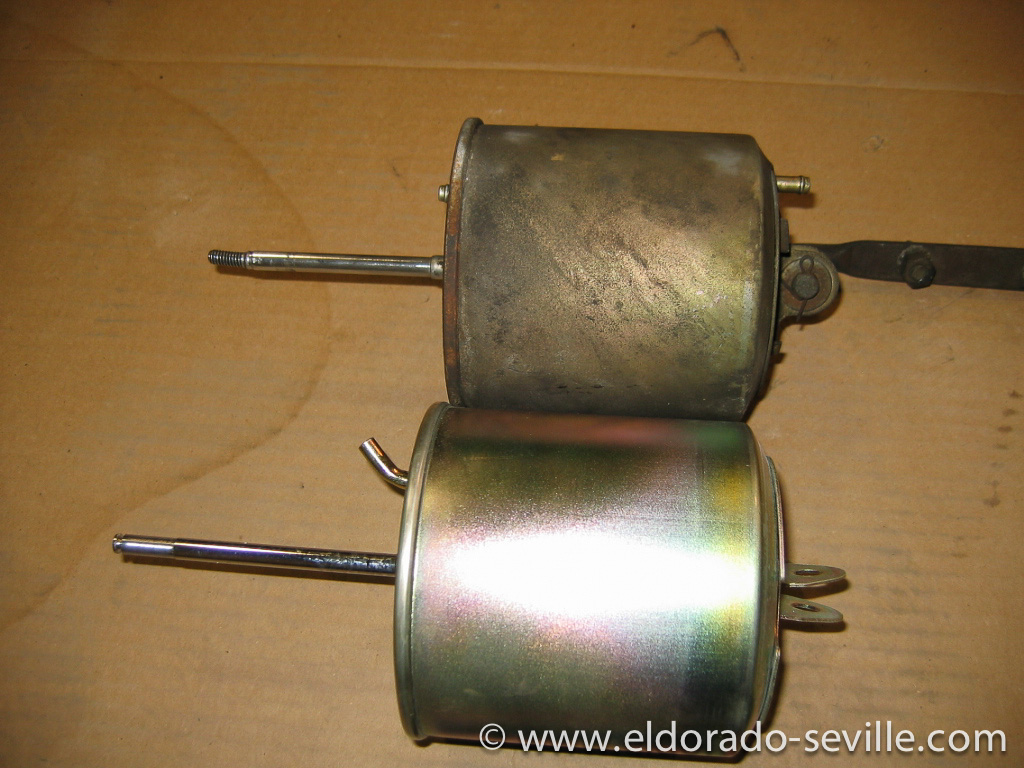
The original Cadillac OEM actuator on top and the Camaro RS actuator below. You can see the difference on the mounting. Also the air outlet is slightly curved on the Camaro. There is a thread on the Cadillac actuator and a clevis pin on the Camaro.
Mark beveled the end of the rod on a grinding wheel, for about a ½ inch at the end of the rod.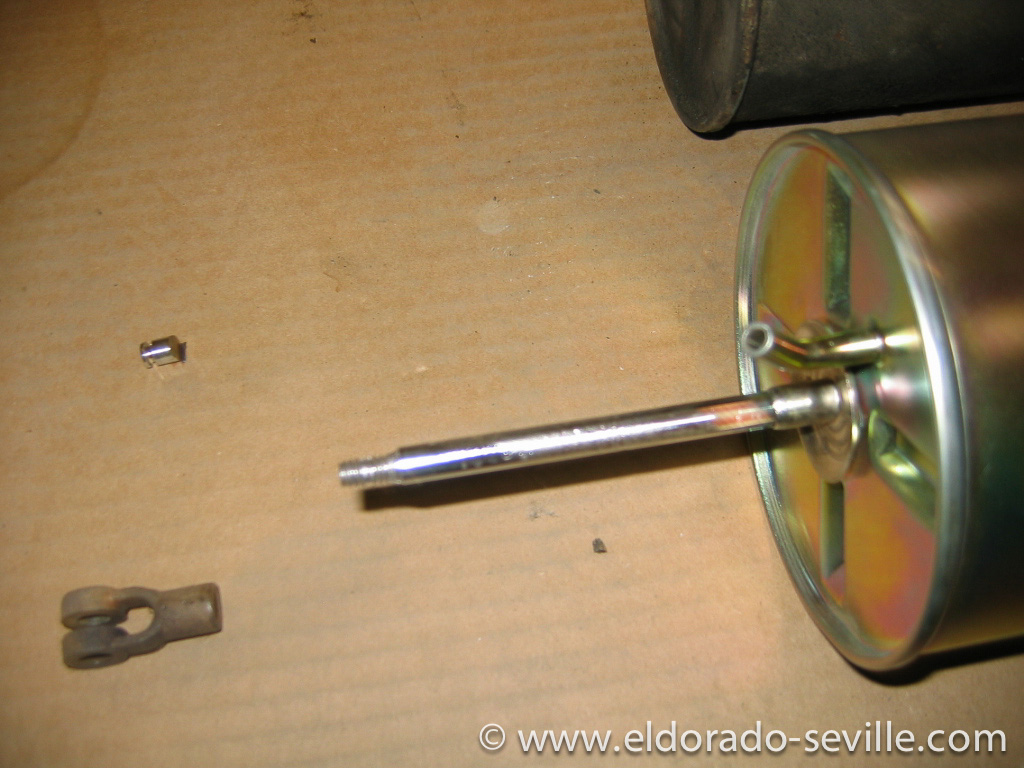
Mark cut a thread onto the Camaro shaft so that the original Cadillac clevis would fit.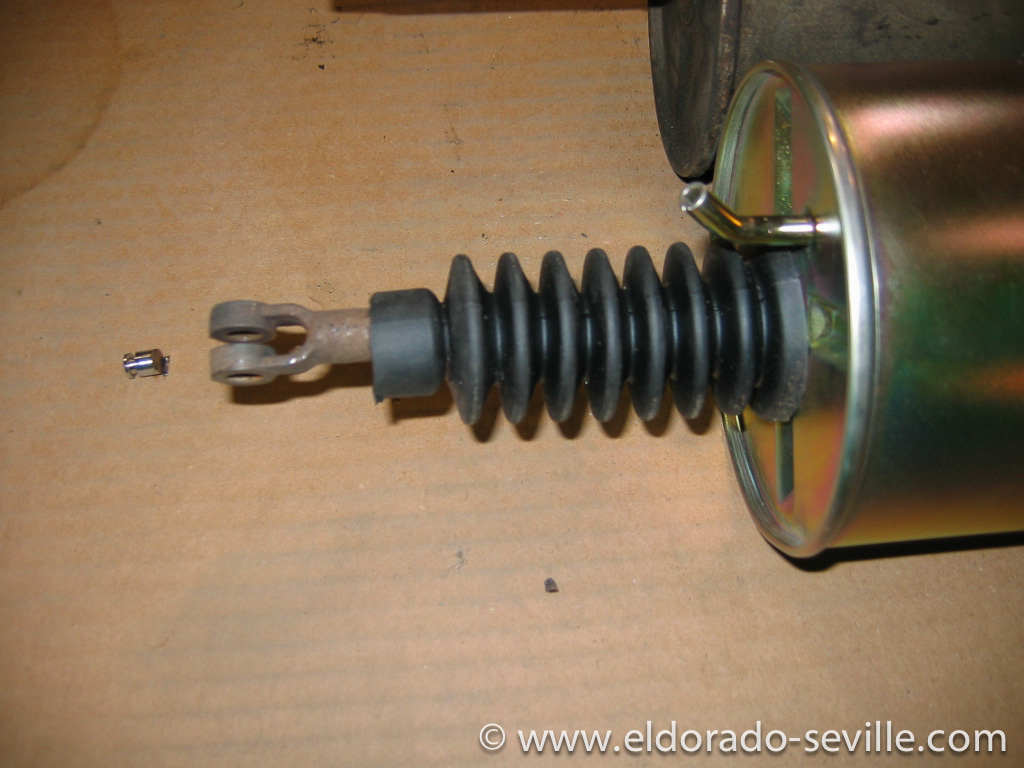
Finished- works perfectly. The modification is done.
A problem with the 67 Eldorados carburetor
The right headlight door actuator also suddenly no longer works correctly. All hoses are new and it worked perfectly until recently. I can now only make it close if I jiggle on the actuator. Is there any way to rebuild them? A source for new or rebuilt ones? I have heard that the ones from the 1969 Camaro is very similar and only needs some minor modifications to work on the Eldorado as well. So I went ahead and ordered one. But the worst thing was that the freshly rebuilt carburetor made strange ticking noises and sounded like a tractor while accelerating. It worked well though, but the sound was unbearable. Could it be a defective gasket? It was also idling quite badly. Acceleration was superb though, its much more powerful than before, but still something was wrong... The ignition also was completely rebuilt. So I played around with the ignition first, but the ticking sound did not go away, no matter in which direction I changed the timing... Almost sounded like an exhaust leak, but there seemed to be none... It was LOUD! Before I had the carb and ignition rebuilt, it was extremely quiet and idling smoothly but had misses while accelerating.
I got some very valuable tips from fellow Cadillac aficionados and the previous owner of this Eldorado even called me from the USA to give me some tips to solve this issue, and he was spot on with his diagnosis...
With a hose held to my ear and the other end to the carburetor, I was able to locate the source of the noise. It came from the carburetor below the choke assembly. So I took the freshly rebuilt Rochester Quadrajet out again, only to find out that the gasket and the metal shim were installed the wrong way around. This burned a hole into the brand new gasket where the exhaust gases from the heat crossover passage could escape and make this noise.
Of course I did not have a new gasket at hand, so I carefully removed the old one from my spare engine, which was in pretty good shape and installed it.
No more ticking - no more noises, no more bad idling.
The car now drives amazingly good and is silky smooth. It could not be any better.
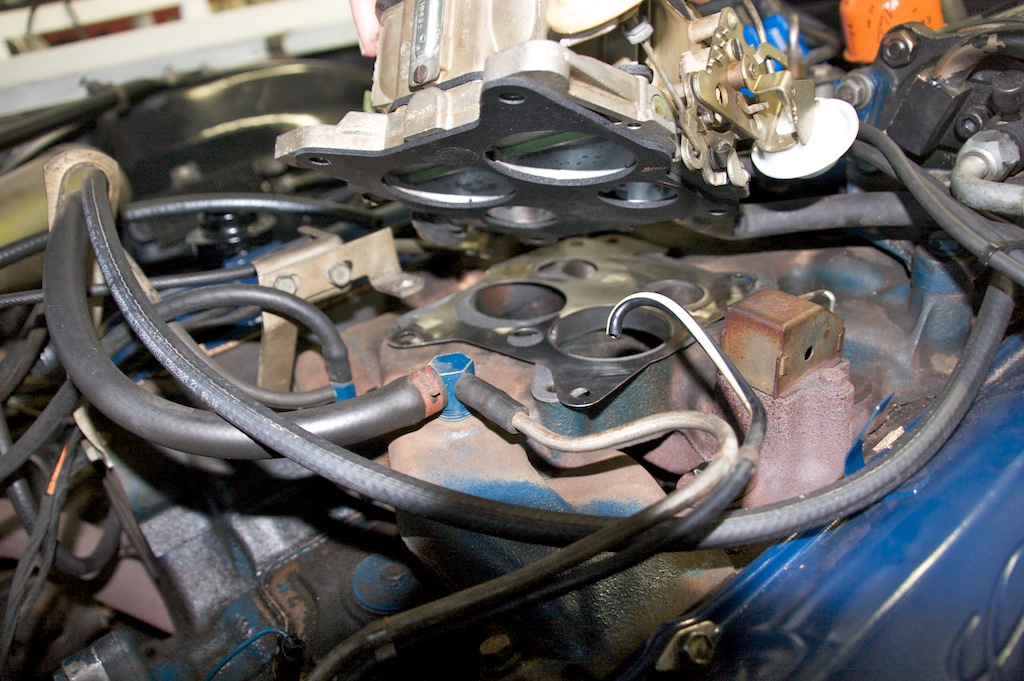
The shim was installed first and then the carb - thats wrong! The gasket has to go on the intake manifold first - then comes the metal shim.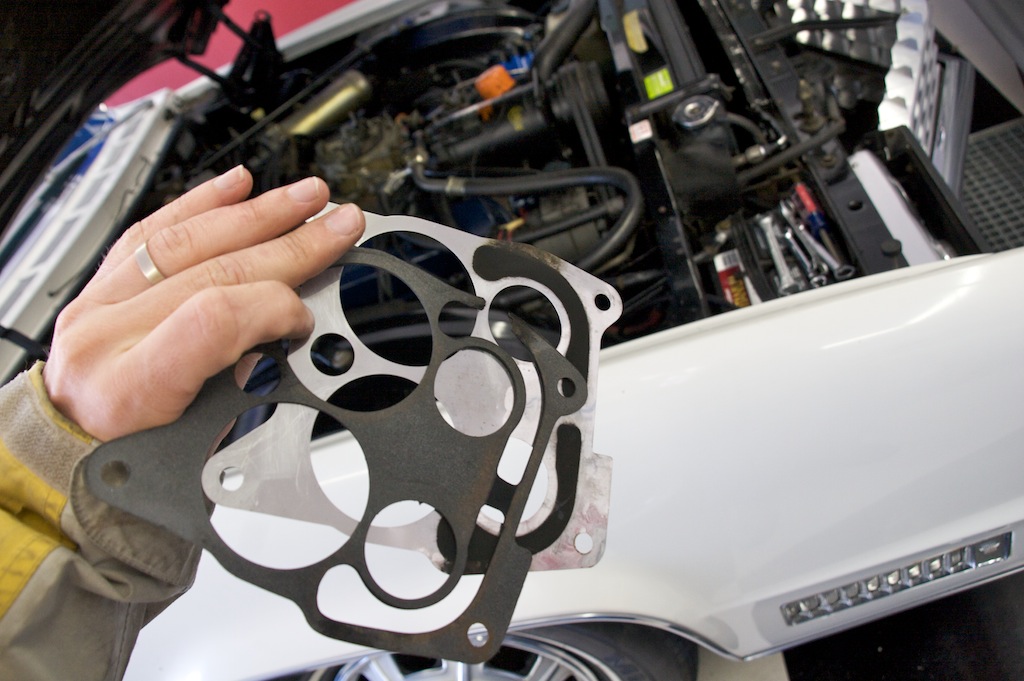
Here you can see the burnt gasket and the metal shim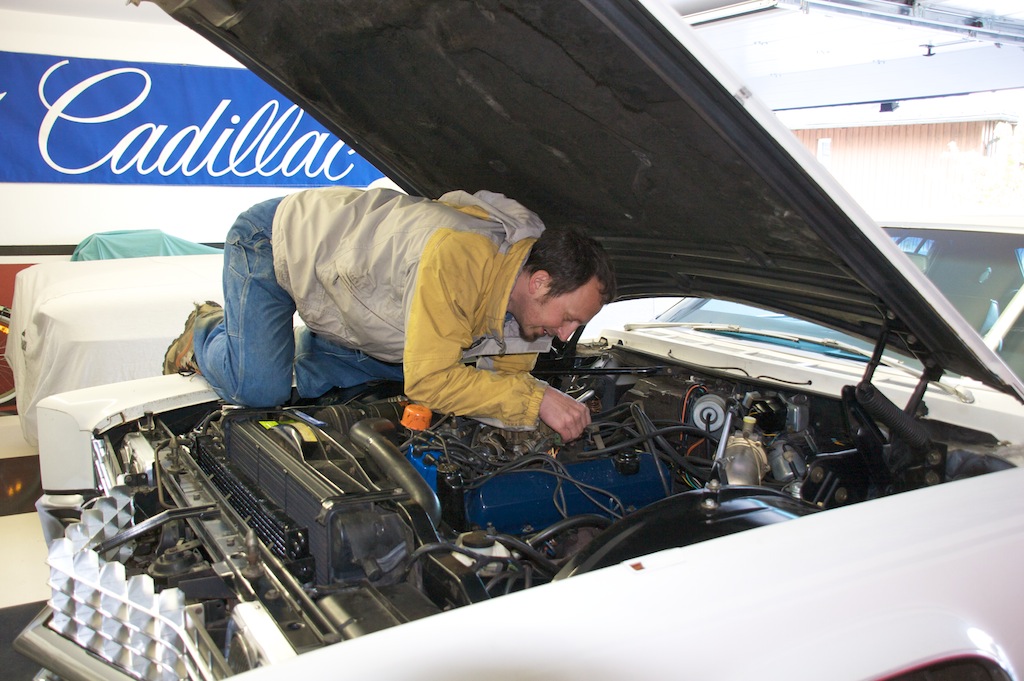
Putting everything back together again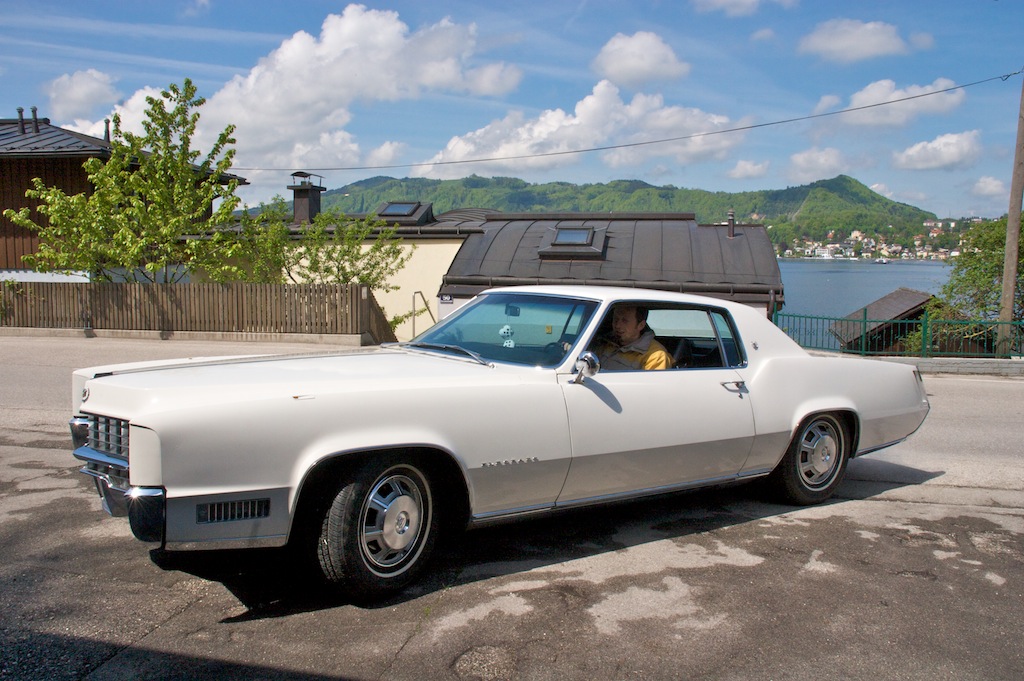
Test drive after the repair - perfect!
The 1967 Eldorado headlight door repairs - first spring outing
While I had the 67 Eldorado out I also turned on the headlights and was once again annoyed by the fact that the right one opened simultaneously, but closed slightly slower than the left one when I turned the lights off. There was a difference of around 1 second in movement between the two headlight doors.
Being a perfectionist I could not stand this, so I began searching for the problem. I already had spent some time in the past trying to fix this, but I did not succeed. The system is driven by vacuum only, so I started to look through the vacuum hoses once again. I had already exchanged a couple of them last year. I found another two brittle ones going through the firewall to the headlight switch from where a slight hissing sound was coming when the lights were on. When I touched them the hissing would become even more noticeable. I then tried to press them onto the connector of the switch and the first hose began to crumble into pieces. So I replaced all the hoses on the switch and rerouted them through firewall through the rubber insulation. There are three hoses . One is the vacuum feed (the one in the middle - I think it was yellow), one is for opening the doors (green) and one for closing (red). I also replaced the red hose behind the firewall going to a T-connector from where the vacuum is fed to the headlight door actuators. I had already replaced the two hoses after the T-connector in the past. With all new hoses in place the doors now perform almost simultaneously and quite fast. So when you run into troubles with your headlight doors, check and replace all the according vacuum hoses first. Its amazing how brittle the hoses going to the headlight switch inside the car can become over the years. It looks like they used a quite different material for these three hoses, as all other vacuum hoses are in much better shape and do not show any sign of deterioration at all.
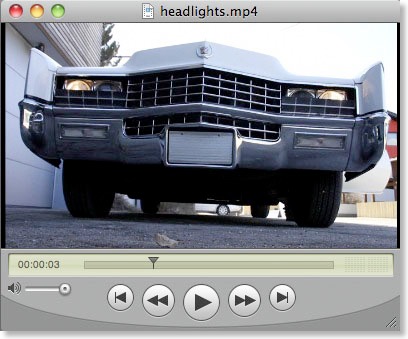
You can see a video of the headlight doors in action below. On this video they are slightly out of sync. As it looks like they are slightly different every day, depending on temperature and engine idle...
watch on youtube or below
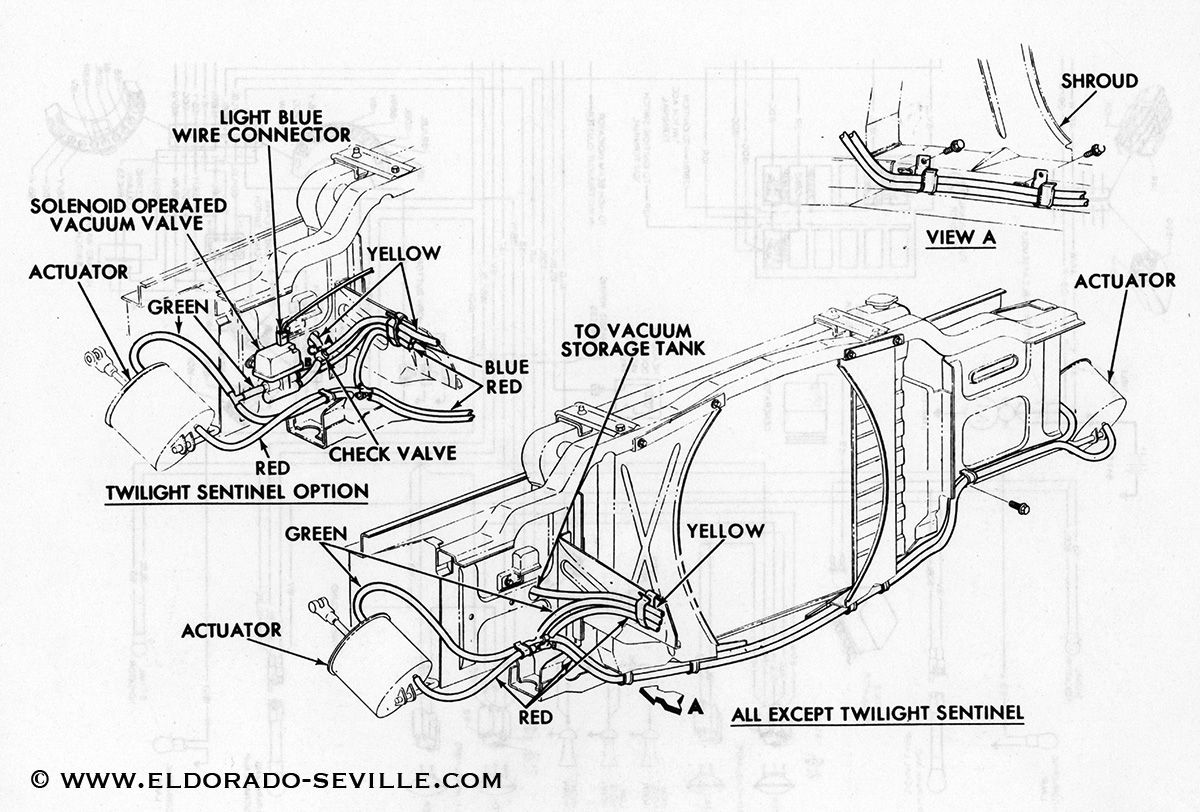
the vacuum diagram for the headlight doors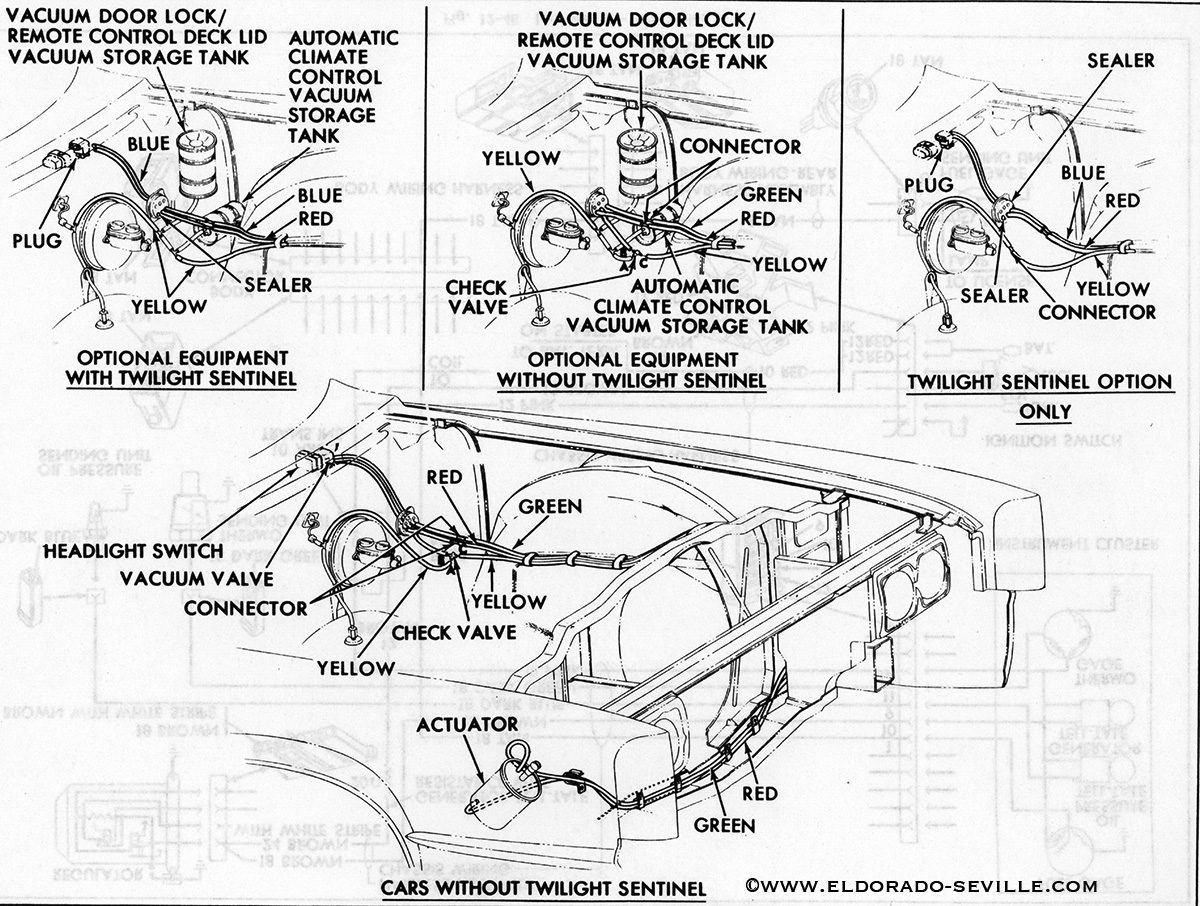
The vacuum diagram for the headlight doors
While the Eldorados were outside the garage my wife used the opportunity to shoot a couple of pictures she had in her mind, which she is planning to hang into the kids room. Cant wait until the medium format film is back from the photo lab. Below you can see only some digital snap shots I took.
Despite the last two unusual warm and beautiful days unfortunately winter is not over yet here in Austria, as some more snow is predicted for next week and the cars are back in the garage desperately waiting for April to come...
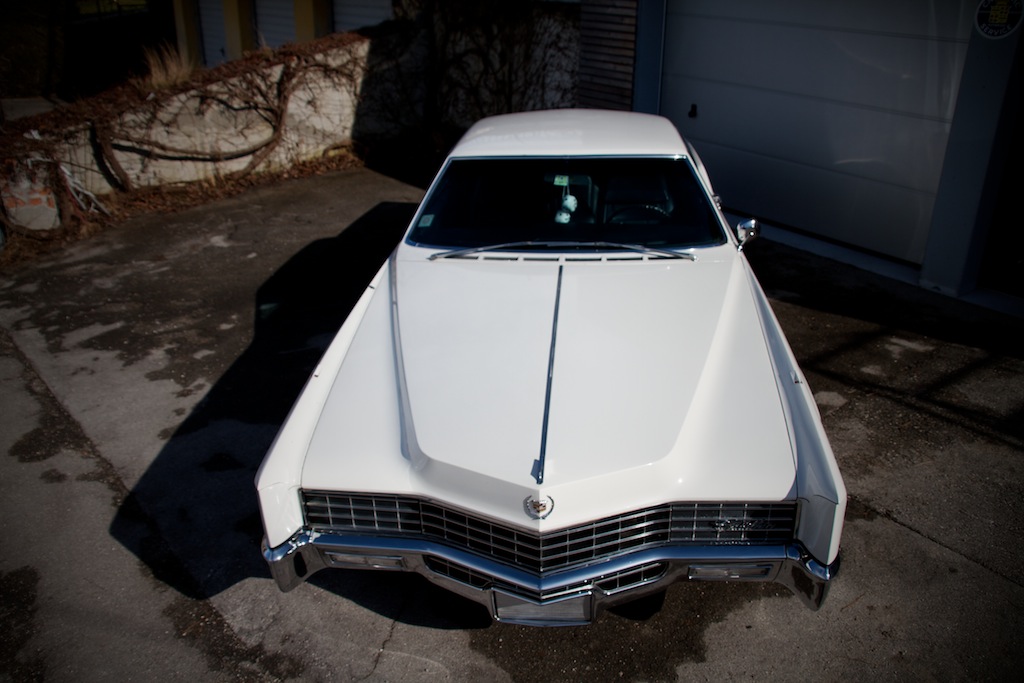
The Eldorado is enjoying some sun rays for the first time this year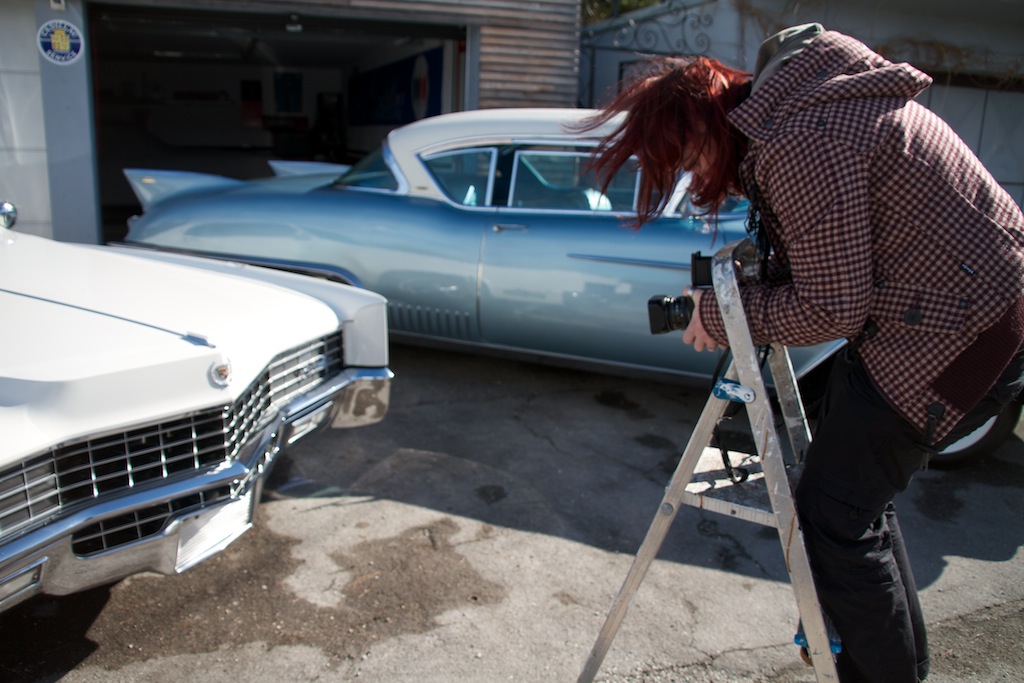
Although she is 7 months pregnant, my wife Afra is still climbing ladders to get the best angle for her shots...
The two Eldorados in front of the garage where the snow has just melted away.
1966 Cadillac Coupe deVille (15)
1967 Cadillac DeVille (54)
1967 Cadillac Eldorado (71)
1971 Lincoln Continental Mark III (23)
1974 Cadillac Coupe deVille (45)
1978 Cadillac Eldorado Biarritz (24)
1996 Buick Roadmaster (19)
Car Shows (53)
Cruising (4)
For Sale (3)
Garage Stuff (32)
Pacer (1)
Restoration (137)
Various (55)
Video (16)
Website News (30)
- 6 way power seat
- 8-track
- 10 Ohm
- 429
- 1932
- 1957
- 1958
- 1958 Cadillac Eldorado Seville
- 1958 Cadillac Repair Tip
- 1959 Cadillac Eldorado Seville
- 1964
- 1965
- 1966
- 1966 Cadillac Coupe deVille
- 1966 Cadillac Repair Tips
- 1967
- 1967 Cadillac DeVille
- 1967 Cadillac Eldorado Repair Tip
- 1967 Cadillac Repair Tip
- 1967 Eldorado
- 1968
- 1970 Cadillac Eldorado
- 1971
- 1971 Lincoln Continental Mark III
- 1974
- 1974 Cadillac Coupe DeVille
- 1974 Cadillac Repair Tip
- 1976
- 1977
- 1978
- 1978 Cadillac Eldorado Biarritz
- 1978 Cadillac Repair Tip
- 1980 Cadillac Eldorado Biarritz
- 1996
- 2012
- 2014
- 2017
- 2018
- 2019
- 2022
- 2023
- 3063206
- 7027235
- 7800483
- 7805675
- 7805676
- 12355706
- 17058531
- 17059968
- 17059969
- 22010515
- 22010661
- A.I.R
- A6
- AC
- AC Compressor
- AC Electrical Diagram
- ACC
- Accelerator Pump
- Accelorator pump
- Actuators
- Adriatic Blue Metallic
- Ads
- Aftermovie
- Air Pump
- Aircondition
- AIRPUMP
- ALC
- Alternator
- AM
- AM-Transmitter
- Antenna
- Anti Rattle Clips
- Antique Gold
- Arizona Vintage Parts
- Arrival
- Article
- ASC
- Ash Tray removal
- ATC
- Atlantis Blue Firemist
- Austria
- Austro Classic
- Autolite SP-459
- Automatic Seat Back Release
- Award
- Banner
- Barn Find
- Battery
- Battery Tray
- Beach Race
- Bearing
- Bendix
- Biarritz
- Bigfoot
- Bill Hirsch Engine Enamel
- Bleeder Screws
- Blower
- Bolts
- Borg
- Brake Booster
- Brake Fluid
- Brake Gray
- Brakes
- Broken Bolt
- Brougham
- Bucket seats
- Buick
- Bumper End
- Bushings
- Cadillac
- Cadillac BIG Meet
- Cadillac BIG Meet
- Cadillac birthday cake
- Cadillac Blue
- Cadillac Color Selections Dealer Book
- Cadillac Coupe deVille
- Cadillac Dealer
- Cadillac Meeting
- Cadillac Mini Meeting
- Camaro RS
- Caorle
- Car Show
- Carburetor
- Card
- Carpet
- Carter AFB
- Cavalry Twill Vinyl
- CB
- CBM
- CCCD
- Choke
- Christmas
- Citizens Band
- Classic Cadillac Club Deutschland
- Clay Towel
- Cleaning
- Clock
- Clockwork
- Clutch
- Clutch Coil
- Collector
- Colonial Yellow
- Color Coded Springs
- Commercial
- Compound
- Compressor
- Condenser
- Continental Mark III
- Control Head
- Conversion
- Convertible top
- Coolant
- Corona
- Cowl
- Cruise Control
- Cruising
- CV Boots
- CV JOINTS
- D6230
- Dash Trim
- Decal Removal
- Decals
- Decoration
- Dehumidifier
- Delco Moraine
- Der Standard
- detailing
- Deville
- Diagnosis Chart
- Diagram
- Dial
- Digital Rotary Drum Clock
- Diner
- Disc Brakes
- Distributor
- Diverter Valve
- Door Jamb Switch
- Door Rubber Conduit
- Dornbirn
- Dot3
- Drive Shaft
- Driving tour
- Drum brakes
- Dry Ice Blasting
- Dry Ice Cleaning
- DVD
- Eastwood
- Eldorado
- Electric Choke Thermostat
- Electrical schematic
- Elvis
- Engine Bay
- Ep
- Epoxy floor
- Europe
- Evaporator
- Exide
- Factory Markings
- Fender Skirt
- Floor
- Flushing
- Foam
- For Sale
- Front AXLE
- Front brakes
- Front bumper filler
- Front Floor
- Front wheel bearing
- Fuel Filter
- Fuel Pump
- Fuel Sending Unit
- Fusible Link
- Garage
- Garage Cabinets
- Gasket
- GE
- Gear indicator
- General Time
- Glove box light
- Grand European
- H4
- Haus of Hot Rod
- Headlight Actuator
- Headlight doors
- Headlights
- Heater Core
- Heater Hose
- Heater Valve
- High Idle
- Holley
- Honest John
- Hood
- Hood Emblem
- Hood Ornament
- Hose Clamp
- Hot Choke
- Hot Water Valve
- HotRod
- How to
- Hödlmayr
- Ignition Diagram
- Illuminated Entry
- John D‘Agostino
- John Foust
- Klassikwelt Bodensee
- Kremsmünster
- LaSalle
- Leather seats
- Light Switch
- Limited
- Lincoln
- Lincoln Mark III Repair Tip
- Low Mileage
- Magazine
- Marilyn Monroe
- Mark III
- Master Cylinder
- Master Switch
- Master Vacuum Switch
- Media Blasting
- Meeting
- Meguiras
- MK II
- Mobile
- Model
- Moldings
- Mom
- Mopar Nationals
- Mostkost Kustom
- Movie
- Neon
- NOS
- Oberösterreicher des Tages
- oilchange
- ORF
- Overspray
- Pacer
- Paint
- Paint correction
- Paintjob
- Part Number
- Parts
- Patch Panel
- Perfect Circle
- Permabag
- Persian Lime
- Photo shooting
- Photoshooting
- Pictures
- PinUp
- POA Valve
- Power Antenna
- Power Servo
- Power Vent Windows
- Power Window
- Printed Circuit Board
- Programmer
- Pulley
- Quadrajet
- Quarter Panel
- Quartz Conversion
- R134
- Radiator
- Radio
- Rattle
- Rear brakes
- Rebuild
- Recalibrate
- RediRad
- Reed Switch
- Relais
- Relaunch
- Removing Overspray
- Repaint
- Repair
- Restoration
- RIP
- Roadhouse
- Roadmaster
- Rochester
- Rocker Arm Cover
- Rocker Panel Extension Clips
- Rostio
- Rotary Valve
- Rotterdam
- Rupes
- Rust removal
- Rust removal gel
- Sabre Wheels
- Sand Blasting
- Sandblasting
- Screed
- Season Greetings
- Seasons Greetings
- Seat Back Locks
- Seat Padding
- Seat Transmission
- See through ornament
- Self adjusters
- Sepp's Garage
- Seville
- Sheetmetal
- Shocks
- shop manual
- short
- Sign
- Solenoid
- Spark Plug Wire Routing
- Speakers
- Special Award
- Speed Bleeder Screws
- Splash Guard
- Starter Diagram
- Starter Motor
- Steering Column
- Storage
- suction throttling valve
- sunroof
- suspension
- Swirl Mark removal
- Switzerland
- T3
- Taillight Cover
- Texan´s Choice Award
- Thermostat
- Tilt and Telescope
- Time capsule
- Tomsclub
- Torque Specifications
- Tower Hose Clamp
- Towtruck
- Transducer
- Transmission
- transmission control selector
- transmission control selector indicator light
- transmission shift indicator
- Treadle Vac
- Treffen
- Tri-Band
- Troubleshooting
- Trunk Cardboard Kit
- Trunk lining
- Trunk to bumper cover
- Turn Signal Switch
- TV
- Typisierung
- Ultimate Garage
- Underbody
- Undercarriage
- Undercoating
- Undercoating Removal
- Vacuum Booster
- Vacuum diagram
- Vacuum hoses
- Vacuum Master Switch
- Vacuum Schematic
- Vacuum Valve
- Valve Cover
- Various
- Vent Window Switch
- Vibration
- Vibrator
- Vicodec roof
- Video
- Vinegar
- Vinyl Roof
- Visitor
- Washer Fluid Float
- Washer Fluid Low Level Indicator
- Water Pump
- Wax
- Weatherstripping
- Website News
- Westclox
- Wheel Bearings
- Wheel Housing
- Wiesbaden
- Windlace
- Winter
- Wiring
- Wiring Diagram
- Wonderbar
- Workbench
- Zurzach