 GERALD´S CADILLACS - NEWS
REPAIRING THE 6 WAY POWER SEAT OF THE 1958 ELDORADO SEVILLE
First I suspected that the switch has a problem - so I took it apart. With a test light you can easily test its function. With a three way jumper wire you can simulate the switch as well at the switch connector. You can see the picture below from the shop manual and its described which terminals you have to connect together to get the desired movement. The shop manual is extremely helpful in diagnosing any seat related problem. Check it out below!
Everything was fine at the switch. So I checked the wires going to the solenoids. There is a plug underneath the switch and I checked the wires from there. Everything was ok there as well.
For some reason the mechanism still did not engage. The front actuator was repaired by the previous owner once, as there were some screws in there which originally were not used. I tightened them and suddenly it worked again when I almost wanted to give up and wanted to try to find a good used one from one of the Cadillac parts places.
I hope it will work now for a long time. The seat is fully adjustable again.
Below are some pictures from the shop manual which should be very helpful if you have power seat problems as well.
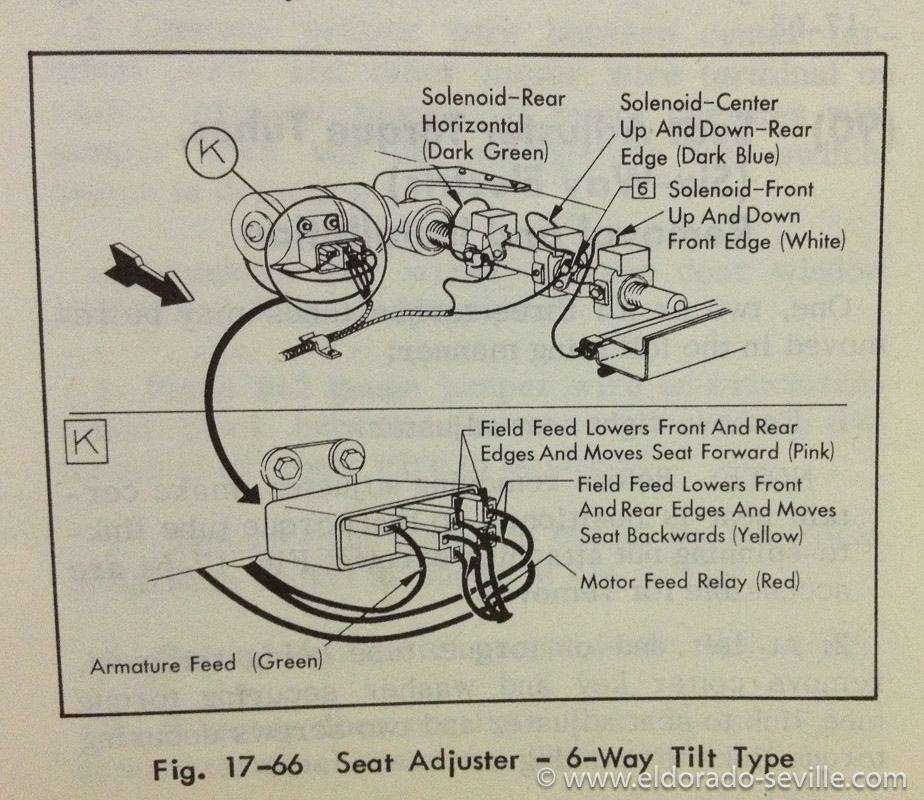
Six-way power seat diagram.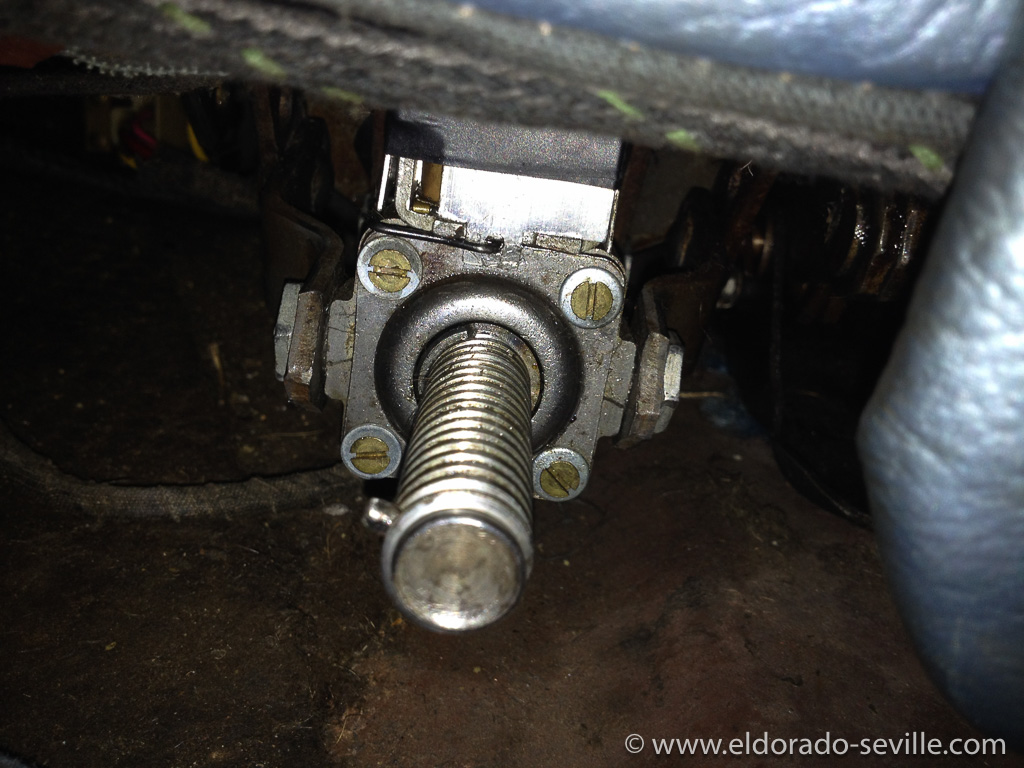
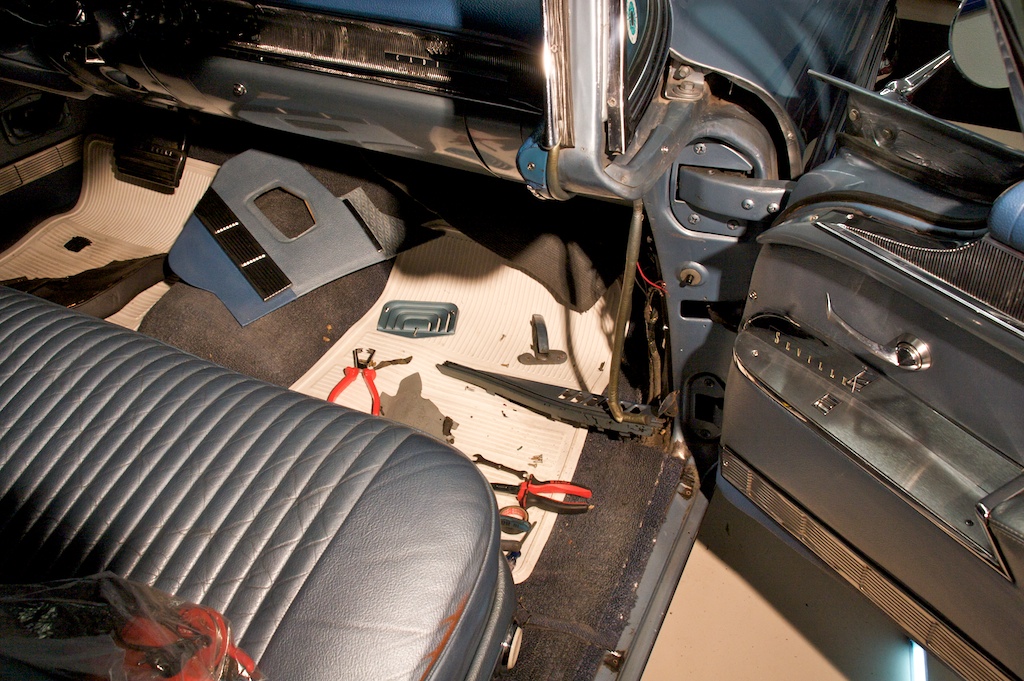
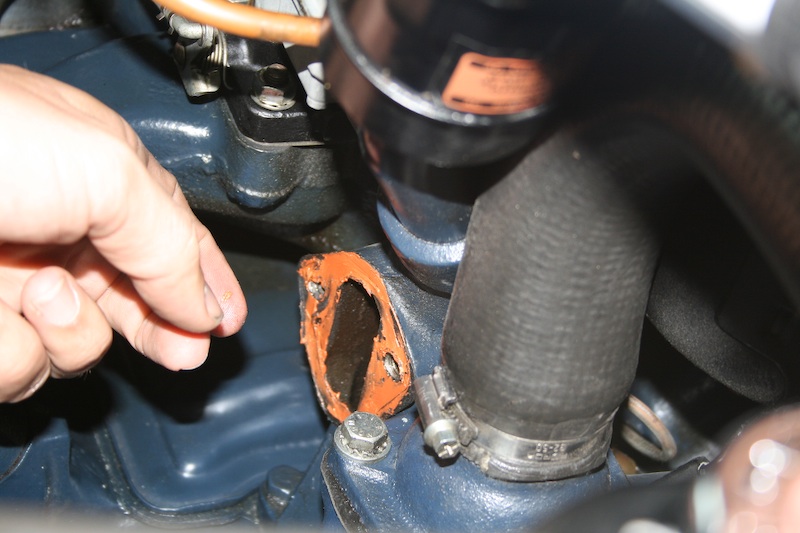
Thats the front actuator and solenoid which had a problem on my car. The mechanism did not engage for some unknown reason. Probably a bad internal contact or the mechanism was stuck somehow.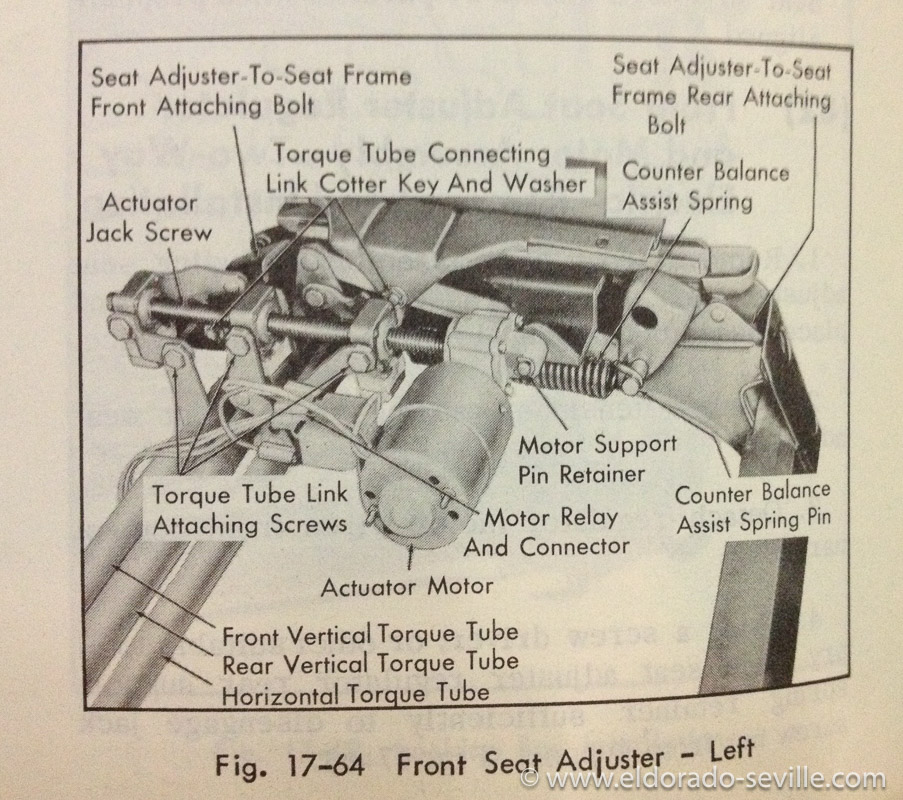

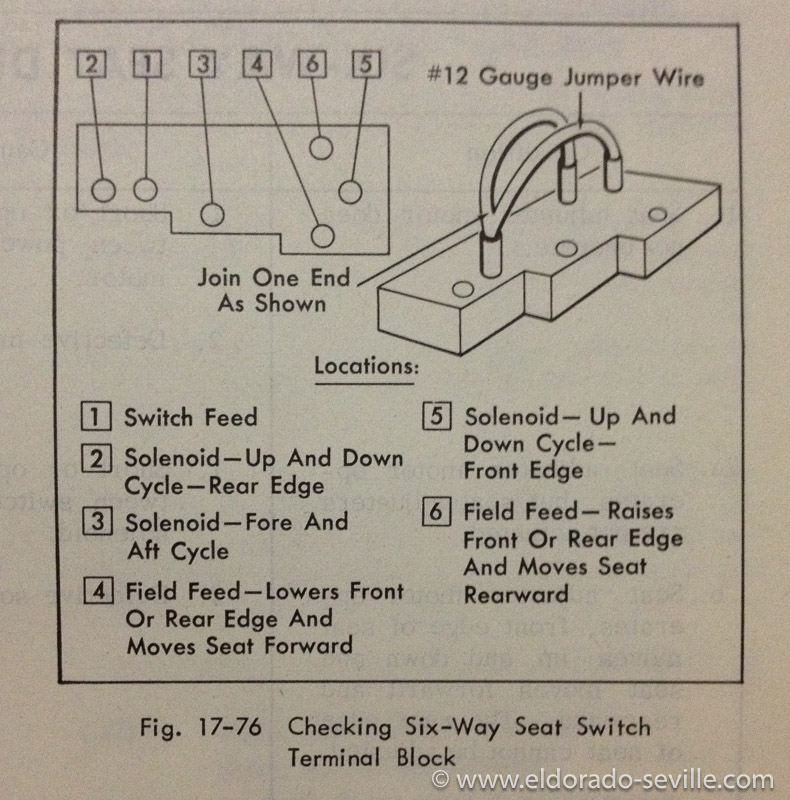
This 3 way jumper wire is very helpful to test the various functions and to rule out any problem with the switch.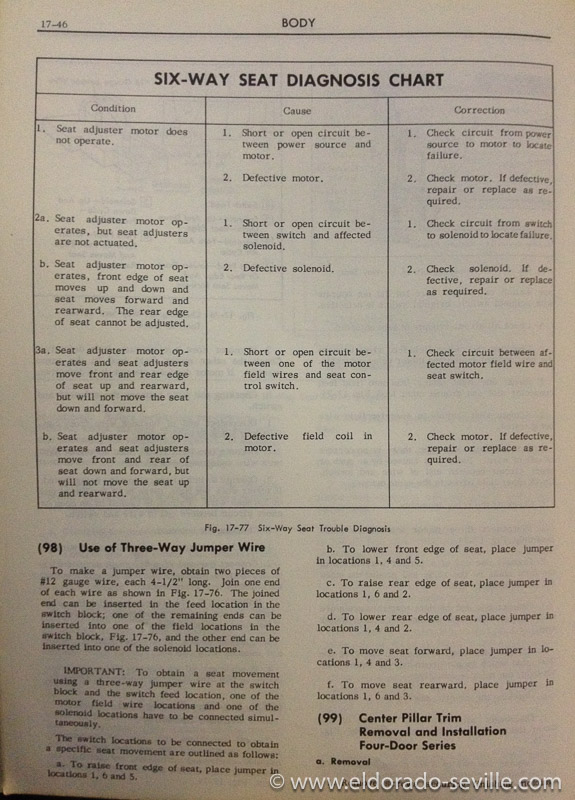
The procedure to test all the functions of the seat.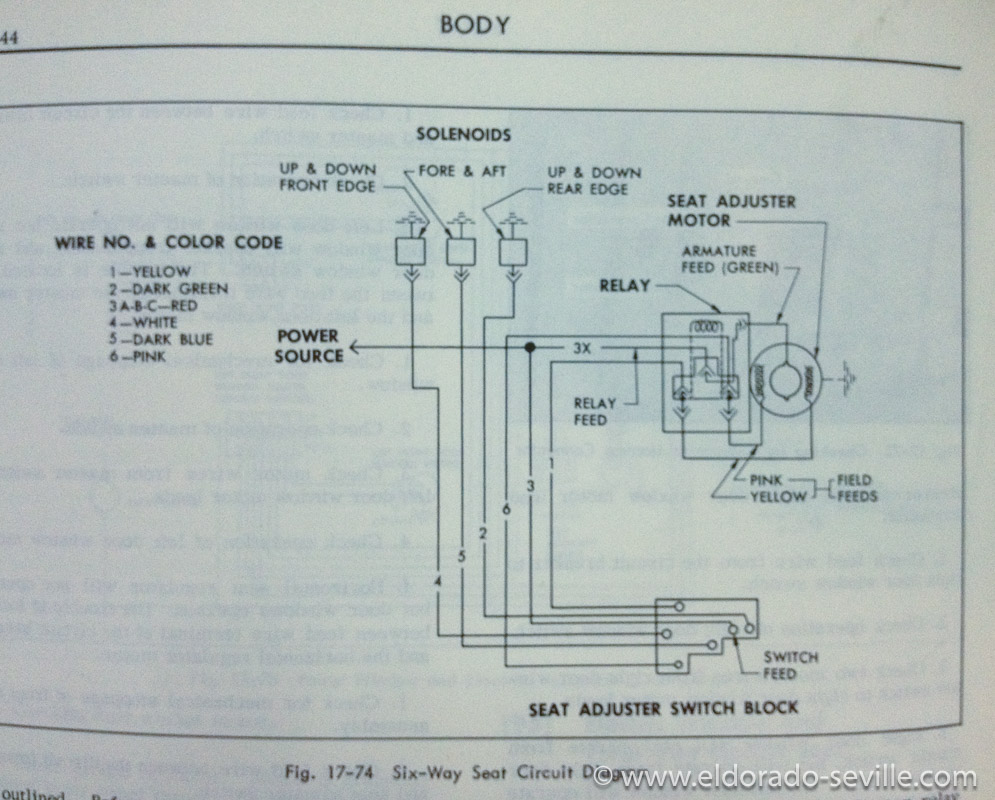
The 6 way power seat wiring diagram.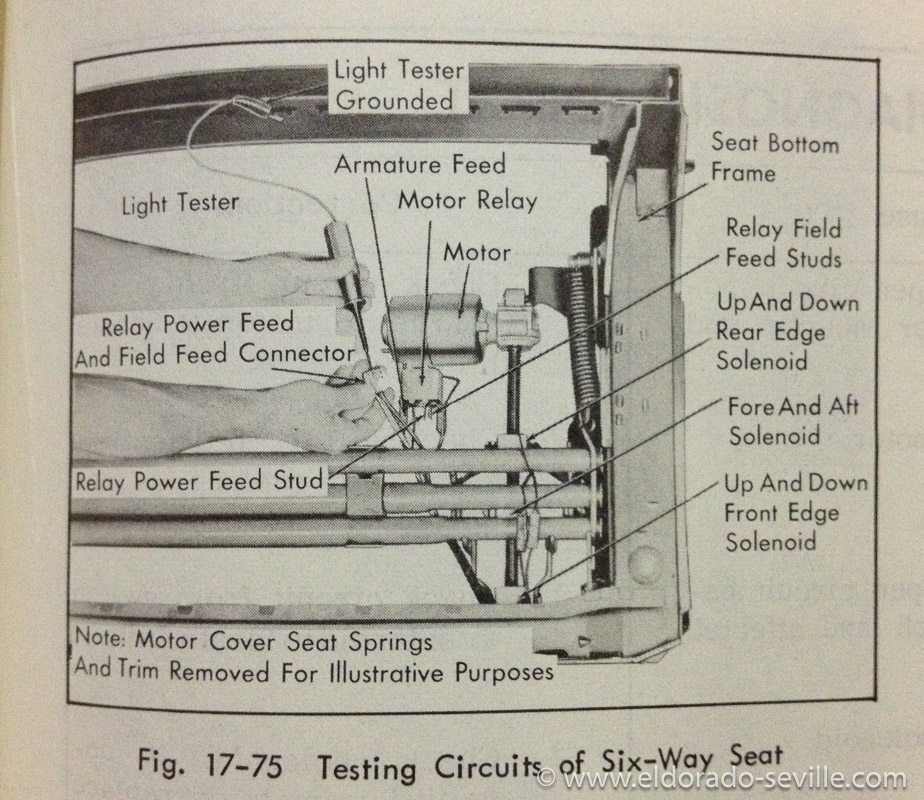
How to test the circuits.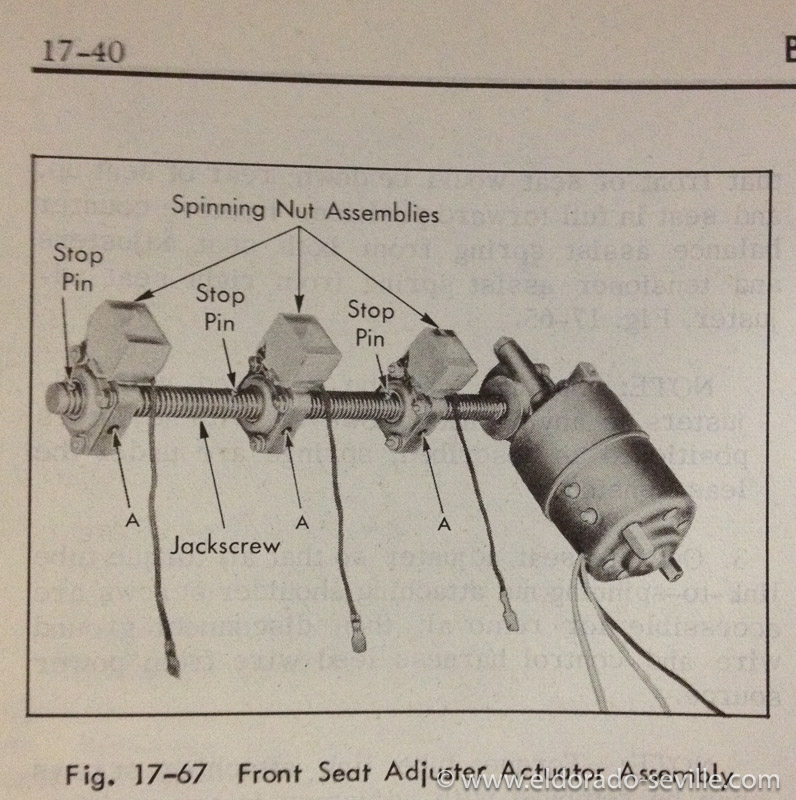
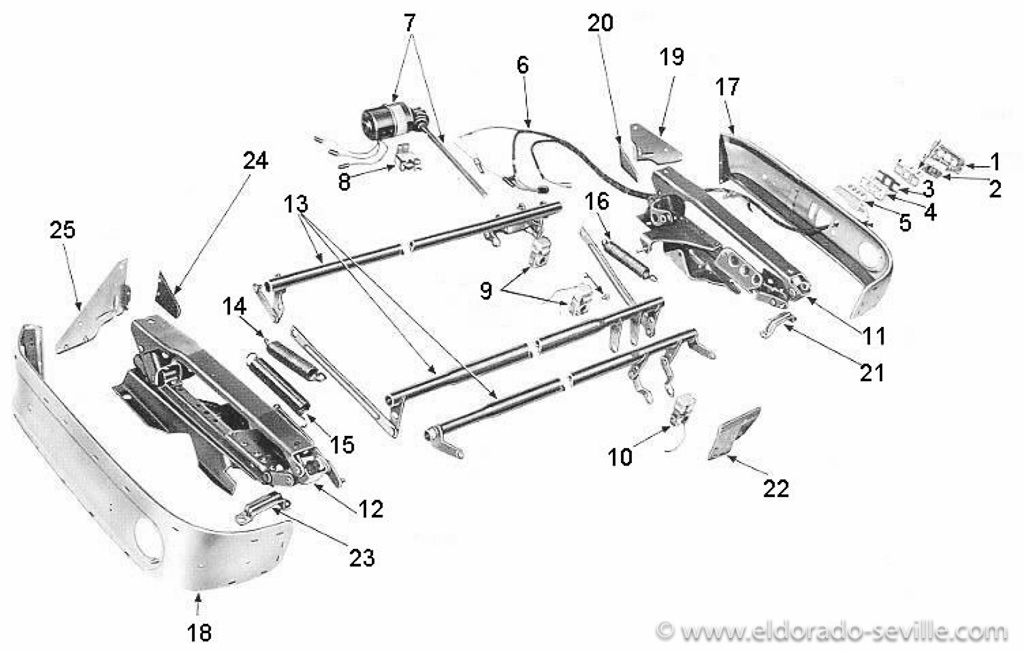
Front Seat Adjuster Actuator Assembly (1957 and 1958)
REPAIRING THE WONDERBAR RADIO OF THE 1958 CADILLAC SEVILLE
Another Cadillac fan I know who likes to try to repair old things and especially older tube radios wanted to give it a try. So the radio came out of the dash.
After his first investigation it soon turned out that the vibrator inside the radio was inoperative.
We could not find a new one - so he decided to cut the aluminum tube with the vibrator inside open.
He ordered a couple of other parts and somehow managed to repair the original vibrator.
I have no clue how he managed to do that and what he did exactly - but I now have a working AM - “Wonderbar" radio inside my 58 Eldorado Seville and for the first time I can proudly say that EVERYTHING works on my 58!
He also managed to repair the speakers on the 1966 and I have a perfectly working radio on this car as well now.

The 58 radio out of the car on the work bench…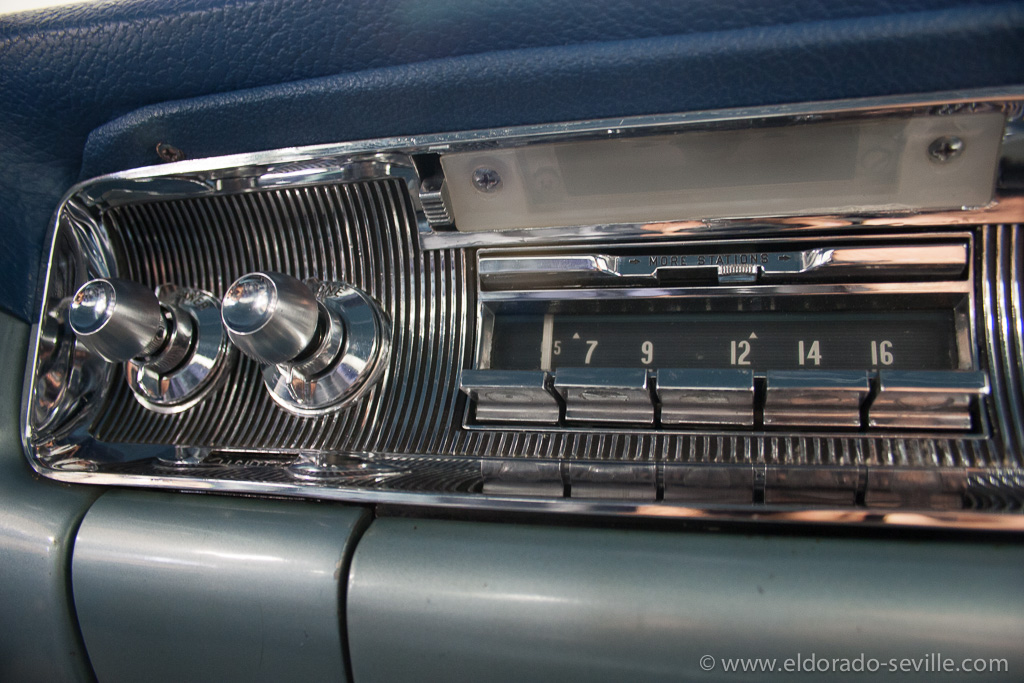
…and back in.
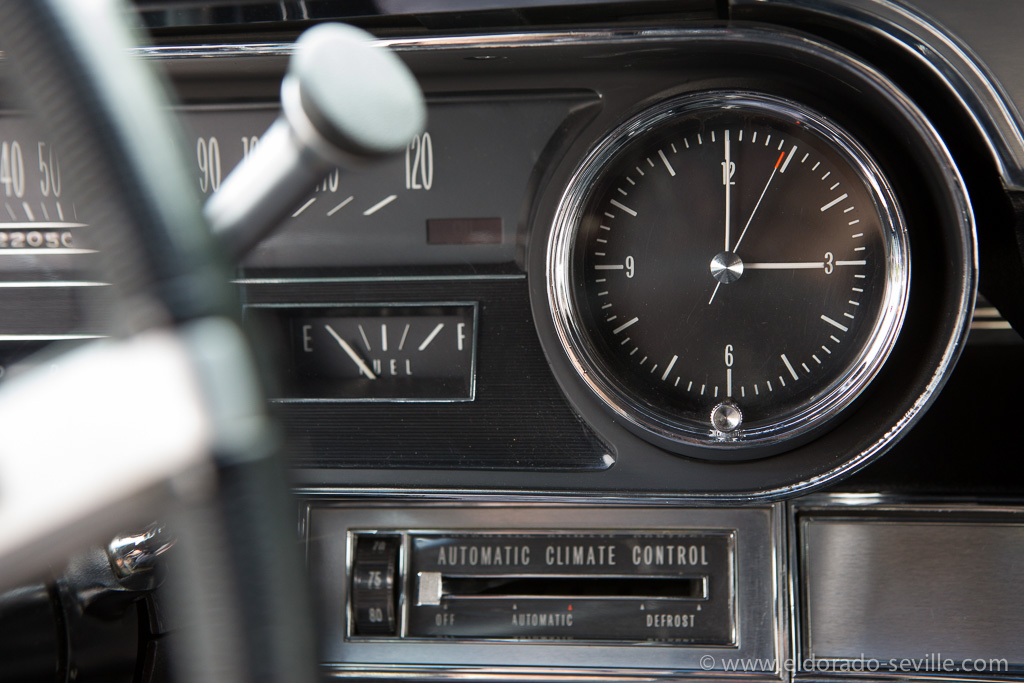
REPAIRING THE CLOCKS OF THE 1958, 1966 AND 1967 CADILLAC
So it was time to service some of the clocks which stopped working over the years.
The clock in the 66 did not work at all.
It's extremely simple to remove on the 66 as you can get it out of the instrument panel by just unscrewing one bolt.
The clock was very dirty in the clock work and needed a good cleaning and some good lubrication. Also the contact of the coil was a little worn and this was fixed. It then happily ticked back to life and now works perfectly.
The clock on my 58 stopped working a couple of years ago. So it came out as well. It's a little more complicated to get it out though...
When it was finally out - it could be seen that the coil was burnt and that it needed some very good cleaning as well. Some of the melted insulation material was all over the clock mechanism and of course I had no spare coil for it - so the original one had to be rewound with some good wire from a left over light solenoid...
Wow - this really took a while - but now the clock works perfectly again!
I was not so lucky with the clock on the 67 Eldorado which only worked when the car was warm. To take it out you have to remove the upper dash and then get out some light bulbs and disconnect it from the printed circuit.
It was also cleaned and lubricated and the clock worked, but it made a very loud noise when the coil rewound the spring of the clock.
The sound got better over night, but then the clock stopped working completely... It's a Westcox clock which uses a double coil and is much more complicated to rebuild than the Borg clocks. Its also almost impossible to find parts for it, as Borg clocks are much more widely used.
Looks like I will need a new 1967 clock and replace it with a Borg unit :-(
The clock in the 66 is now working perfectly again.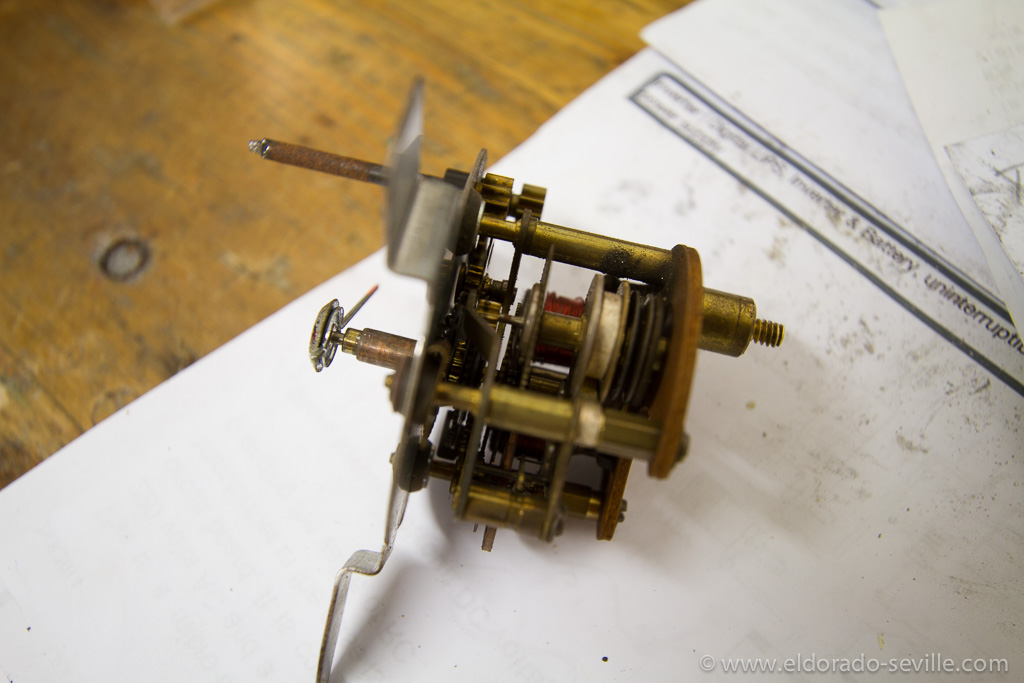
The disassembled clock of the 58 Eldorado.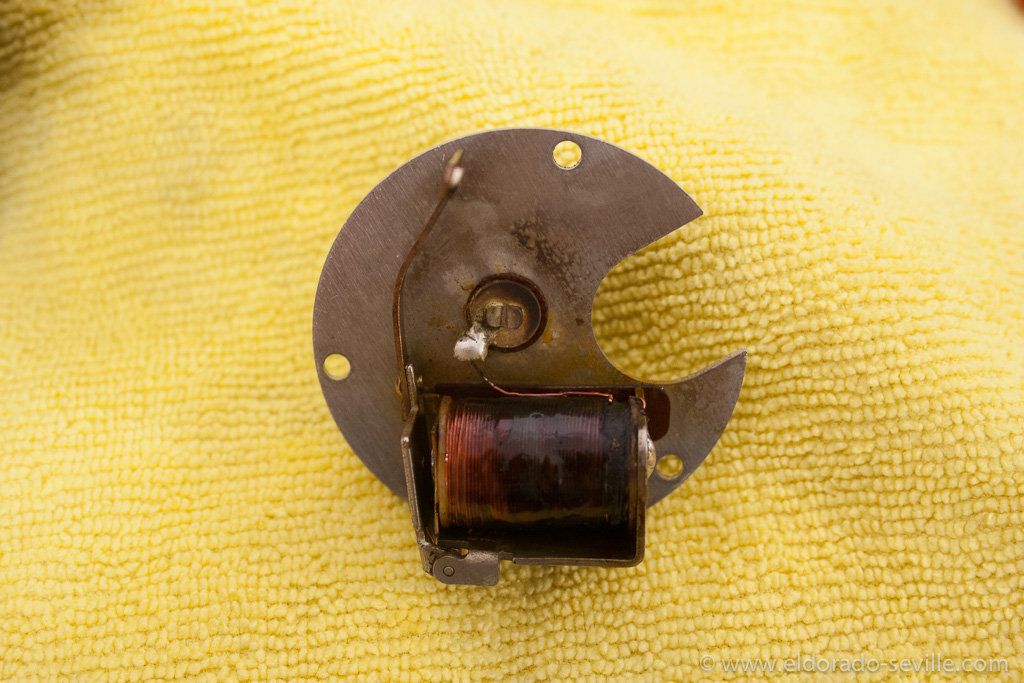
The coil was burnt on the 58 clock.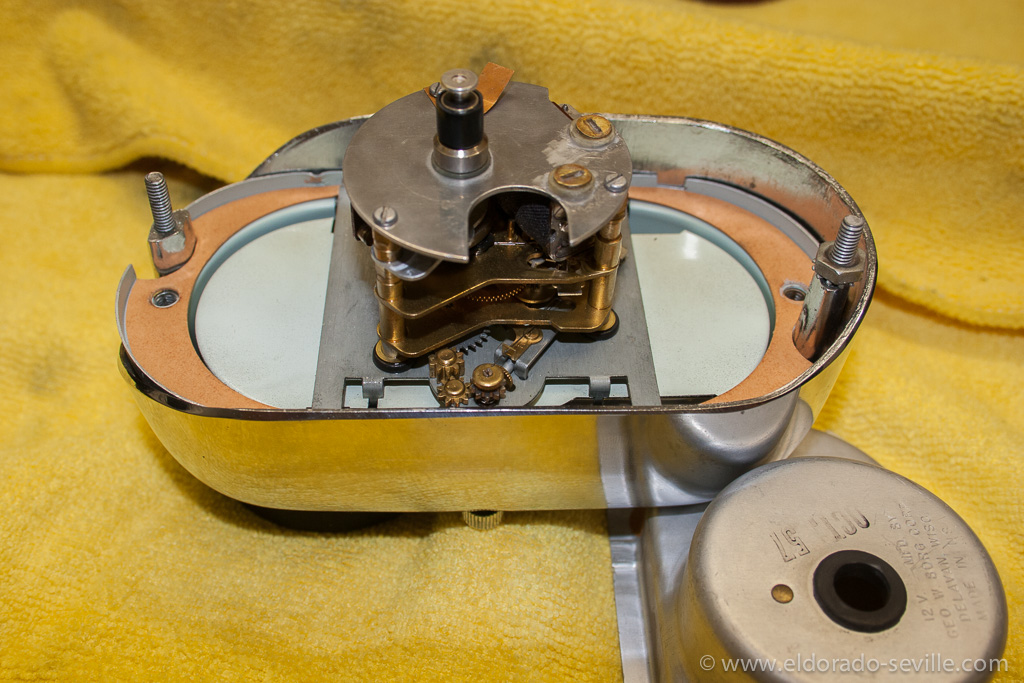
Fully cleaned clock. 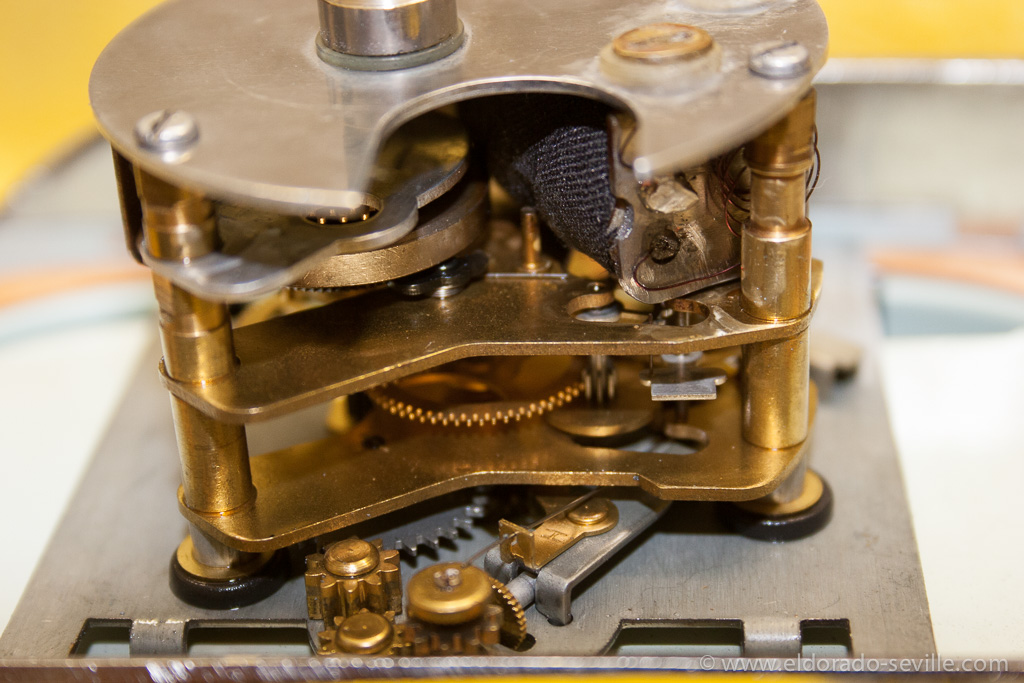
Back together with a rewound coil.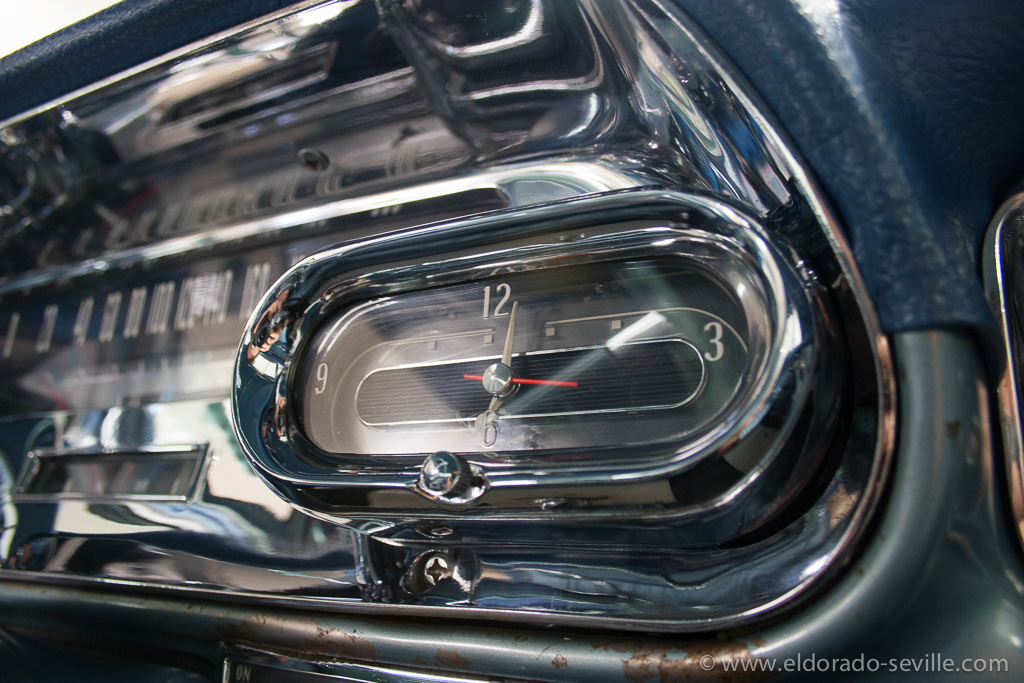
Back in the car - working perfectly again.
Cleaning the Vicodec roof of the 58 and the convertible top of the 67.
I have tried a variety of cleaning methods and cleaners over the years.
This time I used Meguiars professional vinyl cleaner #M39 ( I think this product is no longer available and they only offer #M40 now) along with their stiff nylon brush followed by a special nano foam sponge which is called "dirt eraser". It really removes dirt very thoroughly even from textured materials.
Both tops came out very clean - I then used Meguiars Convertible top impregnation to protect them from getting dirty again soon. It also weatherproofs the tops. (not that I would ever drive in rain with my cars... ;-) )
I have heard really good things about Meguiars Convertible Top Cleaner as well - will try it out next time...
Disclaimer: I´m not getting paid or receive any free products from the companies I´m mentioning here. If I like products or services I mention them and if I dislike things I will also talk about them in a less positive way ;-) I just like to share my findings.
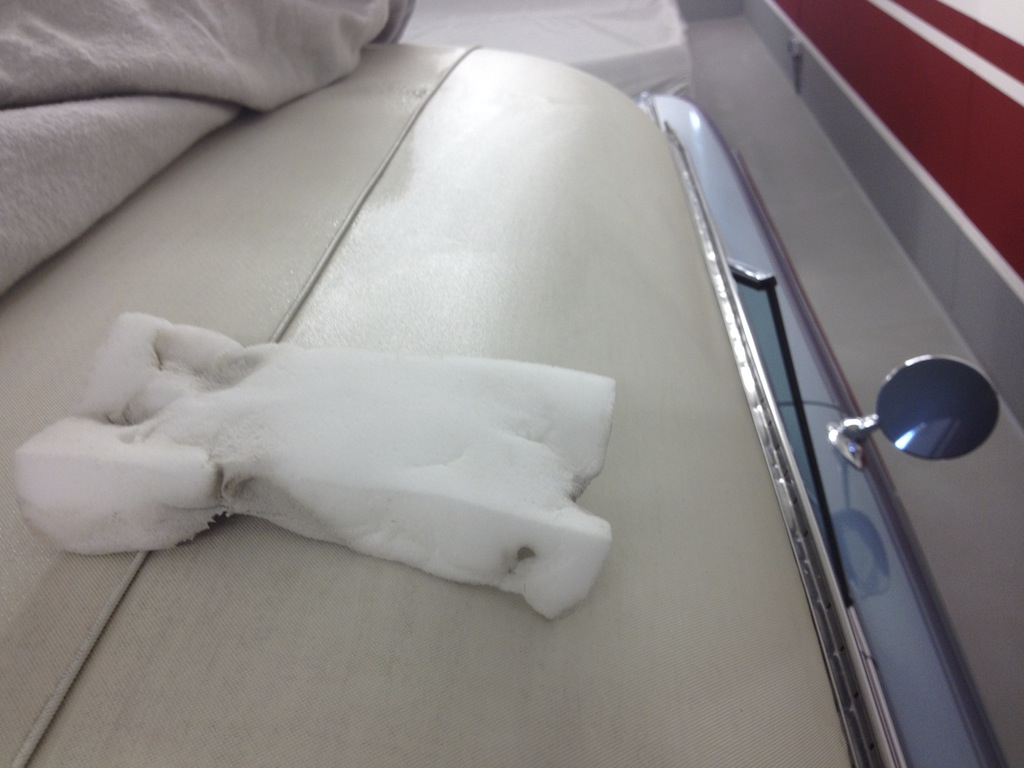
One of the dirt eraser sponges in action on the original roof from 1958. White tops are a pain to keep clean...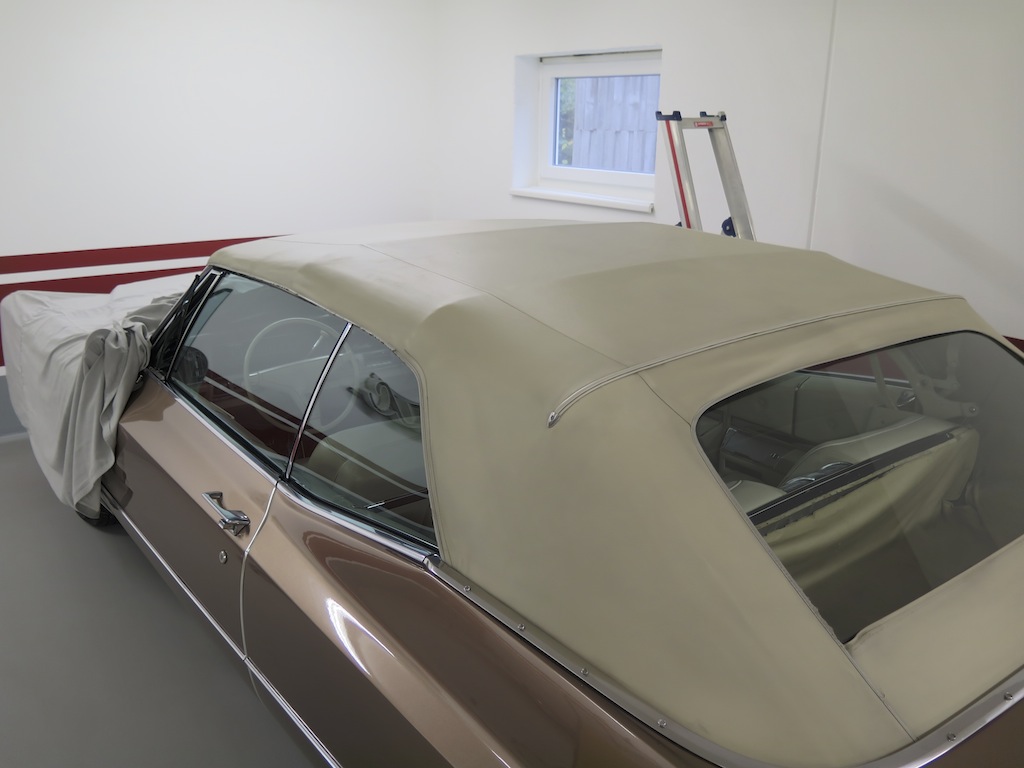
Looking o.k. now - its still the original top from 1967...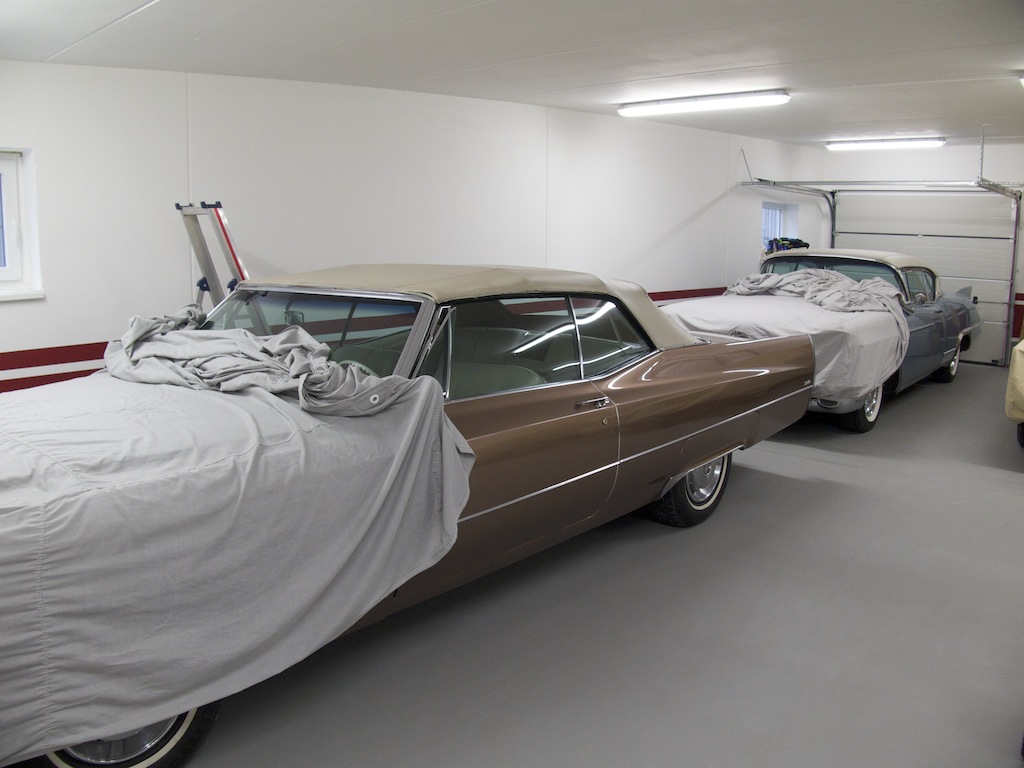
In the garage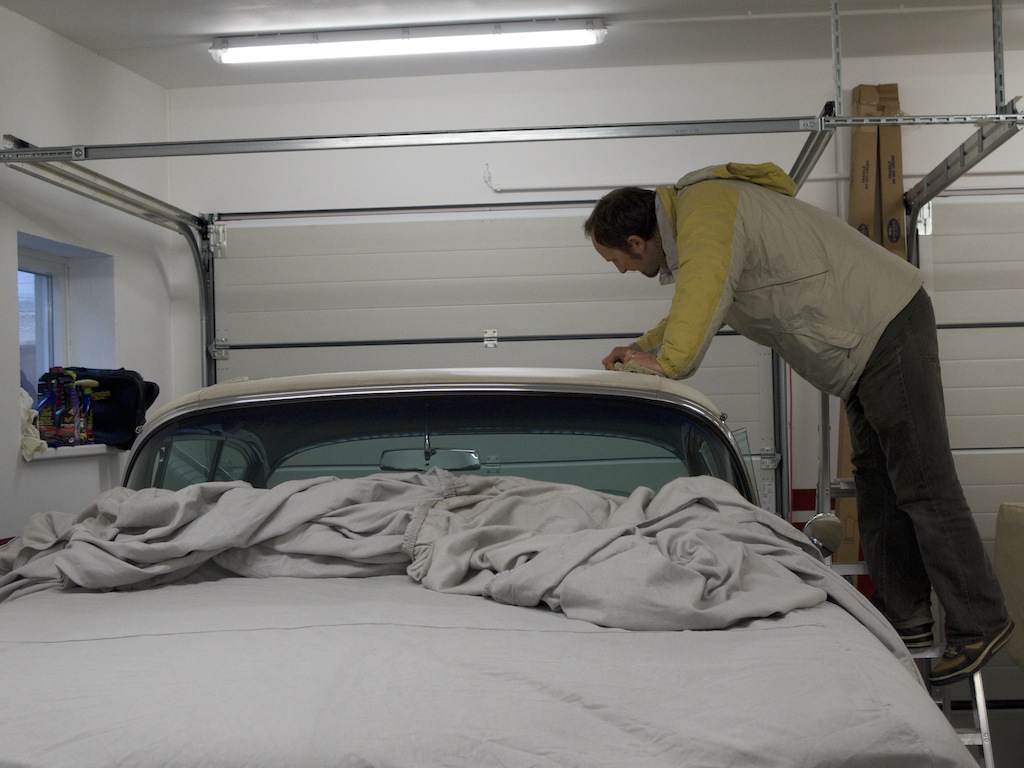
Thoroughly cleaning the Vicodec roof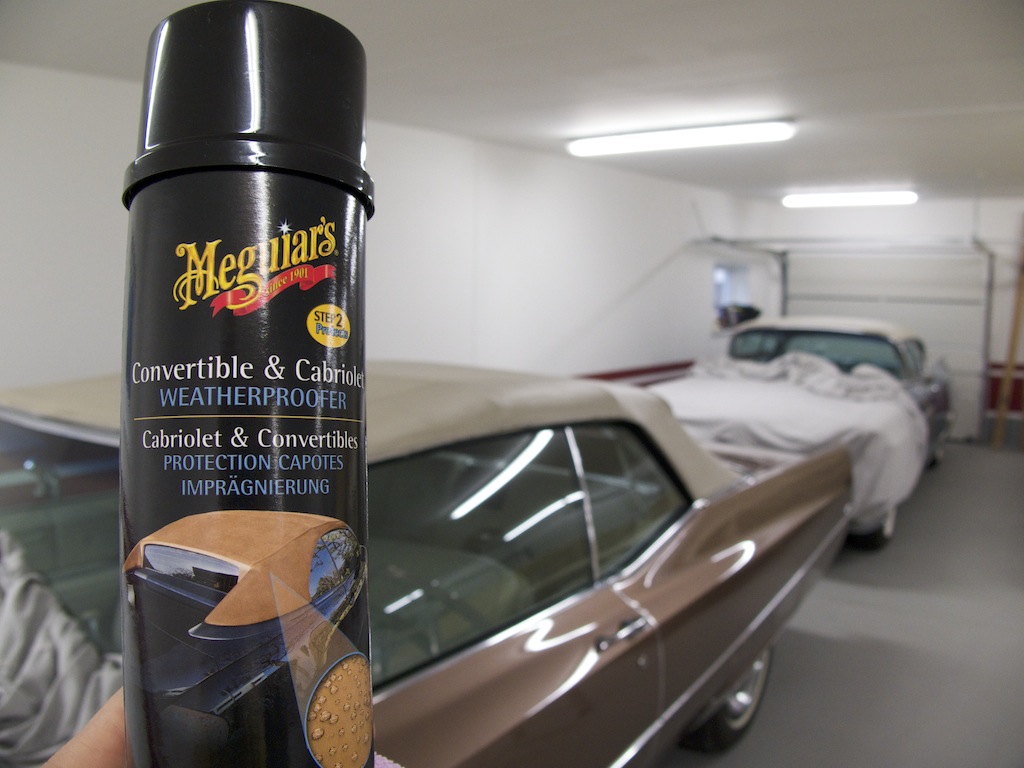
Meguiars weatherproofer for additional protection
1958 Eldorado Wheel Bearing Replacement - oil change - winter hibernation...
The newly installed Speedbleeder valves made the job a lot easier and quicker. I bled the brakes two times and took the 58 Eldorado for a test drive. The brakes worked fine, but felt differently than before the rebuild. The car did stop perfectly, but pedal travel was too long for my taste, before any brake action took place.
I consulted the shop manual for this symptom and it first suggested to adjust the brake pads first.
As I had no brake adjusting tool, I use a flat screwdriver to adjust the star wheel like described in the shop manual and bled the brakes once again.
After this the brakes worked like before the rebuild again — great!
As I had the front brake drums off anyways, I decided to finally change the wheel bearings as well, as they were making a very slight noise, and I had the new bearings laying around in my garage for years now...
They are pretty easy to remove and replace — no big deal — no special tools necessary. Just make sure to tighten them back to specs (shop manual mentions 4 ft-pound of torque (around 5,5nm))
After this, I also changed the oil after I brought the engine to operating temperature and put in 5 quarts of fresh 10W40 oil and a new oil filter. I also lubed some other parts like the alternator.
I then parked the 58 in the new garage - along with my other cars - where it will spend the long, cold winter.
It will get a good coat of fresh wax on the outside and some good leather treatment soon, and I will also treat the rubber parts and weather stripping, so that everything stays soft during hibernation.
I only managed to drive the 58 Eldorado 86 miles this year - way too less!
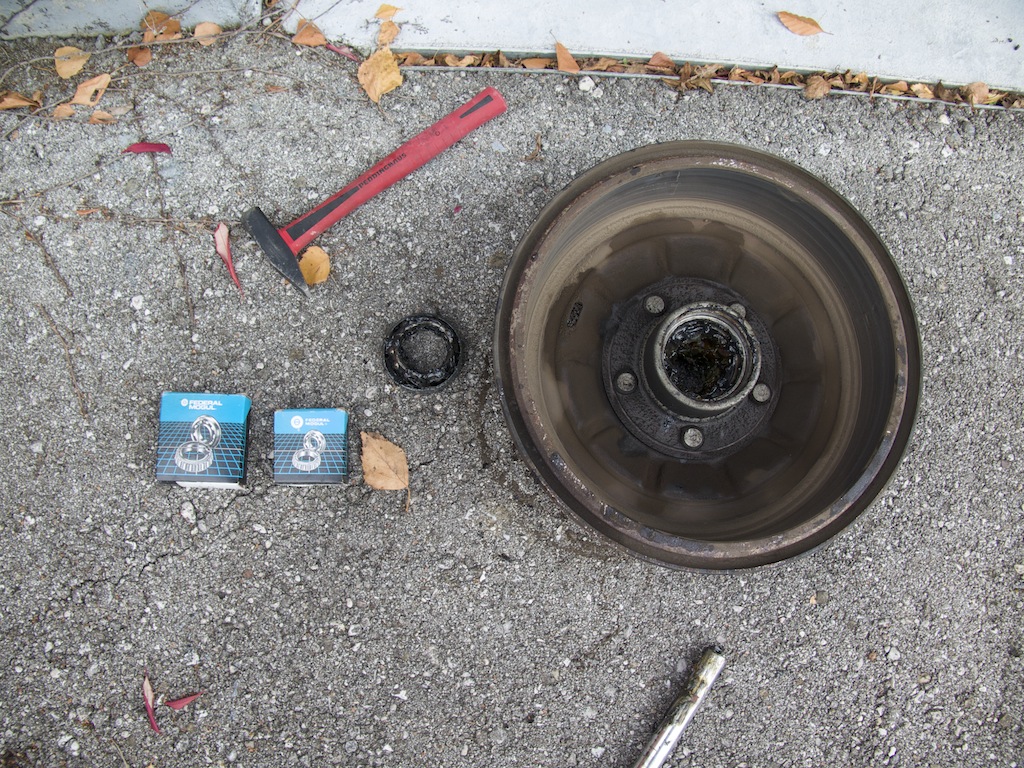
Removed the old bearings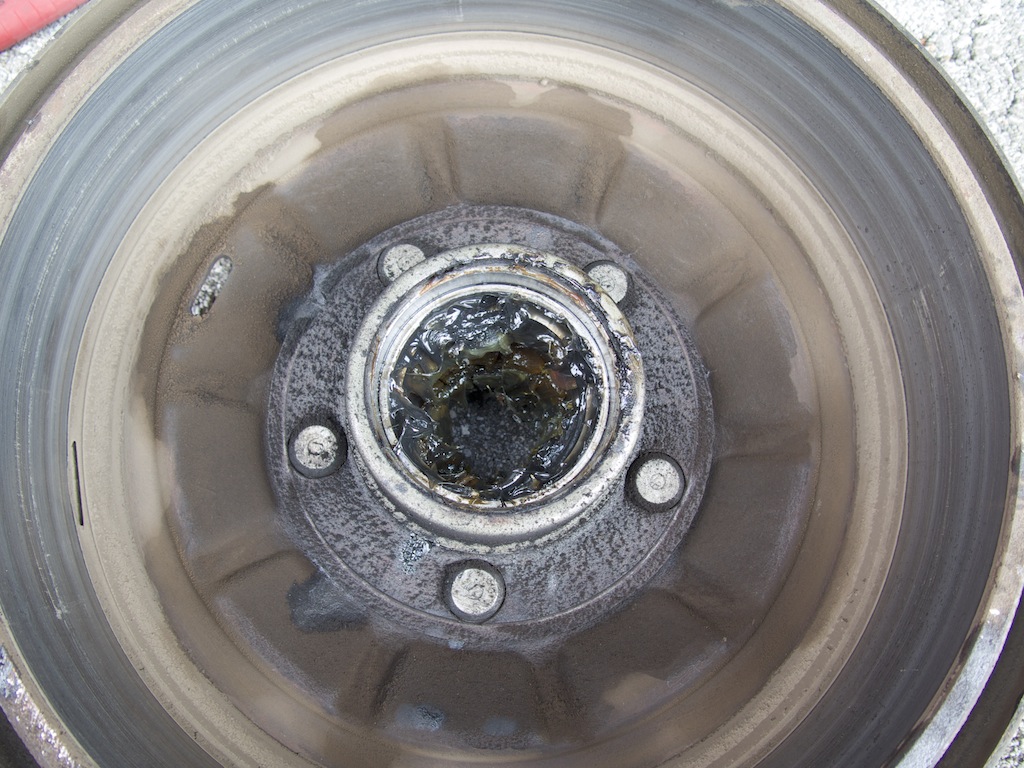
You just have to tap out the rear dust shield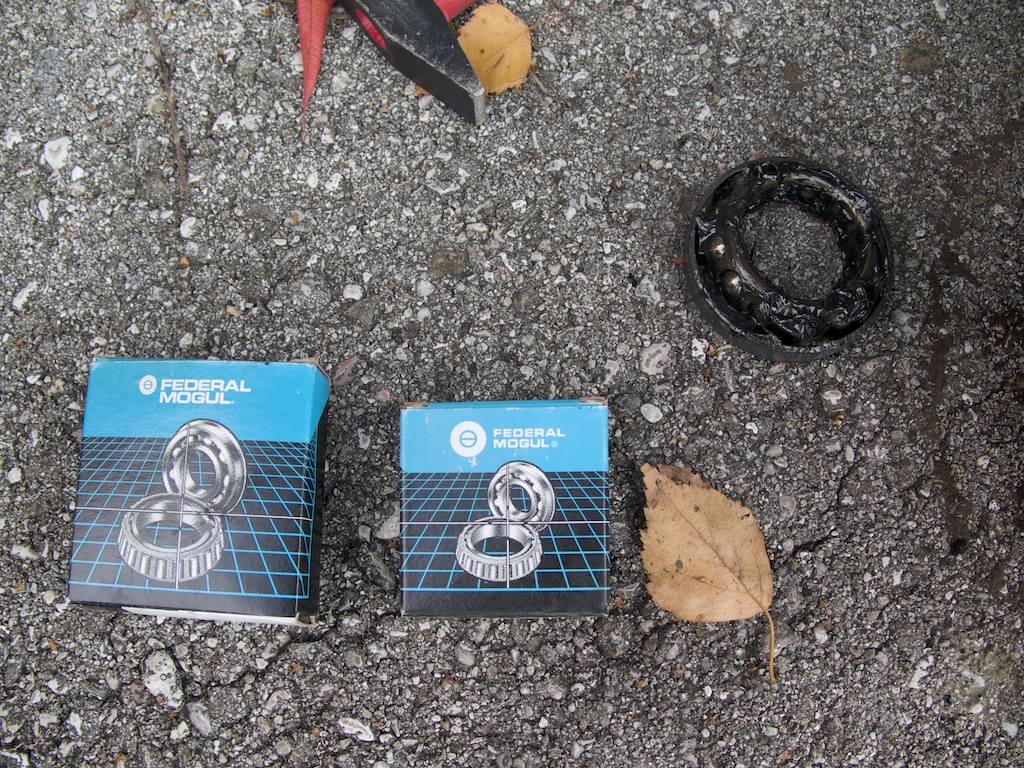
The new bearings waiting for installation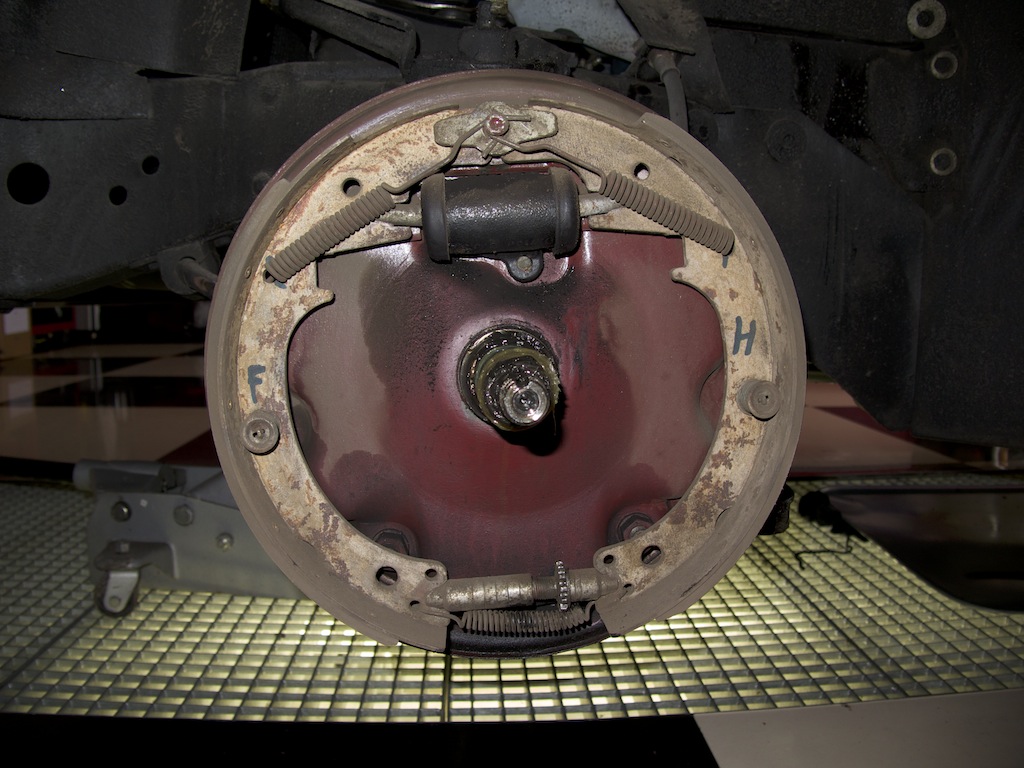
Adjusted the star wheel and checked the front brakes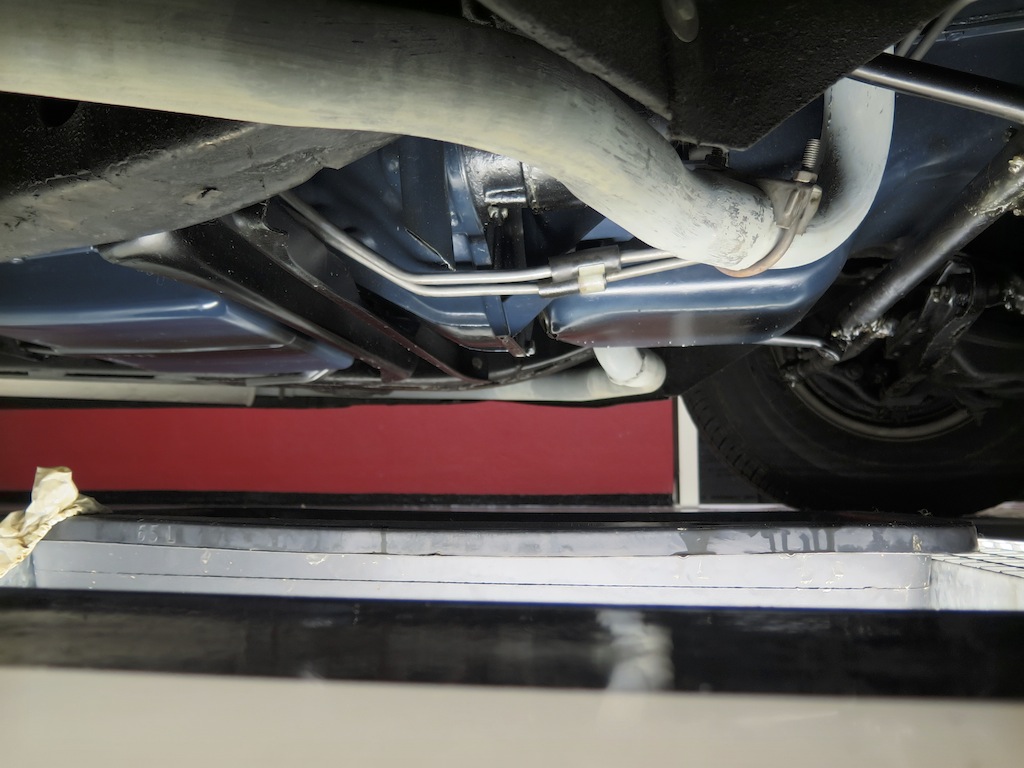
Changing the engine oil
In its winter home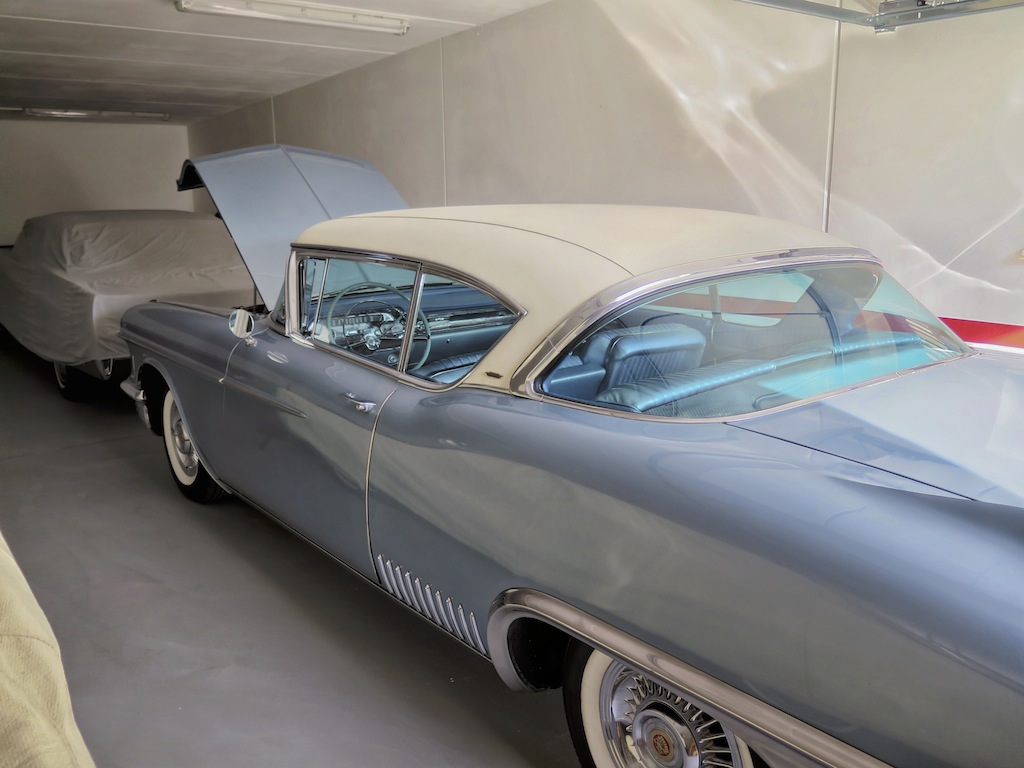
In the winter home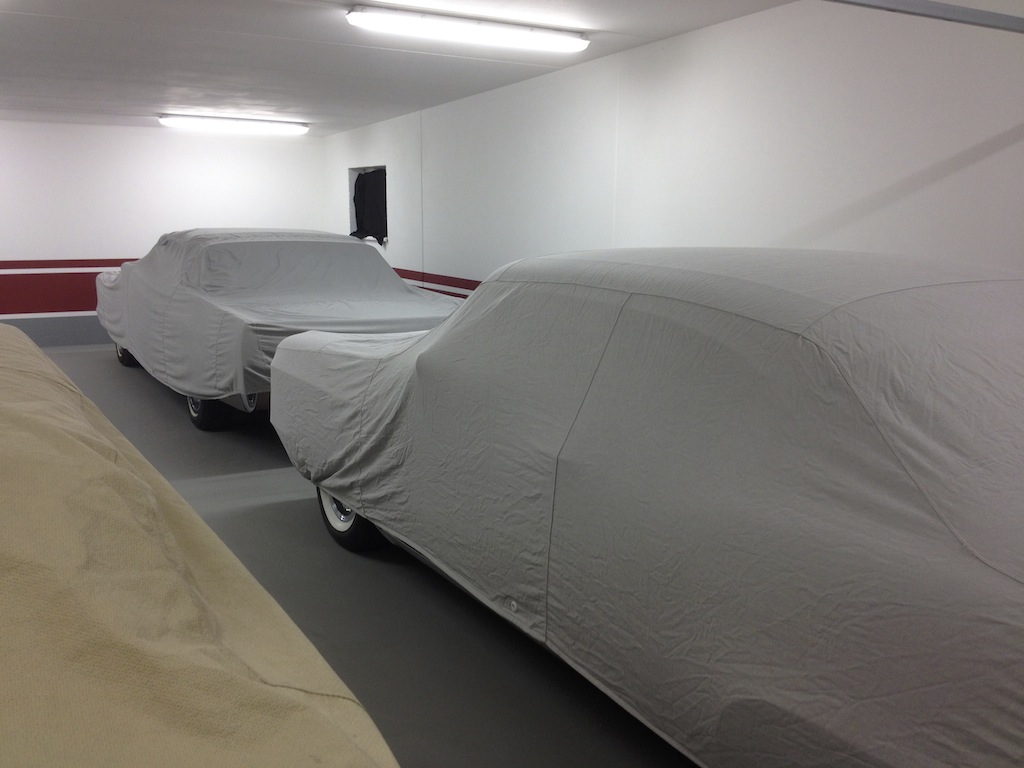
Sleep well!
Repairing the Treadle Vac Master Cylinder and Brake Booster of my 58 Eldorado
Now as I wanted to drive it out of the garage, I found a puddle of brake fluid under the car.
So I went on to search where it was coming from.
I suspected a leaking wheel cylinder, but could not find any traces of fluid coming from the wheels. After some more searching, I eventually found out that fluid was dripping out under the brake booster along the push rod. When I checked the fluid level it was only half full.
So I knew that the Treadle Vac would need a full rebuild…
I ordered a rebuild kit at Cadillac Parts LTD. They offer a kit to rebuild everything from the booster to the master cylinder. As I found out, the gasket for the reservoir did not fit from their set and some other correct smaller rubber parts are also not included in the set. So remove everything carefully from your unit as you might have to reuse some parts for your rebuild. I contacted them about the wrong parts and they immediately sent me the correct parts by mail. Great customer services - I would order from them anytime again!
As I had never done a full rebuild I asked my Cadillac friend Lucky for help - knowing that he can repair almost everything, and that he had done this job during the full restoration of his awesome 58 Biarritz before.
He was so kind to offer his assistance and invited me to his fantastic work shop where he is restoring his cars.
So I carefully removed the whole unit from my car and visited Lucky´s workshop.
With his skills he managed to rebuild the whole unit within a couple of hours. As it turned out a bad O-ring caused fluid to leak into the booster.
Due to all the brake fluid the finish of the Bendix unit suffered a lot, and so I decided to strip everything on the outside down to bare metal to repaint it.
So I took everything apart once again to make sure to do it perfectly.
I ordered some great spray cans from Eastwood to get the perfect look to match its appearance to when it was new.
Originally the master cylinder was not painted at all - but left in bare cast metal. Of course it started to collect surface rust very quickly - even on new cars back in 1958.
The booster originally was painted in semi gloss black.
Eastwood has a product called "Brake Gray" which I used to emulate this look. It comes extremely close to bare metal, but of course the paint protects the metal from rust. This paint is also resistant against brake fluid. I first primered the master cylinder with self etching primer two times before two coats of brake gray were applied.
For the brake booster I ordered Eastwoods Chassis Black extreme primer and satin black paint - painting turned out really fine! See pictures below
To make bleeding brakes easier and a one person job I also ordered a set of speed bleeder screws. (SB3824-SS)
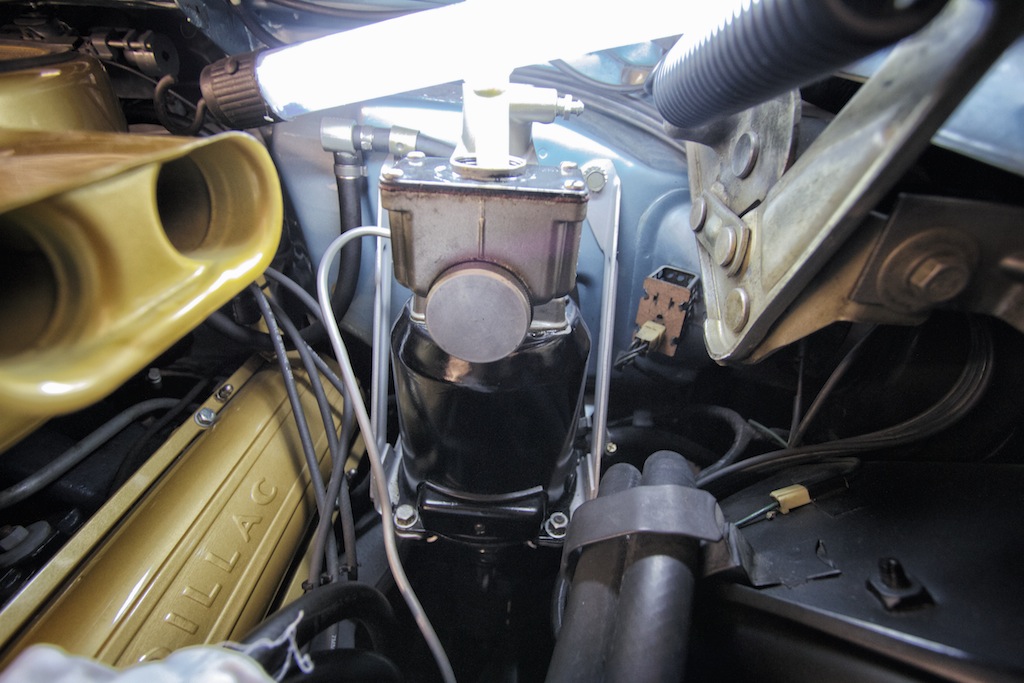
The unit still in the car - before removal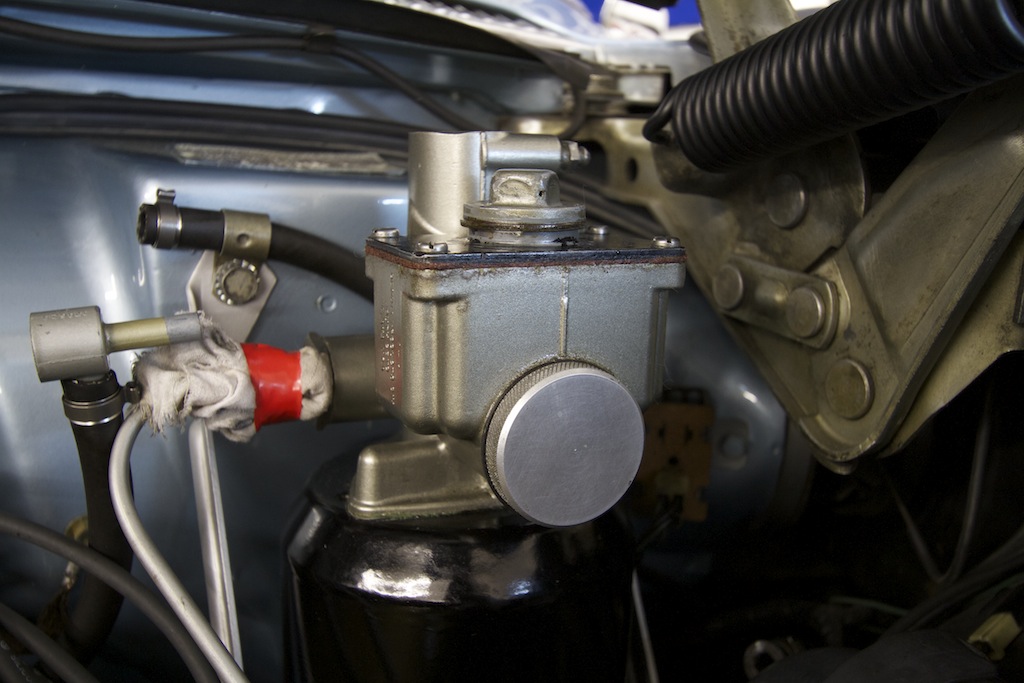
Removal has started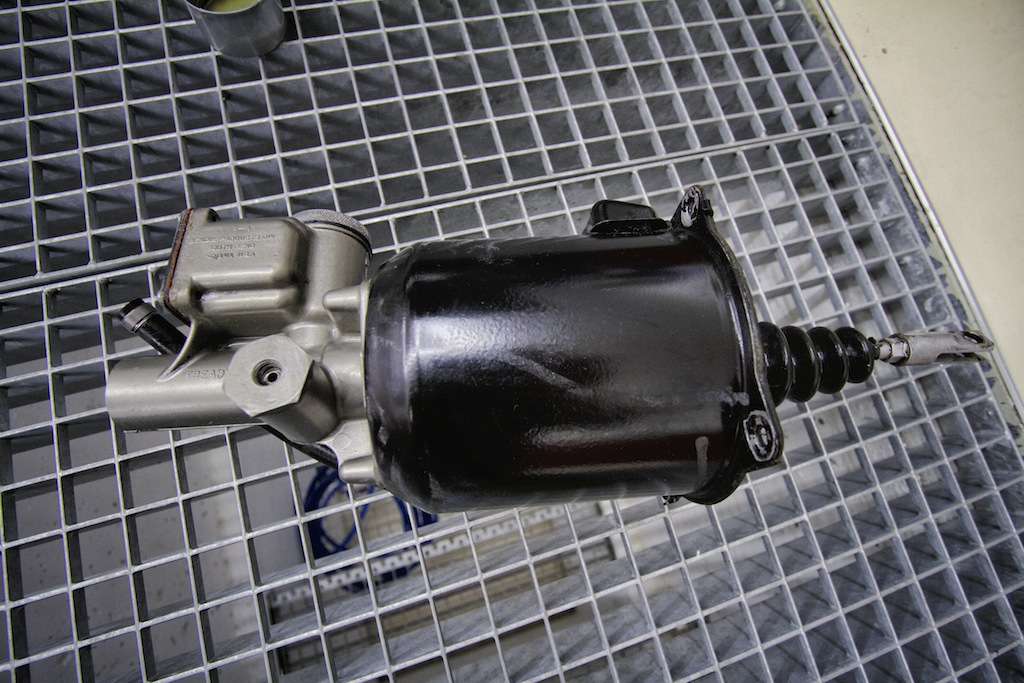
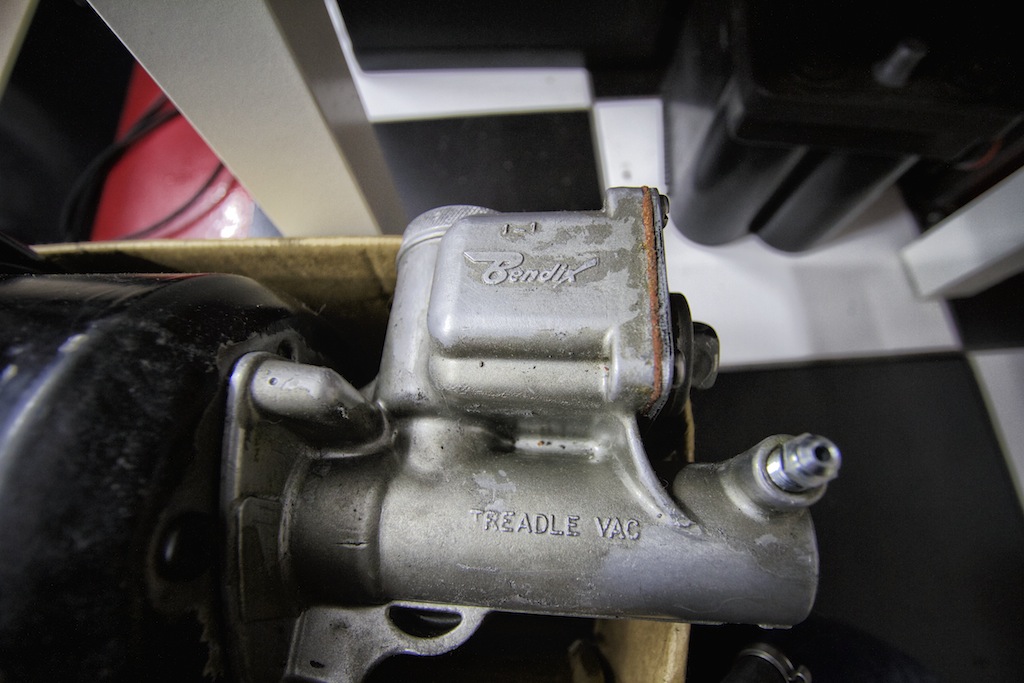
The unit out of the car - before rebuilding it.
Out of the car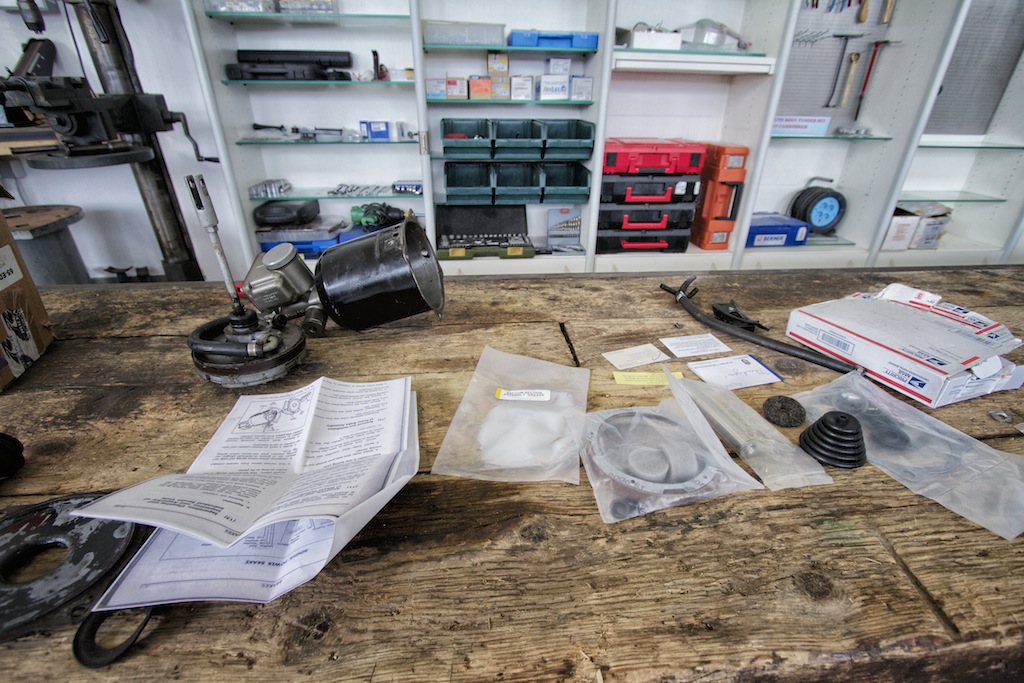
In Lucky´s workshop with the rebuild kit I got from the USA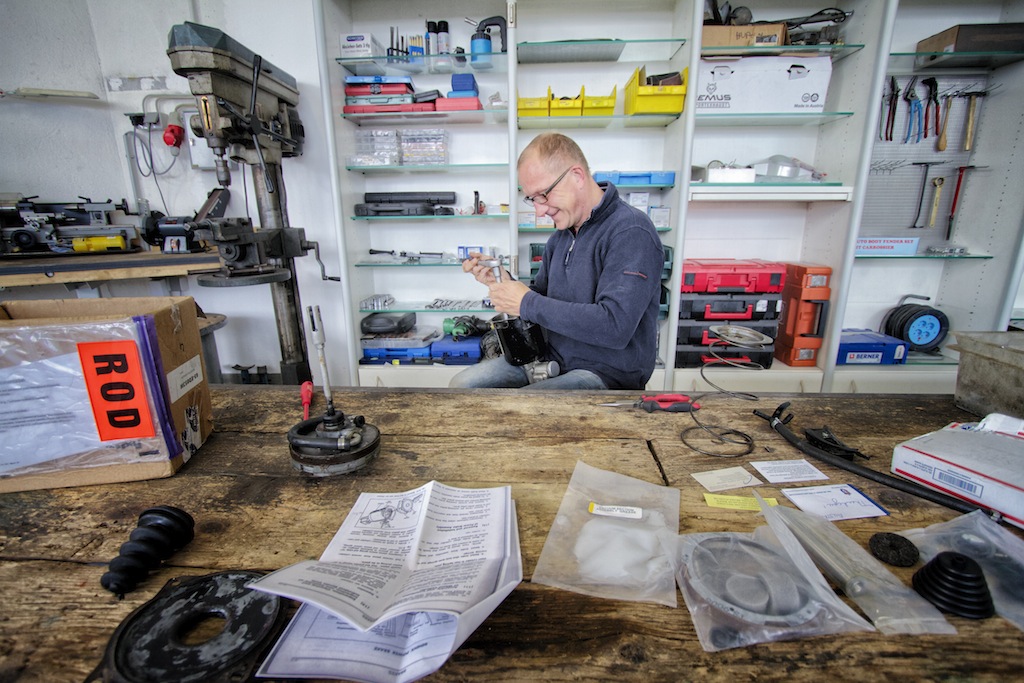
My friend Lucky at work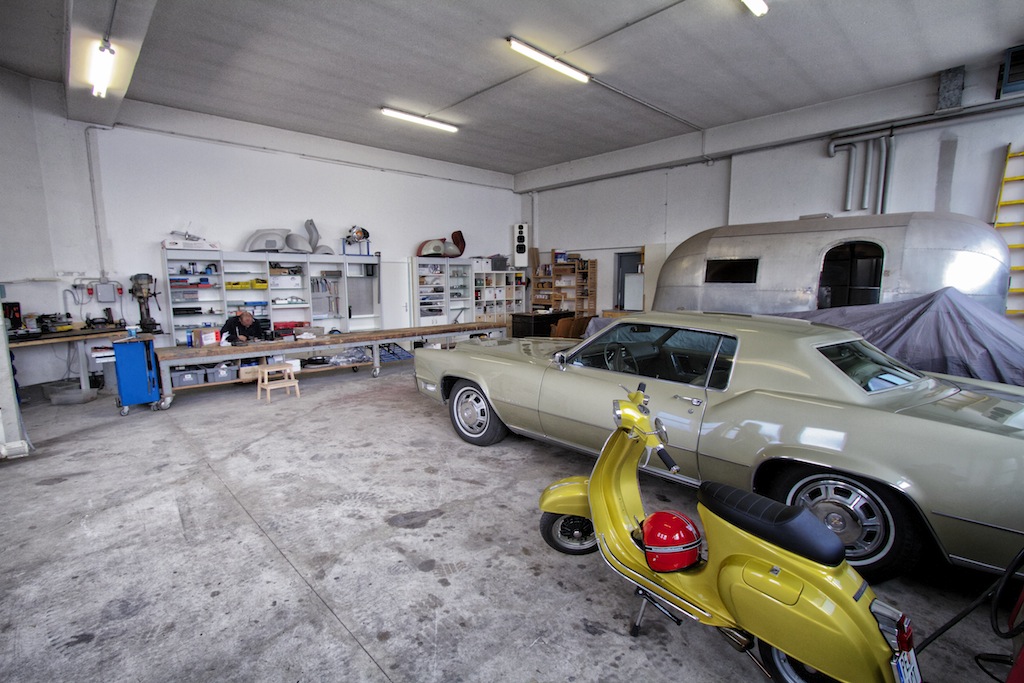
Lucky´s fantastic work shop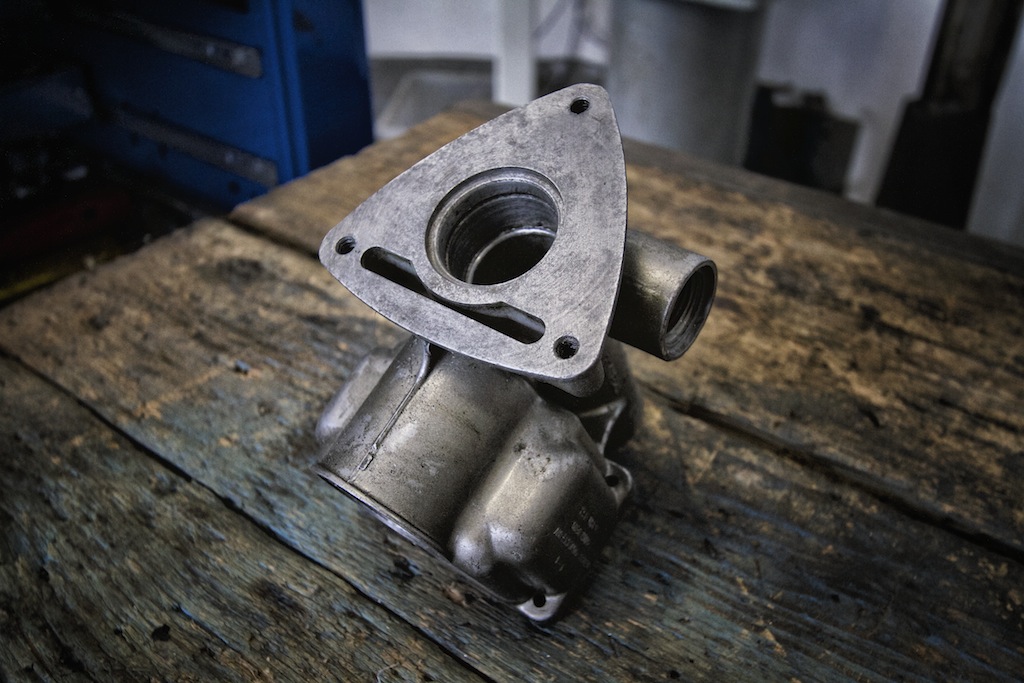
The Bendix master cylinder fully disassembled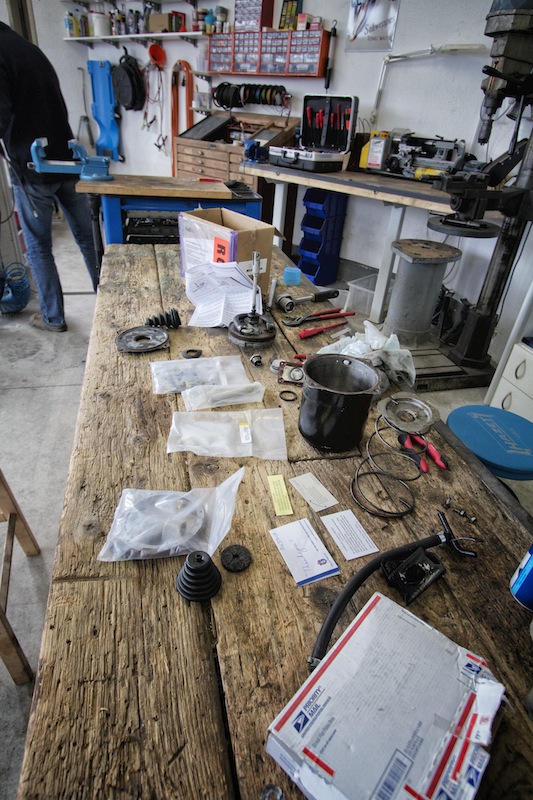
Everything disassembled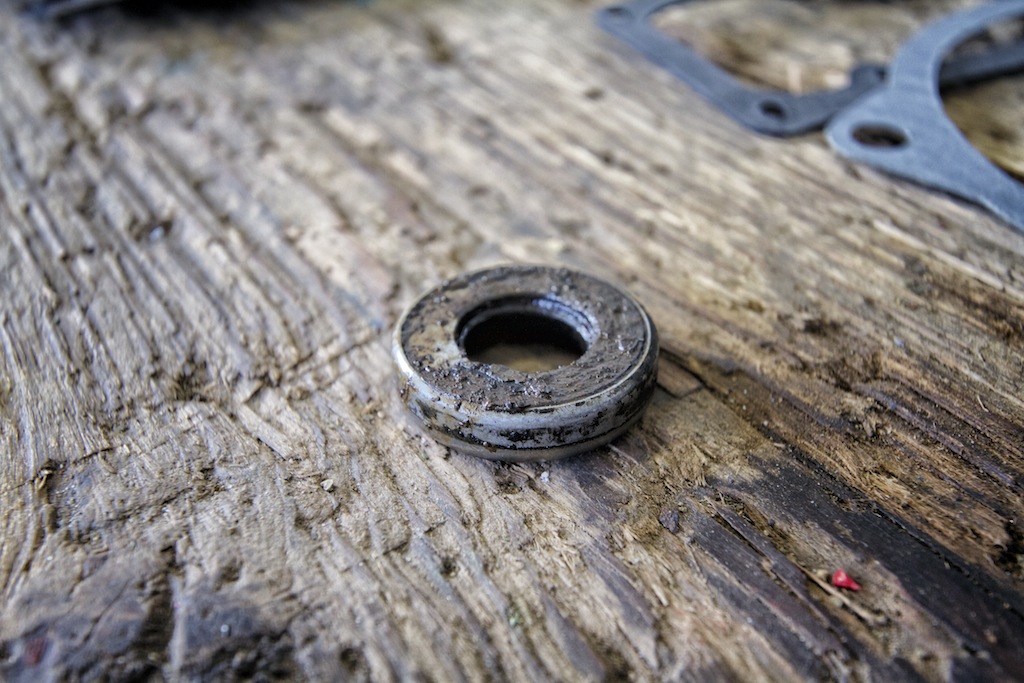
This O-ring was leaking and caused the problem.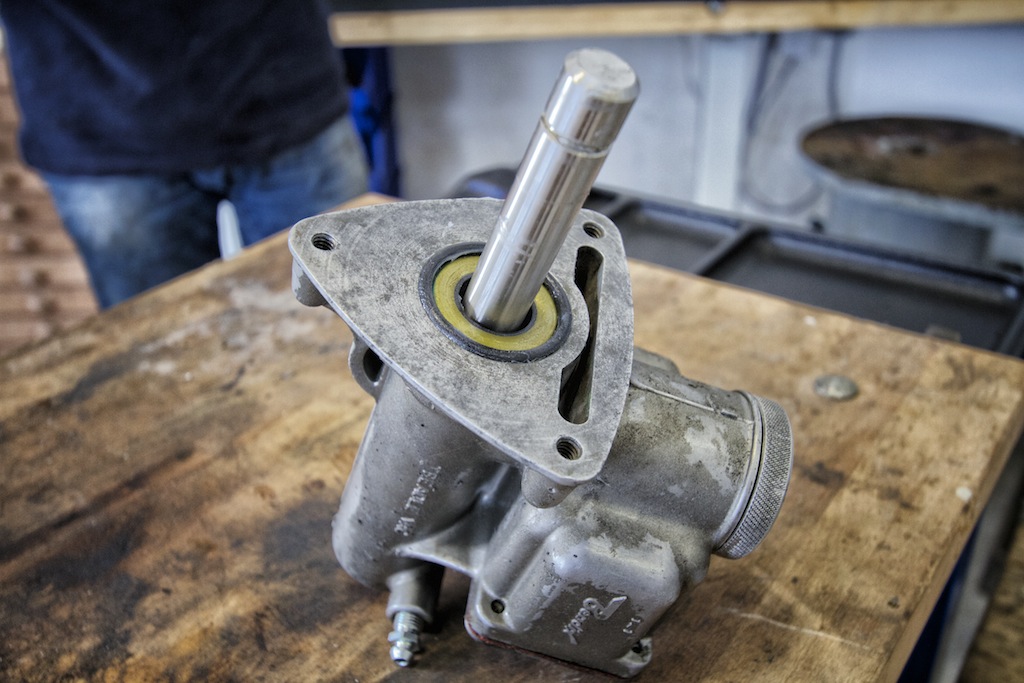
The new o-ring in place.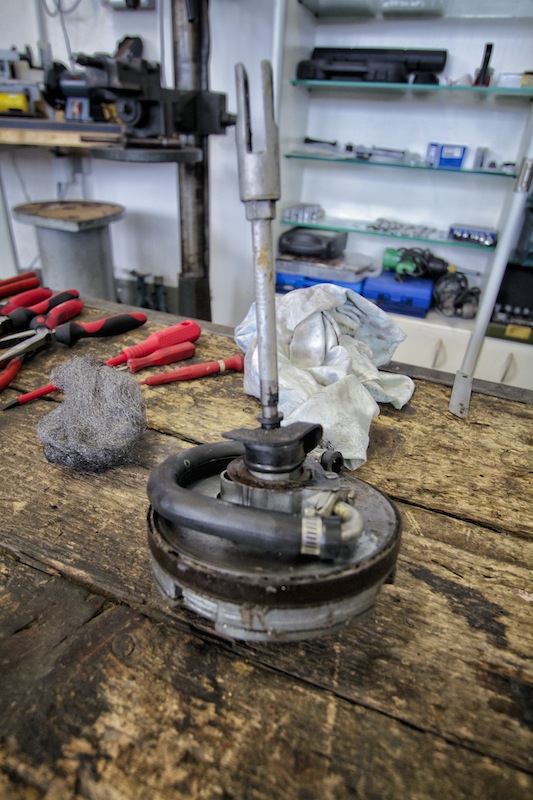
The vacuum cylinder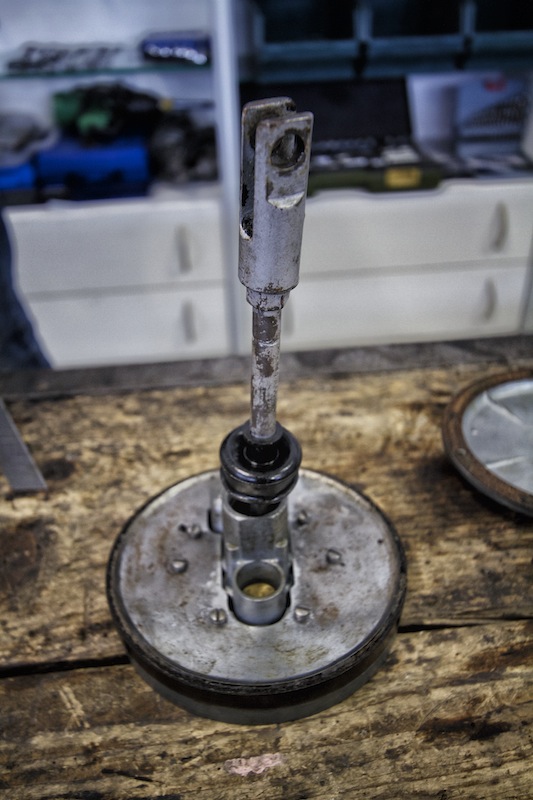
As you can see the paint suffered from the brake fluid - a repaint was necessary after the rebuild.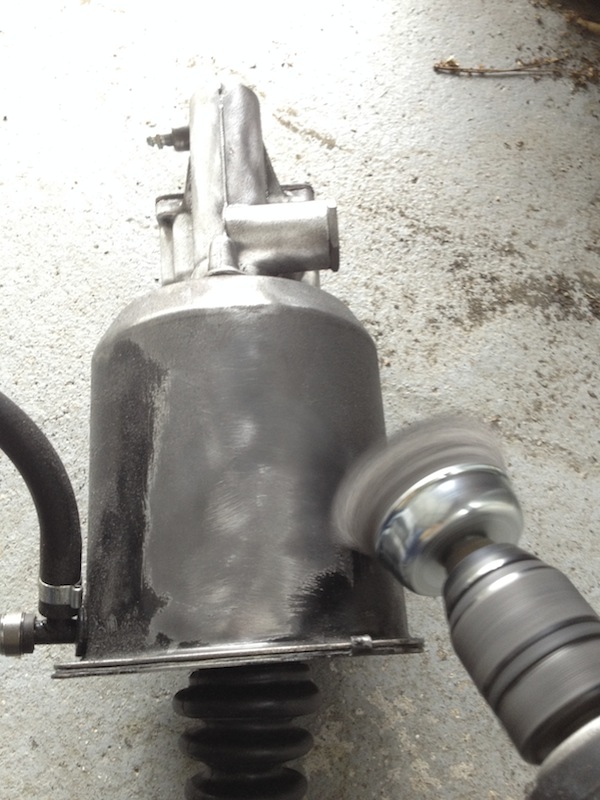
I started to wire brush the paint off - took it apart once again after this picture.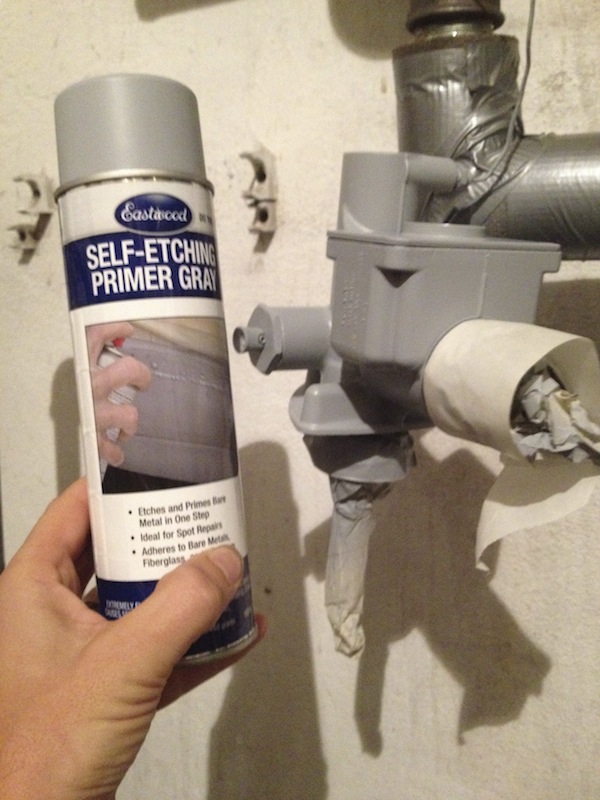
The master cylinder in primer.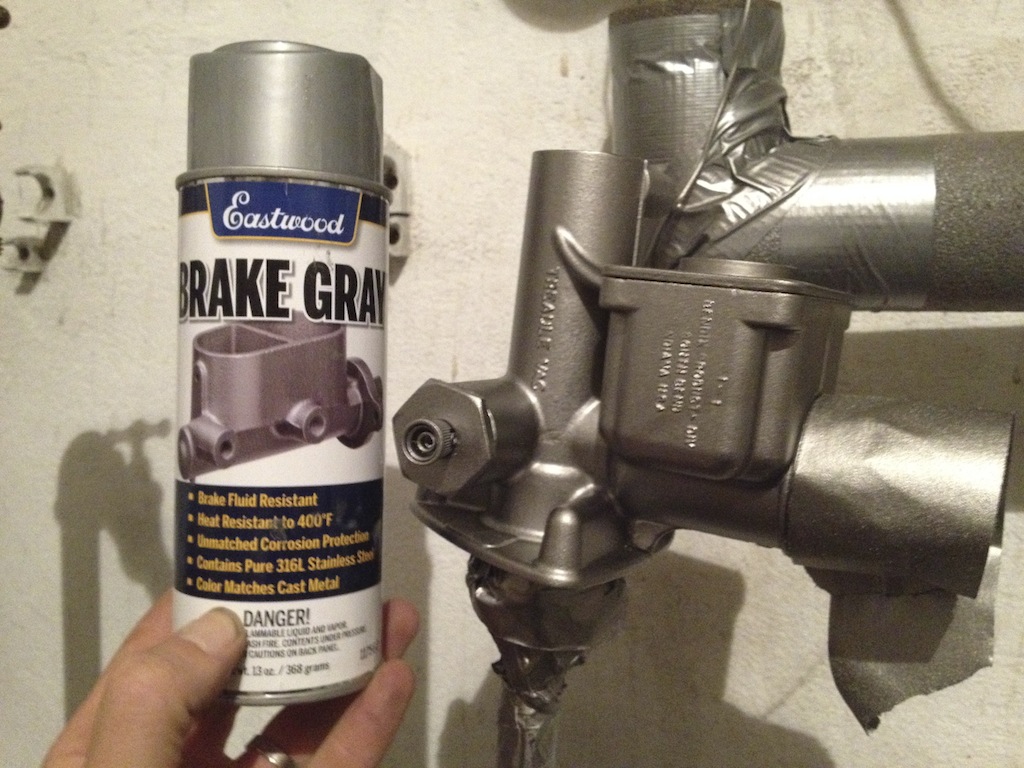
After painting it with "Brake Gray" - great stuff.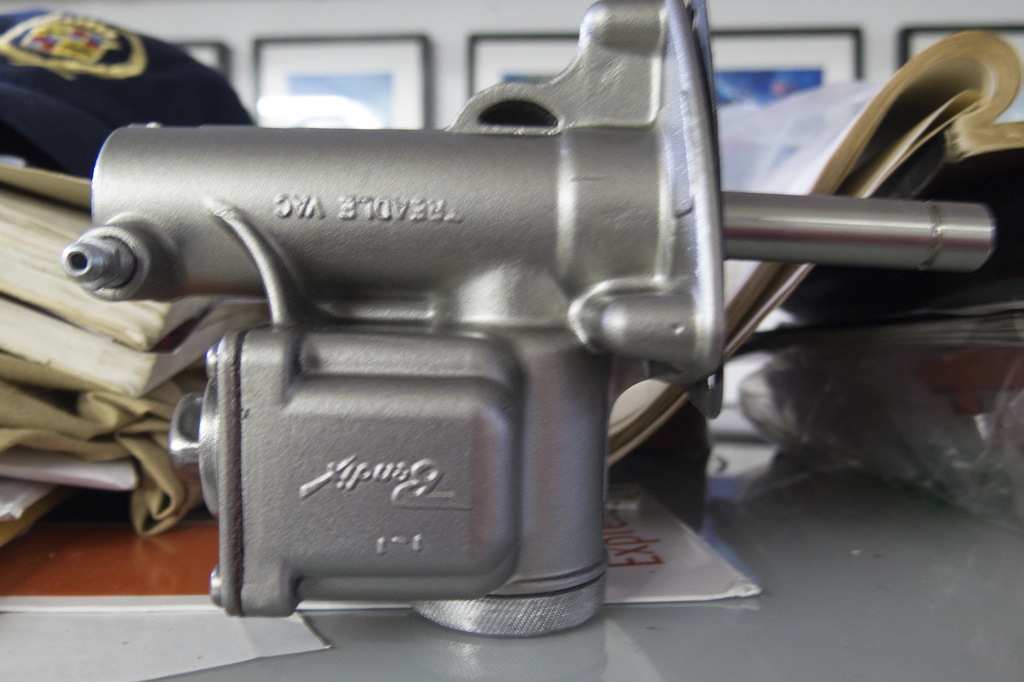
The master cylinder with paint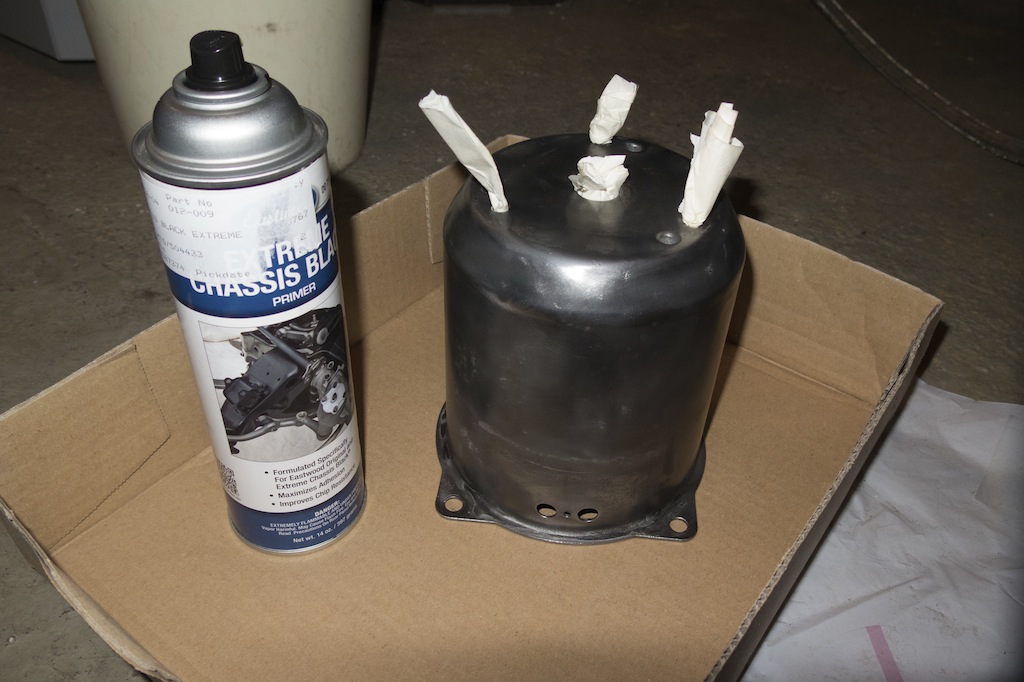
The booster in bare metal before primer. I used Eastwood Extrem Chassis Black primer and paint.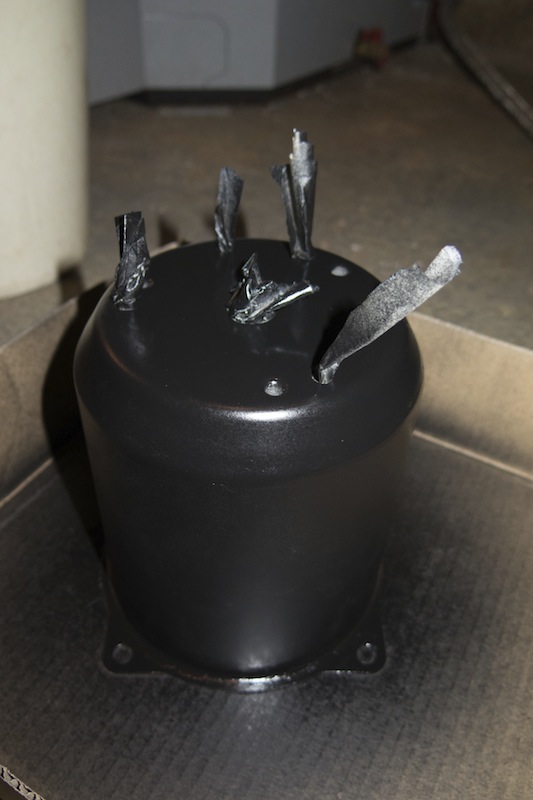
In primer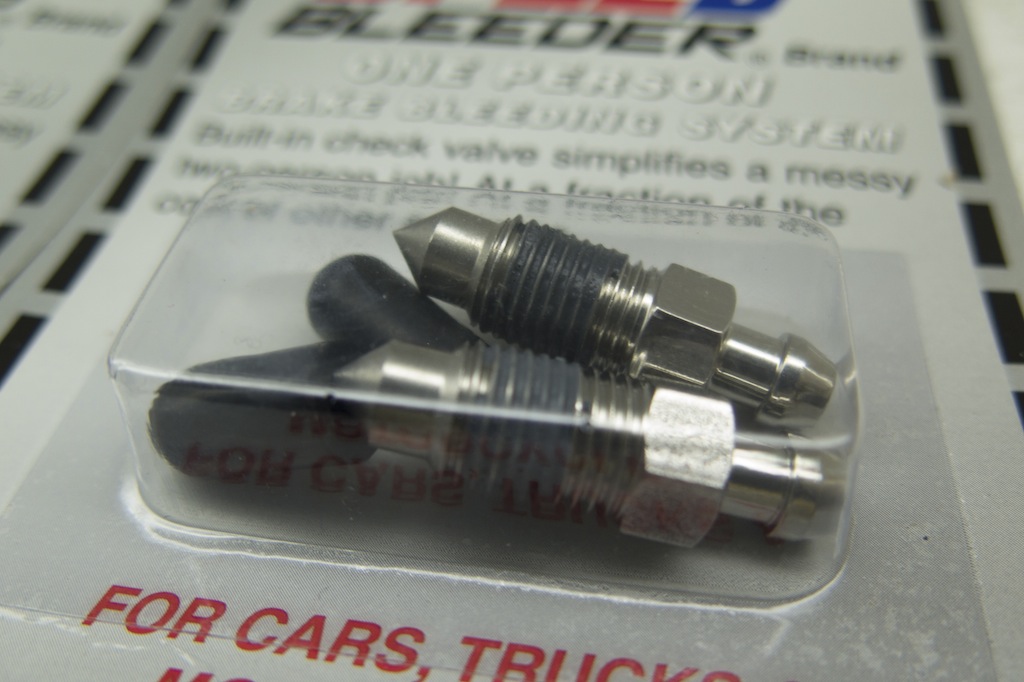
Speed Bleeder screws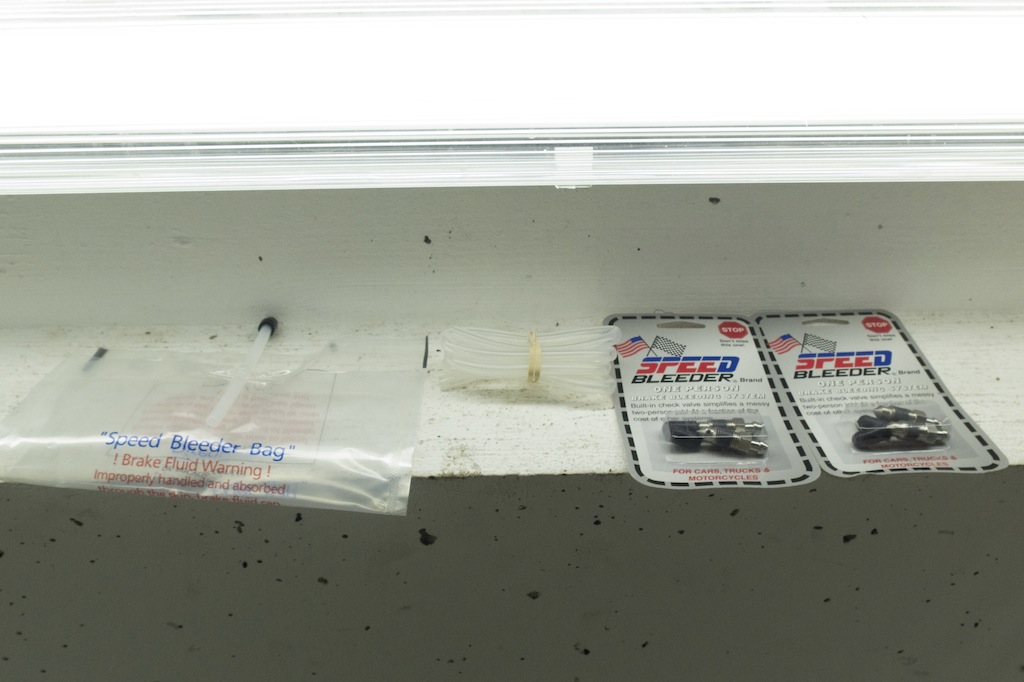
Speed Bleeder screws and bag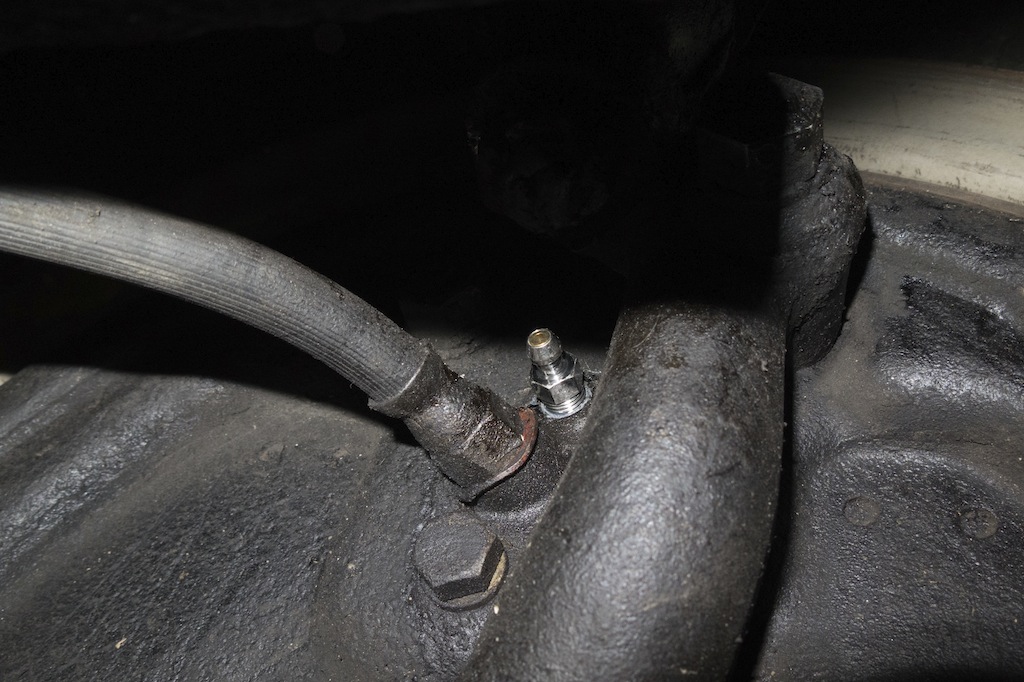
The new Speed Bleeder screw in place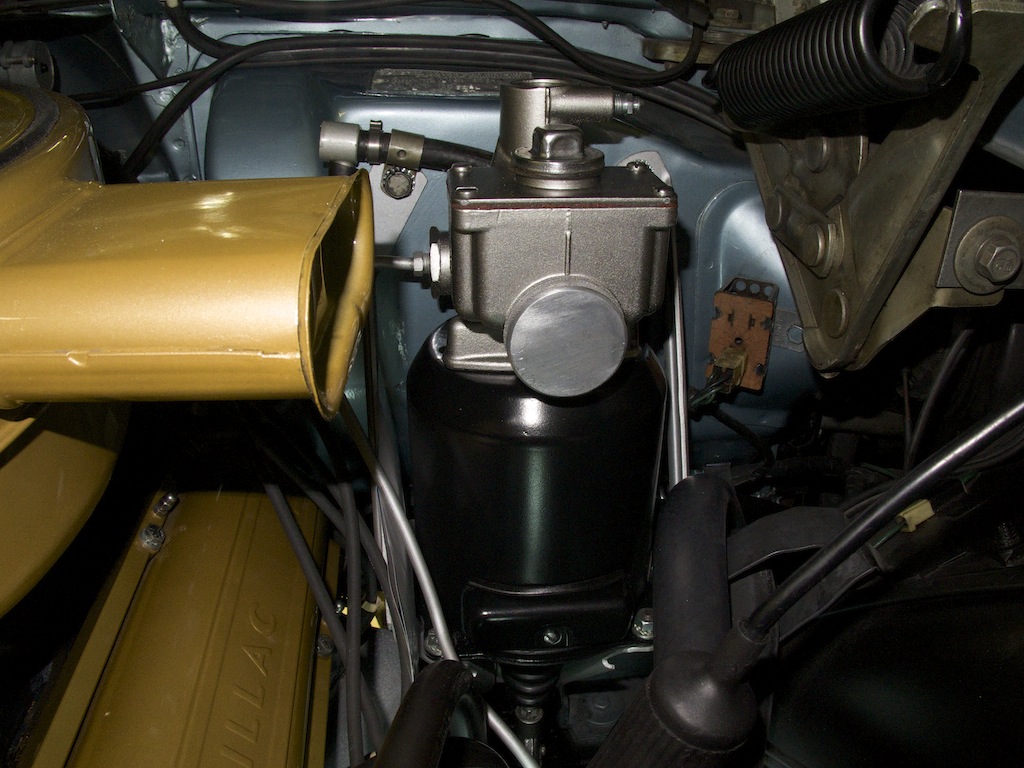
The reassembled unit back in the car.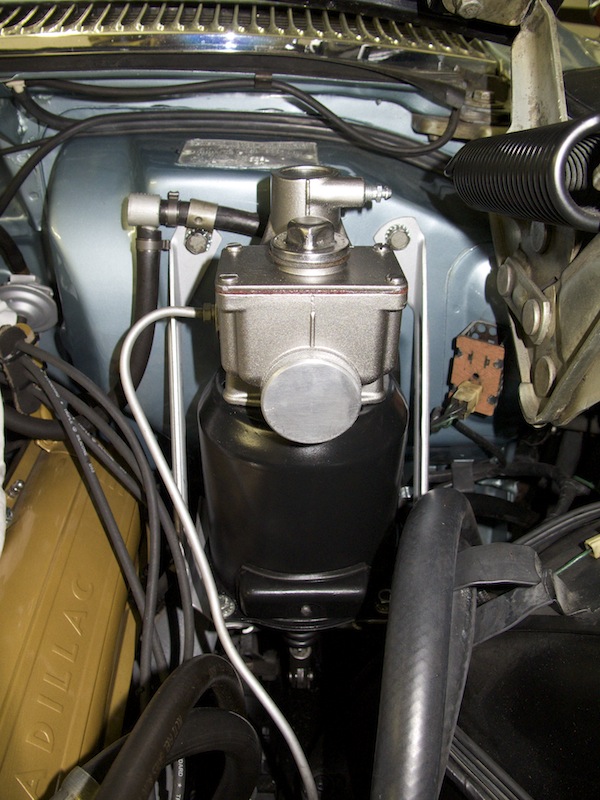
Bleeding brakes and spring cleaning
First up was the 1958 Cadillac Eldorado Seville which needed new brake fluid.
So I sucked out the old fluid from the reservoir and flushed all the lines with fresh DOT 3 brake fluid.
I started at the right rear line, the left rear, the right front and left front brake cylinder.
Although I have a pit its still a pain to reach all the bleeding screws. The power brake cylinder itself also needs some good bleeding.
Thanks to my dear wife Afra for gently pumping the brake pedal and helping me out.
When you bleed brakes make sure your assistant does not push the brake pedal all the way through as this could damage your master cylinders membrane.
Next up was a thorough cleaning of the garage floor.
My 3 year old son Elliot also wanted to help his daddy and helped me swiping the floor ;-)
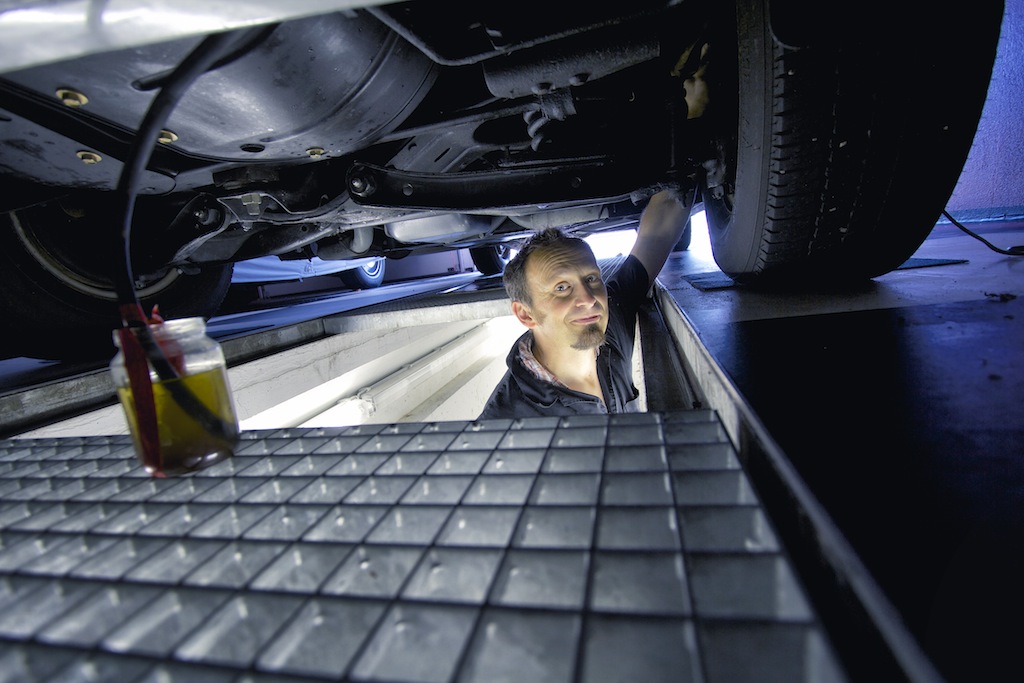
Bleeding and flushing the 58s brake lines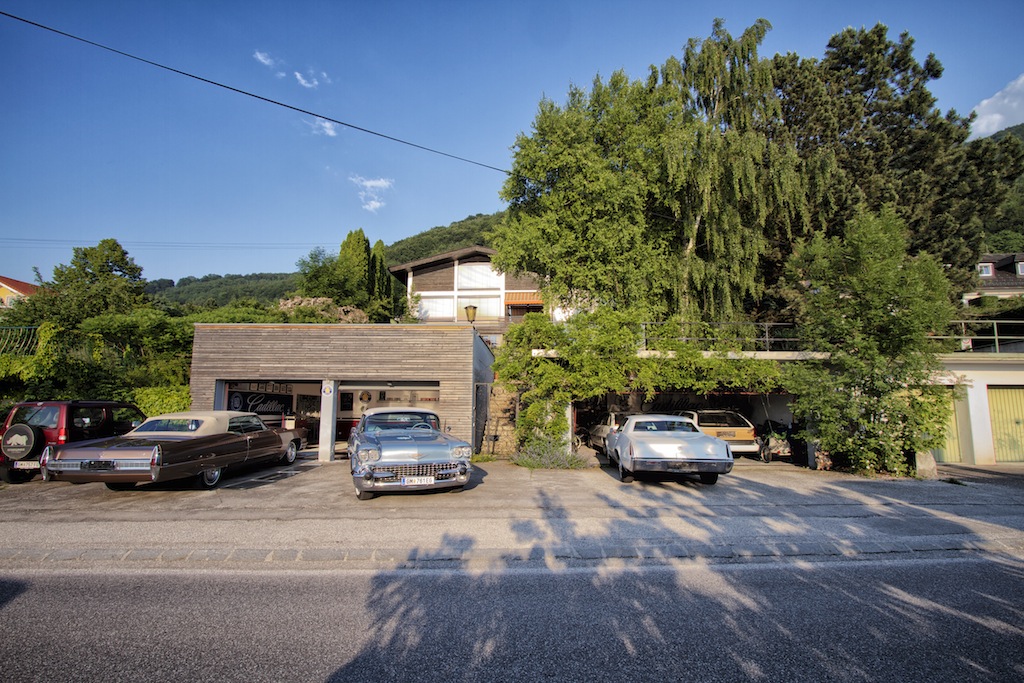
The cars are out for cleaning the garage floor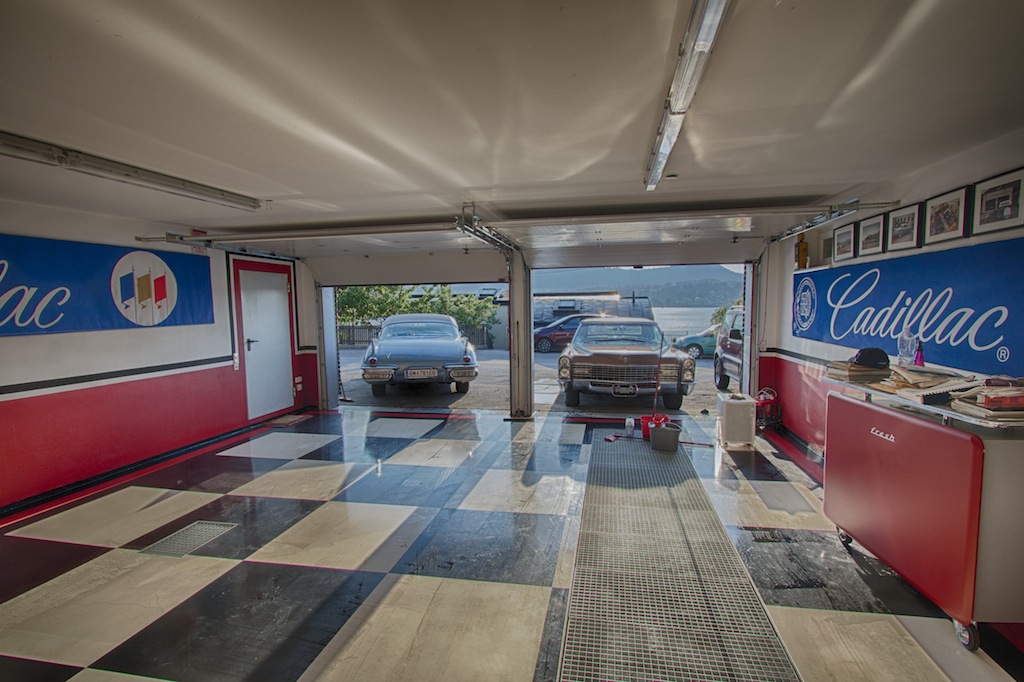
Floor cleaning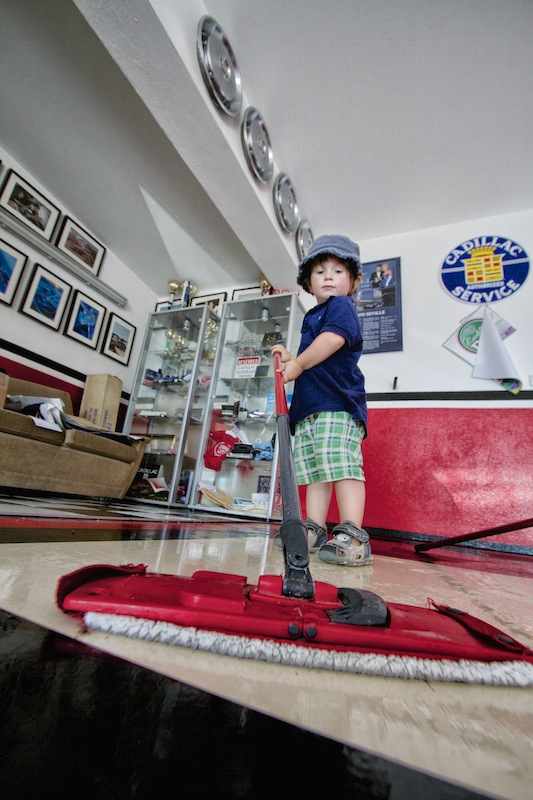
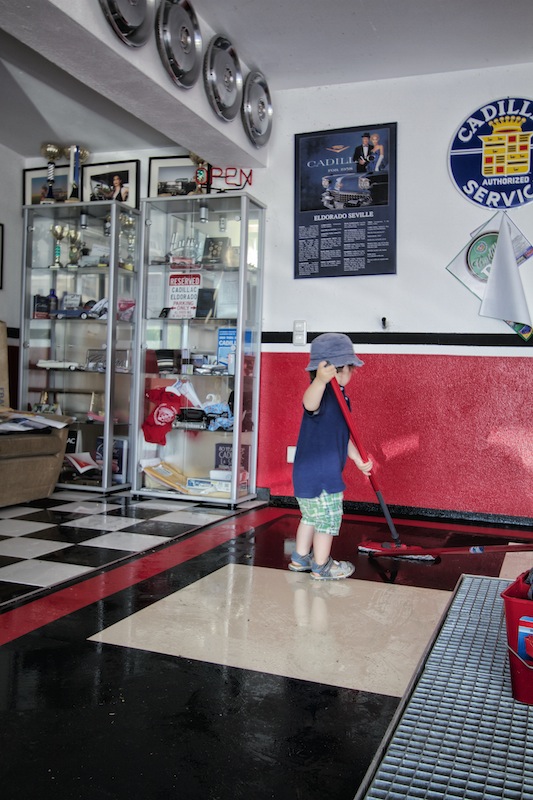
Little Elliot helping out - I´m glad he loves being in the garage.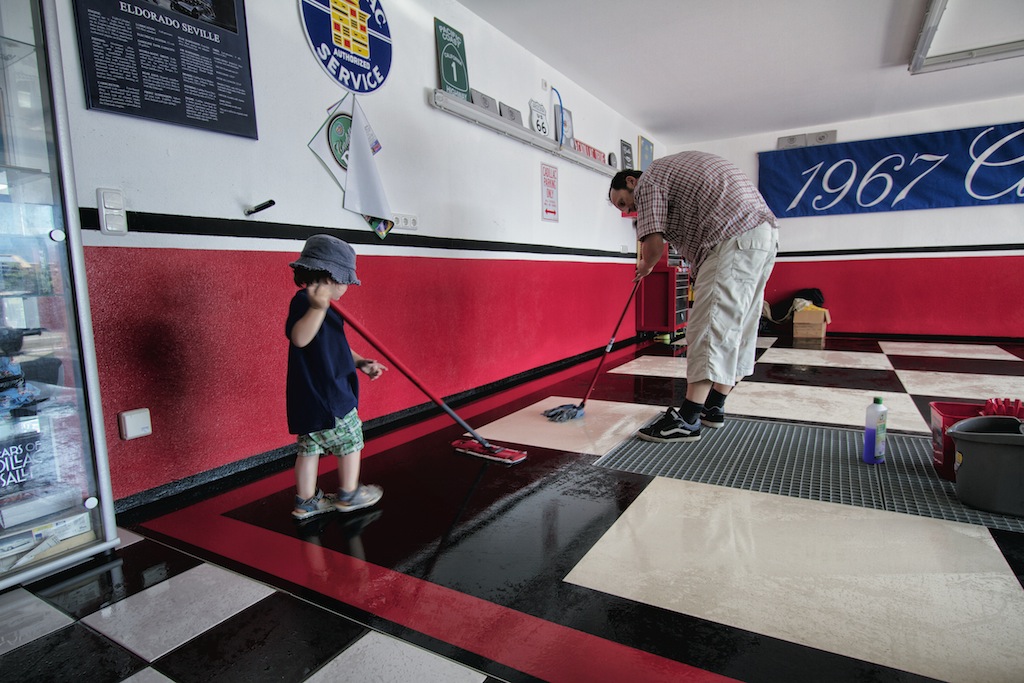
Men at work
FIXED - 1958 Power Vent Window wiring problem
Today I started to repair the broken wires by soldering them together and put some heat shrinking tubes and electric tape around the repaired areas.
You can see some image below. More of them can be found in the restoration section.
Everything now works as it should! Lets hope that the repaired wires wont break again any time soon ;-)
Next up - repair the door jamb switch of my 1967 Eldorado and install a new power seat transmission as the front up/down solenoid does no longer work and therefore does not engage the according seat transmission. This will involve removing the front bench seat which is very heavy... Oh it is so much fun owning these cars! ;-)
I removed the kick panel, heater-box and door sill scuff plates to get access to the broken cables.
They broke at the area where all the bending is taking place when the door is opened. Here the first wire is already soldered together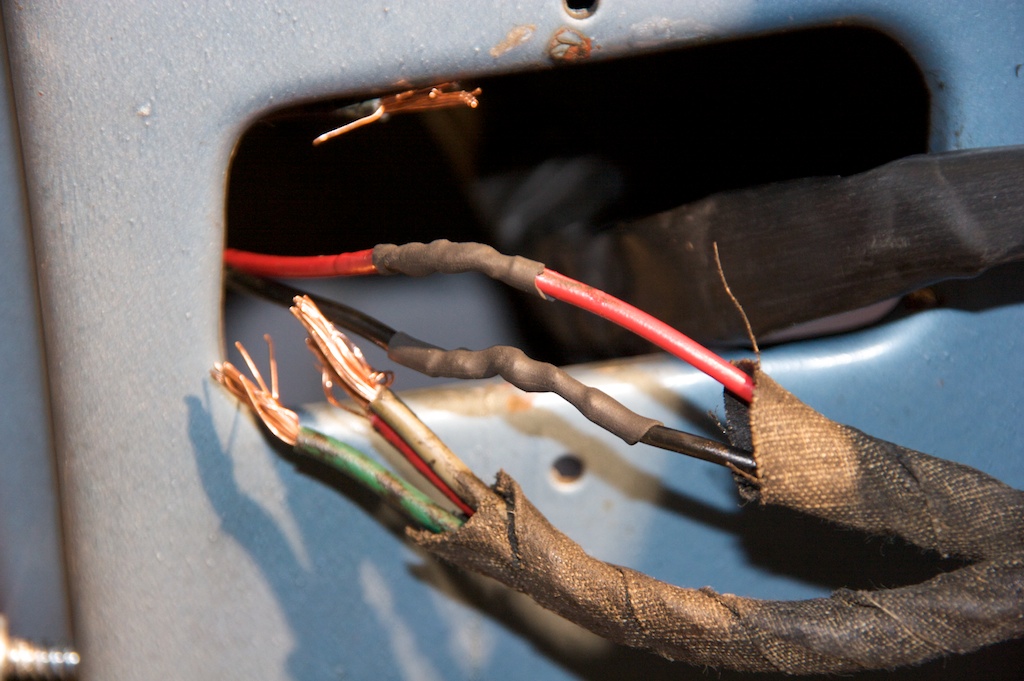
I put some heat shrinking tube around it after soldering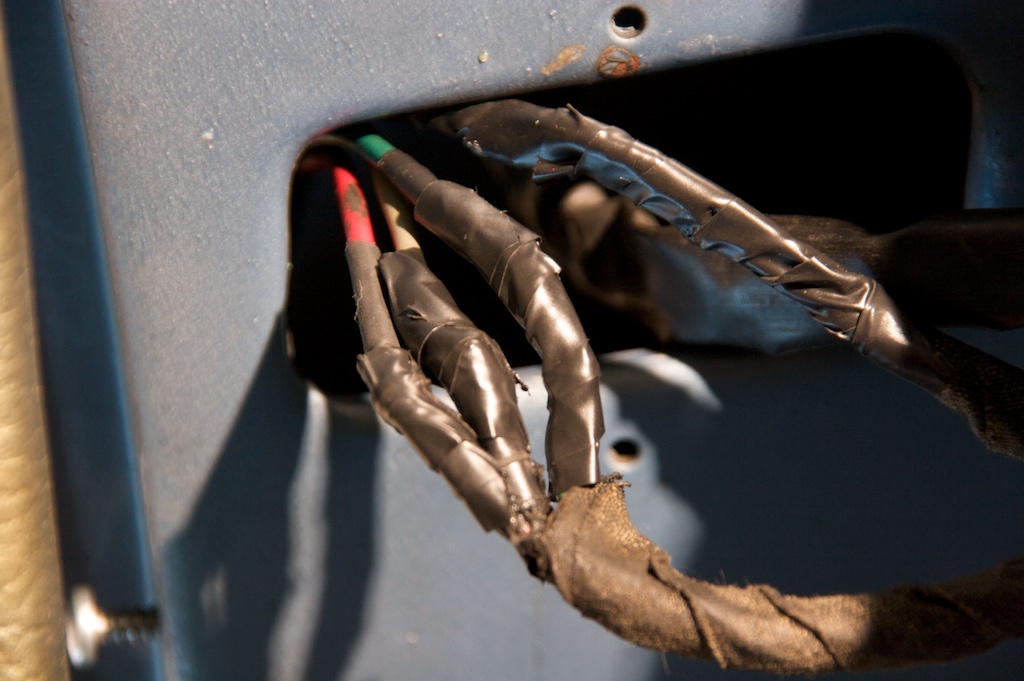
Just to be safe I wrapped some more electric tape around it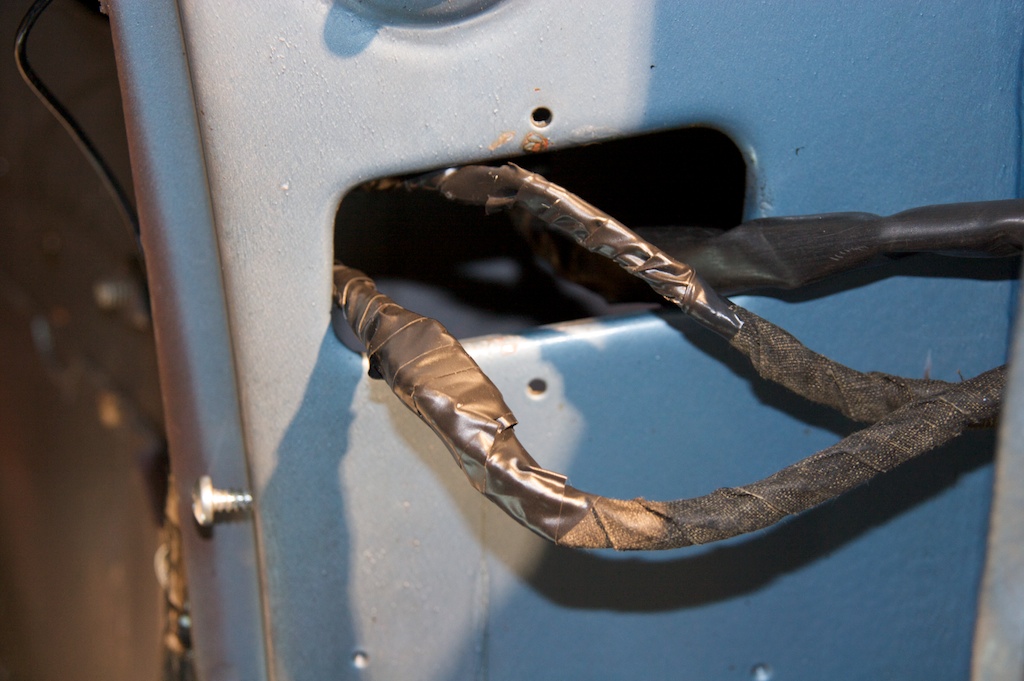
All the wires are back together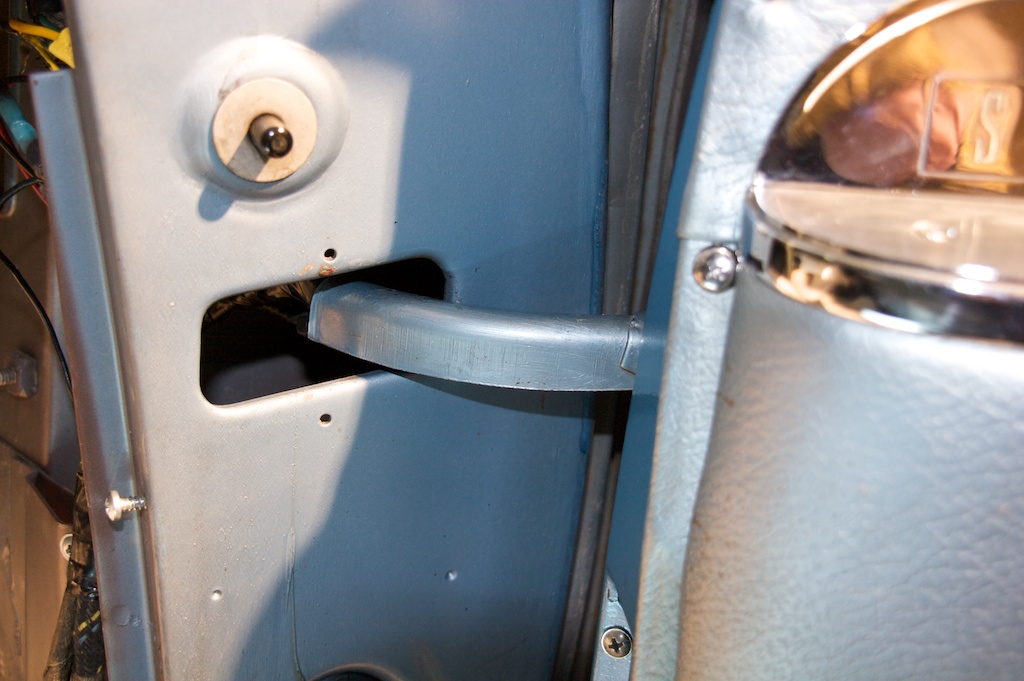
The wires are back together in the metallic tube going through the door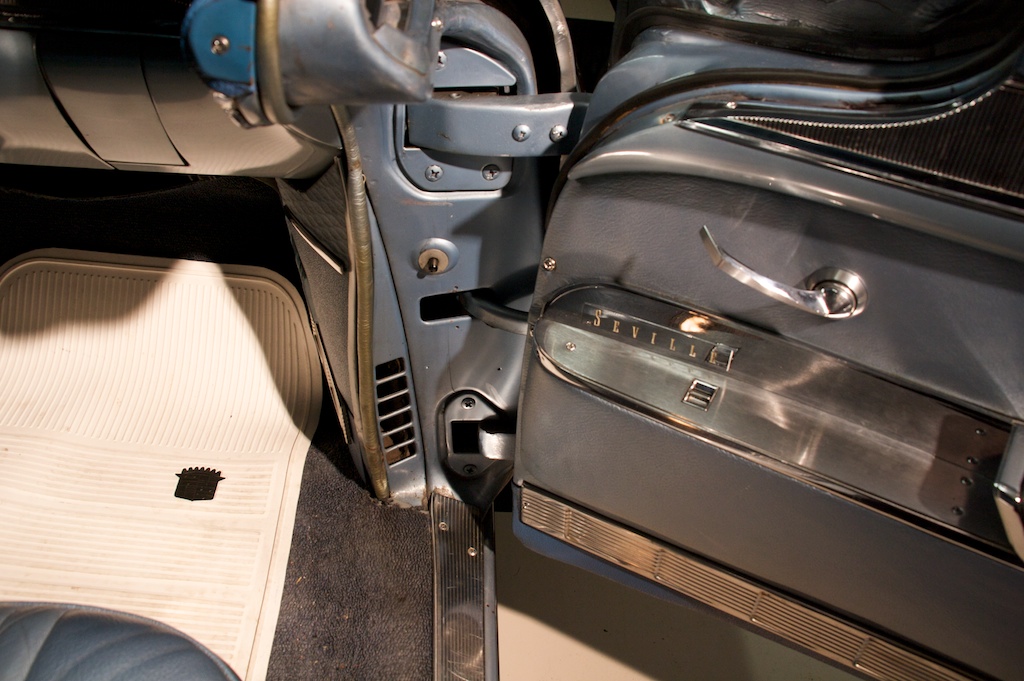
Kick panel and everything else back in place. Everything works as it should now.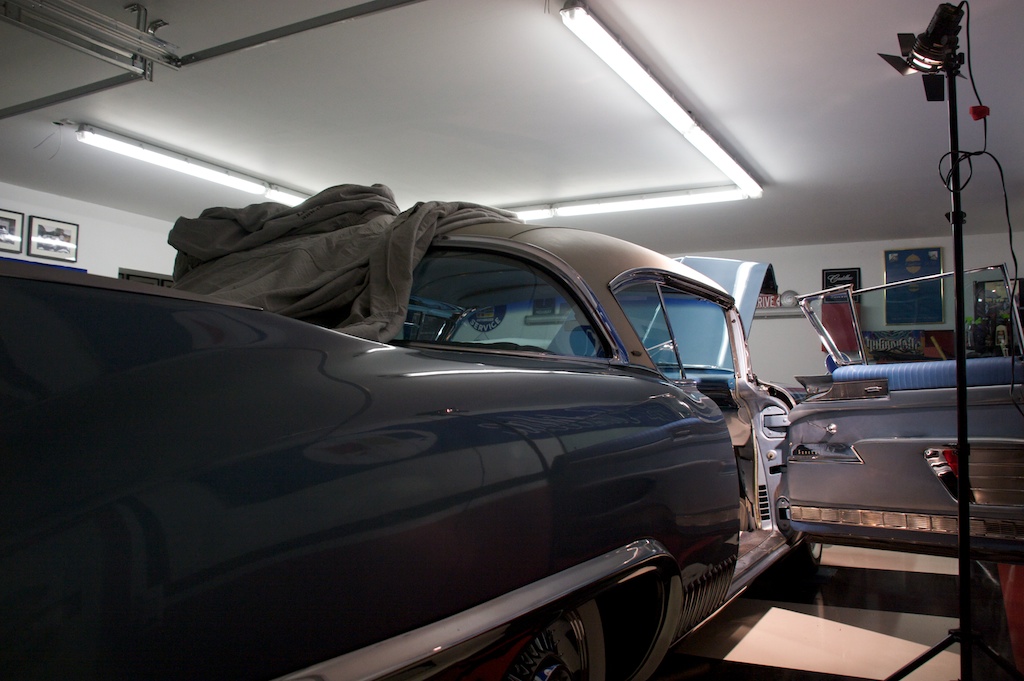
As I work as a cameraman I had a good film light at hand to light the working area properly.
1958 Power Vent Window wiring problem
Yesterday when I was repairing the 6 way power seat which had a contact problem somewhere at a solenoid - suddenly the power vent window started to close itself when I shut the door. So the problem was back! (At least the power seats do work perfectly now!)
So I decided to spend the day in the garage - rewiring the 58´s passenger door as there definitely was a short somewhere in the power vent window circuit. Thats the kind of work I absolutely HATE! 52 years of bending the wires whenever you open the door took its toll.
The bug was easily found after I removed the kick panel, door sill plates, parts of the heat tubing, and the metal tube which is going through the door to protect the wires. 5 (!) cables were broken and only held together by the original fabric covering around it. The cables all broke exactly at the end of the tube where all the bending is going on when the door is opened. I will now have to splice the cables back together somehow and get them back into the tube. No idea how I will do this - I will have to buy some electric supply material first, but the shops are all closed over the weekend. I´m still stunned that the windows still worked and the only sign of failure was that they started to open or close themselves sometimes when I opened the door, and that the battery was drained at one occasion. I guess I was lucky that the car did not catch fire...
UPDATE - Feb. 8th:
I fixed it - read everything about it above or by clicking on this link!
A short in the 1958 Eldorado power vent window wiring
So there was no other way than hooking up the charger. Two hours later, the battery was strong enough to start the car. I checked all electric components and everything seemed to work - so I was wondering what drained down a fully charged battery over night? This was the moment when I noticed a clicking noise coming from the passenger door. I opened all windows including the power vents . When I opened the passenger door the vent window started to close itself! So even when the vent window was fully closed, the window motor would still draw current. At a test drive with the door closed (of course)- the window would eventually start closing itself again.
So I had to remove all the window switches and unscrew the kick panels. Of course some of the cables behind there were broken or had the isolation coming of at the areas where they had to bend each time the door was opened or closed. I replaced one section of a cable and isolated the other ones.
So far everything seems to be working o.k. now. After an extensive test drive and opening the doors multiple times - everything seems to be well.
It is really a pain to get access to all these cables and trying to repair them. Some smaller hands would be very handy in this cases.
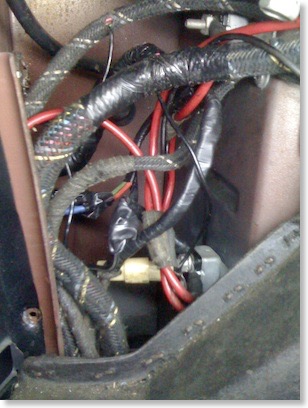
Thats the area behind one of the 1958 Eldorado kick panels where the cables have to bend all the time. After 51 years they seem to get tired.
58 gets a new fuel pump - Video shoot
Later we also did some more repairs on my friend Tayfuns 81 Eldorado. After that we had a nice cruising evening with some friends where we did some professional filming for our next video.
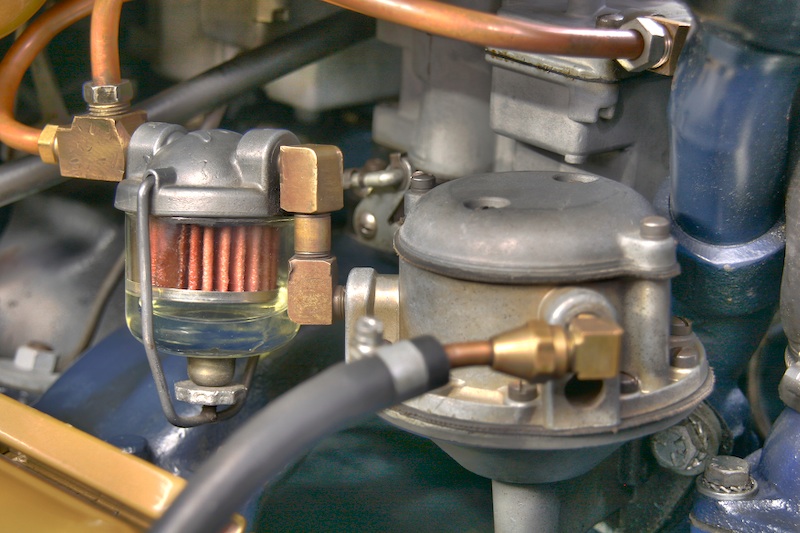
This is where the new fuel pump goes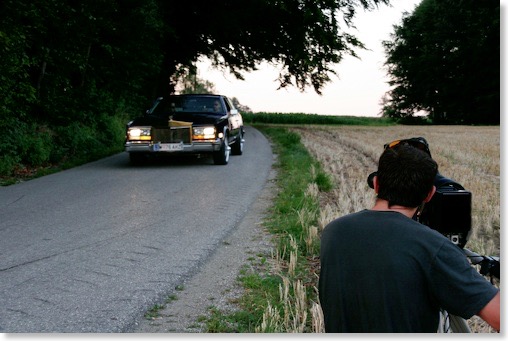
filming
I think it´s the fuel pump
I ordered a new fuel pump today - they are relatively cheap - I hope to have it here in about 2 weeks...
"New" vent window switch arrived + new Battery
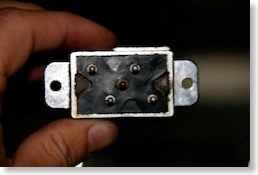
When I opened the box I immediately had the feeling that it would not work. The buttons felt sluggish and two prongs were missing on the backing plate. So somebody must have had it open at some point in its history.
So down I went into the garage to check it.
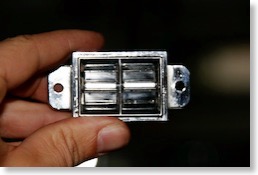
As I spent quite an amount of money for it and could not find another switch anywhere, I did not want to give up yet and so I disassembled it. Of course the 2 rusty prongs broke apart when I bent them open... A really good start! Eventually I made a good working switch from most of my old switches parts and the help of the plastic backing plate of the new switch. So I could also reuse the perfect chrome bezel of my old switch. :-)
Now everything works again - it´s not a concourse winning repair, but a solid one I can be proud of, and nobody can notice until he takes the car apart... ;-)
Now the clock is the only non working gadget on my 58 - my next project.
The new Battery
I also had to install a new battery today as my old one died after only 3 years in service. I bought an Exide Maxxima 900 - hope it will do a better job - I´ve heard lots of good things about it.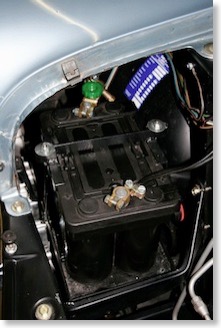
The new Exide battery - the green knob is a battery shut off switch
A photosession with the 58 - Tires balanced
You can find the gallery of the first digital images here - the ones we shot on medium format slides will follow sometime next week.

This morning I drove the car to a tire shop to have the front tires balanced. As it turned out they needed a couple of weights...
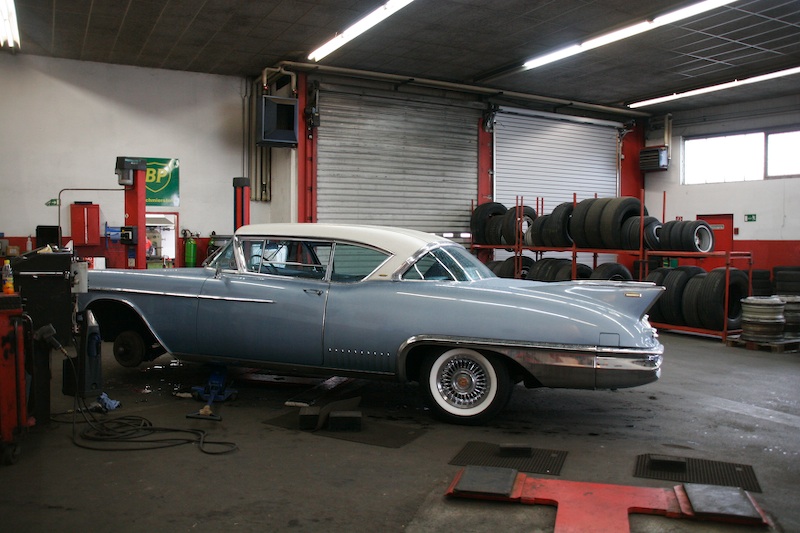

58 Vibrations...
58 Carburetor Rebuilding Project finished
The 3 dual carburetors were rebuilt completely. The carbs were blasted, cleaned and rebuilt and work perfectly now. I did not think that it would make a difference that big. It´s a real pleasure to drive the car now.
And the best surprise was, that the rebuild cost much less than the initial cost estimate I got.
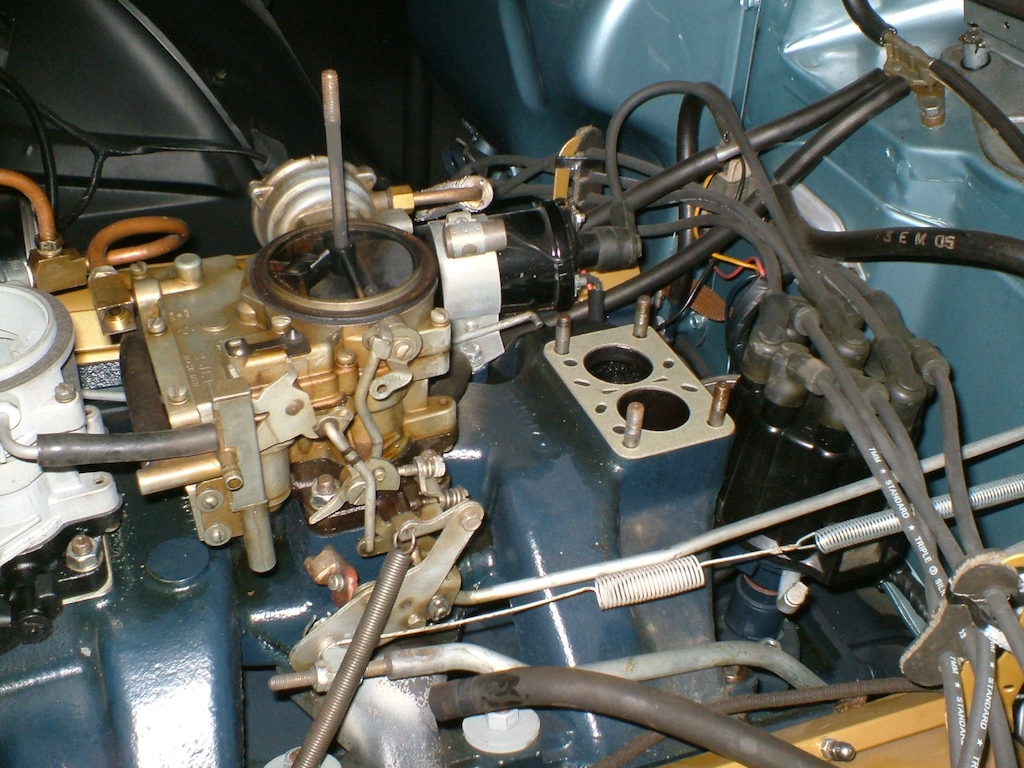
during the rebuilding - click on any picture for larger view!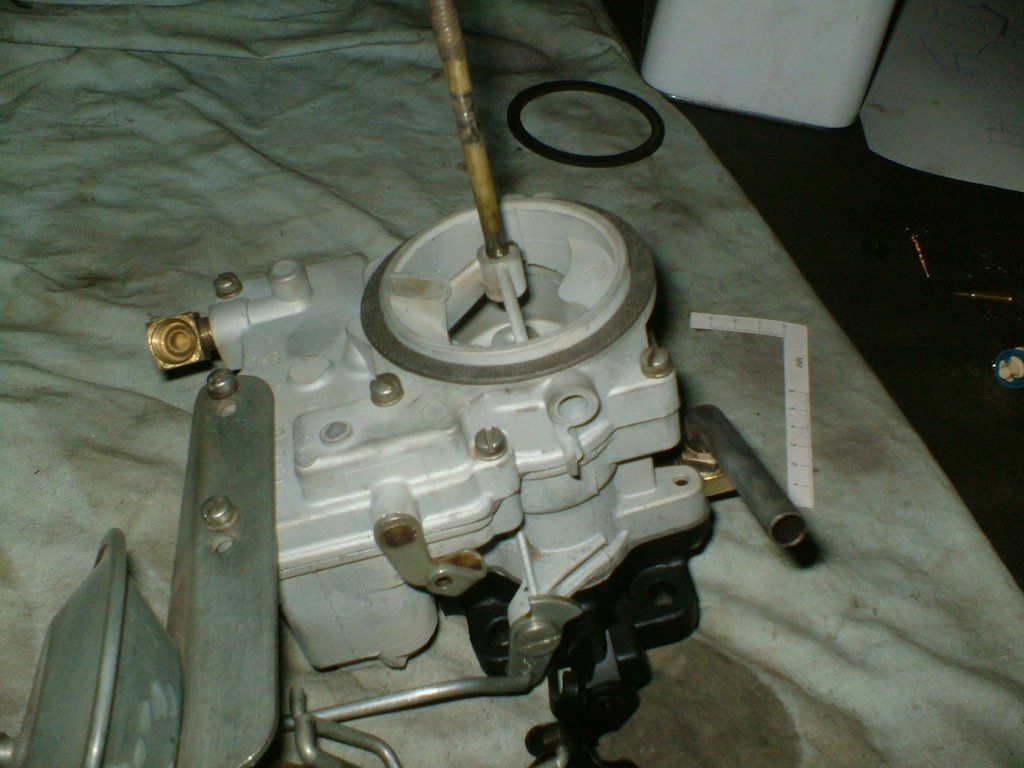
all carbs were blasted and cleaned
the rebuilt front carb
1966 Cadillac Coupe deVille (16)
1967 Cadillac DeVille (54)
1967 Cadillac Eldorado (73)
1971 Lincoln Continental Mark III (24)
1974 Cadillac Coupe deVille (46)
1978 Cadillac Eldorado Biarritz (25)
1996 Buick Roadmaster (20)
Cadillac BIG Meet (2)
Car Shows (55)
Cruising (4)
CT6 (1)
For Sale (3)
Garage Stuff (32)
Pacer (1)
Restoration (140)
Various (55)
Video (21)
Website News (31)
- 6 way power seat
- 8-track
- 10 Ohm
- 429
- 1932
- 1957
- 1958
- 1958 Cadillac Eldorado Seville
- 1958 Cadillac Repair Tip
- 1959 Cadillac Eldorado Seville
- 1964
- 1965
- 1966
- 1966 Cadillac Coupe deVille
- 1966 Cadillac Repair Tips
- 1967
- 1967 Cadillac DeVille
- 1967 Cadillac Eldorado Repair Tip
- 1967 Cadillac Repair Tip
- 1967 Eldorado
- 1968
- 1970 Cadillac Eldorado
- 1971
- 1971 Lincoln Continental Mark III
- 1974
- 1974 Cadillac Coupe DeVille
- 1974 Cadillac Repair Tip
- 1976
- 1977
- 1978
- 1978 Cadillac Eldorado Biarritz
- 1978 Cadillac Repair Tip
- 1980 Cadillac Eldorado Biarritz
- 1996
- 2012
- 2014
- 2017
- 2018
- 2019
- 2022
- 2023
- 2025
- 3063206
- 7027235
- 7800483
- 7805675
- 7805676
- 12355706
- 17058531
- 17059968
- 17059969
- 22010515
- 22010661
- A.I.R
- A6
- AC
- AC Compressor
- AC Electrical Diagram
- ACC
- Accelerator Pump
- Accelorator pump
- Accident
- Actuators
- Adriatic Blue Metallic
- Ads
- Aftermovie
- Air Pump
- Aircondition
- AIRPUMP
- ALC
- Alternator
- AM
- AM-Transmitter
- Antenna
- Anti Rattle Clips
- Antique Gold
- Arizona Vintage Parts
- Arrival
- Article
- ASC
- Ash Tray removal
- ATC
- Atlantis Blue Firemist
- Austria
- Austro Classic
- Autolite SP-459
- Automatic Seat Back Release
- Award
- Banner
- Barn Find
- Battery
- Battery Tray
- Beach Race
- Bearing
- Bendix
- Biarritz
- Bigfoot
- Bill Hirsch Engine Enamel
- Bleeder Screws
- Bleeding
- Blower
- Bodywork
- Bolts
- Book
- Borg
- Brake Booster
- Brake Fluid
- Brake Gray
- Brakes
- Broken Bolt
- Brougham
- Bucket seats
- Buick
- Bumper End
- Bushings
- Cadillac
- Cadillac BIG Meet
- Cadillac BIG Meet
- Cadillac birthday cake
- Cadillac Blue
- Cadillac Color Selections Dealer Book
- Cadillac Coupe deVille
- Cadillac Dealer
- CADILLAC GRAND EUROPEAN
- Cadillac Meeting
- Cadillac Mini Meeting
- Camaro RS
- Caorle
- Car Show
- Carburetor
- Card
- Carpet
- Carter AFB
- Cavalry Twill Vinyl
- CB
- CBM
- CCCD
- Choke
- Christmas
- Citizens Band
- Classic Cadillac Club Deutschland
- Clay Towel
- Cleaning
- Clock
- Clockwork
- Clutch
- Clutch Coil
- Collector
- Colonial Yellow
- Color Coded Springs
- Commercial
- Compound
- Compressor
- Condenser
- Continental Mark III
- Control Head
- Conversion
- Convertible top
- Coolant
- Corona
- Cowl
- Cruise Control
- Cruising
- CT6
- CV Boots
- CV JOINTS
- D6230
- Dash Trim
- Decal Removal
- Decals
- Decoration
- Dehumidifier
- Delco Moraine
- Der Standard
- detailing
- Deville
- Diagnosis Chart
- Diagram
- Dial
- Digital Rotary Drum Clock
- Diner
- Disc Brakes
- Distributor
- Diverter Valve
- Door Jamb Switch
- Door Rubber Conduit
- Dornbirn
- Dot3
- Drive Shaft
- Driving tour
- Drum brakes
- Dry Ice Blasting
- Dry Ice Cleaning
- DVD
- Eastwood
- Eldorado
- Electric Choke Thermostat
- Electrical schematic
- Elvis
- Engine Bay
- Ep
- Epoxy floor
- Europe
- Evaporator
- Exide
- Factory Markings
- Fender Skirt
- Floor
- Flushing
- Flyer
- Foam
- For Sale
- Front AXLE
- Front brakes
- Front bumper filler
- Front Floor
- Front wheel bearing
- Fuel Filter
- Fuel Pump
- Fuel Sending Unit
- Fusible Link
- Garage
- Garage Cabinets
- Gasket
- GE
- Gear indicator
- General Time
- Glove box light
- Grand European
- H4
- Haus of Hot Rod
- Headlight Actuator
- Headlight doors
- Headlights
- Heater Core
- Heater Hose
- Heater Valve
- High Idle
- History
- Holley
- Honest John
- Hood
- Hood Emblem
- Hood Ornament
- Hose Clamp
- Hot Choke
- Hot Water Valve
- HotRod
- How to
- Hödlmayr
- Ignition Diagram
- Illuminated Entry
- John D‘Agostino
- John Foust
- Klassikwelt Bodensee
- Kremsmünster
- LaSalle
- Leather seats
- Light Switch
- Limited
- Lincoln
- Lincoln Mark III Repair Tip
- Low Mileage
- Magazine
- Marilyn Monroe
- Mark III
- Master Cylinder
- Master Switch
- Master Vacuum Switch
- Media Blasting
- Meeting
- Meguiras
- MK II
- Mobile
- Model
- Moldings
- Mom
- Mopar Nationals
- Mostkost Kustom
- Movie
- Munich
- Neon
- NOS
- Oberösterreicher des Tages
- oilchange
- ORF
- Overspray
- Pacer
- Paint
- Paint correction
- Paintjob
- Part Number
- Parts
- Patch Panel
- Perfect Circle
- Permabag
- Persian Lime
- Photo shooting
- Photoshooting
- Pictures
- PinUp
- POA Valve
- Power Antenna
- Power Servo
- Power Vent Windows
- Power Window
- Printed Circuit Board
- Programmer
- Pulley
- Quadrajet
- Quarter Panel
- Quartz Conversion
- R134
- Radiator
- Radio
- Rattle
- Rear brakes
- Rebuild
- Recalibrate
- RediRad
- Reed Switch
- Relais
- Relaunch
- Removing Overspray
- Repaint
- Repair
- Restoration
- RIP
- Roadhouse
- Roadmaster
- Rochester
- Rocker Arm Cover
- Rocker Panel Extension Clips
- Rostio
- Rotary Valve
- Rotterdam
- Rupes
- Rust removal
- Rust removal gel
- Sabre Wheels
- Sand Blasting
- Sandblasting
- Screed
- Season Greetings
- Seasons Greetings
- Seat Back Locks
- Seat Padding
- Seat Transmission
- See through ornament
- Self adjusters
- Self Starter
- Sepp's Garage
- Seville
- Sheetmetal
- Shocks
- shop manual
- short
- Sign
- Solenoid
- Spark Plug Wire Routing
- Speakers
- Special Award
- Speed Bleeder Screws
- Splash Guard
- Starter Diagram
- Starter Motor
- Steering Column
- Storage
- suction throttling valve
- sunroof
- suspension
- Swirl Mark removal
- Switzerland
- T3
- Taillight Cover
- Texan´s Choice Award
- Thermostat
- Tilt and Telescope
- Time capsule
- Tomsclub
- Torque Specifications
- Tower Hose Clamp
- Towtruck
- Trailer
- Transducer
- Transmission
- transmission control selector
- transmission control selector indicator light
- transmission shift indicator
- Treadle Vac
- Treffen
- Tri-Band
- Troubleshooting
- Trunk Cardboard Kit
- Trunk lid
- Trunk lining
- Trunk to bumper cover
- Turn Signal Switch
- TV
- Typisierung
- Ultimate Garage
- Underbody
- Undercarriage
- Undercoating
- Undercoating Removal
- Vacuum Booster
- Vacuum diagram
- Vacuum hoses
- Vacuum Master Switch
- Vacuum Schematic
- Vacuum Valve
- Valve Cover
- Various
- Vent Window Switch
- Vibration
- Vibrator
- Vicodec roof
- Video
- Vinegar
- Vinyl Roof
- Visitor
- Washer Fluid Float
- Washer Fluid Low Level Indicator
- Water Pump
- Wax
- Weatherstripping
- Website News
- Westclox
- Wheel Bearings
- Wheel Housing
- Wiesbaden
- Windlace
- Winter
- Wiring
- Wiring Diagram
- Wonderbar
- Workbench
- Zurzach