 GERALD´S CADILLACS - NEWS
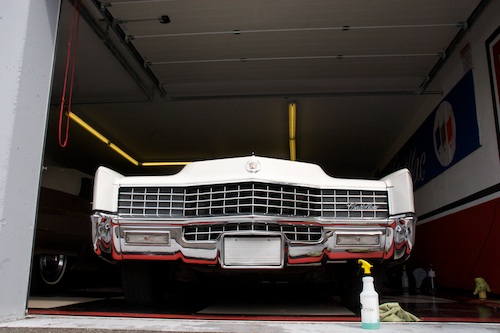
SPRING CLEANING THE 1967 ELDORADO
Unfortunately its very rainy and I can't test drive it.
Here is a short video.
POST CADILLAC BIG MEET CLEAN UP
GETTING READY FOR THE CADILLAC BIG MEET 2021
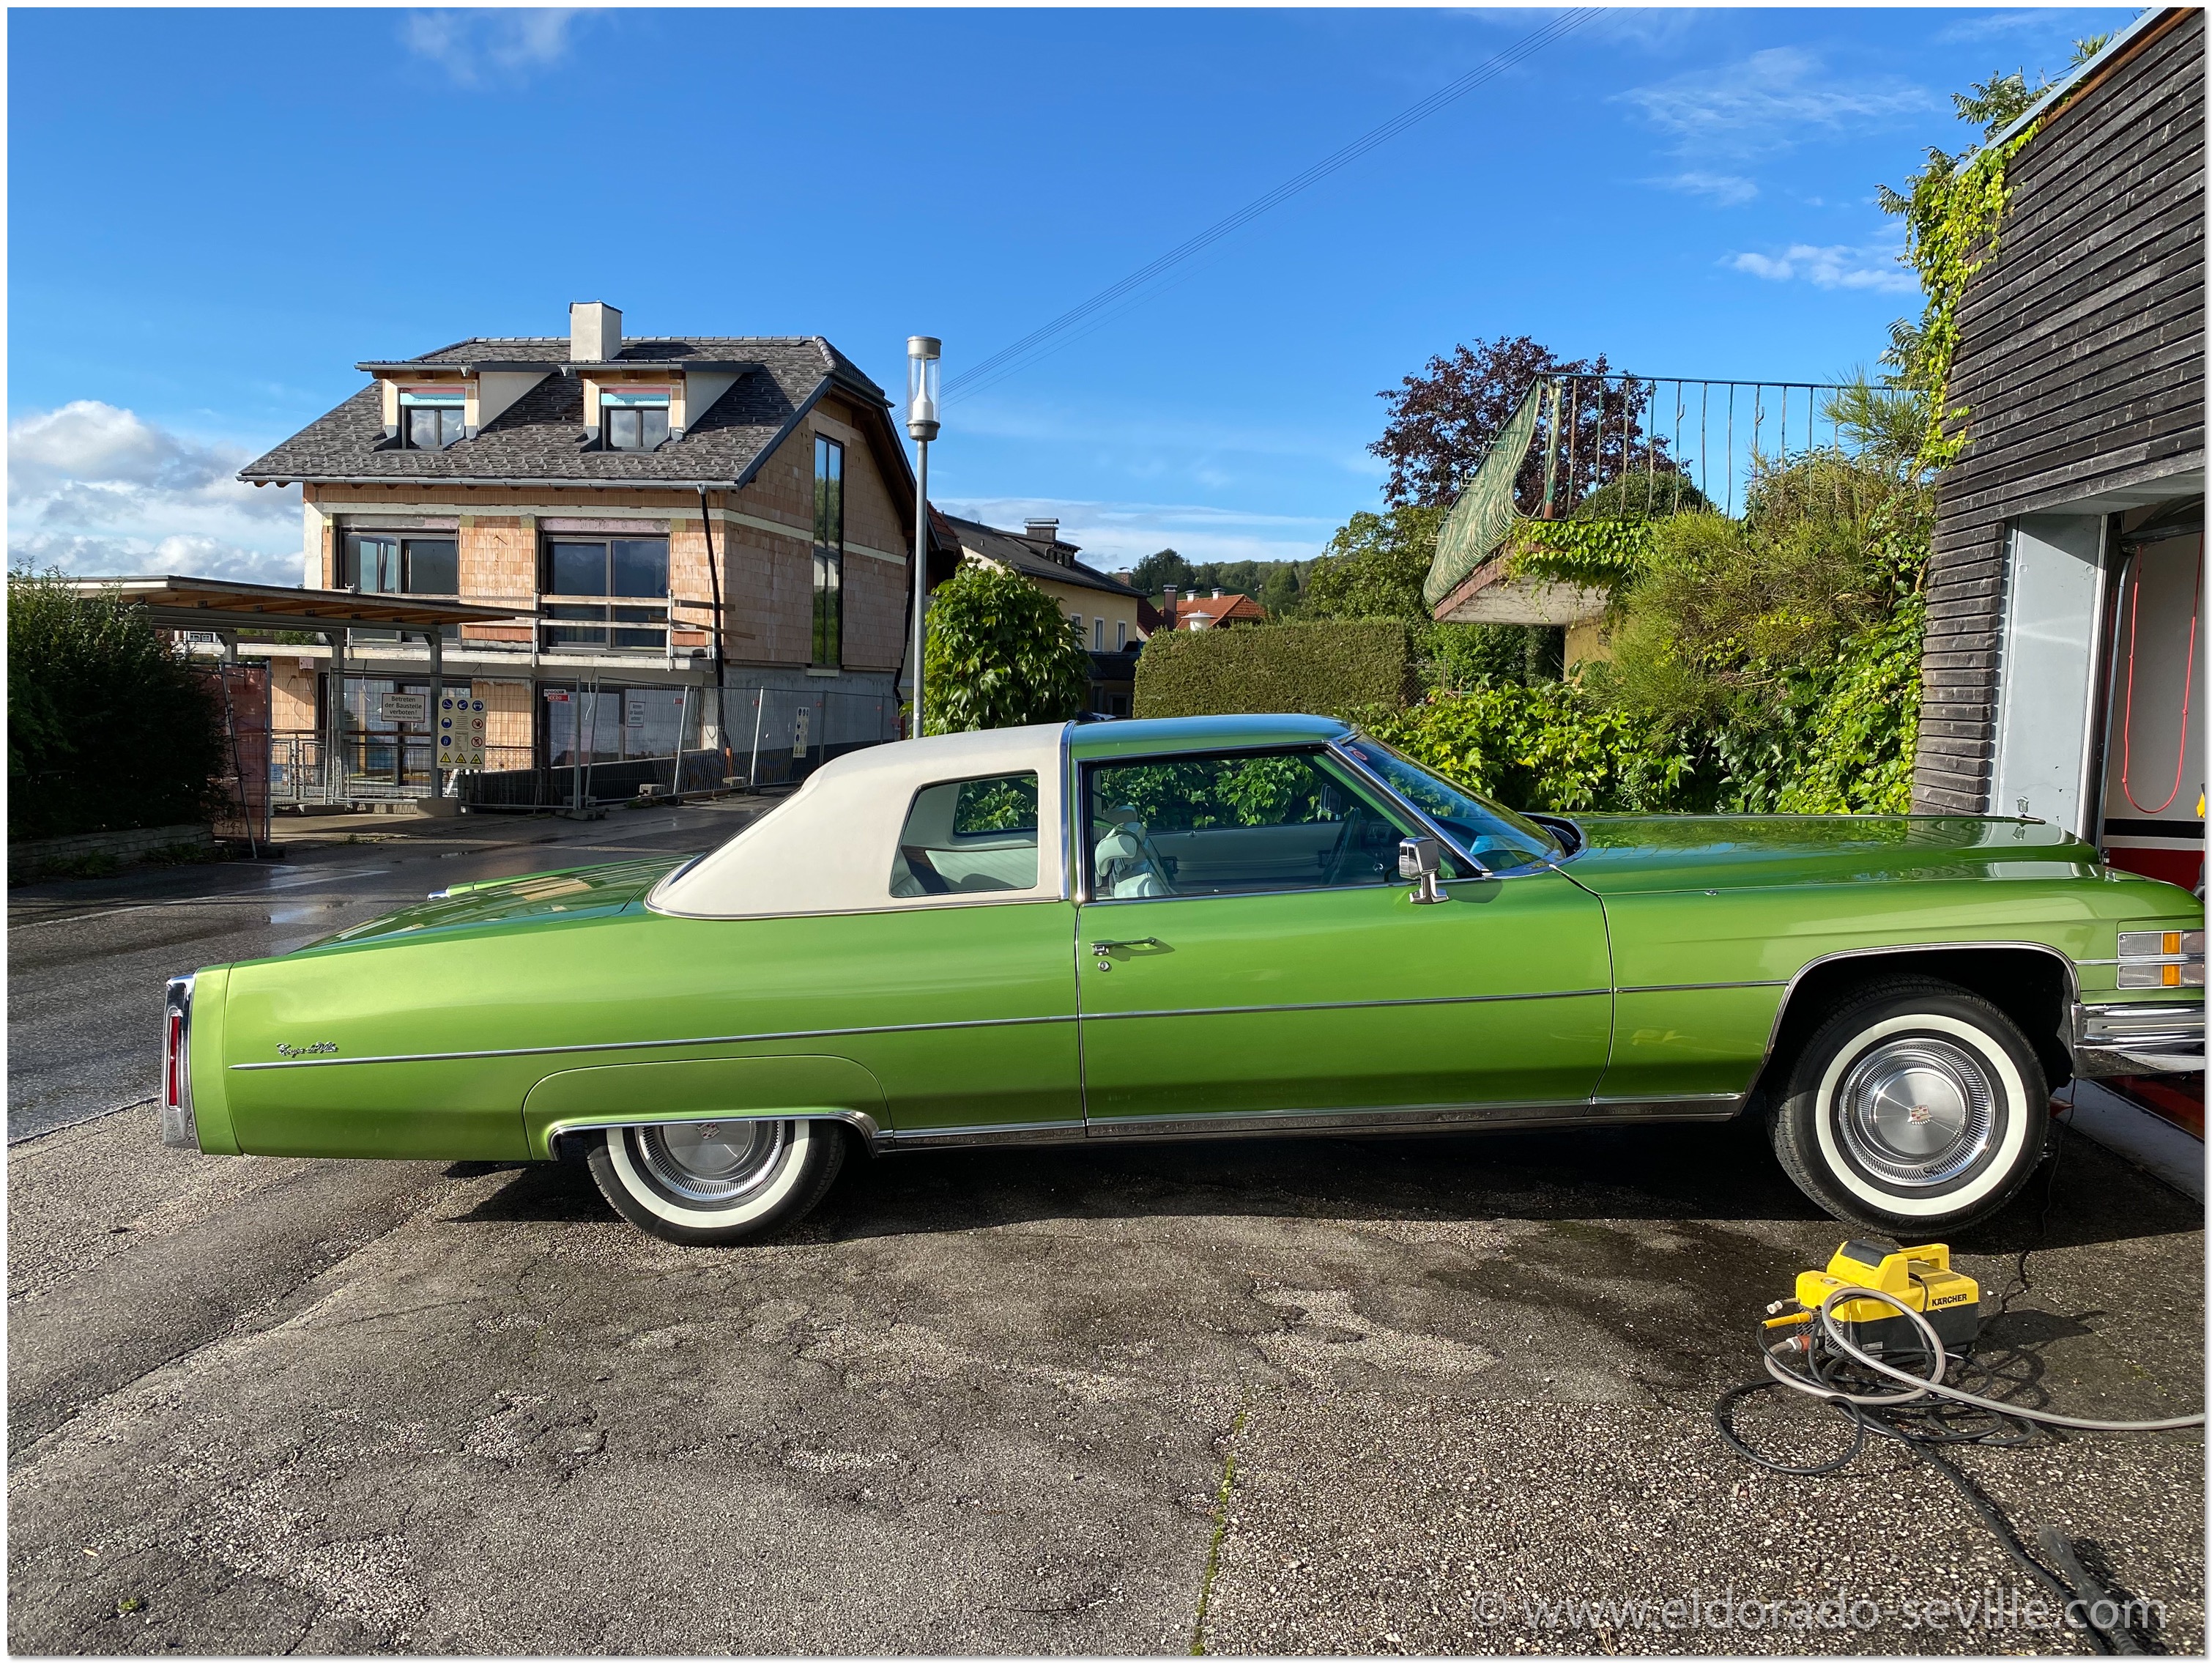
I will spend the next few days in my garage to clean my 74. Looking forward to a great meeting - despite a terrible weather forecast… The 74 will be perfectly detailed for the meeting as always - inside and out.
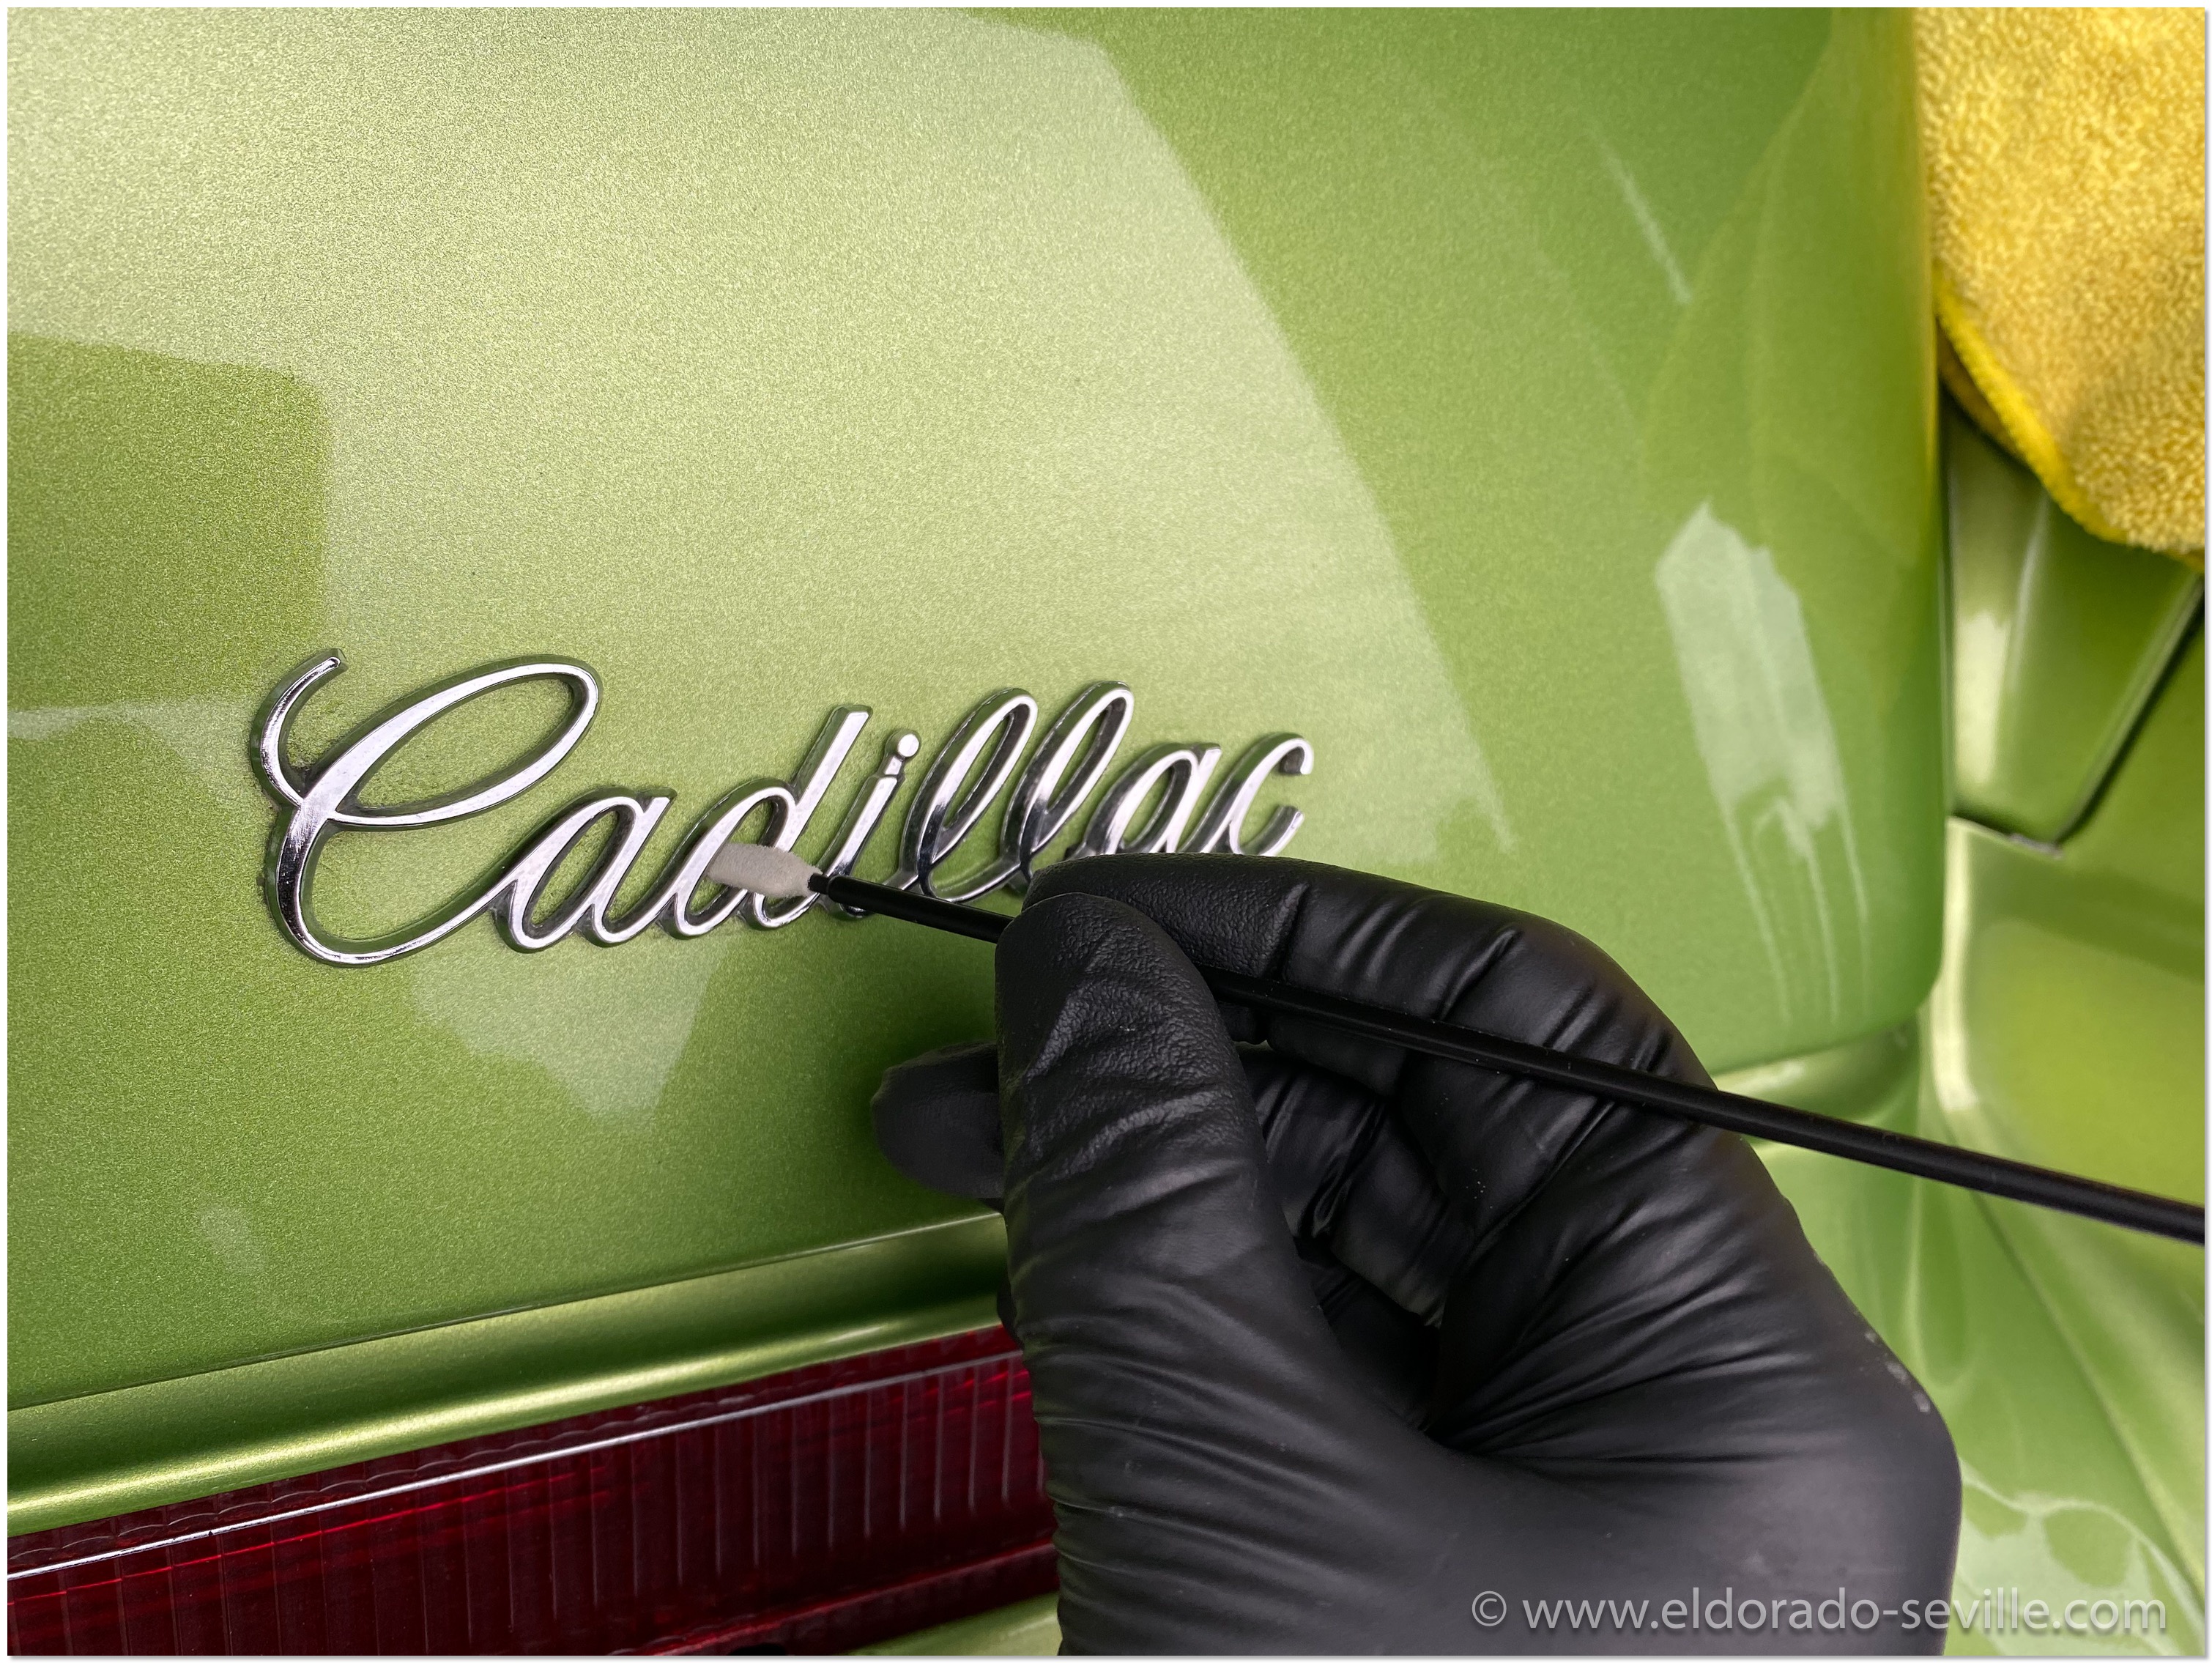
Details matter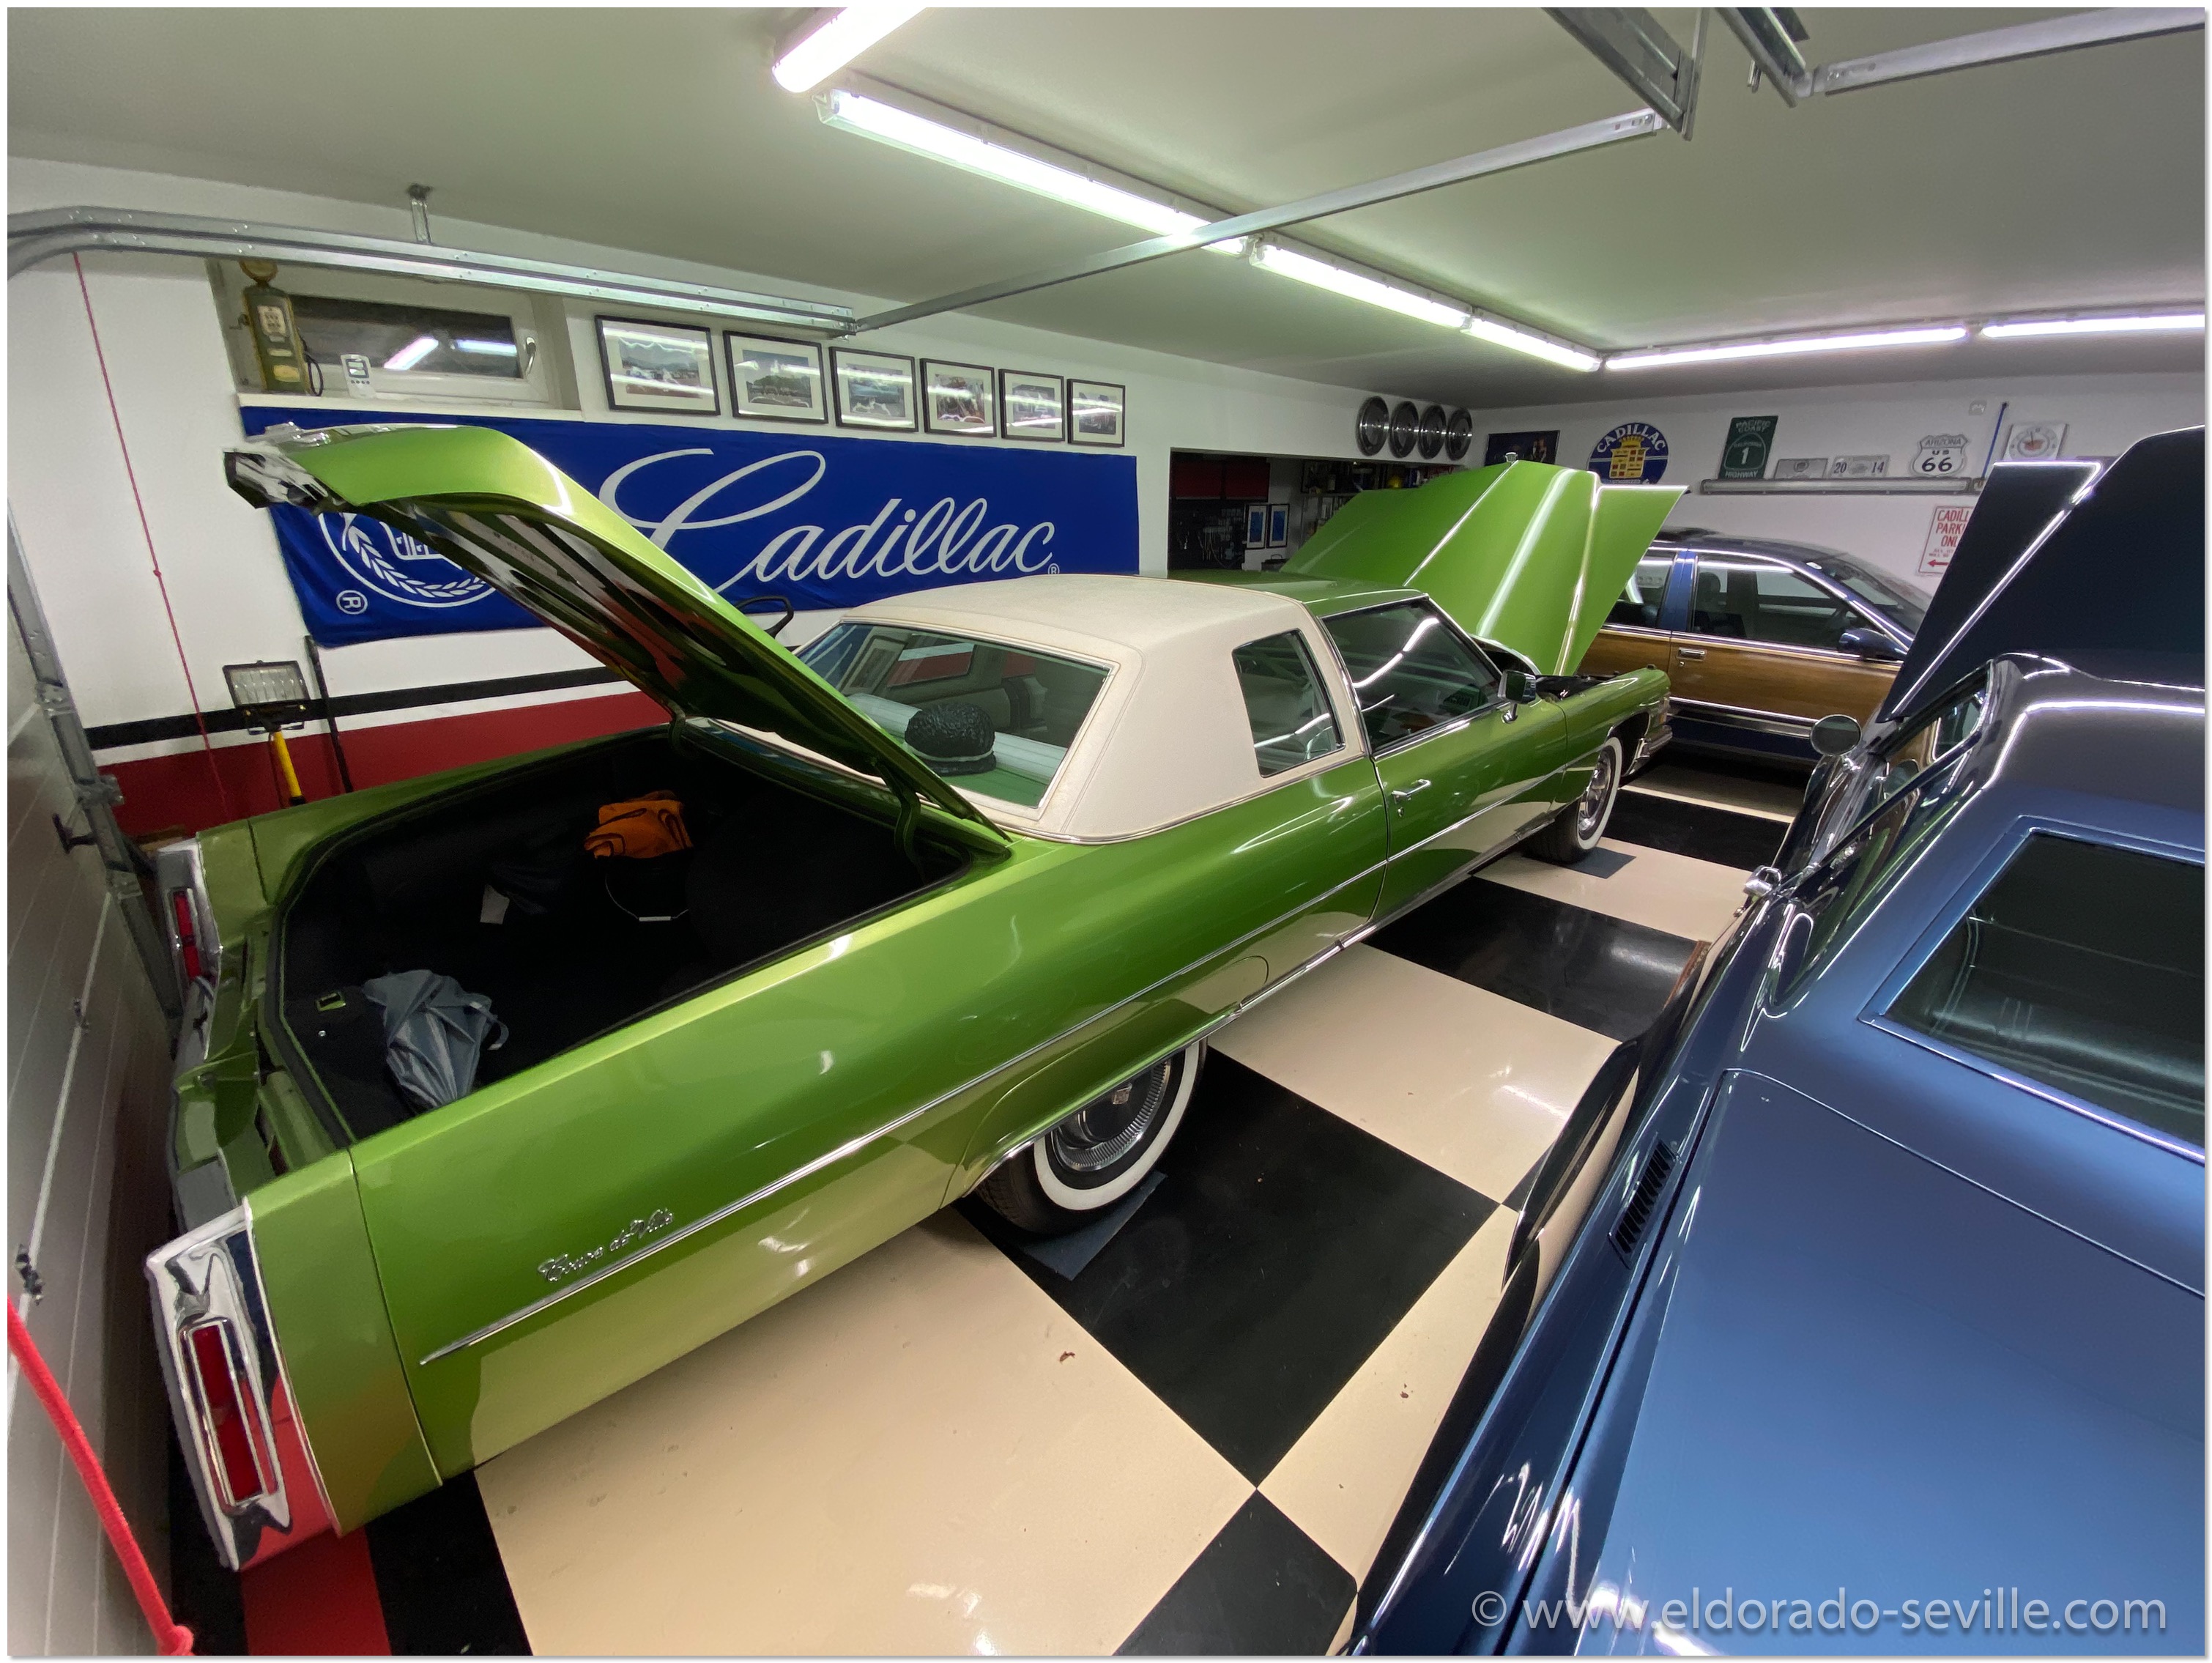
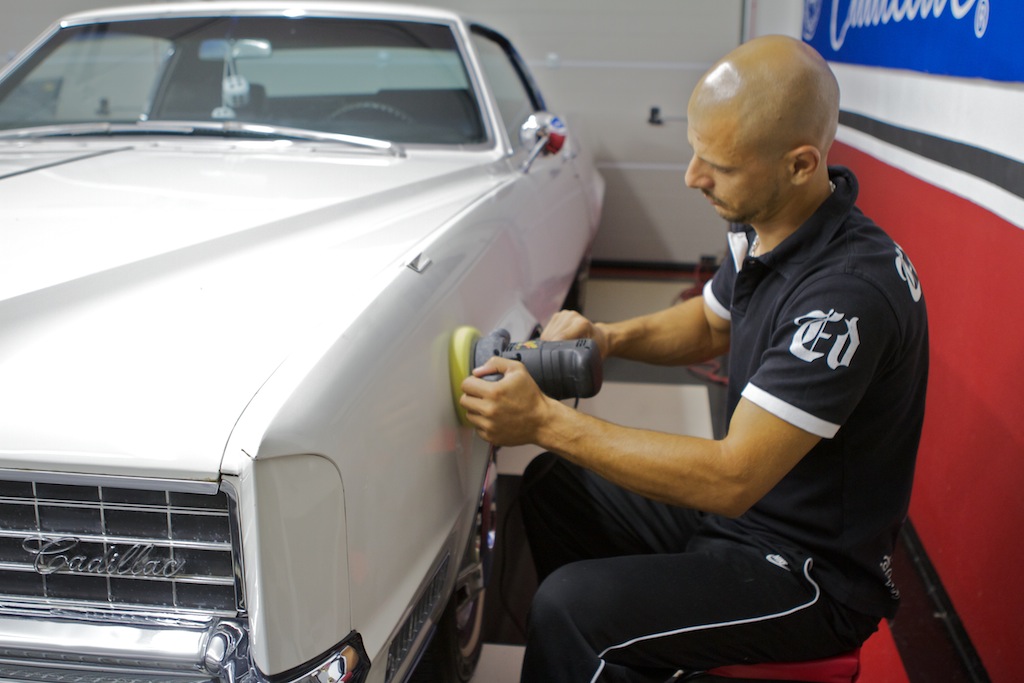
DETAILING MY FRIENDS 1970 ELDORADO
A short while ago his newest car - a fantastic 1970 Eldorado - arrived. The car is a completely all original, unrestored car with only 8k miles on the clock in one of my favorite colors…
 READ MORE...
FINISHED THE 1974 CADILLAC ENGINE BAY RESTORATION PROJECT
Everything that came out was cleaned up, and wherever I found some surface rust or flacking paint it was completely removed and the according part was repainted. I had to do all of this on a very tight budget, but luckily the total cost of this project was extremely low, as all I needed were 3 cans of paint, some wire brushes and some cleaning chemicals .
I took a break from Nov. 2016 to April 2017 where I did not do any car related work at all. During the last 2 weeks I finished everything, and the car is now ready and only needs a good cleaning prior to the upcoming season. When everything was back together the car started up immediately (see video below) but I could not let it run for a longer time yet as the engine enamel (I used Bill Hirsch engine enamel) needs at least 2 weeks to fully cure.
I did not restore parts which still had their original decals, because some are irreplaceable, as there are no correct reproduction decals for the 1974 Cadillac out there. Many decals for sale for the 1974 Cadillac are totally incorrect - beware! For example there is no correct "Caution Fan" decal or AC compressor decal available anywhere. So there is still some patina left on some areas, and at first glance the engine bay does not look restored at all, but more like an extremely well kept car with very low mileage. I did not want to go for this over restored look.
But let the pictures speak for themselves - here are 3 Before/After pictures (Click on them for a larger view) and the rest of the restoration pictures can be found here.
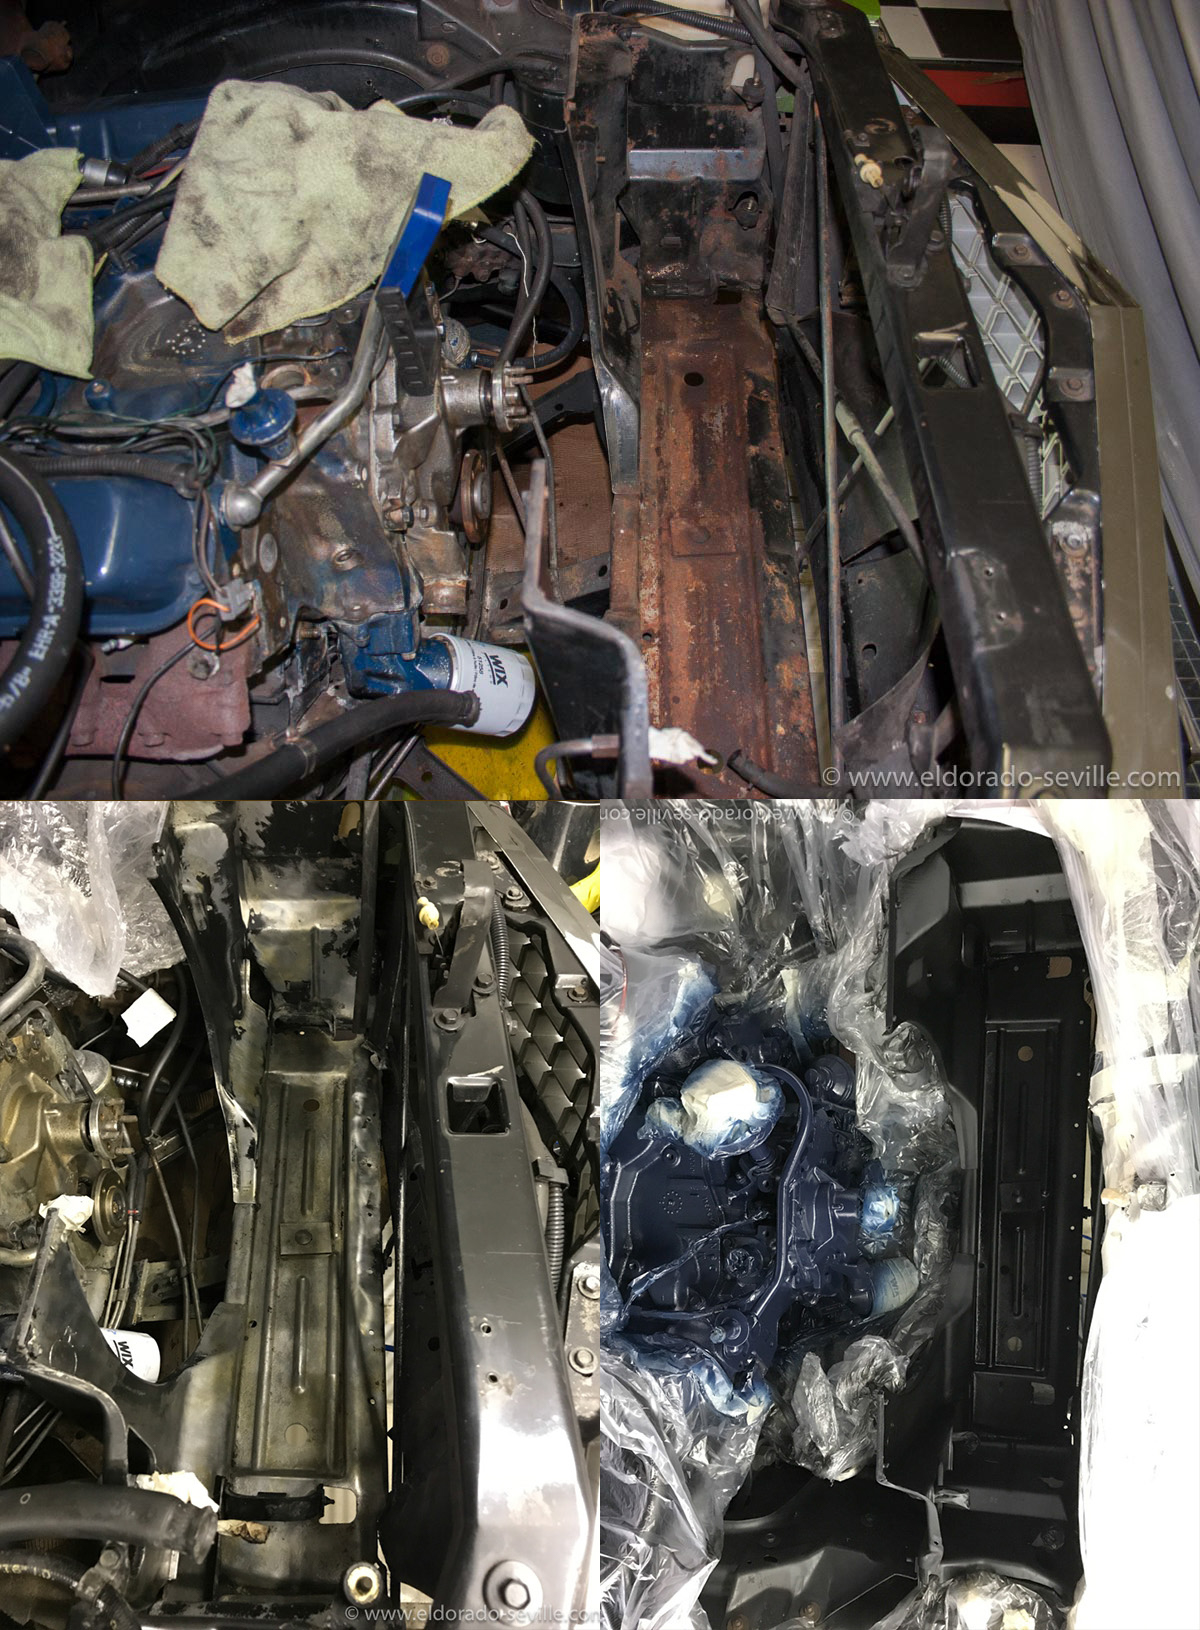
The radiator support frame before, after removing the rust and after painting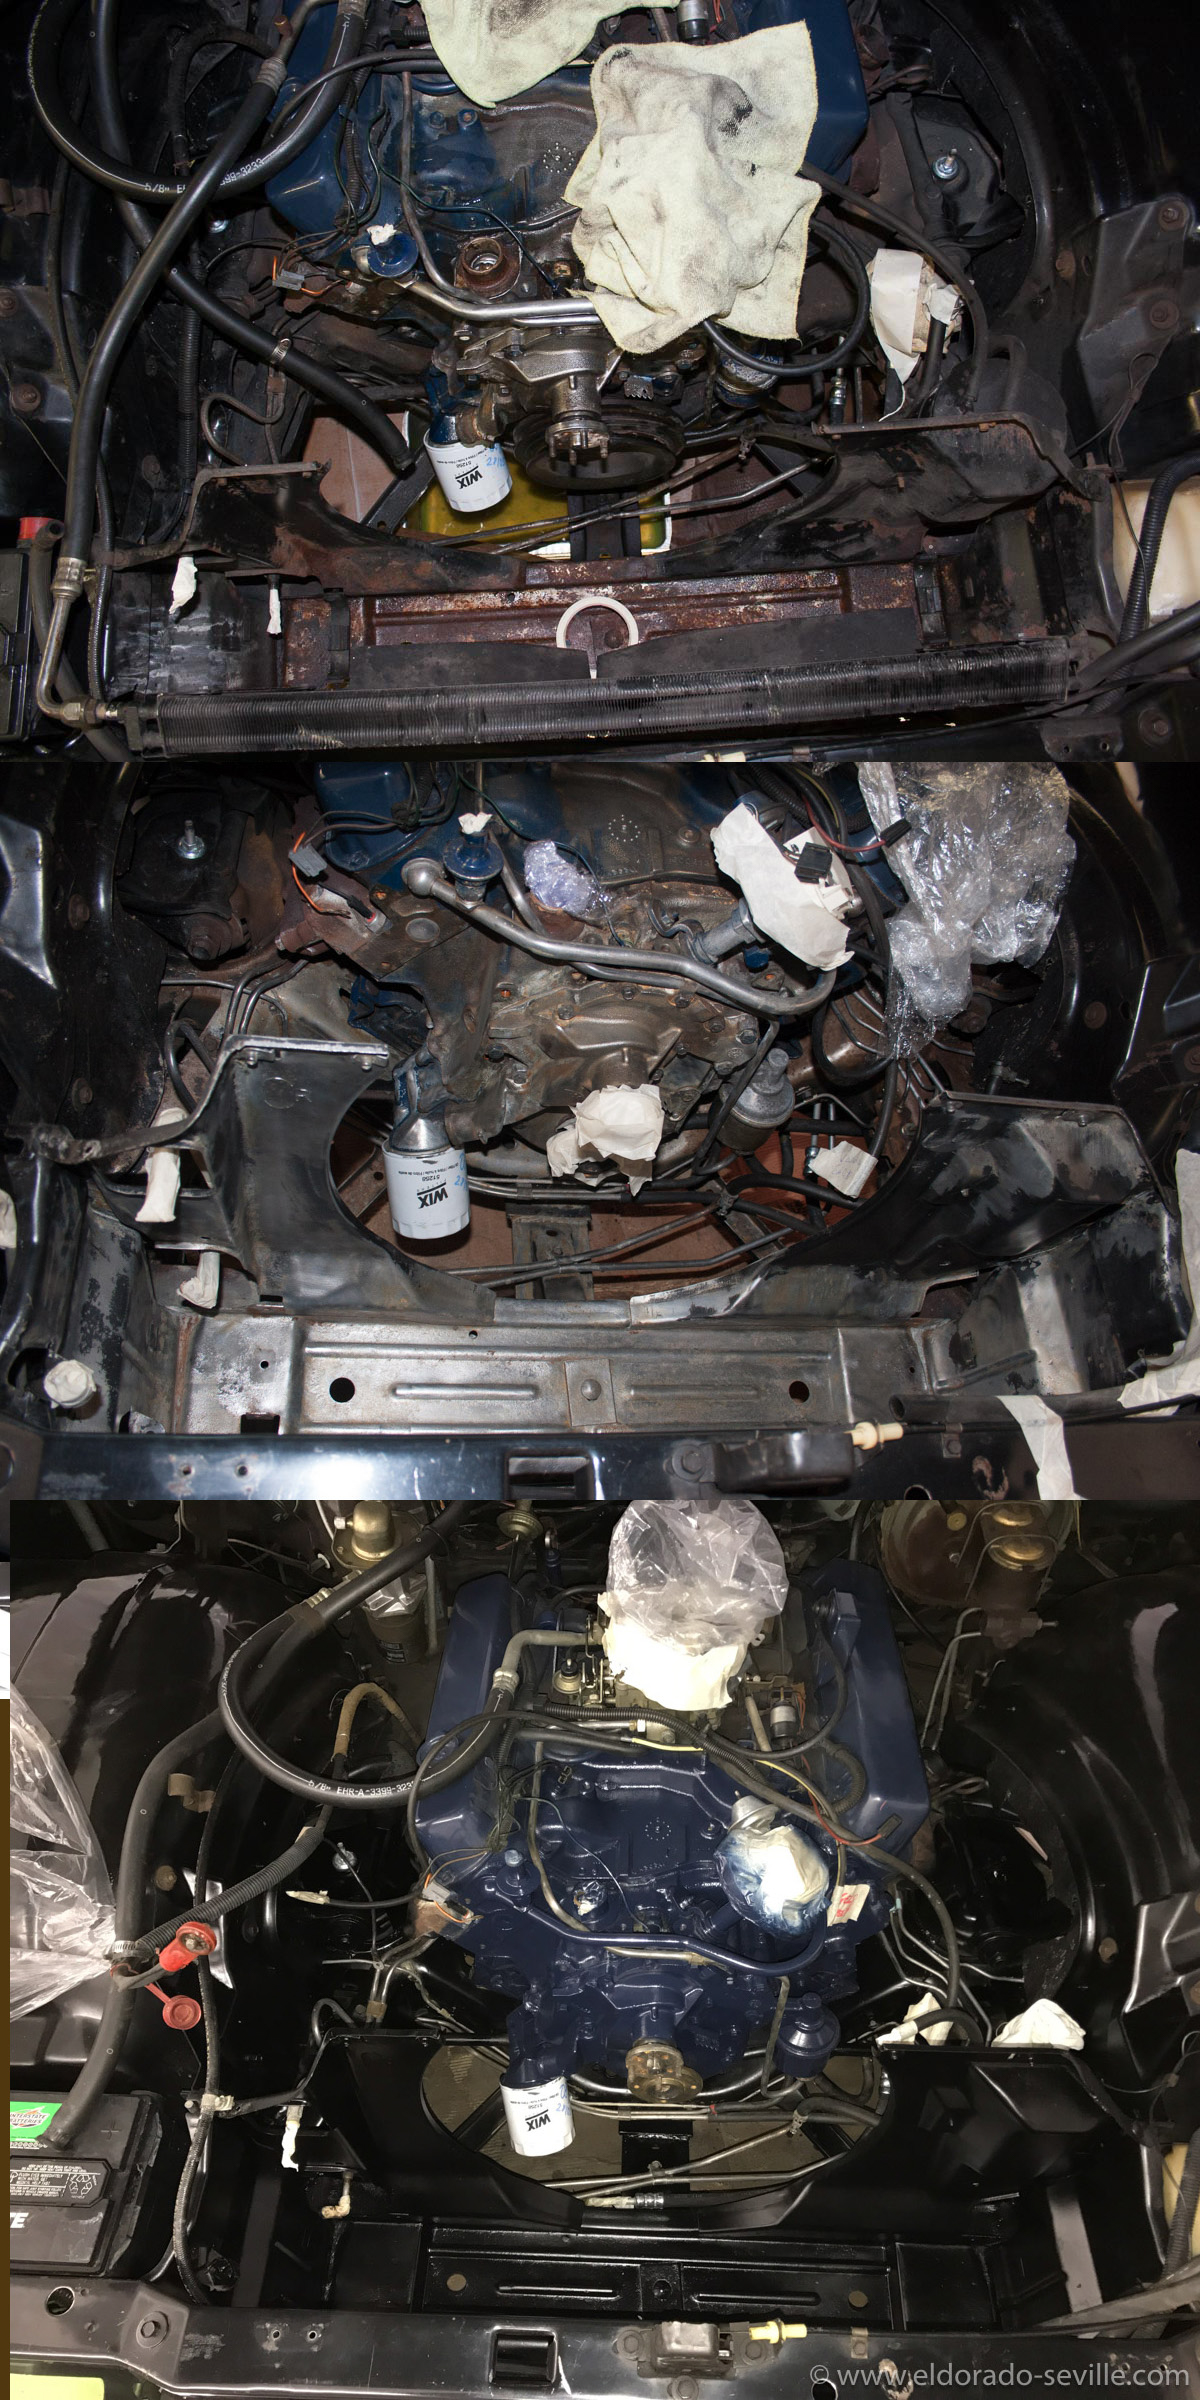
The radiator support frame before, after removing the rust and after painting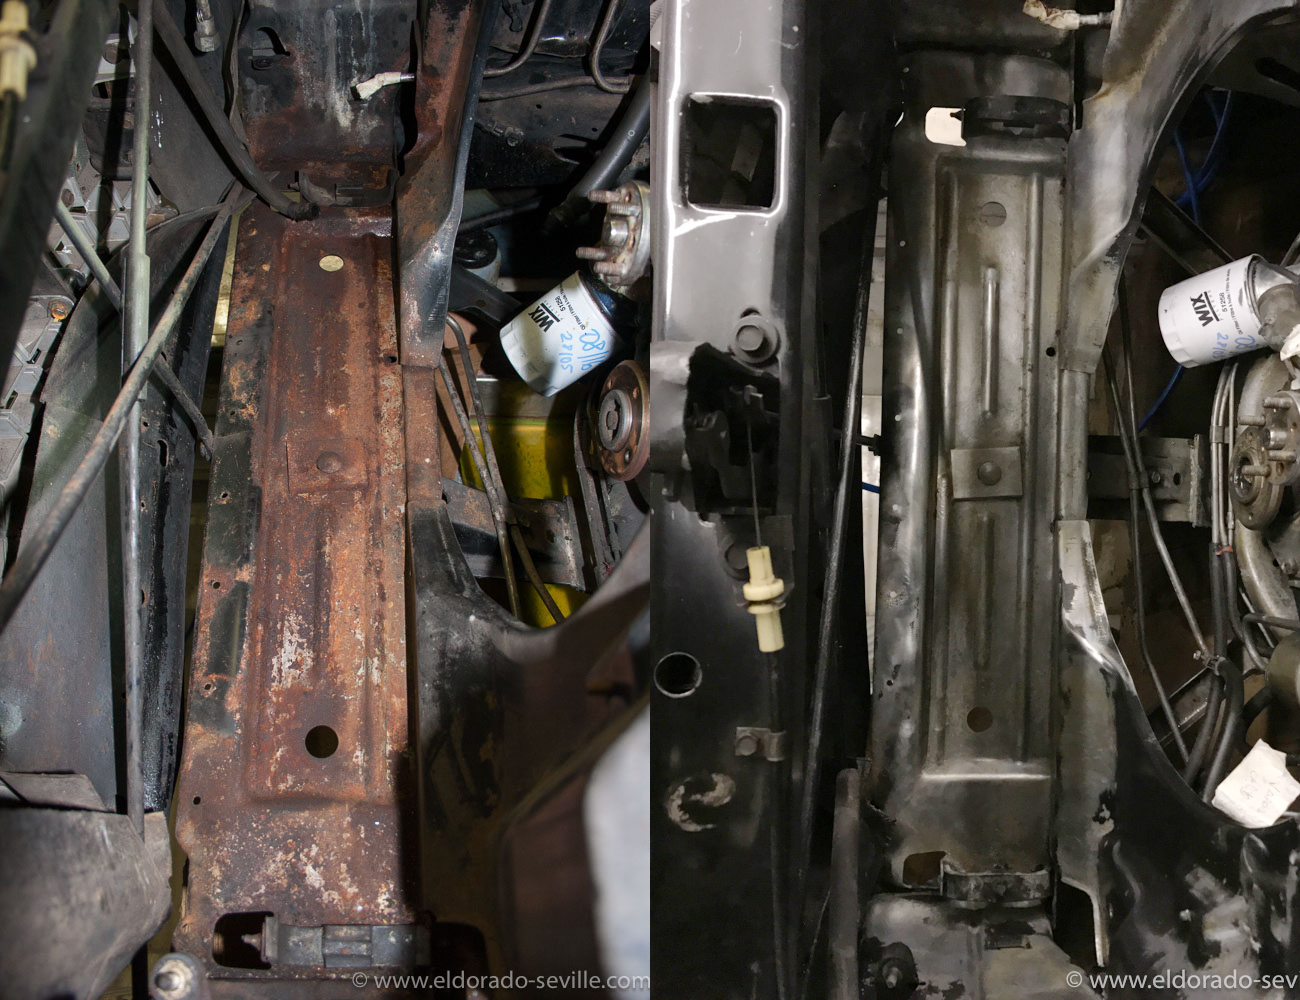
Before and after rust removal
Here is short video of the first start up after the restoration.
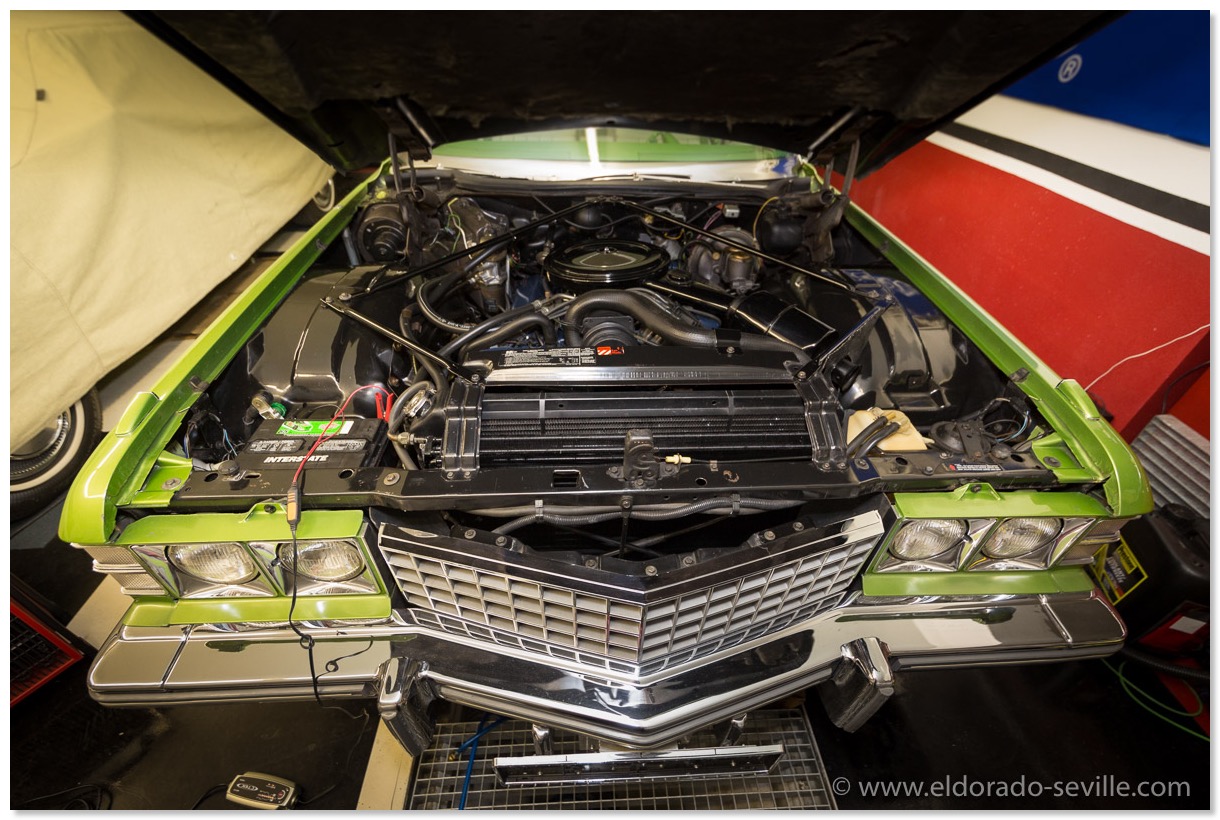
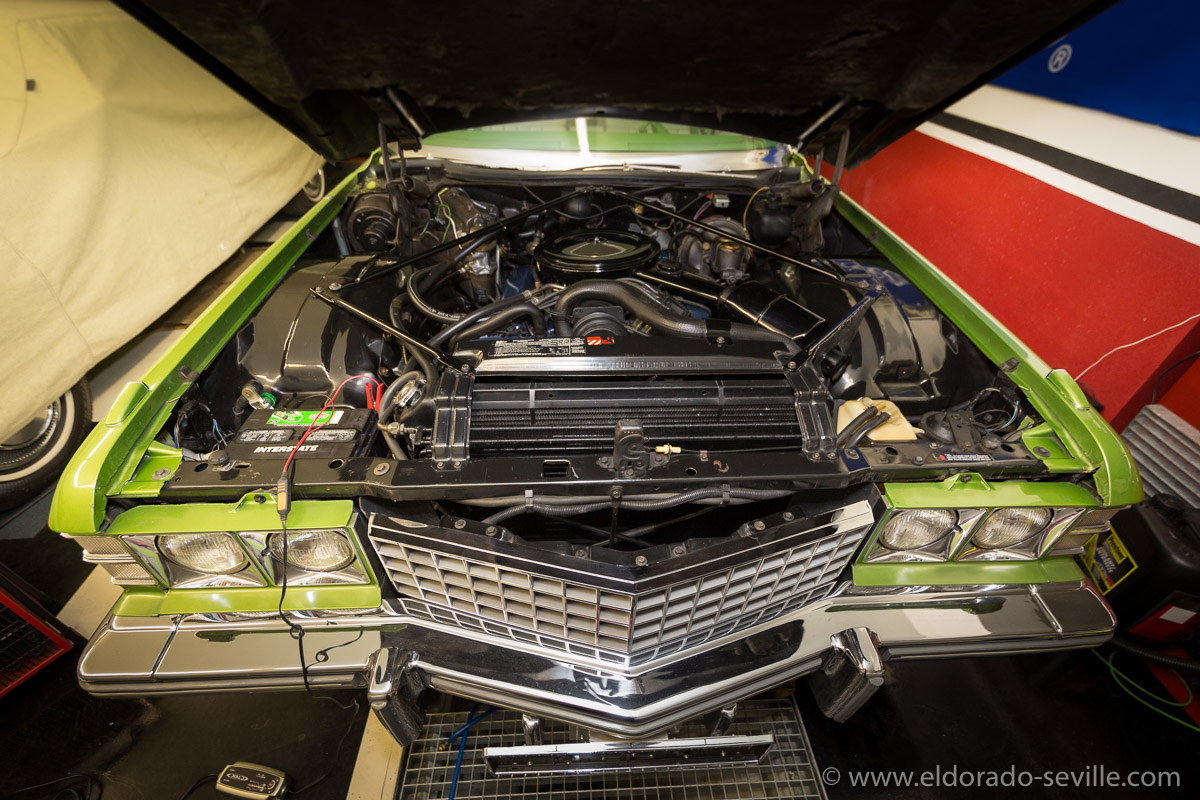
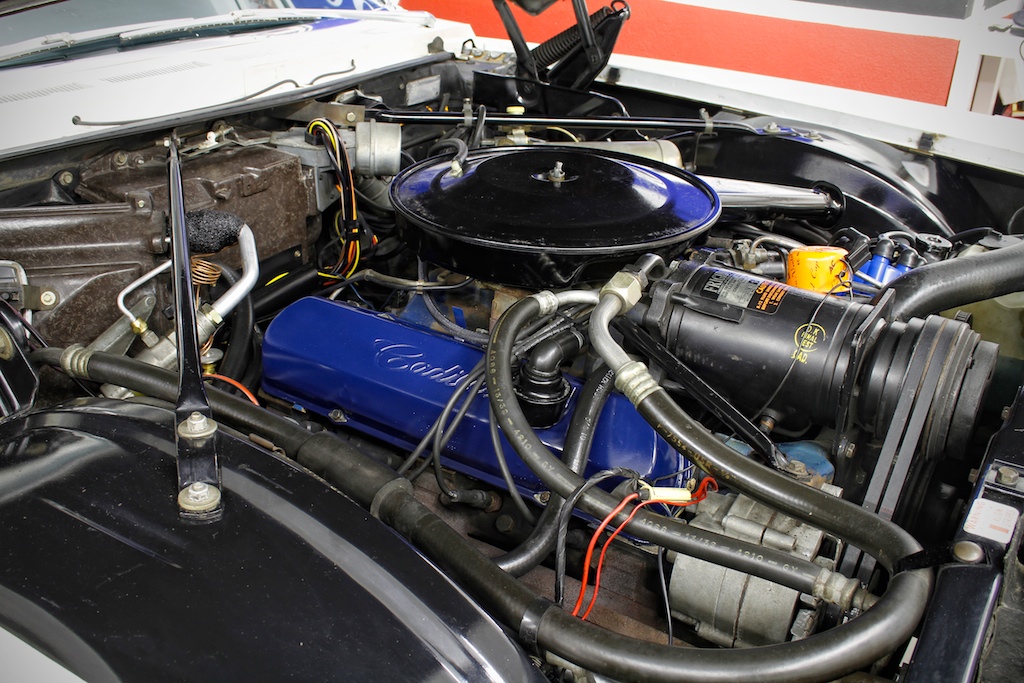
The finished engine bay looks pretty nice!
More pictures of the finished engine bay can be found here.
DETAILING THE ENGINE BAY AND REMOVING A BROKEN BOLT FROM THE AIR PUMP OF THE 1974 CADILLAC
During the restoration of the battery tray of my 74 Coupe deVille I noticed that the belt from the AIR Pump was a little loose. While I tried to find out how to properly tension it, I noticed that one of the bolts going through the pulley into the pump seemed to stick out a little bit at a strange angle. When I touched it, it immediately broke off… Great…
So I had to remove the pump to be able to get to the broken pulley bolt and replace it with a good new one. It was very common on GM cars from the 70s which used this air pump, that the bolts broke off. GM used 3 very cheap and weak bolts to hold the pulley in place.
Before I took any bolts out to remove the pump, I sprayed every nut and bolt with penetrating oil to make sure I could open them without damage.
I anyway had to take out the AC compressor as well for another winter project. After that I removed the generator and then the air pump including all the brackets.
You can see the at the diagram below where the bolts are hiding.
With these parts removed I now have access to many parts of the engine which I can freshen up to the original factory fresh look. I will remove the surface rust on the block, clean everything and re-paint in the original Cadillac Blue paint.
I can clean the air pump, the generator and will blast the brackets and re-paint them. While the AIR Pump is out you might also want to check the diverter valve atop the smog pump to be sure the vacuum canister holds and hasn't ruptured at the vacuum diaphragm. If the diverter valve does not respond to vacuum, it can lead to all of the positive pressure from the pump being injected into the exhaust stream which can cause a backfire through the exhaust.
Many people also plug the AIR Pump and remove everything inside, so they do no longer have to bother with it. Rebuilt pumps are still available, but you can´t get the diverter valve anywhere.
So it is now officially my winter project to freshen up the engine bay…
The air pump is very fragile btw. It's not allowed to put it into a vise. Luckily I could remove the broken bolt with a bolt extractor. I just had to drill into the remains of the stuck bolt a little bit and could then remove it using the left turning extractor tool.
I have now to find replacement bolts now. They seem to be SAE bolts with the following dimensions: 1/4"(diameter)-20(threads per inch) and 1/2" (without the head) long. The original bolts were of the lowest grade material, the new ones I am going to install will be grade 5 or grade 8.
While cleaning the block I decided to also remove the fan and water pump pulley to be able to clean them as well. The pulley was pretty rusty and I had to soak it in rust removing liquid for 48 hours before the rust was gone and I had to paint it immediately as this material develops flash rust immediately.
UPDATE - OCTOBER 28th 2016:
I now also removed the power steering pump to get better access to the front of the engine block. I will also remove the radiator to be able to remove the surface rust underneath. I will then have the entire engine bay dry ice blasted to properly clean everything.
UPDATE - NOVEMBER 5th 2016
I took out the radiator today to be able to clean the surface rust underneath.
I also finished painting all the brackets and the power steering pump which I took down to bare metal before.
You can find much more pictures of this project in my 74 restoration gallery.
As this project is still going on - I will update this posting here soon.
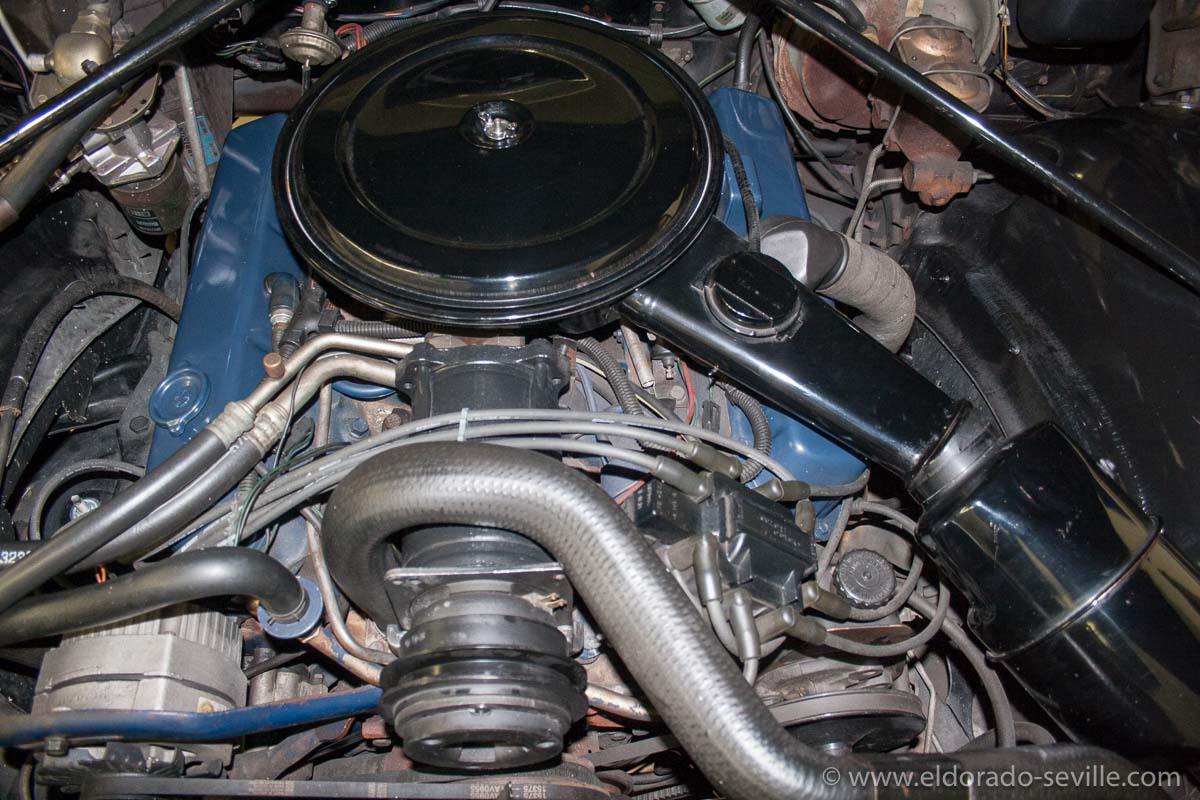
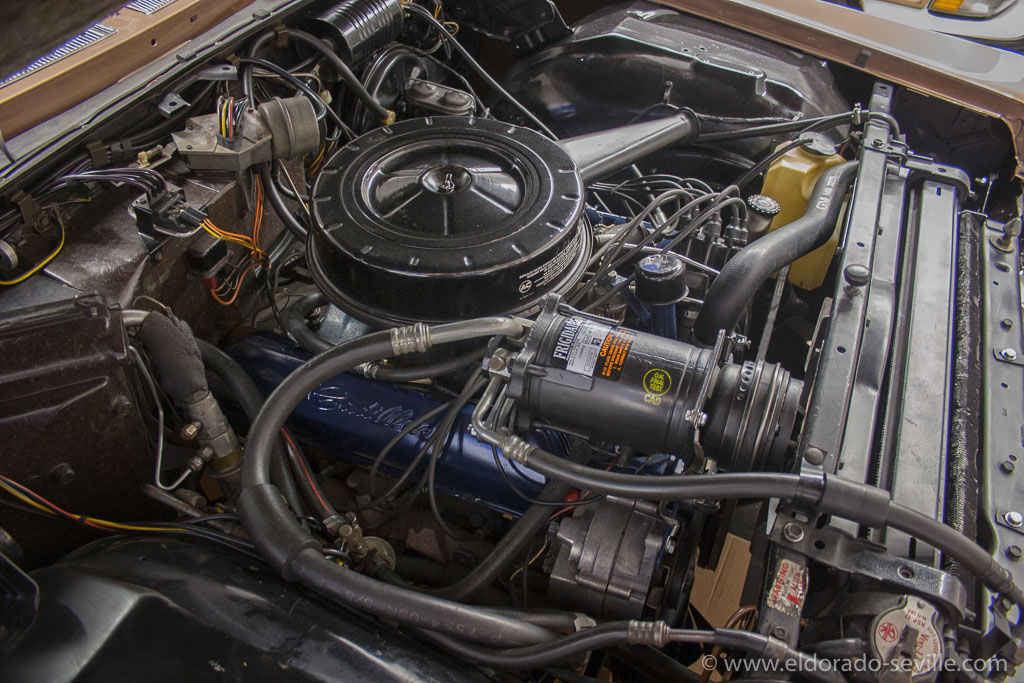
The engine bay before the start of the project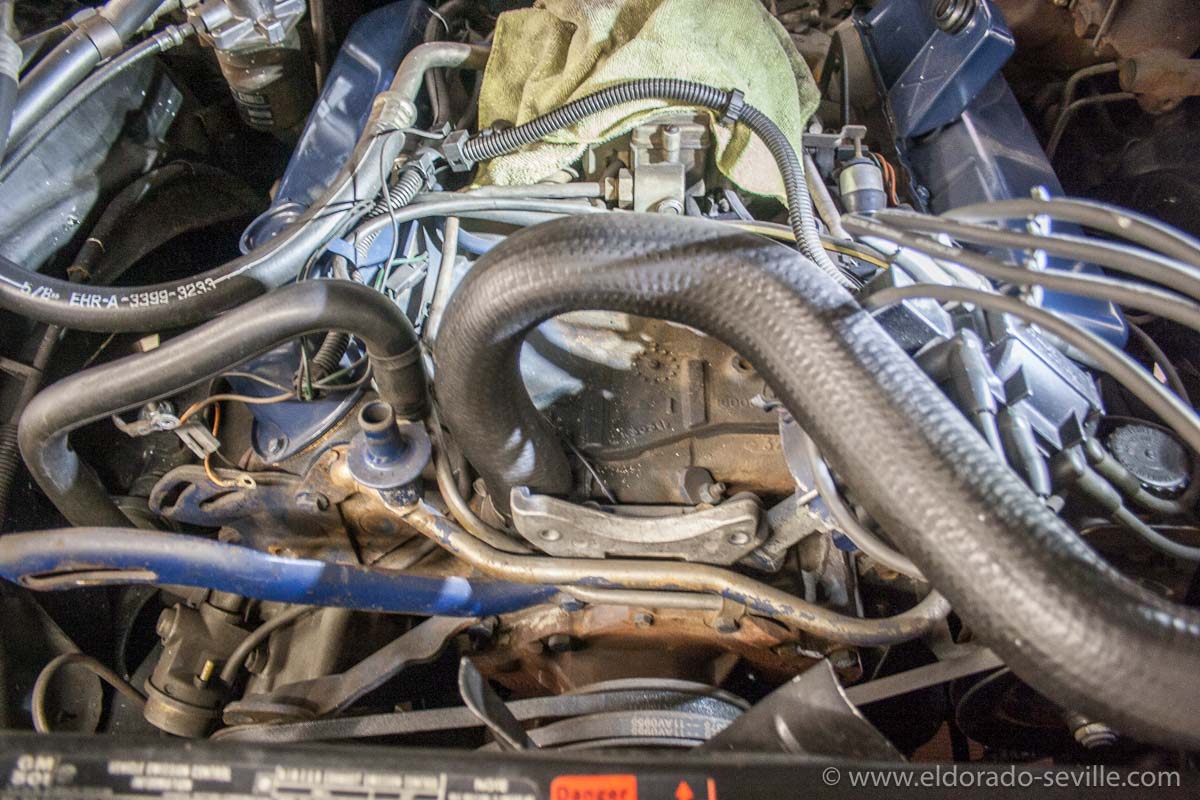
AC compressor and generator removed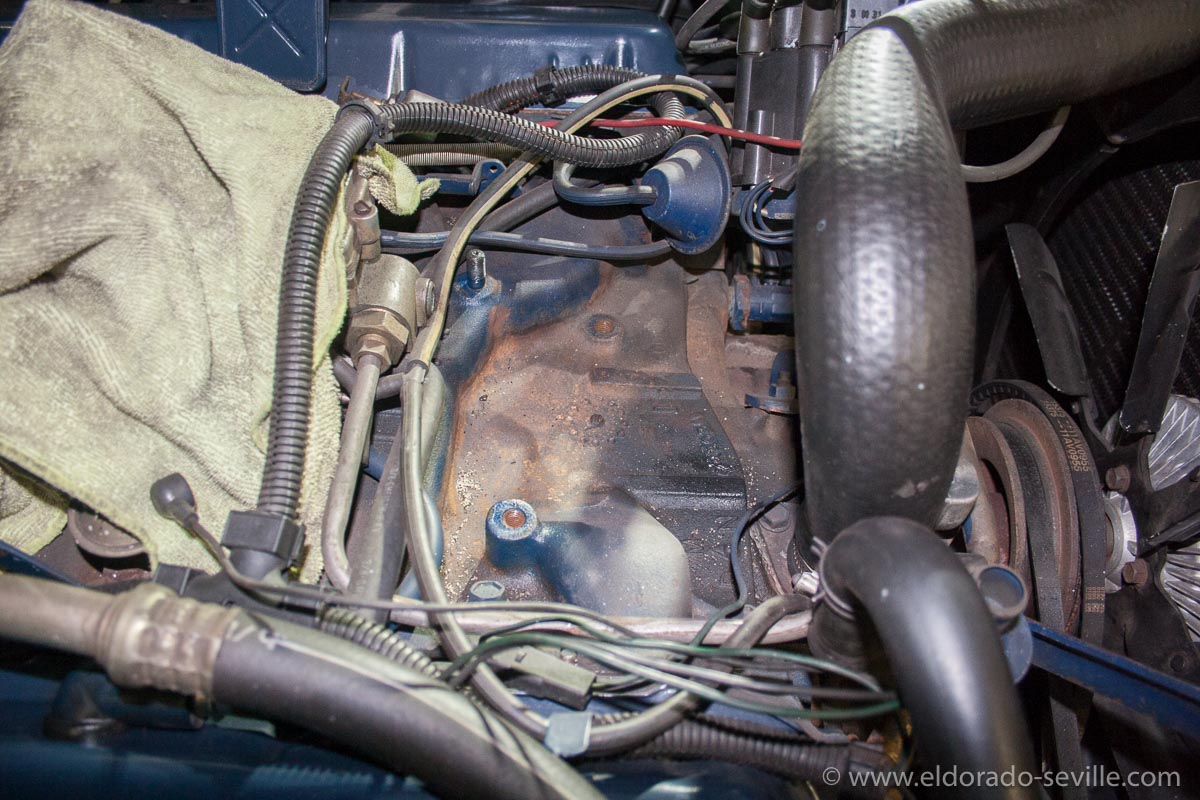
The area below the AC compressor will need some good de-rusting, cleaning and detailing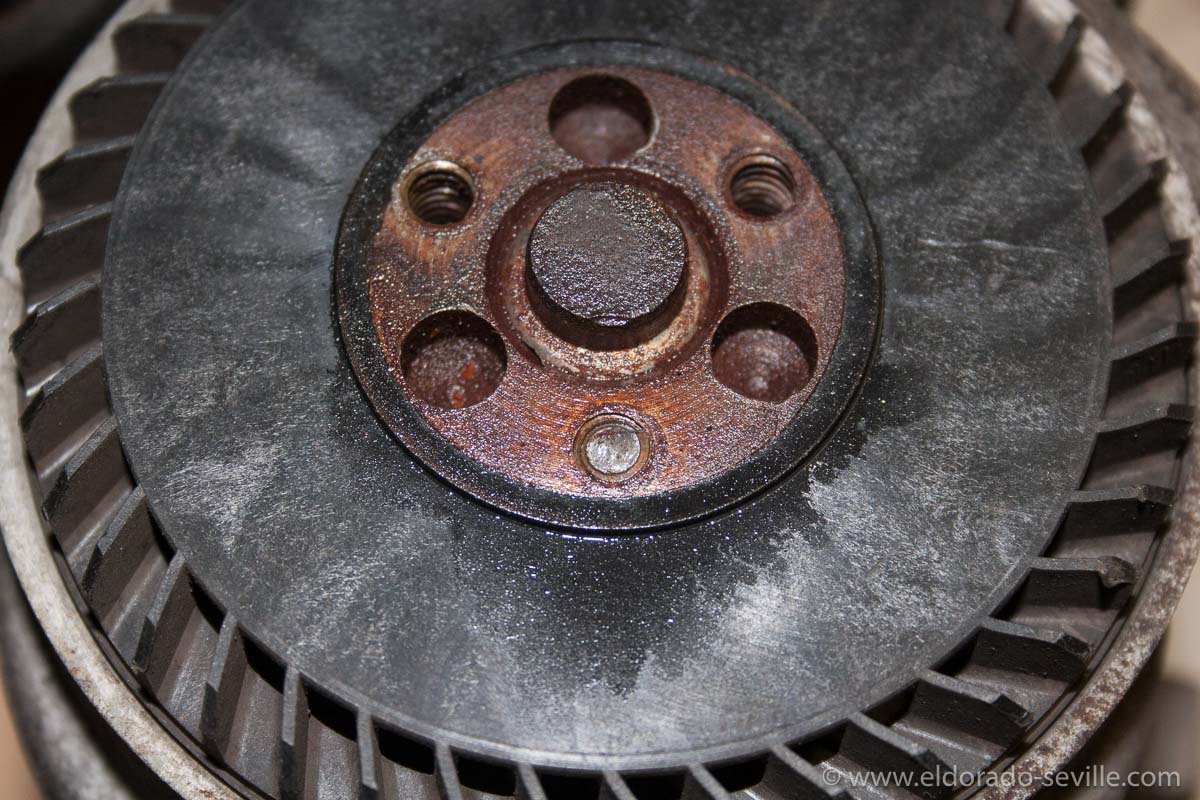
Here you can see the remains of the broken bolt in the AIR pump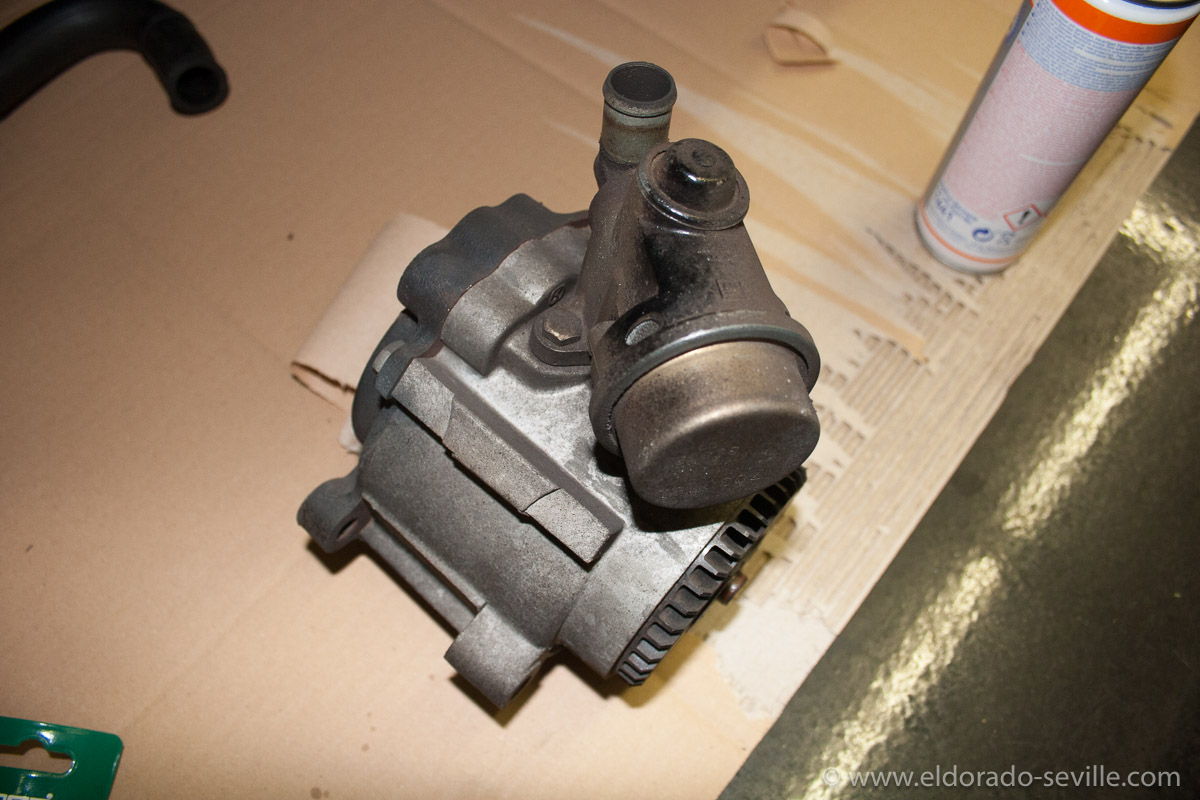
The AIR pump before cleaning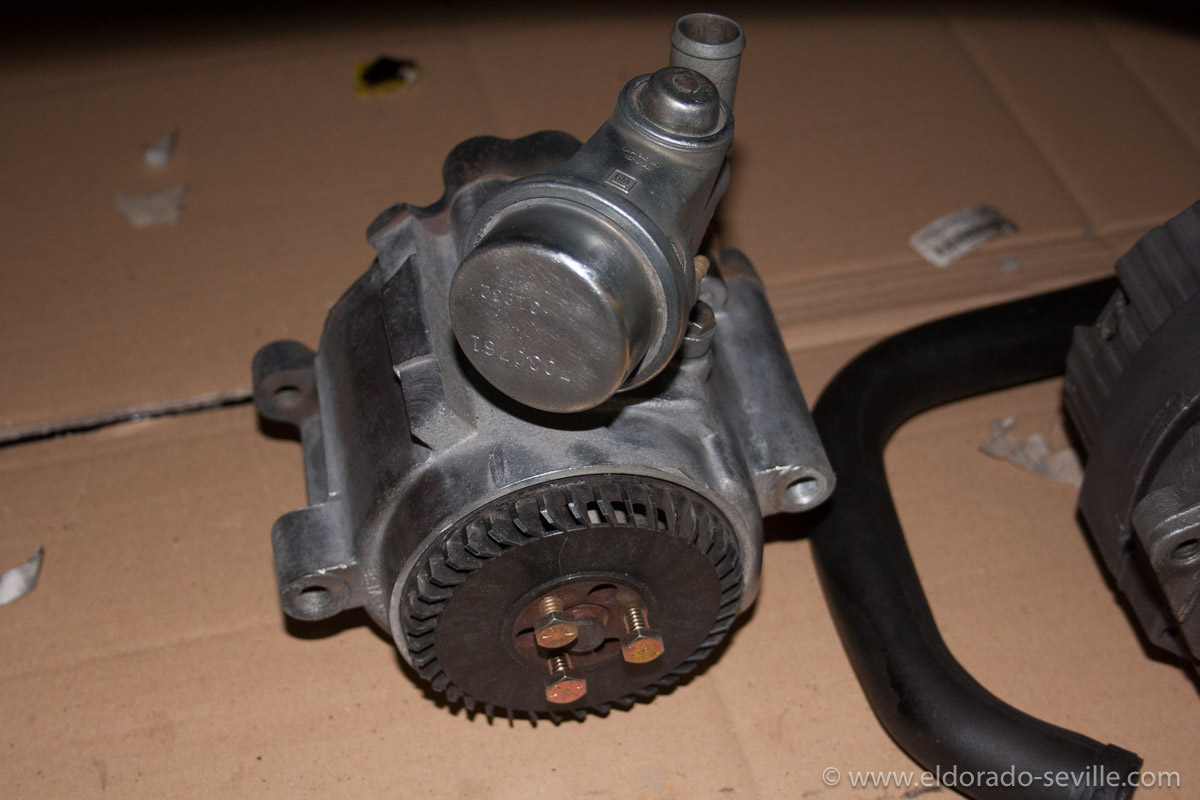
The AIR pump after cleaning - some details will still have to be done.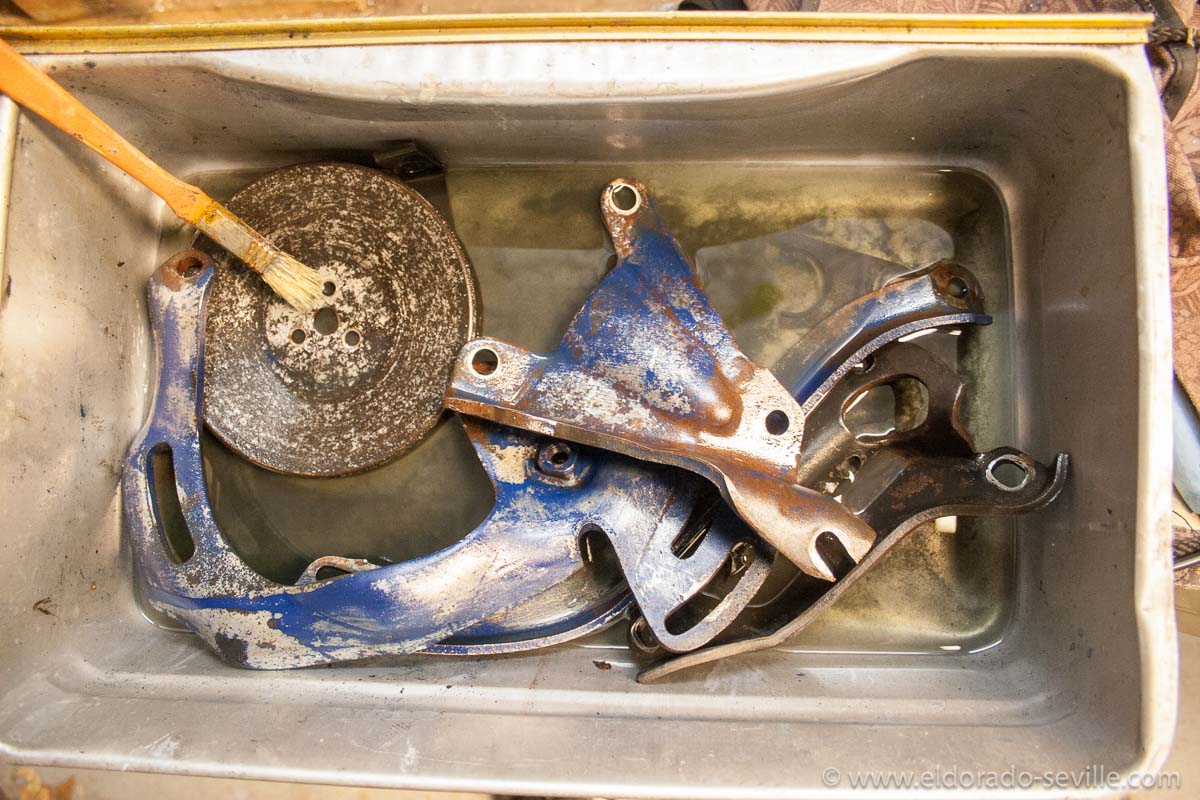
First I soaked the removed brakets in acetone to remove the dirt, grime and paint.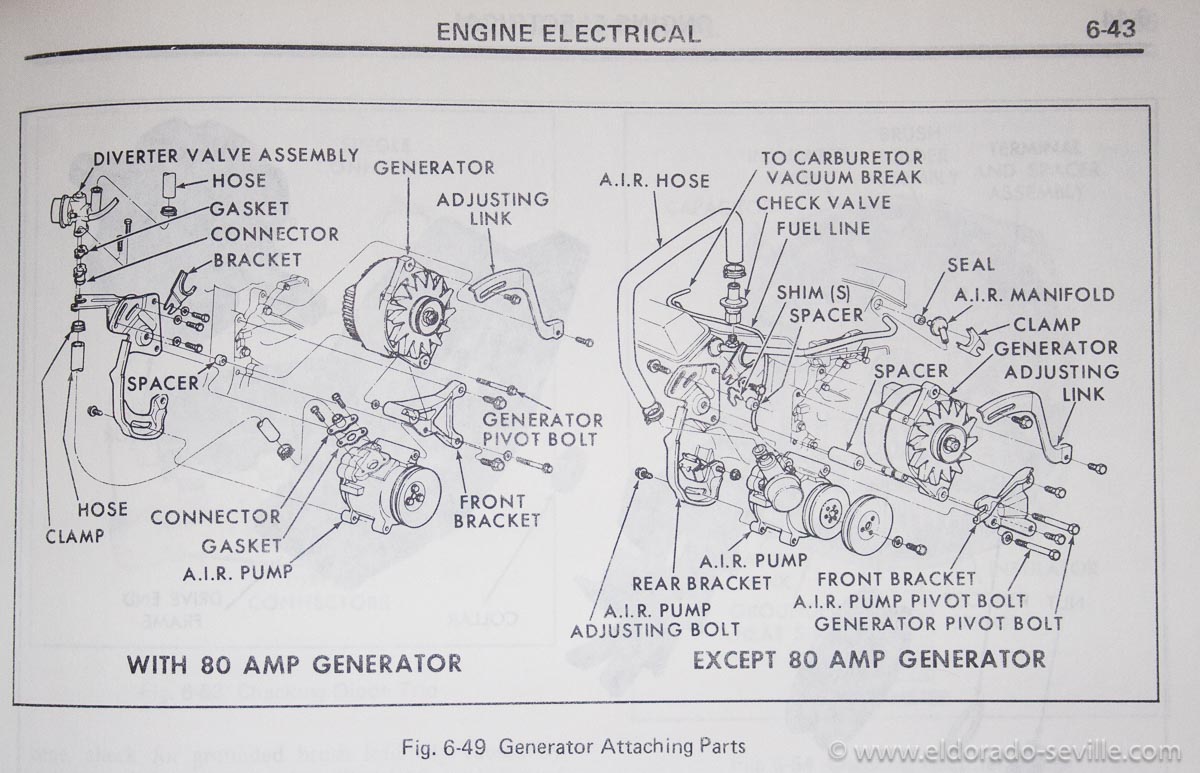
This shows the brackets in the shop manual.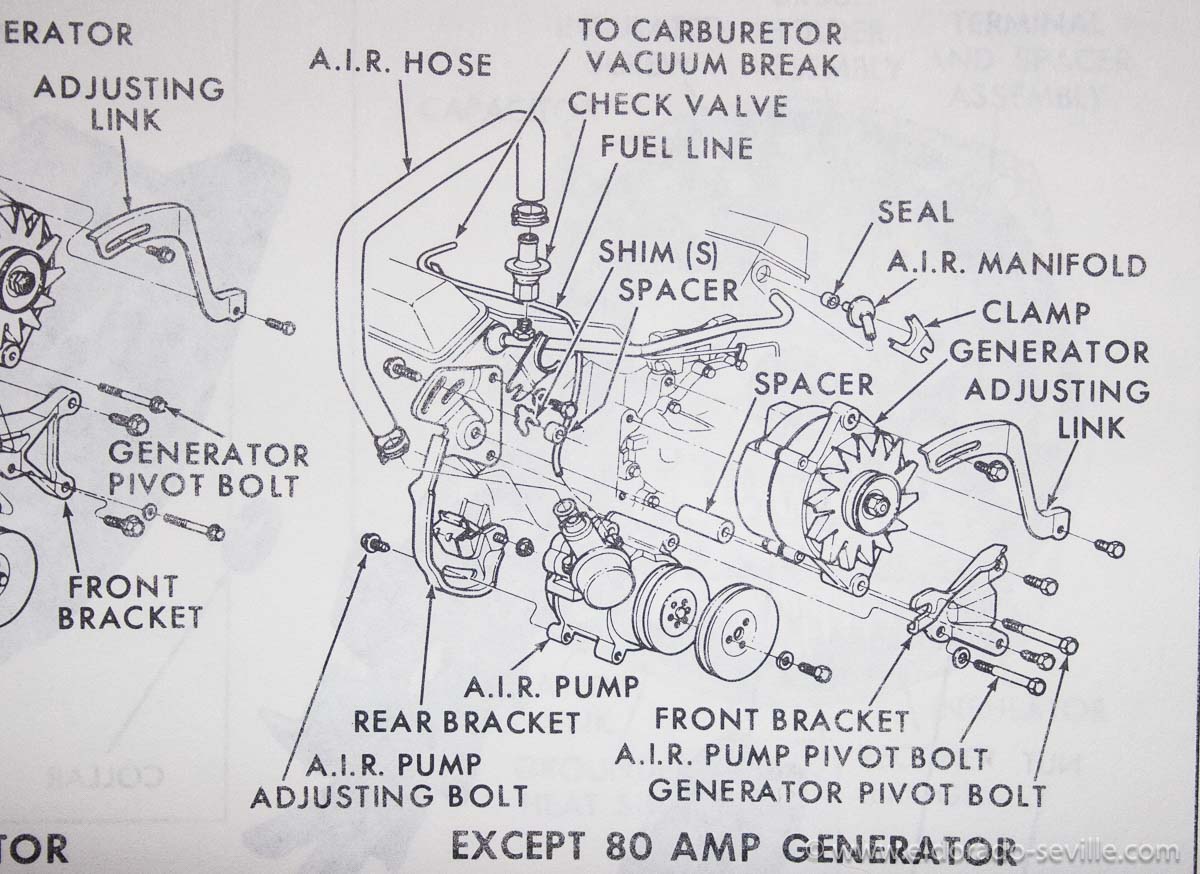
This shows the brackets in the shop manual.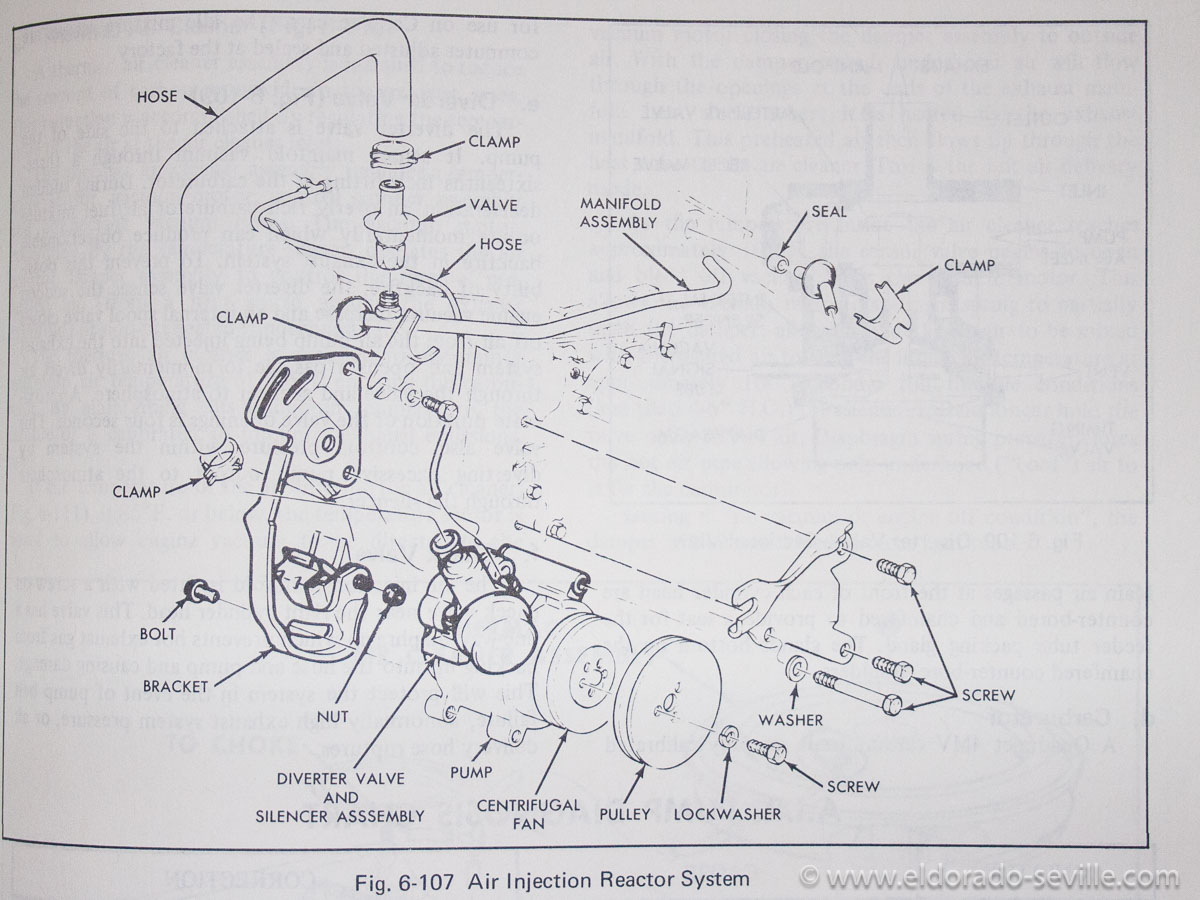
This shows the brackets in the shop manual.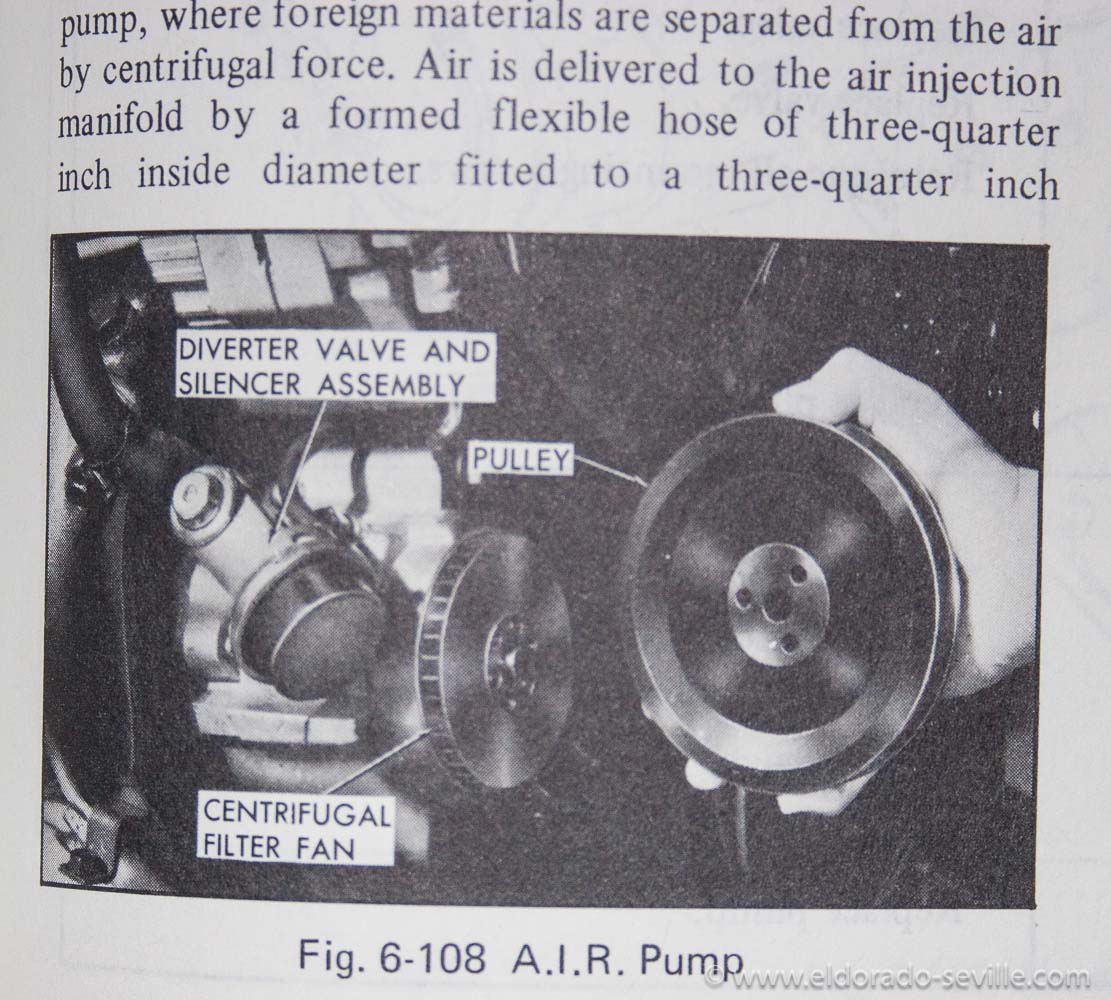
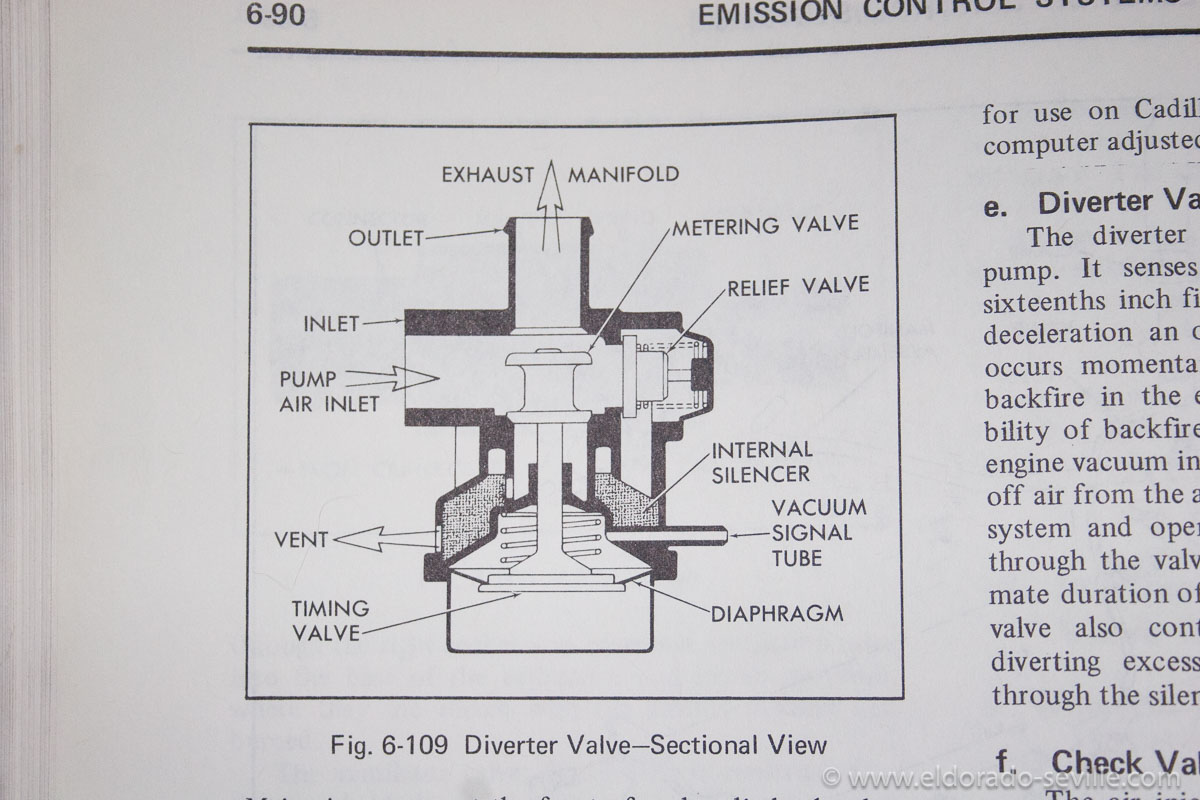
The divert valve which is no longer available. Check the vacuum diaphragm inside while it is out.
The divert valve which is no longer available. Check the vacuum diaphragm inside while it is out.
I had to remove the spark plug wires - this is how to put them back correctly.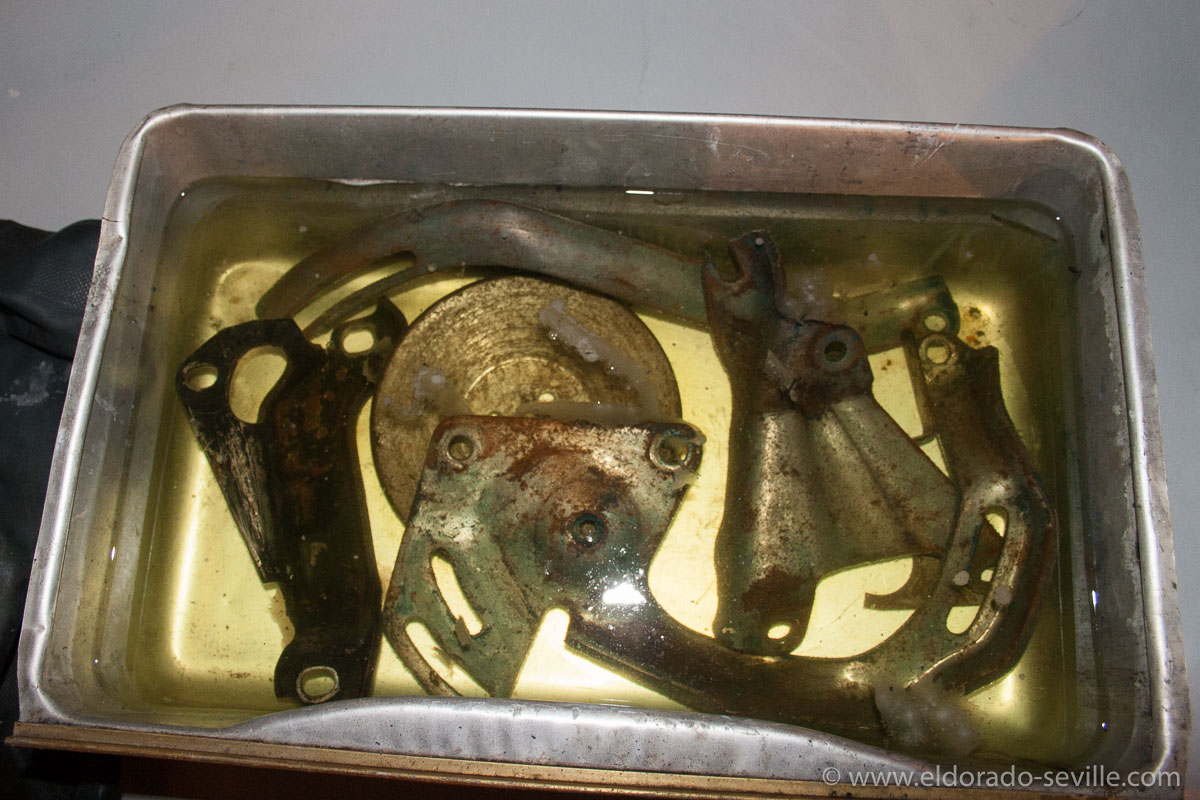
The brackets after I removed the paint - soaking in rust removing liquid until all the rust is gone.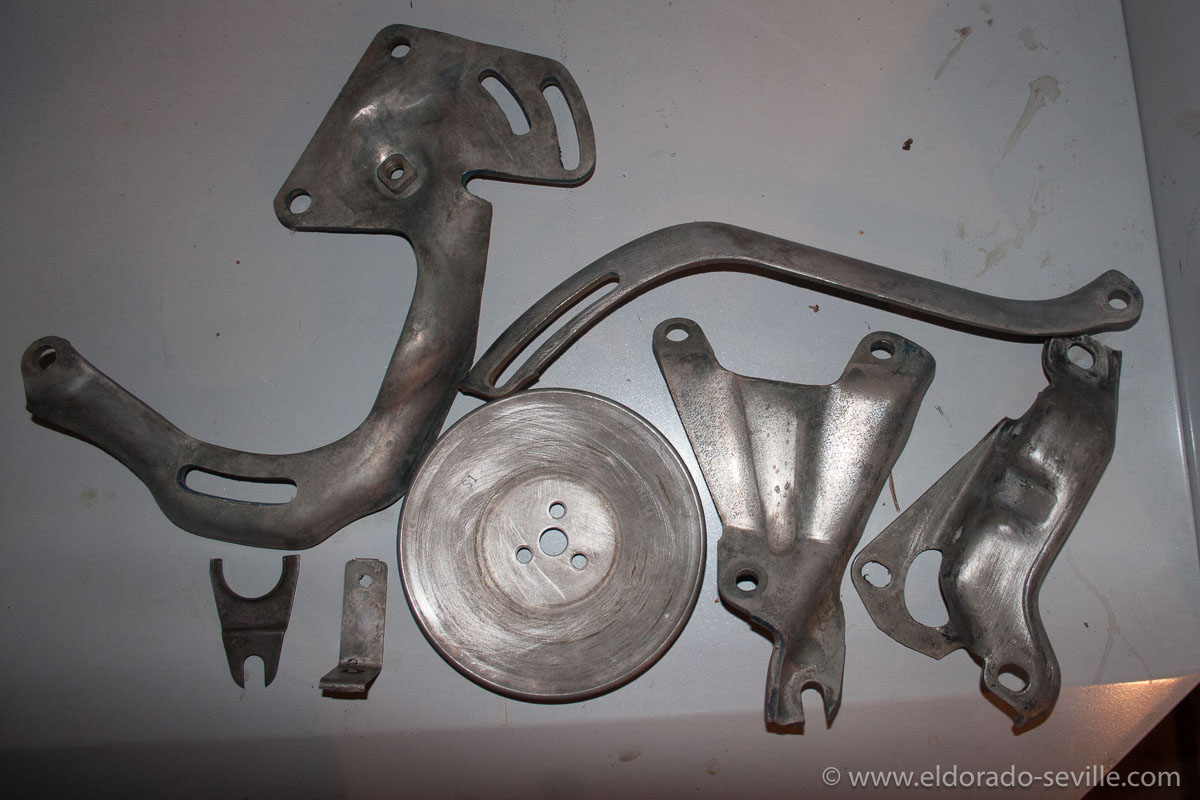
All the brackets and the pulley are now clean, rustfree and ready for paint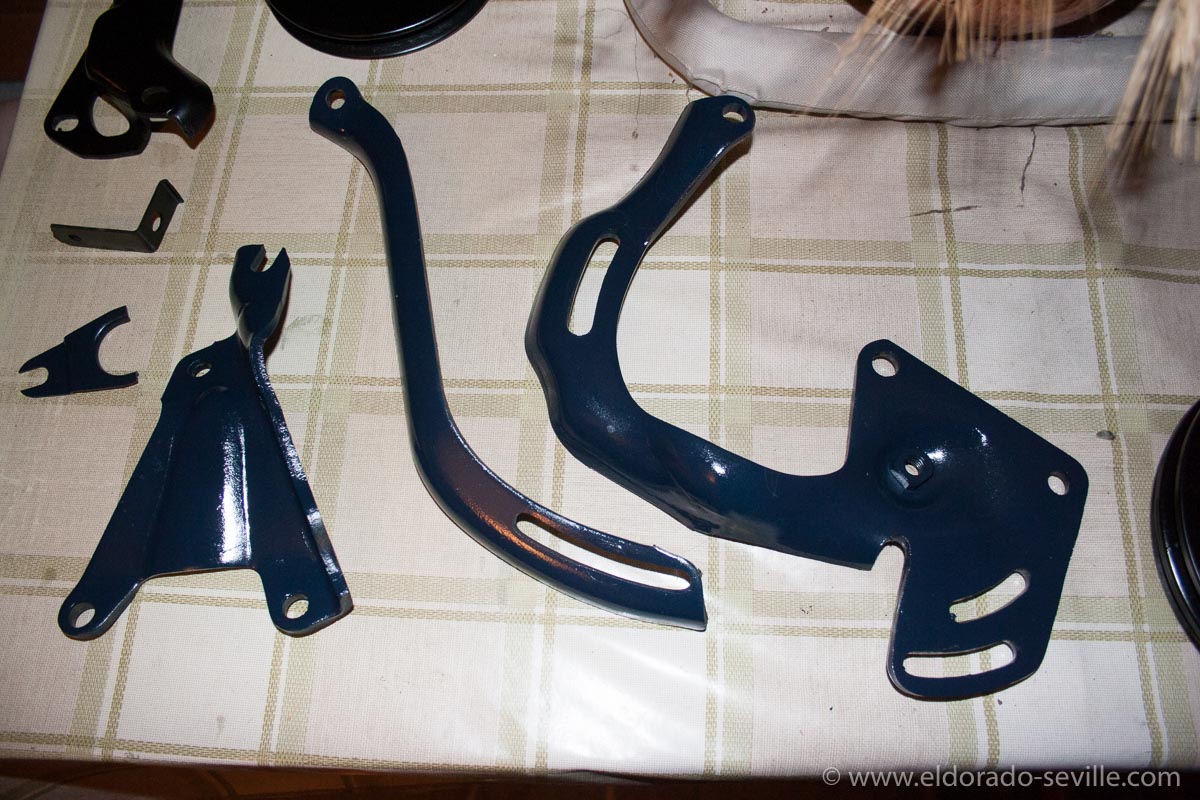
The brackets after painting.
Rust removing gel in action
Rust removing gel in action - I decided to remove the waterpump pulley and the fan as well after I took this picture.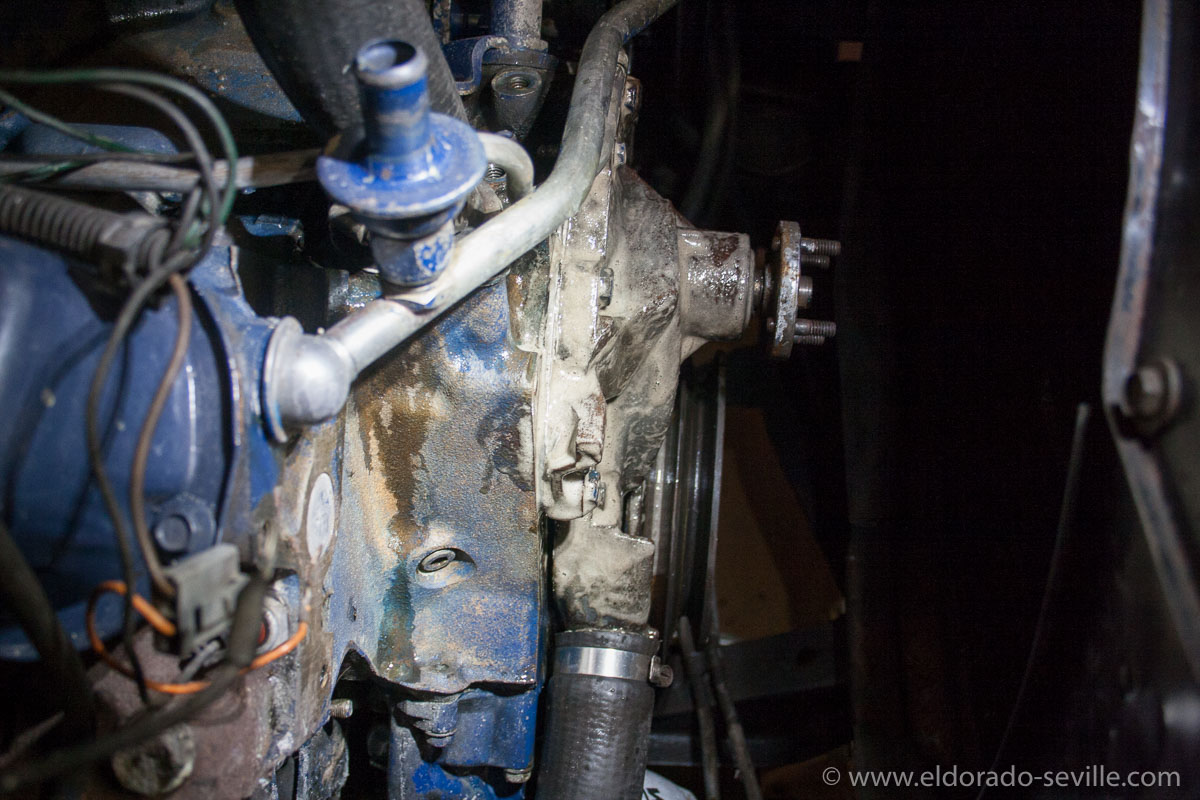
Rust removing gel in action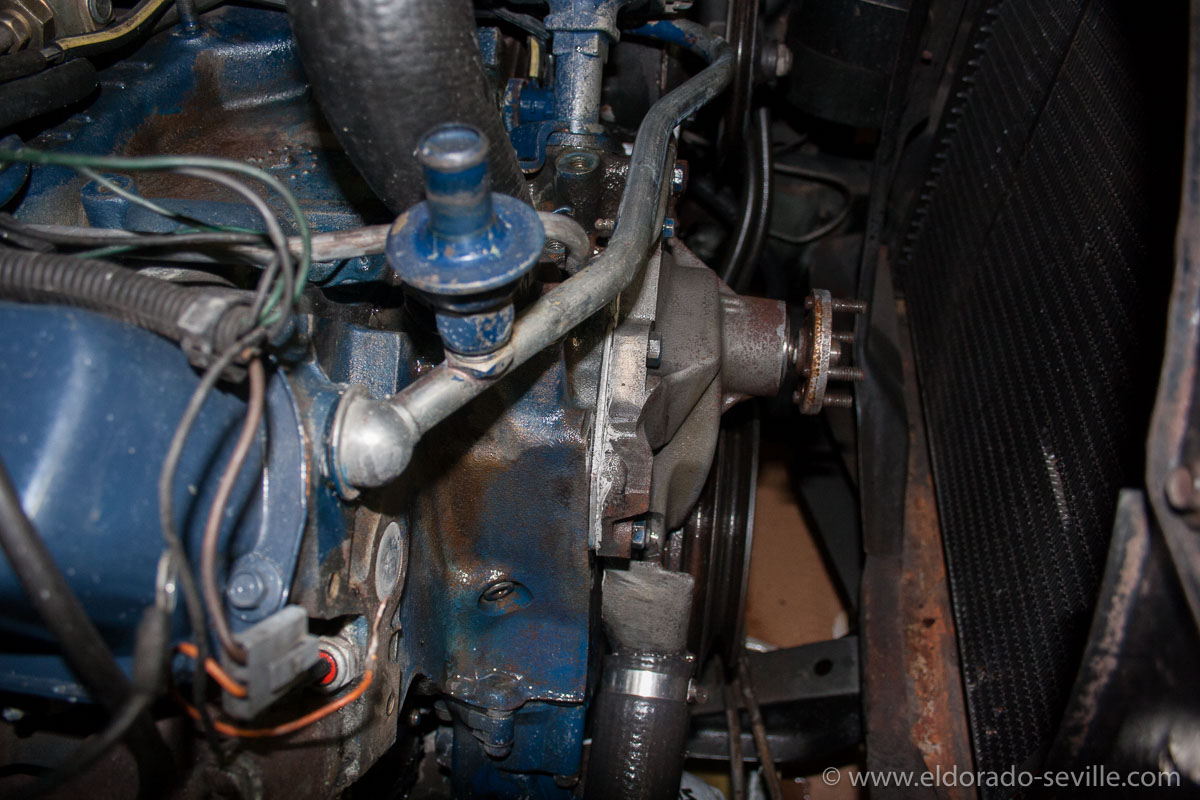
Almost clean - one more treatment will be necessary before it is ready for paint. The waterpump was not painted and therefore was pretty rusty.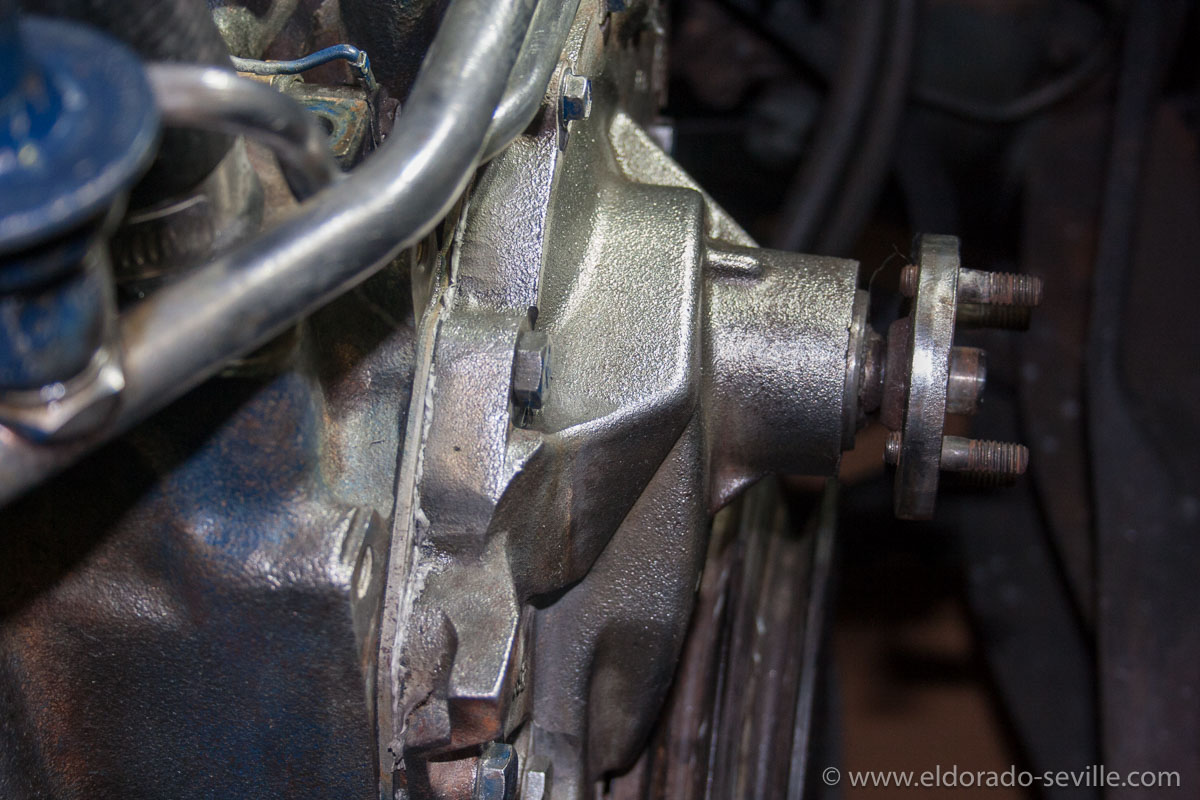
The water pump is now completely rust free and ready for paint.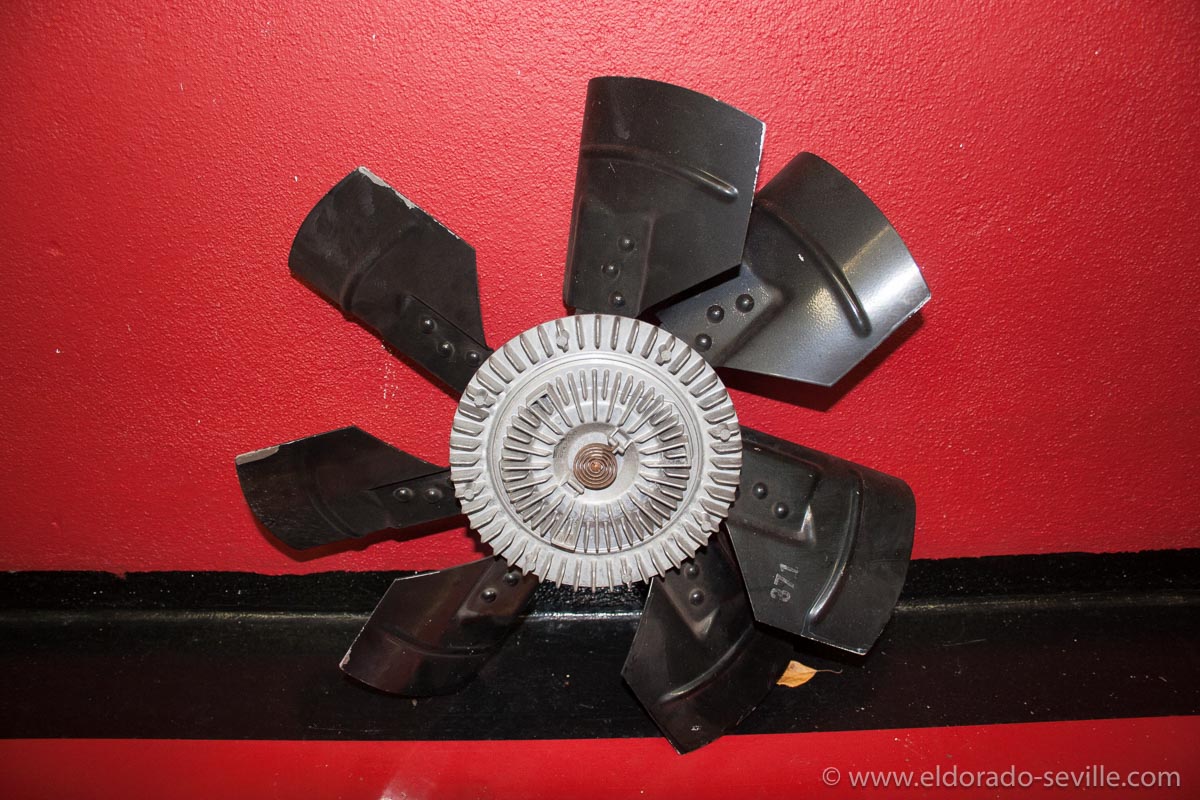
I can now fully clean and detail the fan as well. It even still carries the factory stencil.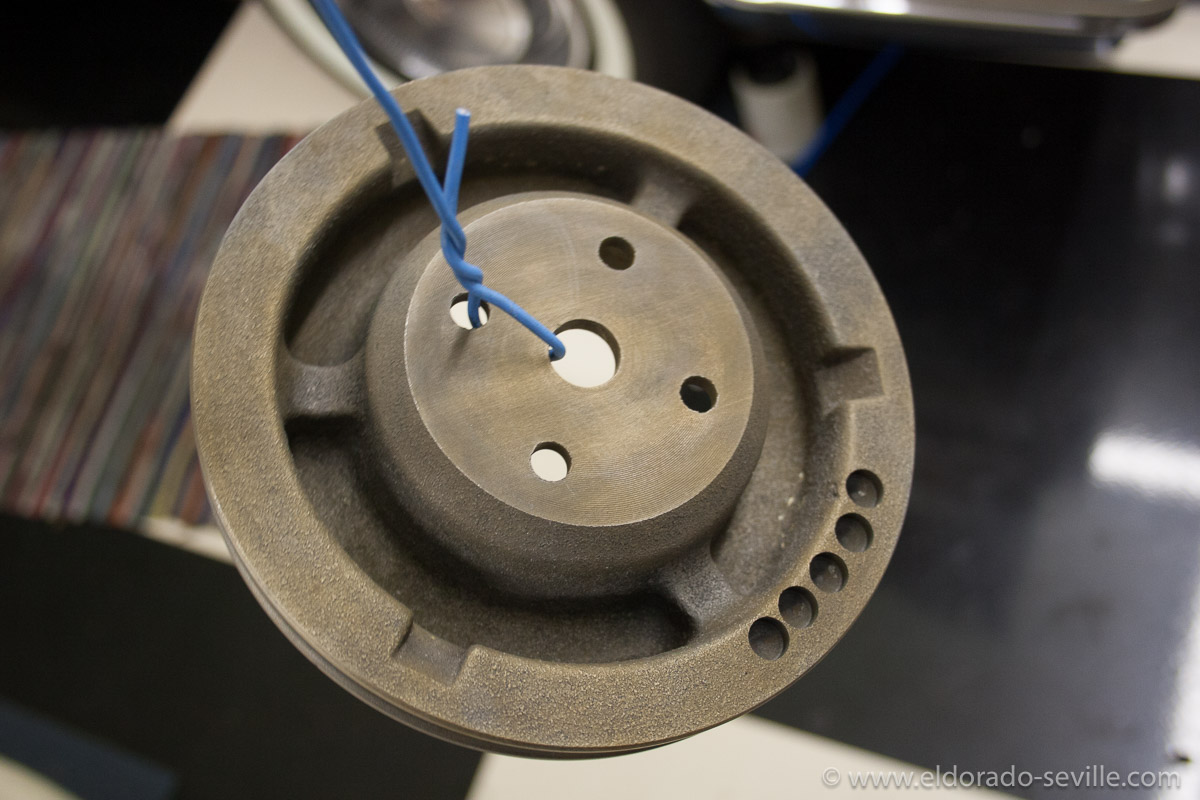
The water pump pulley after rust removal. I had to paint it very quickly because it developed flash rust immediately after removing it from the rust removing liquid.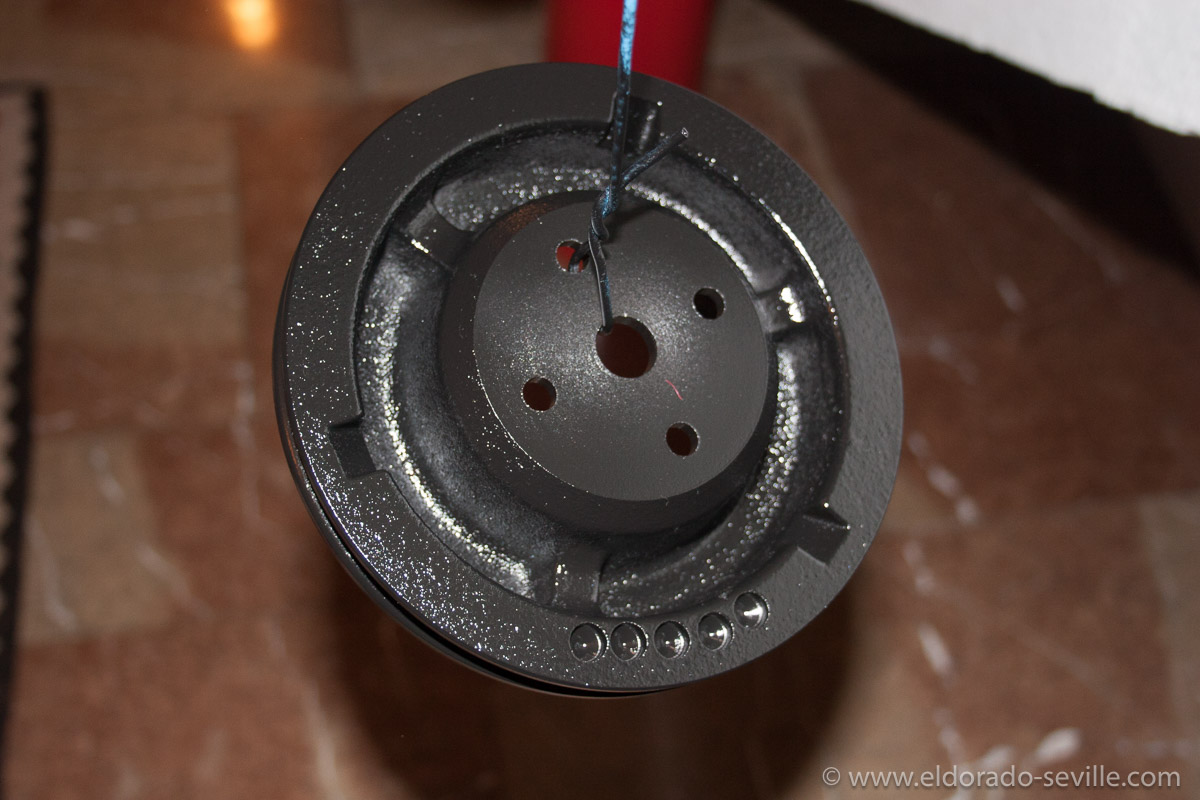
The water pump pulley after rust removal. I had to paint it very quickly because it developed flash rust immediately after removing it from the rust removing liquid. Here it is in black primer to stop it from rusting.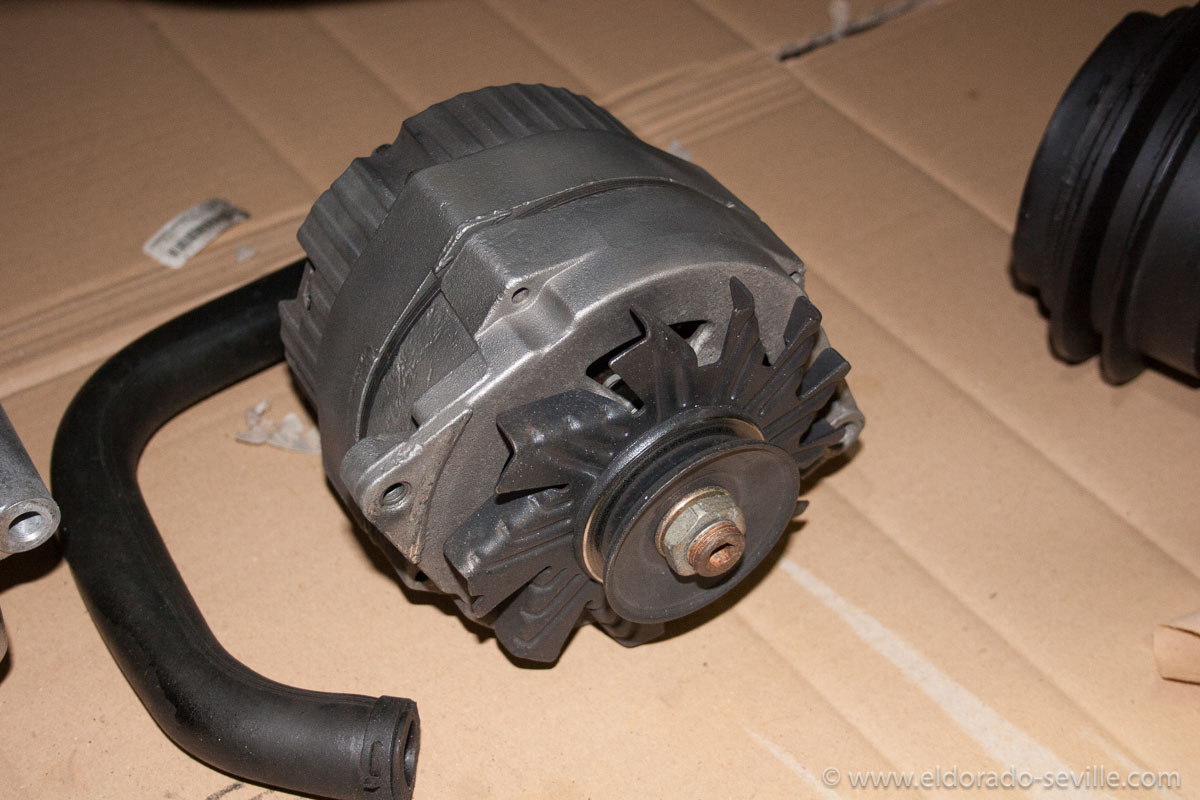
The alternator housing after cleaning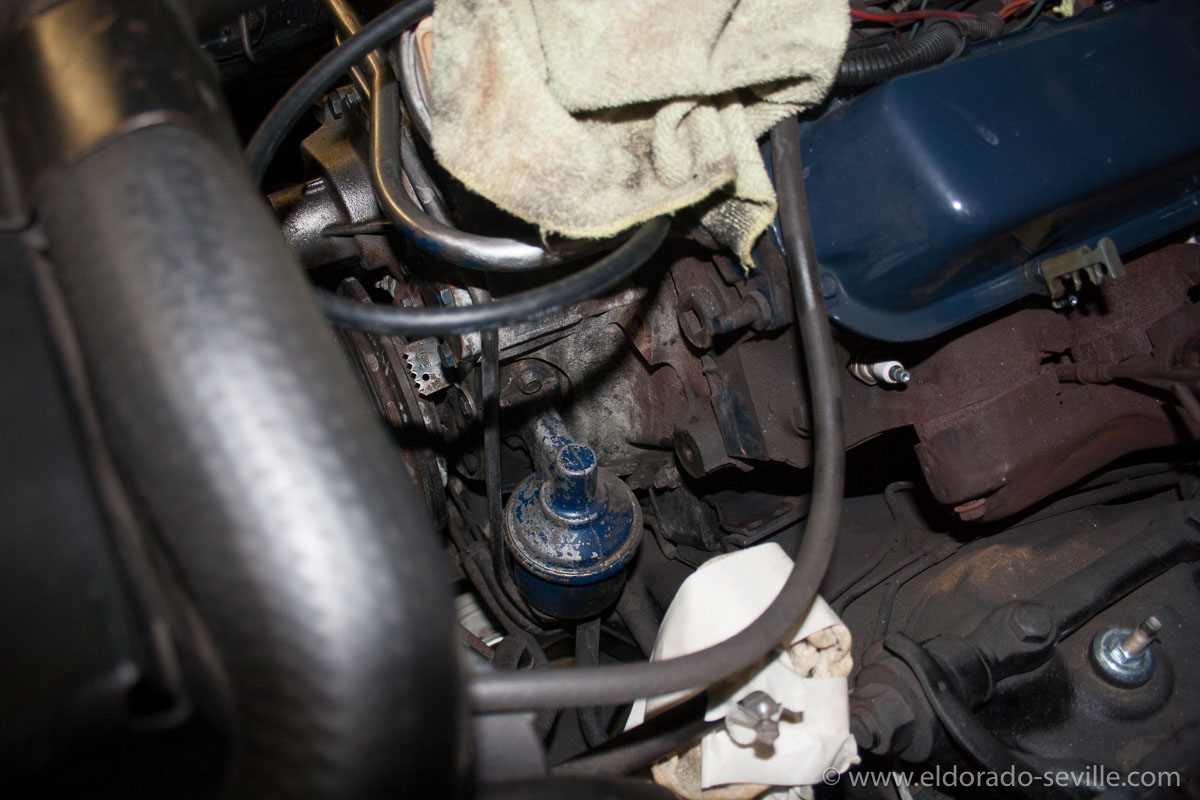
The power steering pump removed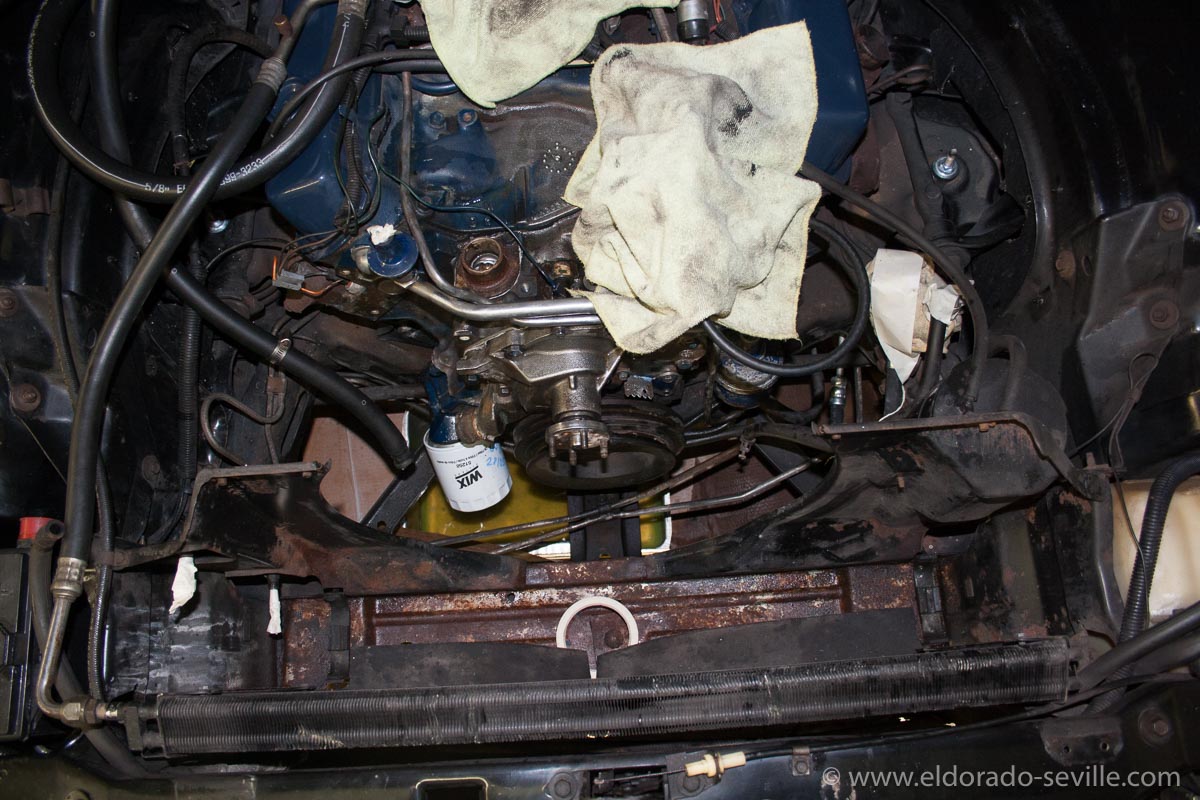
I took out the radiator to clean up the surface rust underneath…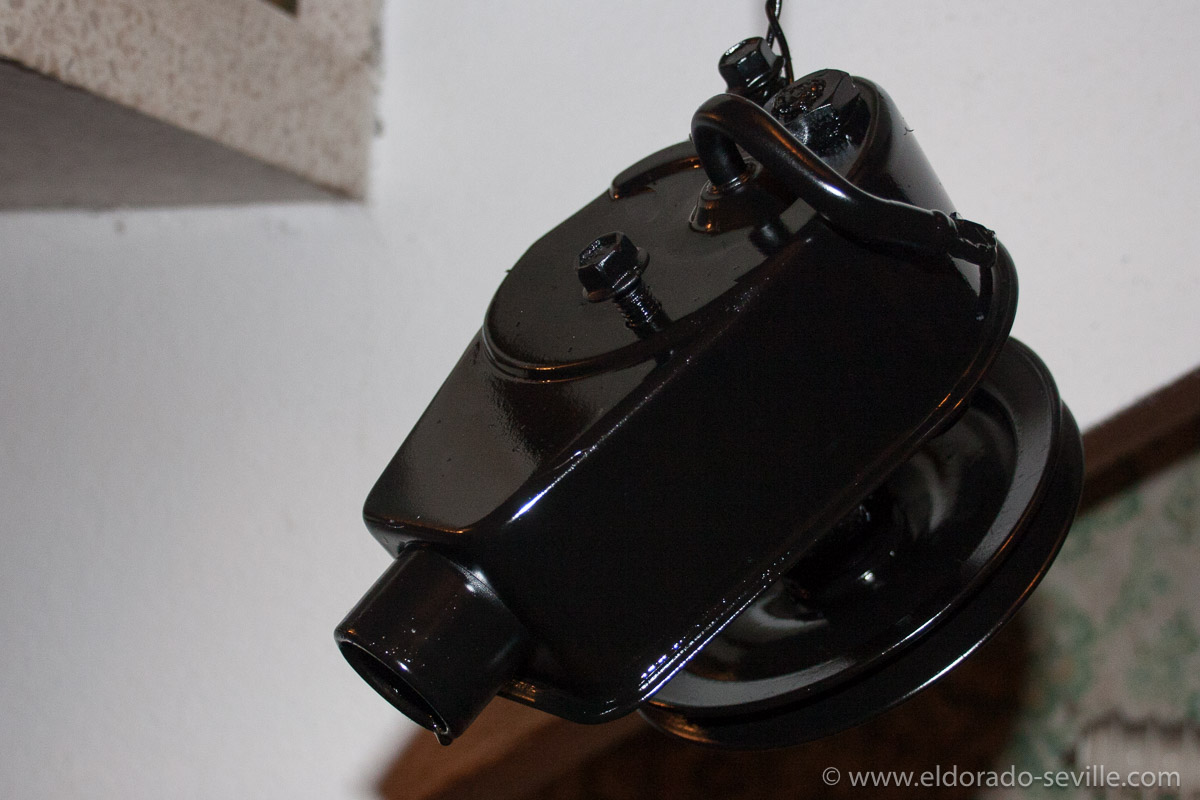
The power steering pump right after painting with wet paint... I took it down to bare metal before painting, but I forgot to take a picture...
GETTING READY FOR THE CADILLAC BIG MEET
I had to clay the paint numerous times and also had to compound it 2 times and polish it 2 times before I finally could apply a coat of wax. Also all the exterior glass was extremely contaminated, and I had to use glass polish to get it smooth again.
I spent 12-16 hours a day, for 4 days in a row with almost no breaks, trying to get the car as clean as possible. I do really work fast, and I could not get it to the level of cleanliness I would have liked, but not many people will notice the areas I could not finish ;-) Looks like I will have to spend next winter to get it as clean as I want it to be.
I am looking forward to the Cadillac BIG Meet now! I will drive the 58 Seville and my wife will take the 74 together with my son to the show, as the 58 has no seat belts.
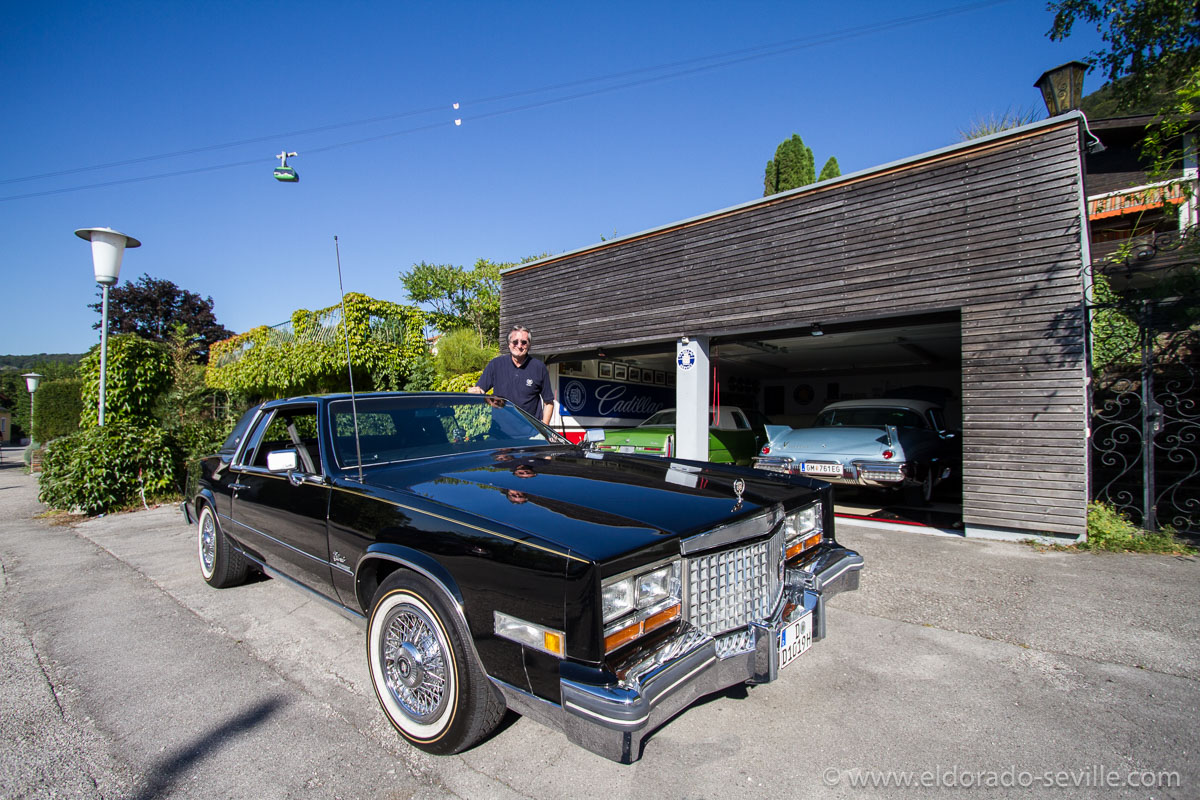
Manuel was one of the first to drive his Eldorado to the Cadillac BIG Meet this year all the way from Düsseldorf. On his way he stopped by my garage and I gave him tour and showed him my humble collection.
Getting the paint clean took forever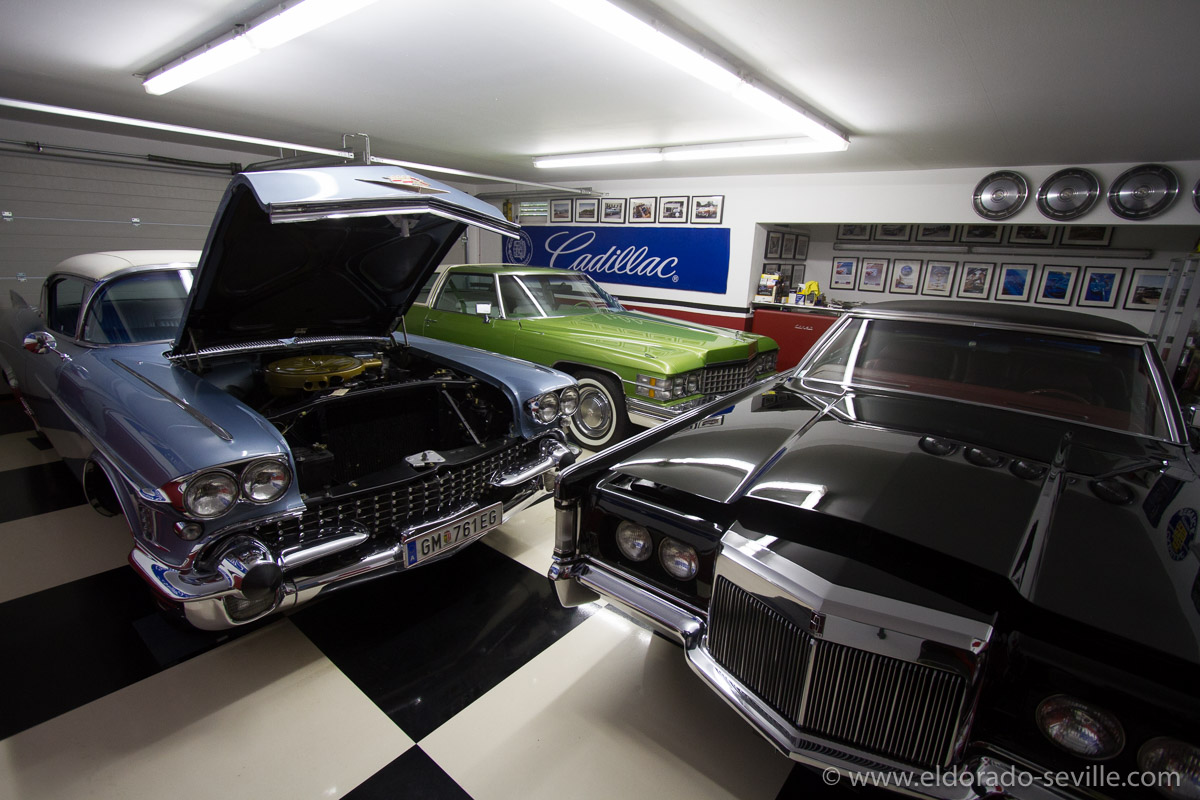
I already fully cleaned the 58 Seville for the Cadillac BIG Meet weeks ago - so I just had to dust it off :-)
THE 1967 WATERPUMP PROJECT IS COMING TO AN END - DETAILING THE AC COMPRESSOR AND A LEAKING VALVE COVER
The project had a major delay as the reproduction radiator hoses were held by customs for 5 weeks. Its unbelievable…
I could now finally refill the cooling system and start the car again with the new water pump in place.
The car fired right up although I had also removed the distributor and forgot to mark how it was in. So I had to find TDC (top dead center) before I could install the distributor back into the car.
I also bought a cheap timing light and set the timing to 5 degrees. You have to set idling to 480 rpm, disconnect the vacuum hose to the distributor and the parking brake and plug the hoses to set timing correctly
After the first few miles I am quite satisfied with my work. I hope that everything will stay like this and that no leaks will show up.
Only the right valve cover where I had replaced the gasket seemed to have a slight leak with oil dropping on the exhaust manifold... Looks like I will have to take the compressor out again to be able to take the valve cover off again and install another new gasket… But first I will have to find out why it is actually leaking. I hope that the cover itself is not warped as it was already leaking before on exactly the same spot. Often these covers get tightened down too much. All it needs is 28 INCH pounds of torque (3,1 NM) I will also make sure the screw holes have not become dished (usually due to over-tightening of the screws). Use a small block of wood as an anvil and a small hammer to flatten the screw holes back out.
The engine somehow runs and idles better than before and has more power. It seems like the ignition was off before. I had the car tuned by a professional years ago - another thing they did not get right...
The new reproduction hoses I got from Fusik are also in place with the correct tower hose clamps. The hoses have the correct numbers stamped on, but compared to my original hoses the stamping looks different where the numbers are much smaller. The hoses fit very well, only the lower radiator hose had to be cut a little to fit.
I also detailed the replacement AC compressor I installed years ago. I bought a new reproduction decal which is a very good match to the original decal. In general I found out that all the reproduction decals available out there are not a 100% match. They look very similar but they all differ in size, spacing of the numbers, and most of the time the font used is very similar, but not exactly the same. I have no idea why the manufactures did not get it 100% right. Maybe I will have to produce my own decals in the future… Most of the AC compressor labels you can buy are incorrect for the year or model they are offered. If you want to get the correct one for the 67 Deville you will have to buy the one for the 67 Eldorado. Often these reproduction decals have the wrong colors, numbers and R12 capacity on them. So do your research to get the correct one.
Another challenge was to reproduce the O.K. inspection stamp. Years ago I found the stamp on ebay and experimented with different kinds of paint and never got any useable results.
Eventually I found a stamp kit set for Corvettes which included the correct yellow paint and a stamp felt and the Corvette stamp. I could not use the Corvette stamp of course, but the rest of the kit is perfect and finally I could apply the stamp to my AC compressor which now looks factory new again.
The engine is back together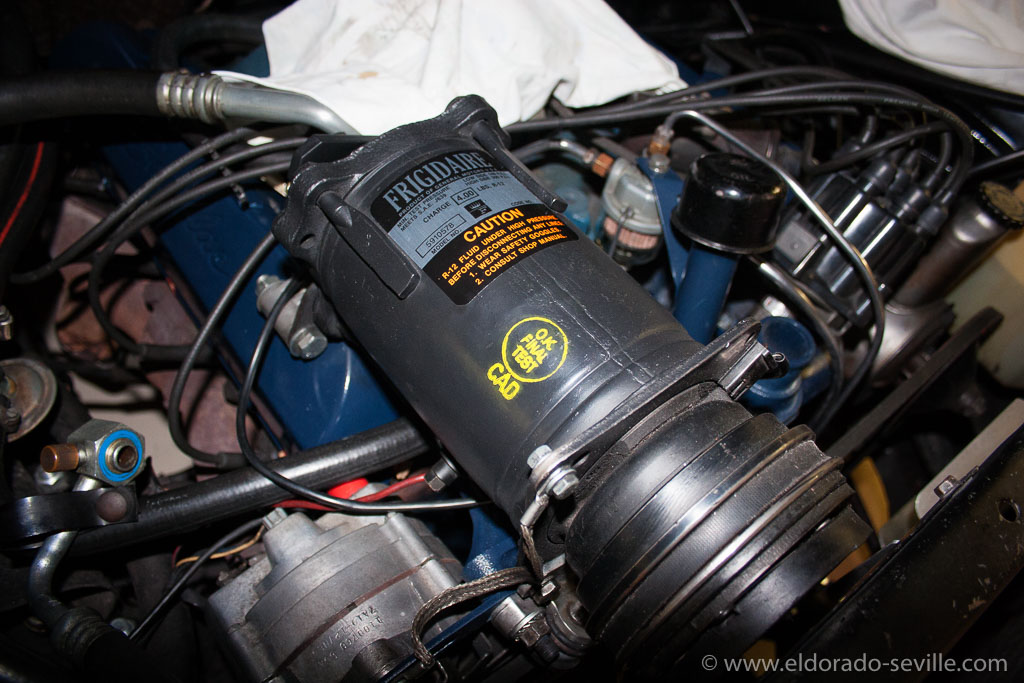
The detailed AC compressor
The O.K: final test stamp
1974 HOOD ORNAMENT, DASH TRIM REPLACEMENT AND SPLASH GUARD DETAILING
![]()
Some 1974 models like the "Cabriolet" Coupe DeVille version were equipped with see through hood ornaments. The one on my car was quite pitted so I got a new used one which looks much better.![]()
This is how Cadillac typically mounted its hood standup ornaments.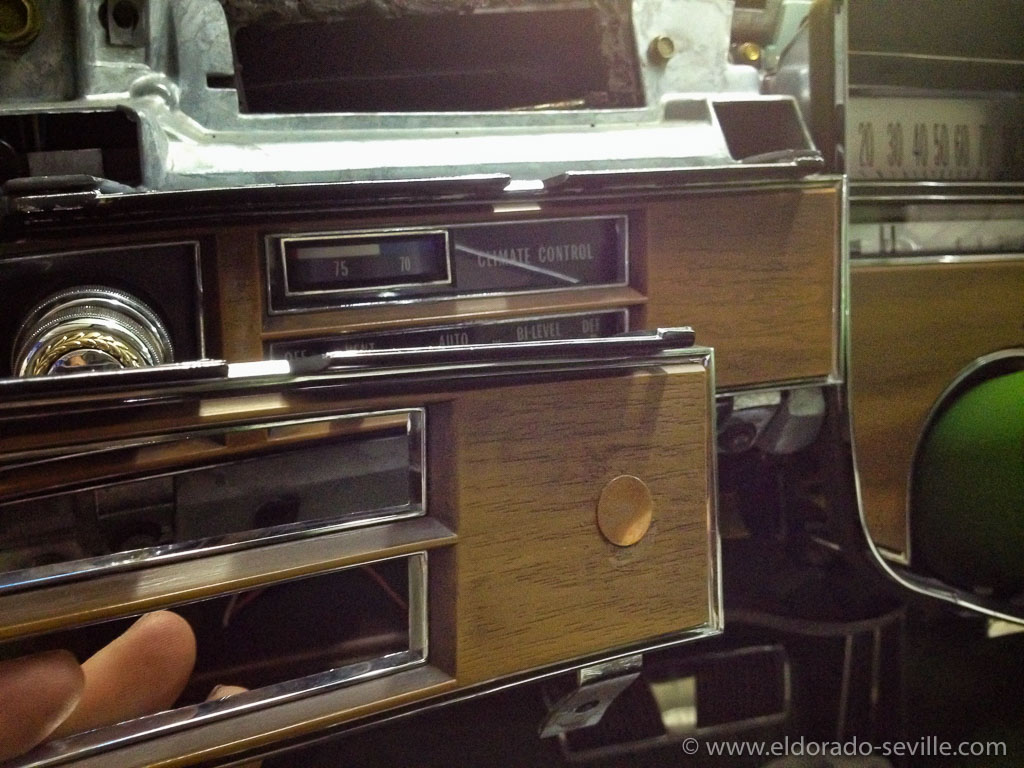
The previous owner glued some emblem to the dash which came off and left some residue on the plastic wood. I got a good used part and replaced it. Here you can see the old part in the front and the "new" part already installed. As I had the dash cover still removed from my heater core replacement and radio/speaker repair it was only a matter of removing two screws.![]()
I removed all the rust from the splash guards in the inner fenders with rust remover gel and repainted them afterwards. Here you can see the applied gel.![]()
The original rubber splash guards got a very good cleaning and are still in very good condition. The rubber has white/grey fabric woven into the rubber - therefor it's not completely black and the white dots you see are not dirt.
DETAILING THE 1974 CADILLAC DRIVESHAFT
When the car was built, Cadillac and all other car companies did not bother to protect the bare metal driveshafts in any way, so they already had surface rust on them when they were delivered new…
My initial plan was to use a wire brush to knock of the rust and just paint it black like most people would do.
But I then decided that I wanted to go the extra mile, do it properly and put it back into the condition it was when it was built.
I wanted to remove the rust chemically in a rust dissolving fluid that is normally used for de-rusting fuel tanks, but I had no idea how I could soak such a long piece in this fluid.
I came up with the idea to just use a big tarp and put some wood to the sides, put the driveshaft in it and fill it with rust removing liquid. This worked out really well.
It took about 48 hours until all the rust was gone.
After a little of the rust was gone I discovered the remains of the 3 factory markings on the drive shaft. There were three rings painted onto the shaft - two in blue and one in black. I found some small traces of the paint during rust removal. I wanted to re-apply them once the shaft was finished.
When the shaft was fully de-rusted I found out that flash rust would come back literally after only a few minutes. Thats why I decided to paint the shaft to replicate the factory appearance.
I used Eastwood Detail Gray to mimic the original look of bare metal. Before applying the paint, I used self etching primer on the bare metal.
When all the paint was dry, I added the finishing touches with the three color rings.
I´m very happy how it turned out - it looks great. You can see more pictures of this project here.
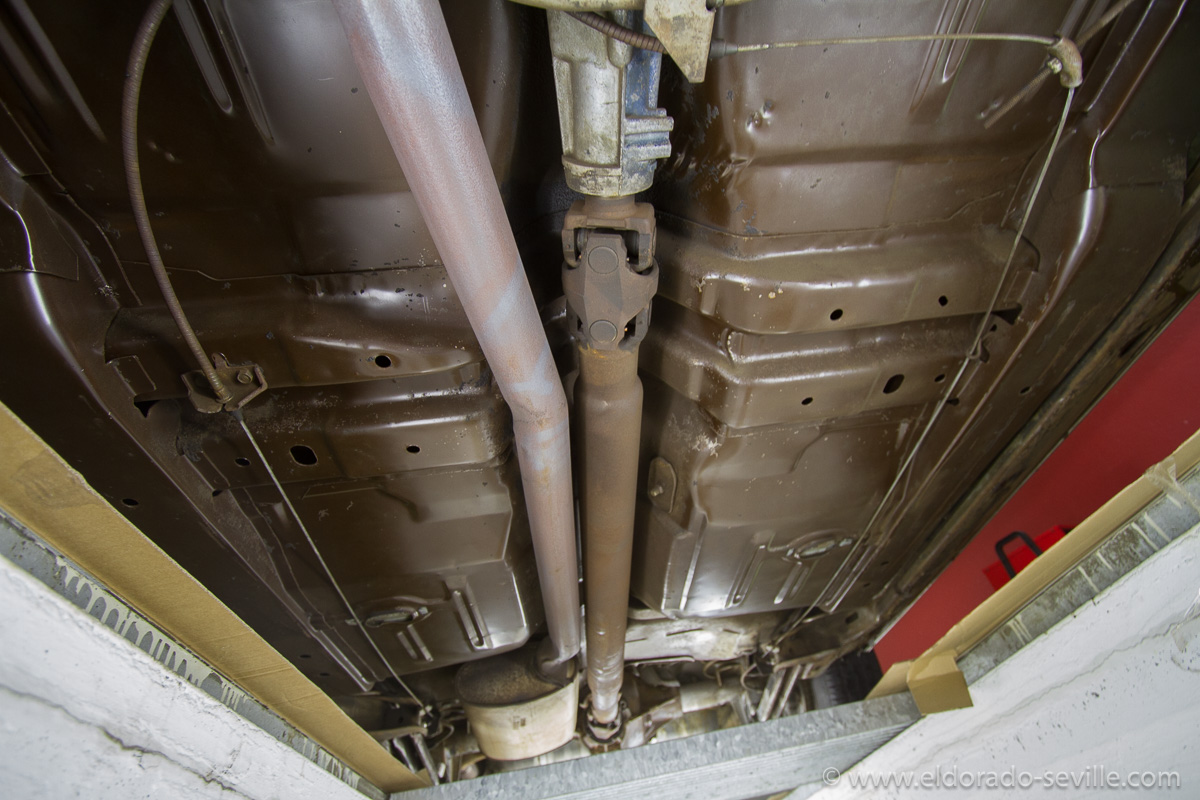
The driveshaft before…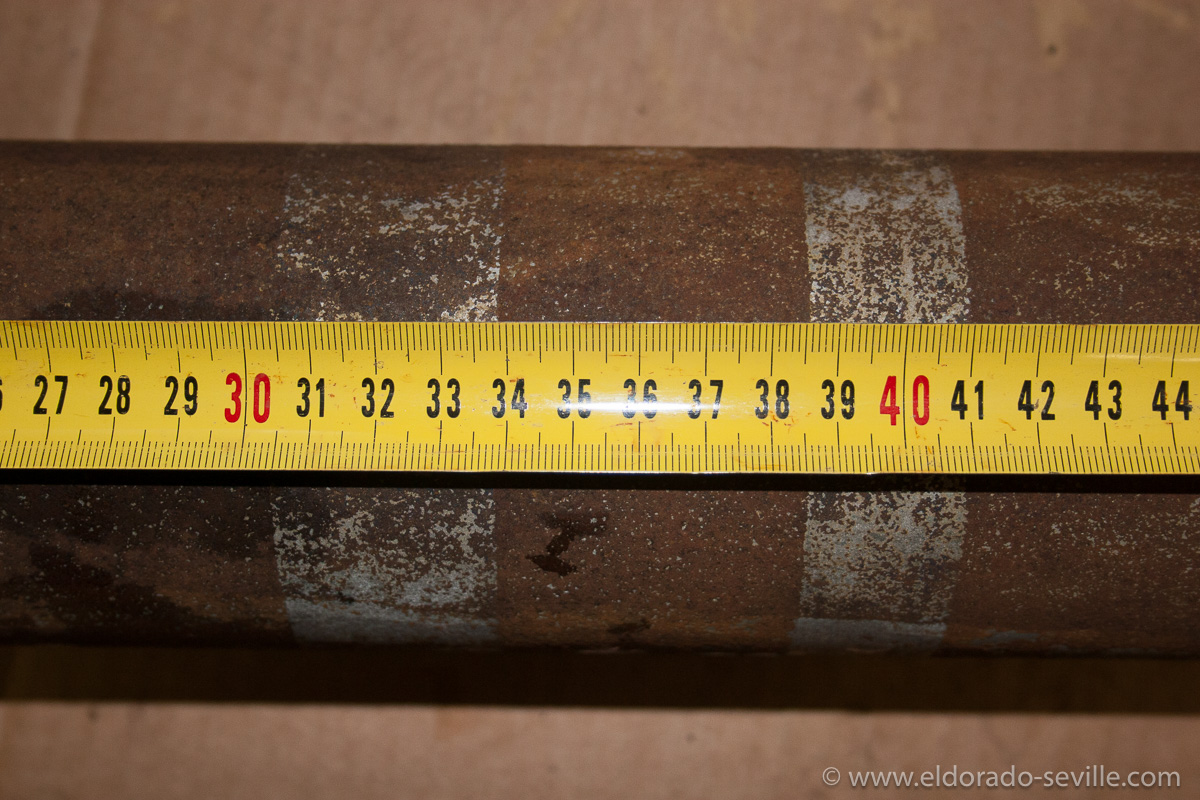
The location of the first two factory markings. I measured them to make sure that I could replicate them when I painted the driveshaft. The first two markings were (light) blue. 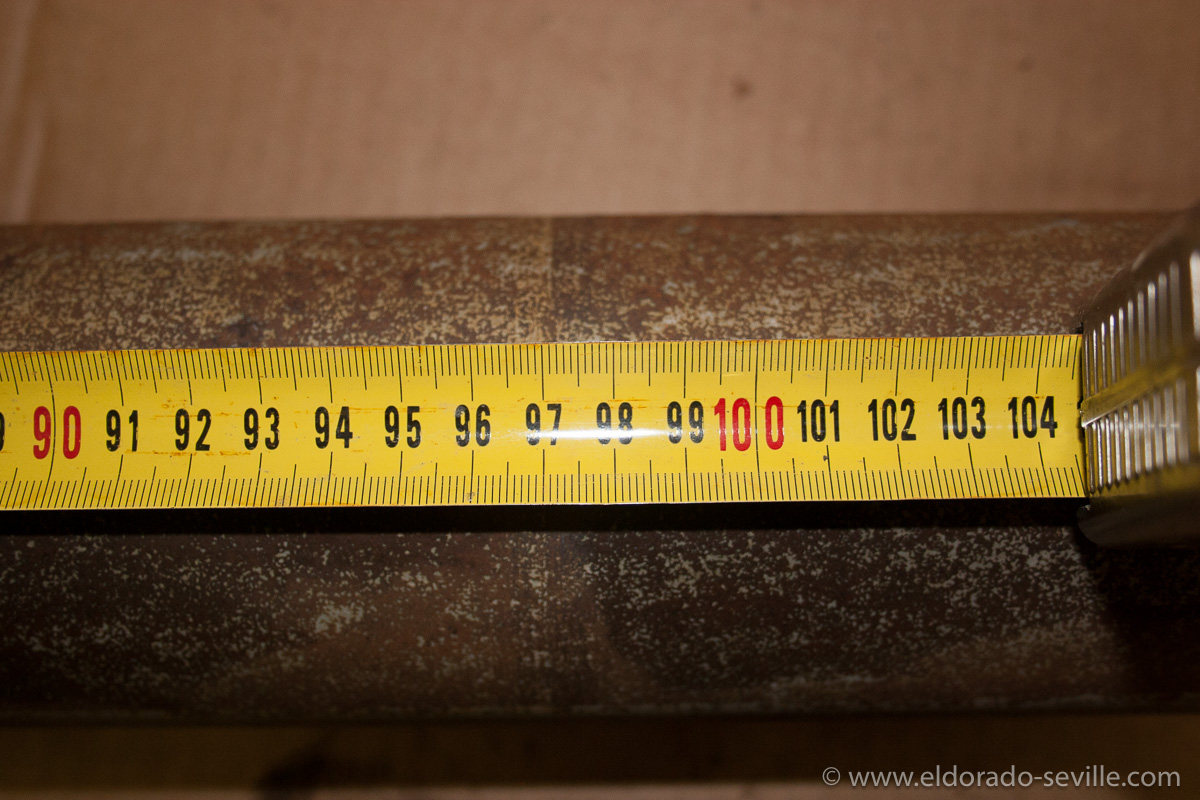
The location of the third factory marking. I measured it to make sure that I could replicate it once I painted the driveshaft. This marking seemed to be black once.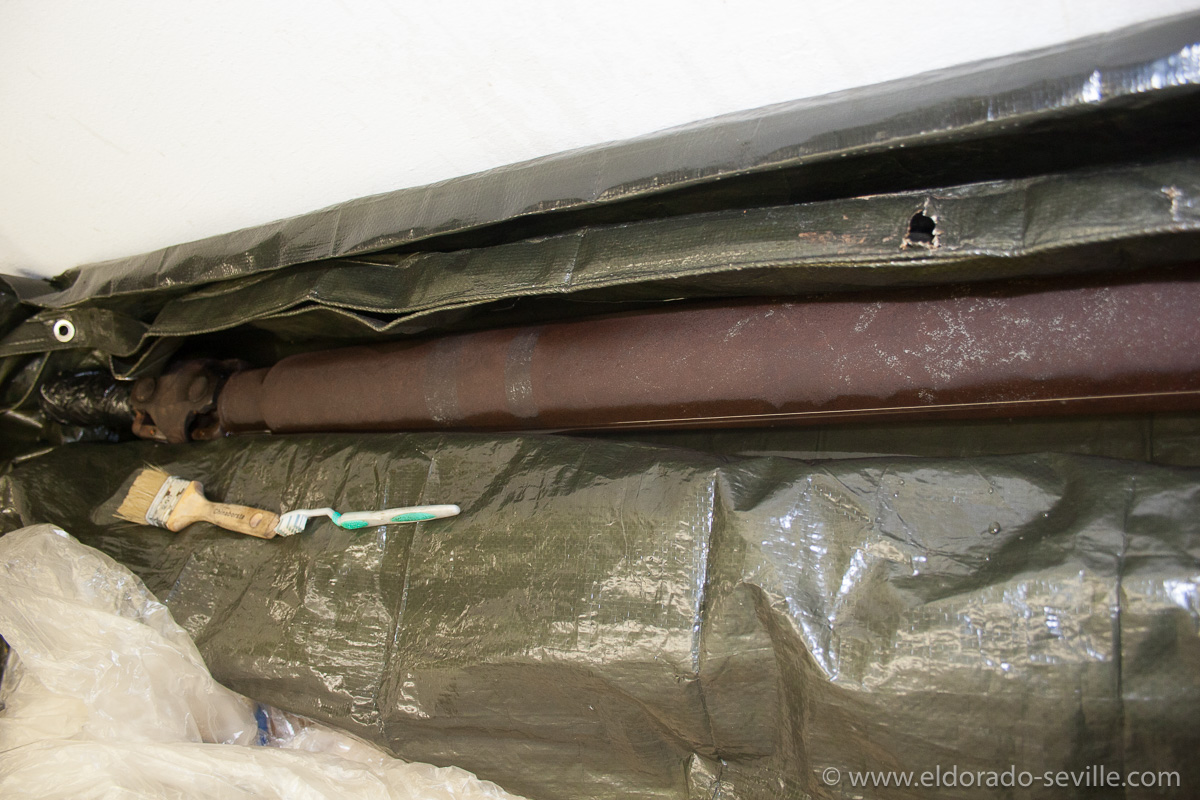
I soaked the driveshaft for 48 hours in rust removing liquid and used these two brushes to agitate it into the rust.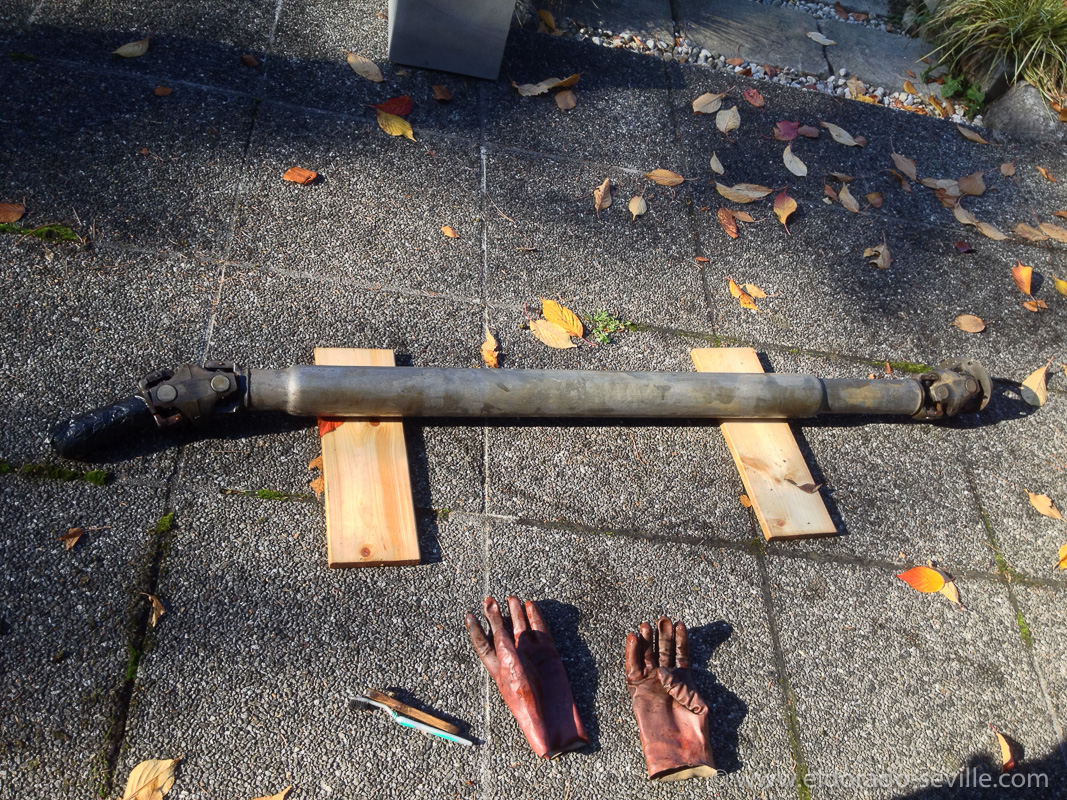
This is how it looked after soaking for 48 hours. All the rust was completely gone and only bare metal was left.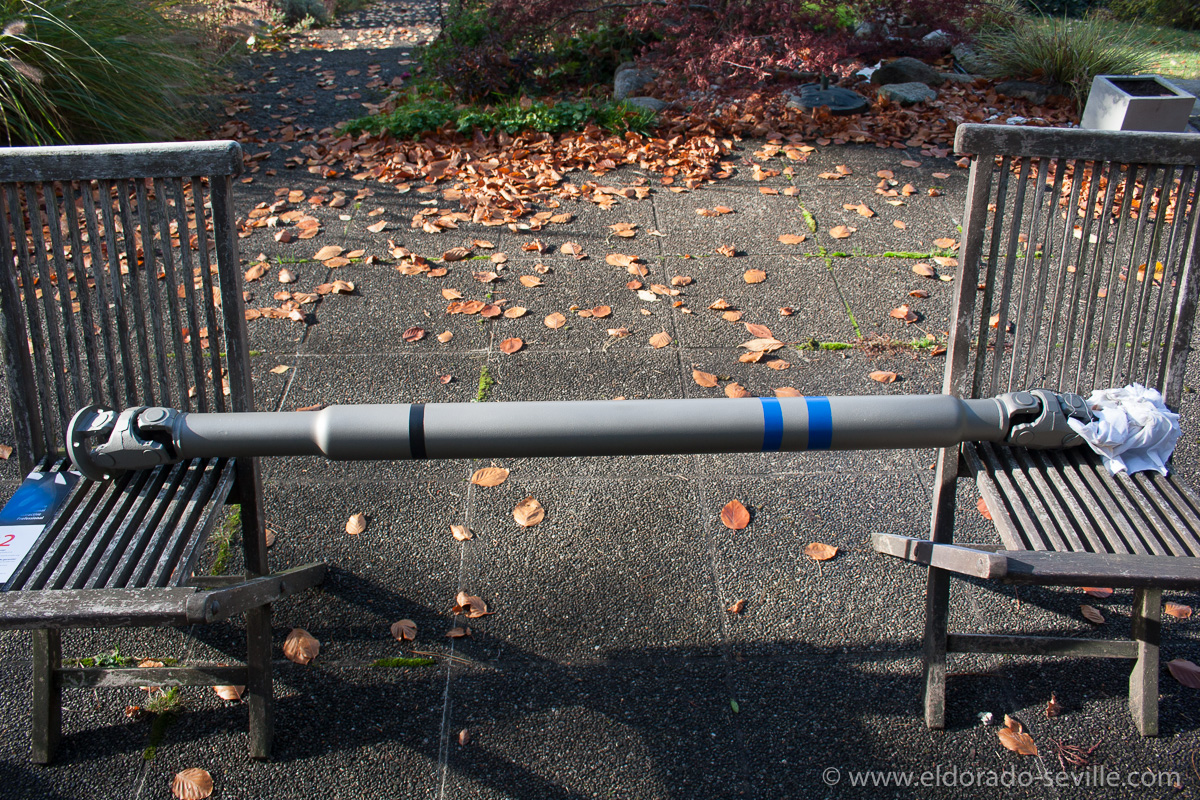
The finished drive shaft.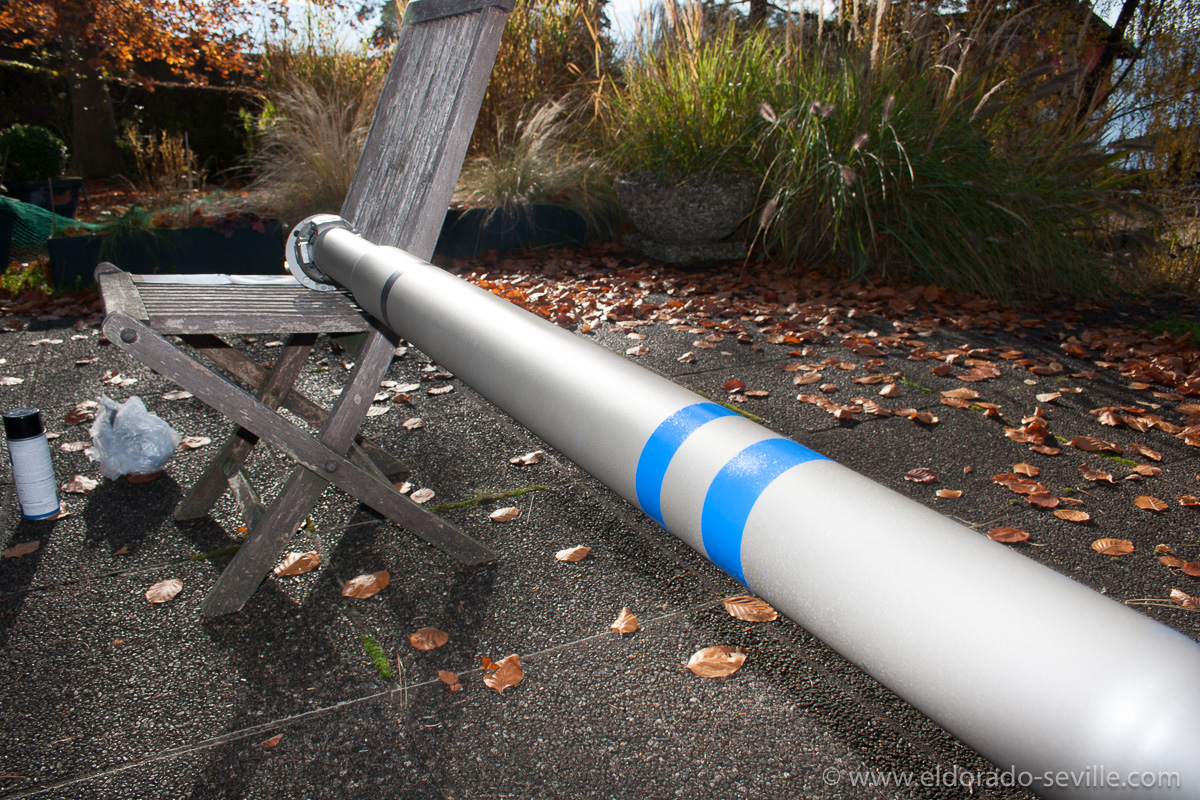
The replicated factory markings on the drive shaft. The correct shade of blue color was only a good guess - I think it comes pretty close to the traces of paint I had found.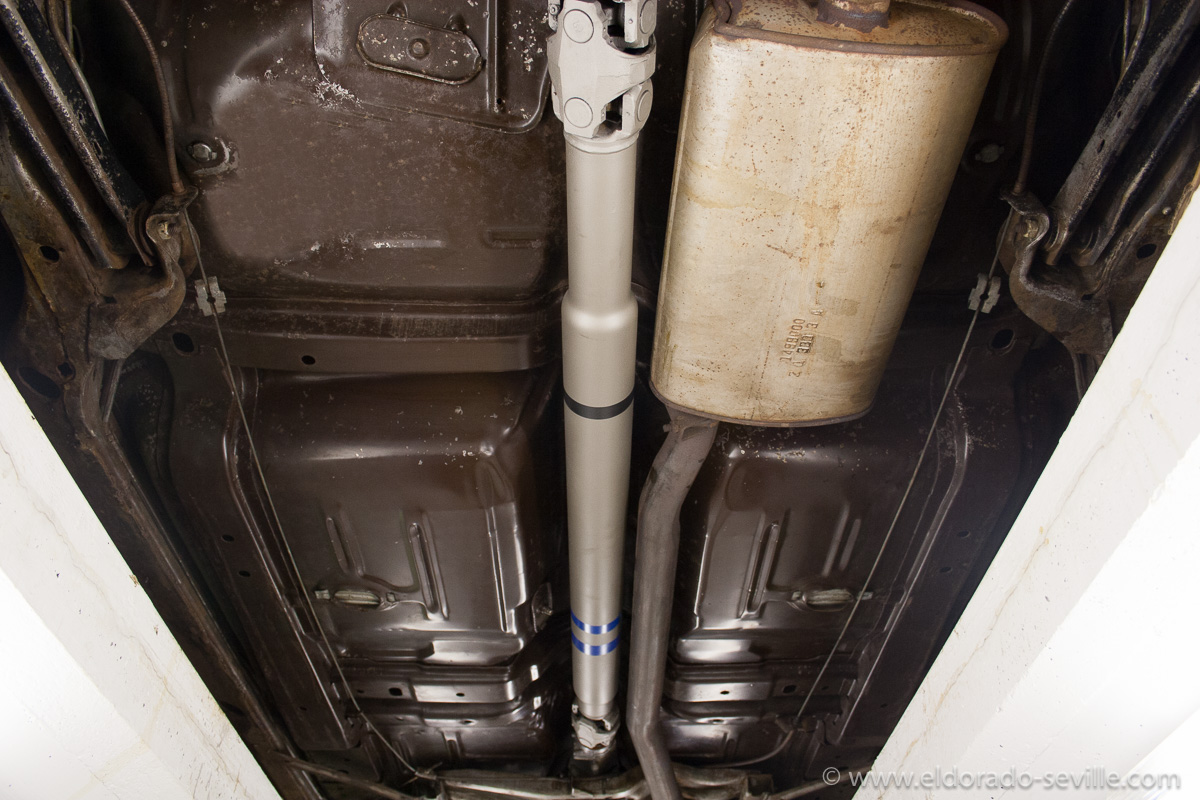
Back in the car to be able to move it around.
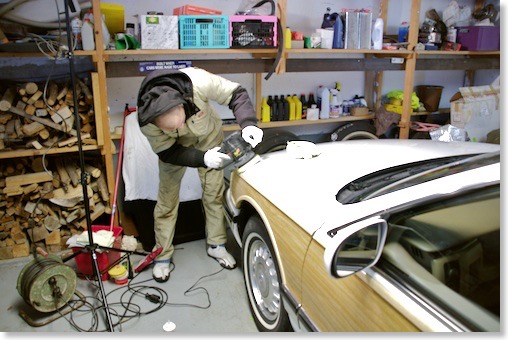
Detailing the paint of my 1978 Biarritz.
My goal is to make this mint car as good as it can get, while keeping everything as original as possible.
I´m really obsessed with cleanliness when it comes to cars... Everything has to be completely detailed and shining like new.
I completely cleaned the entire engine and gave it a good wash and afterwards applied some engine dressing.
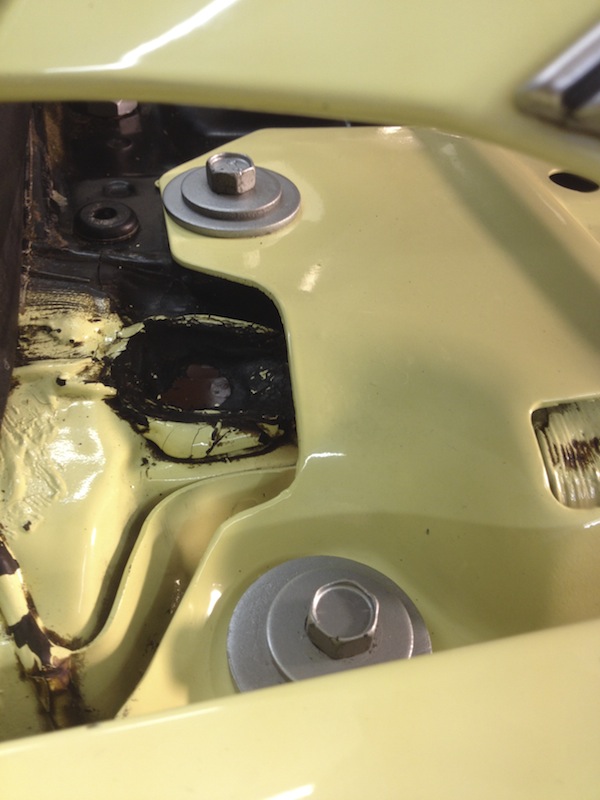
I then removed some screws and small parts which were left unpainted by the factory, like some screws, the hood latch, some brackets and some other smaller parts. Of course these parts developed some slight surface rust during the last 36 years...
As I had no real rust dissolver at hand, I soaked the rusty parts in vinegar over night, which completely removed all the surface rust. I then gave these parts a coat of primer and painted them with Eastwood paint, which looks like bare metal.
With this method I can keep the rust away, while the parts still look original. Only if you look very closely you might see that these few parts are now painted...
I then started to bring the original single stage paint back to like new condition.
I used a couple of Meguiars compounds and polishes to make the paint as smooth as possible. I had to carefully wet sand some of the deeper scratches with 2000 grit paper. Be very careful when doing this as the single stage paint was applied in only VERY thin layers during the 70s.
The car now shows almost no more paint imperfections and the swirl marks are gone. The original paint looks like on a new car now and is extremely shiny. When the car is out in the sun its almost blinding.
I sealed the paint with Meguairs #16 wax.
I used a Meguiars DA polisher (G125) for the paint correction work - which is not really that good, but I would like to have a more powerful machine for the future like the Flex 3401 or the Rupes Bigfoot .
I used the procedure explained in the following video for my paint correction:
Download his description as PDF file here
This gentleman, Larry Kosilla, has a lot more awesome video tutorials for people who love detailing their cars. Check him out!
I also started detailing the interior of the car. I treated the leather with Gliptone Leather Conditioner - which is the best conditioner I have tried so far. It really makes the leather very soft.
I´ll have to steam clean the carpet once its really warm outside so that it can dry fast afterwards.
I also cleaned the undercarriage a little and removed some of the factory applied undercoating from components where it does not belong to, on which they sprayed it on very carelessly at the factory. Looks much better now.
The car really looks spectacular already - I´ll continue with the chrome and stainless steel trim now. It should be shining in fully glory for the 2014 season beginning in May and also be ready for various car shows, especially the Cadillac BIG Meet in August.
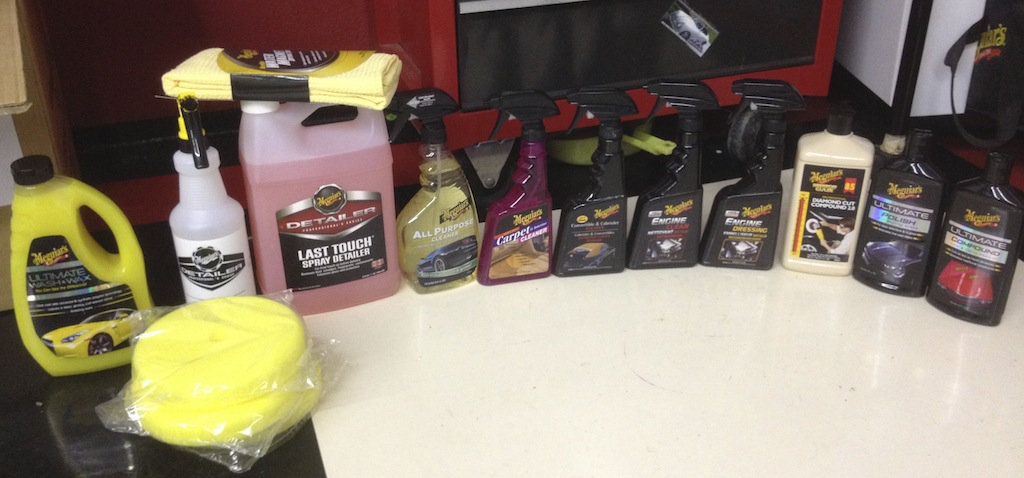
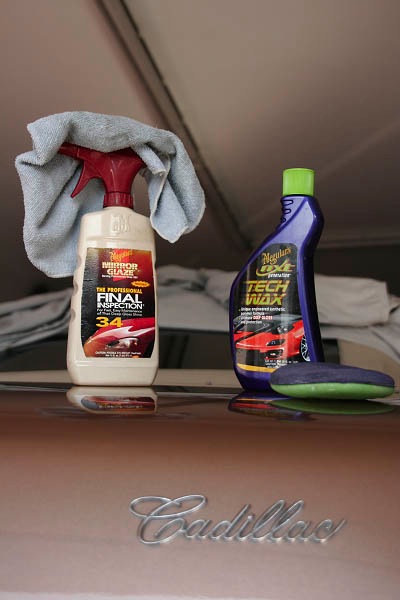
My weapons of choice came from the Meguiars dealer...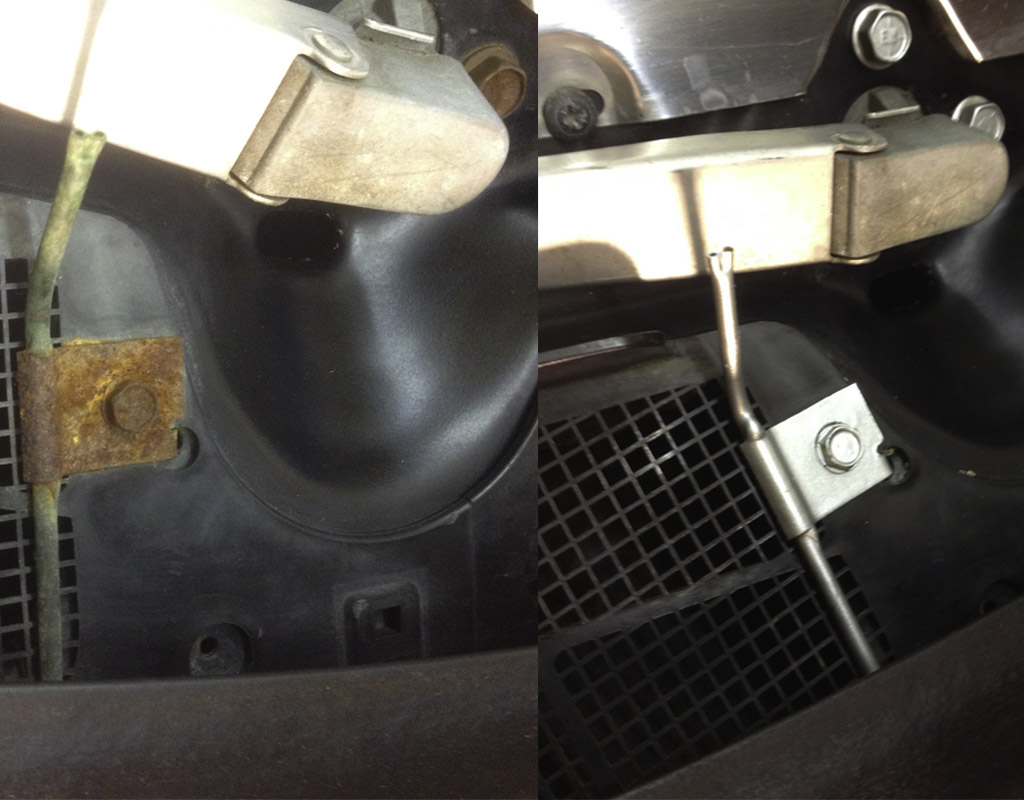
before and after cleaning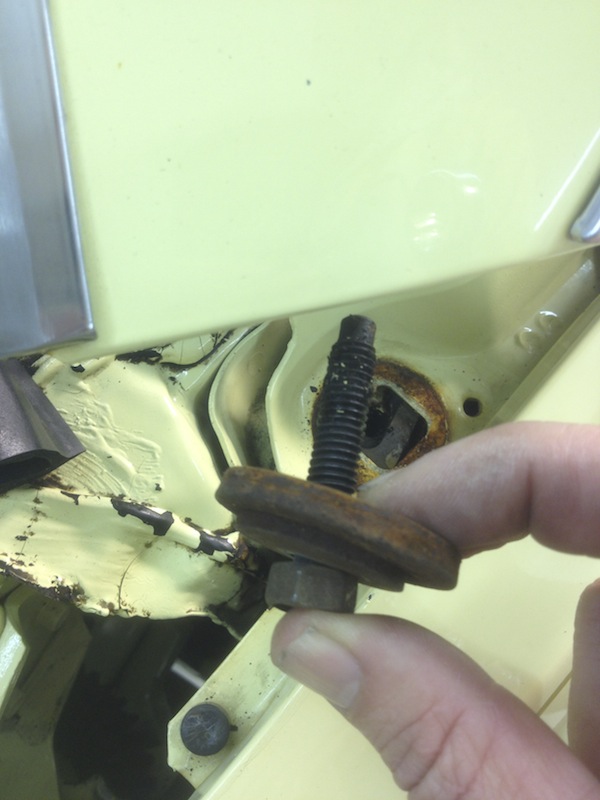
rusty bolts before and after cleaning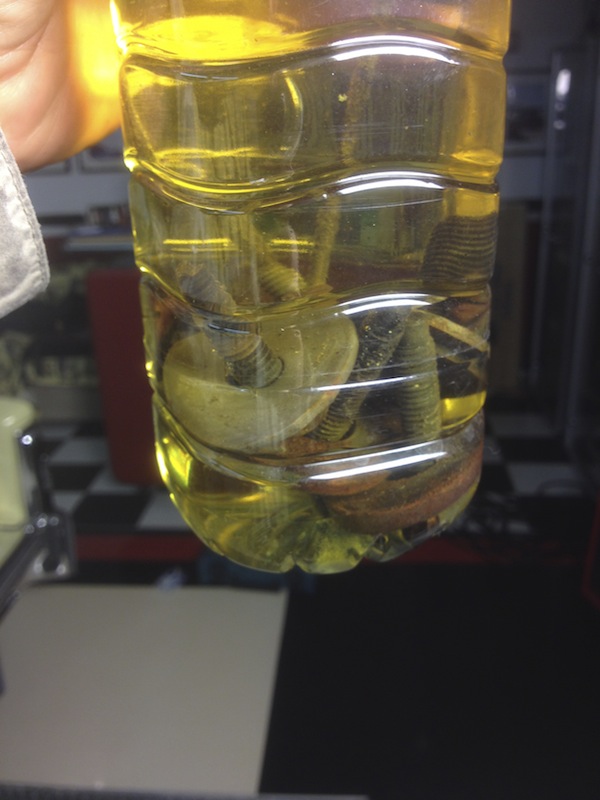
Soaking rusty parts in vinegar
Cleaning more rusty parts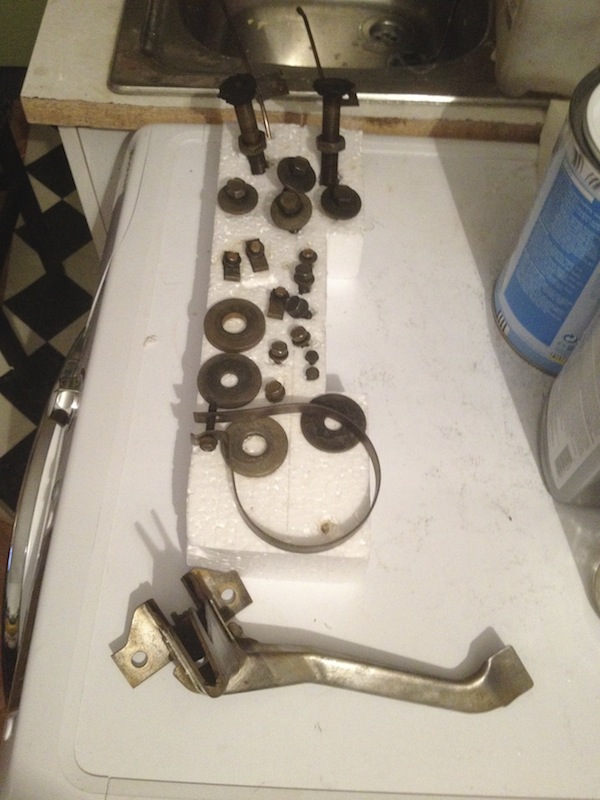
with the rust removed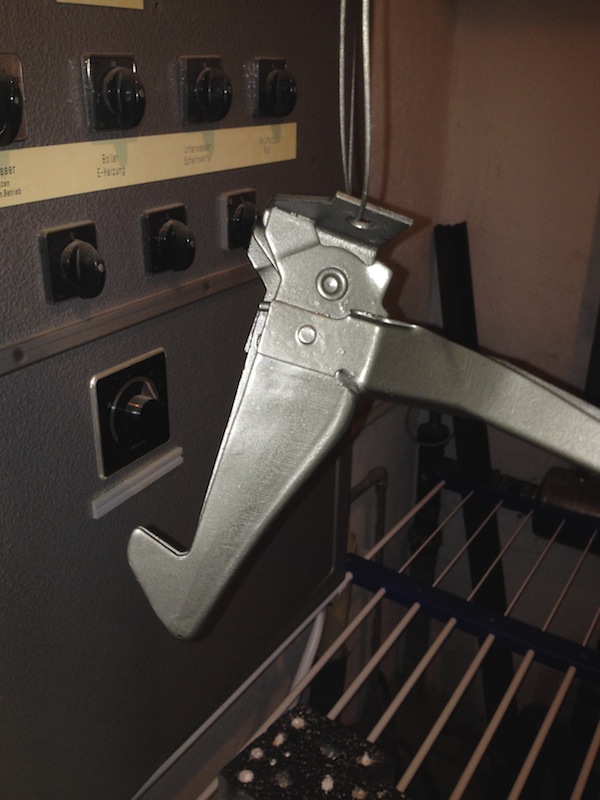
The Hood latch cleaned and painted with Eastwood Silver Cad Paint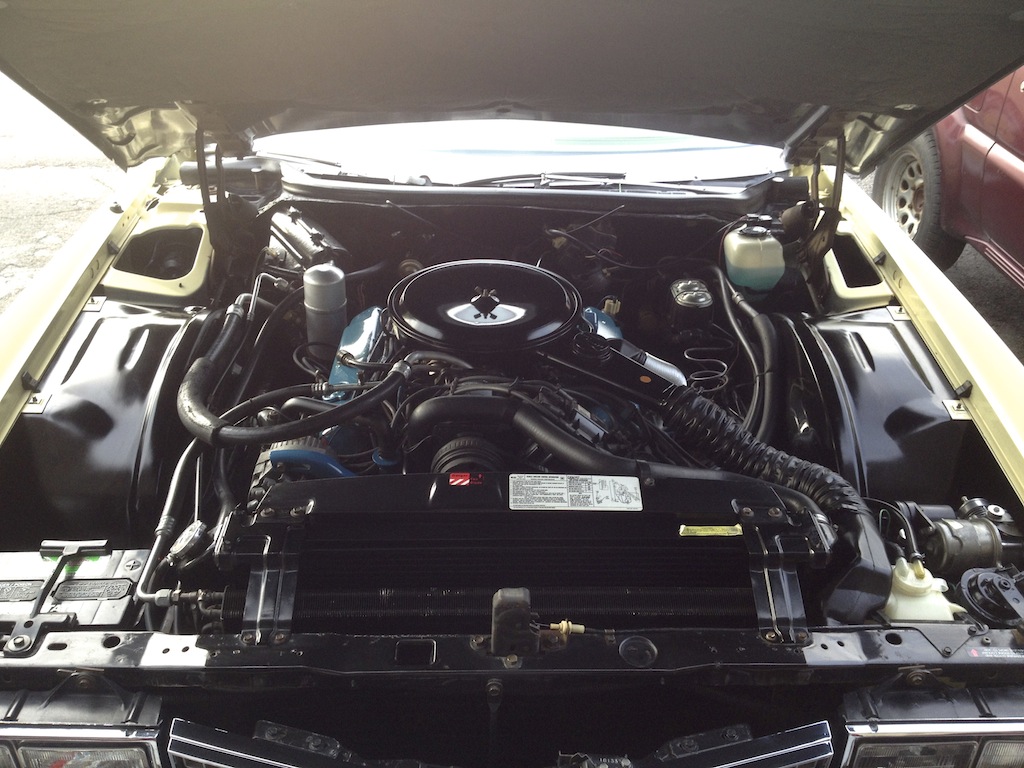
The cleaned engine bay
The car after polishing the paint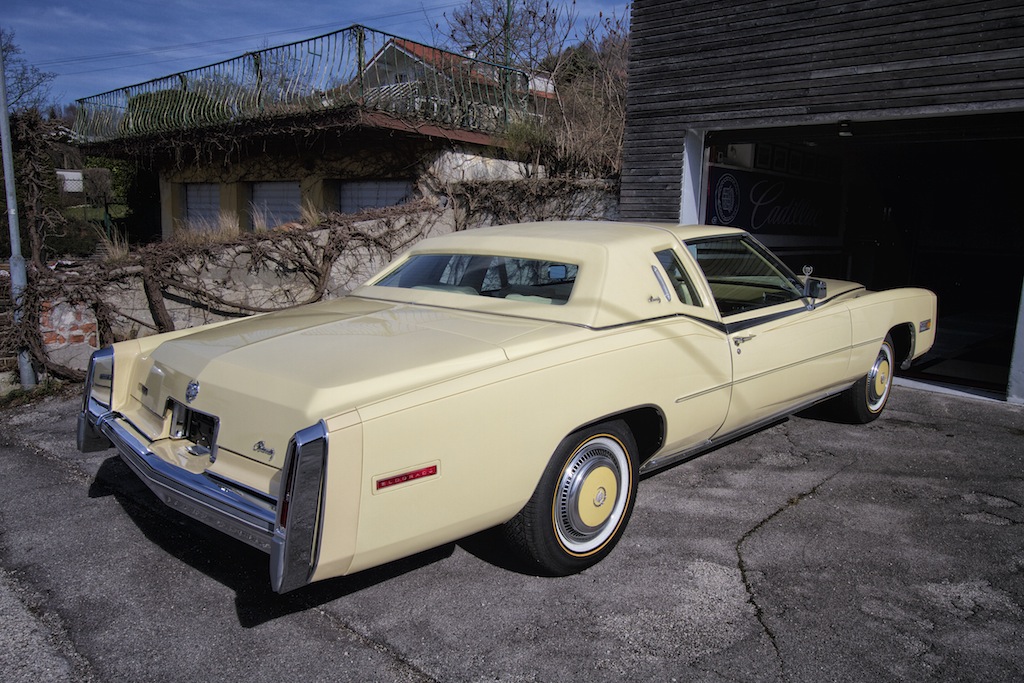
the polished paint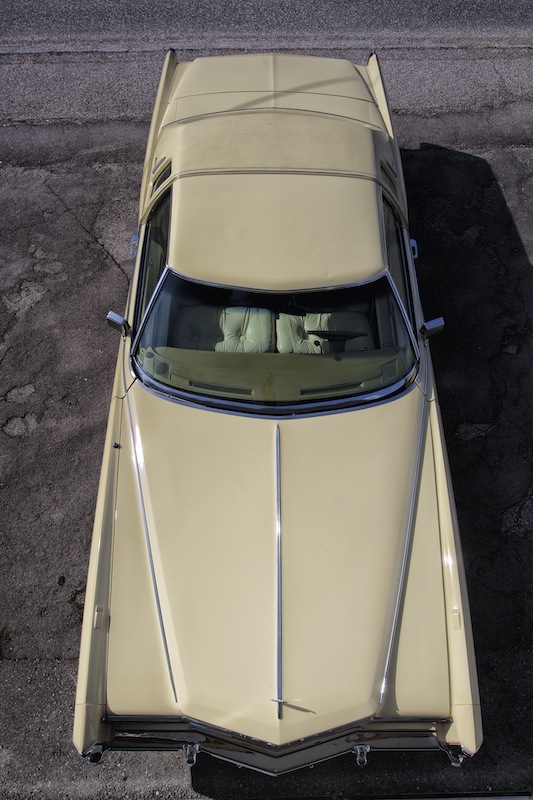
very shiny
Besides the carpet - the interior is already perfectly clean. The original floor mat is under the aftermarket mats.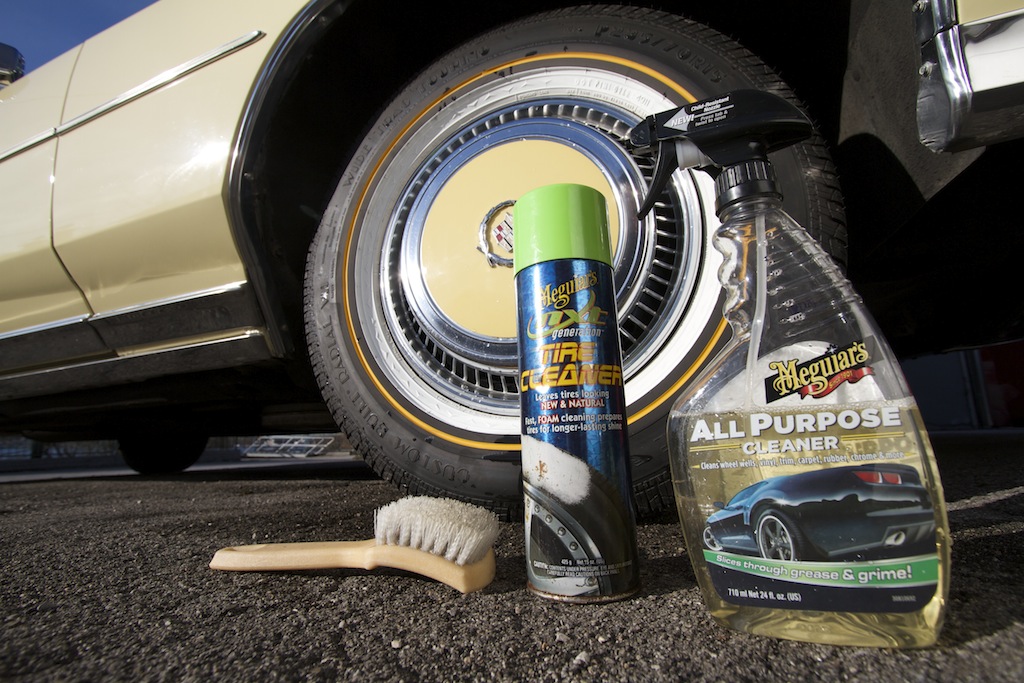
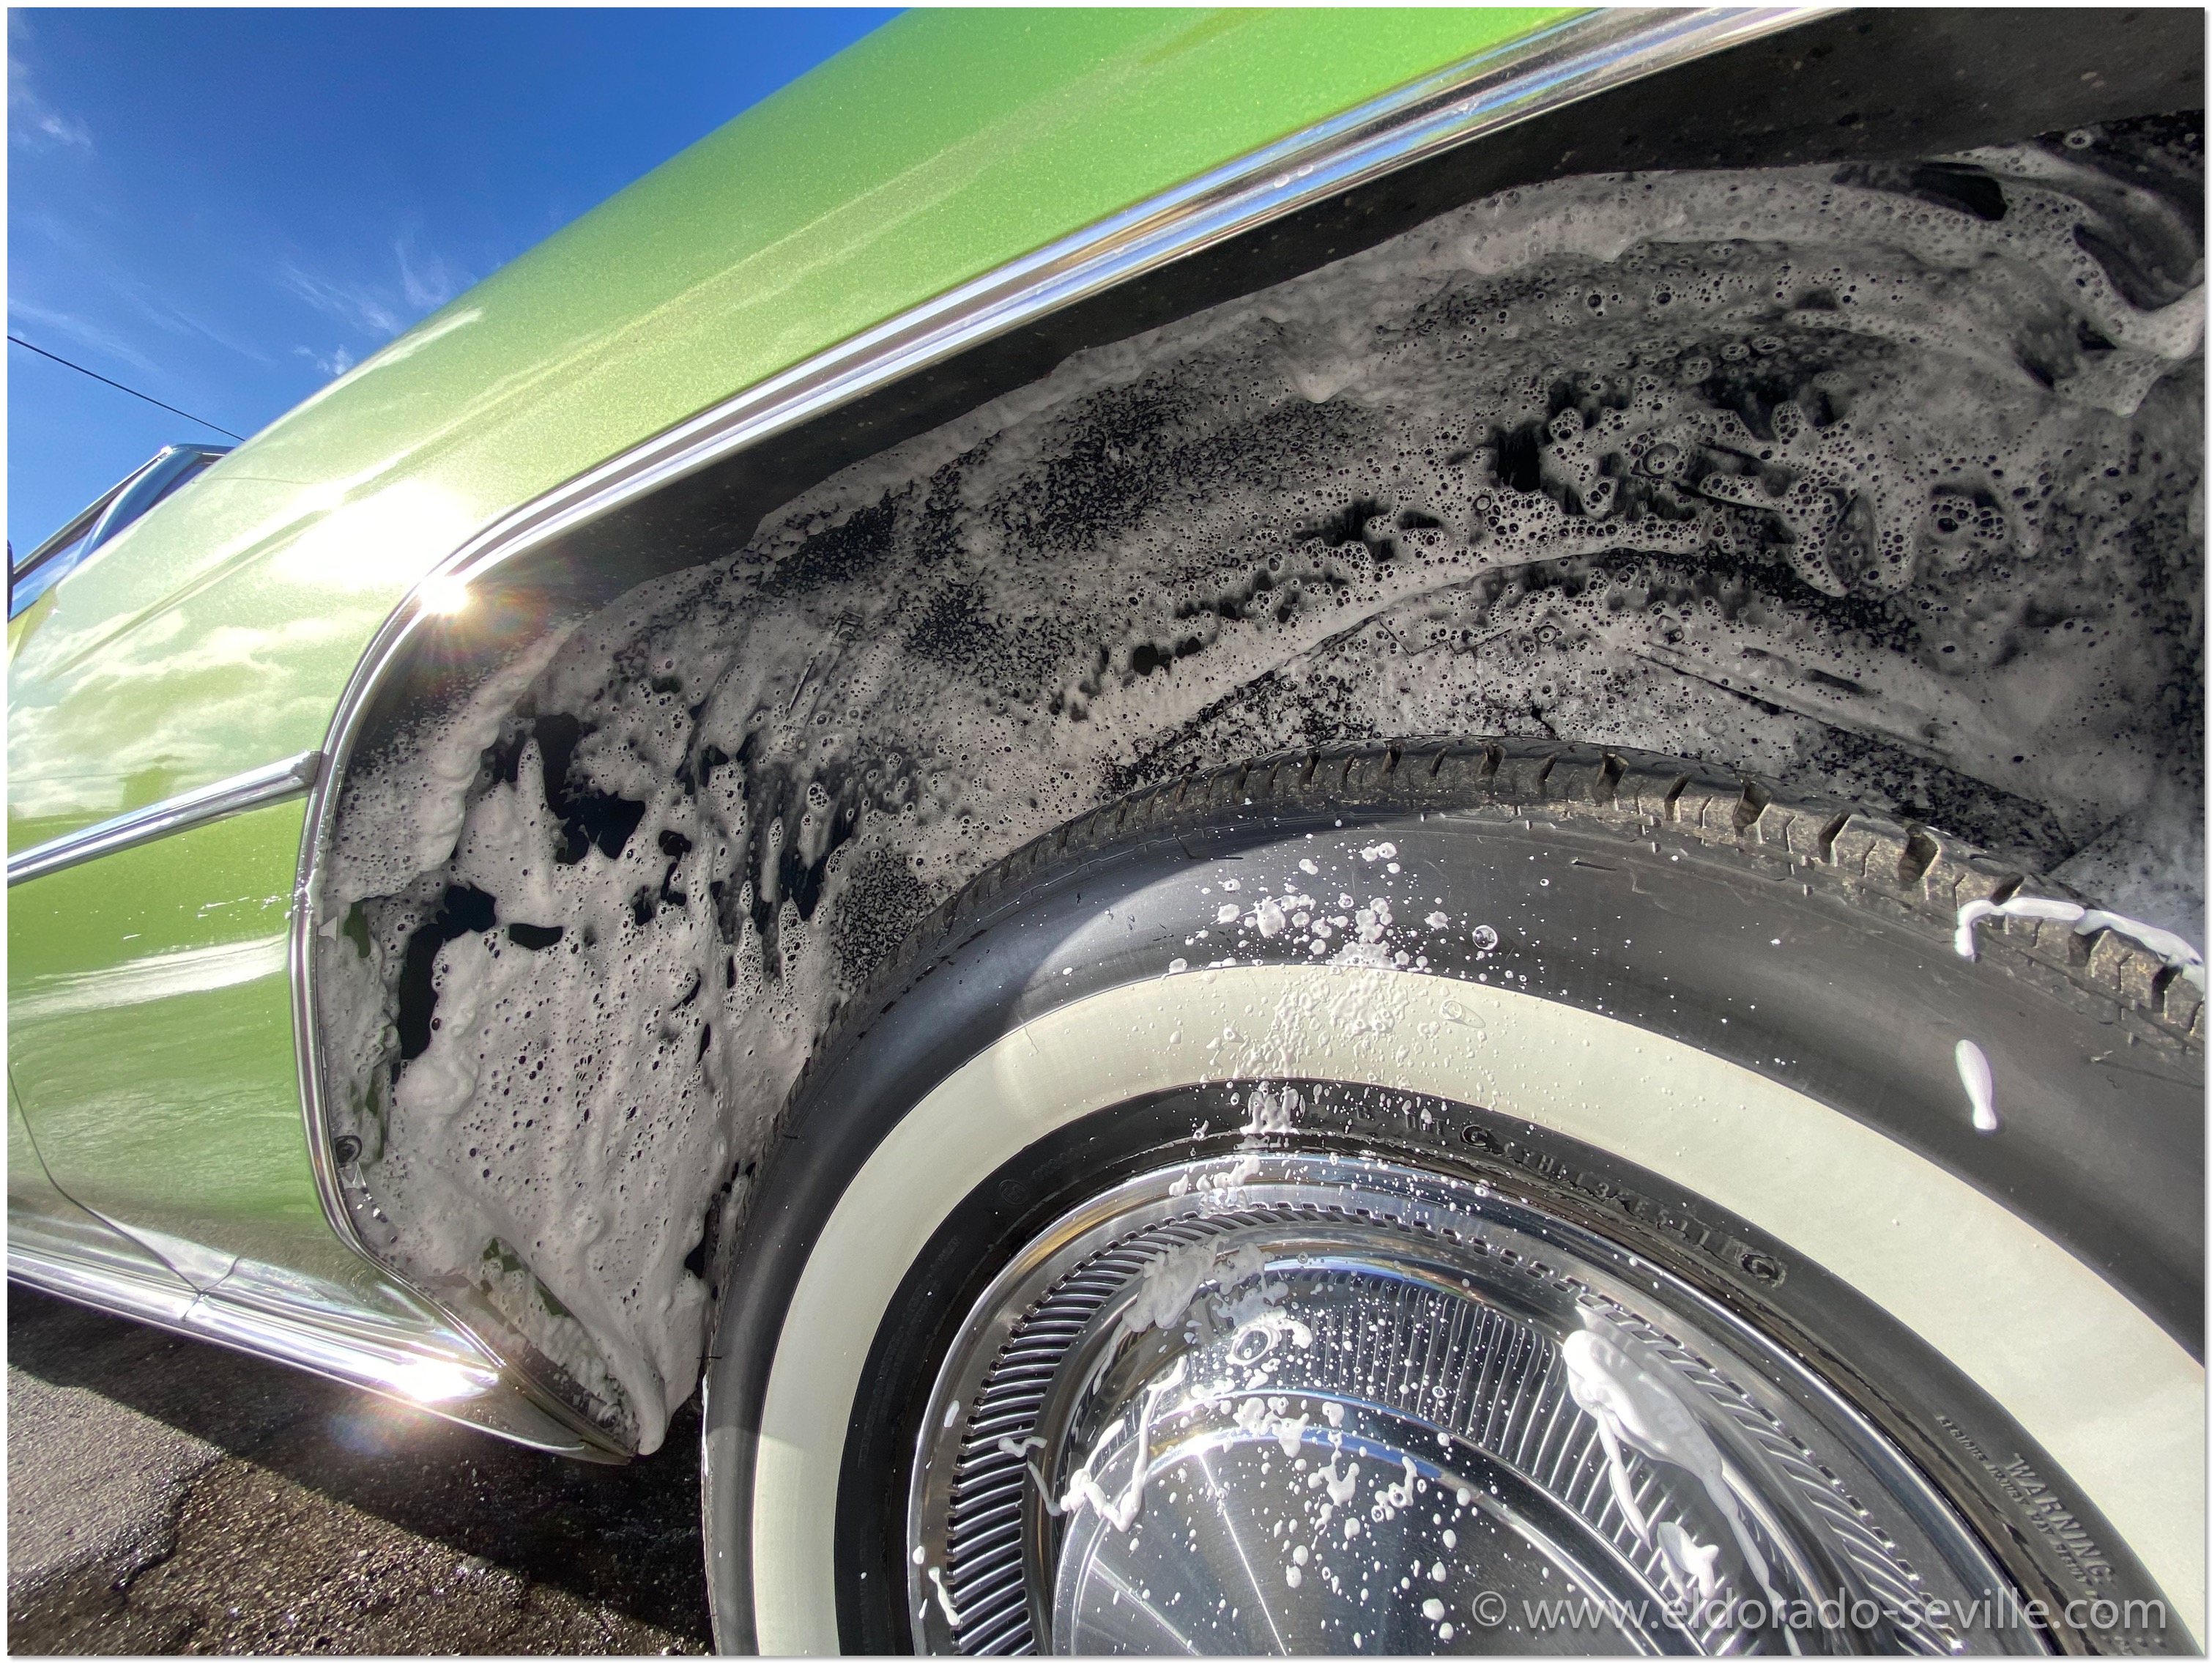
Cleaning the Vogue tires.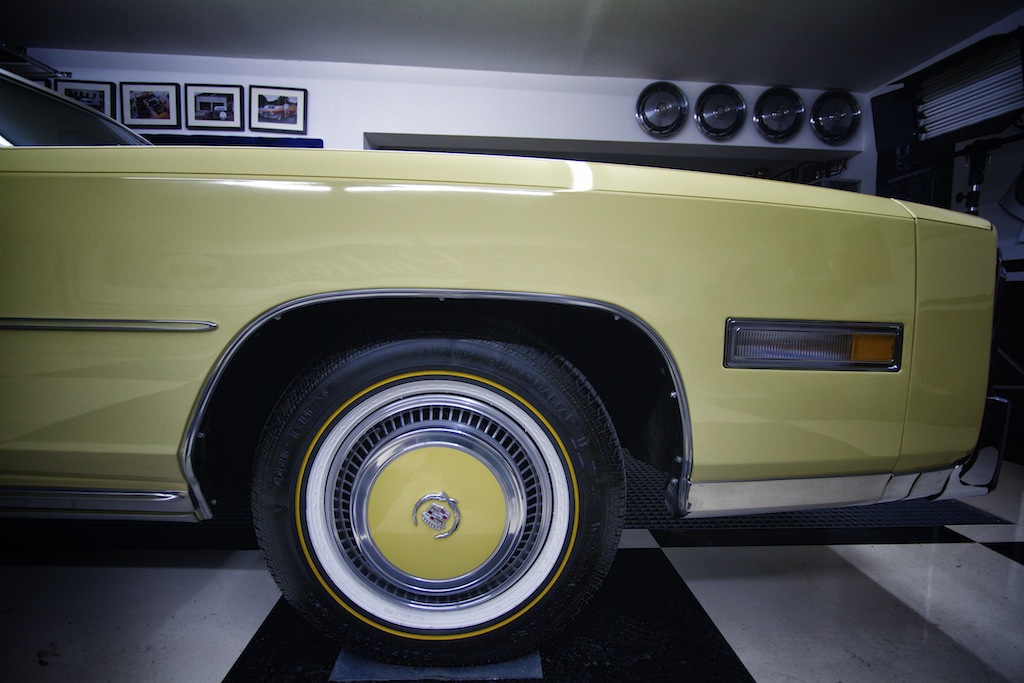
Clean paint and tires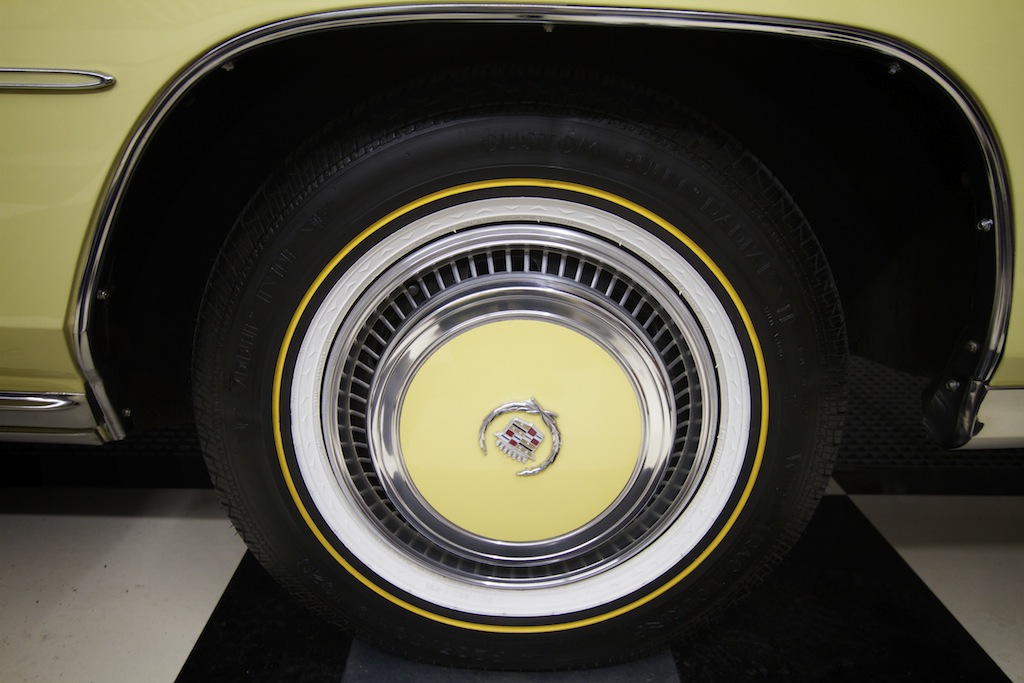
Clean tires and perfect hubcaps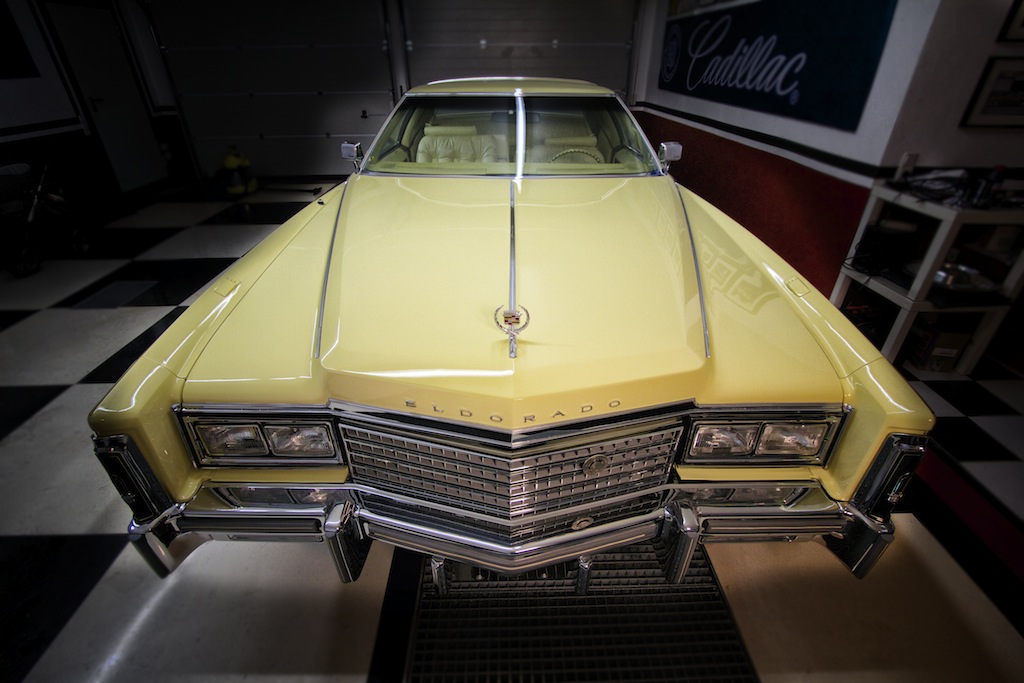
Before waxing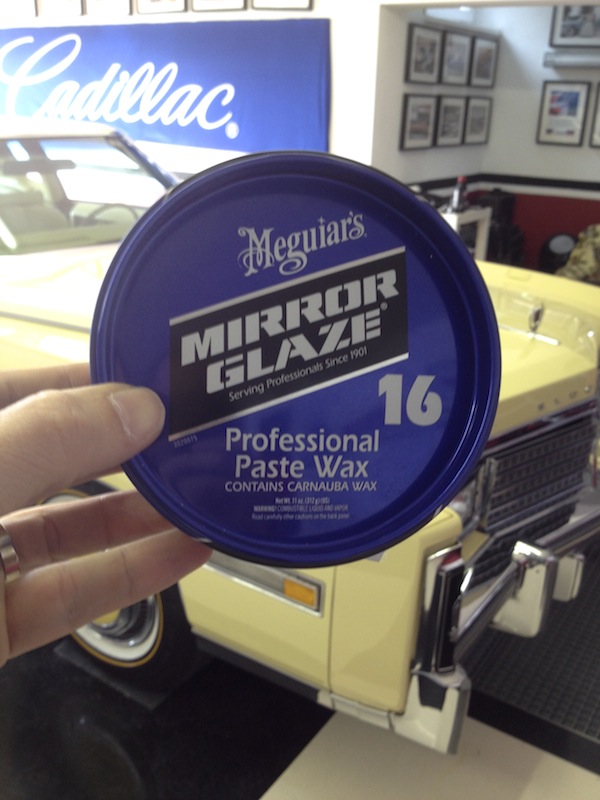
I really like this Meguiars wax. Its one of their cheapest but best waxes. A gentleman from Meguiars once told me that it is one of their oldest waxes, but contains a lot of carnauba wax, which makes it so good! Its also offering the best protection of their product range.
Here are some links to Meguiars products I like to use (link to german Amazon Shop):
Preparations for the Cadillac BIG Meet 2012
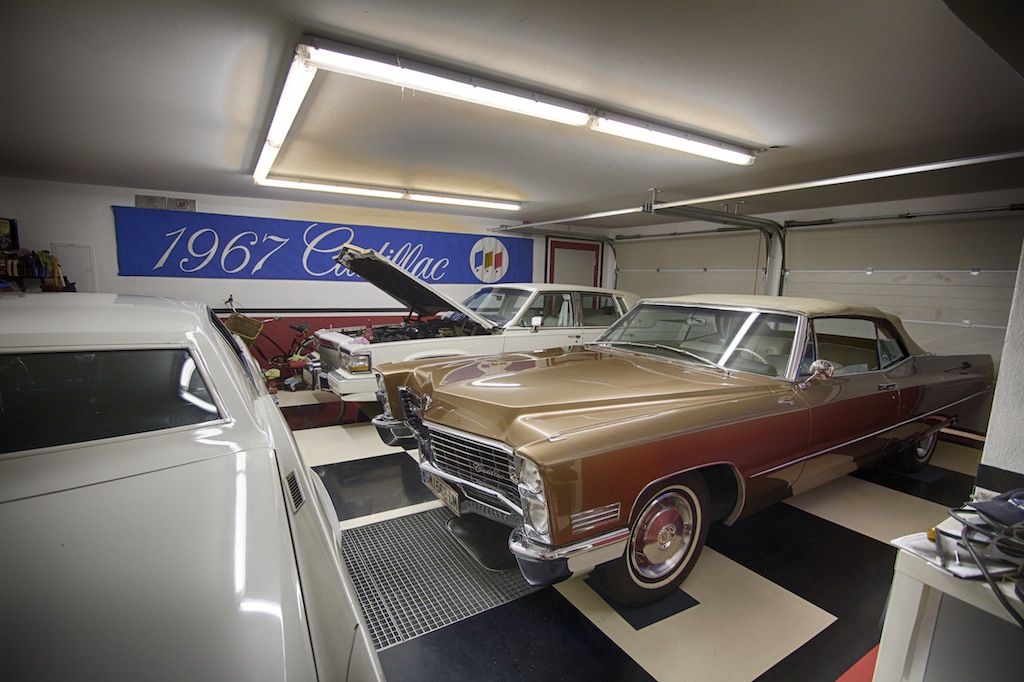
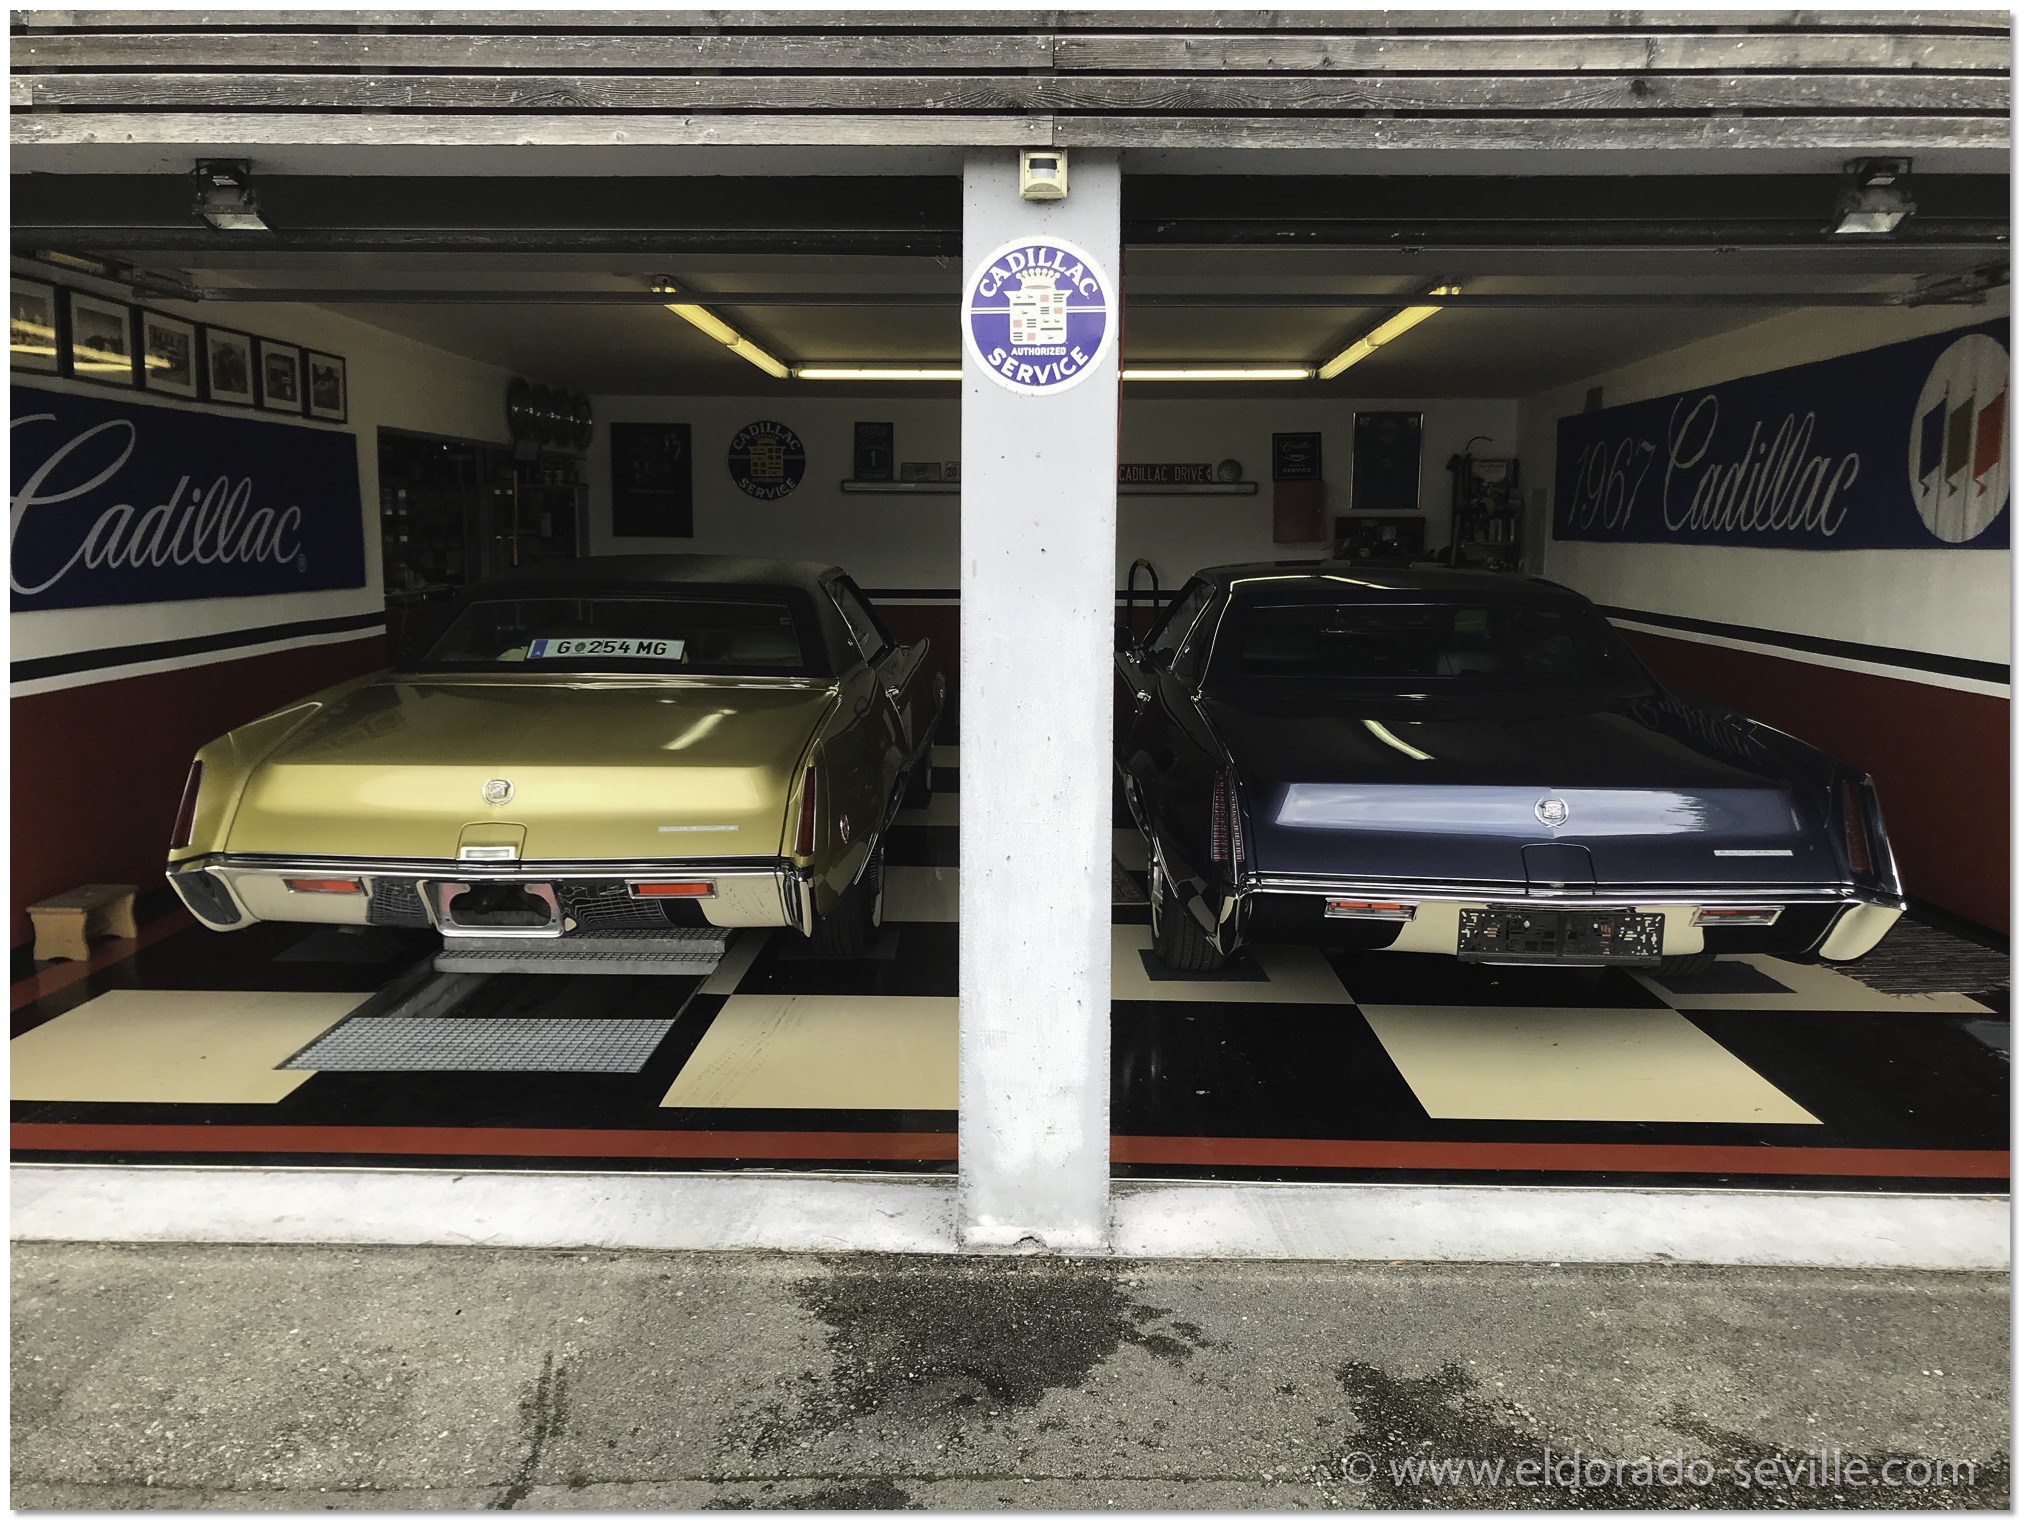
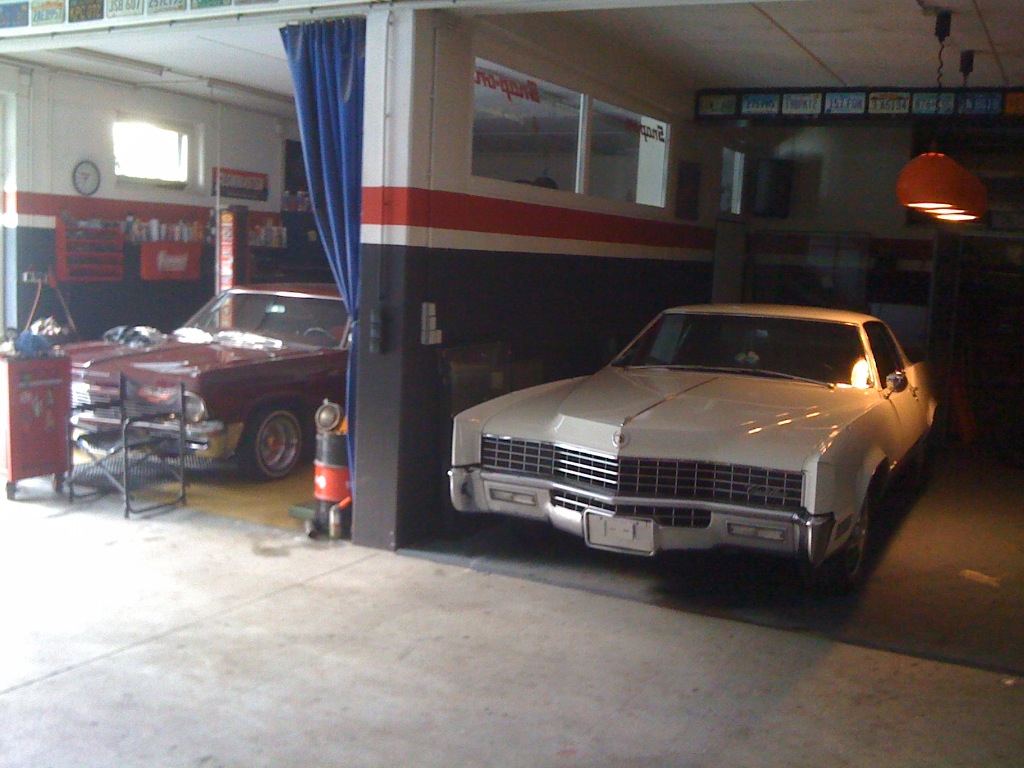
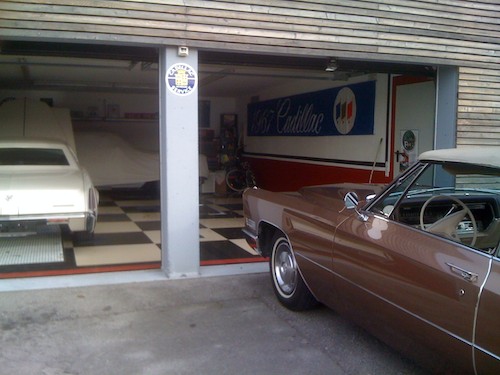
In the garage with the Brougham and the 1967´s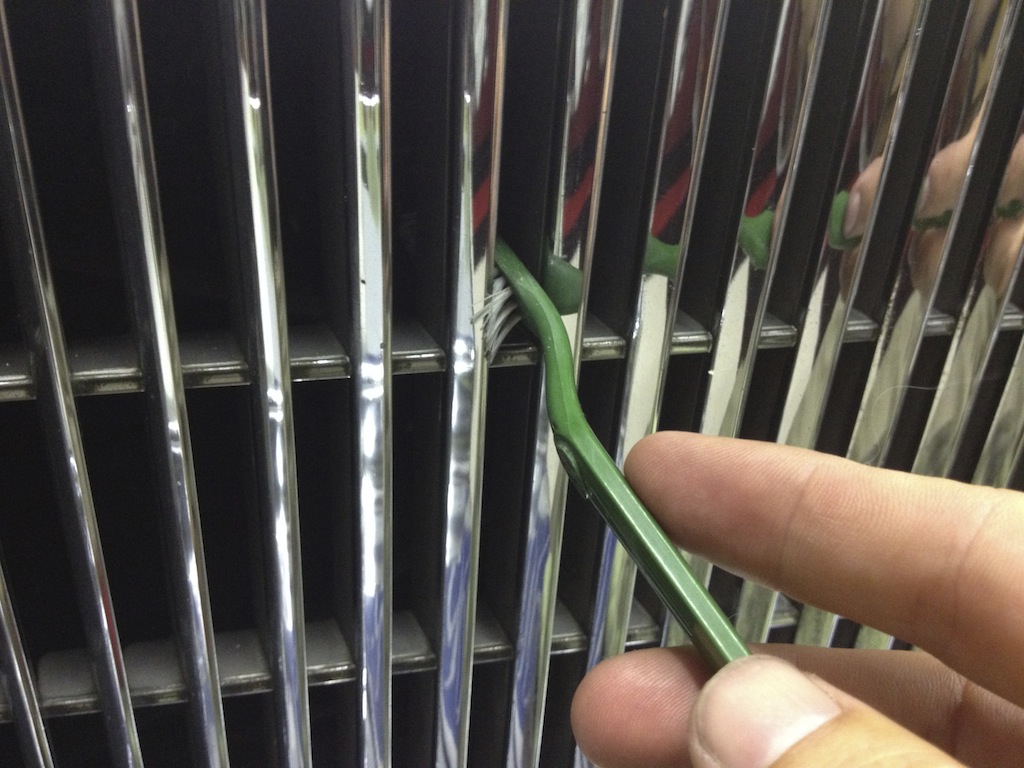
Detailing the grille of the Brougham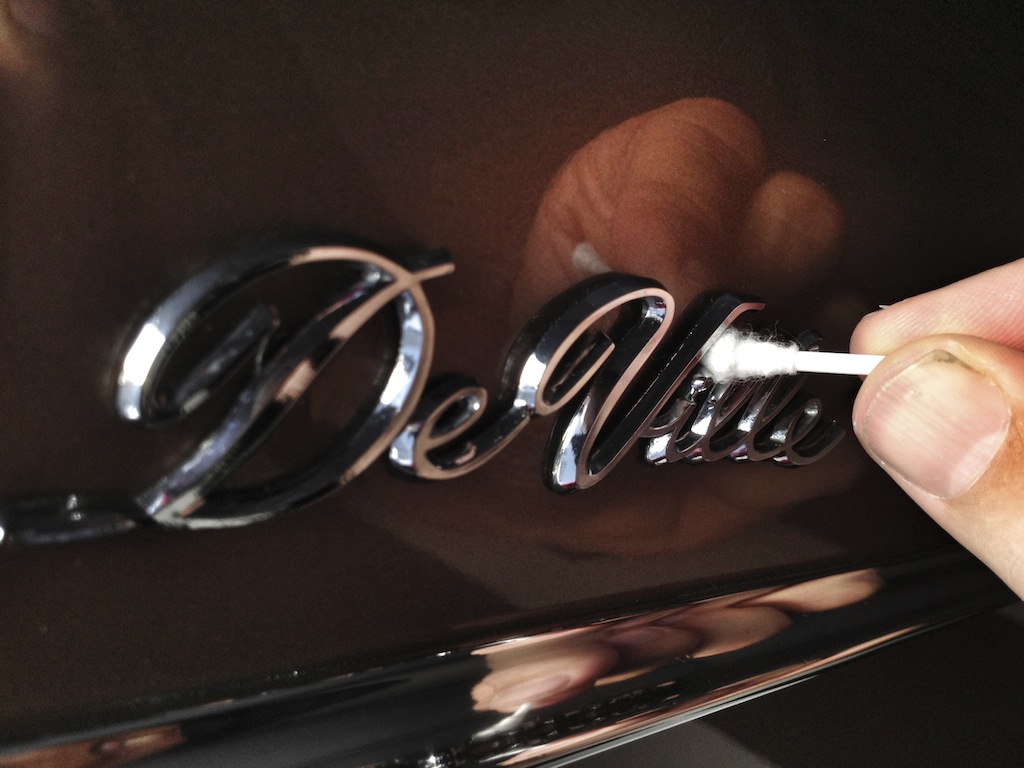
Detailing work
Front wheel bearings replacement on my 1967 Cadillac DeVille
As we had the first really warm and sunny days this weekend, I took the car out of storage and put it into my old garage to do the work. It's a pretty easy job on the 1967 Deville - you do not even need any special tools or presses.
I got a set of inner and outer wheel bearings for both front axles from Rockauto.com - I got a set made by “Moog“ as I have heard good things about their quality.
You just have to remove the tires, remove the pin at the axle, remove the big nut and pull off the brake drum. The outer bearings can just be pulled out - the inner bearings have to be tapped out with a long screwdriver, as they are held in place by a dust cap. A very slight tap is all it needs to get it out. I cleaned everything and put the greased new wheel bearings in and put everything back together. I also readjusted the front brakes and also found that one of the new brake hoses was a little loose and loosing a little brake fluid, so I tightened it.
As I had the front wheel tires off the car - I also cleaned the entire front suspension and detailed it. Everything is squeaky clean now again. No more noise is coming from the wheel bearings now…
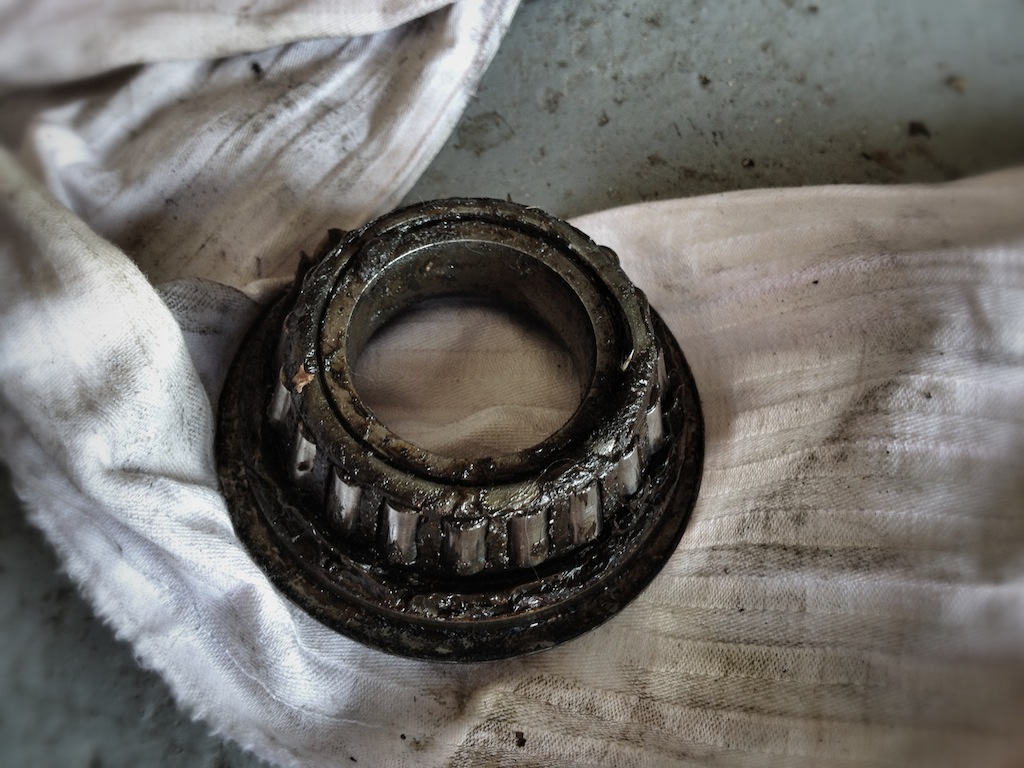
The old inner wheel bearing is out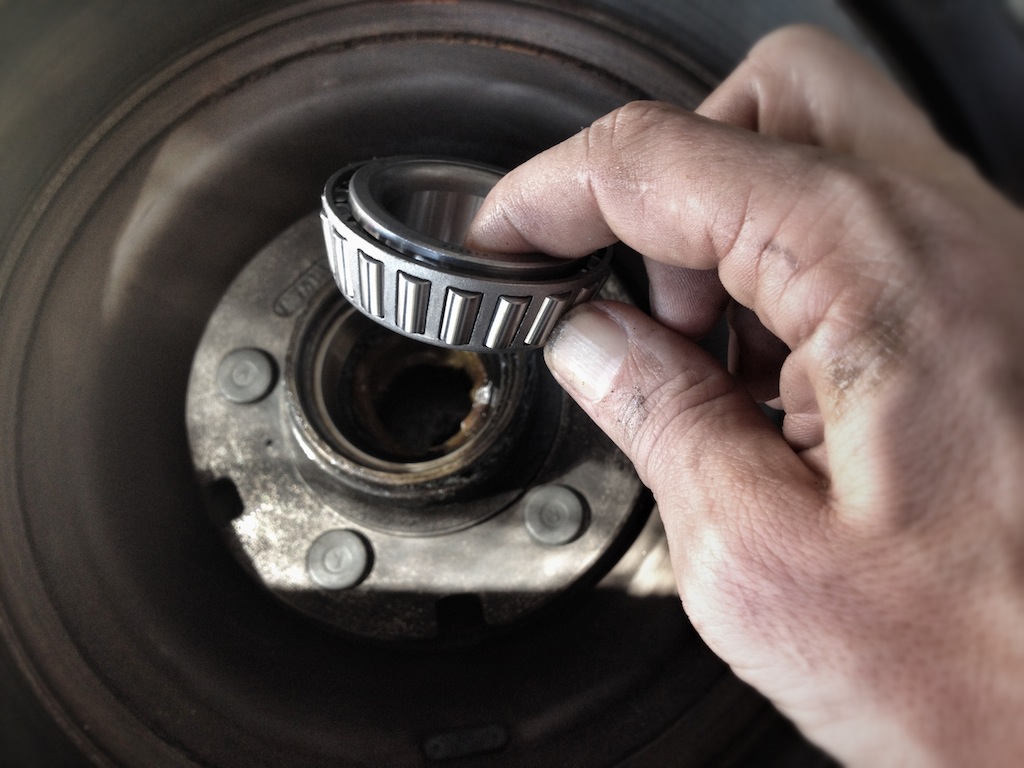
The new inner bearing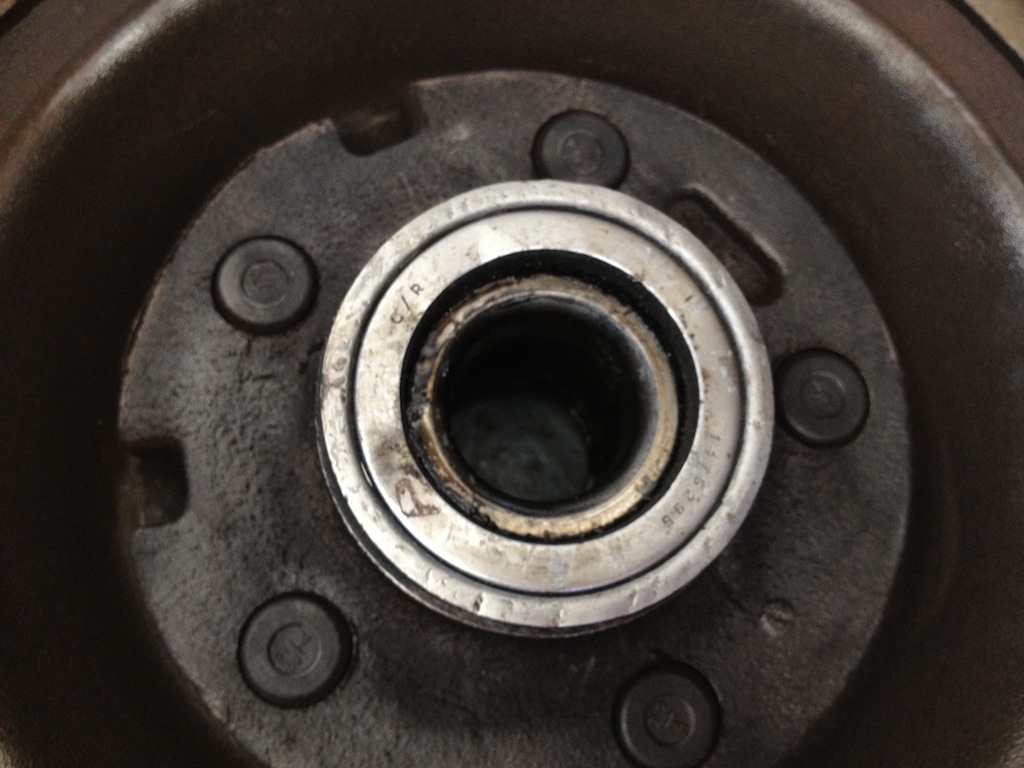
There is a dust cap which you have to tap out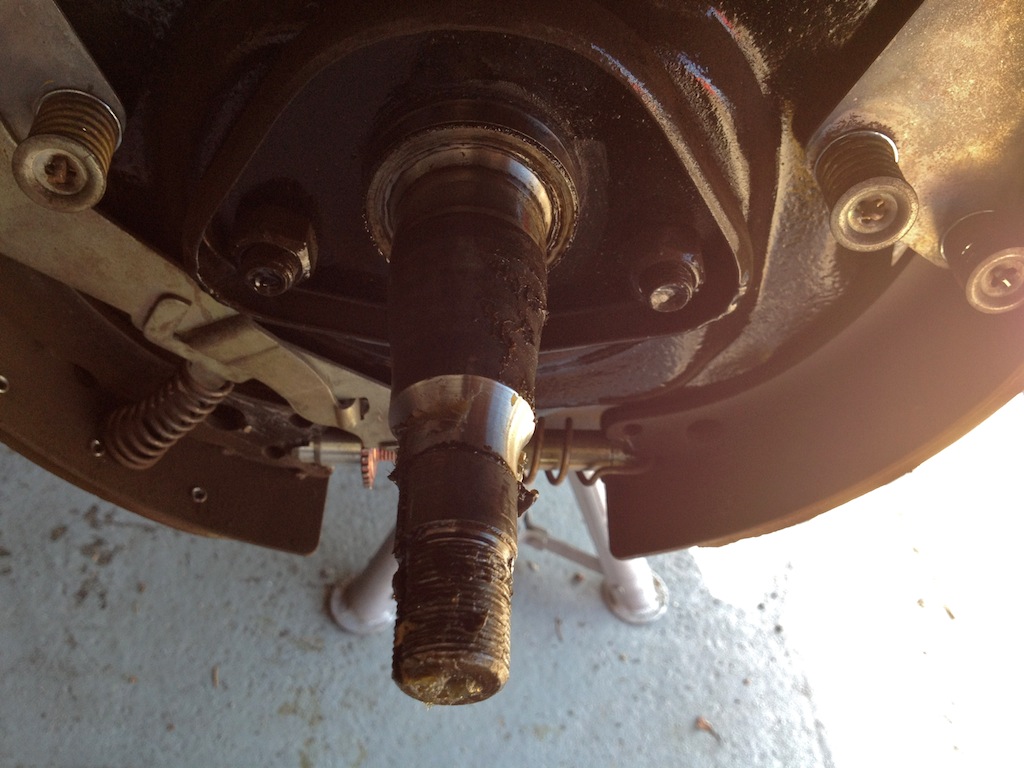
the front axle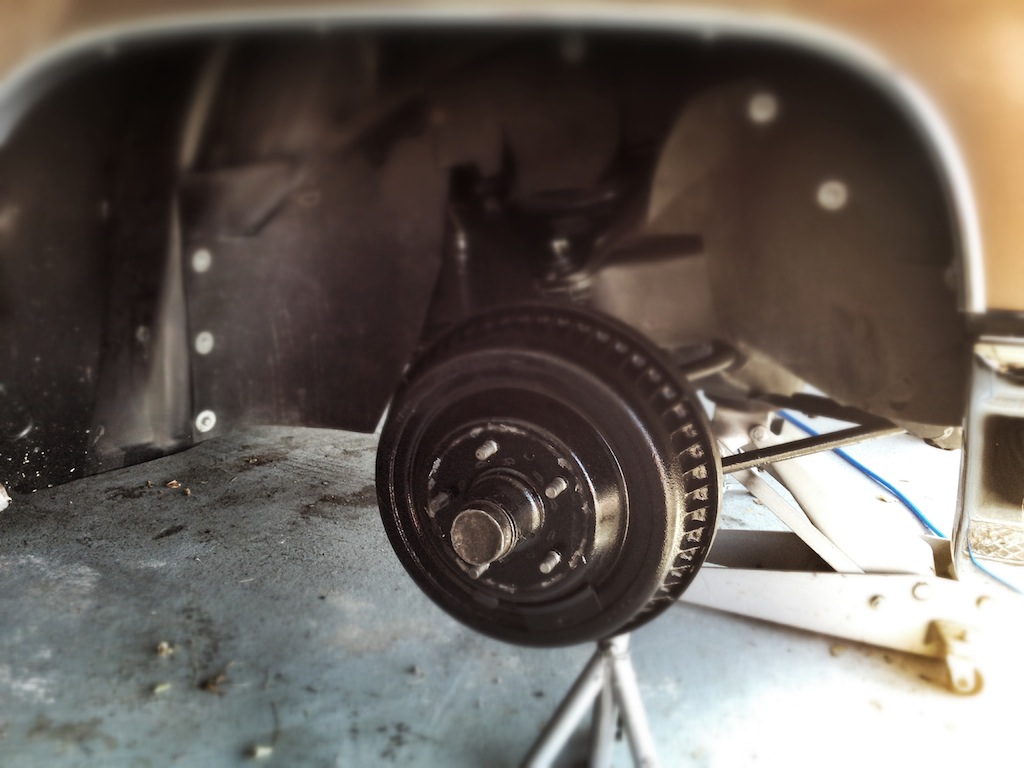
Back together - before detailing the wheel housing and front suspension
Preparing the Mark III for the Cadillac BIG Meet
Luckily my buddy Tayfun volunteered to come to my garage for 2 full days to help me getting the car show worthy. Without his help I would not have been able to get the car ready in time. Thanks Tayfun!!!!
As I ran out of garage space my other great friend Richard helped me out and lets me store my 1967 Eldorado at his cool garage for a while - thanks Rick!!
My 67 Eldorado is temporarily stored at my friend Richards garage until I find a solution for my storage problems - thanks Rick!
The Mark III needed the full treatment as it was very dirty from its long journey from the United States to Europe. It needed a complete interior treatment along with lots of paint detailing to look great again. So we worked until 1am in the morning each day. During these few days we had the highest August temperatures ever recorded, so a lot of sweat was produced...
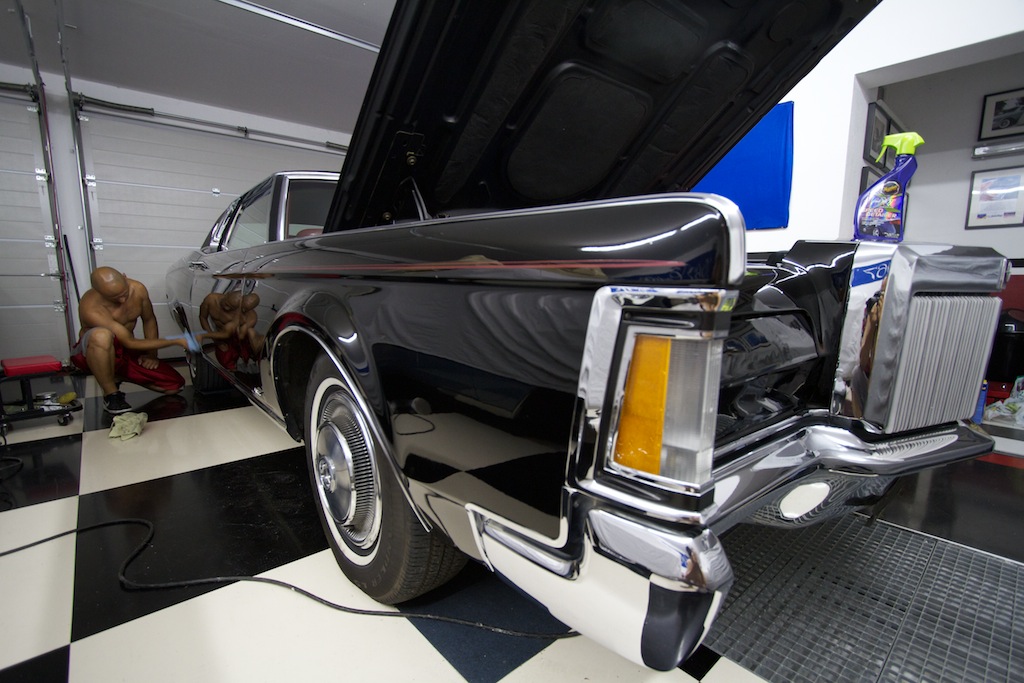
My friend Tayfun in the garage polishing the paint - around midnight...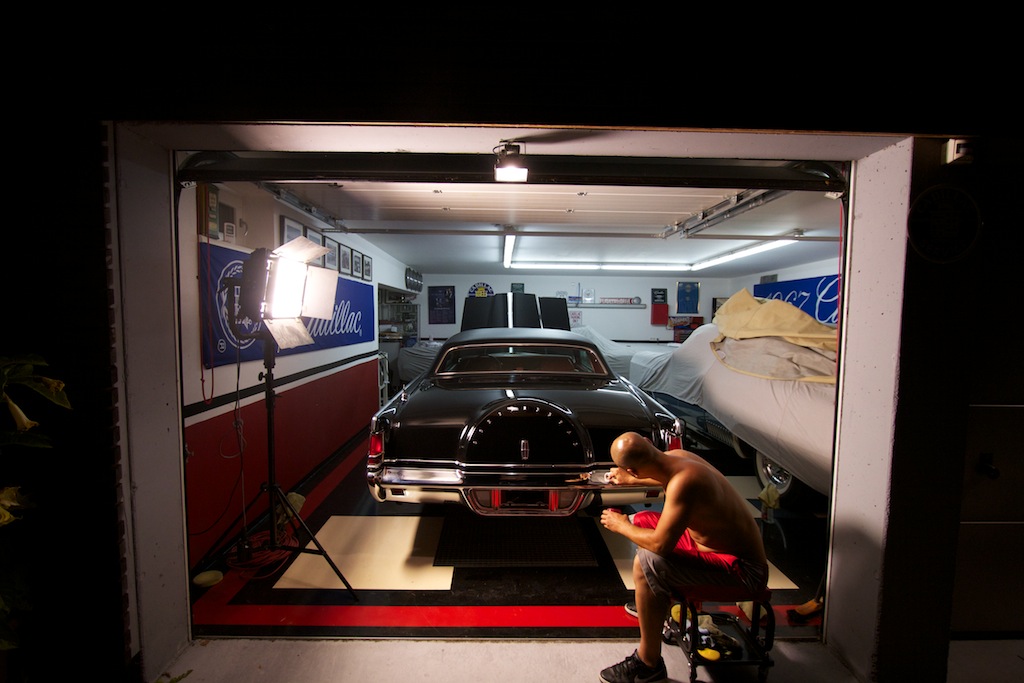
In the middle of the night - we set up some film light...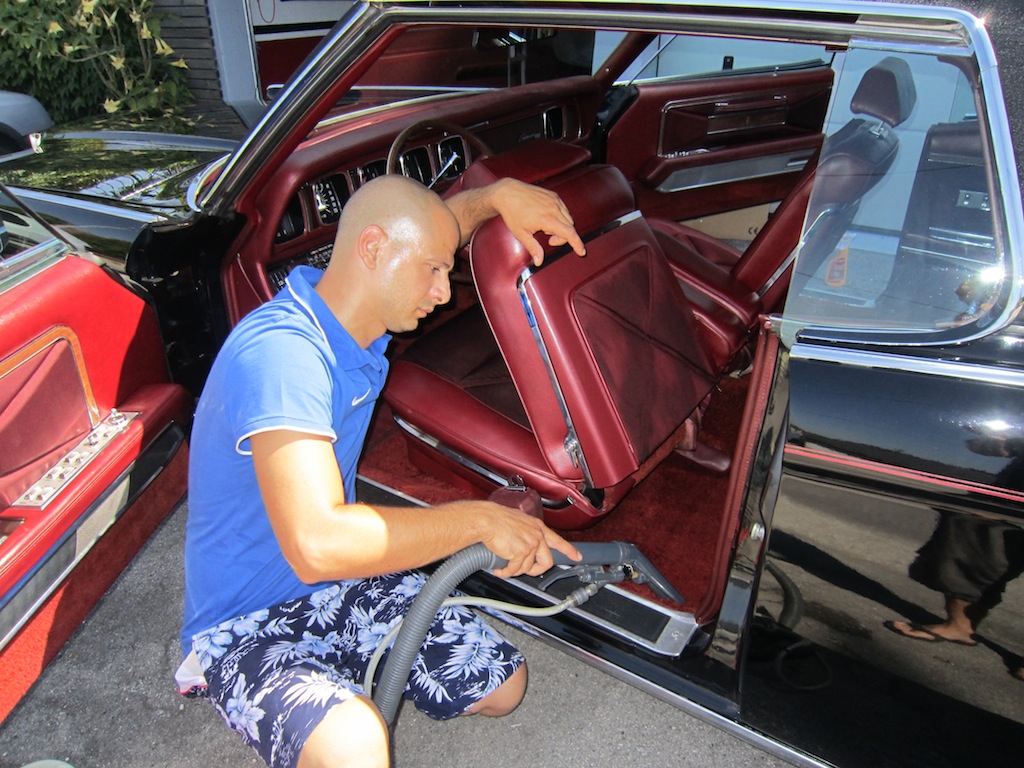
Tayfun wet - cleaning the interior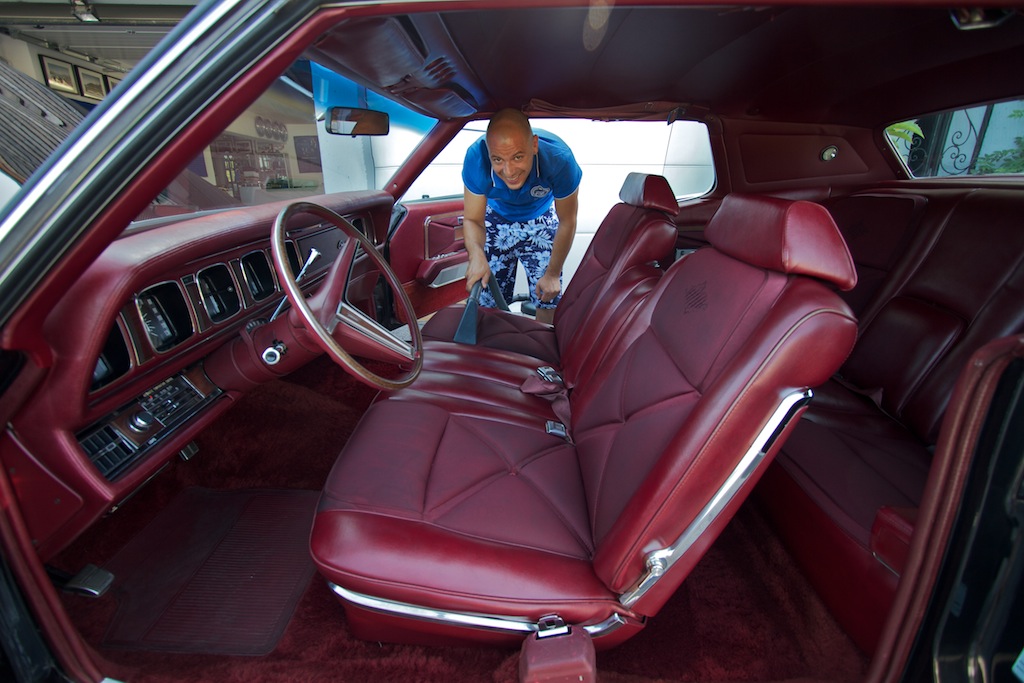
Tayfun cleaning the interior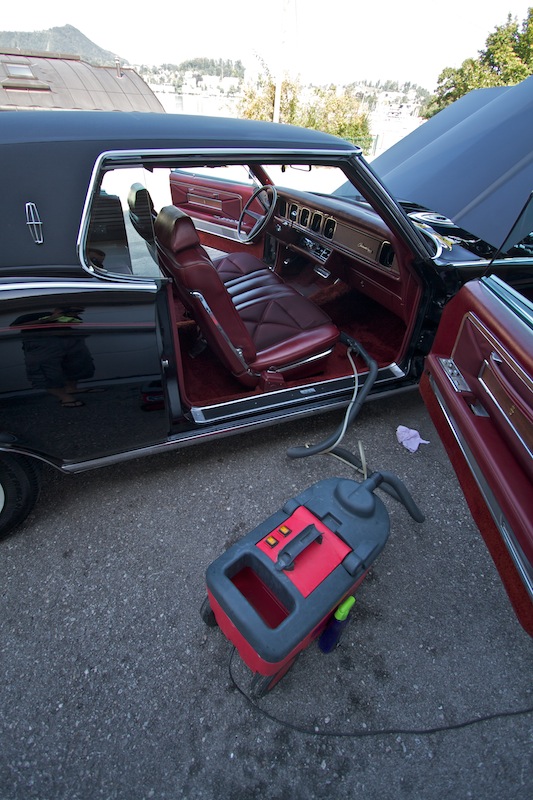
wet-cleaning the interior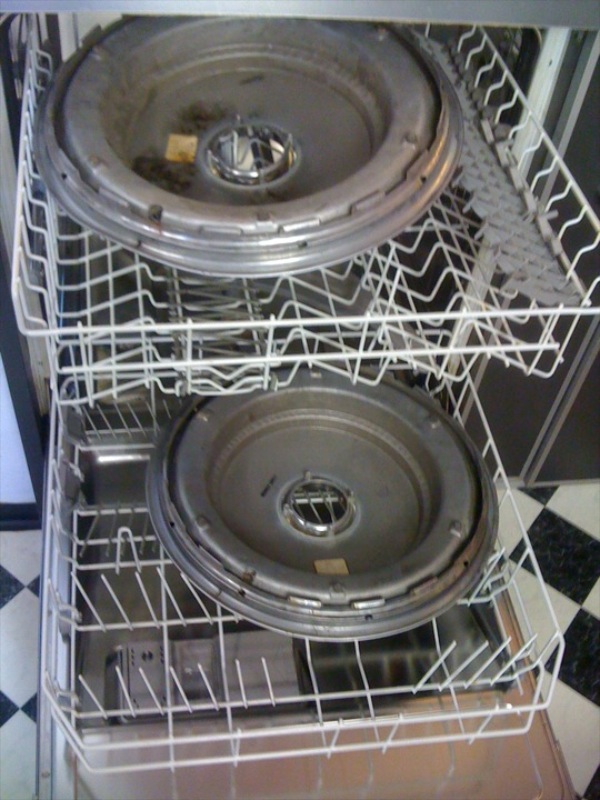
the hubcaps were cleaned in the dish washer - my wife was not very happy about this...
Good morning Cadillacs!
Before the season actually starts I started to prepare the cars. I checked all fluids, checked the tire pressure, reconnected the freshly charges batteries, pushed the cars out of the garage, pumped the pedal a couple of times and then cranked the engine. One after the other came back to life. Great! I took them for a quick drive around the house and checked all systems.
I´m now starting to clean each one and give them a thick coat of fresh Meguiars wax. The leather seats will also get another treatment with Gliptone leather conditioner. I thoroughly cleaned the cars before I put them into storage and also changed the oil before I tucked them away, so there is not that much to do at the beginning of the new season. I have two more weeks now before I can officially drive the cars again - this should be enough time to make them look absolutely pristine.
Good morning Cadillacs - welcome to the 2011 season.
Detailing the paint of the 1967 Eldorado
My friend Tayfun polishing the paint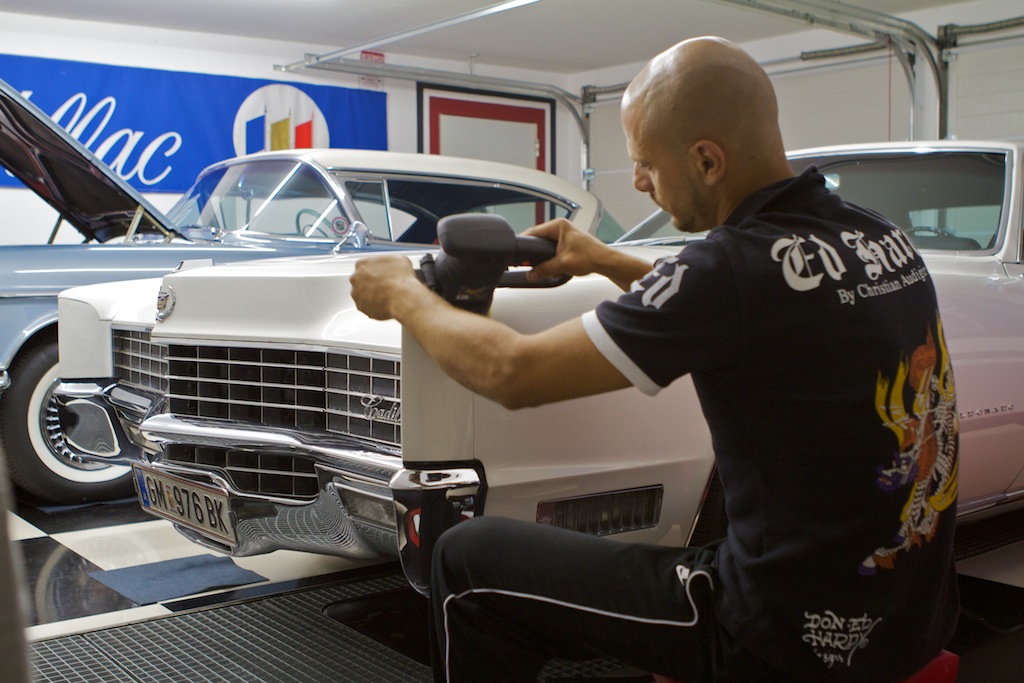
it took 7 steps for a smooth surface...
Cleaning the 1967 Eldorado´s Engine Bay
Below you can find some pictures of the now clean engine bay.
As seen from the passenger side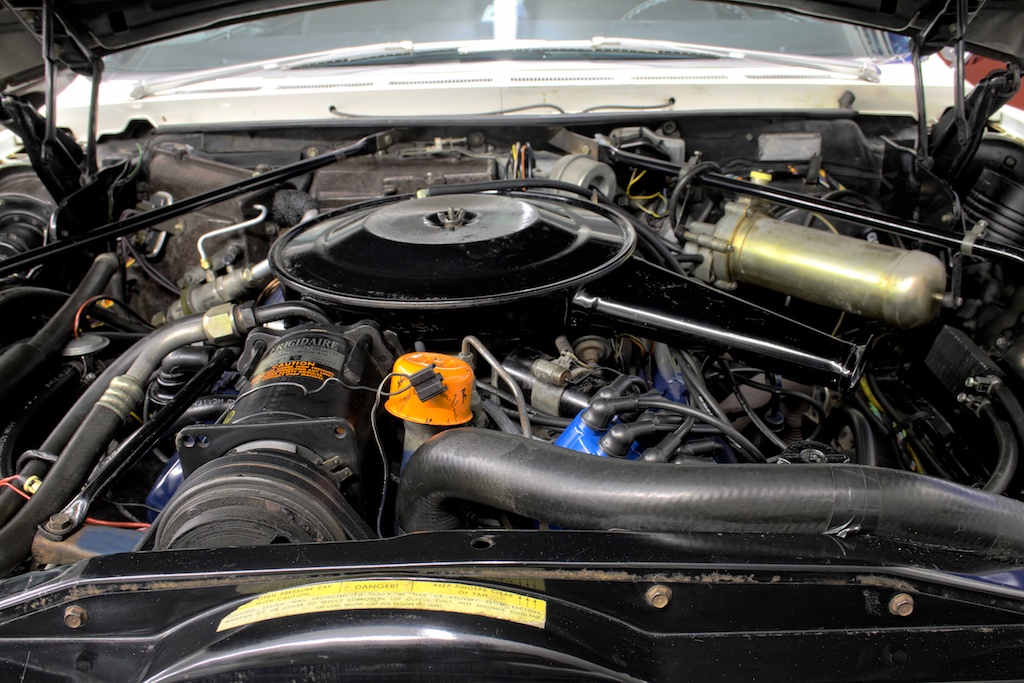
From the front
From the left
1967 Eldorado detailing
The Eldorado got a wet cleaning treatment of the carpet and trunk and a full detailing of the interior - which looks like from a new car now. We also started to clean and polish the original paint but ran out of time. We only finished the hood - but the before and after difference is amazing. More work will be done soon.
The Eldorado is lurking out of the garage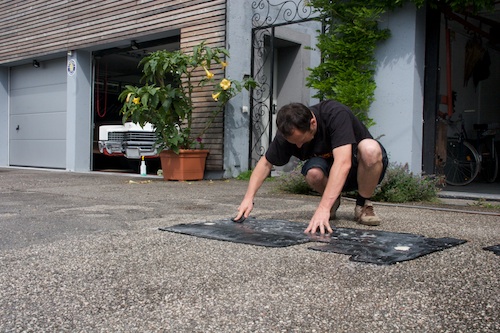
washing and brushing the original rubber floormats...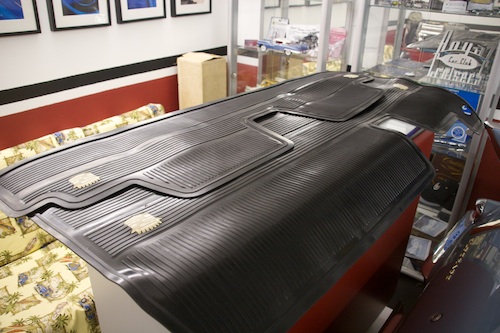
...they turned out as if they just left the factory - awesome - this Meguiars rubber treatment is more than fantastic!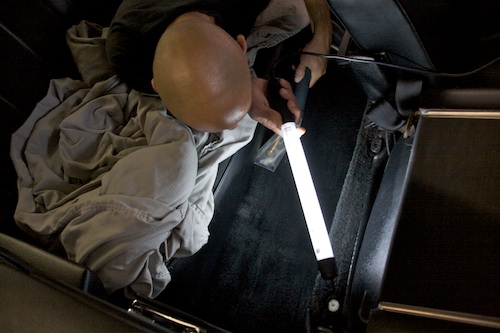
Tayfun - wet cleaning the carpet and trunk - looks like new now as well - the low miles are showing on the interior pretty well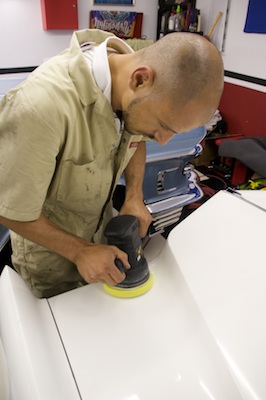
My buddy Tayfun polishing the hood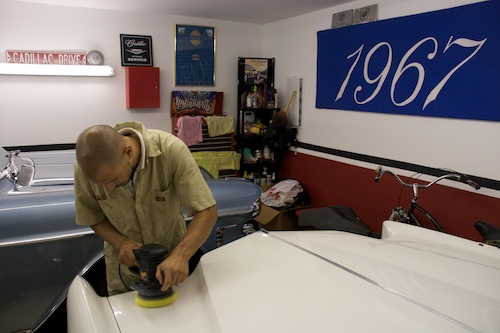
Tayfun at work
The hood´s paint came out really fine and smooth - unfortunately we ran out of time and could not finish the rest of the paint
Detailed seats are finally back in the 67
If you compare the new pictures to the “before” pictures below - you can clearly see the difference.
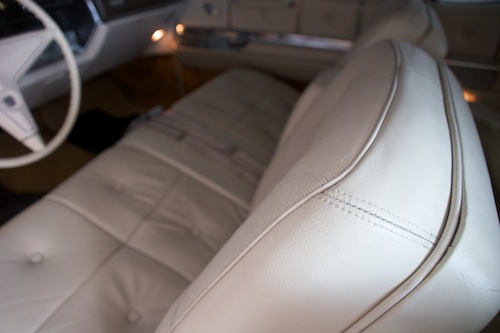
Thats the area which showed the most wear - looking perfect now!
the same area before detailing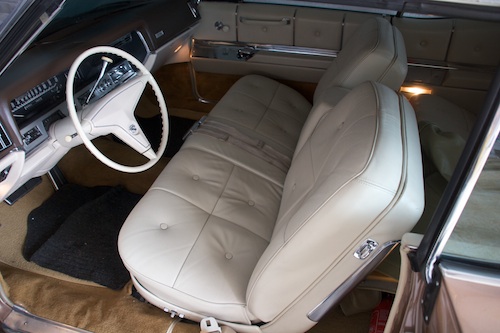
the interior is back together and now waiting for the cruising season
Leather seats are back from detailing!
They look like brand new leather seats now!
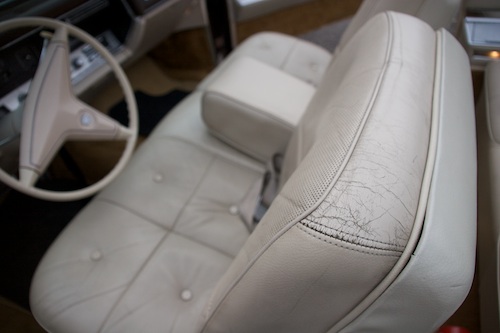
the front seat before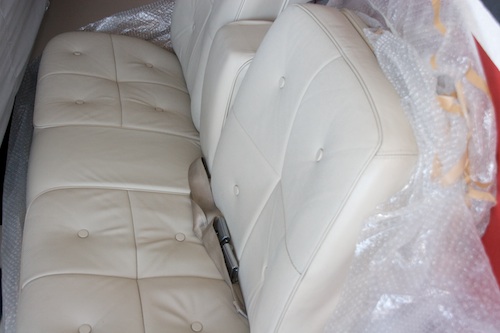
the front seat now - before installation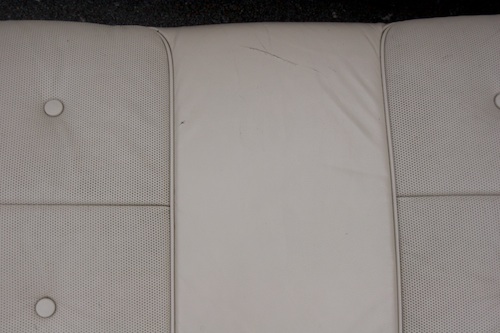
the rear bench before the repair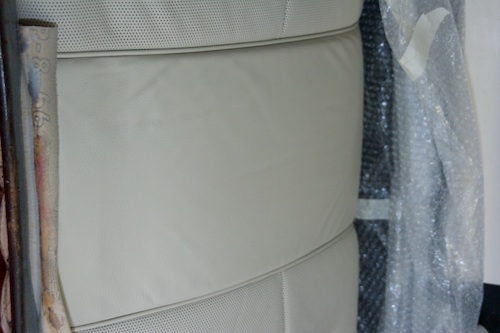
after the repair - all the tears and cracks are gone!
The 67s interior is going to the detailer.

this is one of the areas which will be restored - its showing some surface age cracks.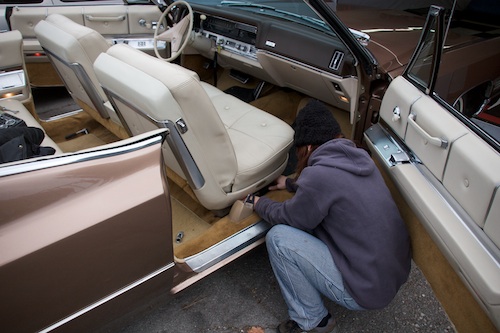
my wife Afra helped me removing the seats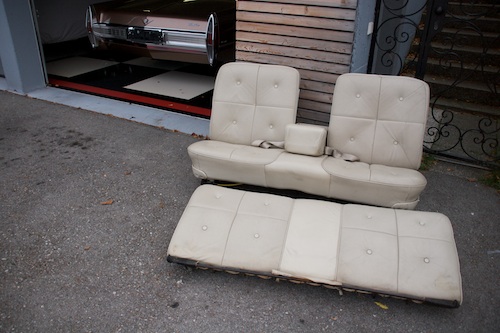
the removed seats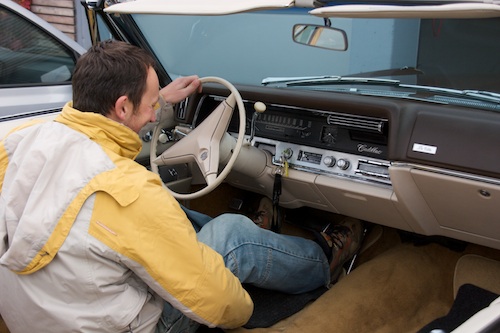
I had to drive the car back into the garage sitting on the floor...
Happy New Year! - Roadmaster detailing
The paint on this 1996 Buick Roadmaster was pretty much neglected and a lot of cleaning, buffing, polishing and waxing was necessary to bring it up to like new condition.
It took us 2 days to just do the paint properly. We worked more than 20 hours in reviving the paint job and the exterior chrome.
We´ll do some more detailing work on the car later - it is now in winter storage anyway.
The car looks really good now - the white paint job is very bright. I have the impression that the shade actually changed...
Next up: Interior, engine and engine bay, rims and everything else...
My buddy Tayfun with the buffing machine...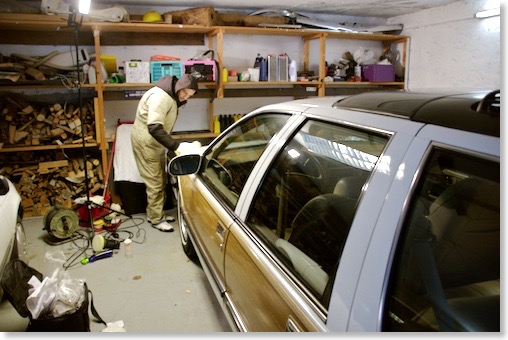
more polishing....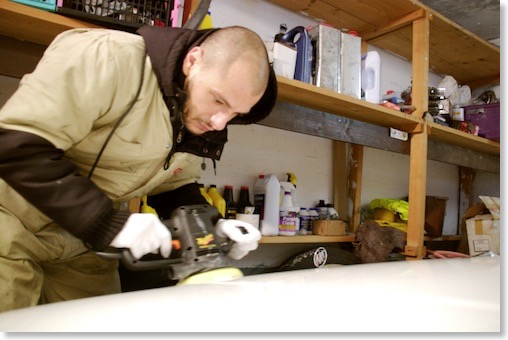
and more...
Cleaning the 67´s front suspension
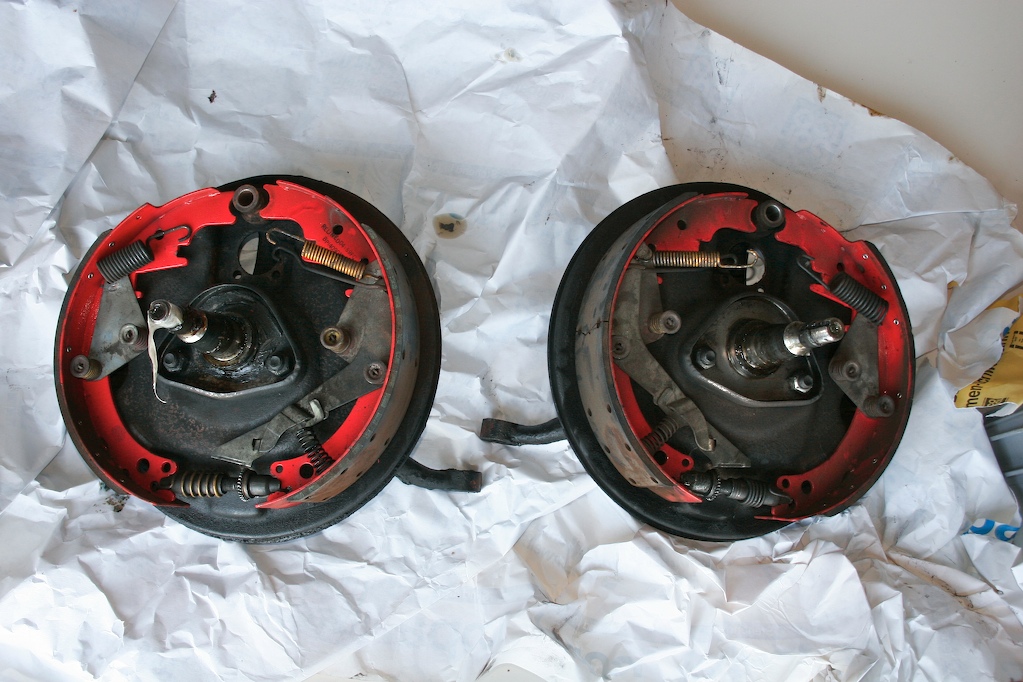
The brakes before I disassembled them - I hope I can clean the small metal parts with an ultrasonic cleaner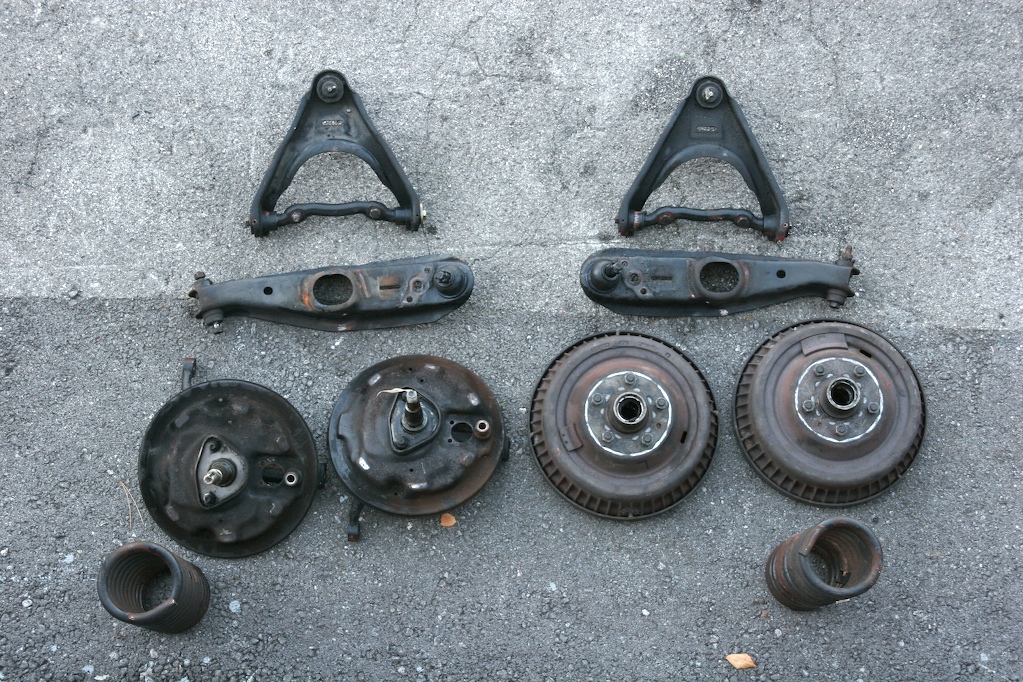
All these parts will be sandblasted and painted afterwards
Preparations for the Cadillac BIG Meet
working on the AC
installing the new backup lenses - which had to be custom fitted...
Interior cleaning and Cruisenight

cleaning the trunk of the 58
Cruising night!
After cleaning we had a nice cruising trip around the lake with friends and our ladies.
Tayfun
on a hill
the ladies
Alex
Tayfun
Richard
I took the 67
Preparing the 67 for the 2007 season
I started to clean the car and gave it a new coat of wax. In about 2 weeks I will bring it back to live and hopefully drive it a little bit more than last year when I only did about 300 miles.
1966 Cadillac Coupe deVille (16)
1967 Cadillac DeVille (54)
1967 Cadillac Eldorado (73)
1971 Lincoln Continental Mark III (24)
1974 Cadillac Coupe deVille (46)
1978 Cadillac Eldorado Biarritz (25)
1996 Buick Roadmaster (20)
Cadillac BIG Meet (2)
Car Shows (55)
Cruising (4)
CT6 (1)
For Sale (3)
Garage Stuff (32)
Pacer (1)
Restoration (140)
Various (55)
Video (21)
Website News (31)
- 6 way power seat
- 8-track
- 10 Ohm
- 429
- 1932
- 1957
- 1958
- 1958 Cadillac Eldorado Seville
- 1958 Cadillac Repair Tip
- 1959 Cadillac Eldorado Seville
- 1964
- 1965
- 1966
- 1966 Cadillac Coupe deVille
- 1966 Cadillac Repair Tips
- 1967
- 1967 Cadillac DeVille
- 1967 Cadillac Eldorado Repair Tip
- 1967 Cadillac Repair Tip
- 1967 Eldorado
- 1968
- 1970 Cadillac Eldorado
- 1971
- 1971 Lincoln Continental Mark III
- 1974
- 1974 Cadillac Coupe DeVille
- 1974 Cadillac Repair Tip
- 1976
- 1977
- 1978
- 1978 Cadillac Eldorado Biarritz
- 1978 Cadillac Repair Tip
- 1980 Cadillac Eldorado Biarritz
- 1996
- 2012
- 2014
- 2017
- 2018
- 2019
- 2022
- 2023
- 2025
- 3063206
- 7027235
- 7800483
- 7805675
- 7805676
- 12355706
- 17058531
- 17059968
- 17059969
- 22010515
- 22010661
- A.I.R
- A6
- AC
- AC Compressor
- AC Electrical Diagram
- ACC
- Accelerator Pump
- Accelorator pump
- Accident
- Actuators
- Adriatic Blue Metallic
- Ads
- Aftermovie
- Air Pump
- Aircondition
- AIRPUMP
- ALC
- Alternator
- AM
- AM-Transmitter
- Antenna
- Anti Rattle Clips
- Antique Gold
- Arizona Vintage Parts
- Arrival
- Article
- ASC
- Ash Tray removal
- ATC
- Atlantis Blue Firemist
- Austria
- Austro Classic
- Autolite SP-459
- Automatic Seat Back Release
- Award
- Banner
- Barn Find
- Battery
- Battery Tray
- Beach Race
- Bearing
- Bendix
- Biarritz
- Bigfoot
- Bill Hirsch Engine Enamel
- Bleeder Screws
- Bleeding
- Blower
- Bodywork
- Bolts
- Book
- Borg
- Brake Booster
- Brake Fluid
- Brake Gray
- Brakes
- Broken Bolt
- Brougham
- Bucket seats
- Buick
- Bumper End
- Bushings
- Cadillac
- Cadillac BIG Meet
- Cadillac BIG Meet
- Cadillac birthday cake
- Cadillac Blue
- Cadillac Color Selections Dealer Book
- Cadillac Coupe deVille
- Cadillac Dealer
- CADILLAC GRAND EUROPEAN
- Cadillac Meeting
- Cadillac Mini Meeting
- Camaro RS
- Caorle
- Car Show
- Carburetor
- Card
- Carpet
- Carter AFB
- Cavalry Twill Vinyl
- CB
- CBM
- CCCD
- Choke
- Christmas
- Citizens Band
- Classic Cadillac Club Deutschland
- Clay Towel
- Cleaning
- Clock
- Clockwork
- Clutch
- Clutch Coil
- Collector
- Colonial Yellow
- Color Coded Springs
- Commercial
- Compound
- Compressor
- Condenser
- Continental Mark III
- Control Head
- Conversion
- Convertible top
- Coolant
- Corona
- Cowl
- Cruise Control
- Cruising
- CT6
- CV Boots
- CV JOINTS
- D6230
- Dash Trim
- Decal Removal
- Decals
- Decoration
- Dehumidifier
- Delco Moraine
- Der Standard
- detailing
- Deville
- Diagnosis Chart
- Diagram
- Dial
- Digital Rotary Drum Clock
- Diner
- Disc Brakes
- Distributor
- Diverter Valve
- Door Jamb Switch
- Door Rubber Conduit
- Dornbirn
- Dot3
- Drive Shaft
- Driving tour
- Drum brakes
- Dry Ice Blasting
- Dry Ice Cleaning
- DVD
- Eastwood
- Eldorado
- Electric Choke Thermostat
- Electrical schematic
- Elvis
- Engine Bay
- Ep
- Epoxy floor
- Europe
- Evaporator
- Exide
- Factory Markings
- Fender Skirt
- Floor
- Flushing
- Flyer
- Foam
- For Sale
- Front AXLE
- Front brakes
- Front bumper filler
- Front Floor
- Front wheel bearing
- Fuel Filter
- Fuel Pump
- Fuel Sending Unit
- Fusible Link
- Garage
- Garage Cabinets
- Gasket
- GE
- Gear indicator
- General Time
- Glove box light
- Grand European
- H4
- Haus of Hot Rod
- Headlight Actuator
- Headlight doors
- Headlights
- Heater Core
- Heater Hose
- Heater Valve
- High Idle
- History
- Holley
- Honest John
- Hood
- Hood Emblem
- Hood Ornament
- Hose Clamp
- Hot Choke
- Hot Water Valve
- HotRod
- How to
- Hödlmayr
- Ignition Diagram
- Illuminated Entry
- John D‘Agostino
- John Foust
- Klassikwelt Bodensee
- Kremsmünster
- LaSalle
- Leather seats
- Light Switch
- Limited
- Lincoln
- Lincoln Mark III Repair Tip
- Low Mileage
- Magazine
- Marilyn Monroe
- Mark III
- Master Cylinder
- Master Switch
- Master Vacuum Switch
- Media Blasting
- Meeting
- Meguiras
- MK II
- Mobile
- Model
- Moldings
- Mom
- Mopar Nationals
- Mostkost Kustom
- Movie
- Munich
- Neon
- NOS
- Oberösterreicher des Tages
- oilchange
- ORF
- Overspray
- Pacer
- Paint
- Paint correction
- Paintjob
- Part Number
- Parts
- Patch Panel
- Perfect Circle
- Permabag
- Persian Lime
- Photo shooting
- Photoshooting
- Pictures
- PinUp
- POA Valve
- Power Antenna
- Power Servo
- Power Vent Windows
- Power Window
- Printed Circuit Board
- Programmer
- Pulley
- Quadrajet
- Quarter Panel
- Quartz Conversion
- R134
- Radiator
- Radio
- Rattle
- Rear brakes
- Rebuild
- Recalibrate
- RediRad
- Reed Switch
- Relais
- Relaunch
- Removing Overspray
- Repaint
- Repair
- Restoration
- RIP
- Roadhouse
- Roadmaster
- Rochester
- Rocker Arm Cover
- Rocker Panel Extension Clips
- Rostio
- Rotary Valve
- Rotterdam
- Rupes
- Rust removal
- Rust removal gel
- Sabre Wheels
- Sand Blasting
- Sandblasting
- Screed
- Season Greetings
- Seasons Greetings
- Seat Back Locks
- Seat Padding
- Seat Transmission
- See through ornament
- Self adjusters
- Self Starter
- Sepp's Garage
- Seville
- Sheetmetal
- Shocks
- shop manual
- short
- Sign
- Solenoid
- Spark Plug Wire Routing
- Speakers
- Special Award
- Speed Bleeder Screws
- Splash Guard
- Starter Diagram
- Starter Motor
- Steering Column
- Storage
- suction throttling valve
- sunroof
- suspension
- Swirl Mark removal
- Switzerland
- T3
- Taillight Cover
- Texan´s Choice Award
- Thermostat
- Tilt and Telescope
- Time capsule
- Tomsclub
- Torque Specifications
- Tower Hose Clamp
- Towtruck
- Trailer
- Transducer
- Transmission
- transmission control selector
- transmission control selector indicator light
- transmission shift indicator
- Treadle Vac
- Treffen
- Tri-Band
- Troubleshooting
- Trunk Cardboard Kit
- Trunk lid
- Trunk lining
- Trunk to bumper cover
- Turn Signal Switch
- TV
- Typisierung
- Ultimate Garage
- Underbody
- Undercarriage
- Undercoating
- Undercoating Removal
- Vacuum Booster
- Vacuum diagram
- Vacuum hoses
- Vacuum Master Switch
- Vacuum Schematic
- Vacuum Valve
- Valve Cover
- Various
- Vent Window Switch
- Vibration
- Vibrator
- Vicodec roof
- Video
- Vinegar
- Vinyl Roof
- Visitor
- Washer Fluid Float
- Washer Fluid Low Level Indicator
- Water Pump
- Wax
- Weatherstripping
- Website News
- Westclox
- Wheel Bearings
- Wheel Housing
- Wiesbaden
- Windlace
- Winter
- Wiring
- Wiring Diagram
- Wonderbar
- Workbench
- Zurzach